All Databank locations in Star Wars Jedi: Survivor
Trying to get all the collectables but are missing some scans? We’ve got a guide for you!


In Star Wars Jedi: Survivor , you’ll be spending a lot of time exploring the different planets you land on, looking for secrets and stories hidden around the enviroment. More often or not you’ll come across scannable databank collectables - these count towards your overall completion stat for a zone and are a must get for all completionists.
However, they can be tricky to find. As such, we’ve created this guide detailing all databank collectable locations . We’ve broken them down planet-by-planet, so you can go through and sweep them all up as you go.
Be sure to use the menu below to jump to the planet you’re looking for. Under each planet section, we’ve broken it down into each sub-region so you can go through bit by bit.
Watch the launch gameplay trailer for Star Wars Jedi: Survivor here!
Star Wars Jedi: Survivor all databank locations
Databank collectables are split into two different twos: scannable objects and force echos. Regardless of what type of collectable it is, you just need to walk up and interact with it and the collectable will be automatically added to your databank. Force echos glow bright blue, so are easier to find. They also come with a bit of voice acting, which is nice!
Once you’ve collected a databank entry, you can find them in your databank by pressing pausing and heading over to the Databank tab. There, you can read up on all the planets, factions, characters and so on.
- Coruscant databank collectable locations
- Jedha databank collectable locations
- Shattered Moon databank collectable locations
- Nova Garon databank collectable locations
- Tanalorr databank collectable locations
Coruscant databank collectable locations
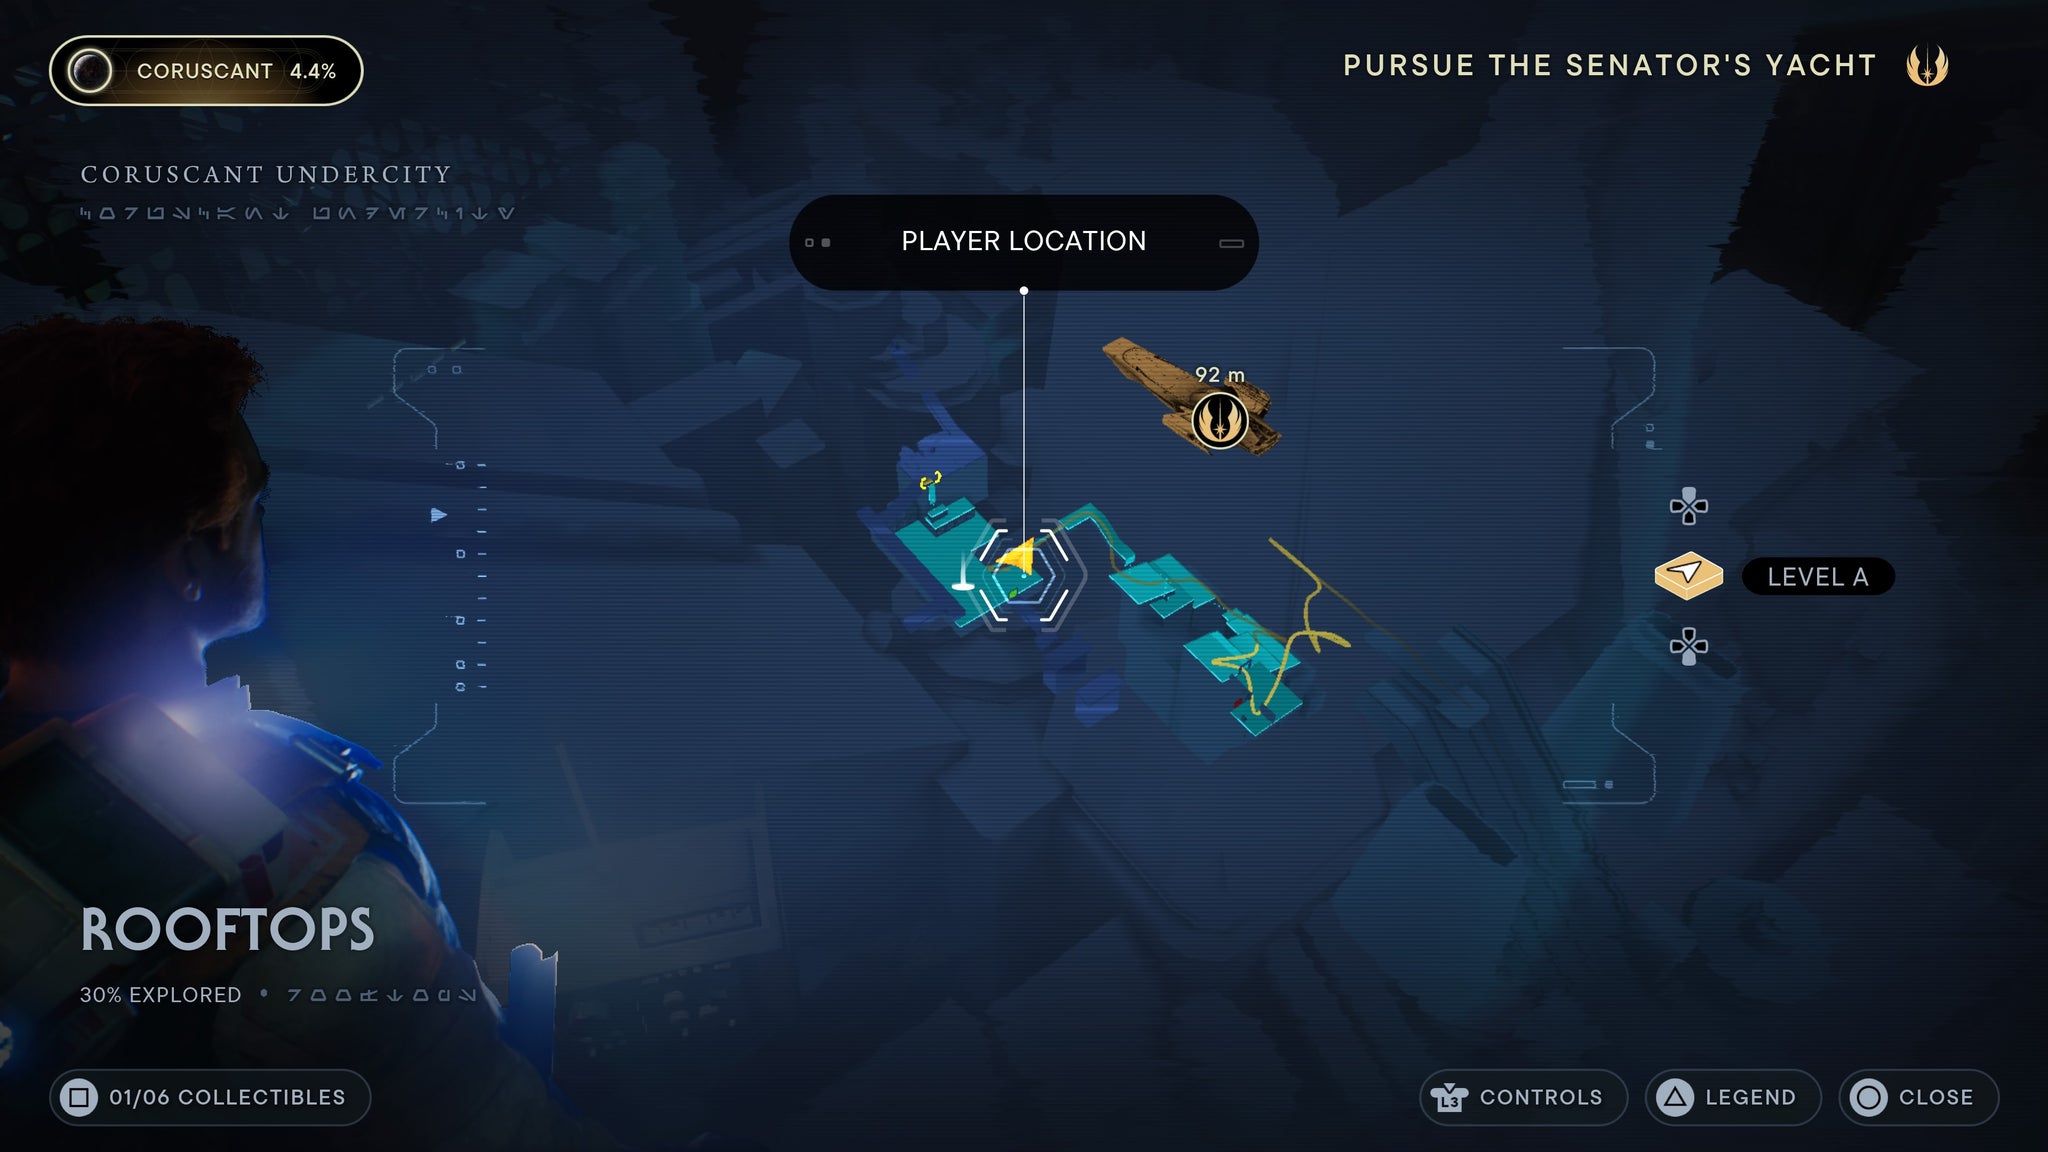
Rooftops
In the first room you drop down into, scan the table for your first databank collecable.
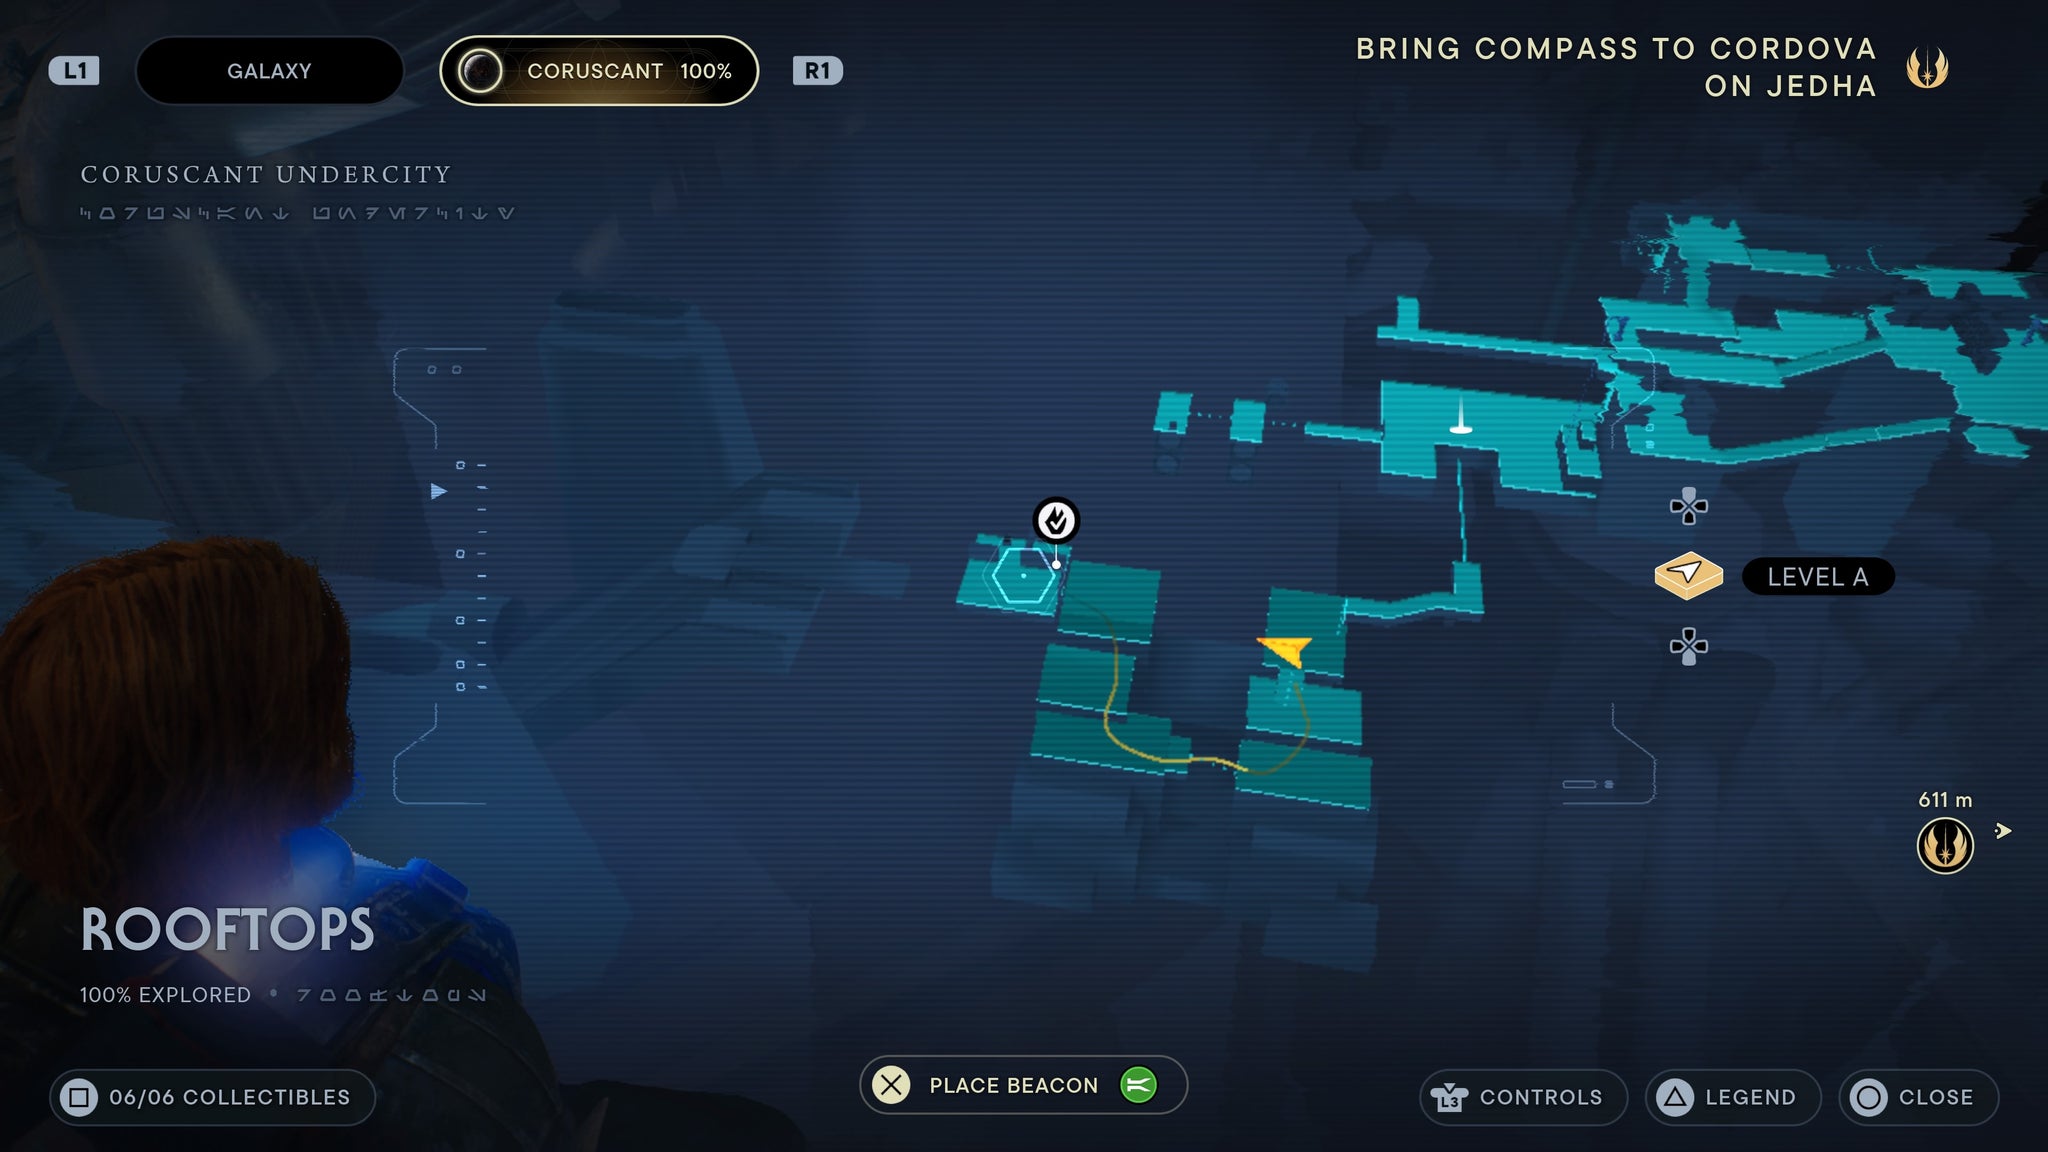
In the very first room!
Around the corner from the meditation point, by the door you can slice, is a force echo you can interact with.
Hiden away around the corner.
After killing three troopers near the first meditation point, scan the white marking on the wall.

Right above the meditation point, on the marked wall.
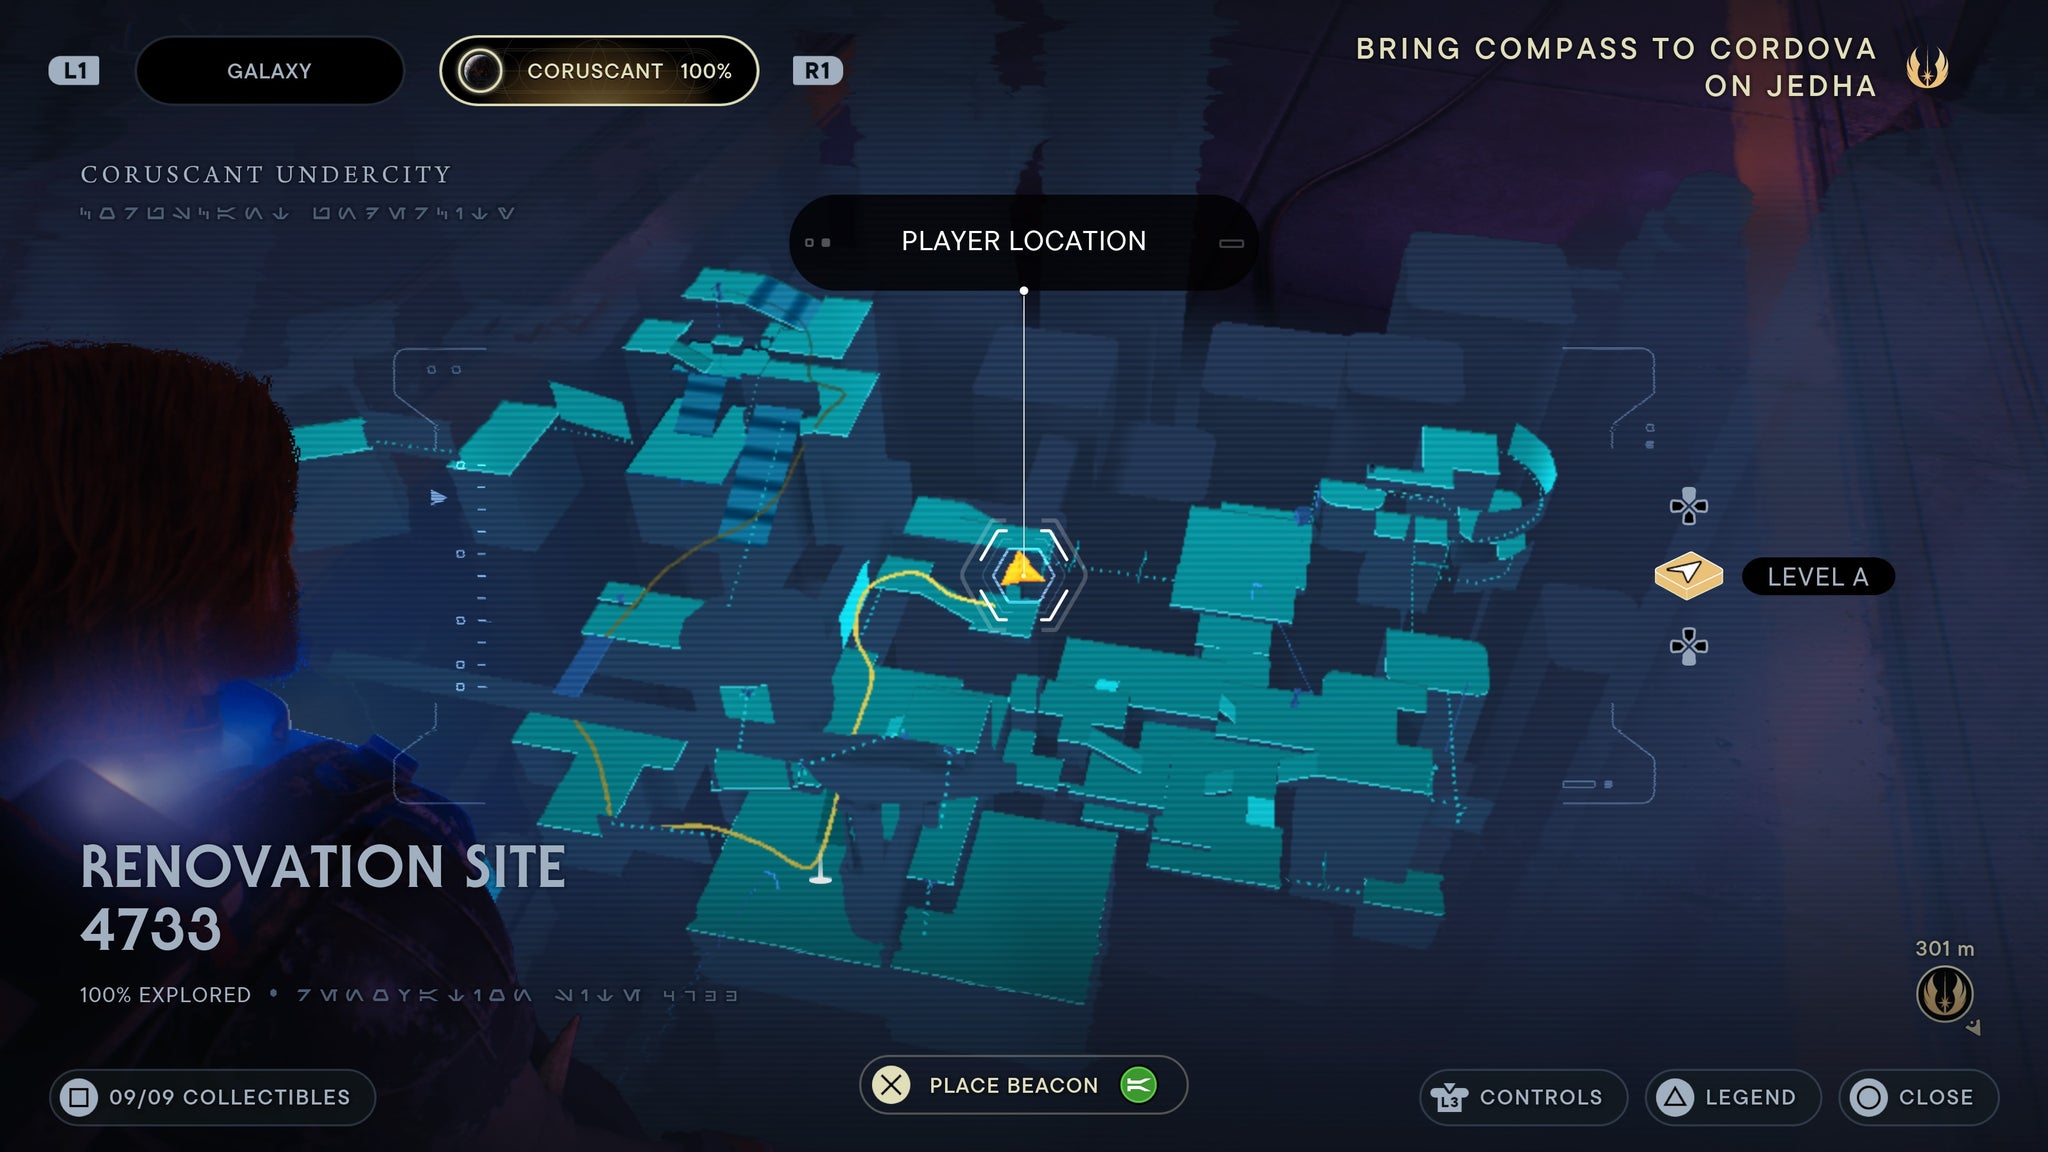
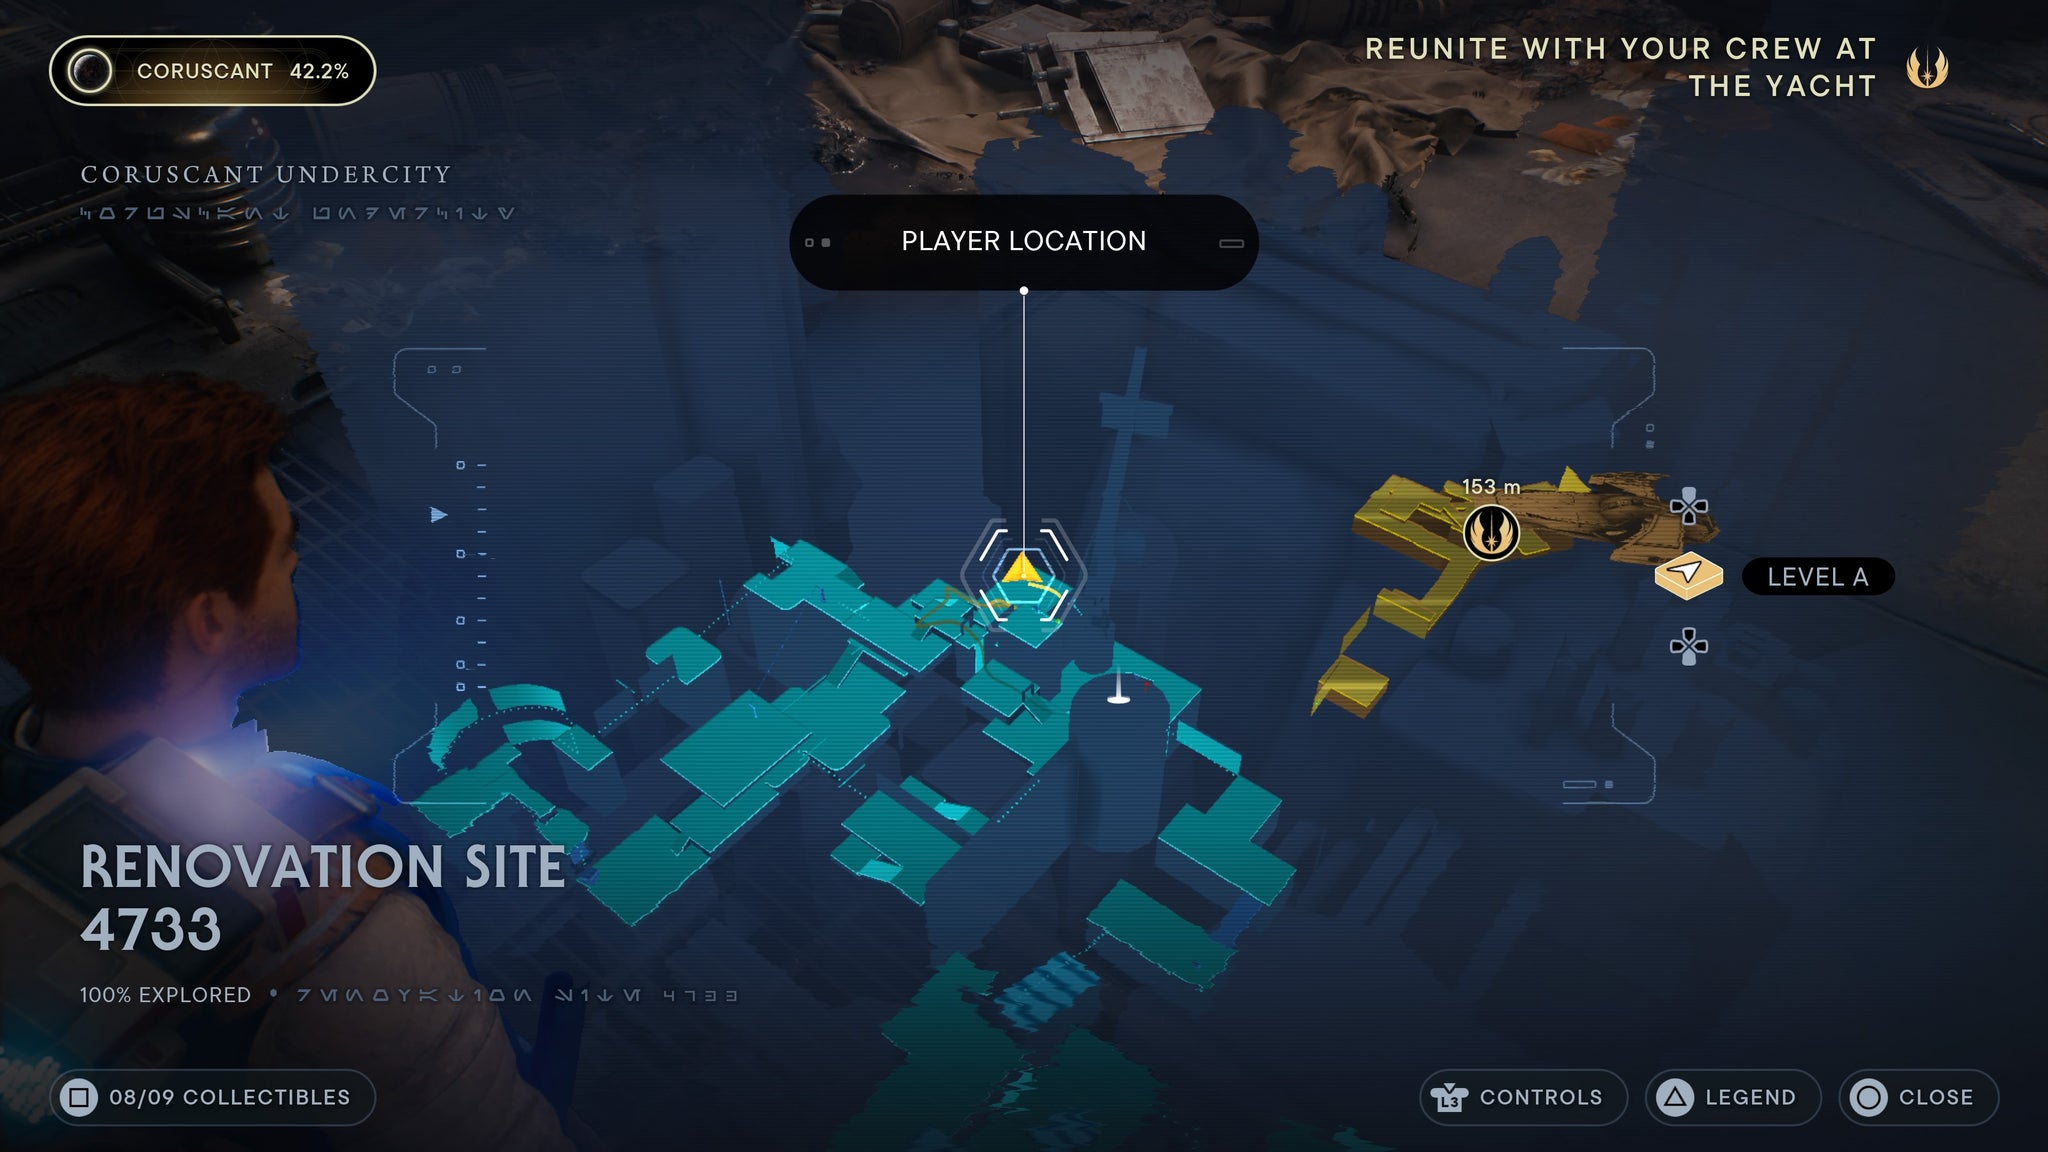
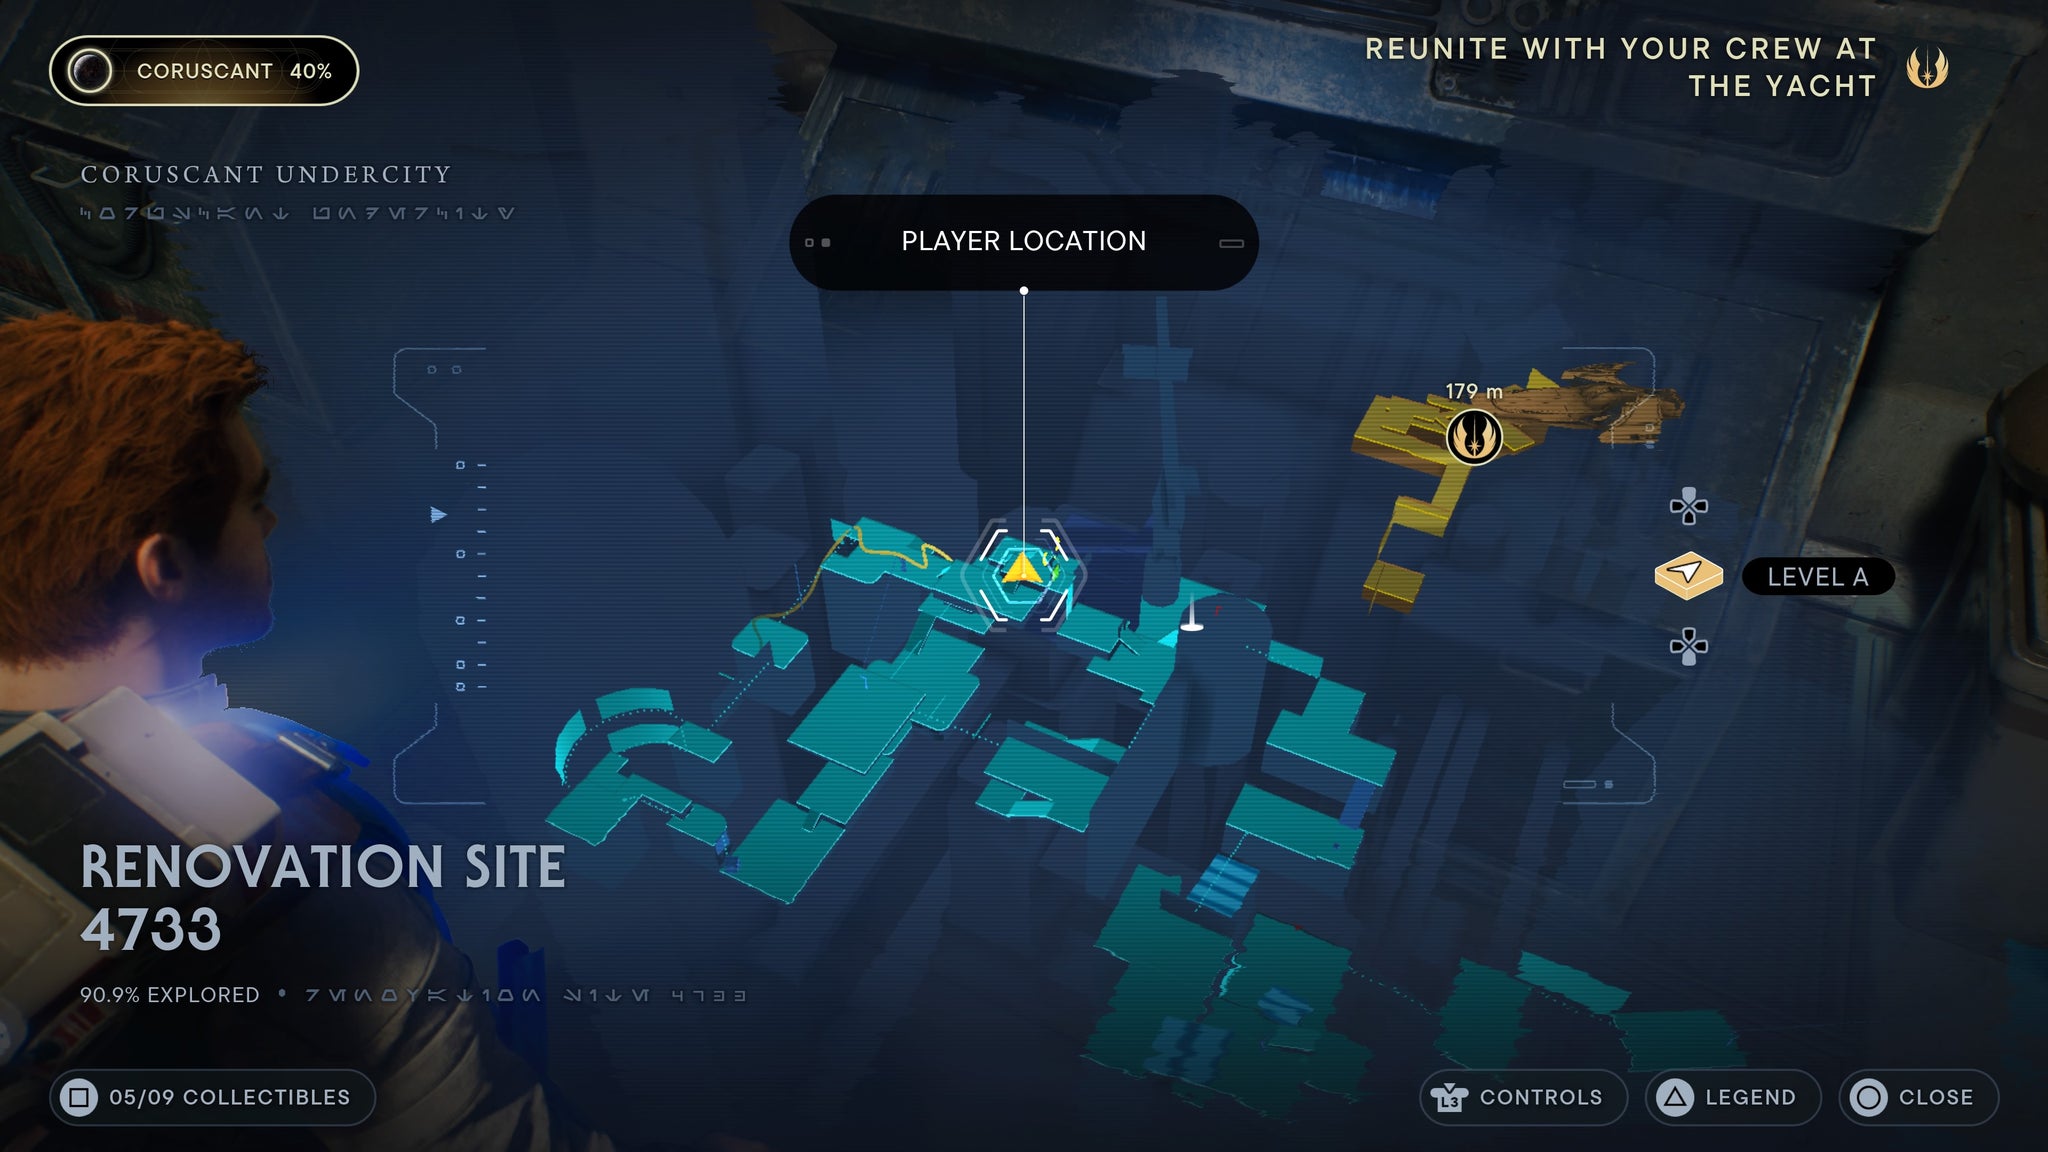
Renovation Site 4733
Near meditation point, use BD to scan a terminal back near the big red billboard for a databank collectable.
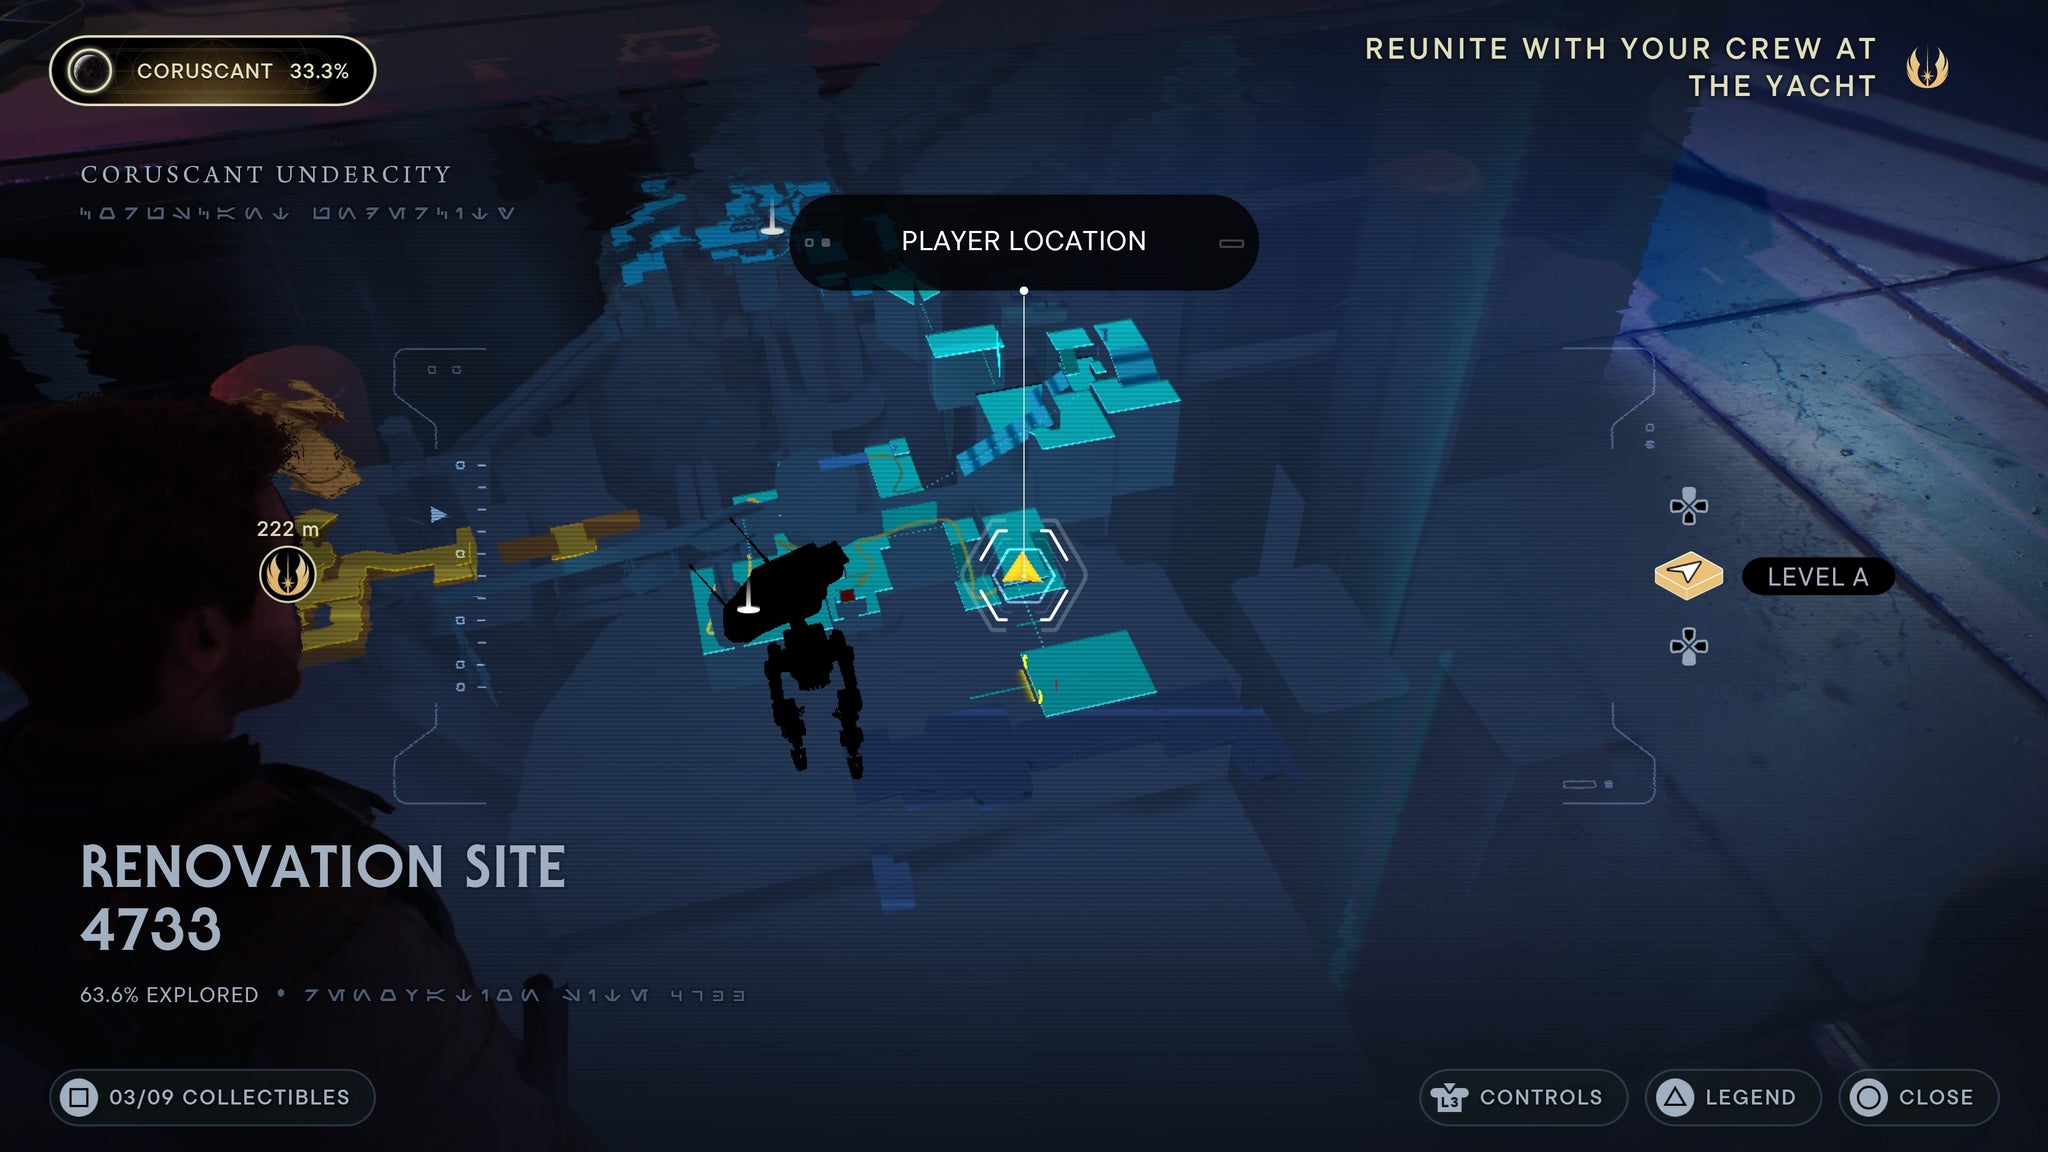
The first scannable in the area.
Upstairs from the meditation point, across the purple billboard and inside the purple room. Use BD to scan the bar for a databank collectable.
Scan the bar when you enter the purple room.
Ascension cable - The ascension cable you pick up as part of the main story, after the K-405 fight. Mandatory.
You literally can’t miss this one.
Near the crane, and the zipline shortcut, descend down a staircase to find a room with the force echo inside.
Walk down the stairs, near the crane.
Industrial stacks
Head inside the senator’s yacht. On the ground, in his office, you’ll see a golden circle. That’s a force echo, interact with it for a databank collectable.
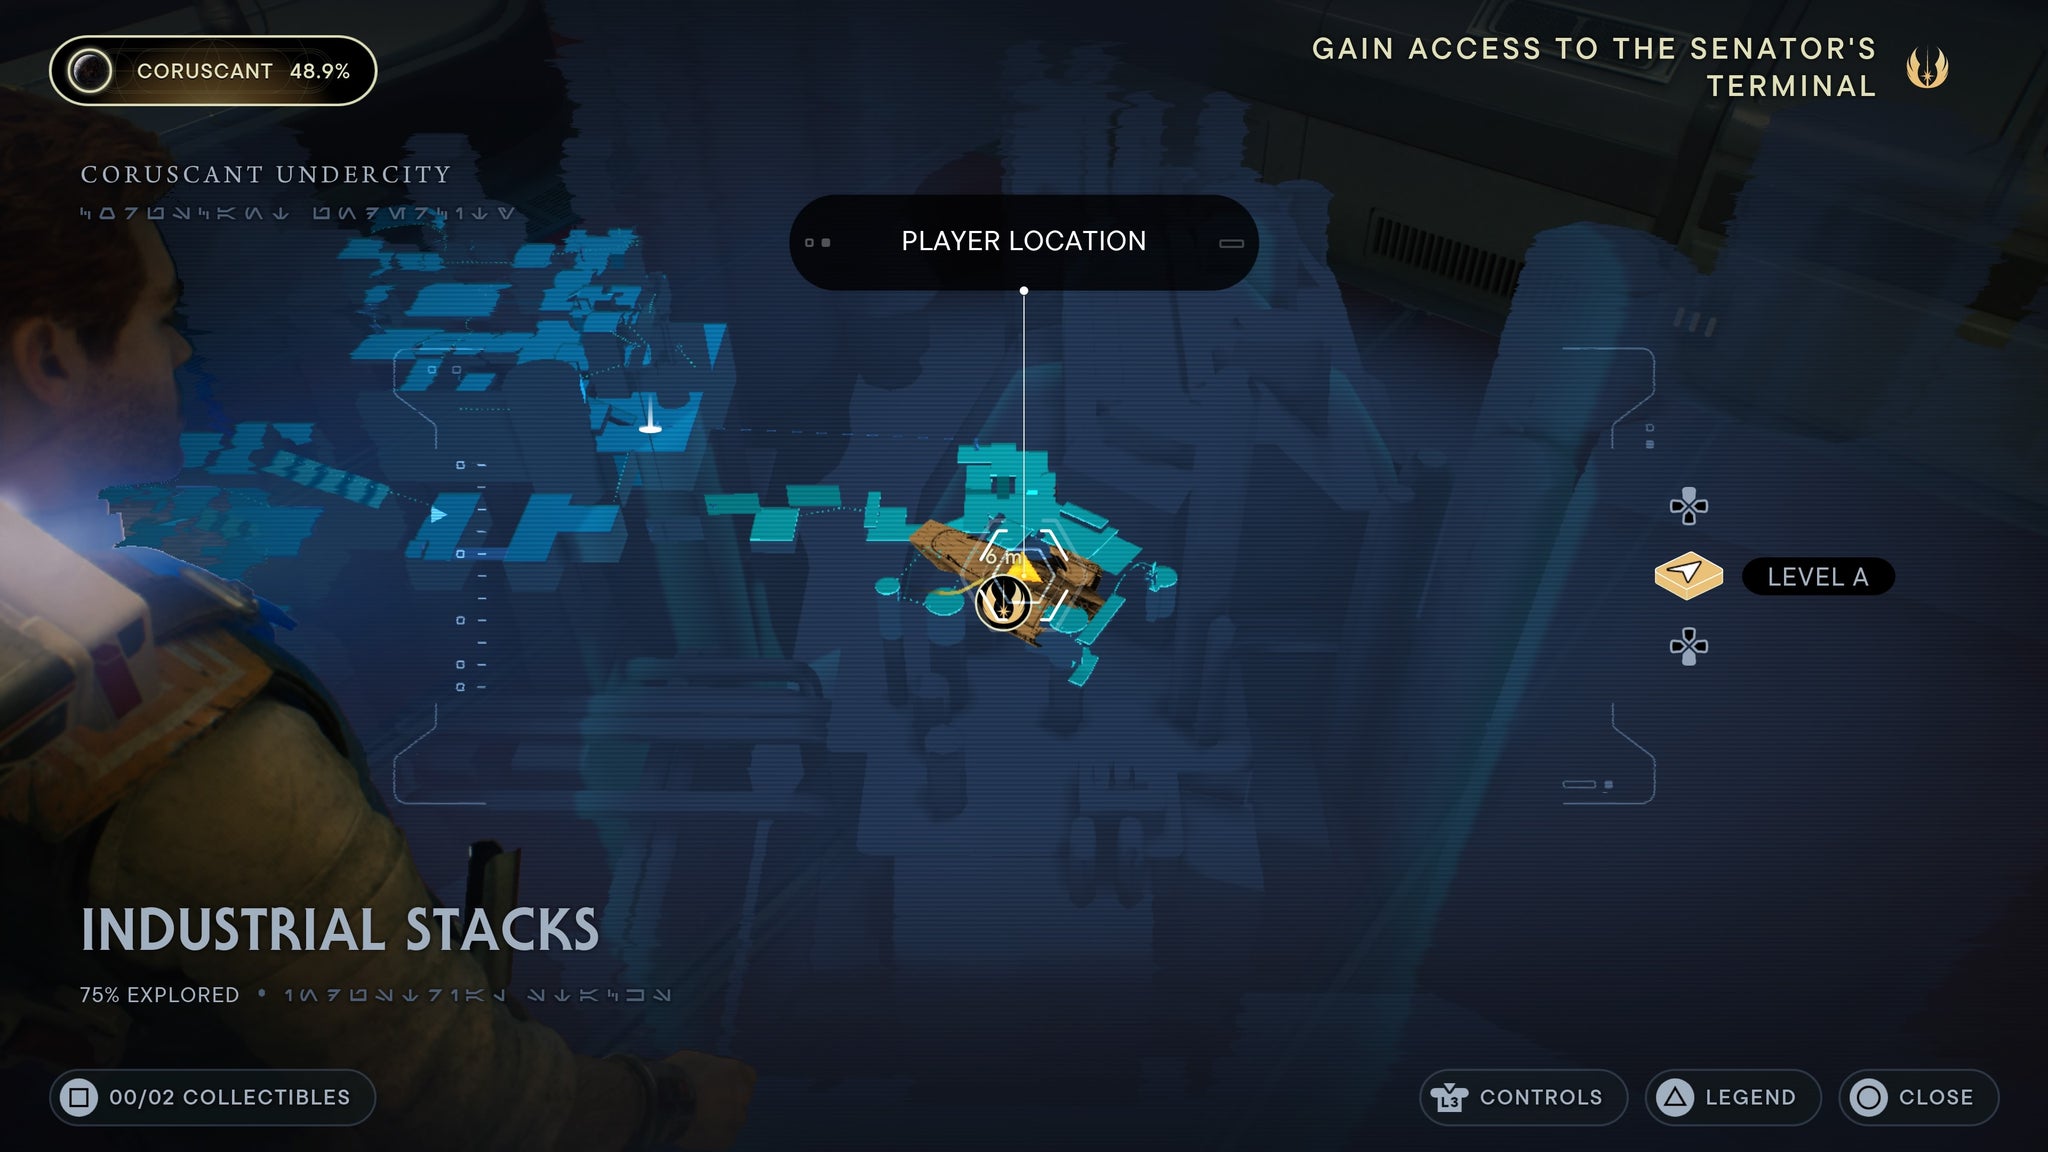
Right at the centre of the room.
Once you’ve accessed the Senator’s terminal on his yacht, turn around and scan the shelves behind it.
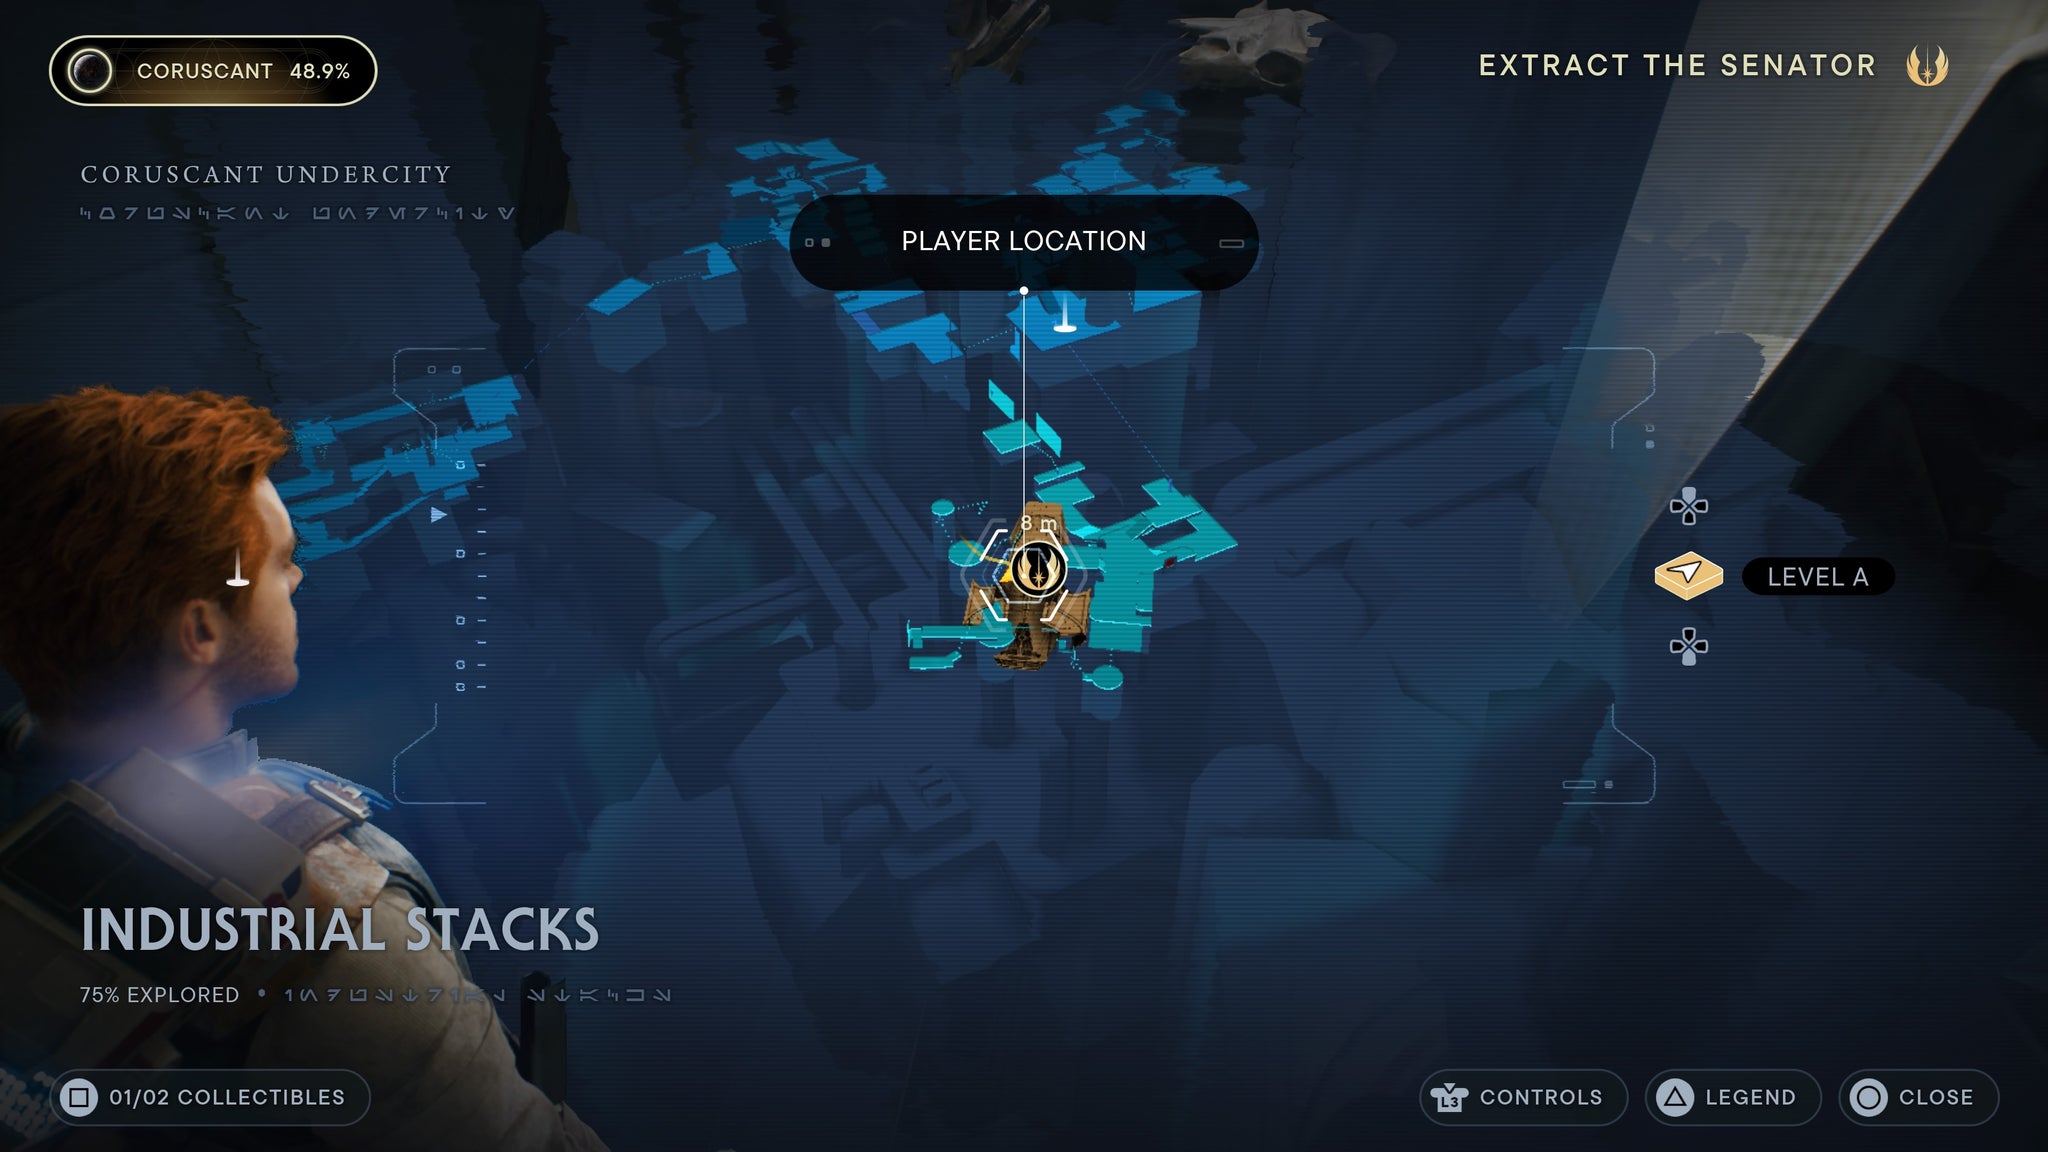
Behind the desk, after you mind trick th sennator.
Undercity Meats / Freight Handling depot
Head through the door that BD can splice, then you should find red crates on the floor. Have BD scan them for a databank collectable.
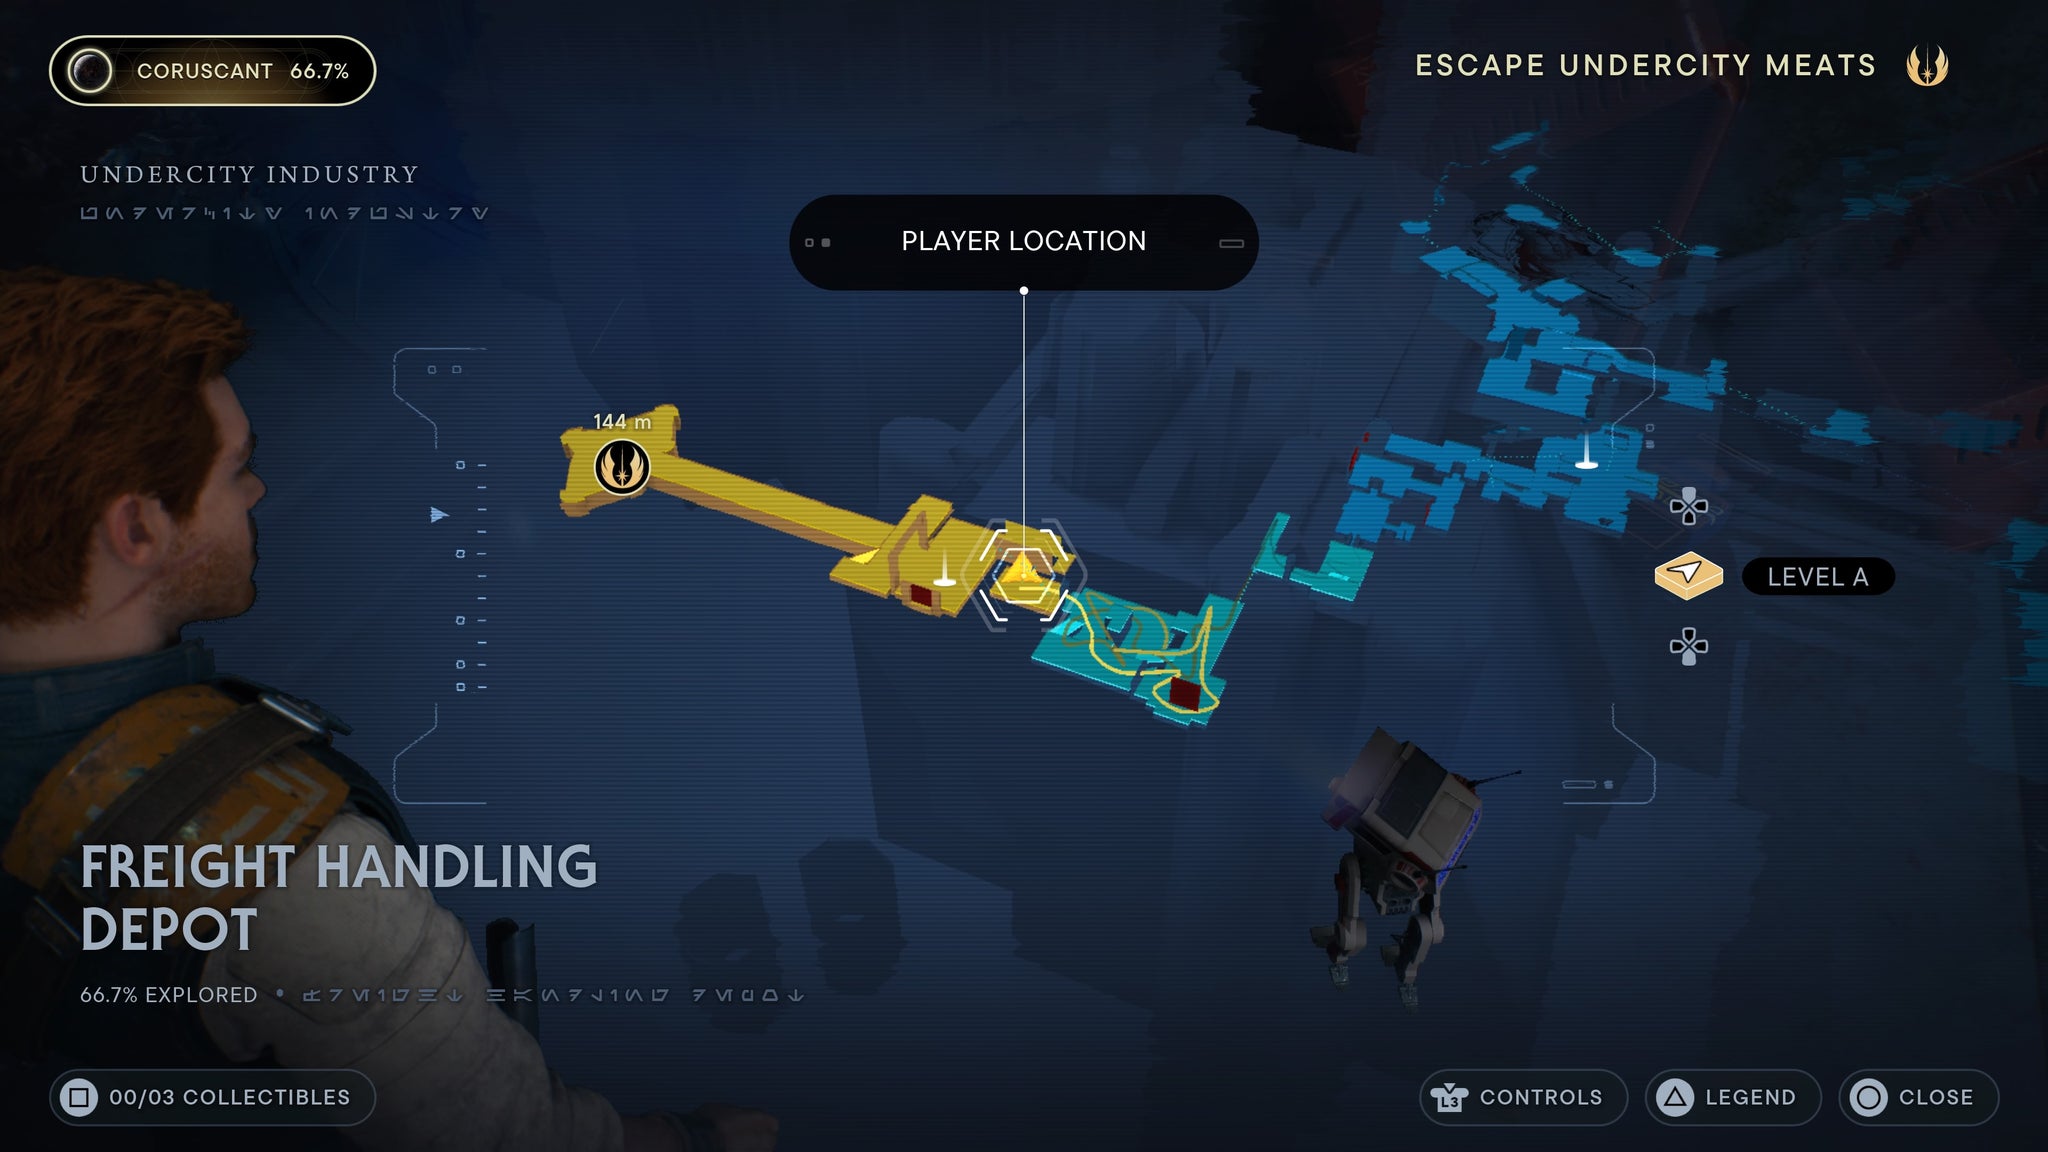
On the ground below the pipes you can swing on.
Coruscant Skylanes
From the meditation point, head downstairs and have BD scan the droid in the corridor for a databank collectable.
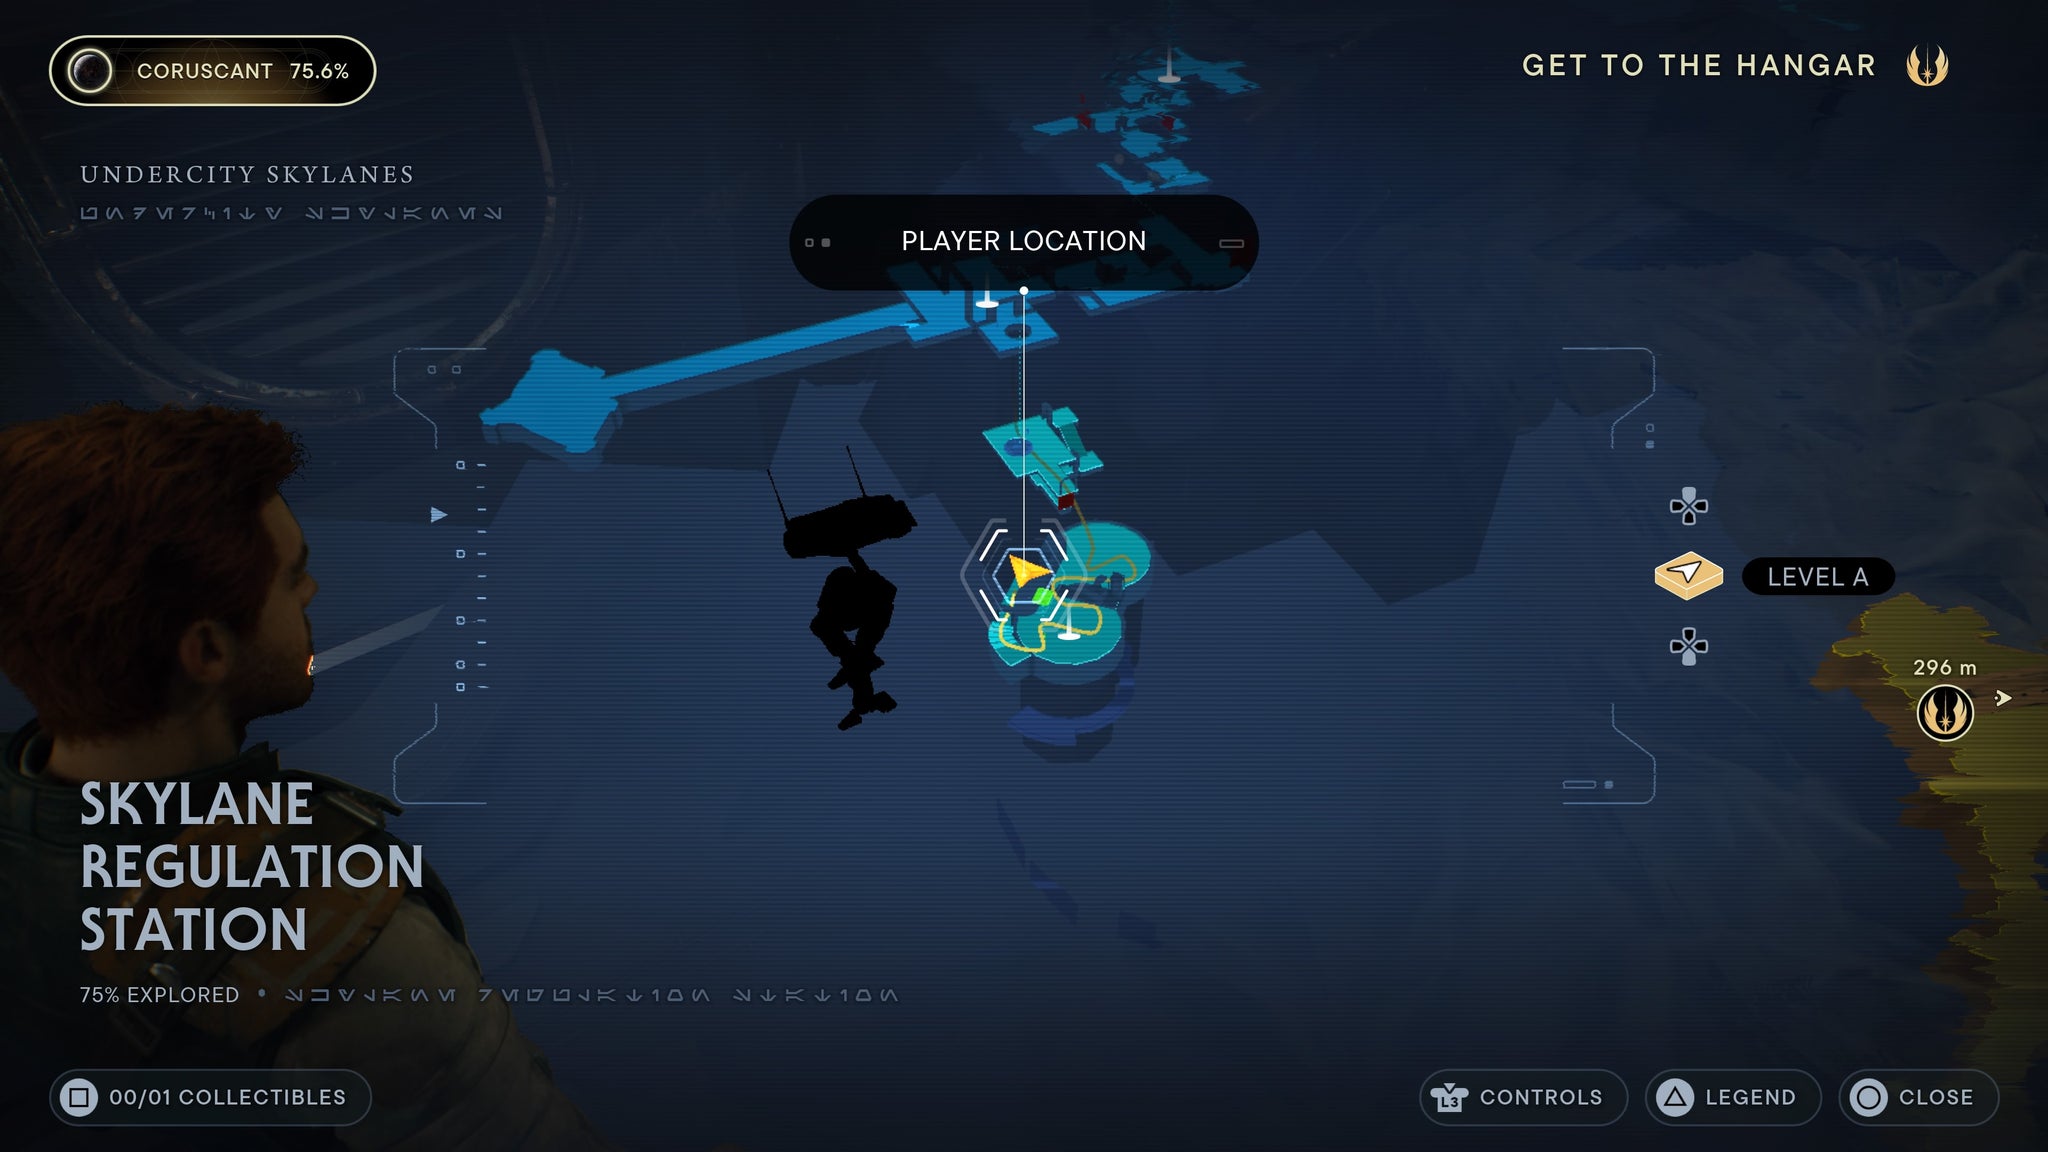
After the Inquisitor fight, in the hallway.
Hanger 2046-C
On the first platform you enter the zone from, where several storm troopers and a purge trooper are present, there is a terminal BD can scan. Do so for a databank collectable.
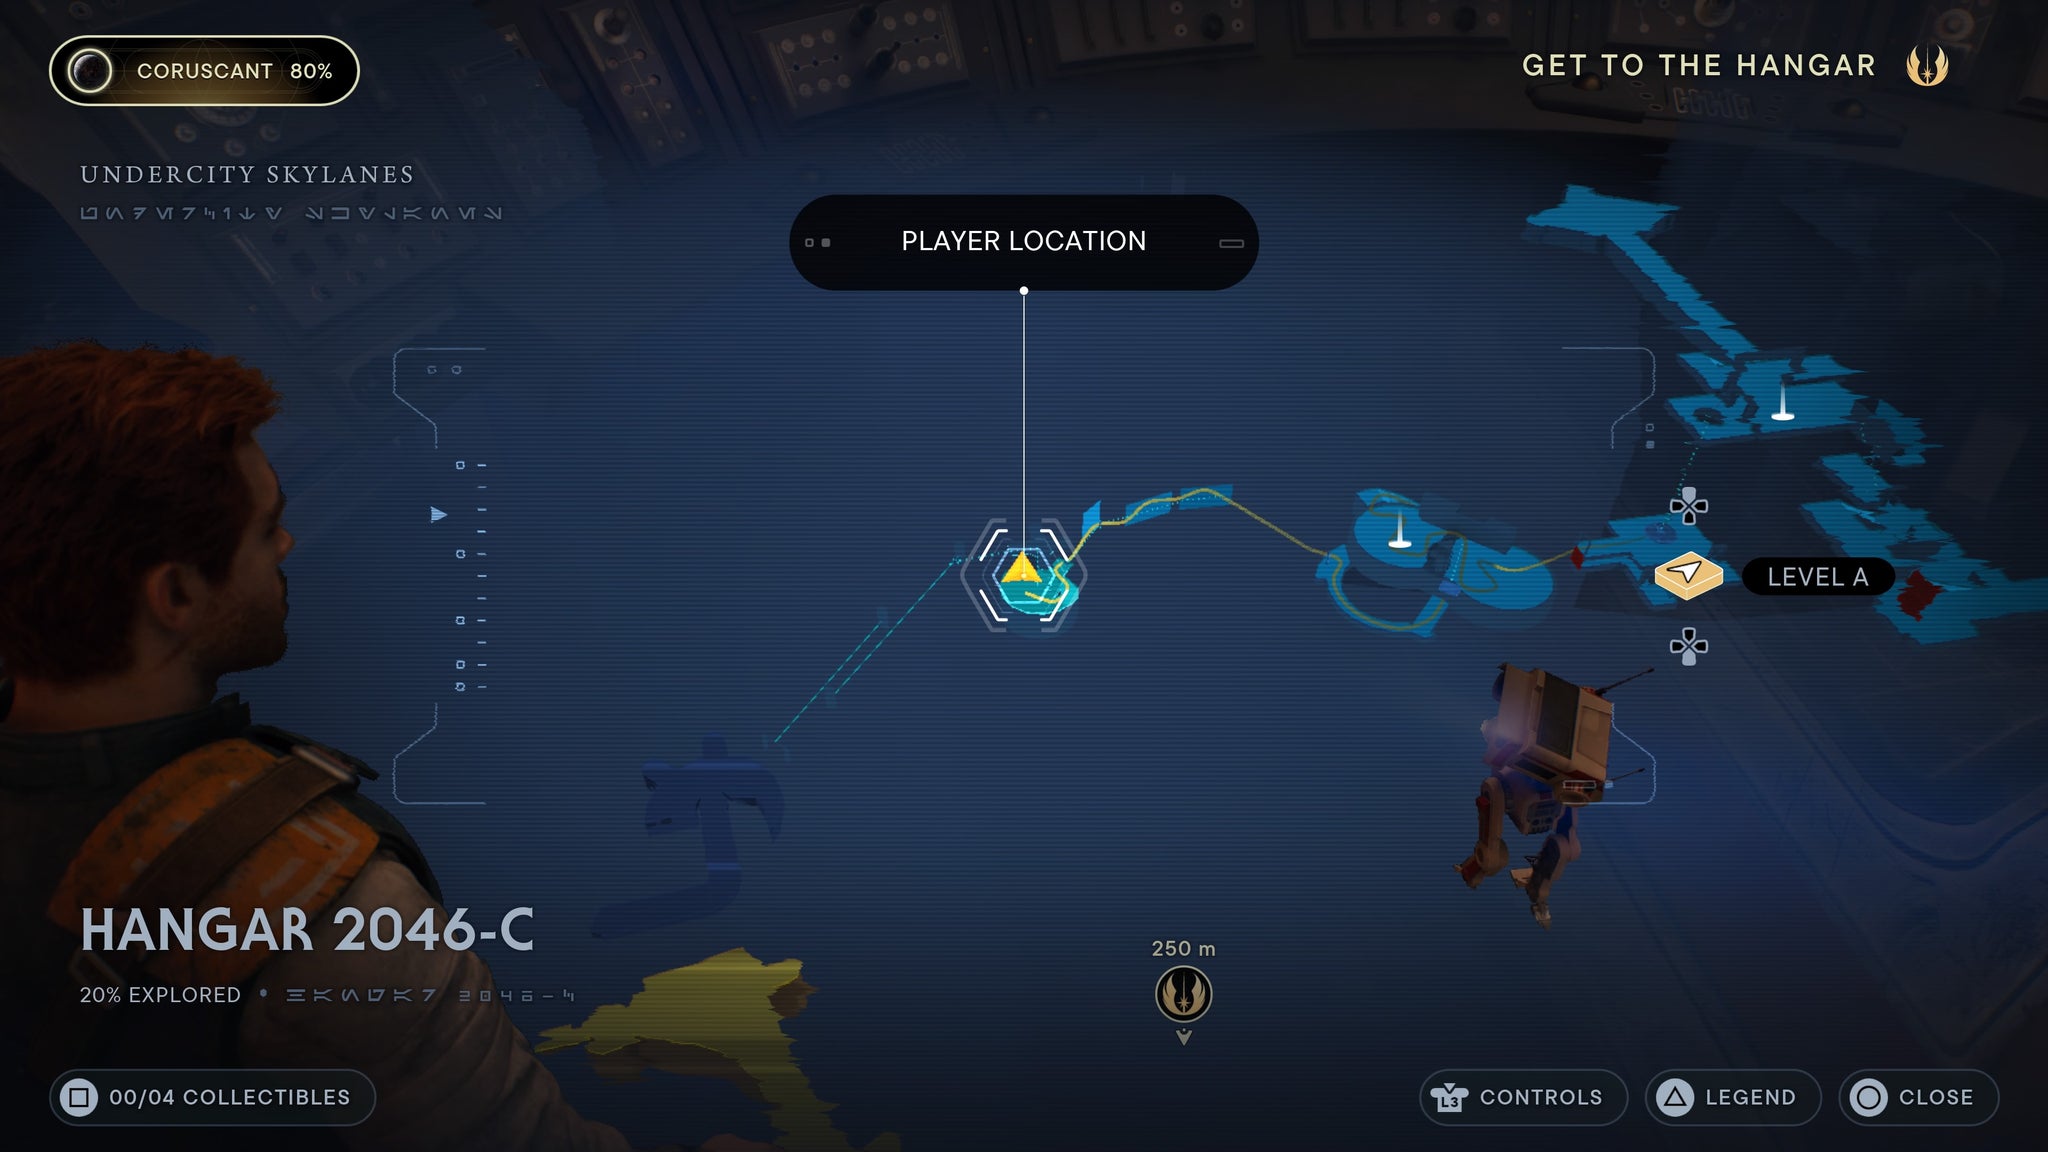
On a terminal where stormtroopers and a purge trooper are present.
Koboh
Gorge Crash Site
From the meditation point, head left of the elevator to find a force echo you can interact with in the oil nearby.
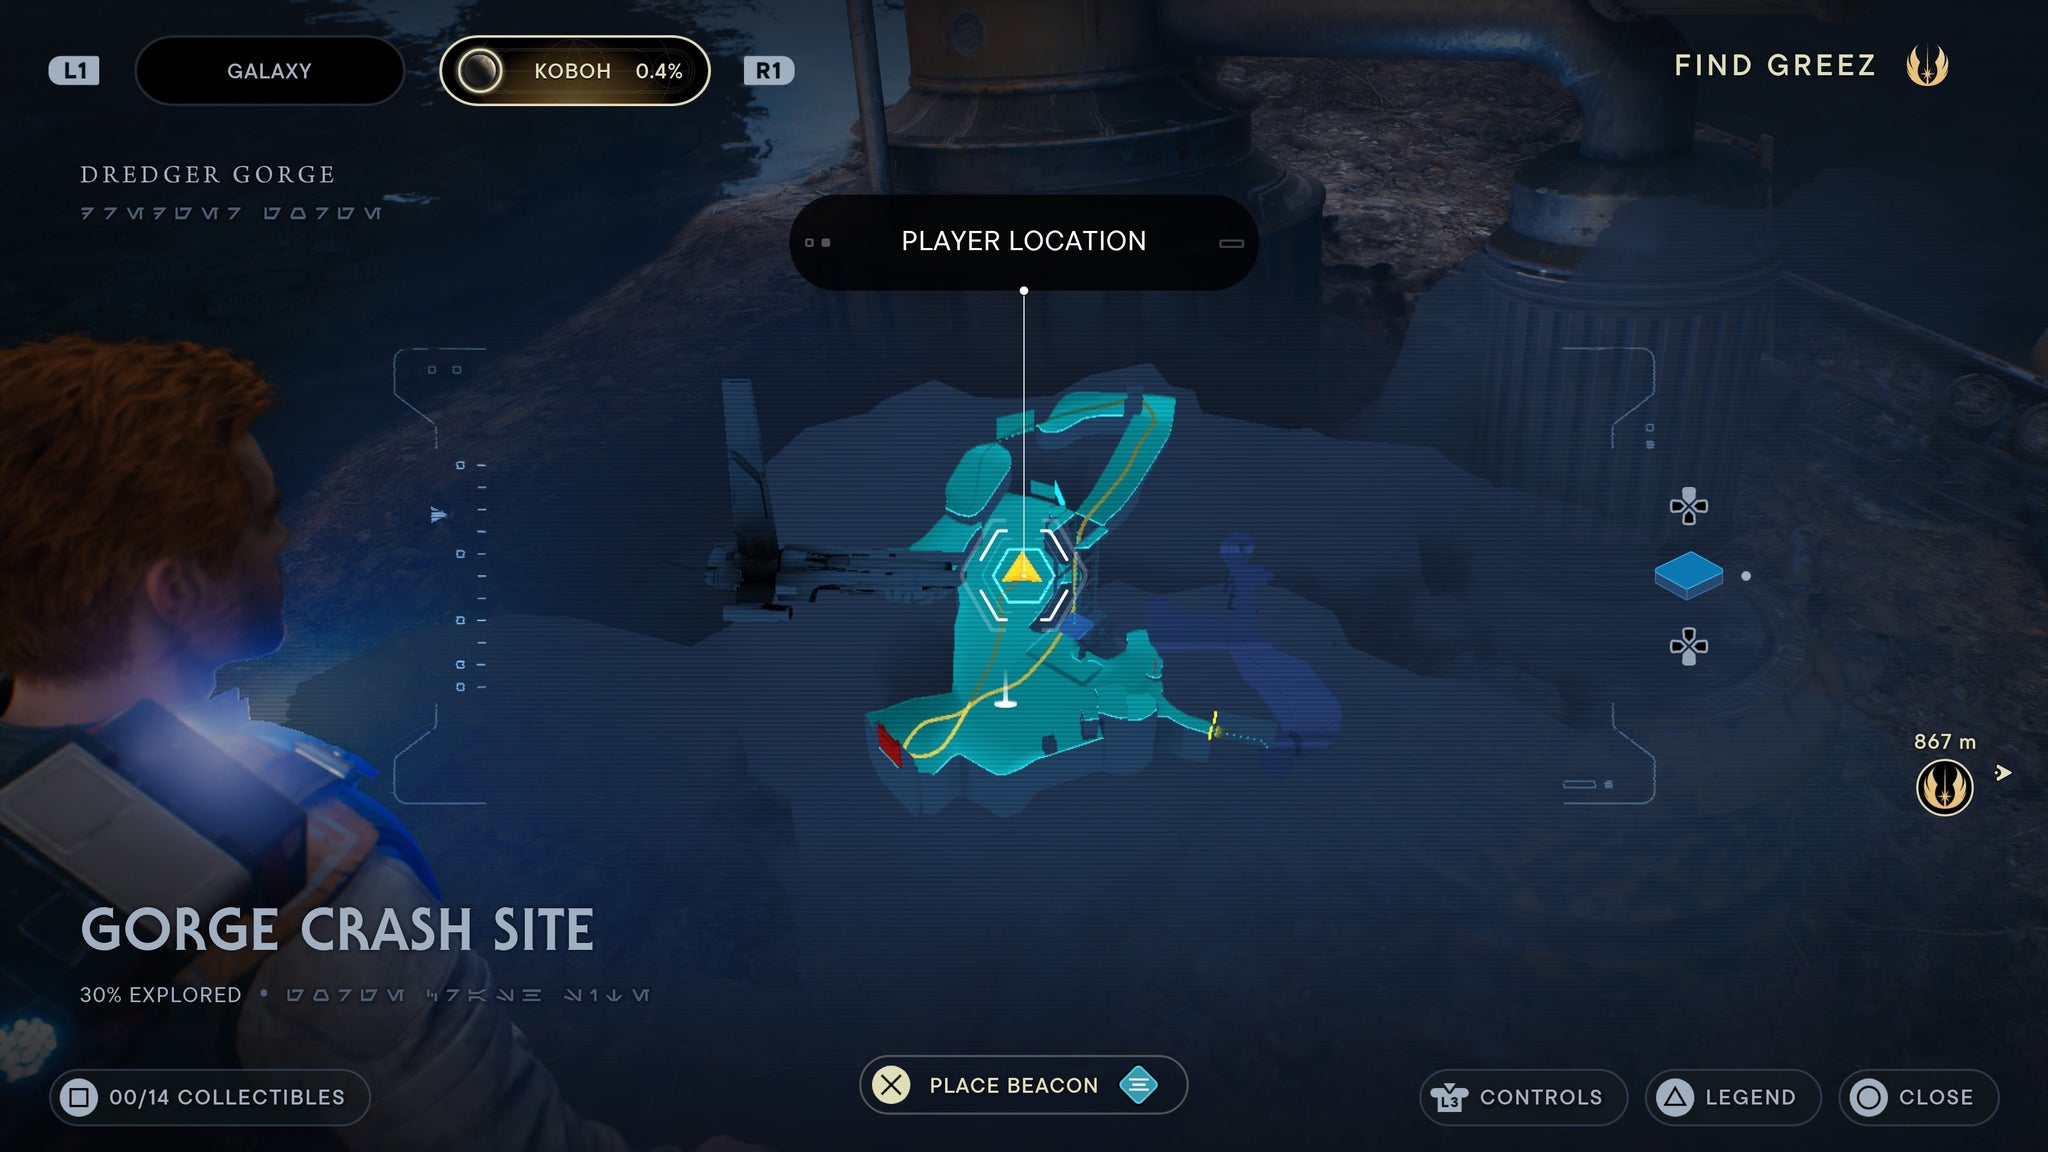
Right by the oil, on the ground.
From the meditation point, head left of the elevator and walk all the way to the end of the oily path to find a broken droid you can scan.
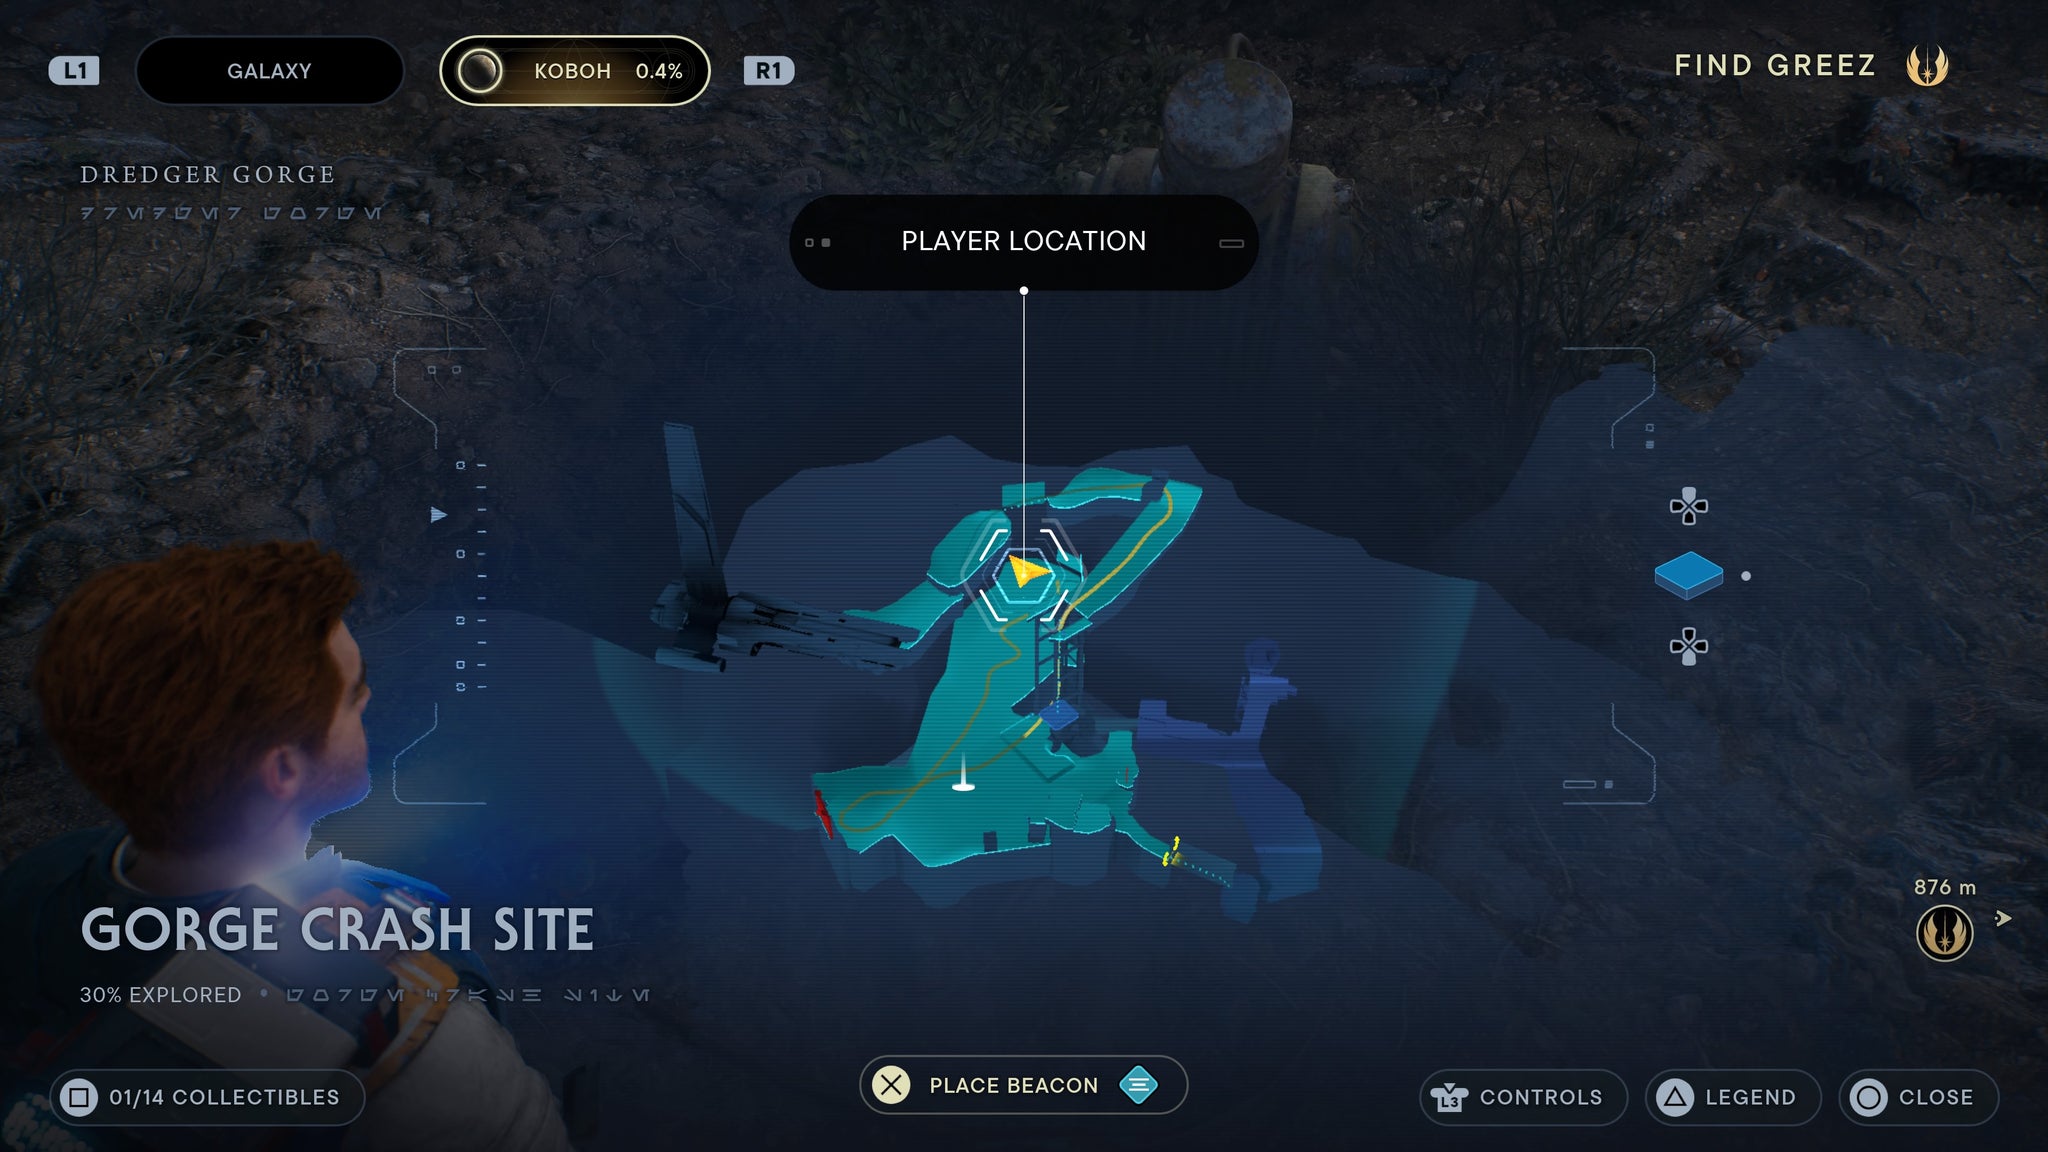
All the way at the end of the oily ground.
Enter the caves near the meditation point. Pass the big room where you fight droids and a raider, then enter the dark cave passage behind them. There, on the ground, is a databank collectable BD can scan.
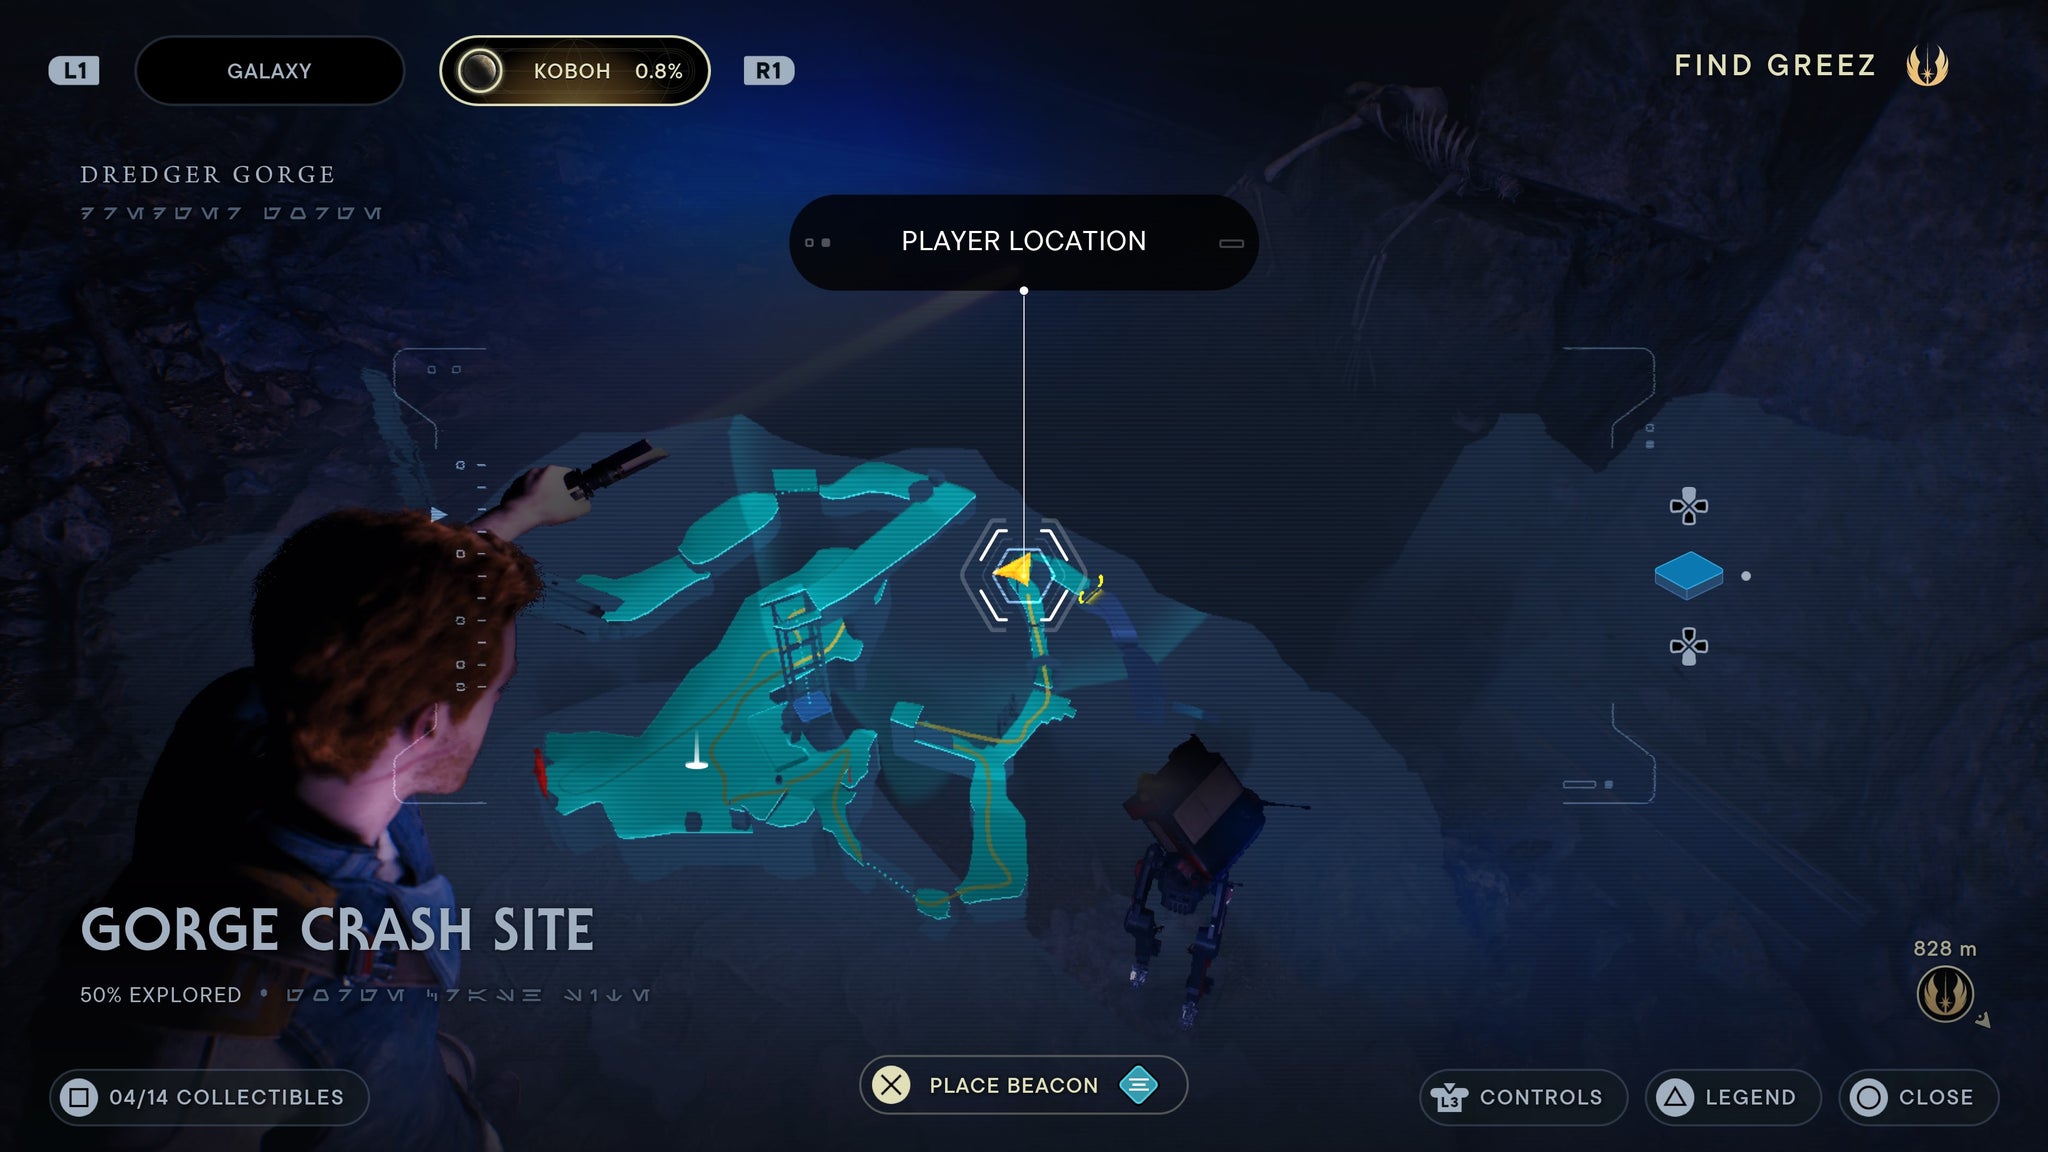
In the cave, past the raider and droids.
After you take out the B2 battle droid and his raider pal, run along a nearby wall and drop int the tar below. Quickly jump onto the nearby platform that’ll keep you from sinking, then you should be able to scan the tar for a data bank collectable.

Jump on the platform, then scan the tar.
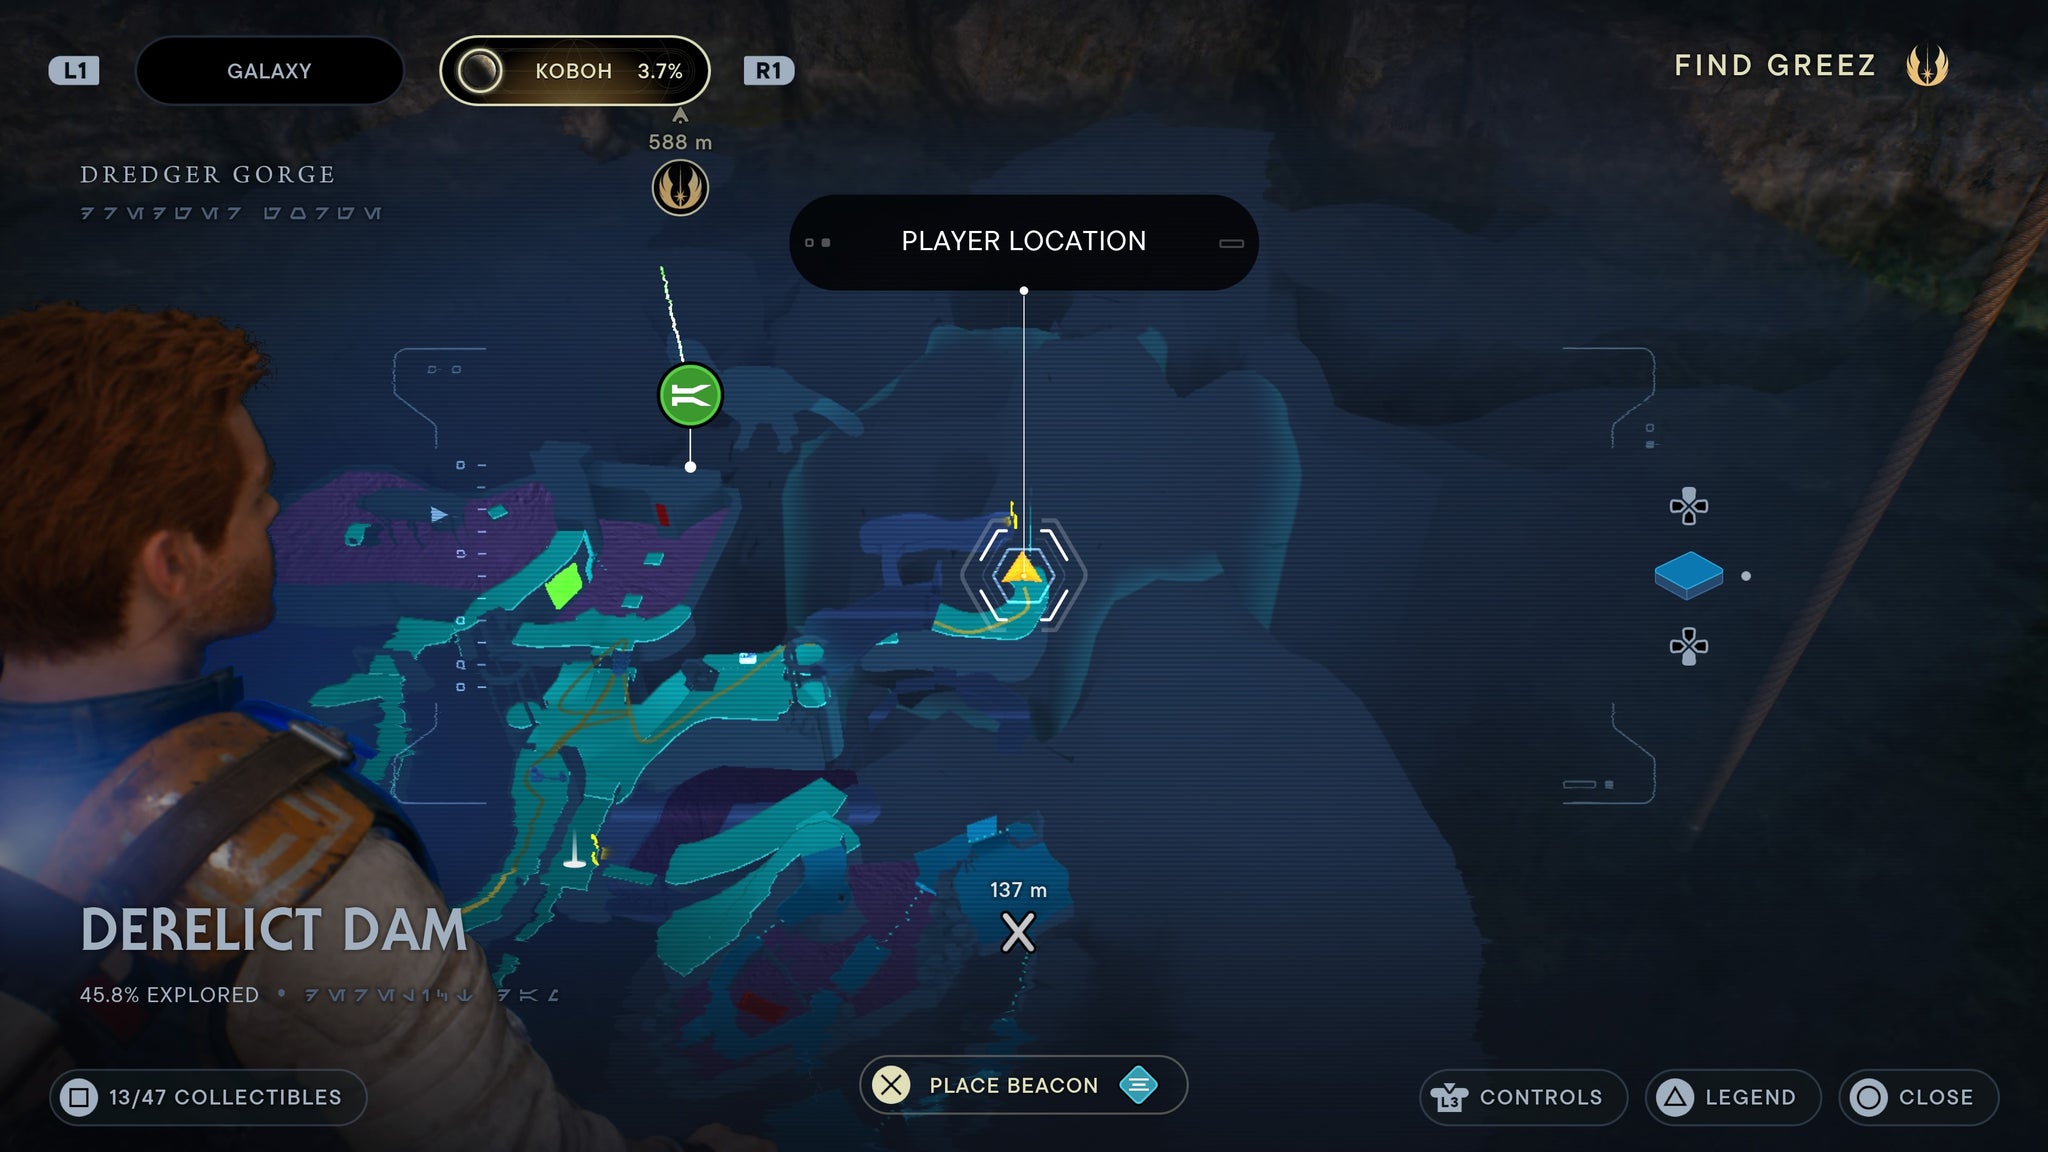
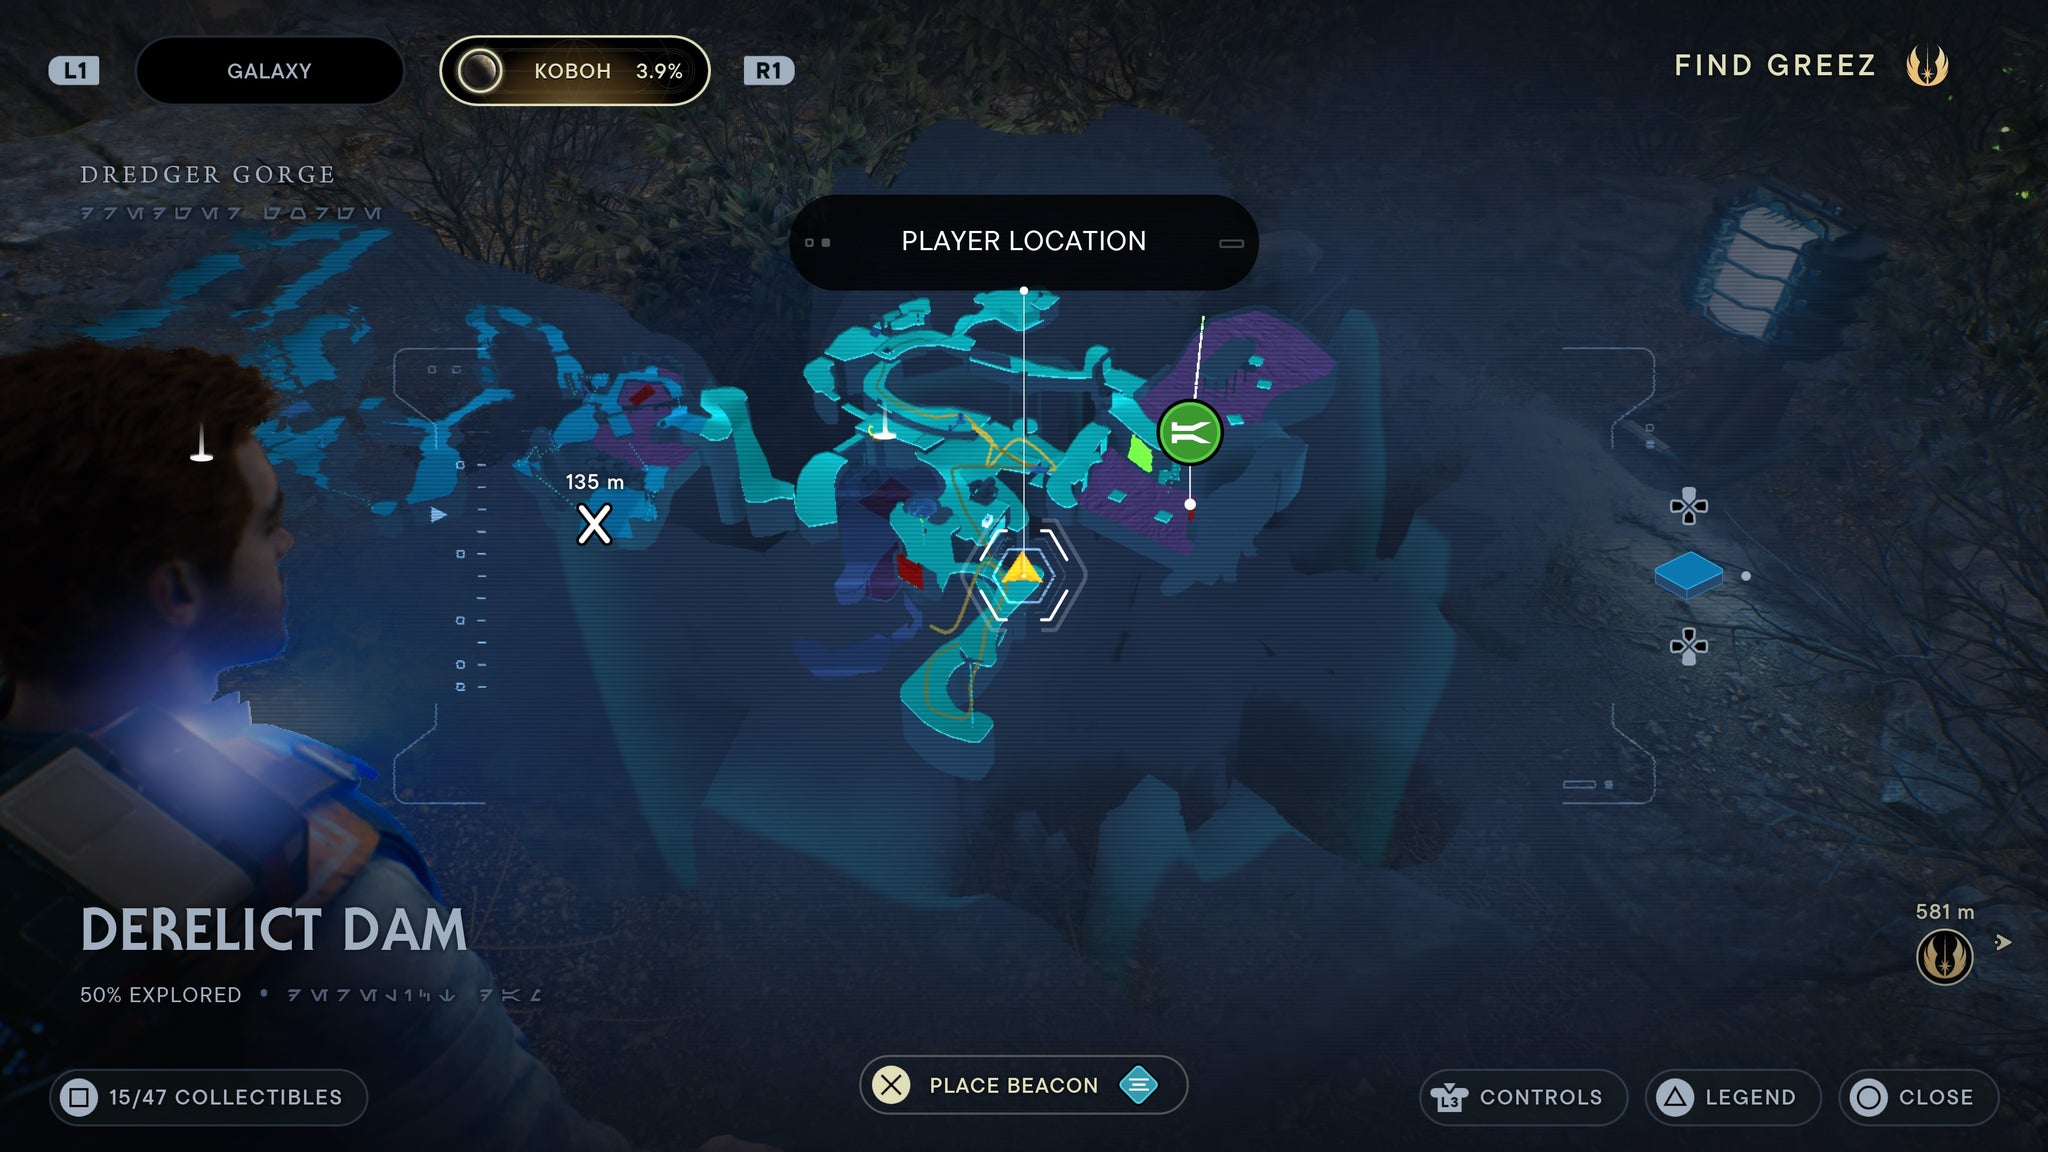
Derelict Dam
As you descend down into the dam, you’ll come to two raiders and a B2 droid. Kill them, then you can scan a nearby corpse for a collectible.
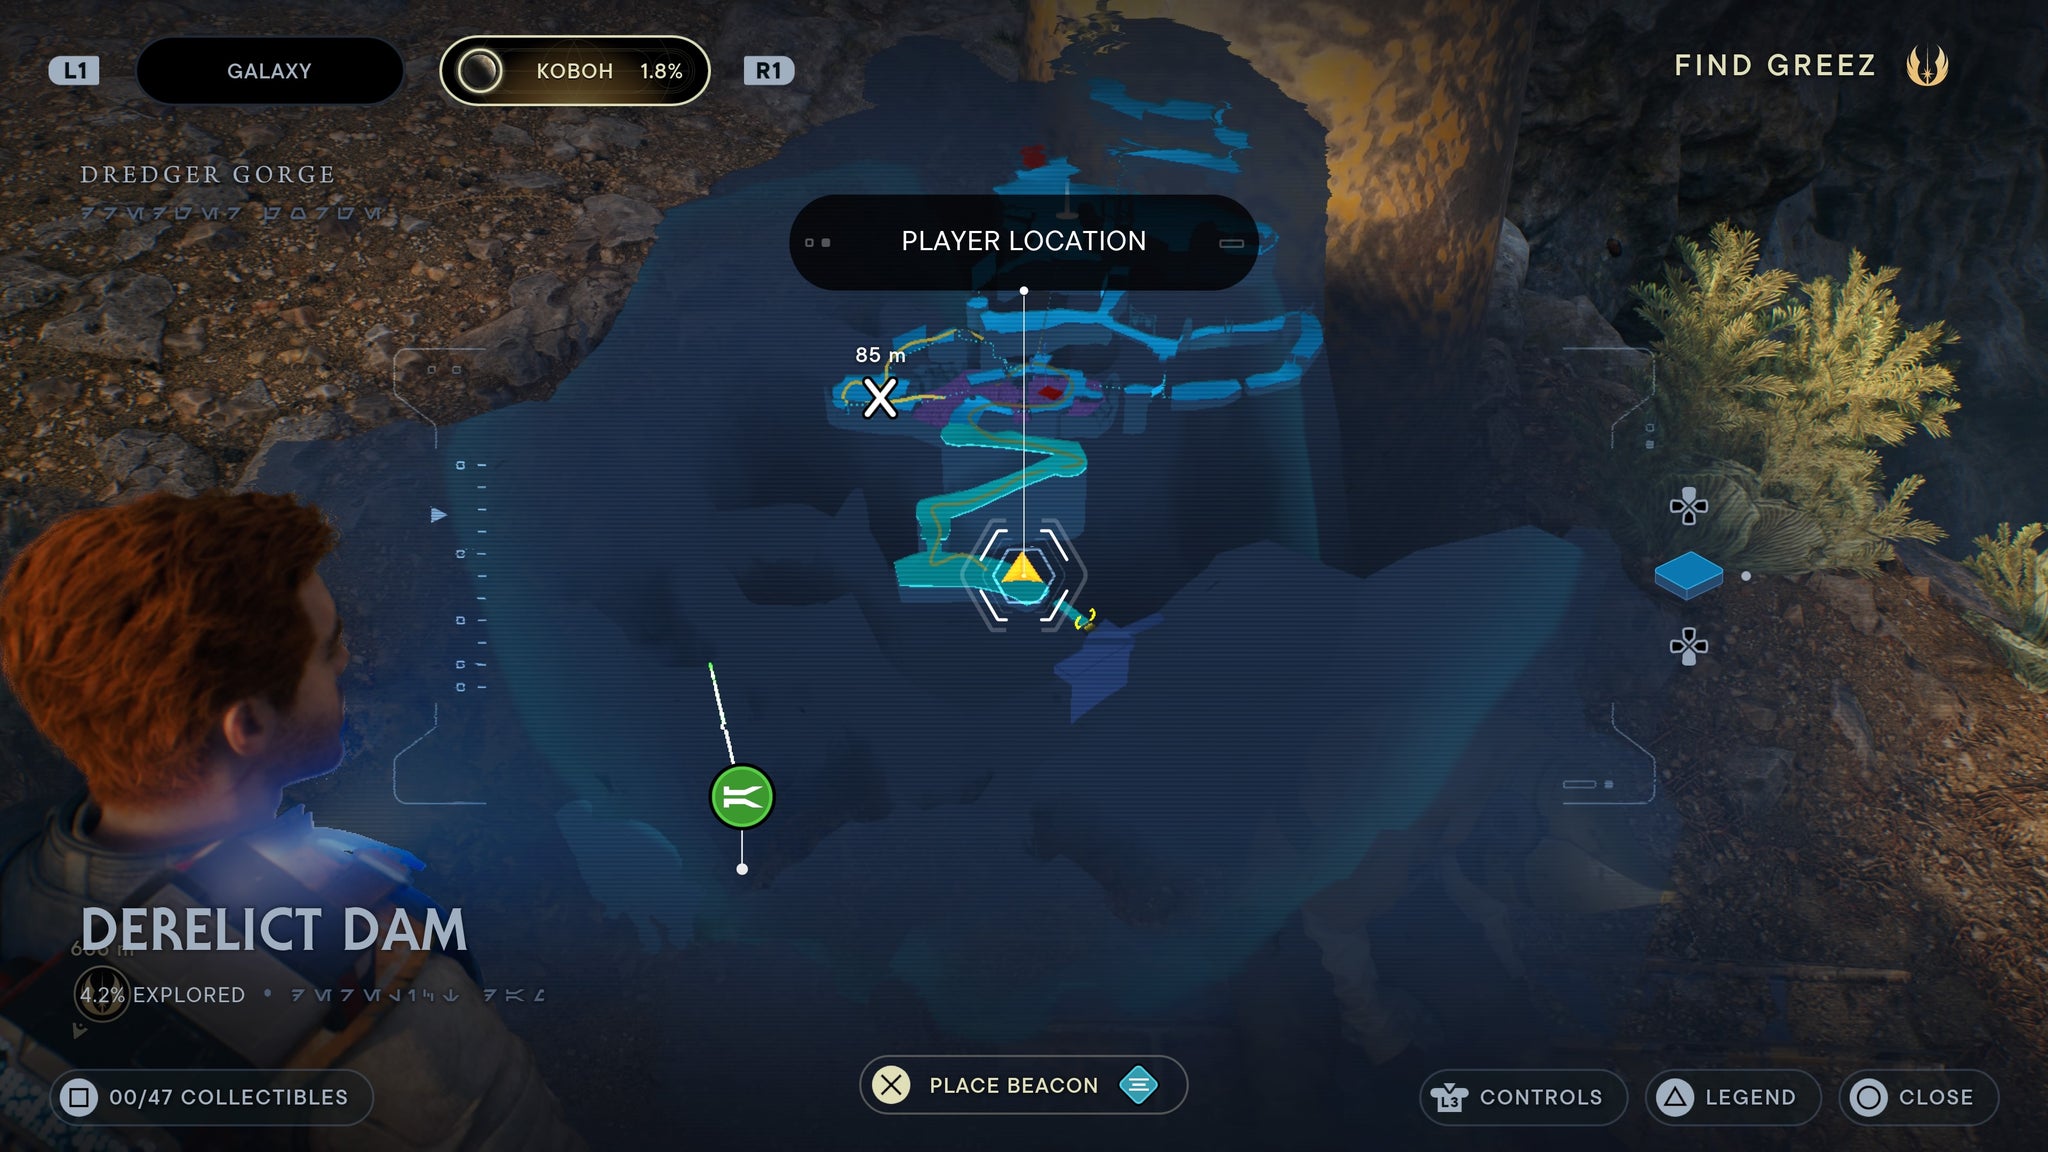
Just along the path.
From the meditation point, walk away from the giant creature and cross the broken bridge. You’ll come across two droids, who will be killed by a goroco. Take revenge for the duo, then force pull down a hatch. Walk through, then you’ll find a nest you can scan.

Justi nt he corner.
From the meditation point, climb down to the area directly below. When you reach the bottom, you’ll find a part of the destroyed dam you can scan.

Right below the meditaton point.
From the meditation point, climb down to the area directly below. When you reach the bottom, walk past the wreckage and you’ll find a body covered in tar. Scan it for your data bank entry.
You’ll fidn ab ody covered in tar here.
From the meditation point, walk towards the giant creature and keep going straight. On the ground, near a death drop, is a dead raider you can scan.

Right by the endless drop.
From the meditation point, walk towards the big creature then jump up to the platform directly ahead of you. There, you’ll be able to walk up to the edge of the tar pit and scan the nearby leaking wall for a data bank entry.

Scan this before you blow it up later.
From the meditation point, walk towards the big create then jump up to the platform directly ahead of you. Once you’re up, take a right and walk to the nearby tree. You’ll be able to scan the pipes nearby.

Scan these pipes in front the the tar lake.
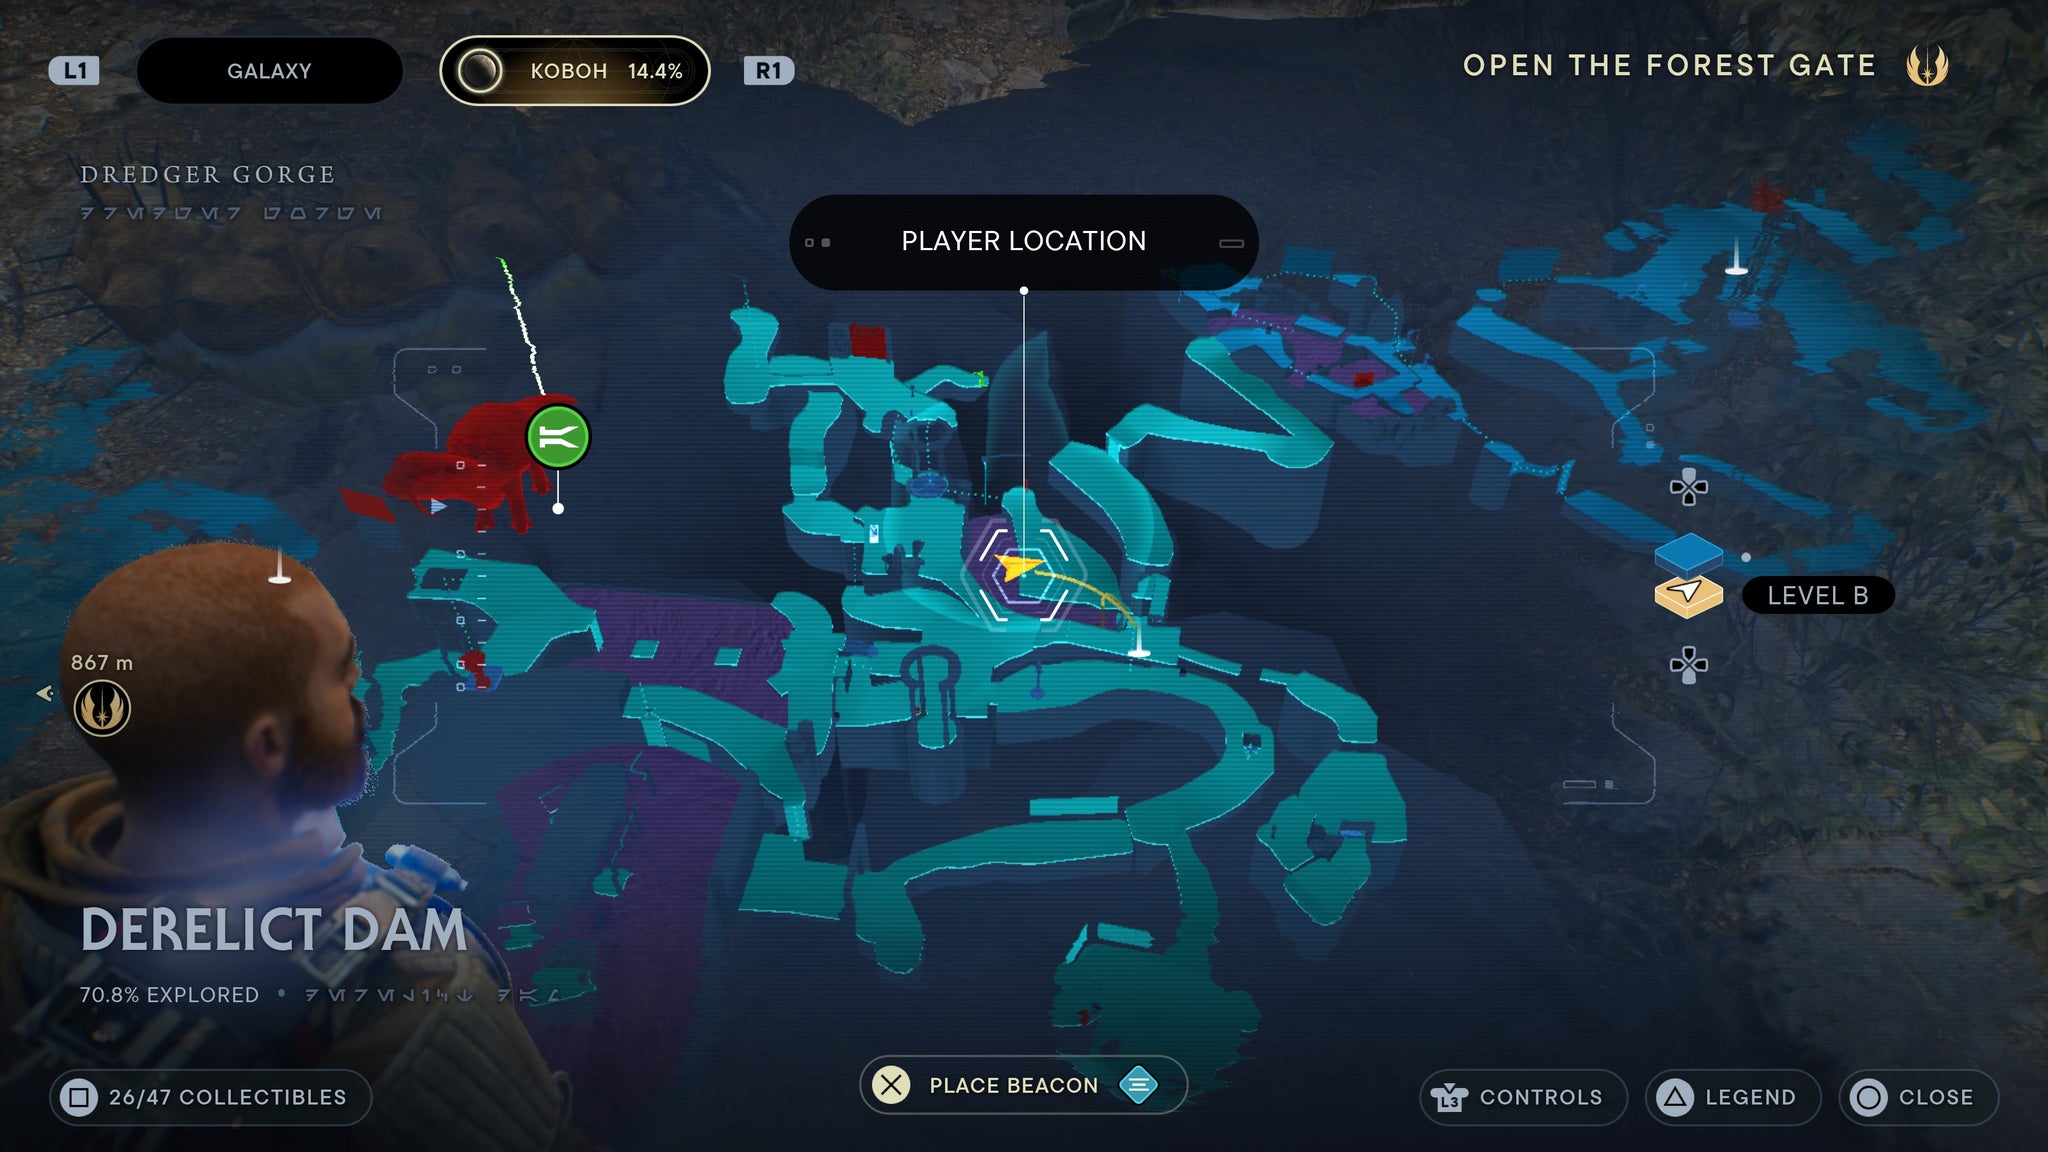
Inside the cave where you meet your first roller mine, look right and a force echo will be on the ground. Scan it for a data bank entry.

Right as you enter the cave, turn right.
Use a roller mine to blast open a wall near the workbench. Then, kill the monster inside. Behind the rope at the end of that room is a scannable collectible.
Right behind the rope, before you ehad up.
Use a roller droid to destroy the wall near the workbench. Climb the rope inside the room beyond it, then continue forward. By a blue light on the path ahead, you’ll find a scannable collectible.
Scannable camp, at the highest point of the dam by the lift.
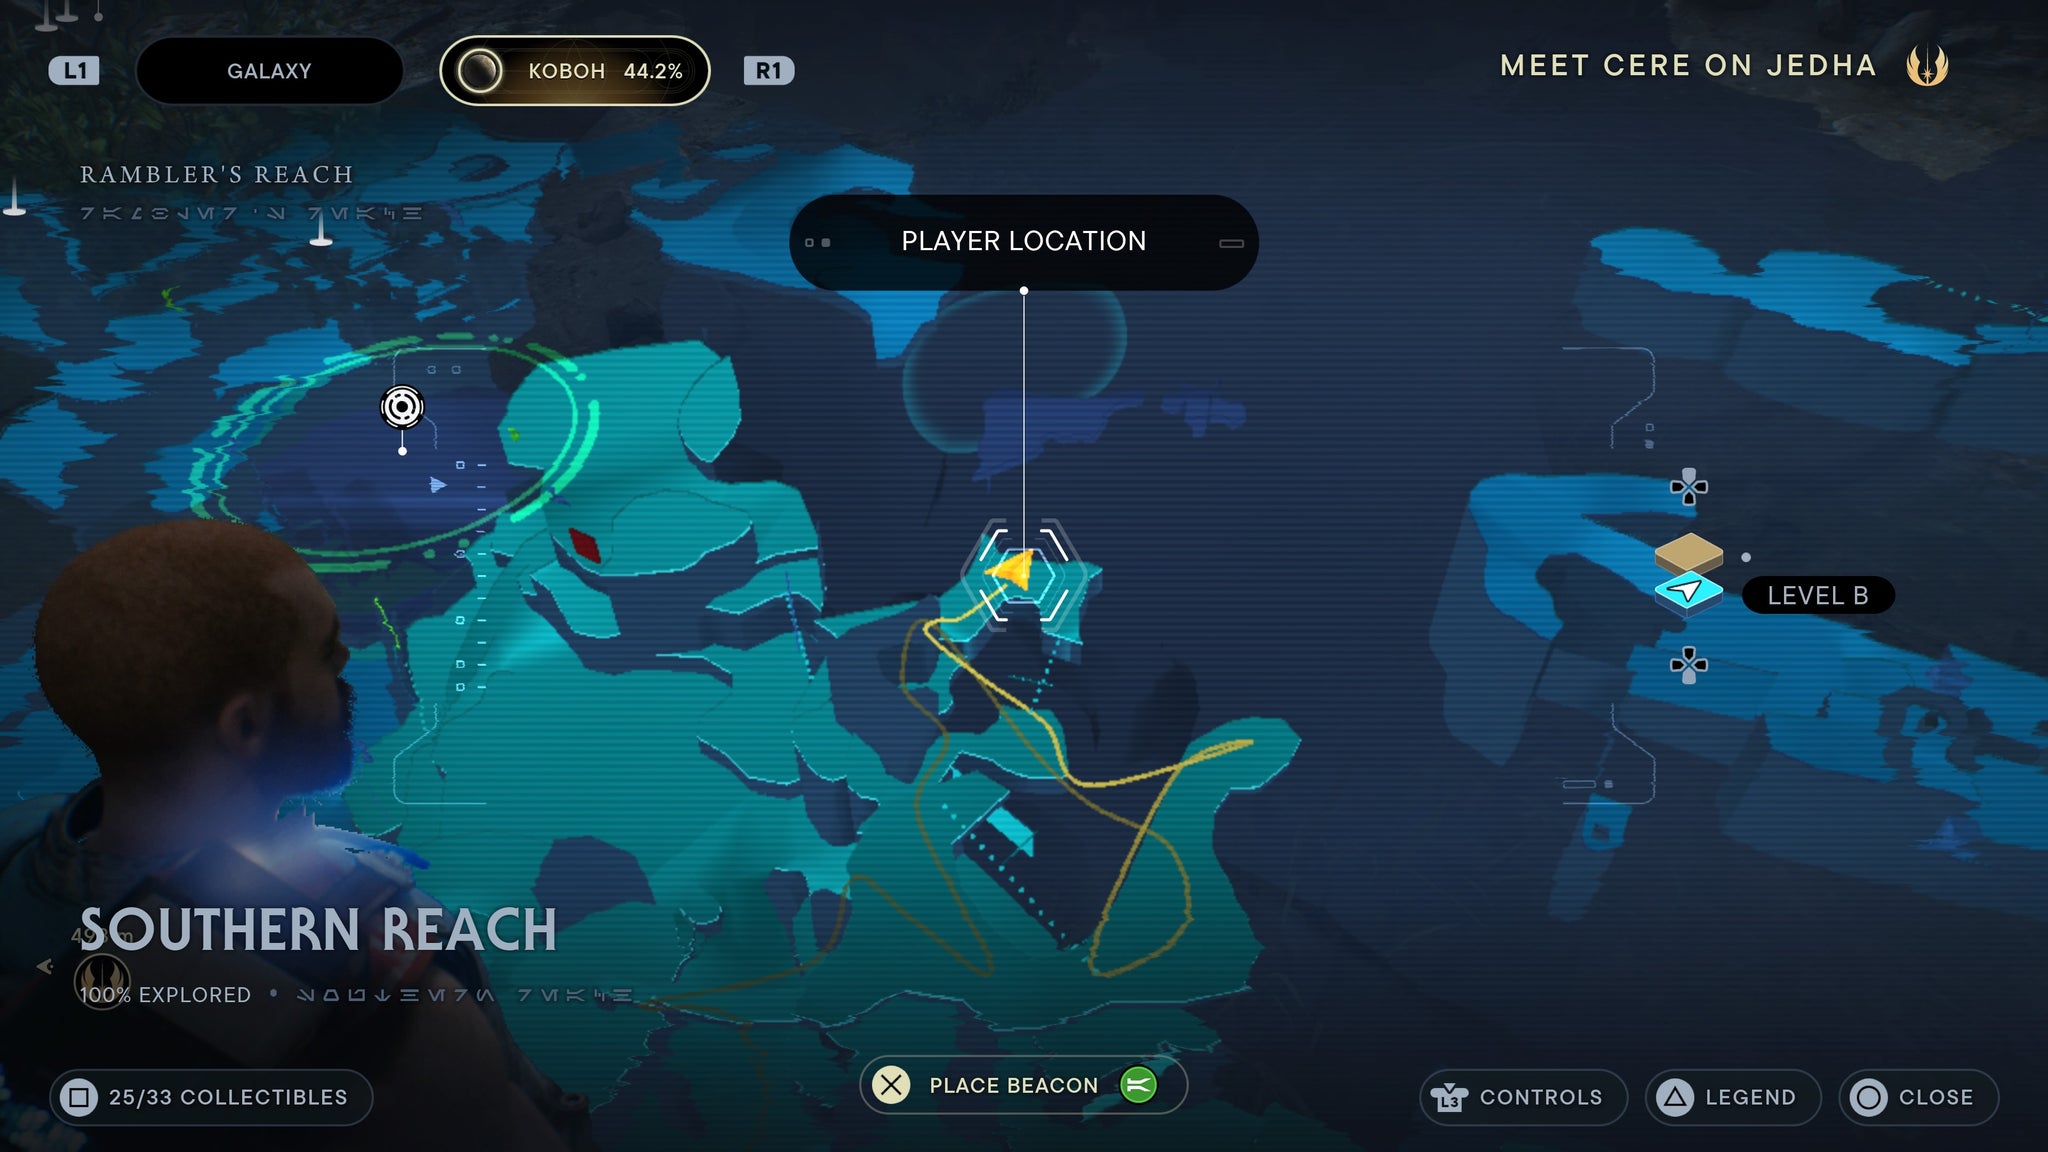
Southern Reaches
From the meditation point, head downhill to Mosey’s hut. Then take a right past and climb up the wall marked with white symbols. Once up there, use the poles to leap across a chasm. Once across, you’ll be able to walk forward and find a rope you can swing across over the enemies below. After you’ve swing across, you can find a force echo to the right the plateau.

Force echo scannable across a swinging point.
Walk down the hill from the meditation point and towards the locked circular door on the map. Near there, past a lot of wildlife, you’ll find two gorgers. Kill them, then walk up to the large silo nearby. BD will be able to scan this for a data bank collectable.

Right by the silo, by two gorgers.
Climb to the top of the silo, then climb up the cliffs beside it. At the top of these cliffs,head left over some shallow rock pools and you’ll see a gap in the cliff wall. Head inside, then drop down into the cavern below. In here, on the ground, is a force echo you can scan.
In the cave near a chest, overlooking the view.
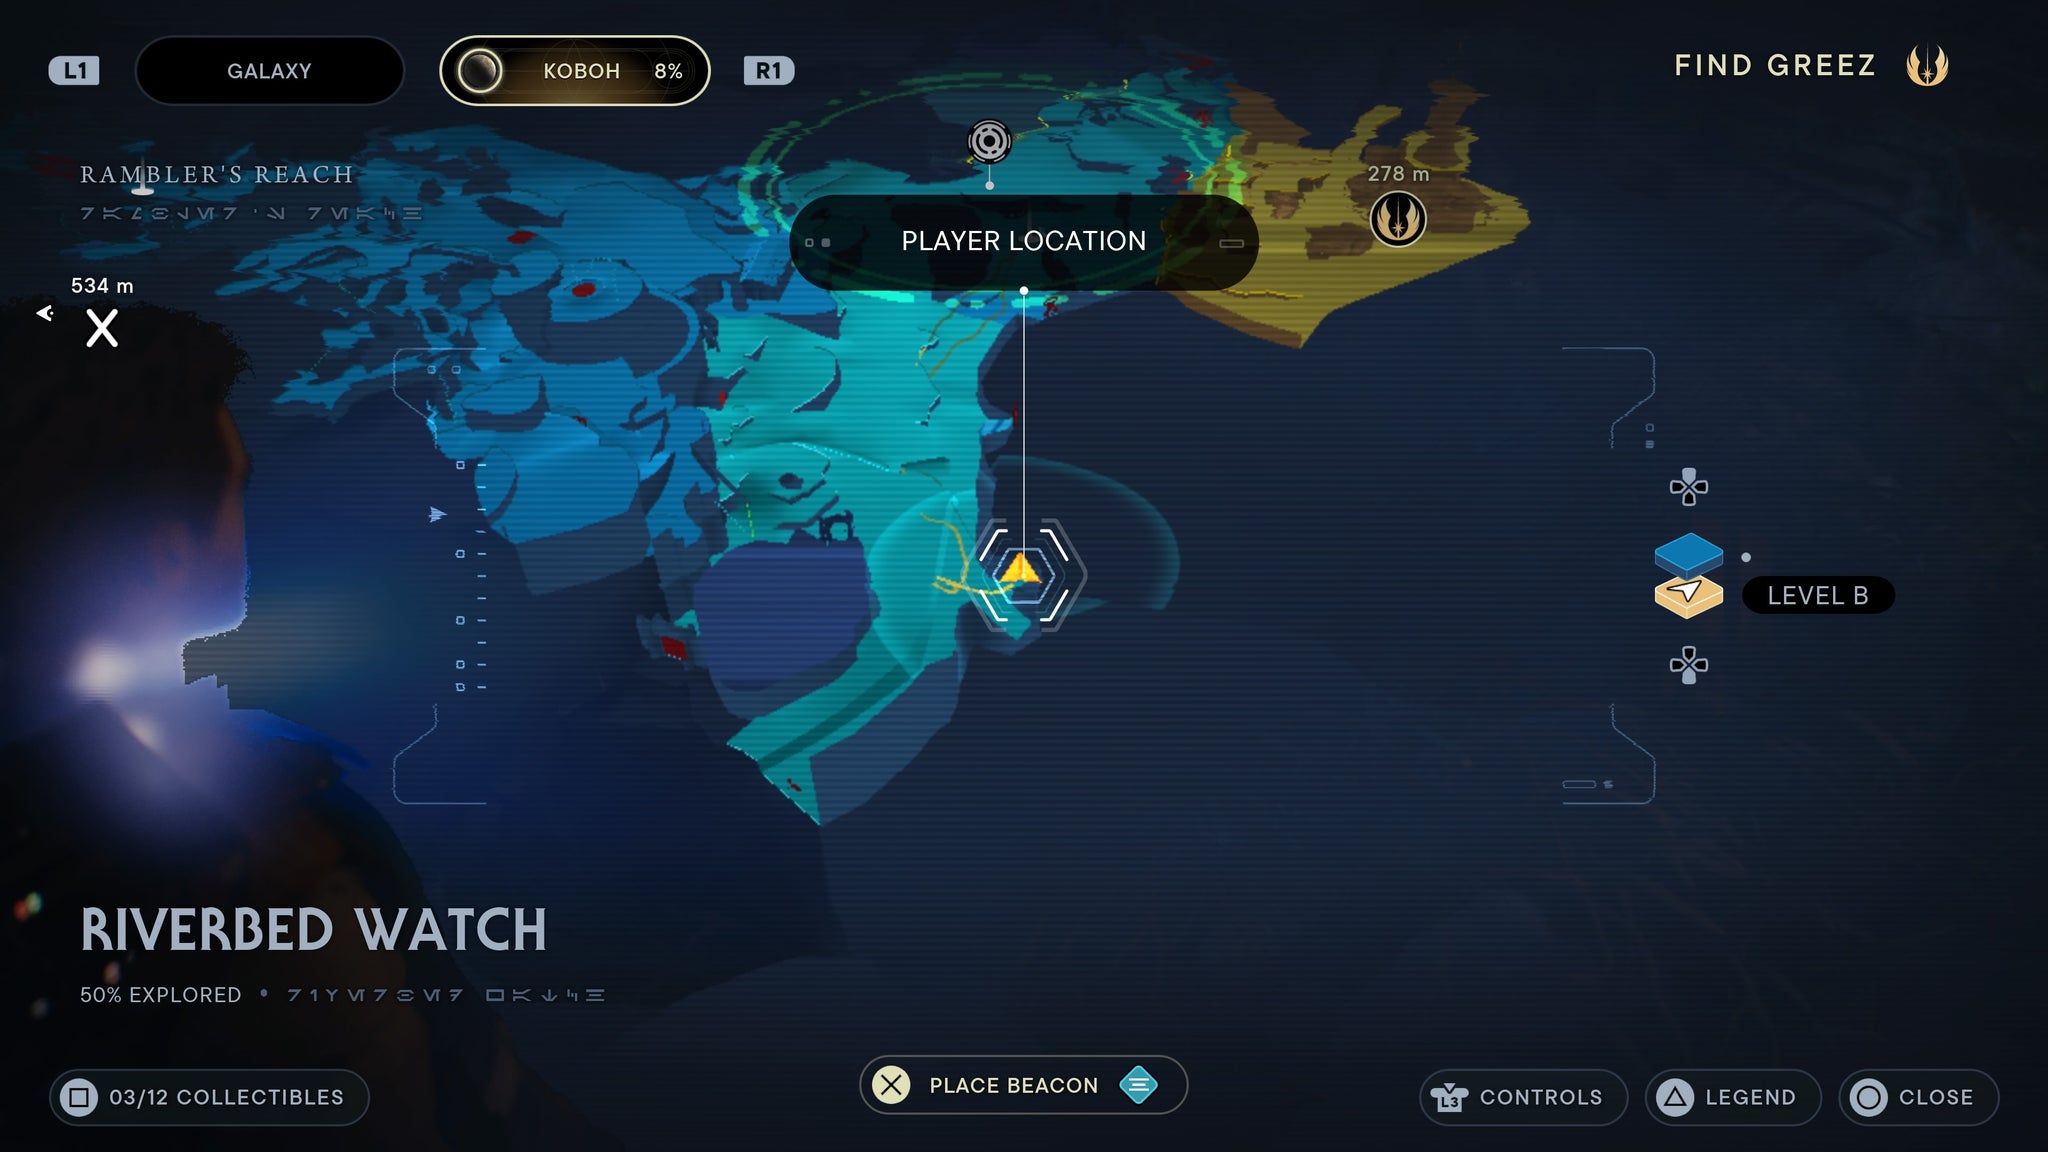
Riverbed Watch
Follow the left side of the river until you see a cave, with two smaller enemies inside. Kill them, and a force echo will be there!
Inside a cave, by a drestroyed droid.
Where the Southern Reaches and Riverbed Watch connect, just below the warehouse , you’ll find a body with a force echo on it. Interact wit this for a databank entry.

On a body, by the large rock near the meditation point.
You can find a scan right next to the Riverbed Watch meditation point, on some boxes.
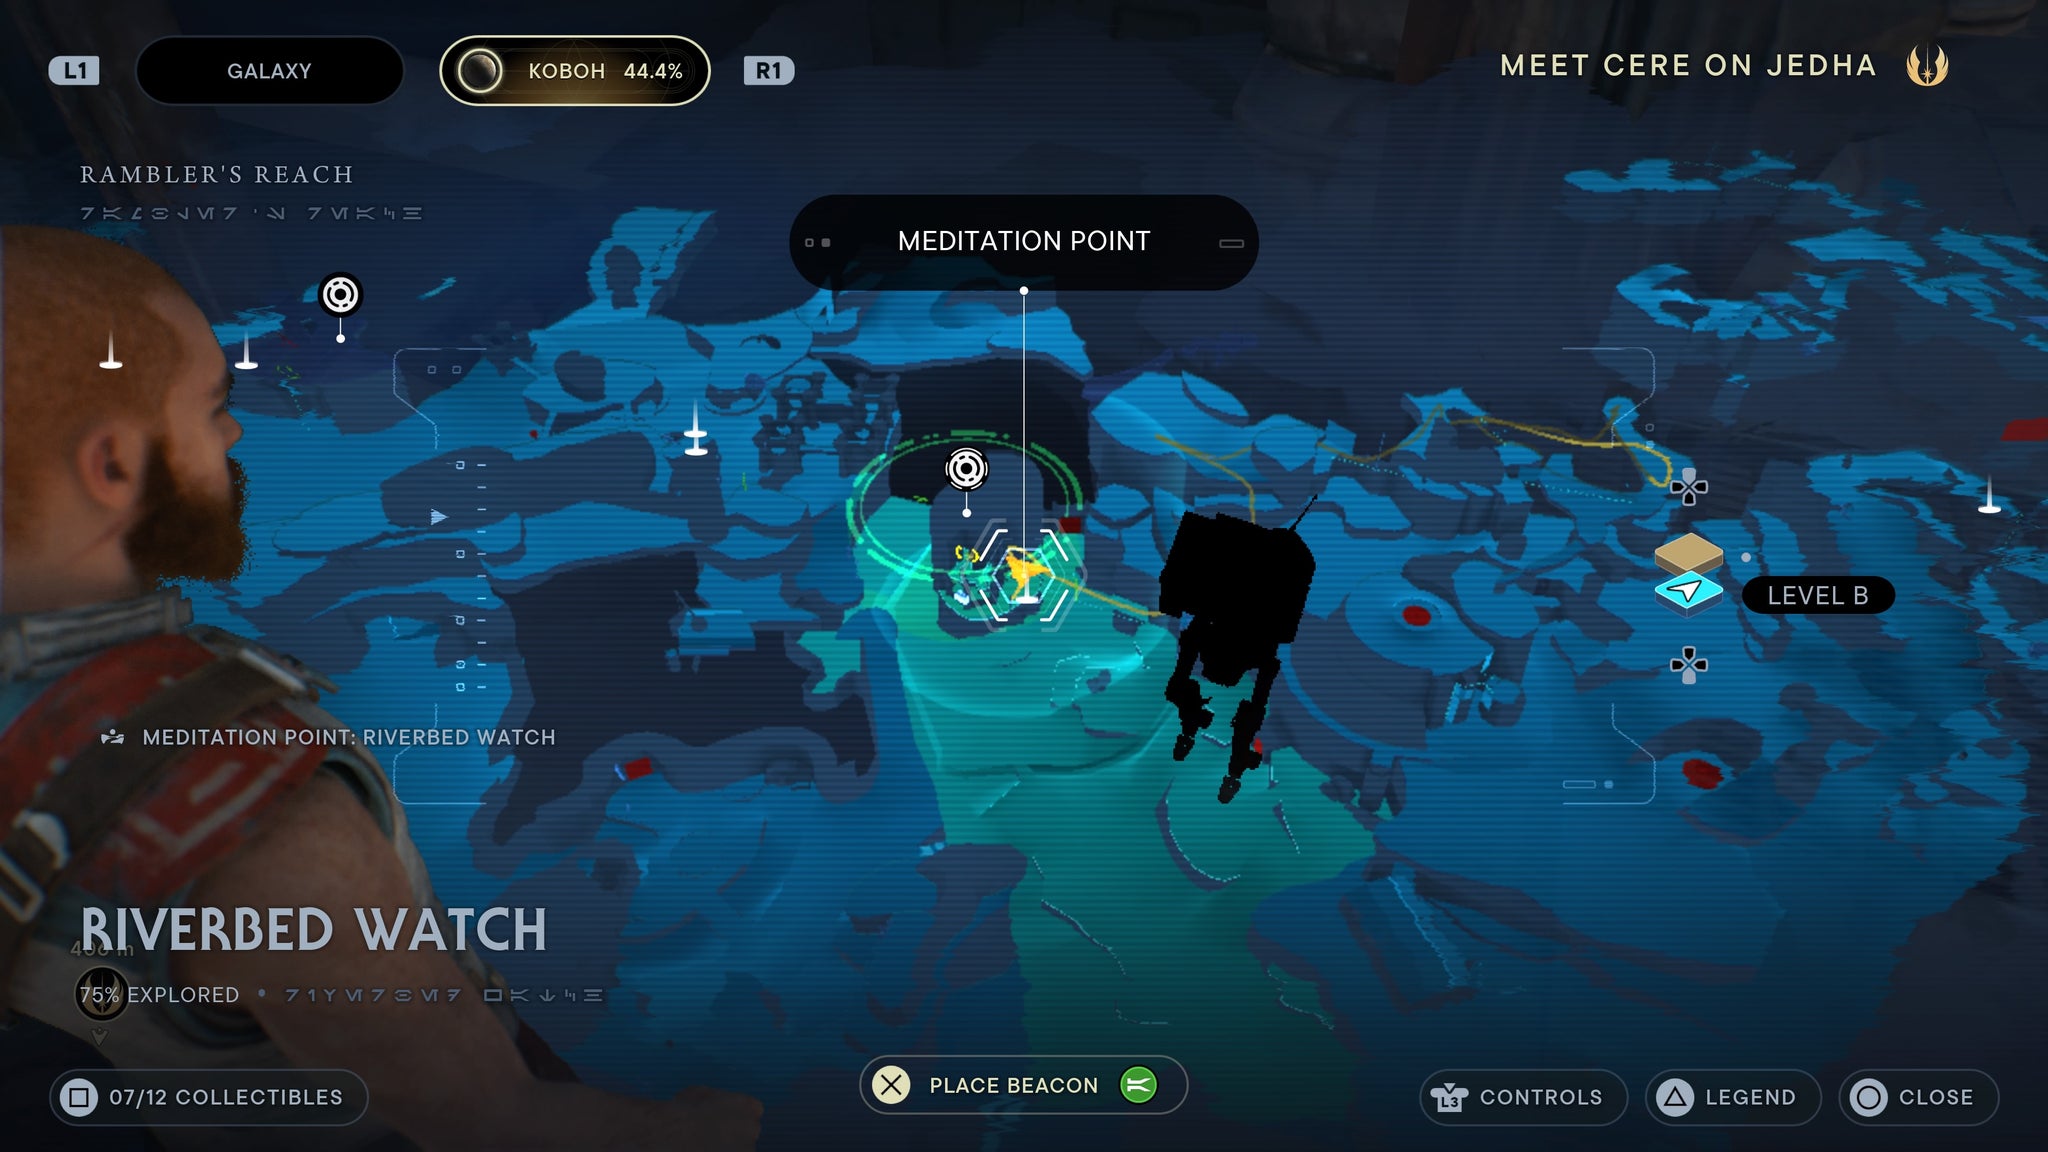
Right next to the meditation point.
At the top of the watchtower and above the RIverbed Watch meditation point, there’s a broken B2 droid you can scan on the ground.
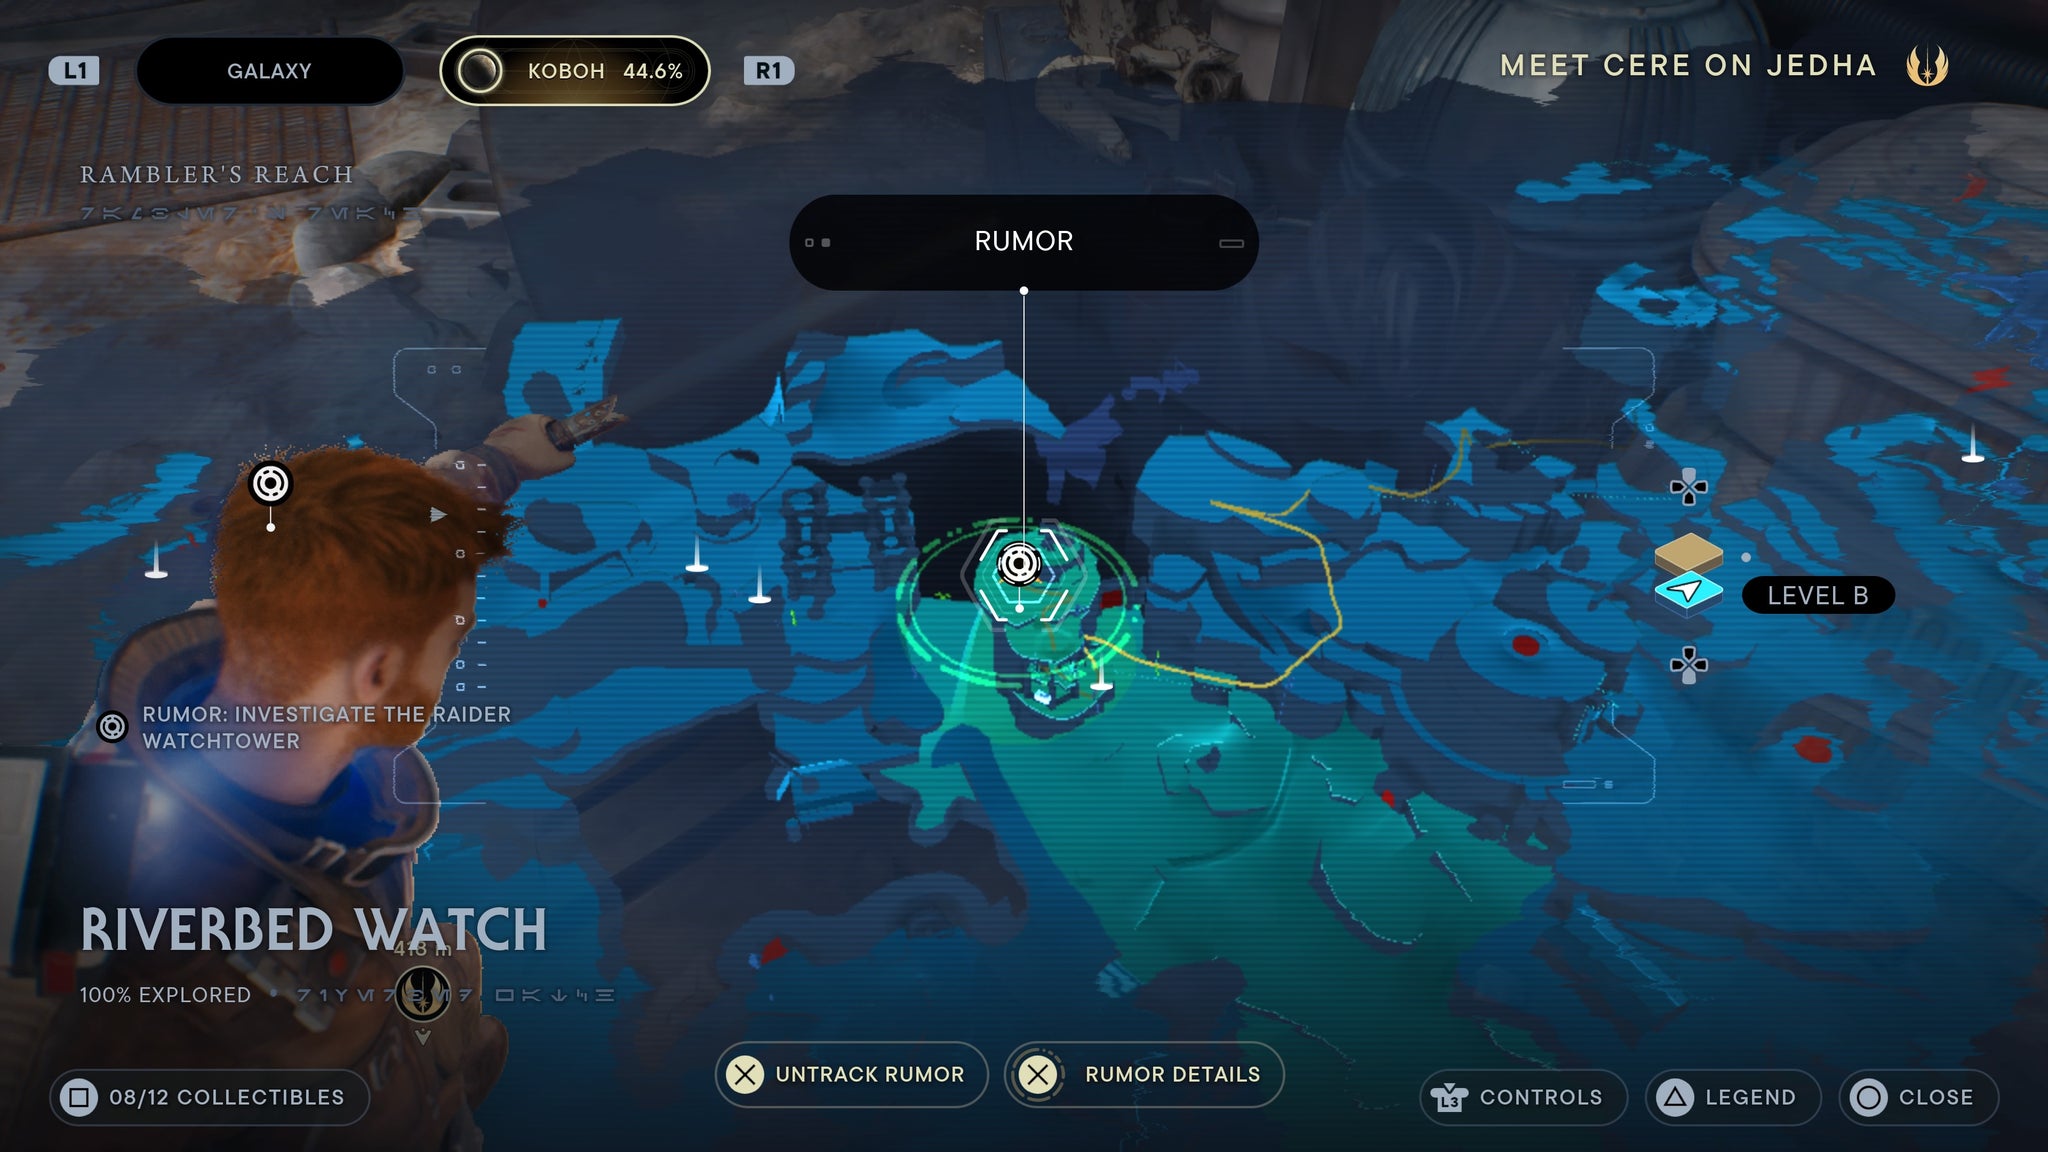
Scan the droid on the ground.
Hunter’s Quarry
Walk to the far edge of the Hunter’s Quarry, and you’ll see a cave massive entrance to a busted up building, filled with droids and a raider. Once they are all dead, walk inside and look the the right. You’ll see a force echo that you can interact with for a databank entry.
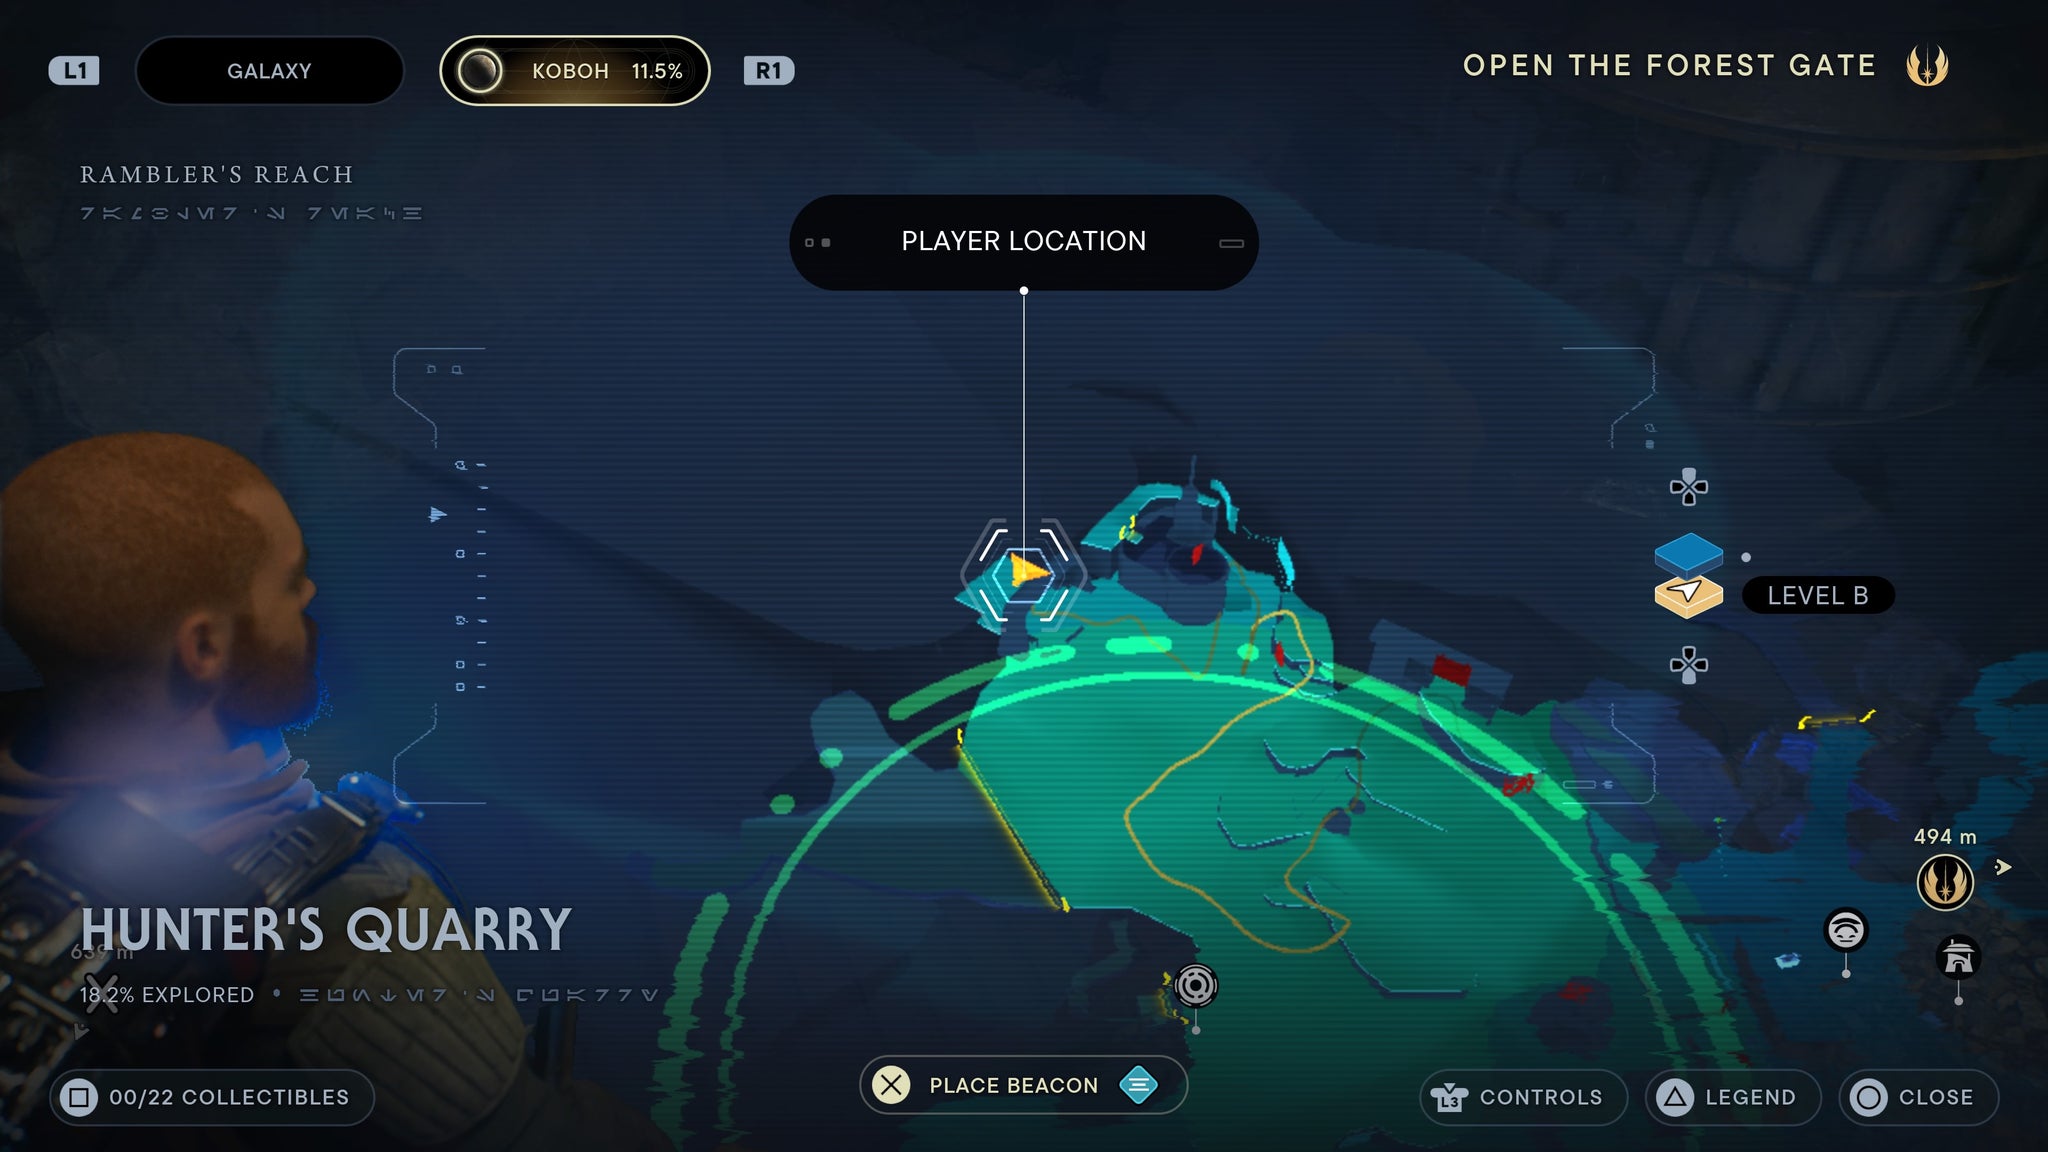
On a body, in the big entrance.
Follow the border of the Hunter’s Quarry around to the right, until you reach a wall you can run across to reach a higher platform. While up there, you’ll be able to drop down into an abandoned building through the roof. As you drop down, you can find a datapad against a wall that BD can scan for a data bank.
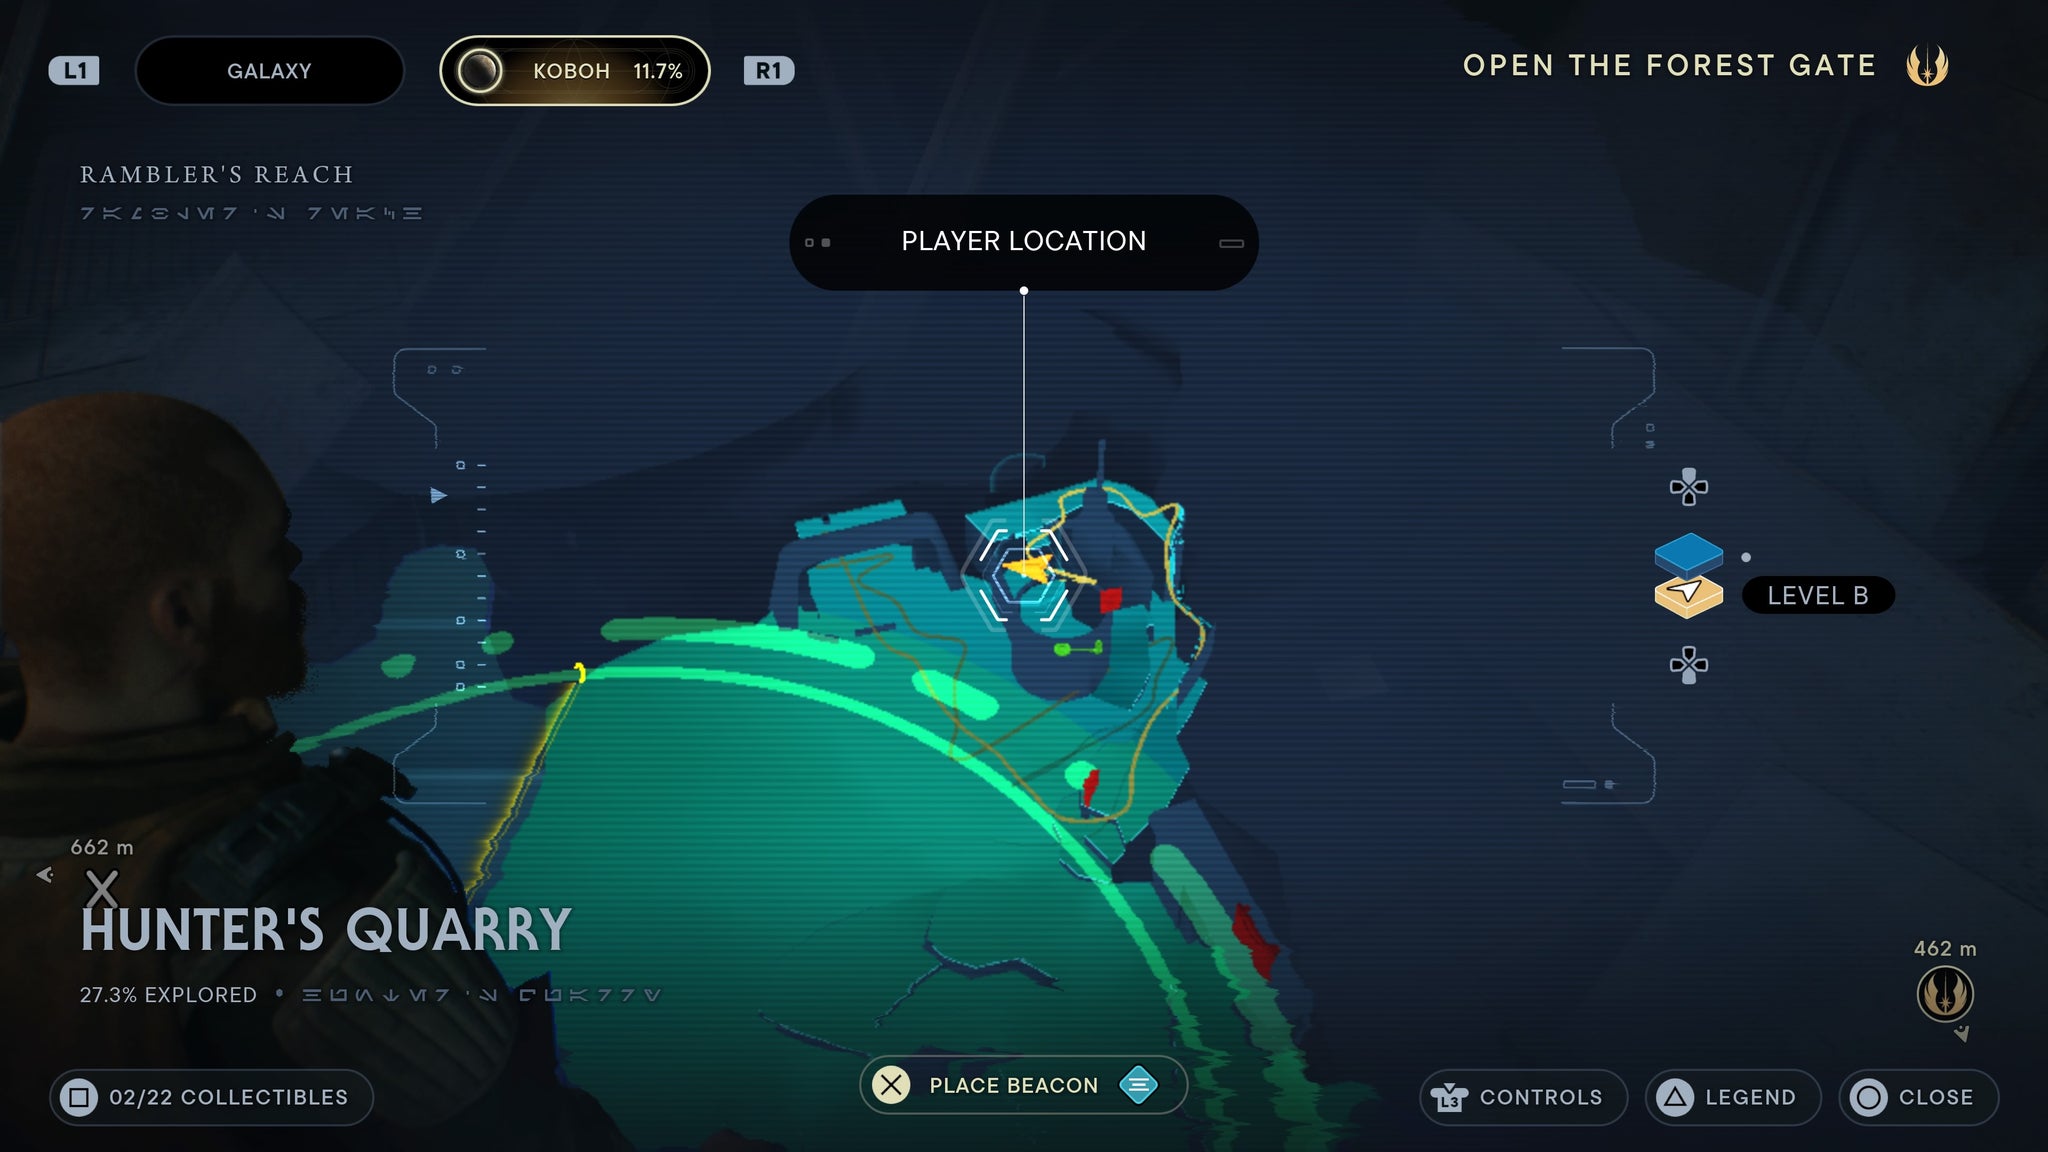
On a blue datapad on the ground.
Follow the border of the Hunter’s Quarry around to the right, until you reach a wall you can run across to reach a higher platform. While up there, you’ll be able to drop down into an abandoned building through the roof. As you drop down, you can find a datapad on a table in the centre of the room.

Inside the building, on a table.
Head to the far end of the Hunter’s Quarry, into the cave filled with Gorgers. Once they are all dead, follow the wall left round the room, and you’ll be able to scan a small hole in the wall.

Inside the far cave, along the left wall.
Run into Hunter’s Quarry and towards the cave at the far end of the zone. Before you enter, turn left and jump up to the platform overlooking the area. Once up, walk straight ahead until you reach the ledge looking towards the Southern Reach then turn right. You’ll find an echo / data bank entry there.

Right at the edge of the cliff.
Climb up to the rocky platform overlooking the quarry. There, on a pillar on the Souther-Reach-side of the platform, you’ll find scratches you can scan for a data bank entry.

Right next to where you fight the Goroco.
Requires lift and slam. Lift up the heavy door in Hunter’s Quarry then head inside. Take the left path down, then grab the orb. Use this orb to walk down a dark corridor, place the orb, then interact with the force echo.
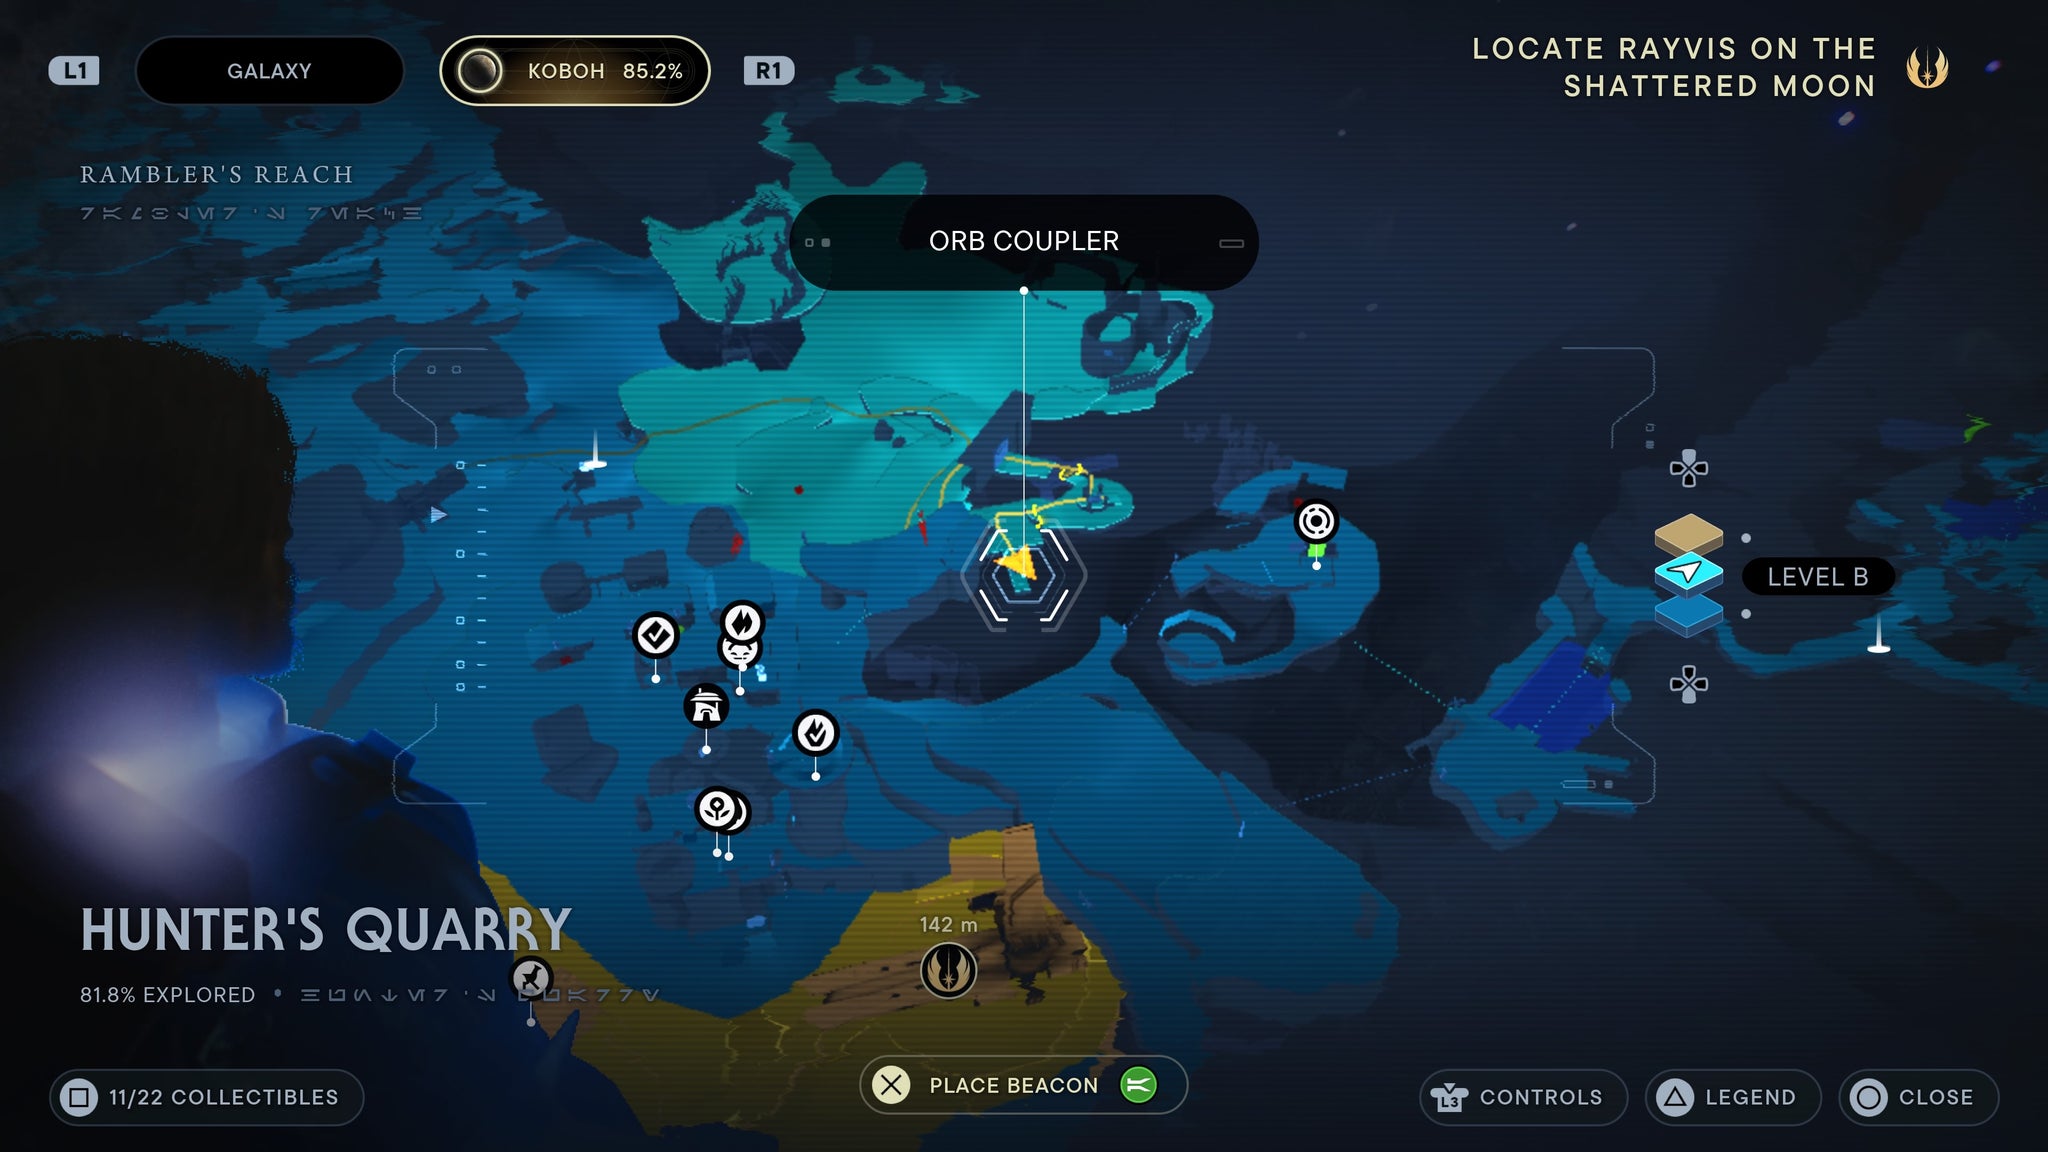
Look for a body!
Requires lift and slam. Lift up the heavy door in Hunter’s Quarry then head inside. Take the left path down, then grab the orb. Take it through the cave passage until you come out by another pedestal. Next to this pedestal is a datapad you can scan.
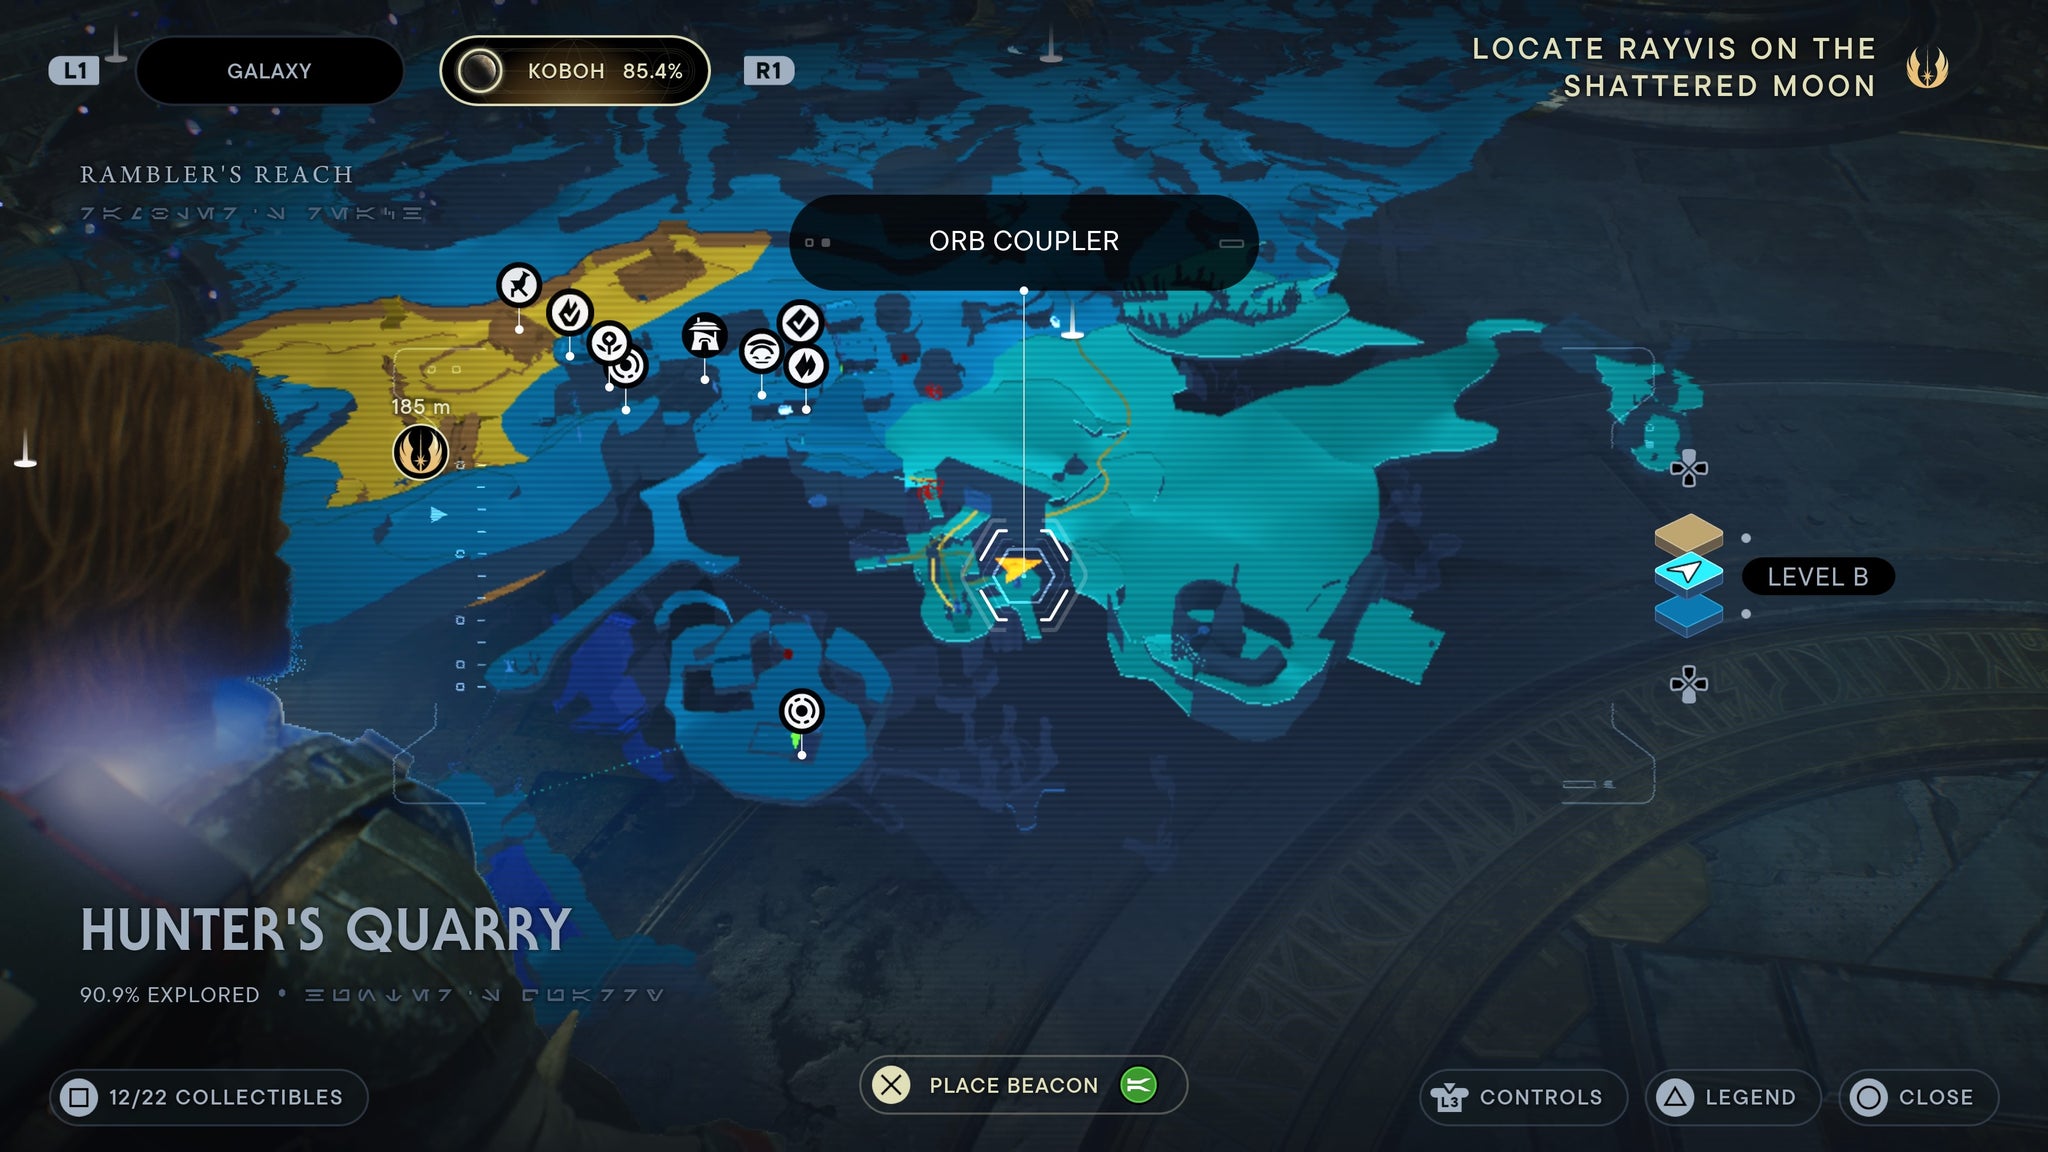
On a datapad near the pedistal.
Found on a datapad left of the big entranceway.

Left of the massive doorway at the end of the zone.
Sodden Grotto
Once you force push down the large stone to create a bridge, cut through the wires to your left and proceed forward. You’ll come to a solitary enemy at the end of a mine shaft, next to a light and a dead body. This body has a force echo on it, which you can interact with to get the data bank.
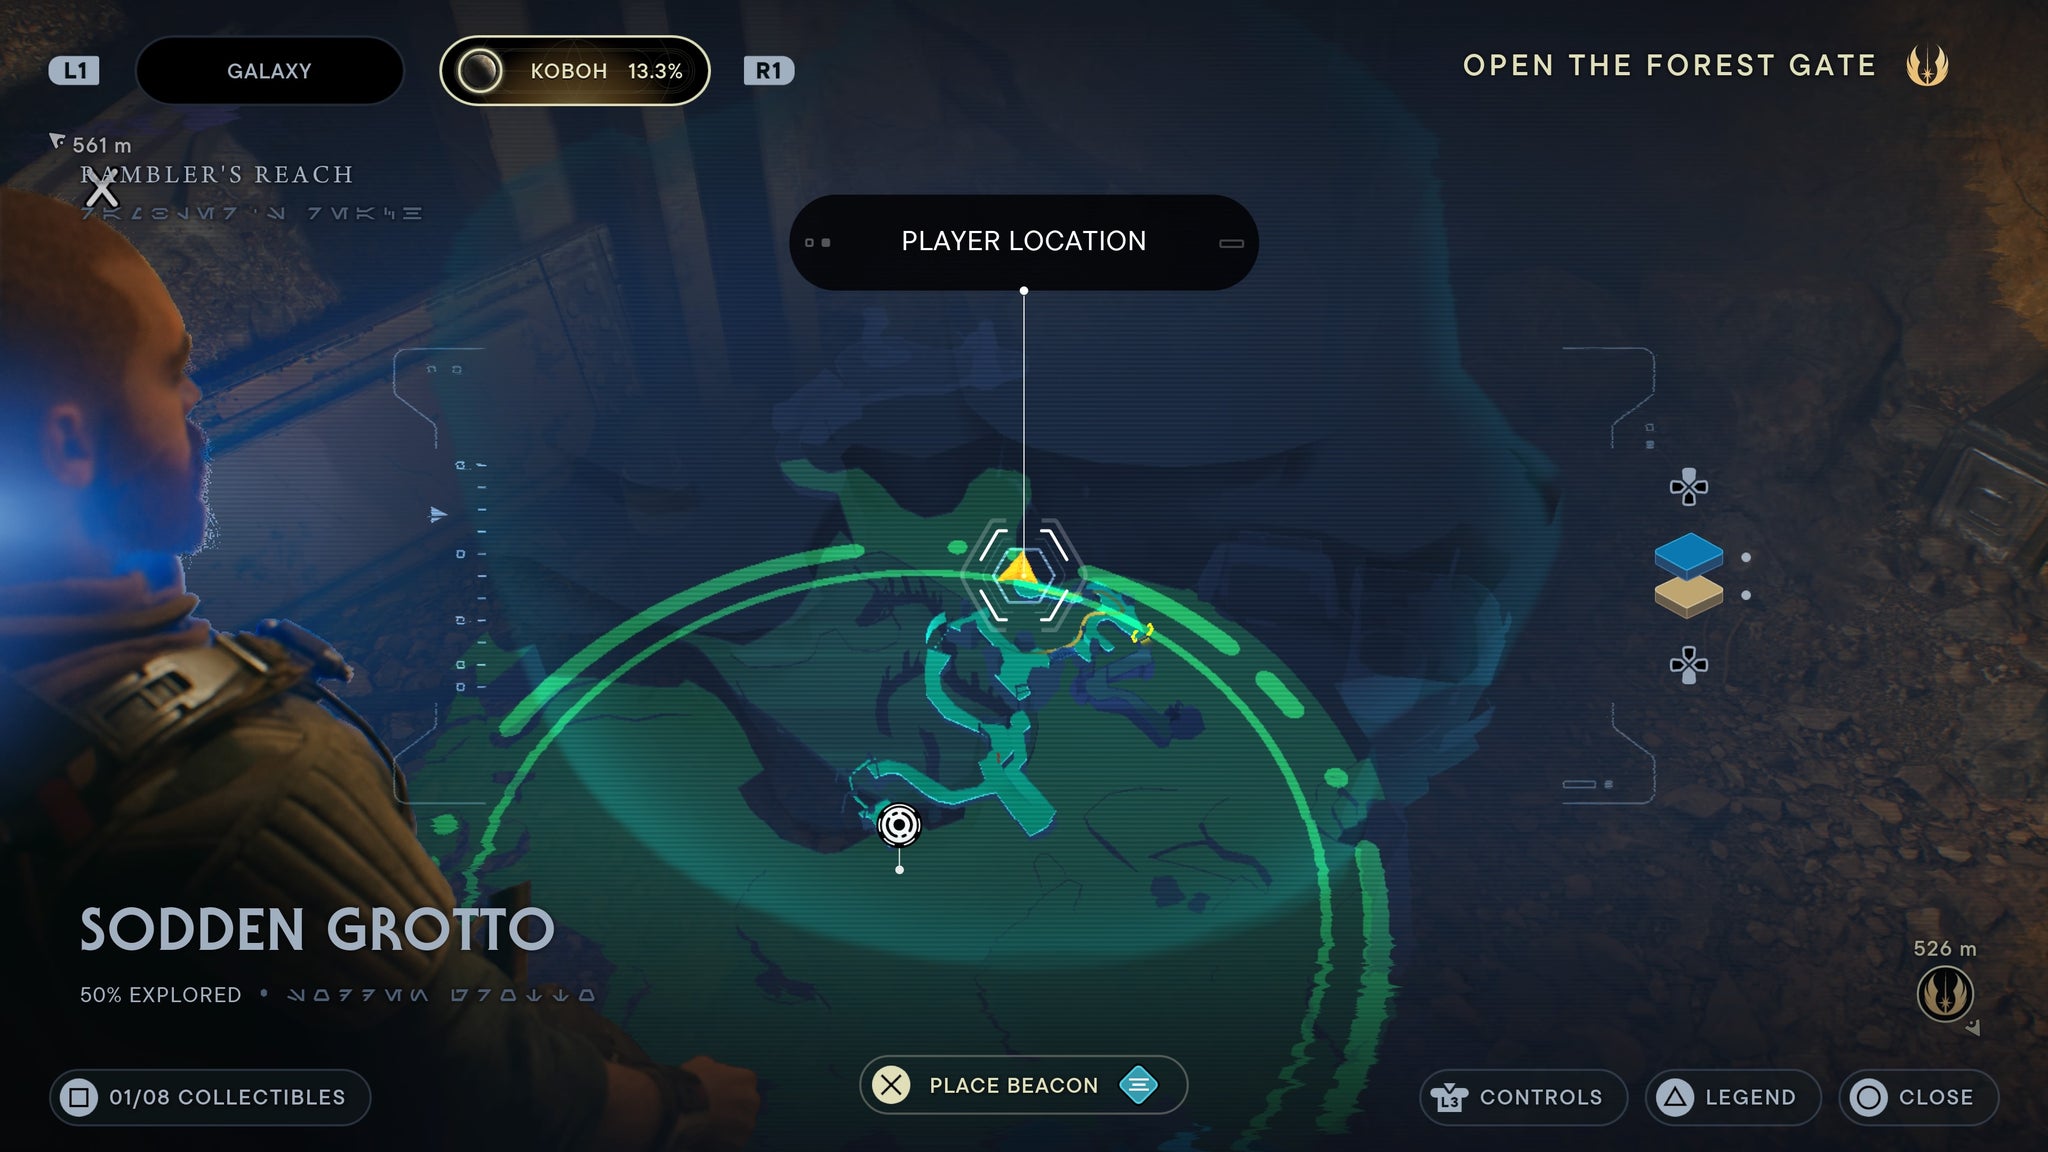
Once you cut some wires, head straight o the echo.
After you push down the giant rock to create a bridge, jump across then turn right. Follow the lit path forward. Then you’ll find several dead Gorgers on the ground overlooking an endless chasm. Scan one of these gorgers for a data bank entry.

You’ll find several gorgers you can scan here.
After you create the zipline shortcut, proceed through the mines a small distance and you’ll come across a giant ribcage. Scan this for your data entry.

As you walk down towards the boss arena, scan the ribcage.
Once you reach the Sodden Grotto meditation point, walk to the other side of the room and you’ll see a force echo on the ground. Interact with this for a data entry.

Right next to the boss arena, by the meditation point.
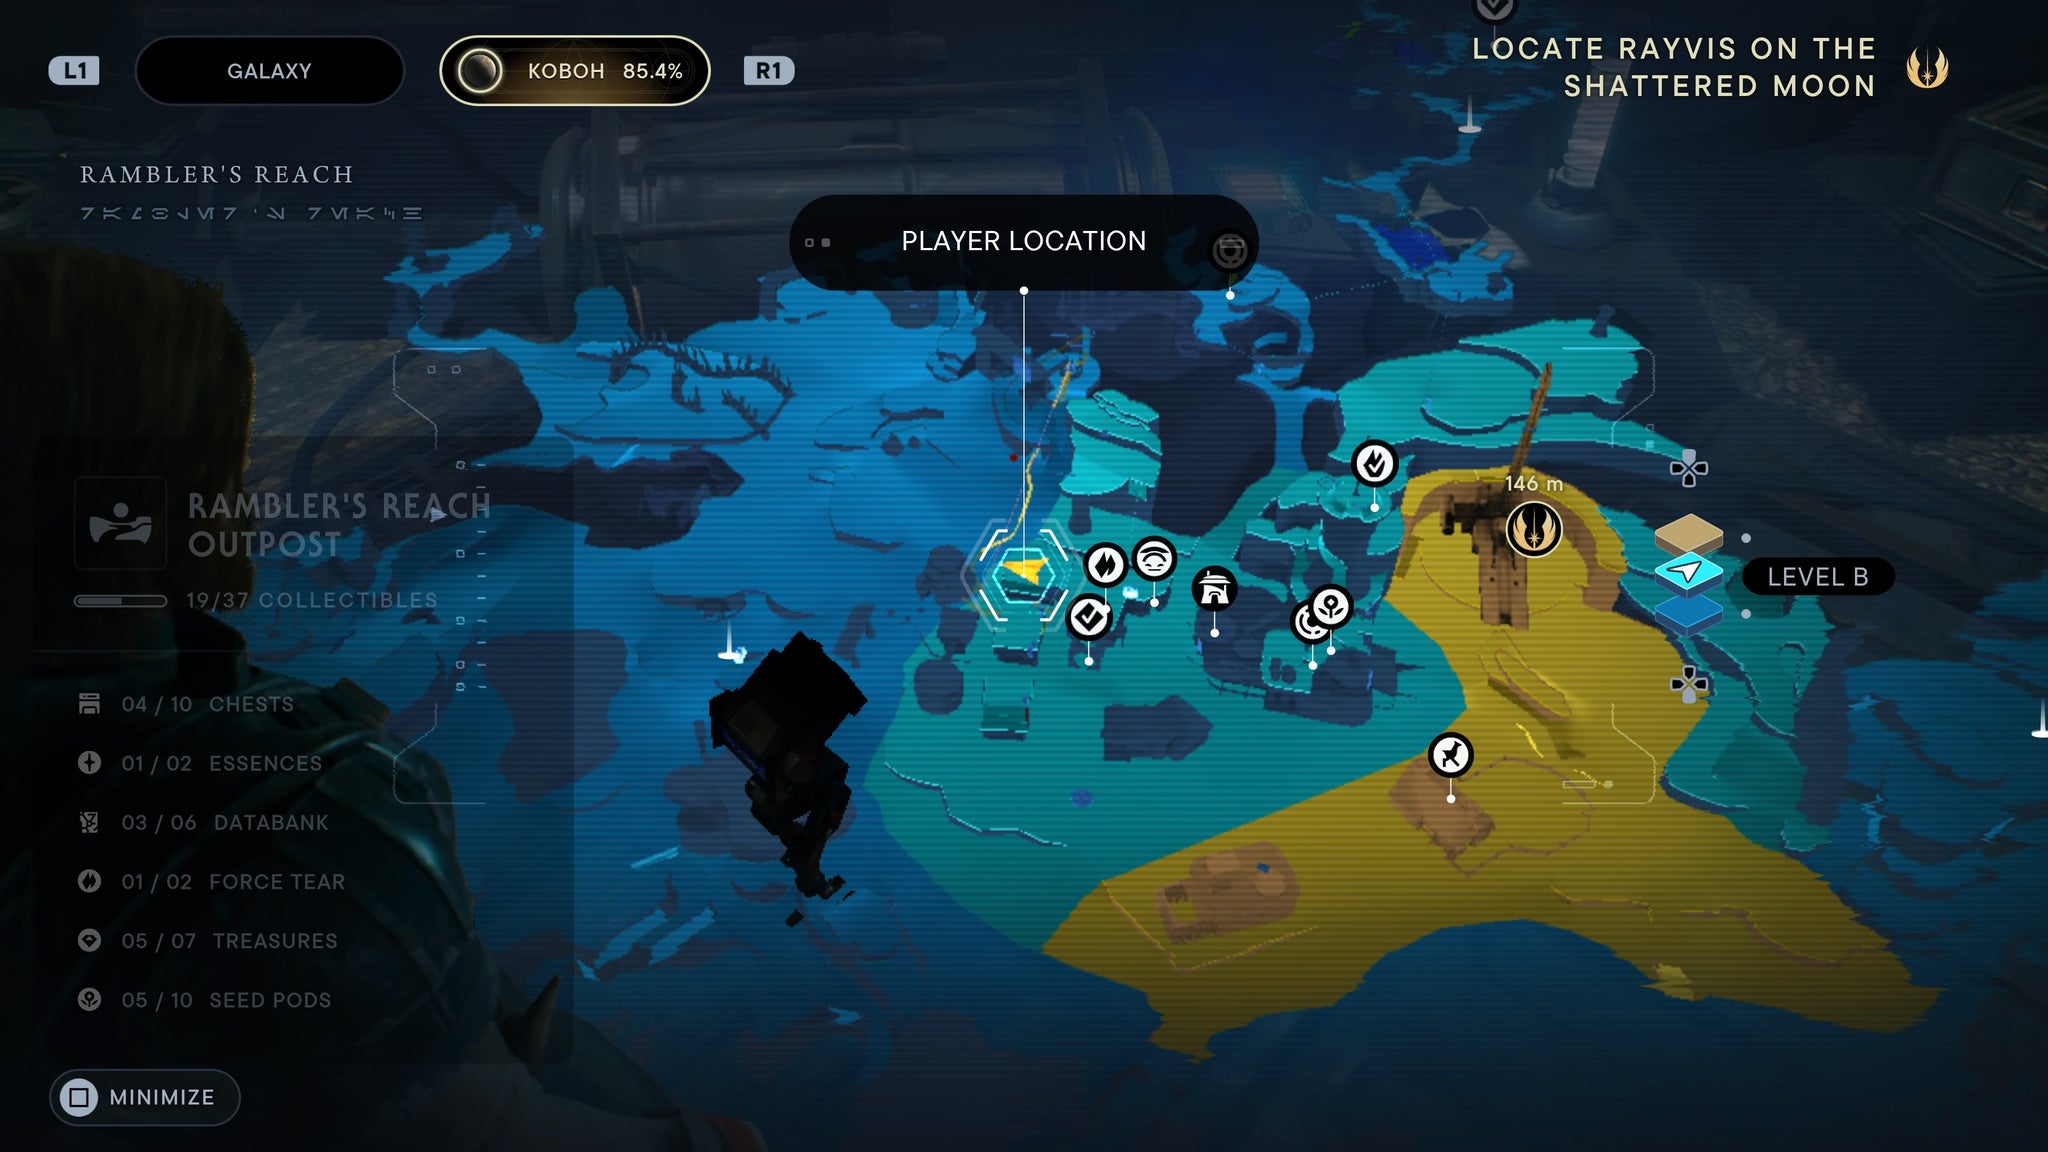
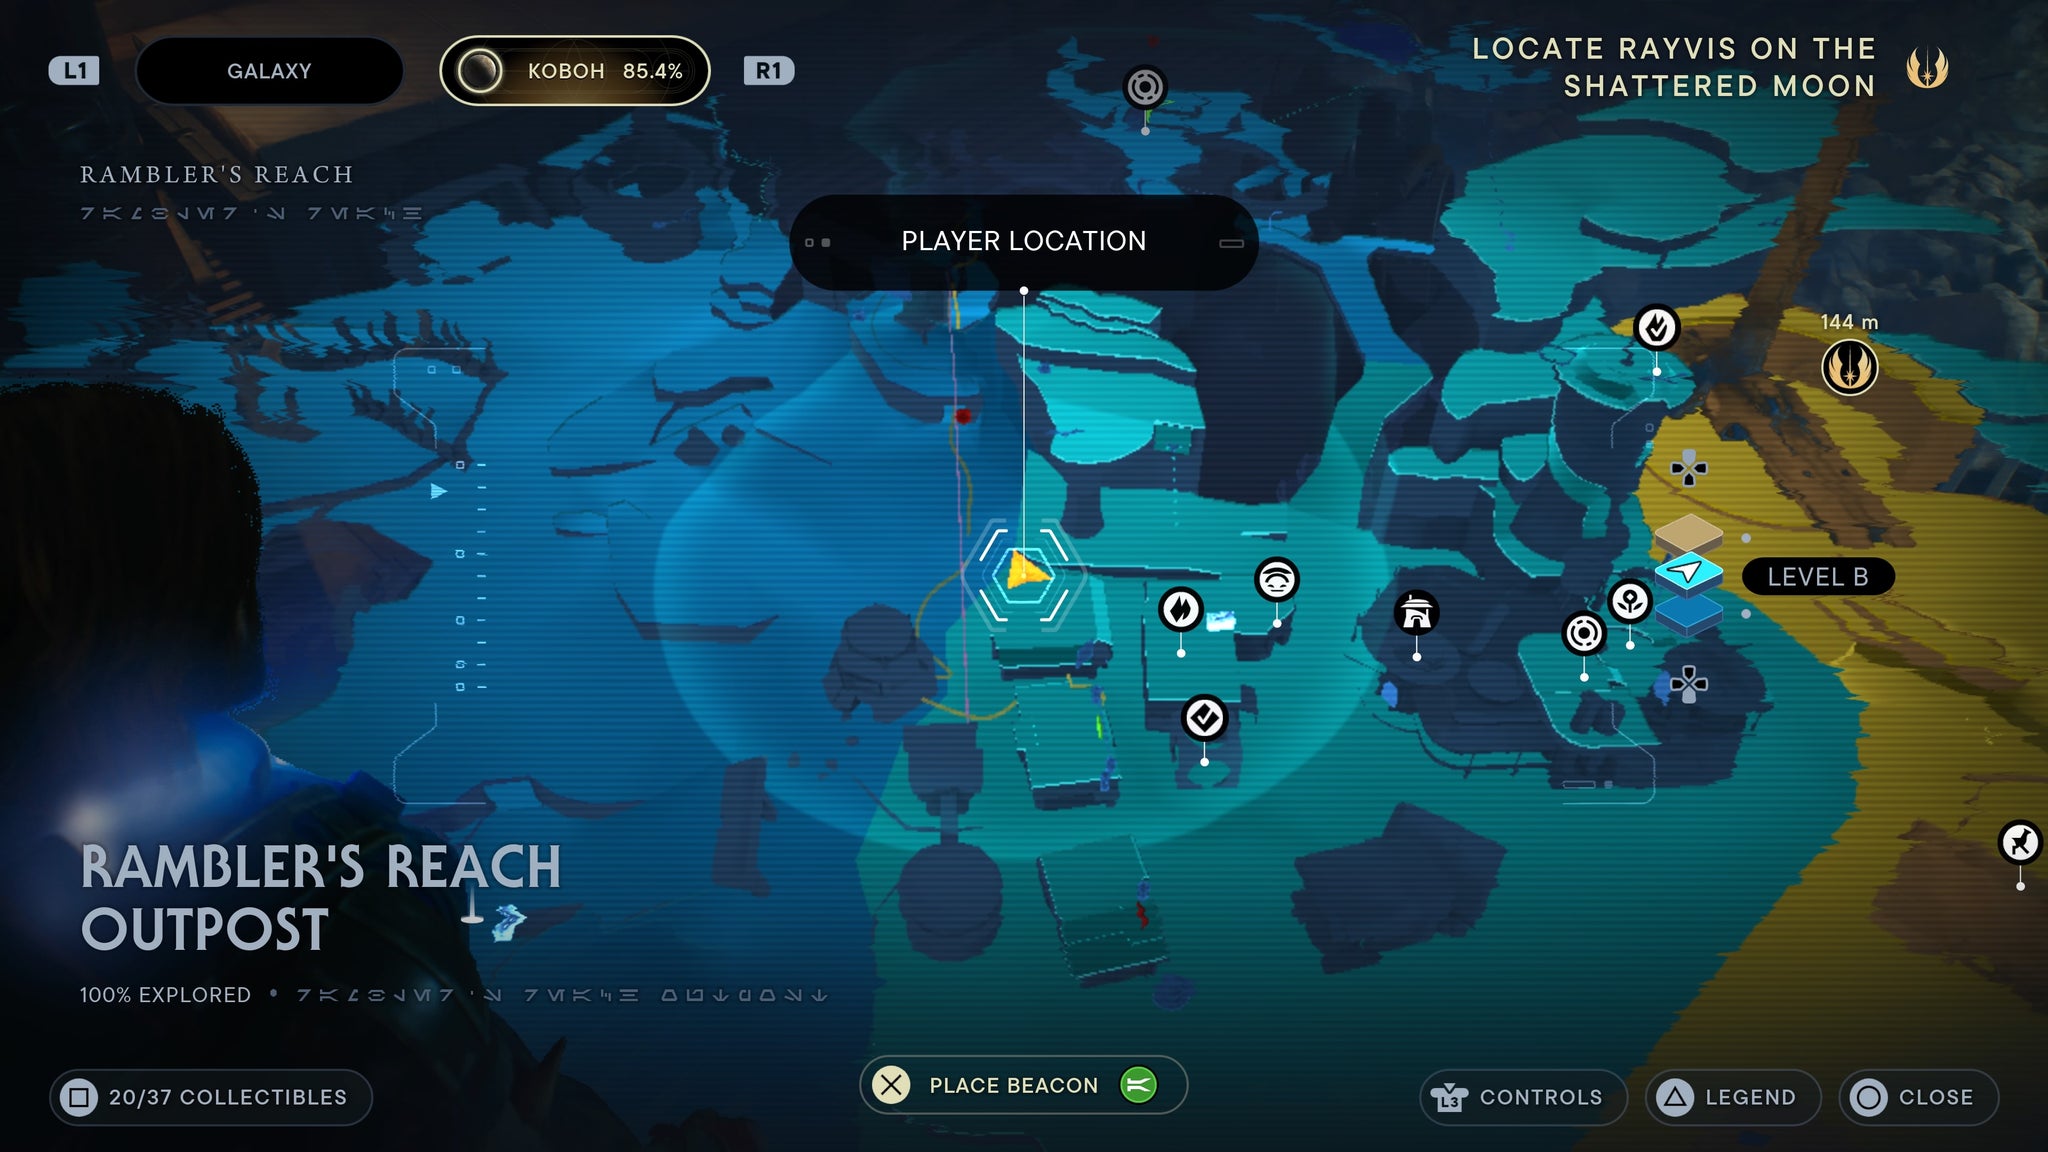
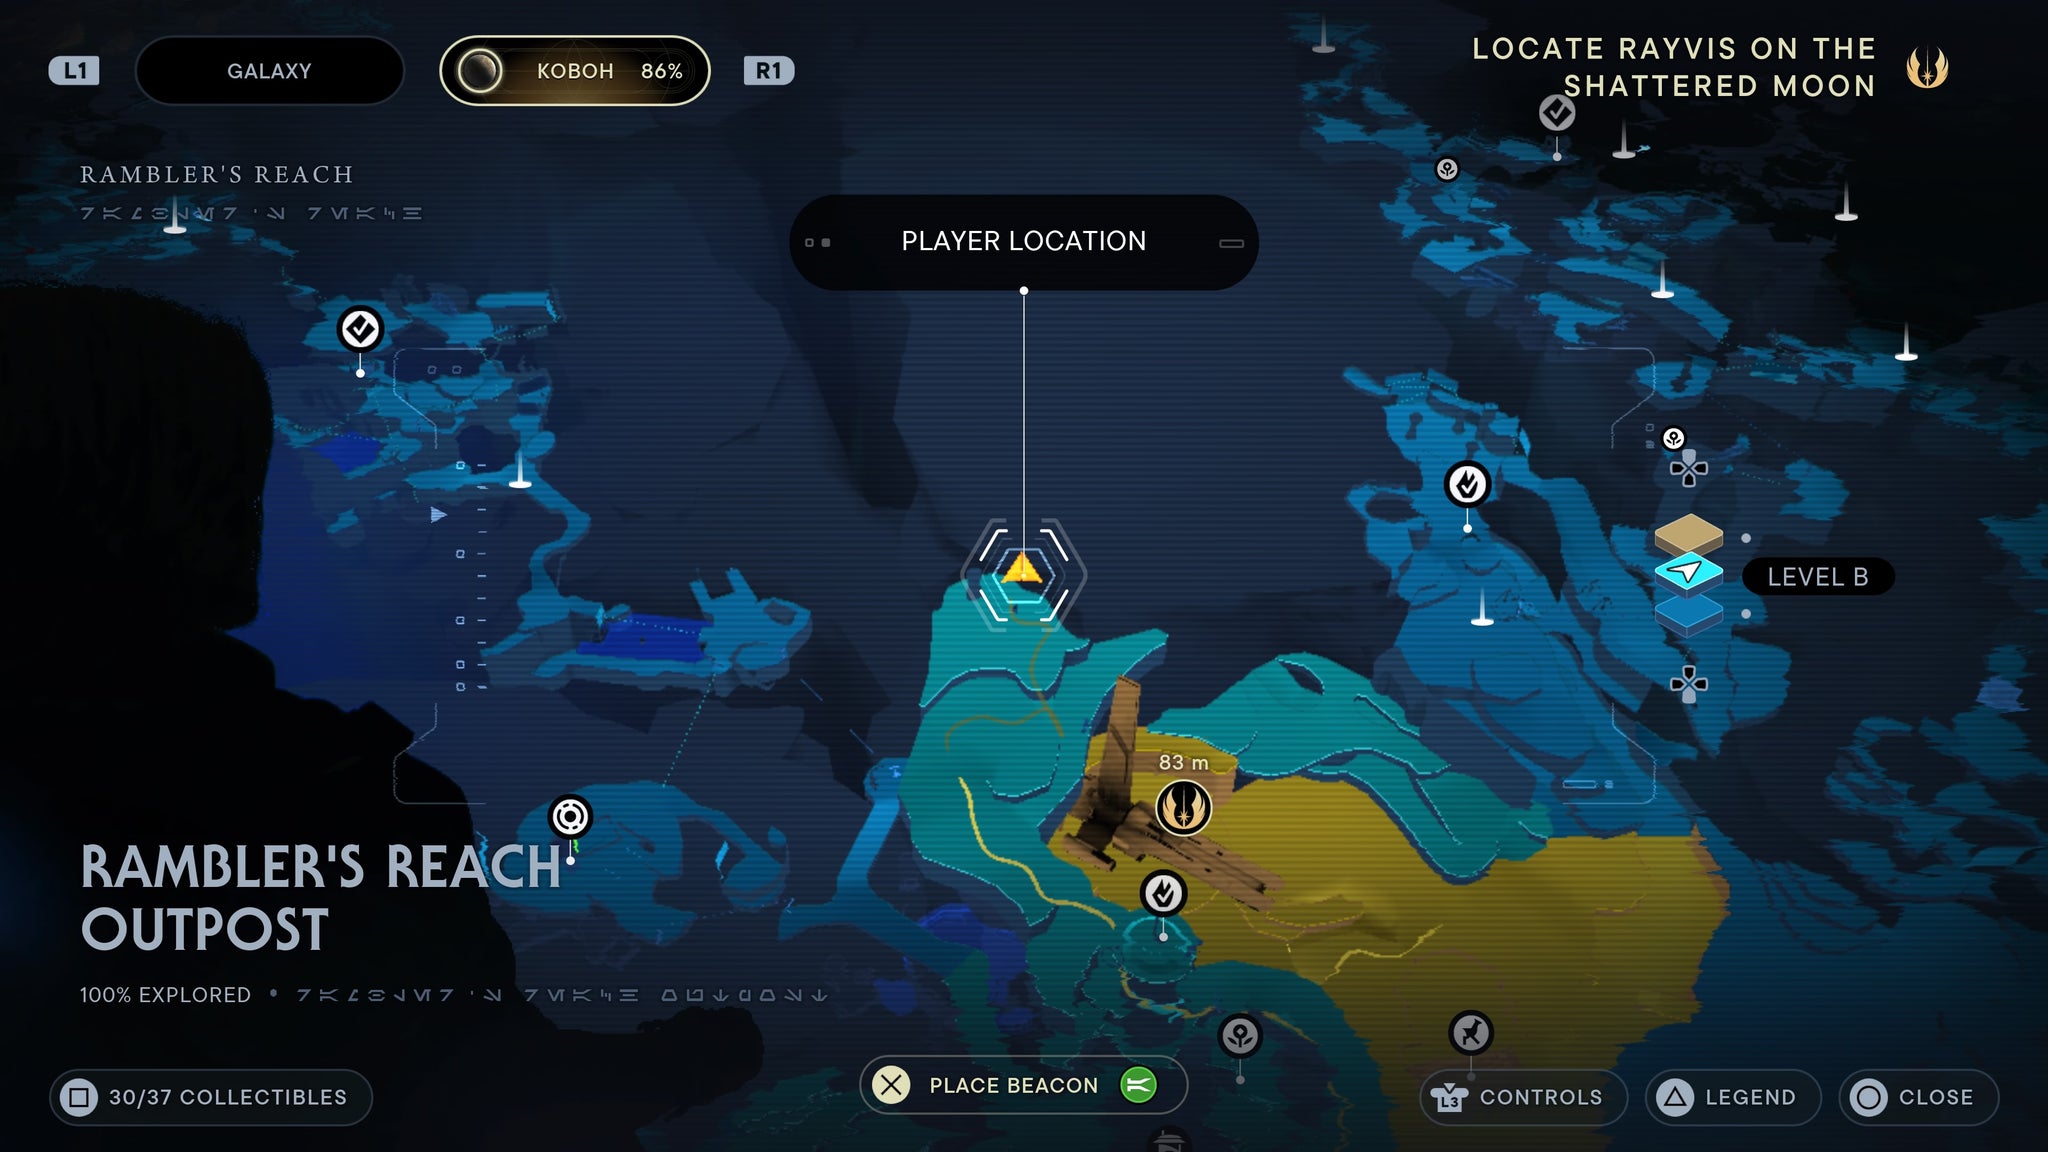
Ramblers Ranch Outpost
On the side of the area bordering Hunter’s Quarry, there’s a grapple point you can use to scale up a cliff face. One up there, you’ll find a force echo inside a small cave.

Grapple up for your first echo.
By the river near the giant drawbridge and the entrance to the forest gate, there’s a shell on the ground you can scan.

Right alongside the river, up towards the forst gate.
Inside Doma’s shop, the toad by the front desk. Following the Spawn of Oggdo fight in Fort Kah’Lin.
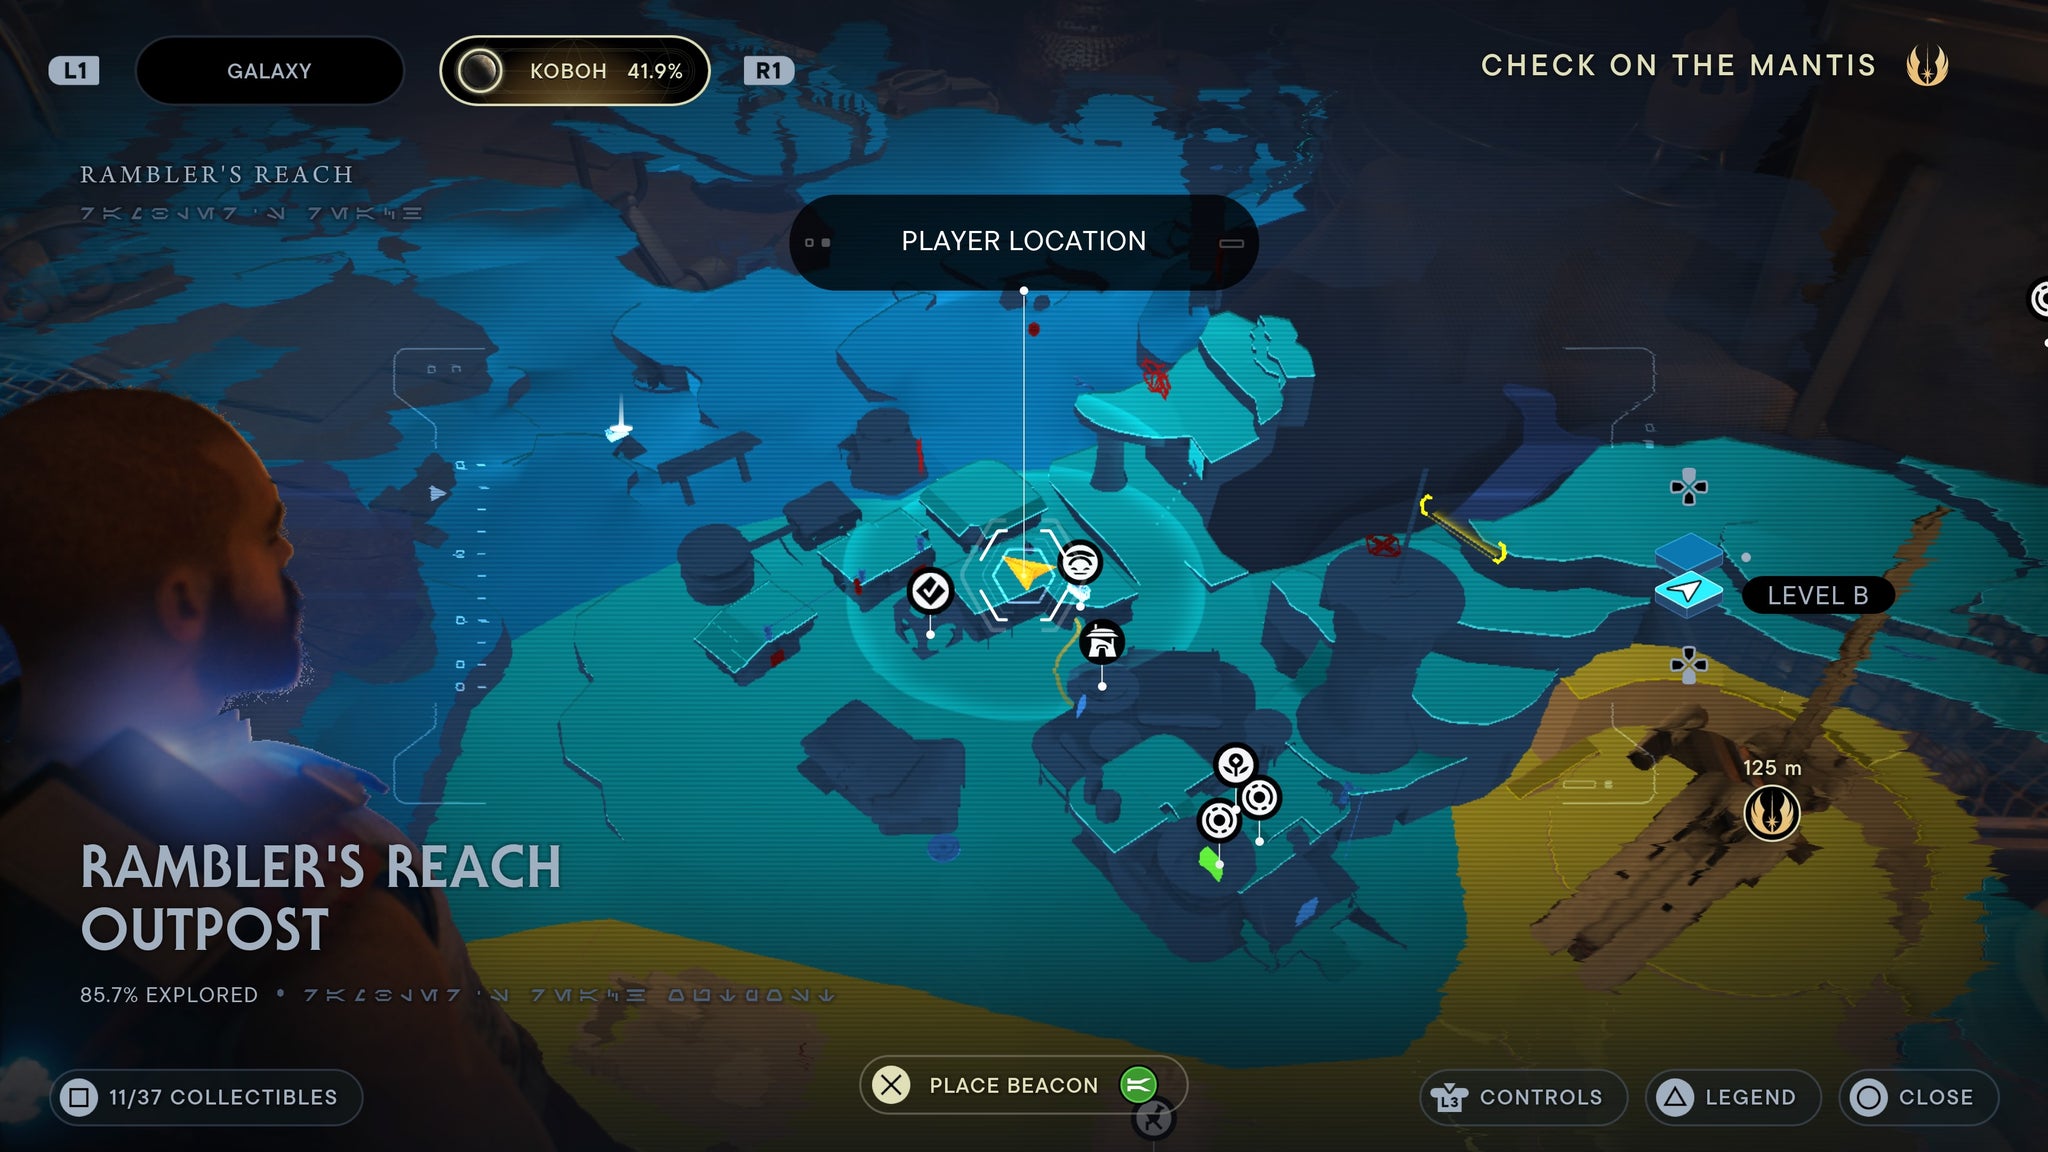
Chat tot he frog, then prepare for hell.
Requires force lift and slam. Head to the metal building with the robot eyes that pop out the walls. Lift up the door and dash inside. You’ll find a scan on the left side of the room.

Lift the door and look left for a datapad.
Requires force lift and slam. Head to the metal building with the robot eyes that pop out the walls. Lift up the door and dash inside. You’ll find a scan straight ahead.
Another datapad straight ahead.
Requires force lift and slam. Head to the metal building with the robot eyes that pop out the walls. Lift up the door and dash inside. Chat to the guy inside and mind trick him. This will open up a set of stairs in the room. Go down and you’ll find a force echo.
There’s a body in the basement!
Climb up the large tower above Pyloon’s Saloon, then jump to the raised area behind it/ At the back of this area, in a cave, is a scan.
All the way in the back, in the cave!
Pyloon’s Saloon
Next to the meditation point in the basement, there’s a scannable musical instrument on the wall.

Right next to the meditation point, on the wall.
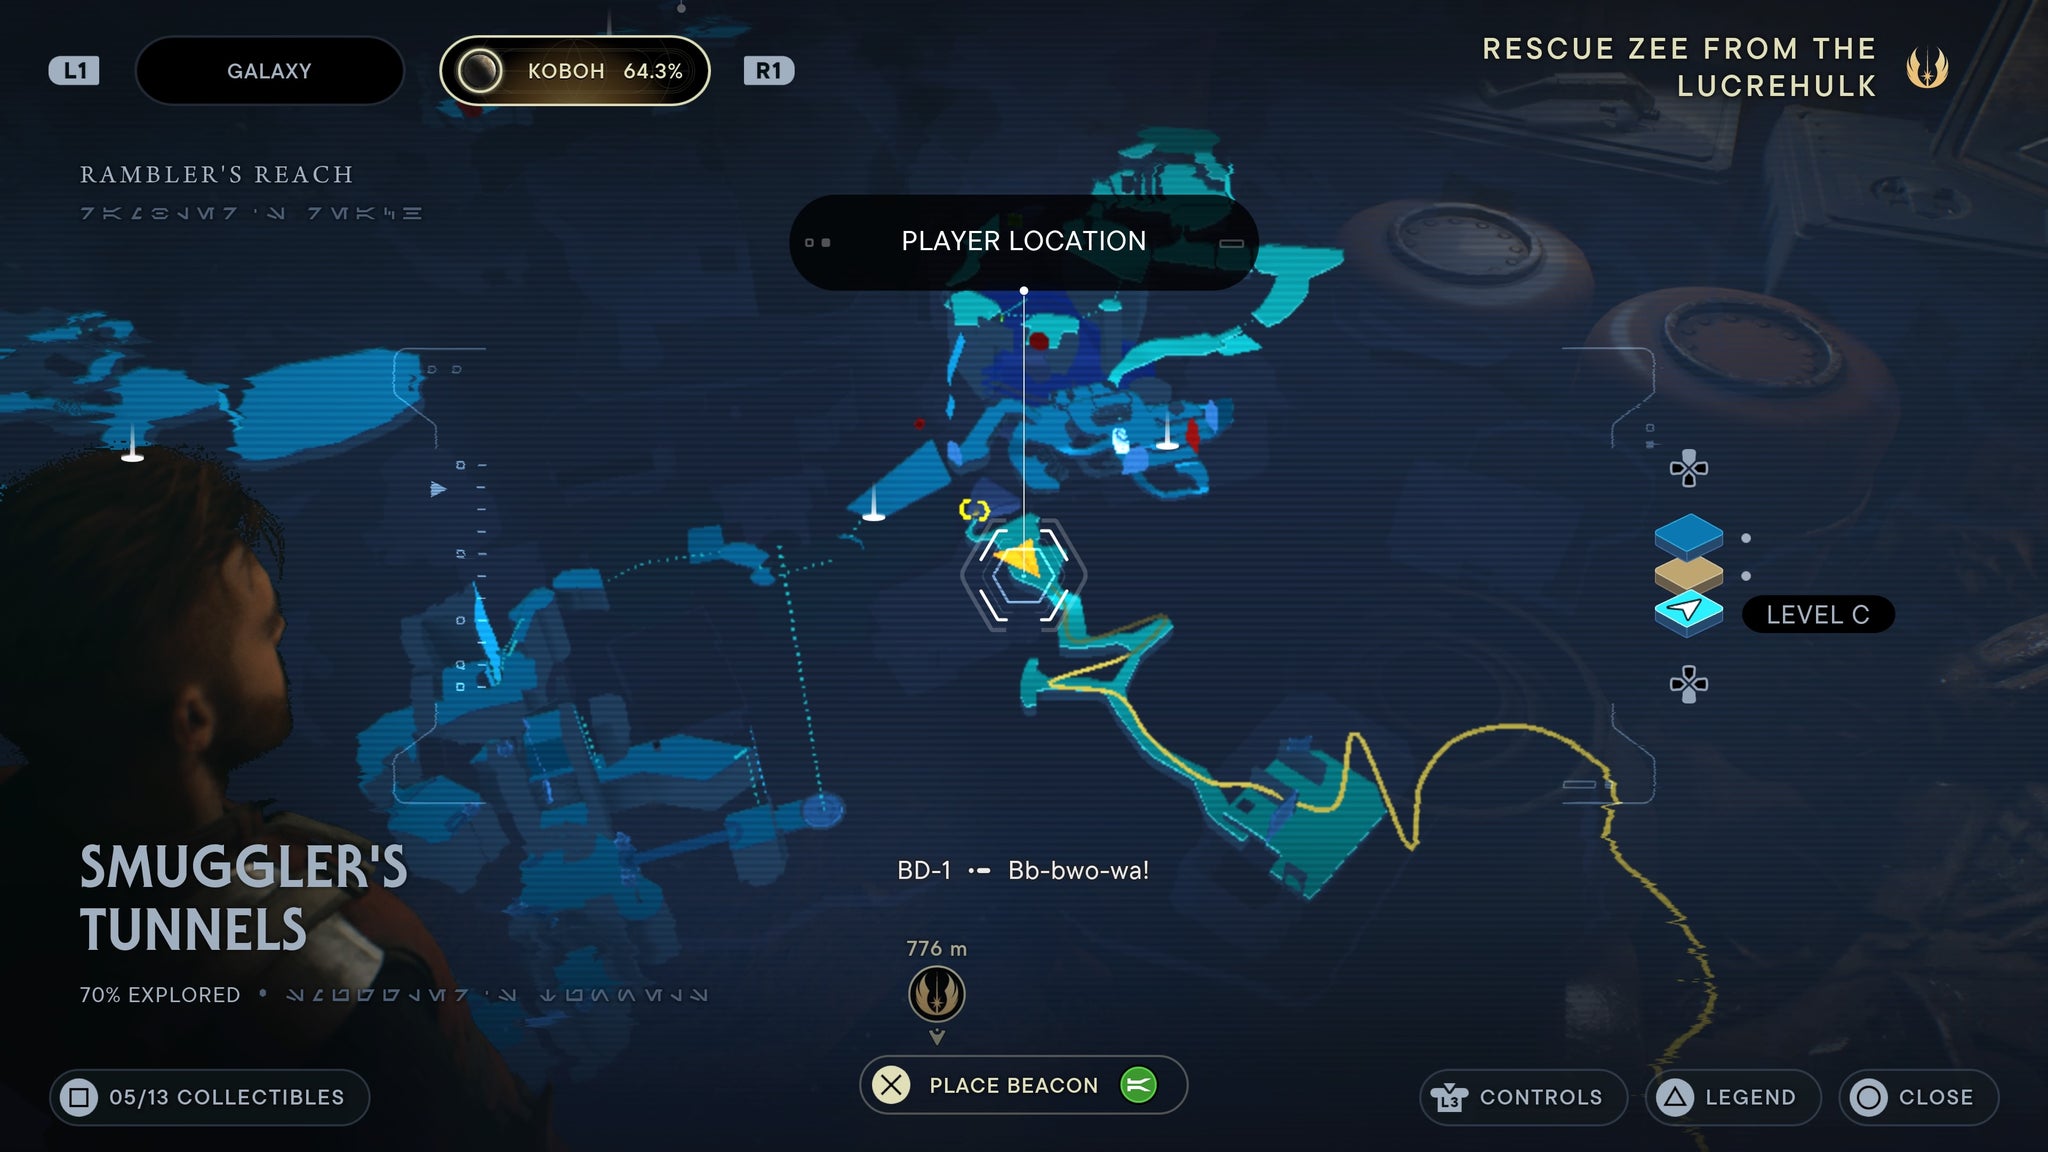
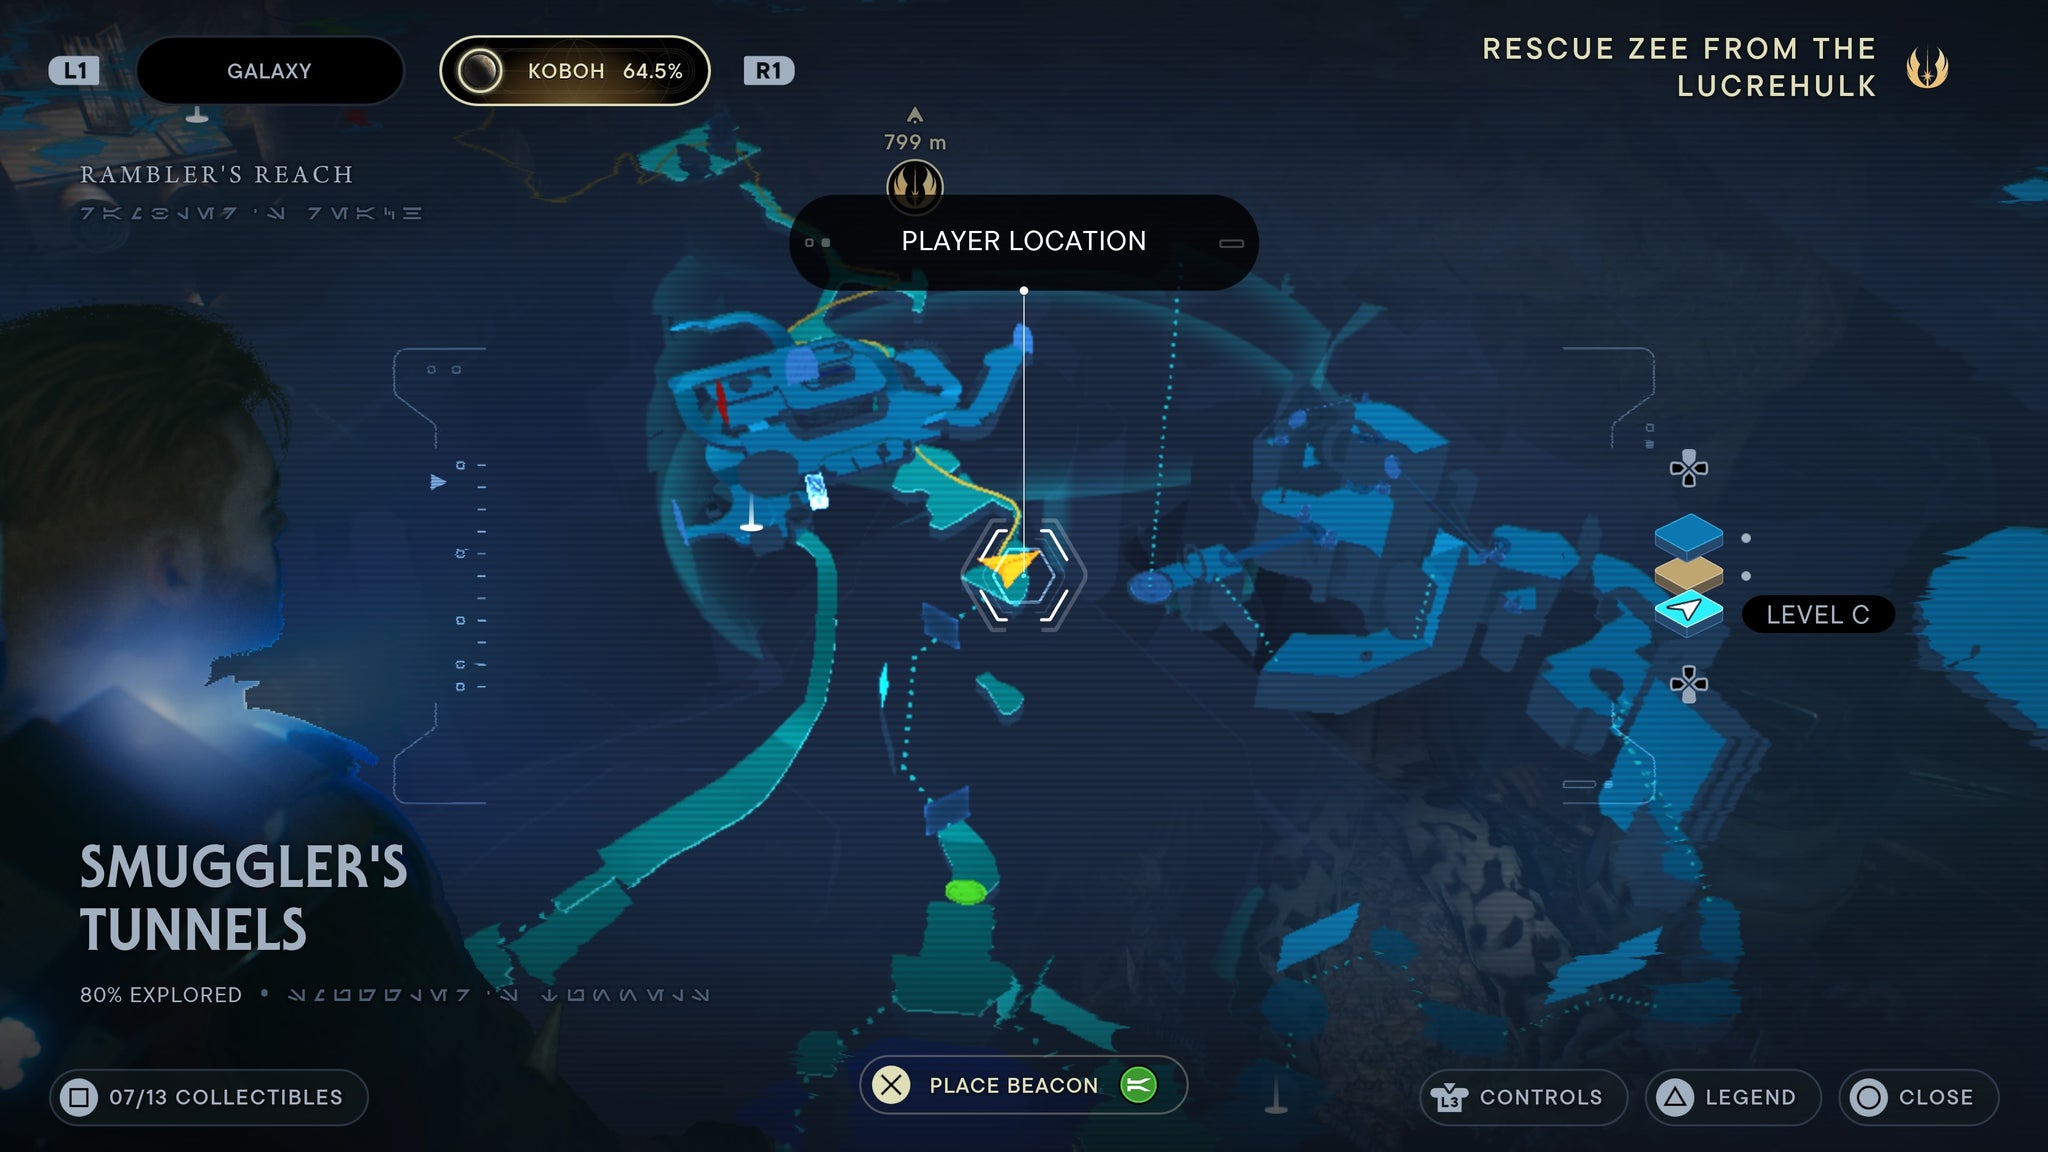
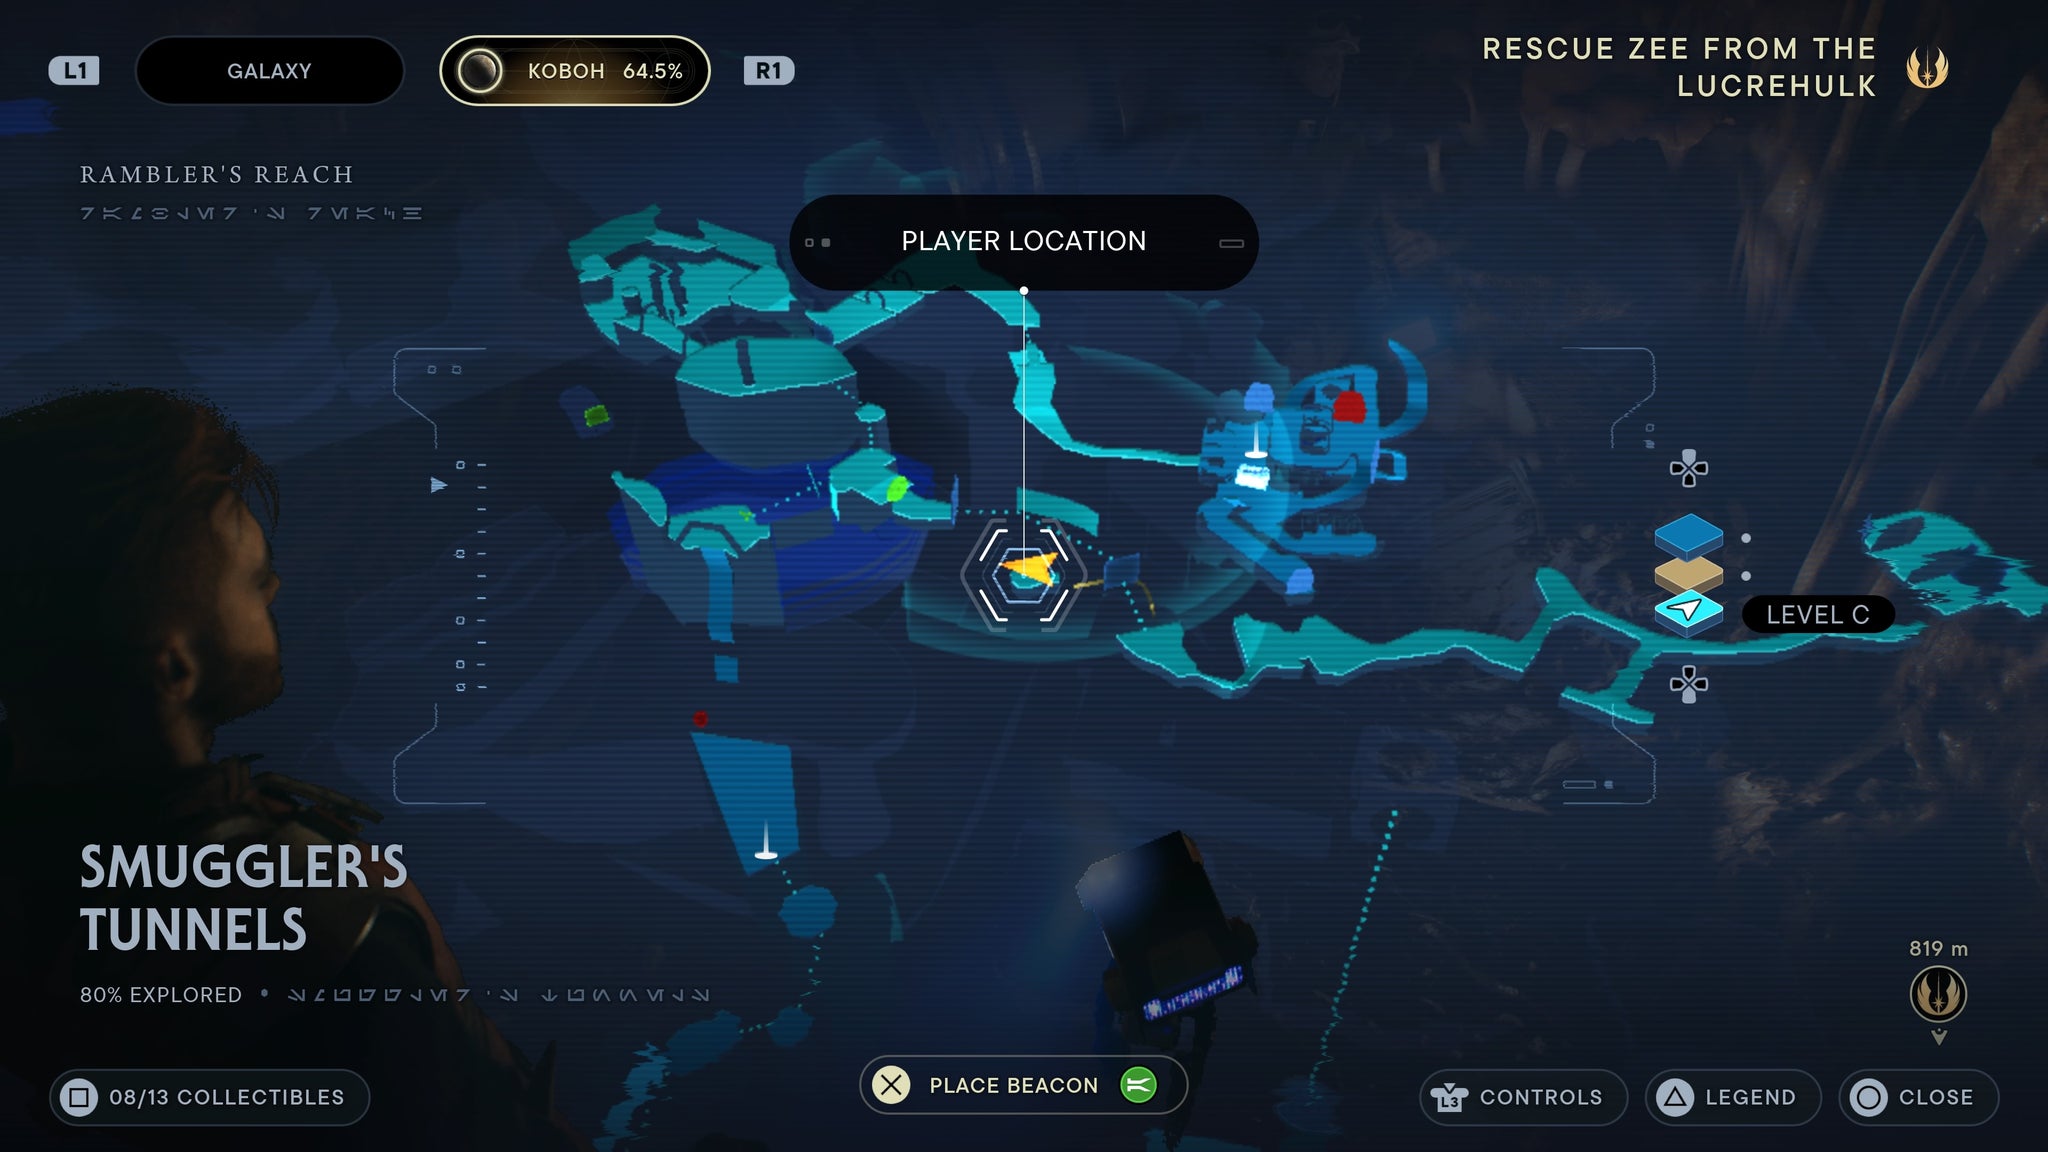
Smuggler’s Tunnels
As you go down the Smuggler’s Tunnels from the Saloon, turn right when you enter a well-lit room. There, against the wall, is your scan.
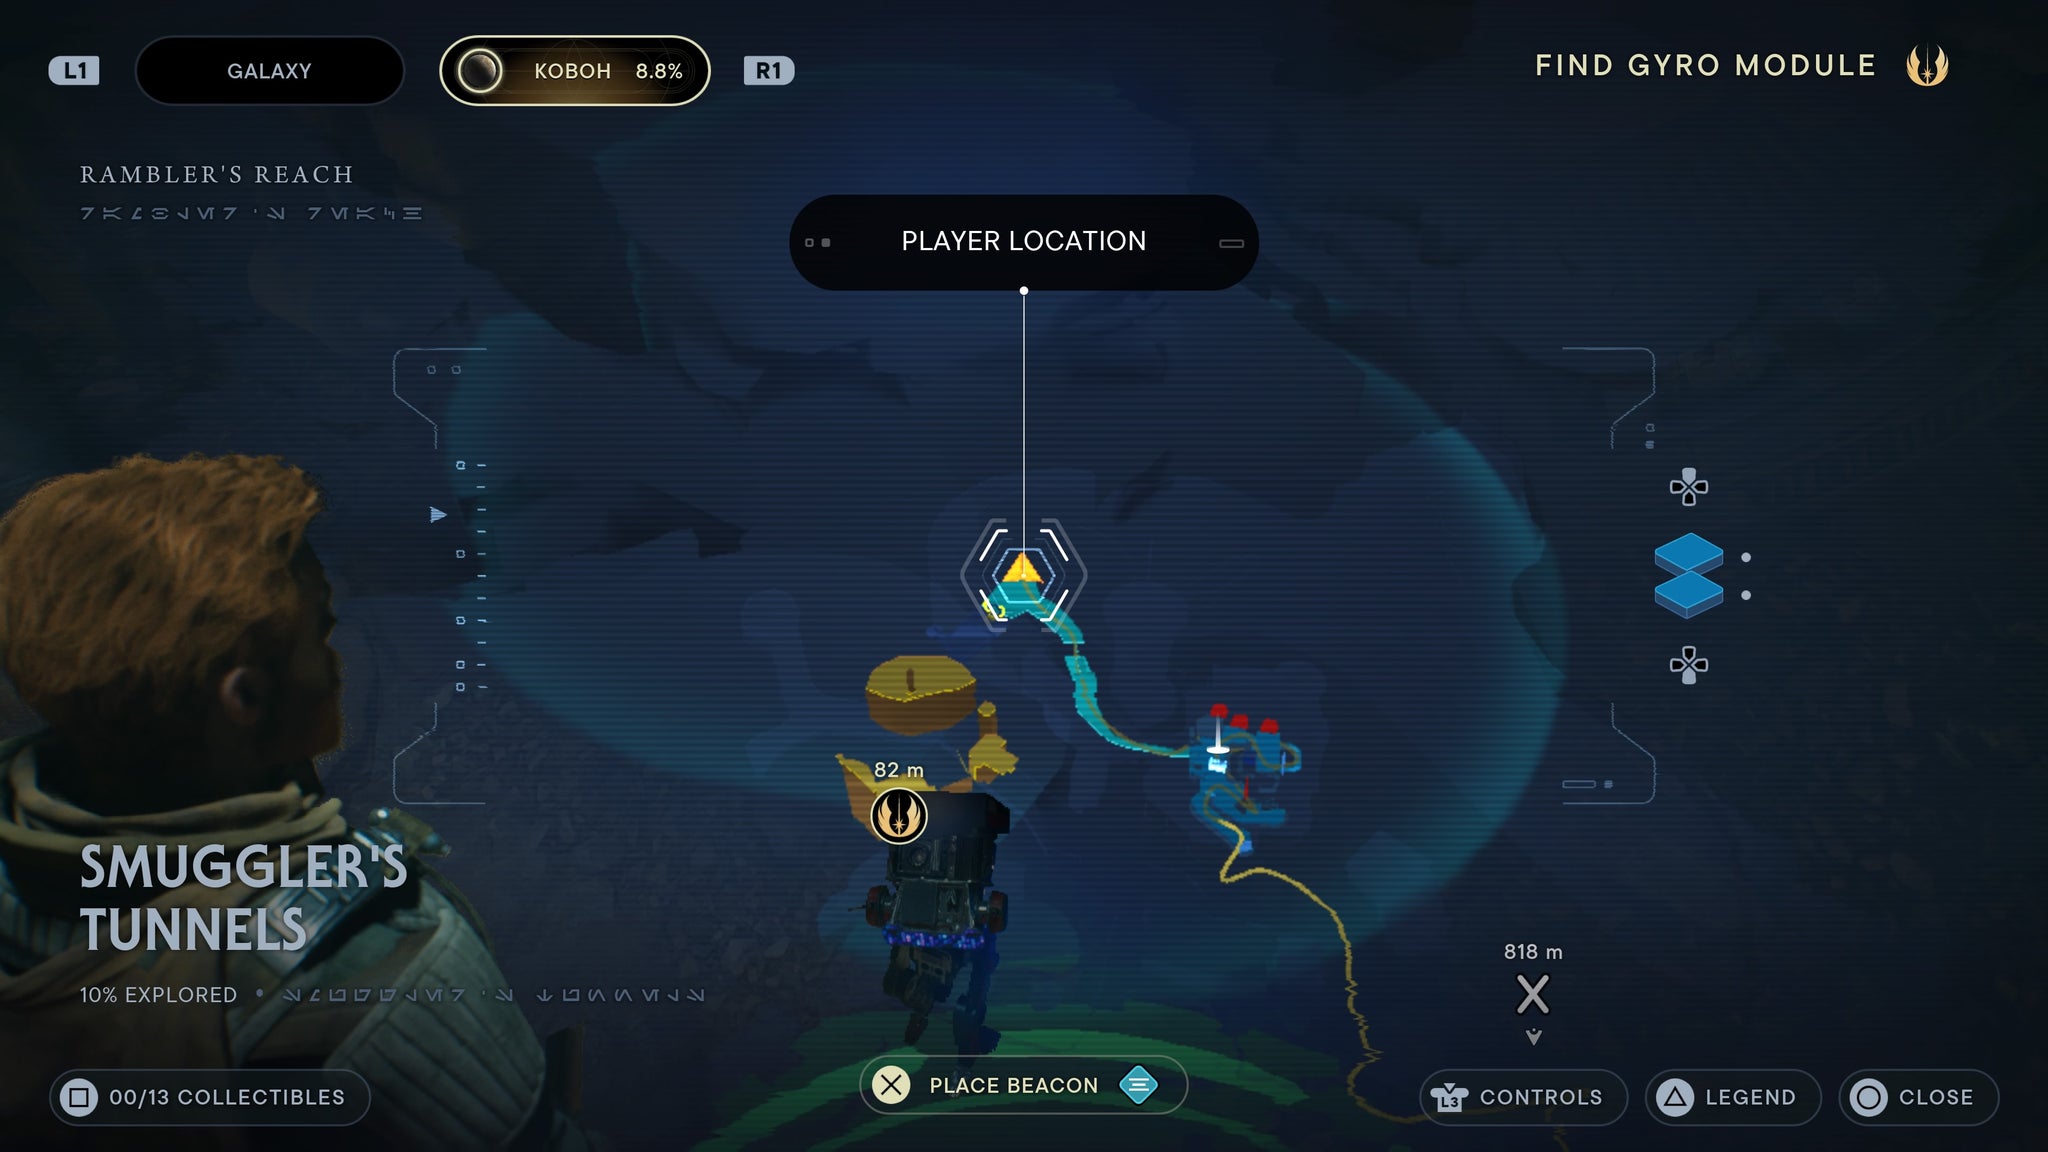
Scan the busted wall for a collectable.
Requires relter gliding and nekko riding. Start in Harvest Ridge and use a nekko to scale up to the top of the cliffs there. Once up, proceed forward across walls and pole swings until you reach a relter. Use this to glide down towards Rambler’s Reach Outpost, and land on the roof of the first building you fly over. Drop through the roof, and a scannable will be on a table.

In the jail, on the table.
Requires forcefield dash. Enter the abandoned jail in Rambler’s Reach Outpost, then dash through the forcefield there. Enter the tunnel below, then take the right path int othe lit room filled with gorgers. On a box, you’ll see a datapad you can scan.
kill the gorgers then this is yours.
Requires forcefield dash. Enter the abandoned jail in Rambler’s Reach Outpost, then dash through the forcefield there. Enter the tunnel below, then take the right path in the lit room filled with gorgers. Squeeze through the gap, and you’ll see a force echo.
On a body.
Requires forcefield dash. Enter the abandoned jail in Rambler’s Reach Outpost, then dash through the forcefield there. Enter the tunnel below, then take the right path in the lit room filled with gorgers. Squeeze through the gap, then dash though the small gap left of the forcefield for a scan.
On a body in a hidden room.
Chamber of Duality
As you first enter the Chamber of Duality from the Collapsed Tunnels, have BD scan the doorway for your one and only data bank entry for this zone.
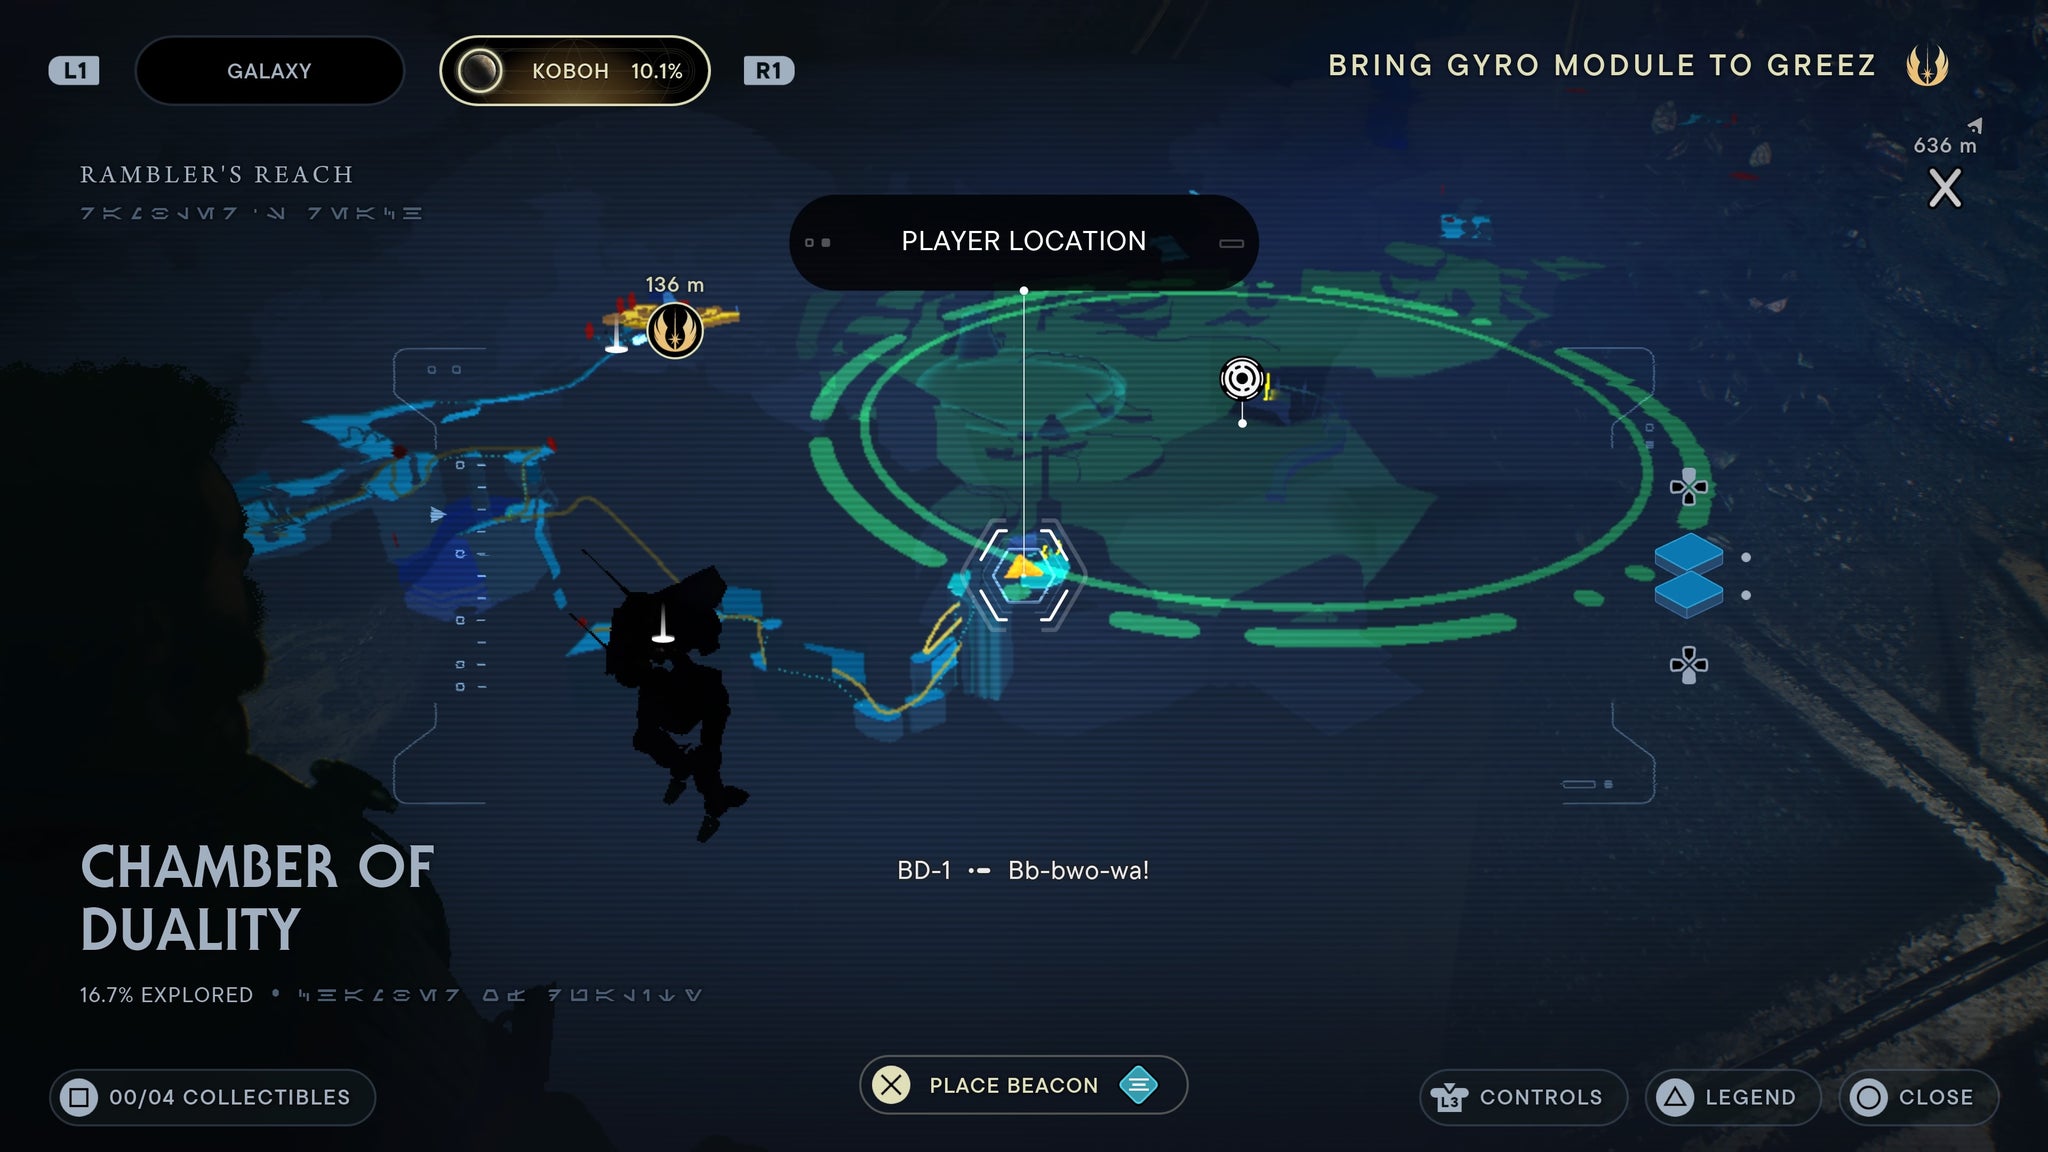
Scan the doorway for the one and only databank entry.
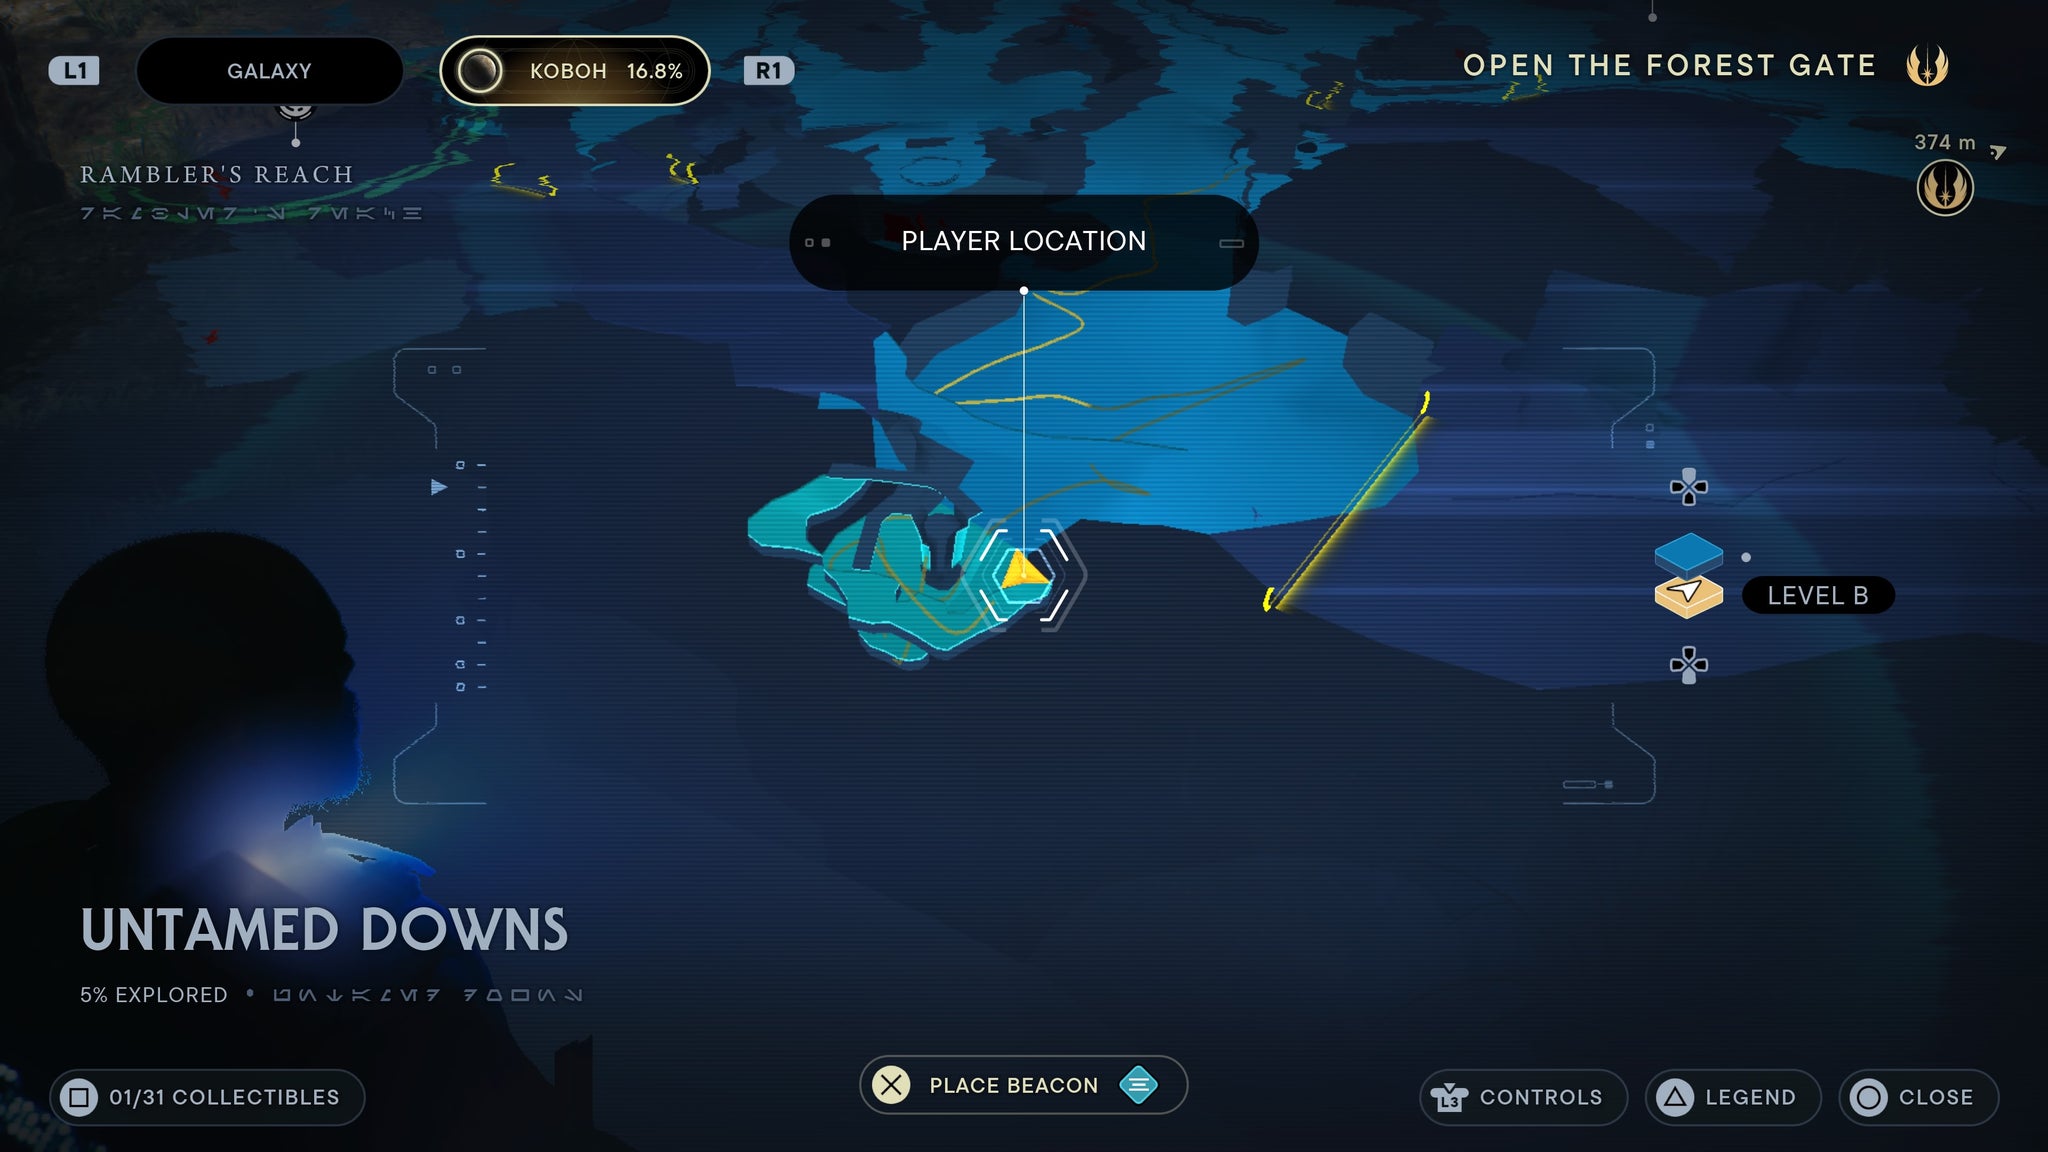
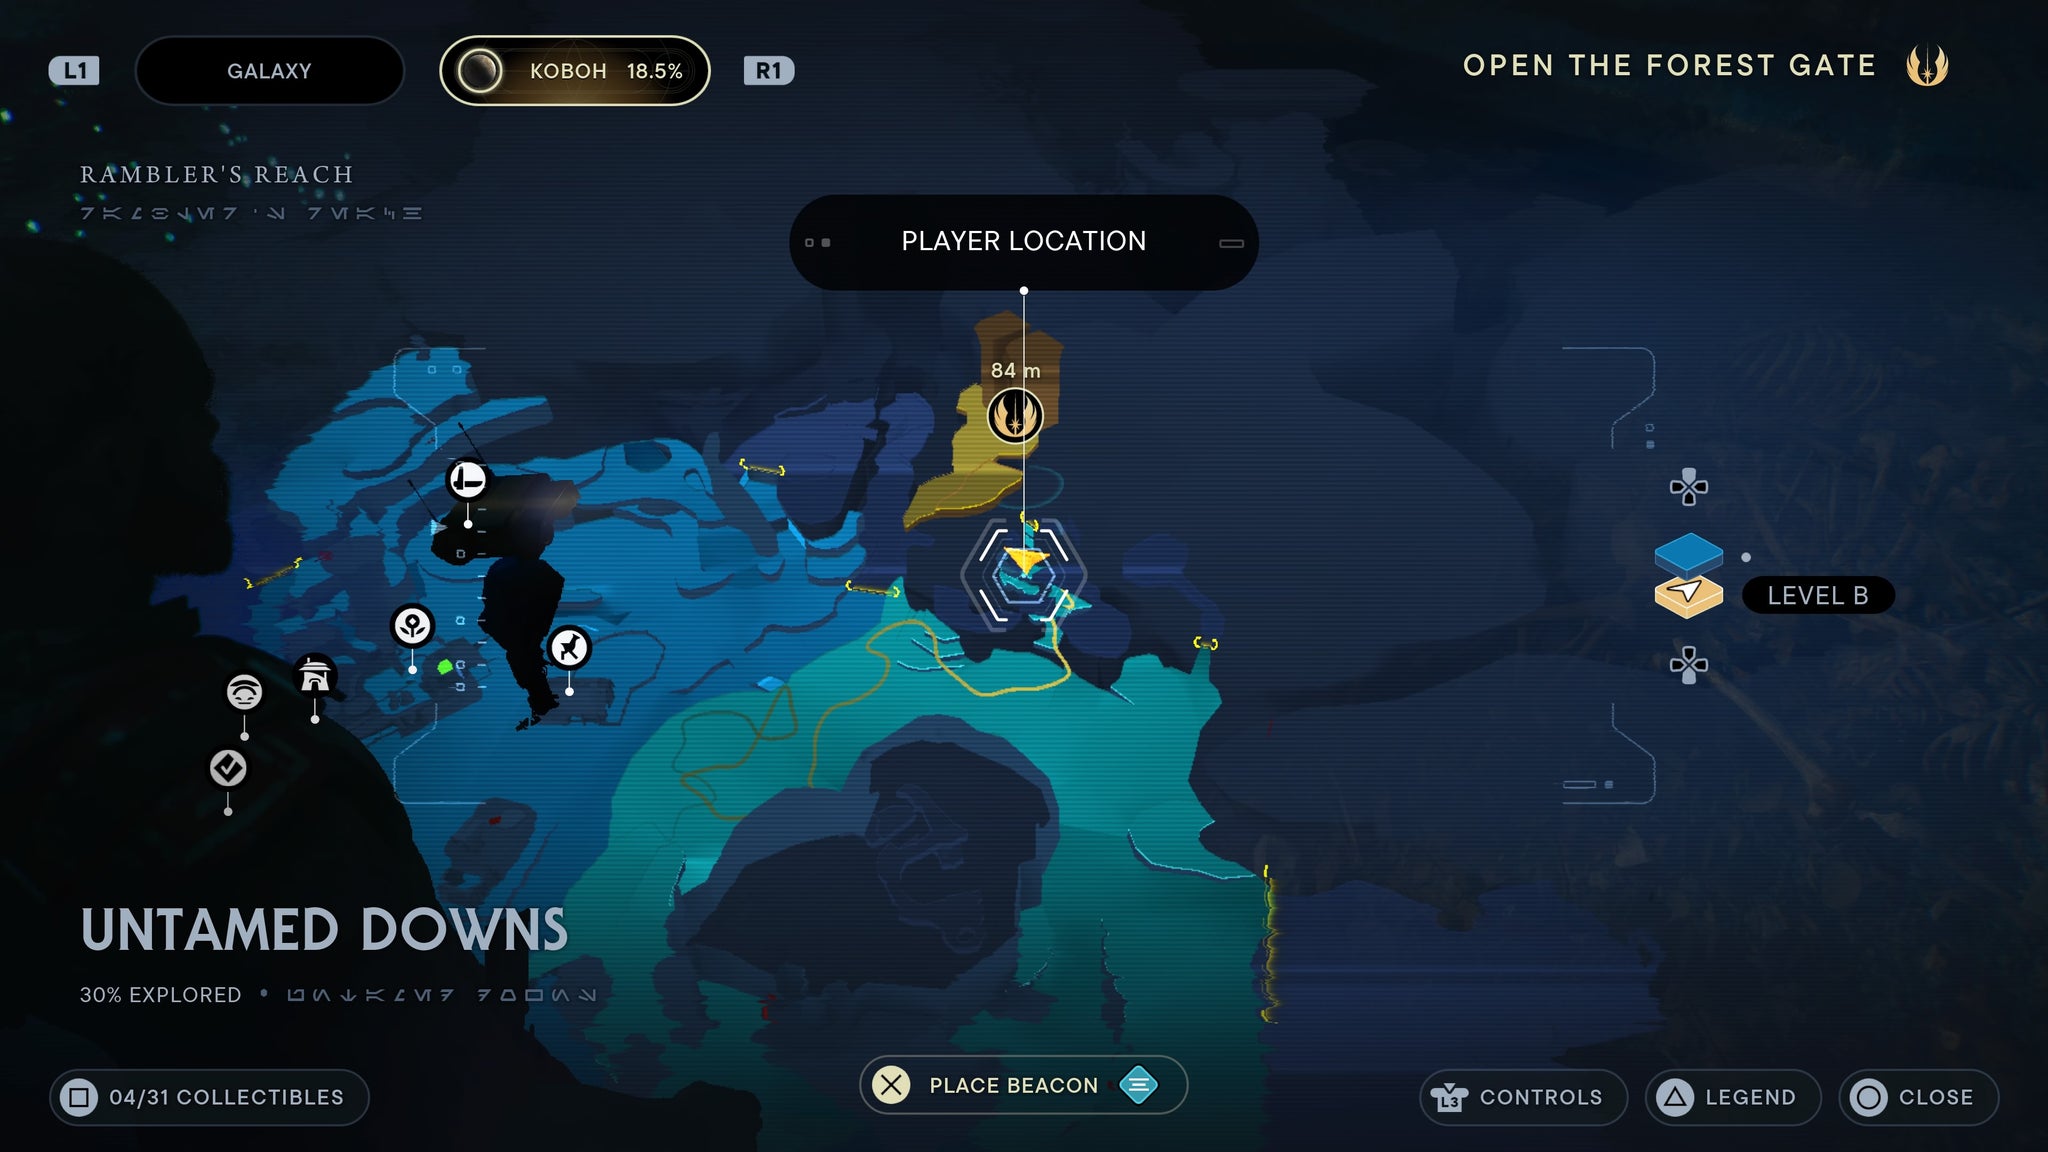
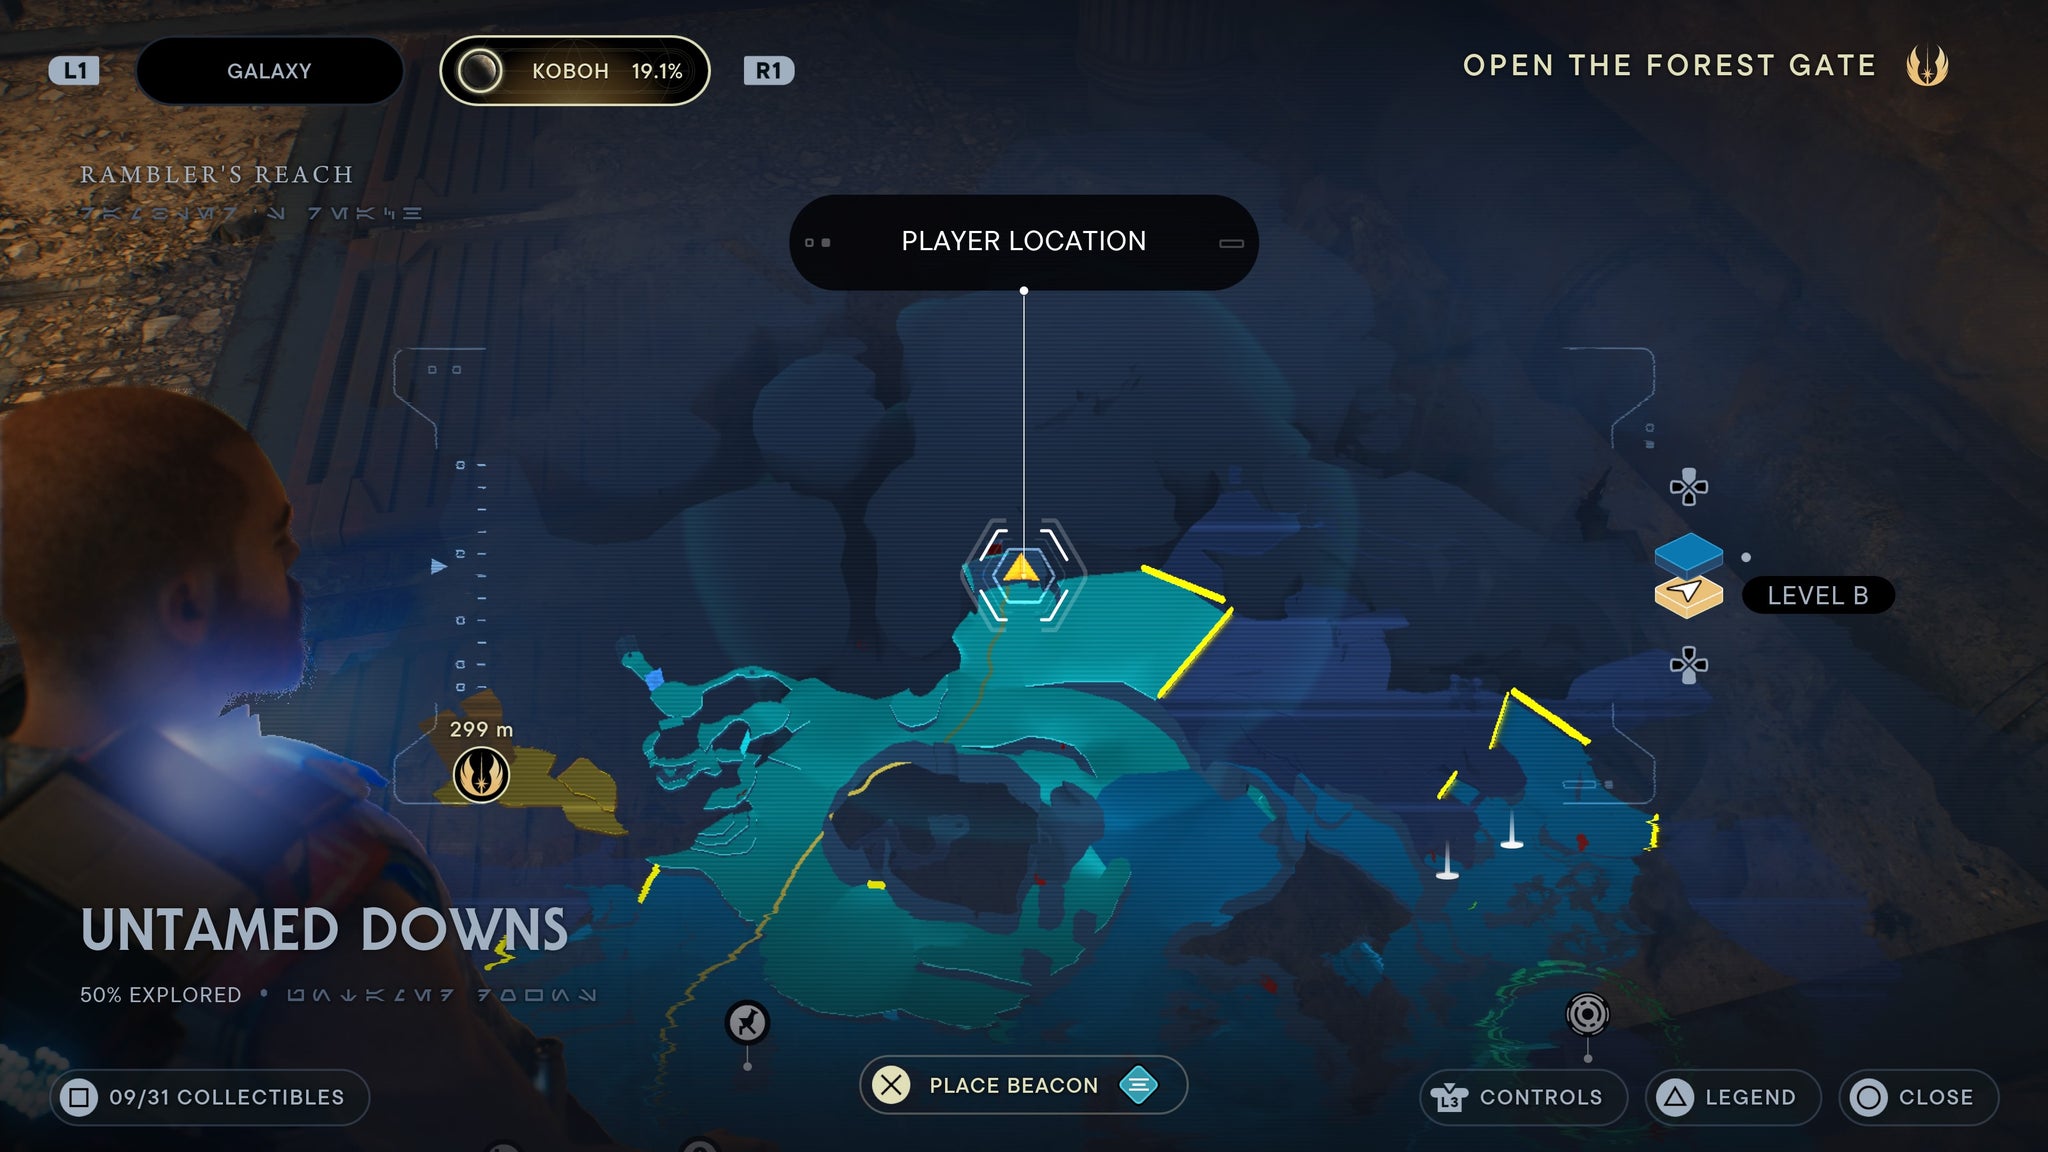
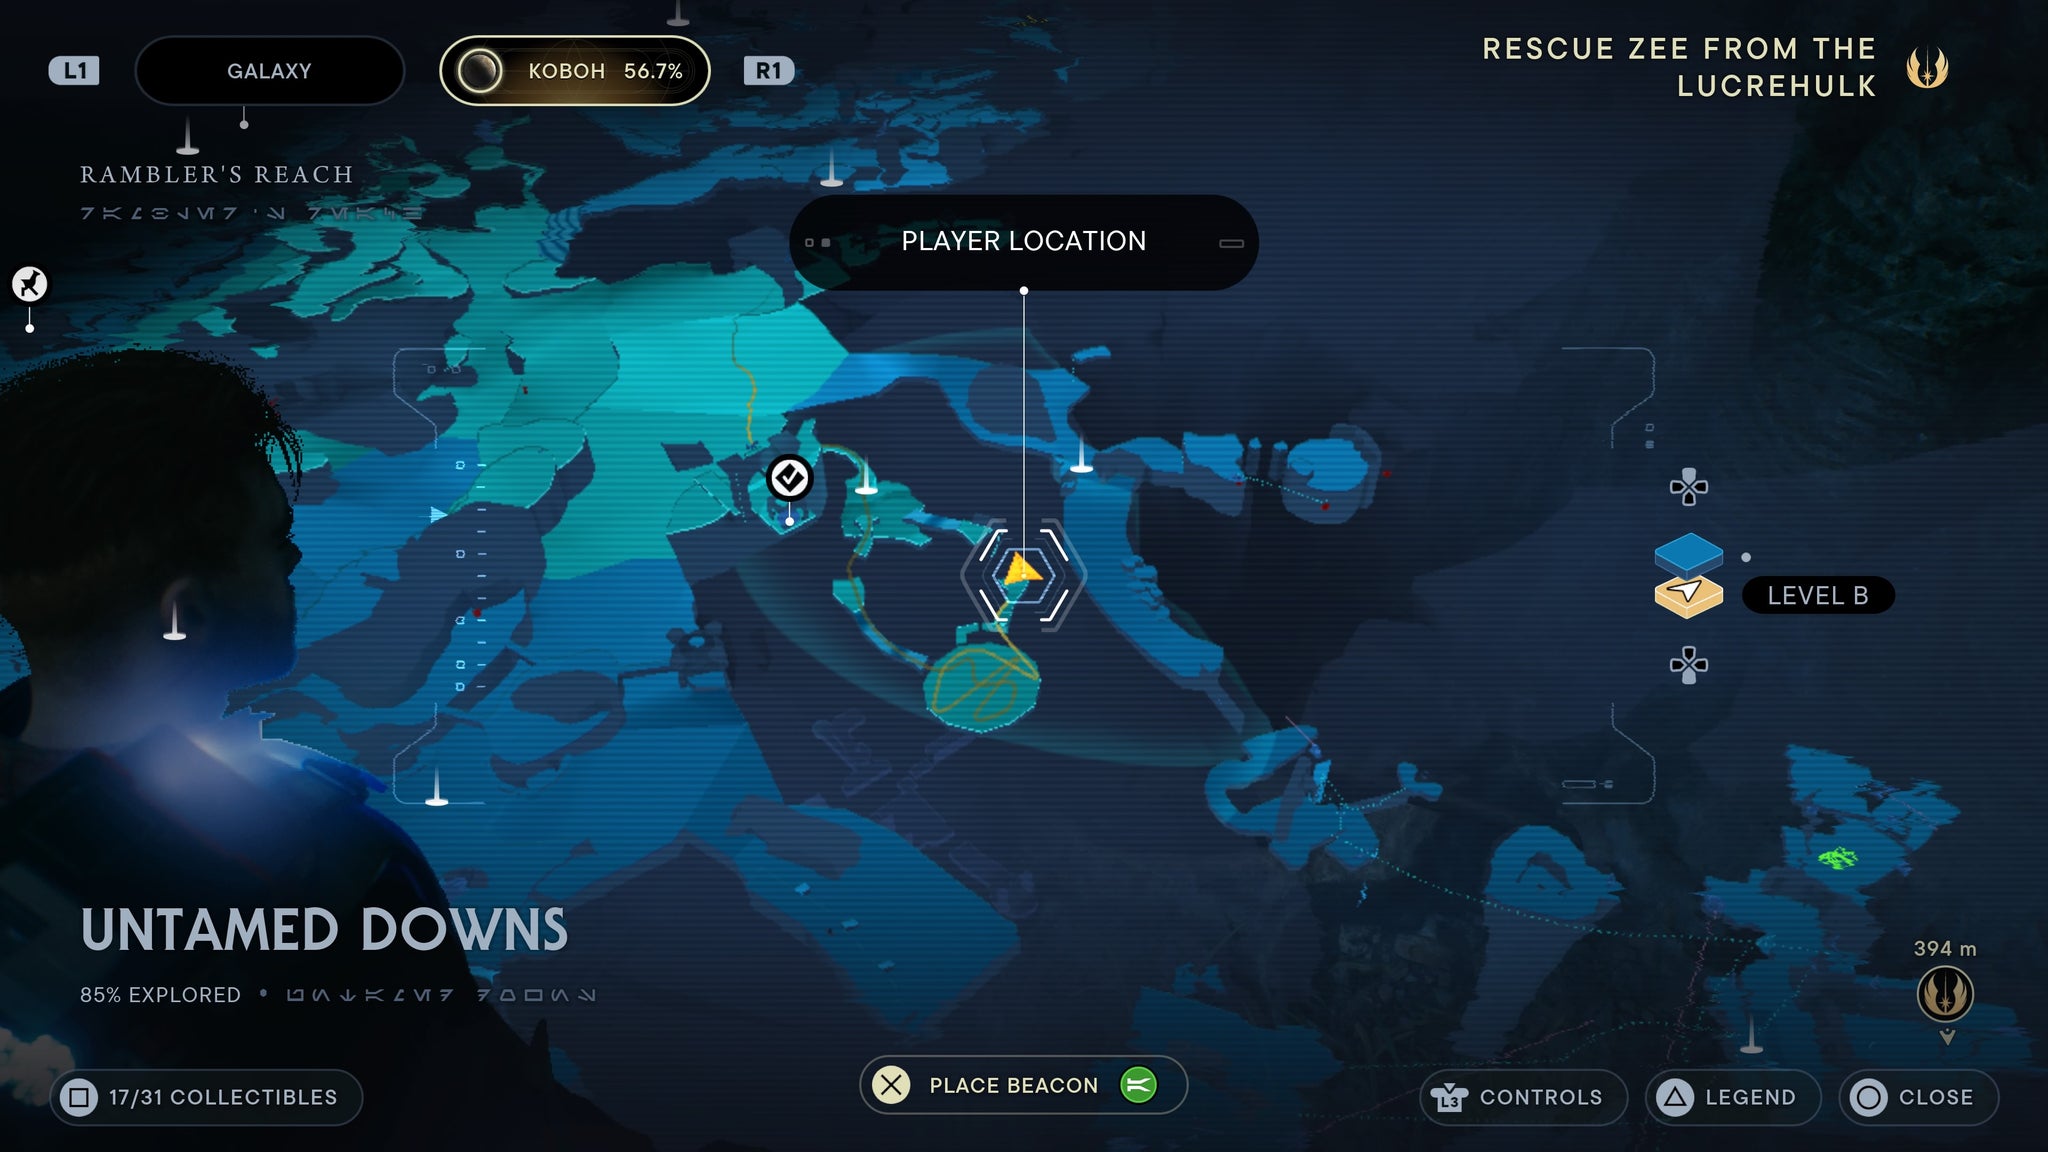
Untamed Downs
From Harvest Ridge, walk into a large cave and you’ll find a giant Bilemaw. Kill it, then walk a bit further into the cave. You’ll find a skeleton you can scan.

Right past the bilemaw is your first scan.
From Harvest Ridge, walk into a large cave and you’ll find a giant Bilemaw. Kill it, then climb up the vines on the centre pillar to reach the higher level. Once you land, cut some vines and proceed forward to find a force echo / data entry.
Higher up in the bilemaw cave.
Jump up into the cave in the cliff wall near the Forest Gate. Once inside this cave, jump down and follow the path back up. You’ll find a skeleton you can scan on the floor.
As you enter the cave, jump down to the ground and walk forward.
Go to the cave to the right of the forest gate, then walk inside. Clear out all the enemies. You’ll find a door you can blow up using a roller mine. Drag a Roller Mine from a locked door nearby ( read a guide about it here ). Once you blow the door open, you’ll find a force echo on the ground that you can scan.

Past the blocked door, next to theg iant chest.
In front of the green forcefield, surrounded by roller mines, there’s a force echo. Interact with it for a data bank entry.
at this location, you’ll find a broken roller mine to scan.
From the Untamed Downs meditation point. Drop down, and you’ll find a scannable data tablet on the ground by the wall.

You’ll find a datapad to scan after you drop down.
From the Untamed Downs meditation point. Leave the cave and exit back out towards Harvest Ridge. As you leave, you’ll see a glowig blue force echo in front of you. Run over and the data bank entry is yours!

In a smalll cave near the fort is an echo to scan.
Requires relter glide. Glide down from the harvest Ridge meditation point. Walk to the circular white roof on the cliff. Enter the nearby cave and you’ll find a force echo inside.

A small shrine of rocks.
Requires air dash. From the meditation point, dash over the room below and enter the beast arena. Once killed, climb up the vines. Folow the path onwards and you’ll find a force echo.
Kill the monsters and it’s yours.
Next to the locked door where raiders are fighting, you’ll find a force echo on the ground.
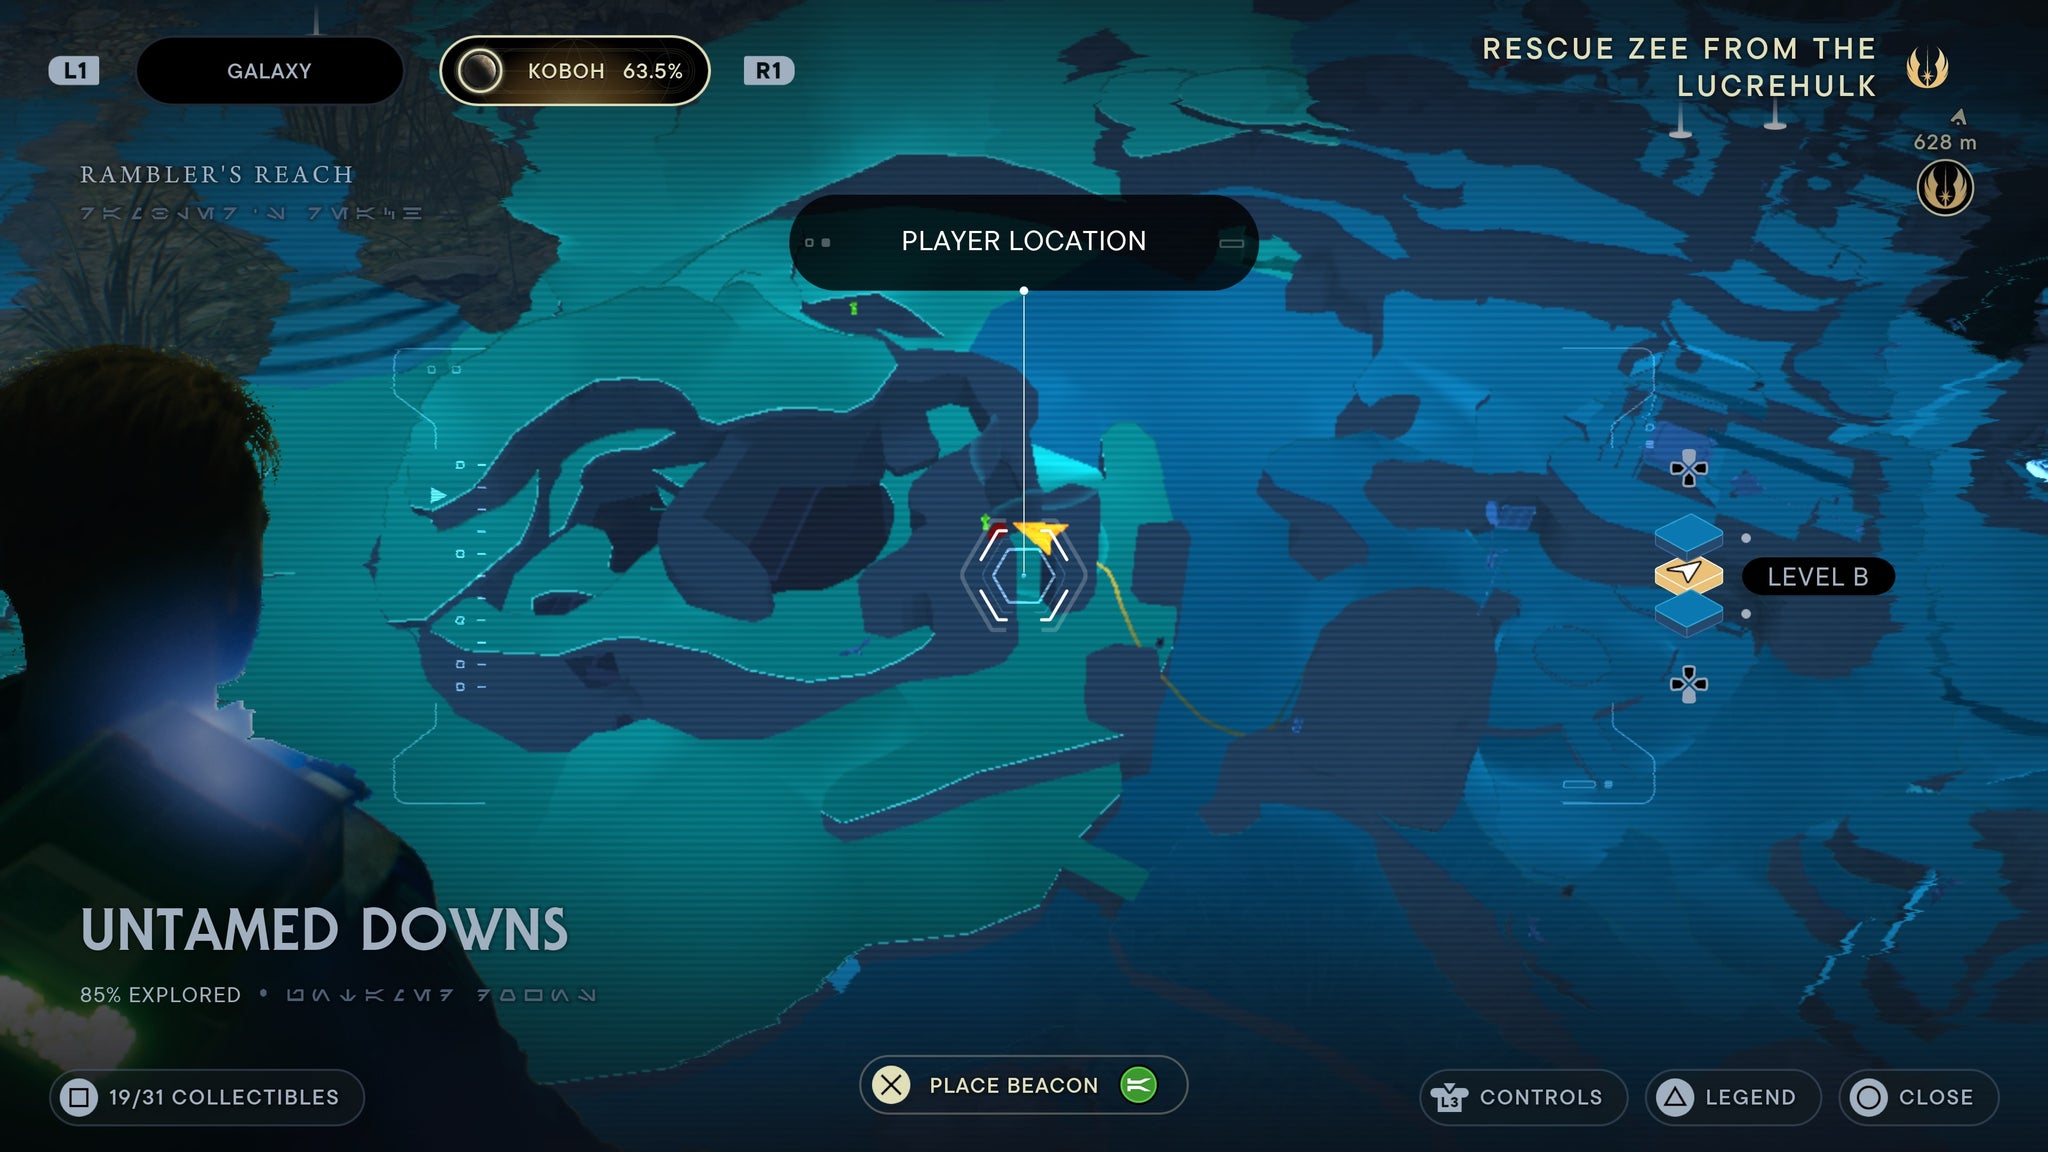
Right of the locked door.
Requires forcefield dash. Run past the rollermines and dash through the forcefield near the boiling bluff. Once inside, wark into the second half of the room and scan an ore bucket on the right.
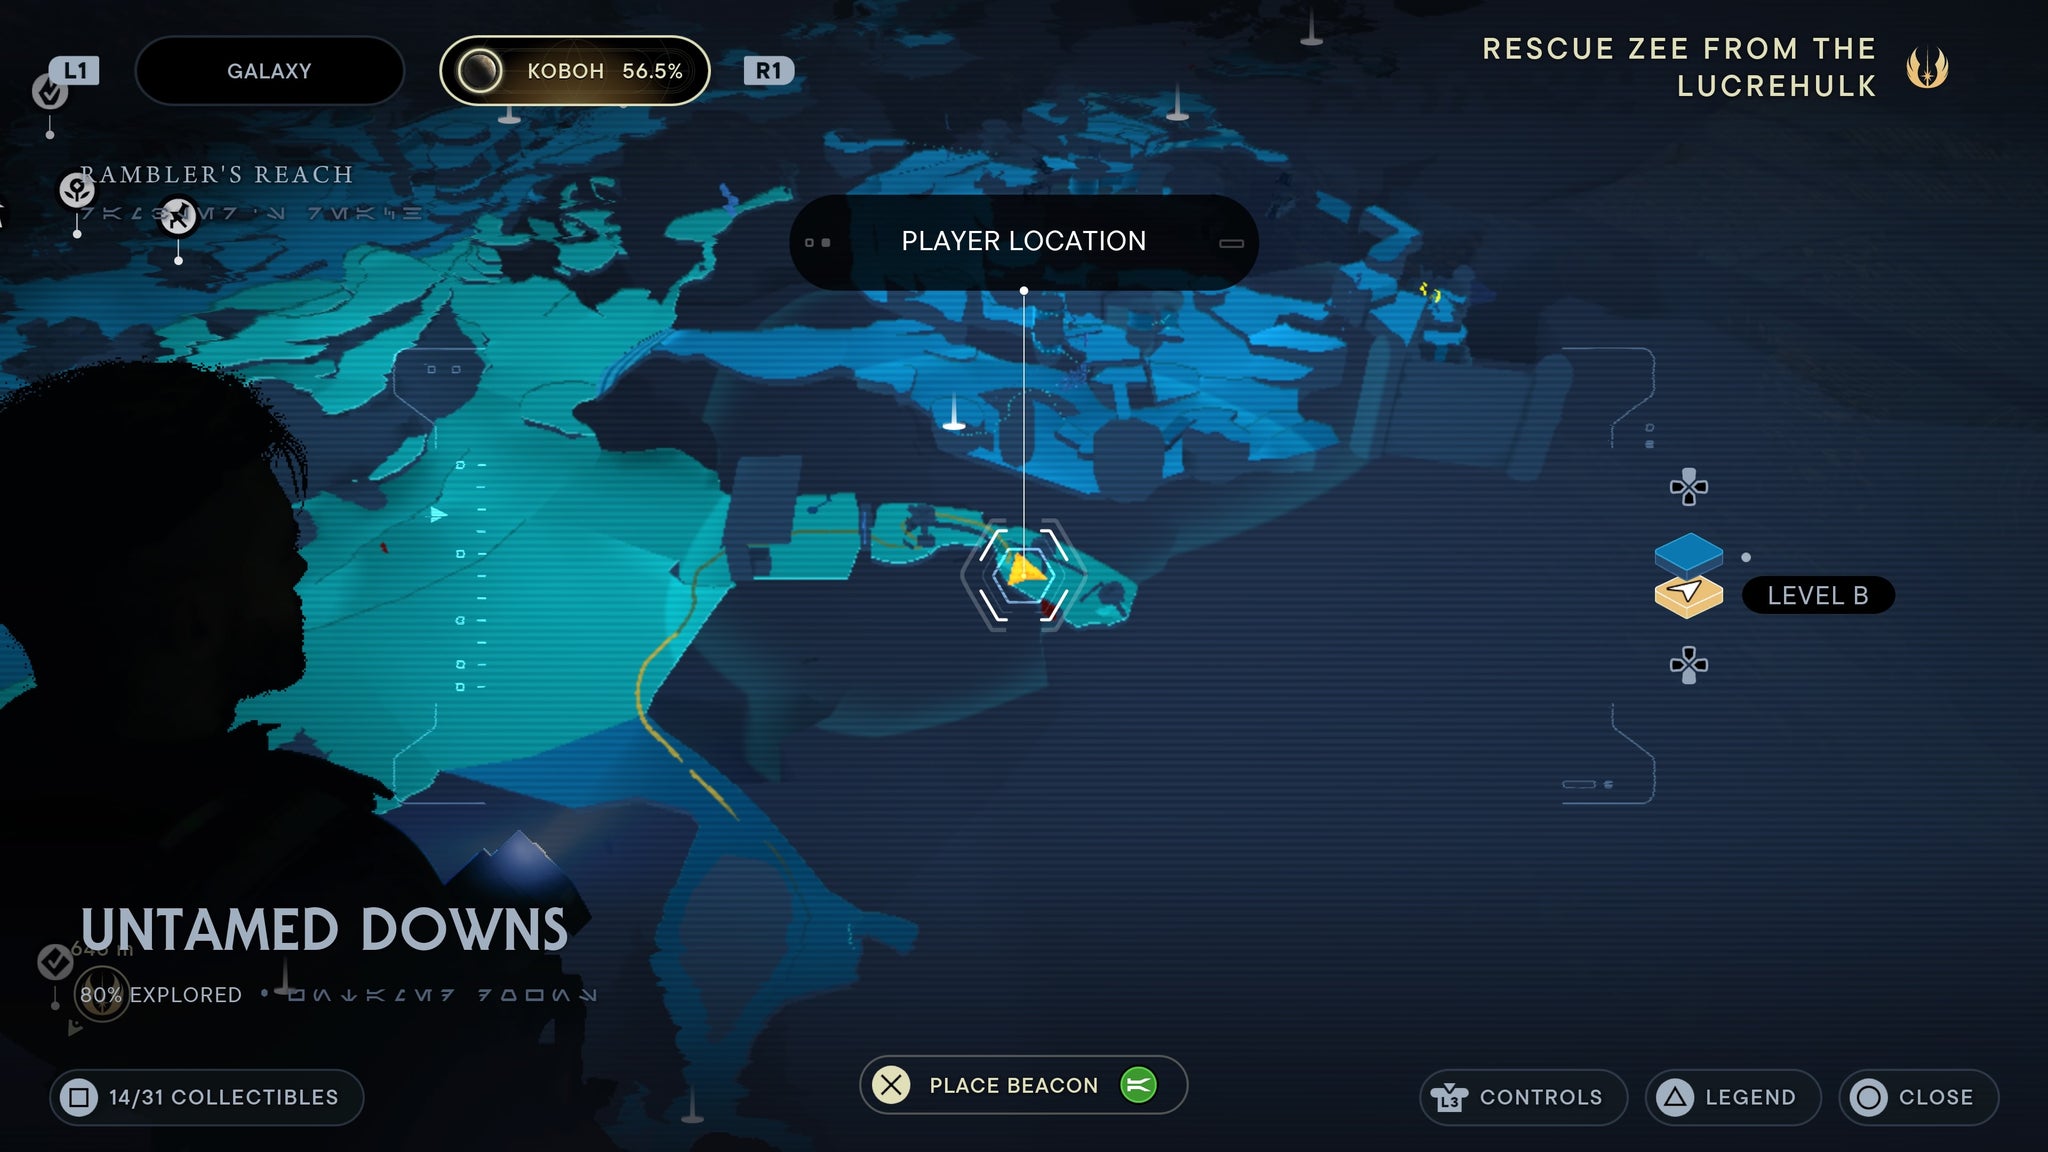
Past the forcefield
Requires air dash. From the Untamed Down meditation point, air dash over the room below. Walk down, and you’ll find a scan to the right.
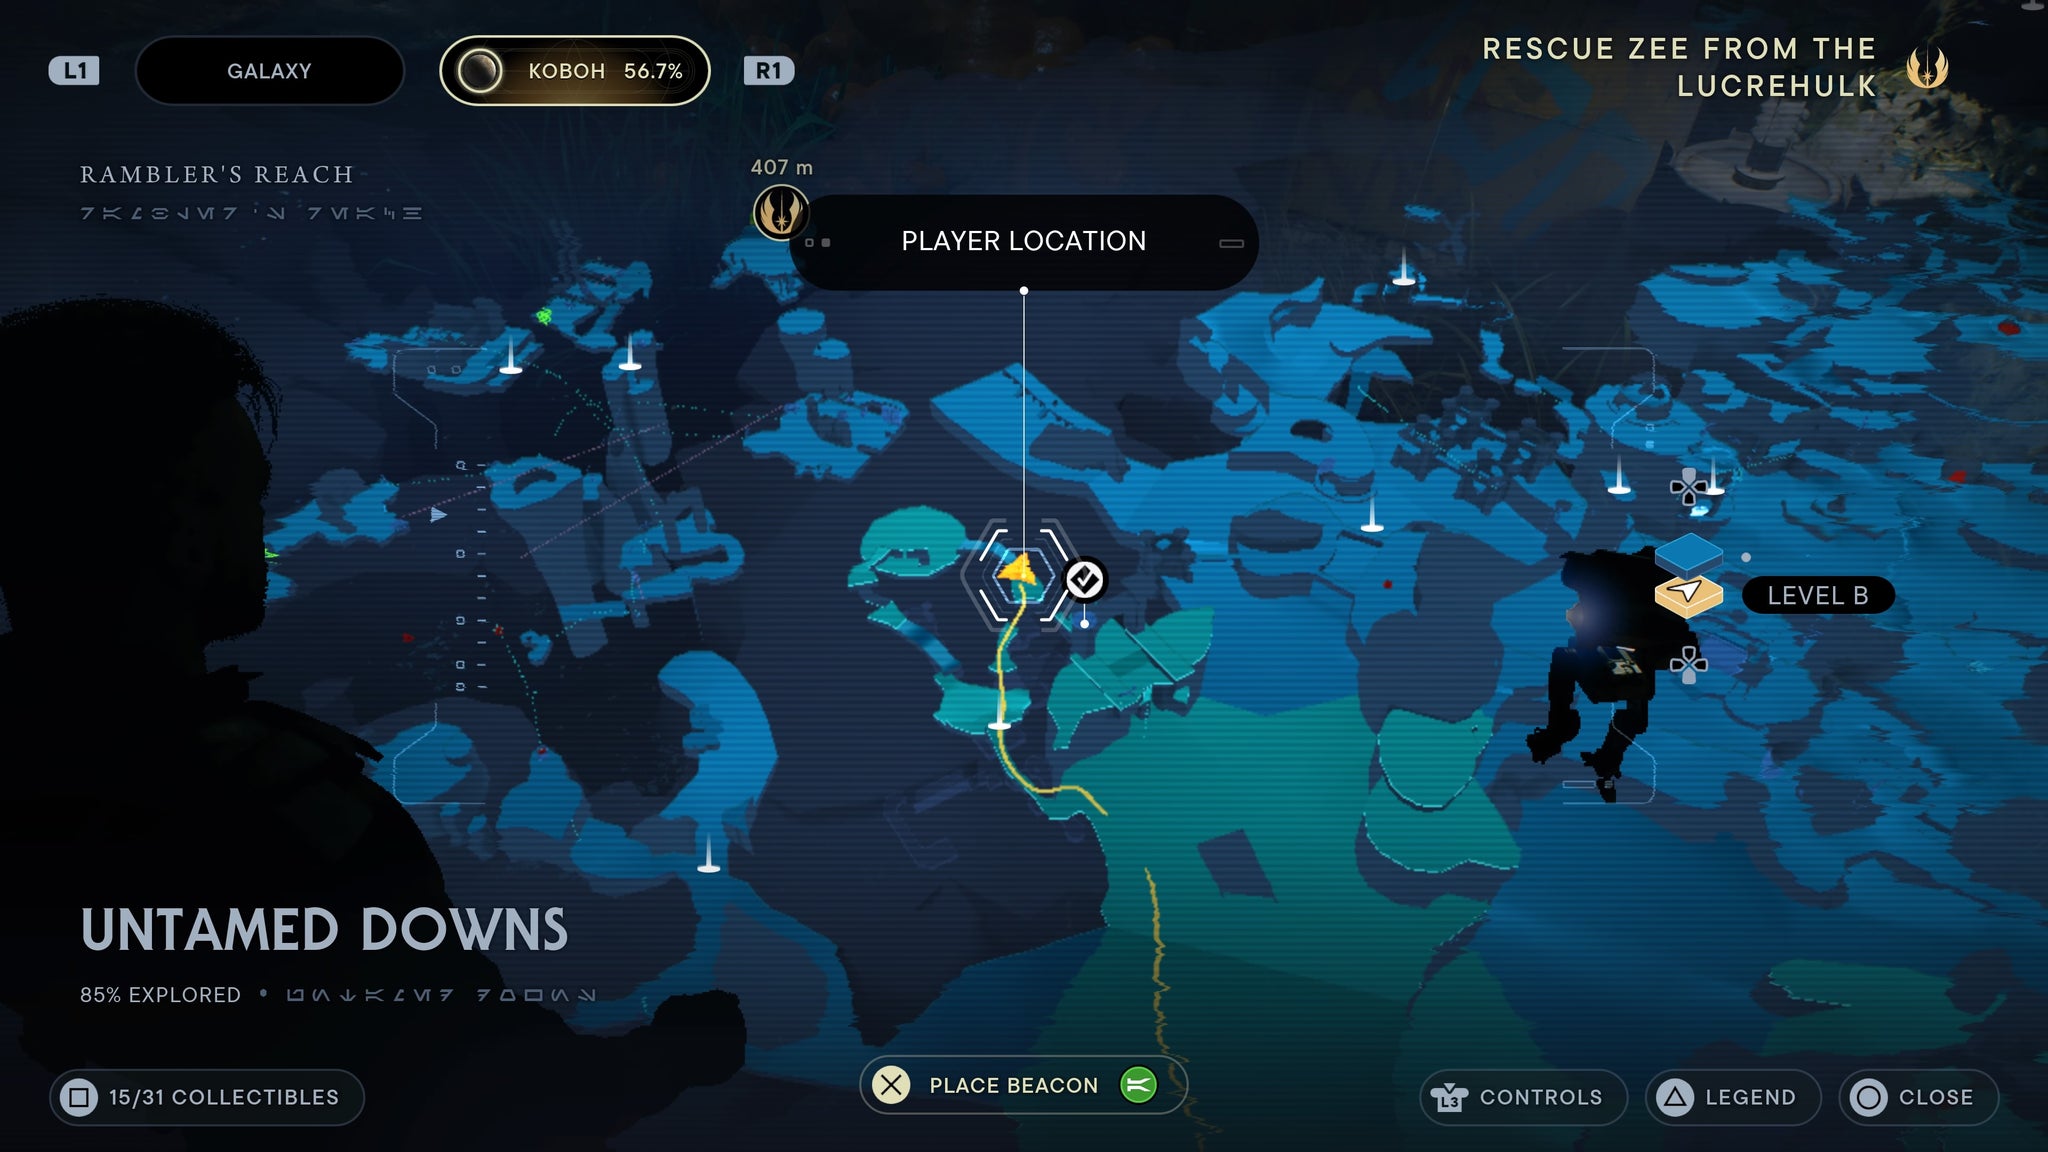
A sign on the floor.
Requires force lift and slam. Enter the bunker behind the green forcefield. Kill the legendary droideka, then look right in this room. You’ll find a datapad you can scan.
It’s on a body.
Requires force lift and slam. Enter the bunker behind the green forcefield. Kill the legendary droideka, then look left in this room. You’ll find a datapad you can scan.
On a datapad in a small red room.
Fort Kah’lin
From the Fort Kah’Lin meditation point, walk in the direction of the B2 and commando droid nearby. Once they are dead, you can find an echo by a closed door.
On the ground in front of a door.
From the Fort Kah’Lin meditation point, enter the building next to you. Inside, you should be able to scan some deactivated droids.

Inside a nearby building you’ll fidn broken battle droids.
From the Fort Kah’Lin meditation point, enter the building at the centre of the fort. There, on the ground, is a B2 droid you can scan.
Once you find a broken B2 droid, you can scan it.
After you defeat the Spawn of Oggdo, you can find the force echo to the right of the pit exit.
Kill the frog, then speak to his son maybe?
Requires balloon grapple Found in Fort Kah’Lin. Grapple up to the higher platform, then take a right into the cube. Inside, there’s a droid you can scan.
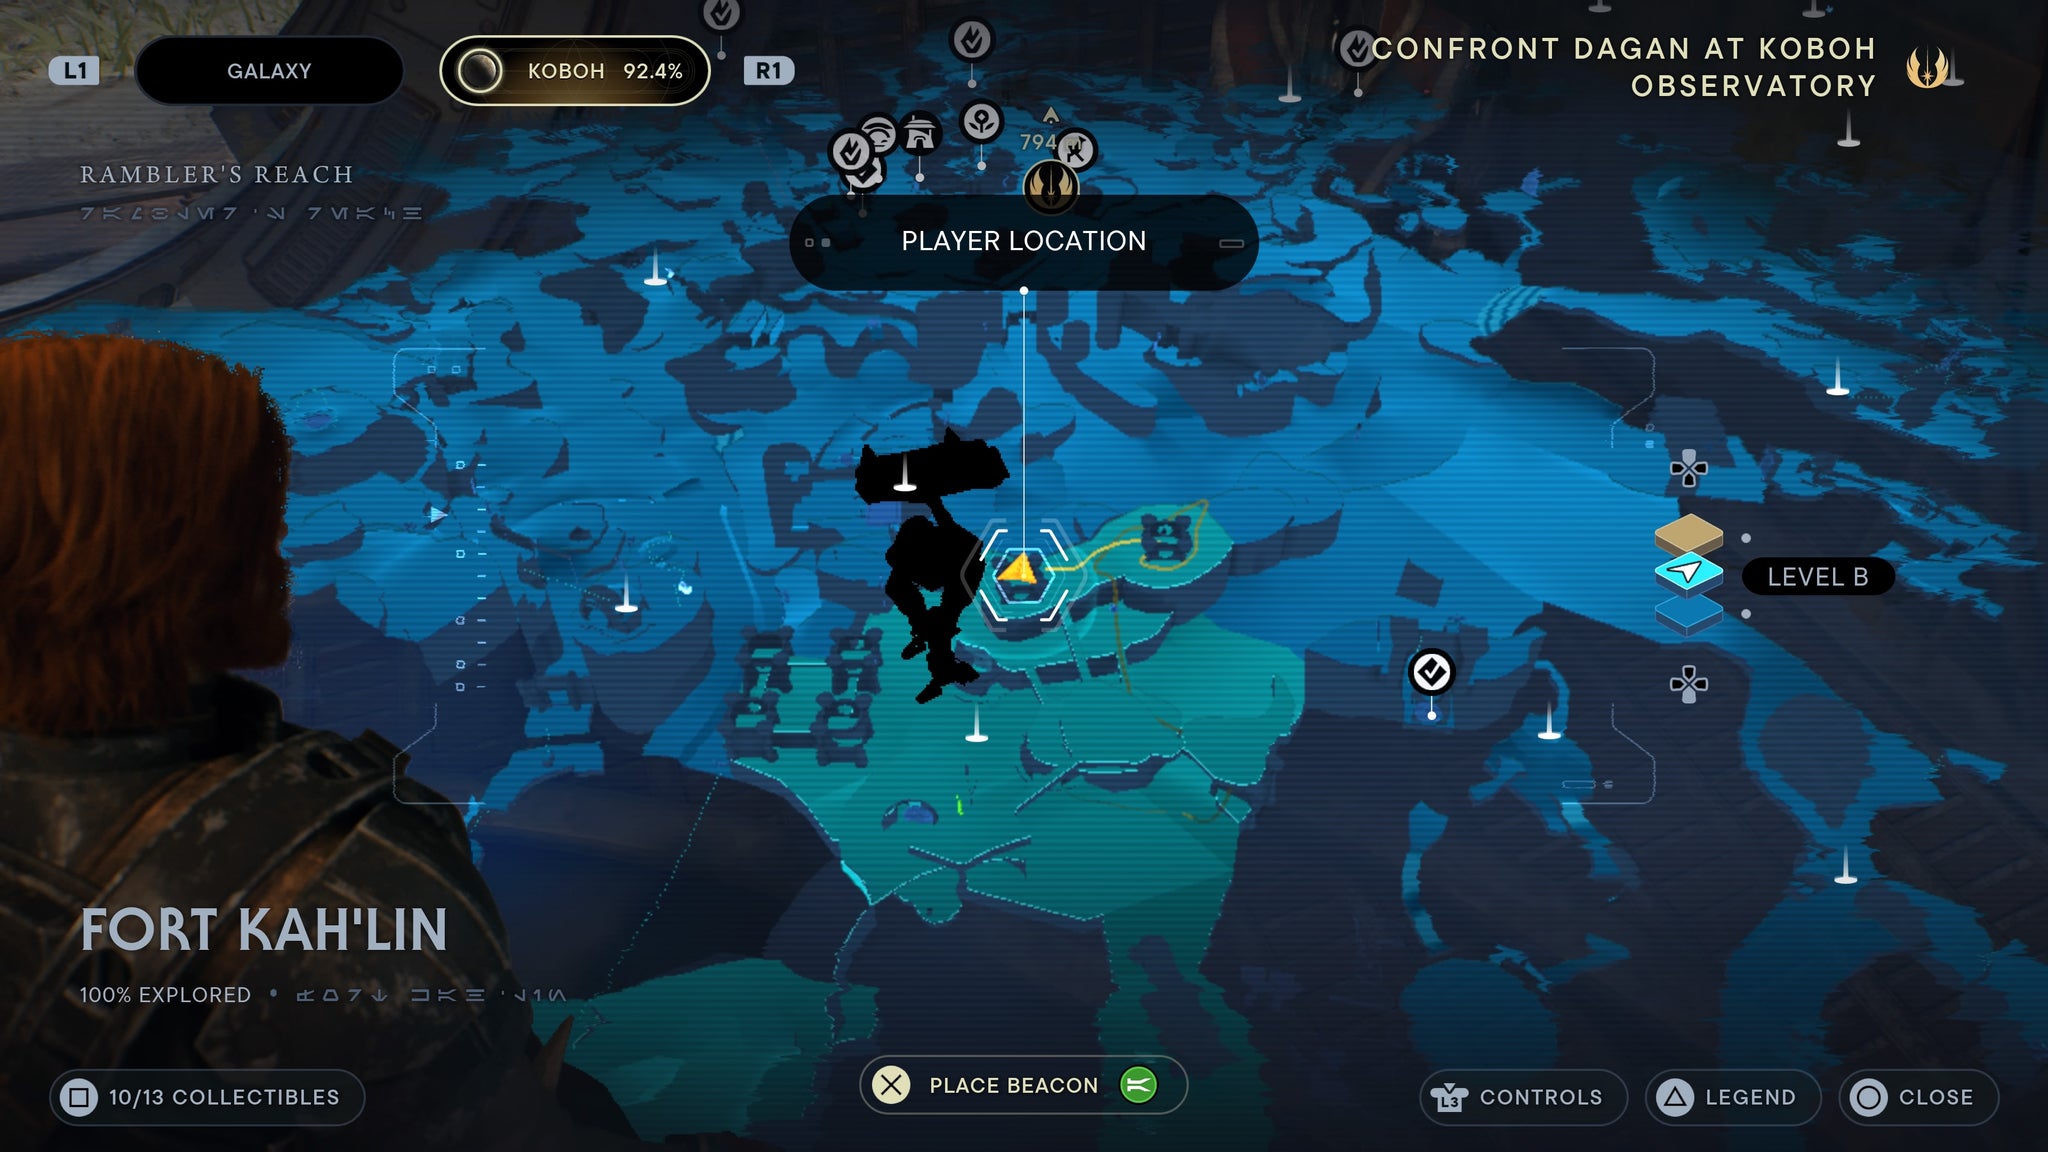
A broken droid on the floor inside the cube!
Requires balloon grapple Found in Fort Kah’Lin. Grapple up to the higher platform, then take a right into the cube. Inside, there’s a force echo.
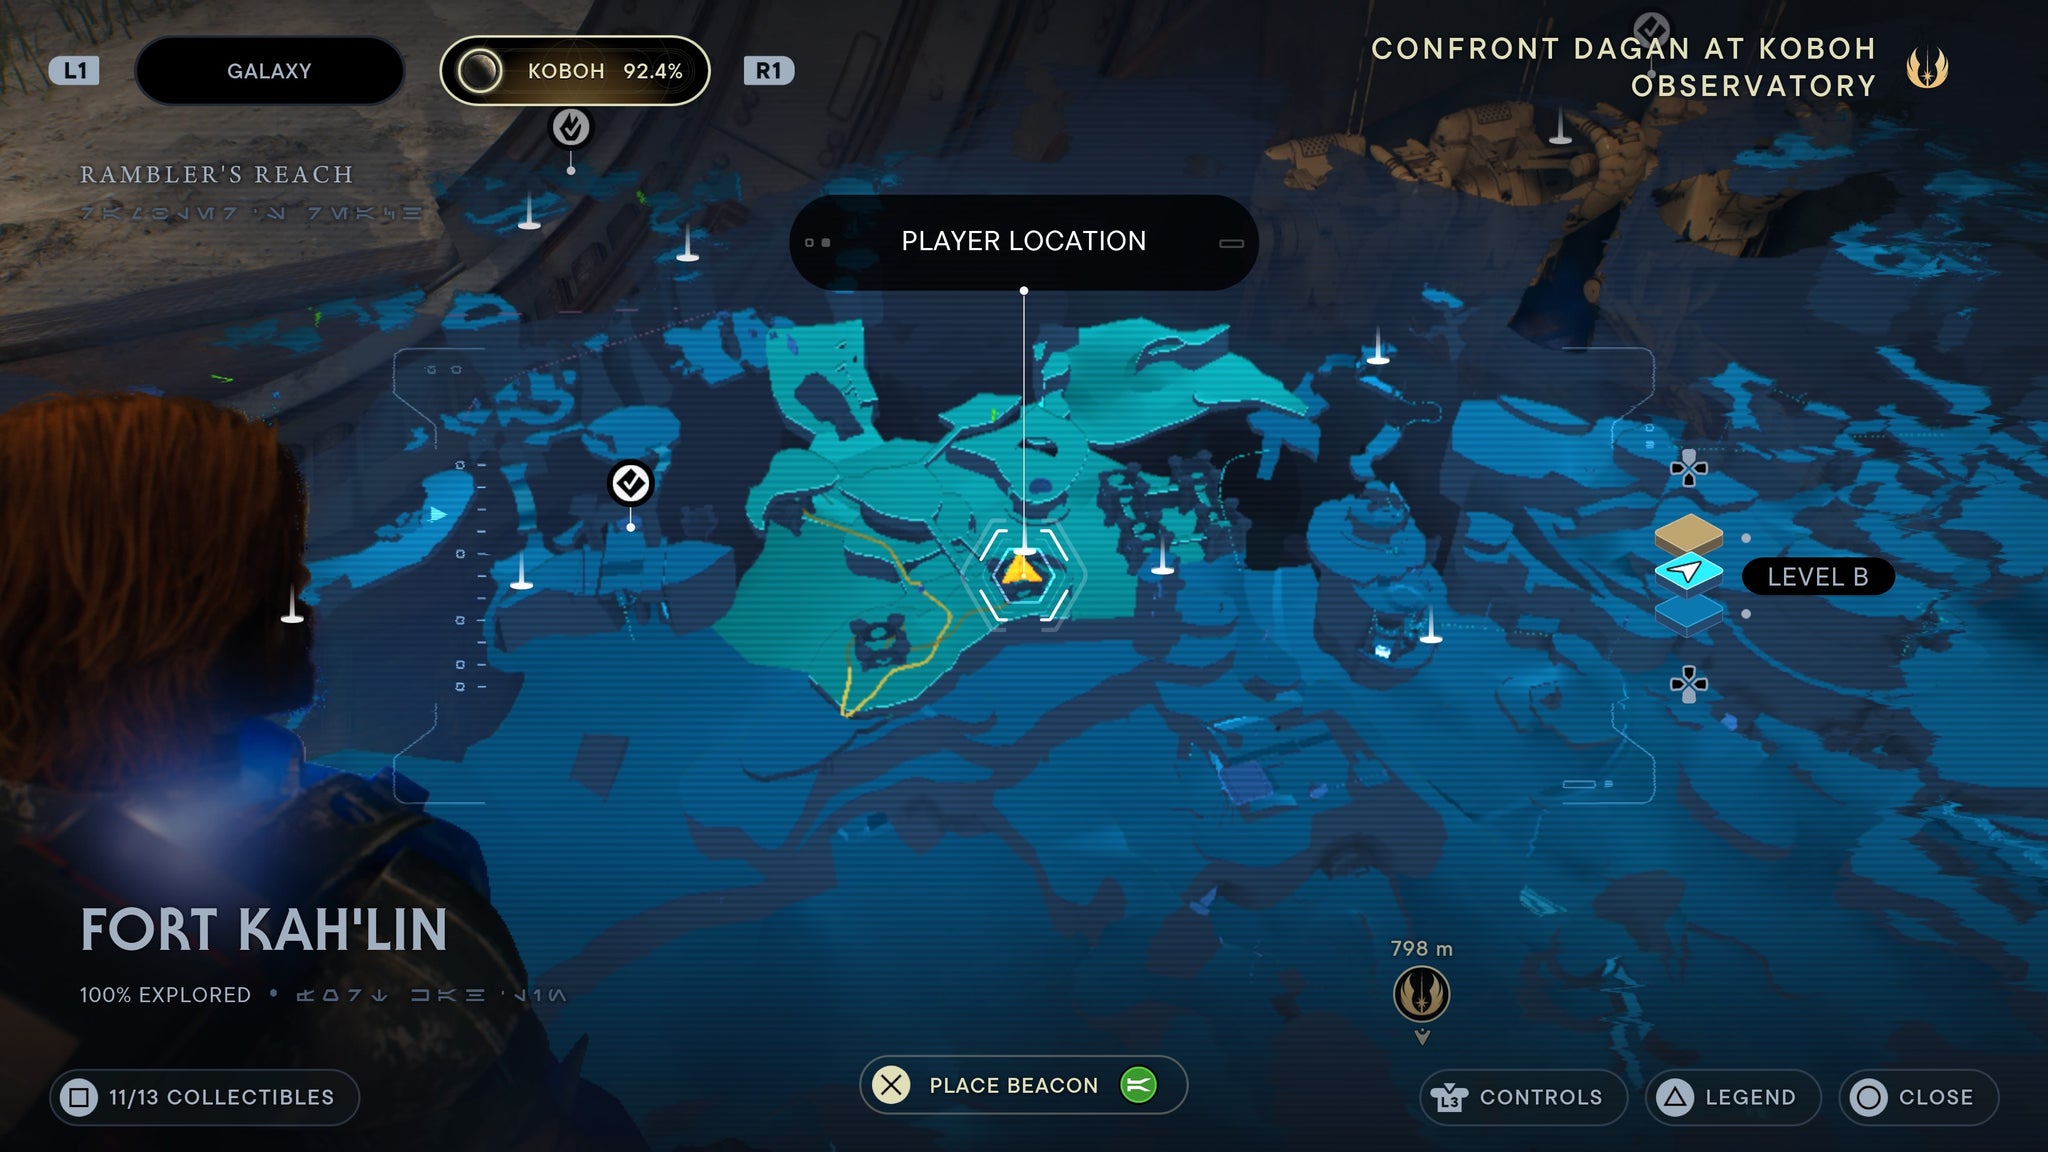
A force echo inside the cube on he highest level!
Boiling Bluff
As you walk into the Boiling Bluff from the Untamed Downs, take the left path. You’ll find a force echo just in front of the water to your right.
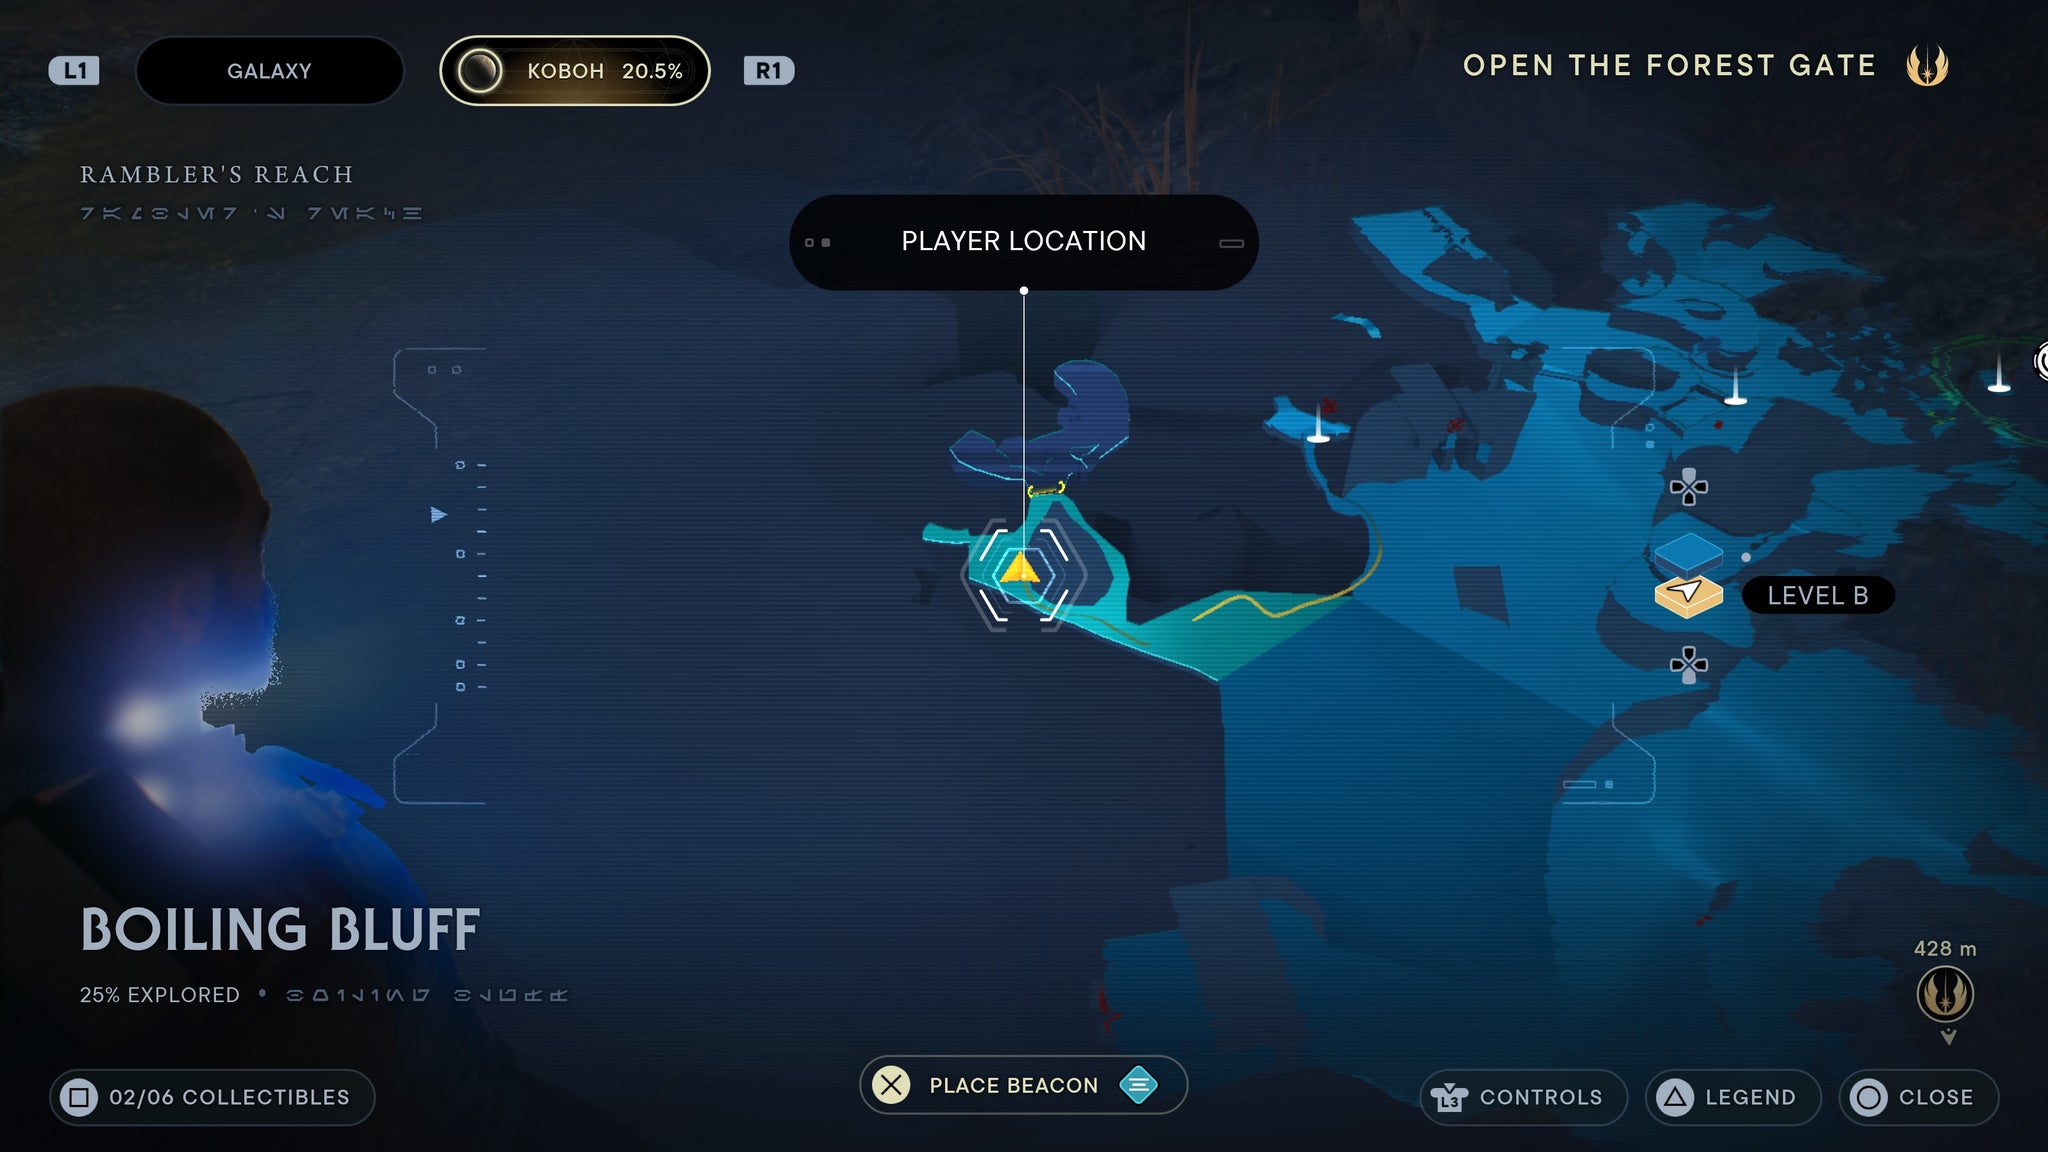
to the left ,as you enter.
Right next to the boiling bluff meditation point is an echo on top of a large rock platform. Use the smaller platforms around it to double jump and grab the ledge to pull yourself up.
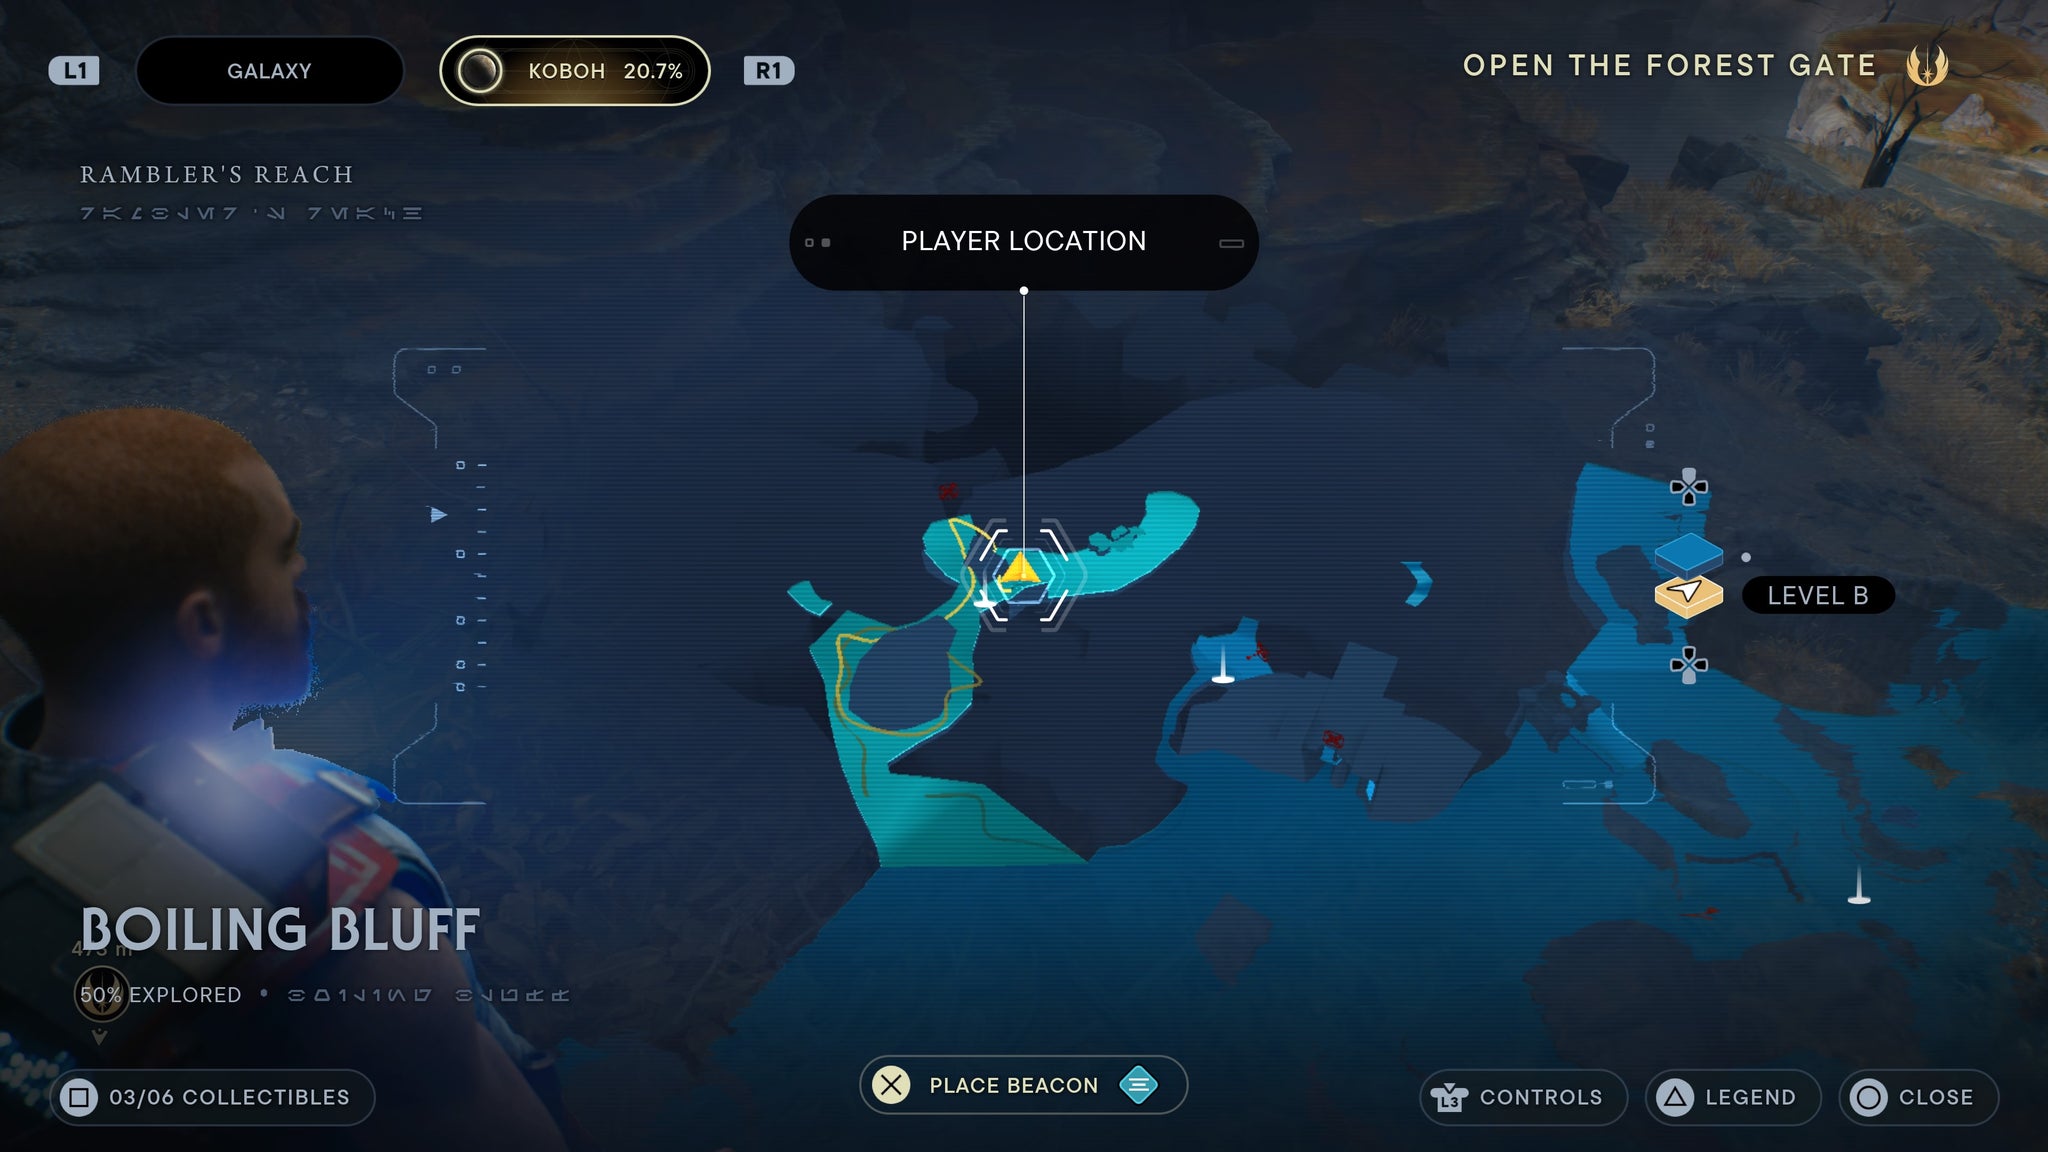
Easier with nekko riding.
Basalt Rift
Cross over the chasm using the zipline, then walk around to the other side of the tone pillar. There, you’ll be able to scan.
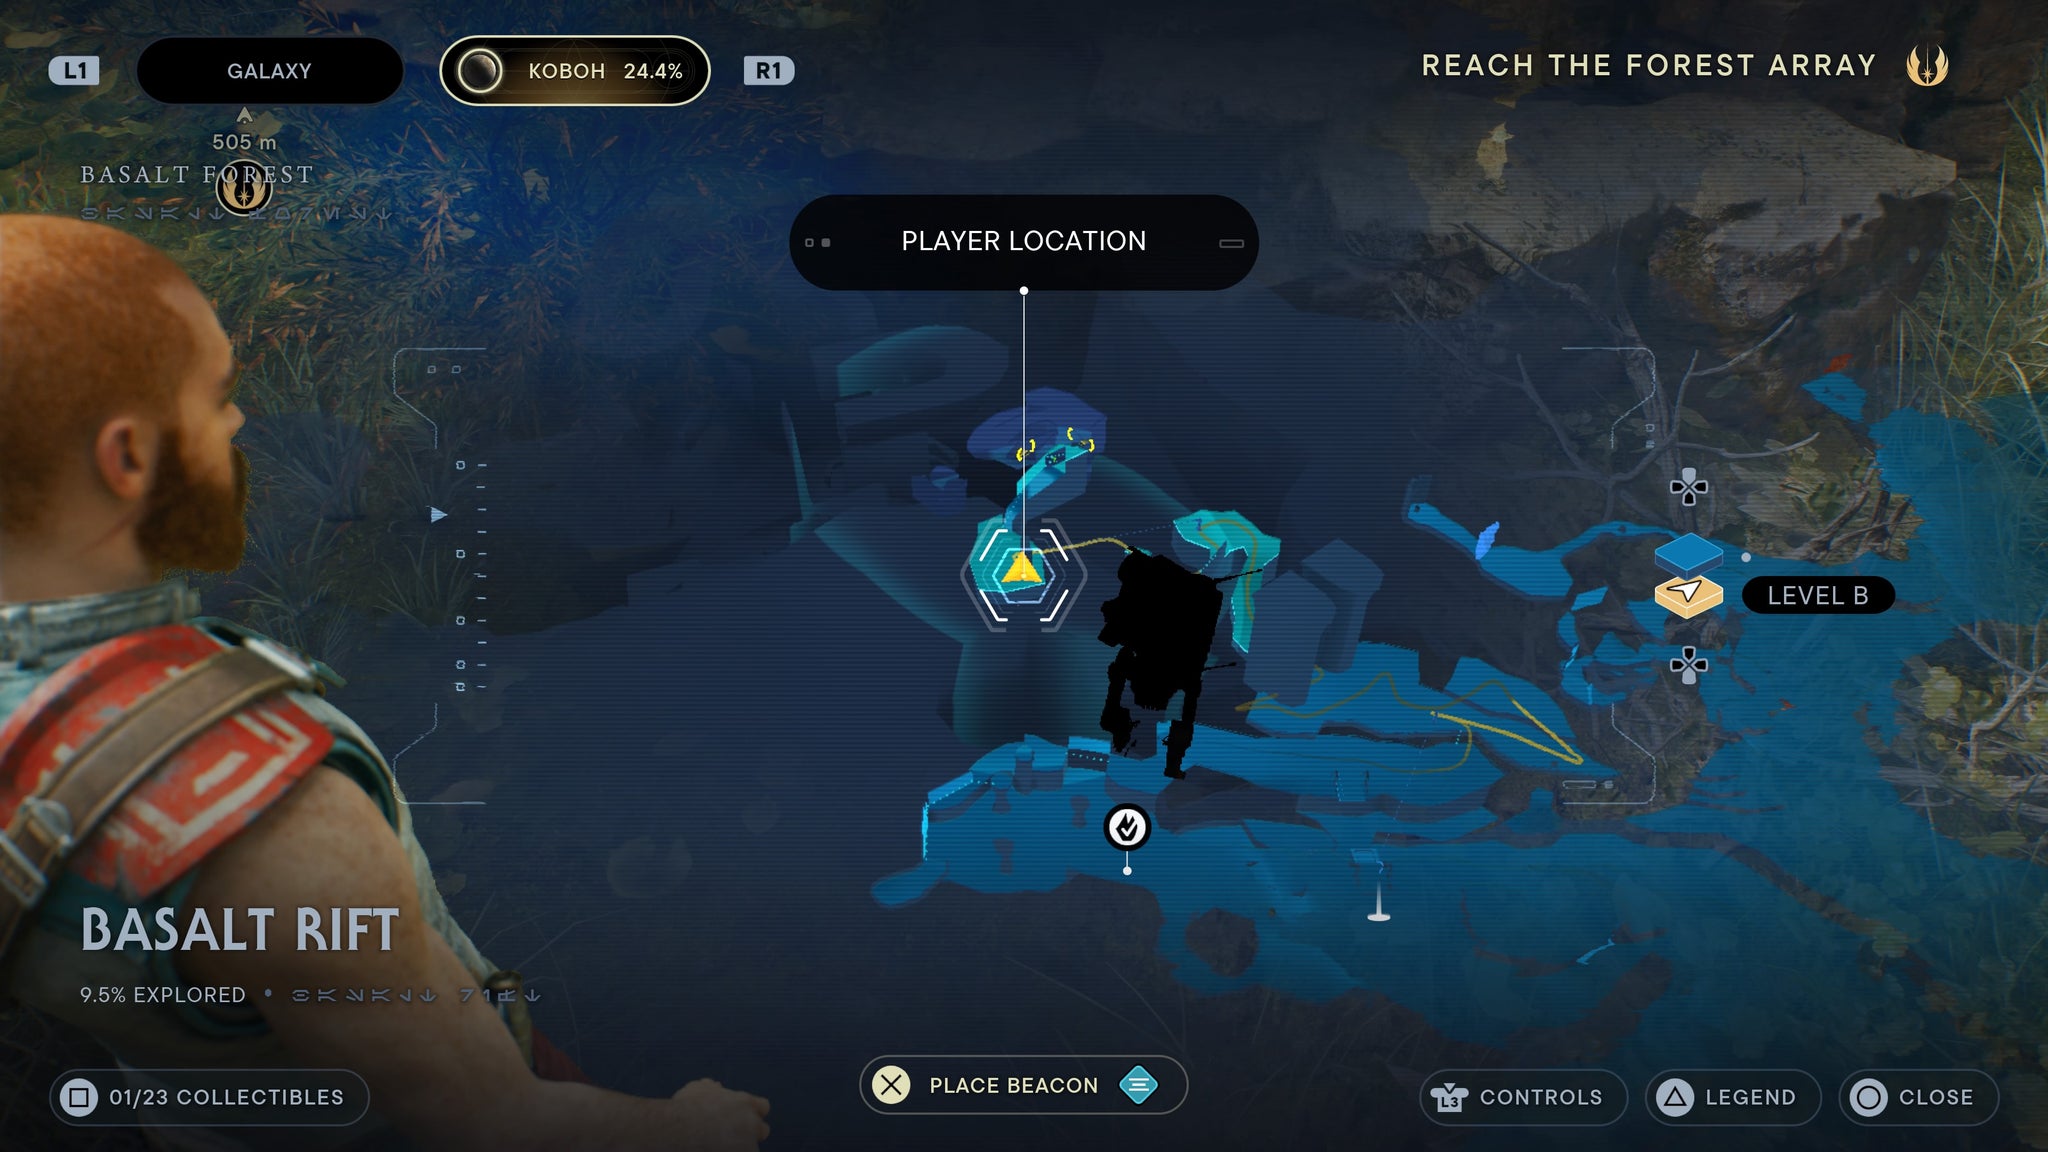
Right next to the shortcut.
From the meditation point, jump over the gap where the shield troopers and droids are fighting. Look to your right, then scan the large machine there.
Right next to the camp.
From the meditation point, leap over to the platform where the shield troopers and droids are fighting. Grapple up the vines down to the stormtroopers below, and you’ll find a force echo below.
It’s a broken egg on the floor!
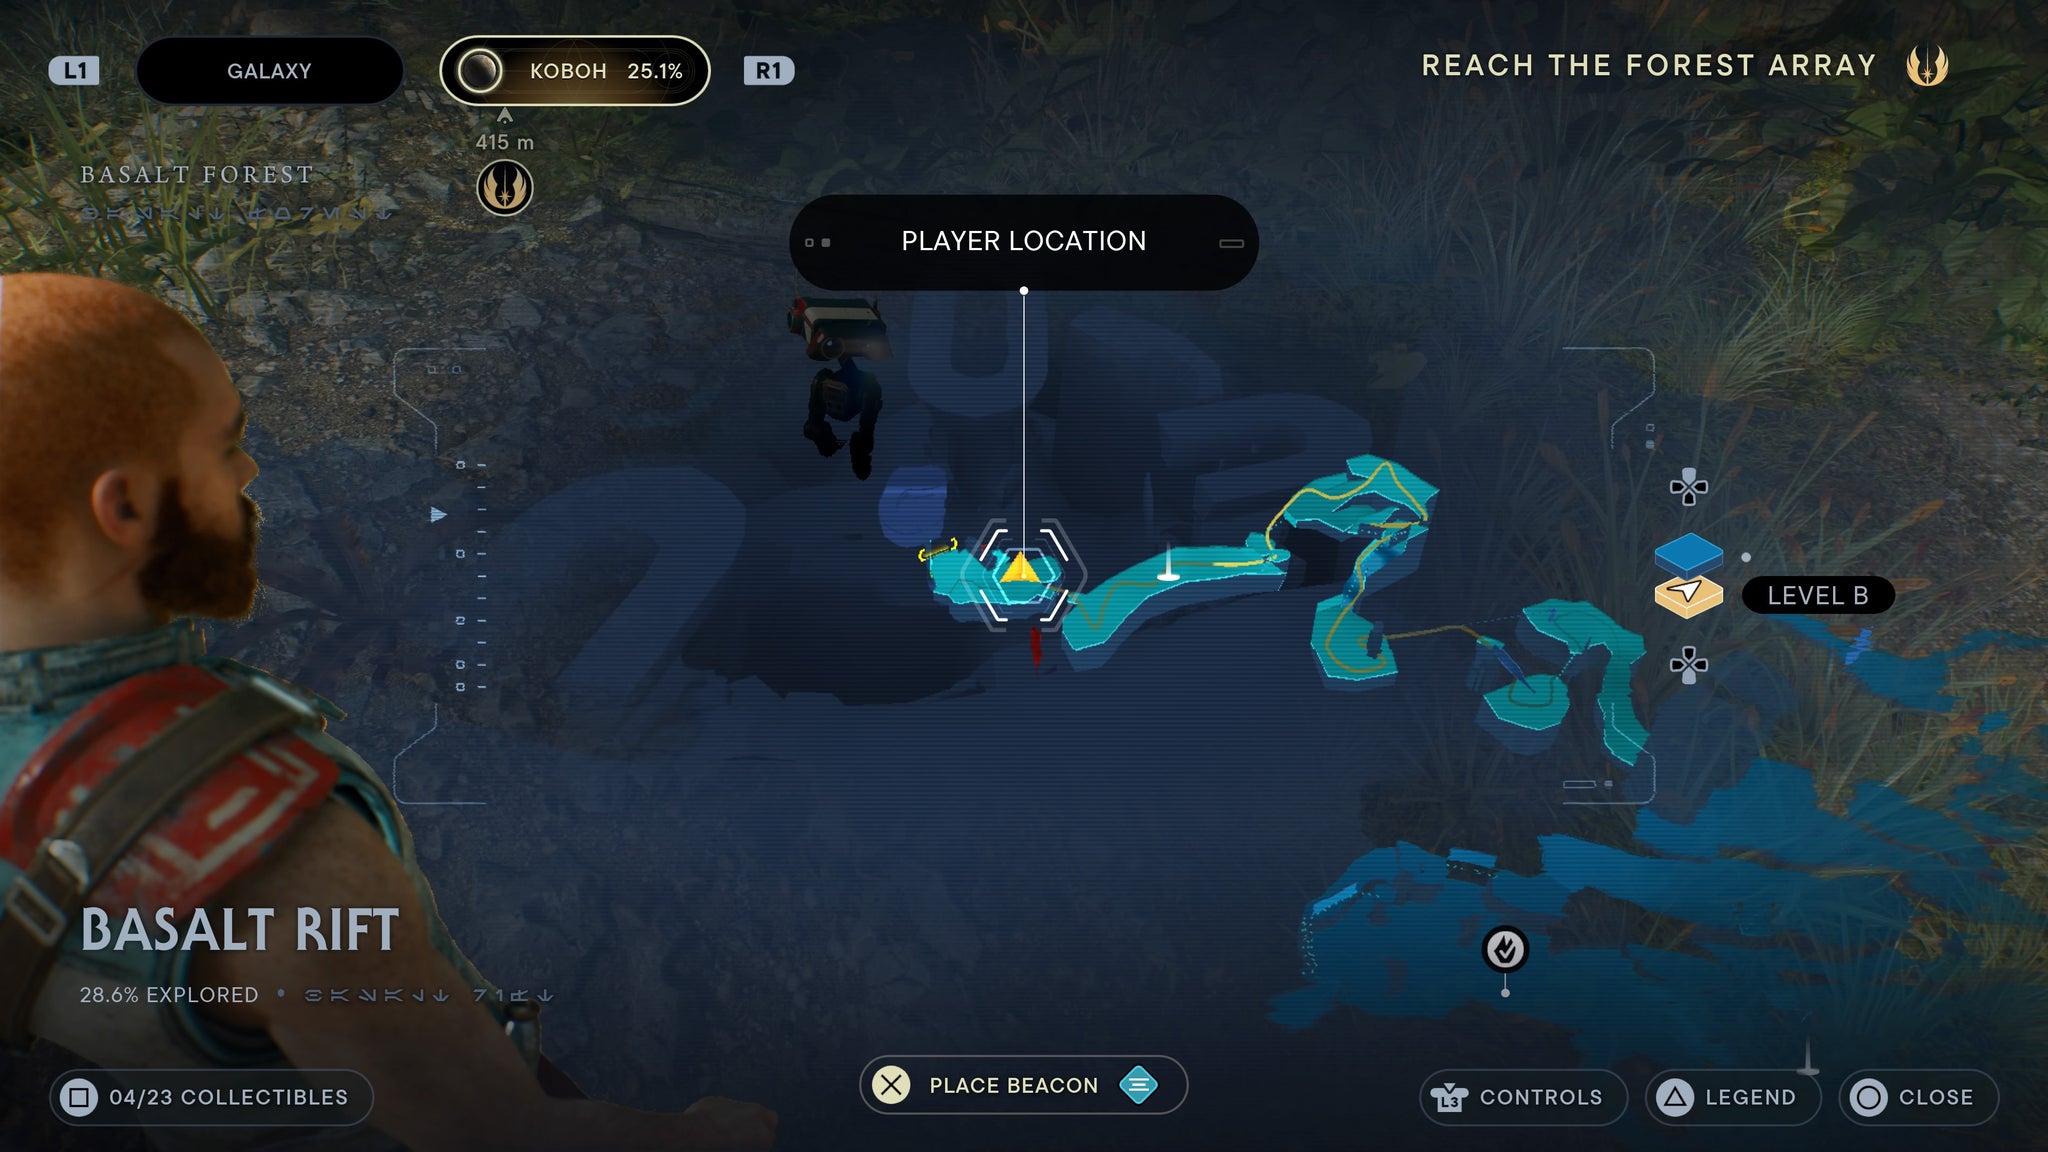
When you slide down, kill the bilemaw. Once you do, scan the right of the entrance to its cave.

Kill the bilemaw, then scan th cave entrance.
Climb up to the camp where you find Toa for the first time. The metal nearby is something you can scan.
Be sure to talk to Toa while there!
From the meditation point, walk across the shortcut and down the hill until you reach several storm troopers. From there, you can scan a pile of boxes nearby.
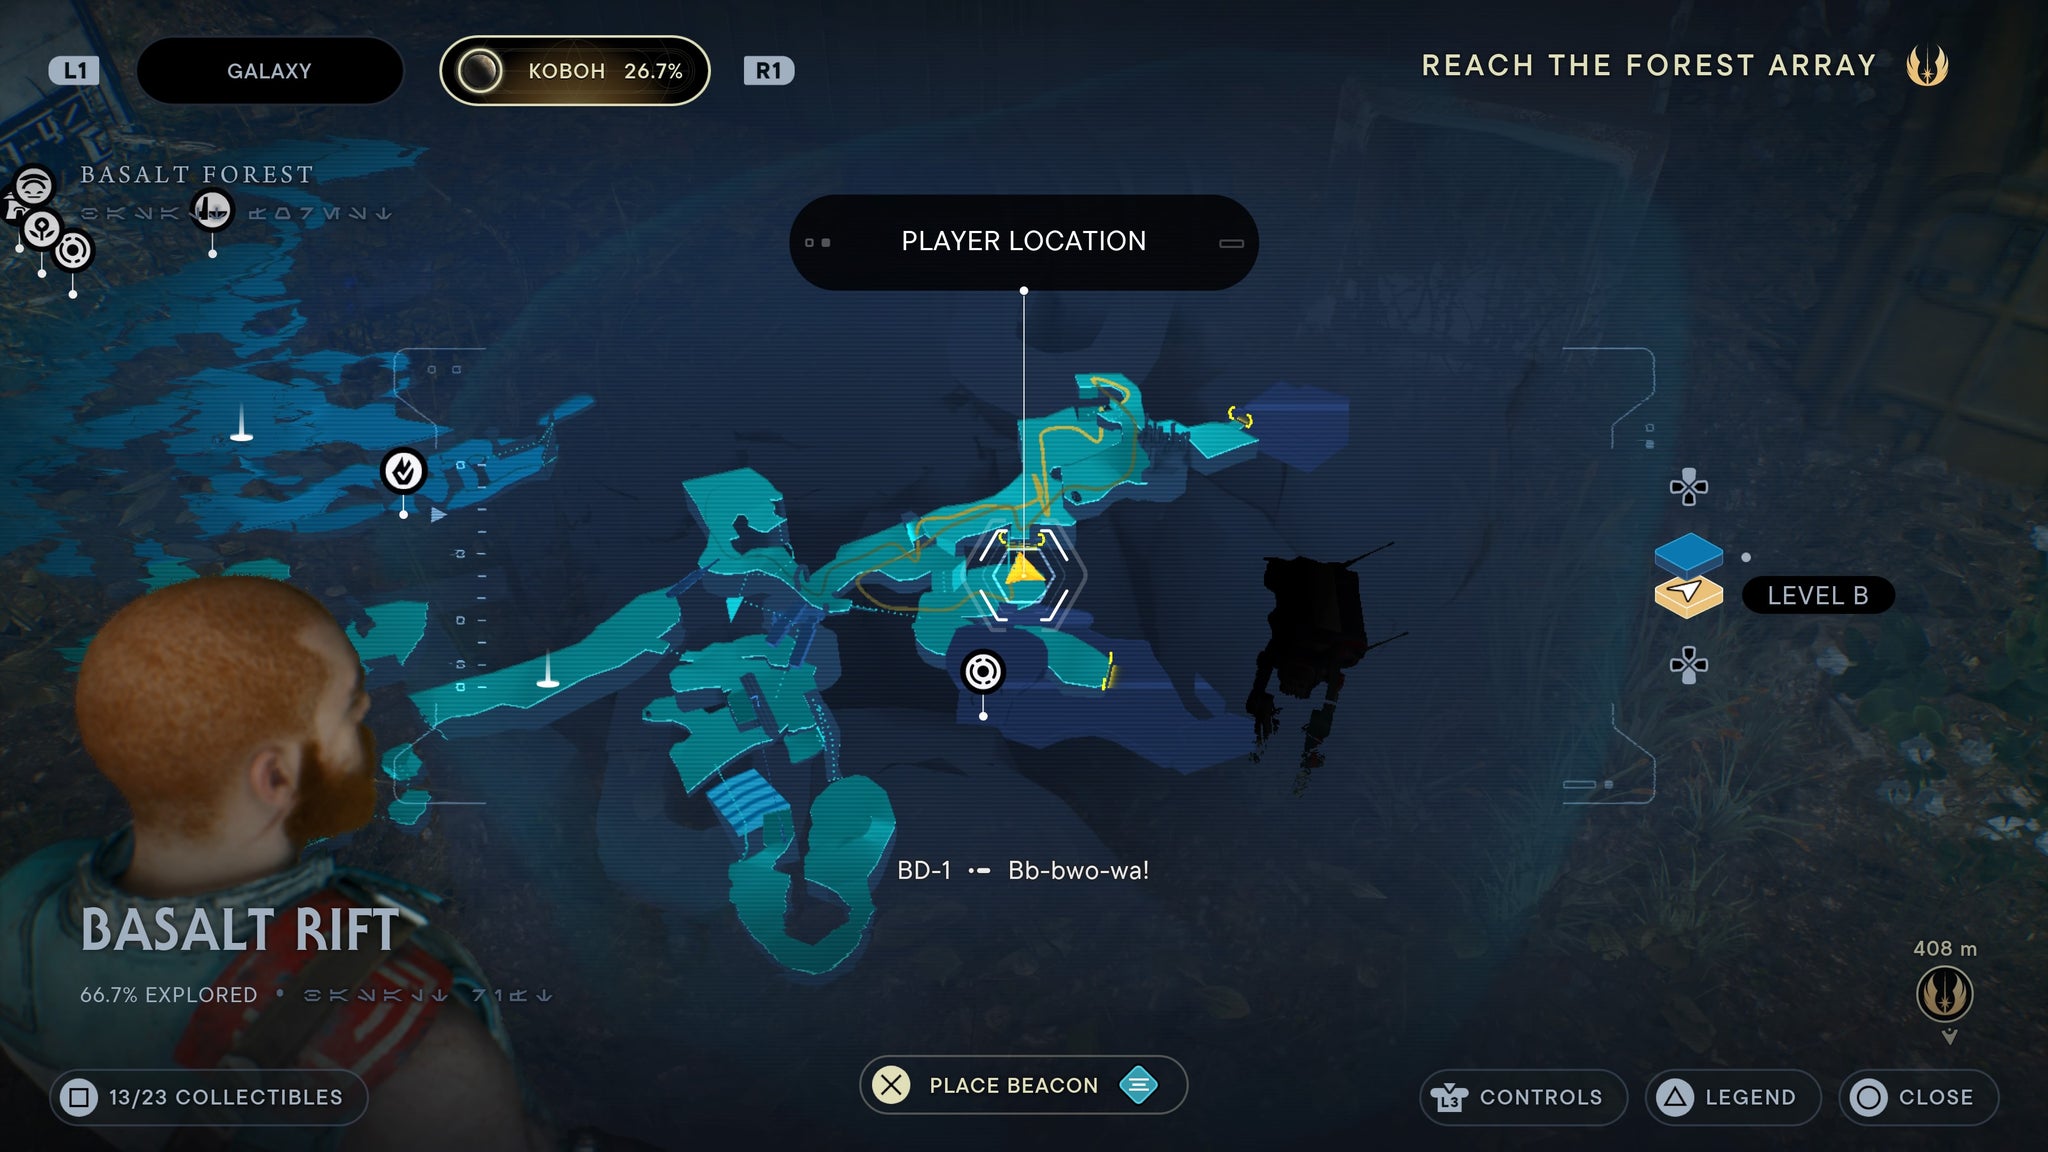
Right next to a locked chest.
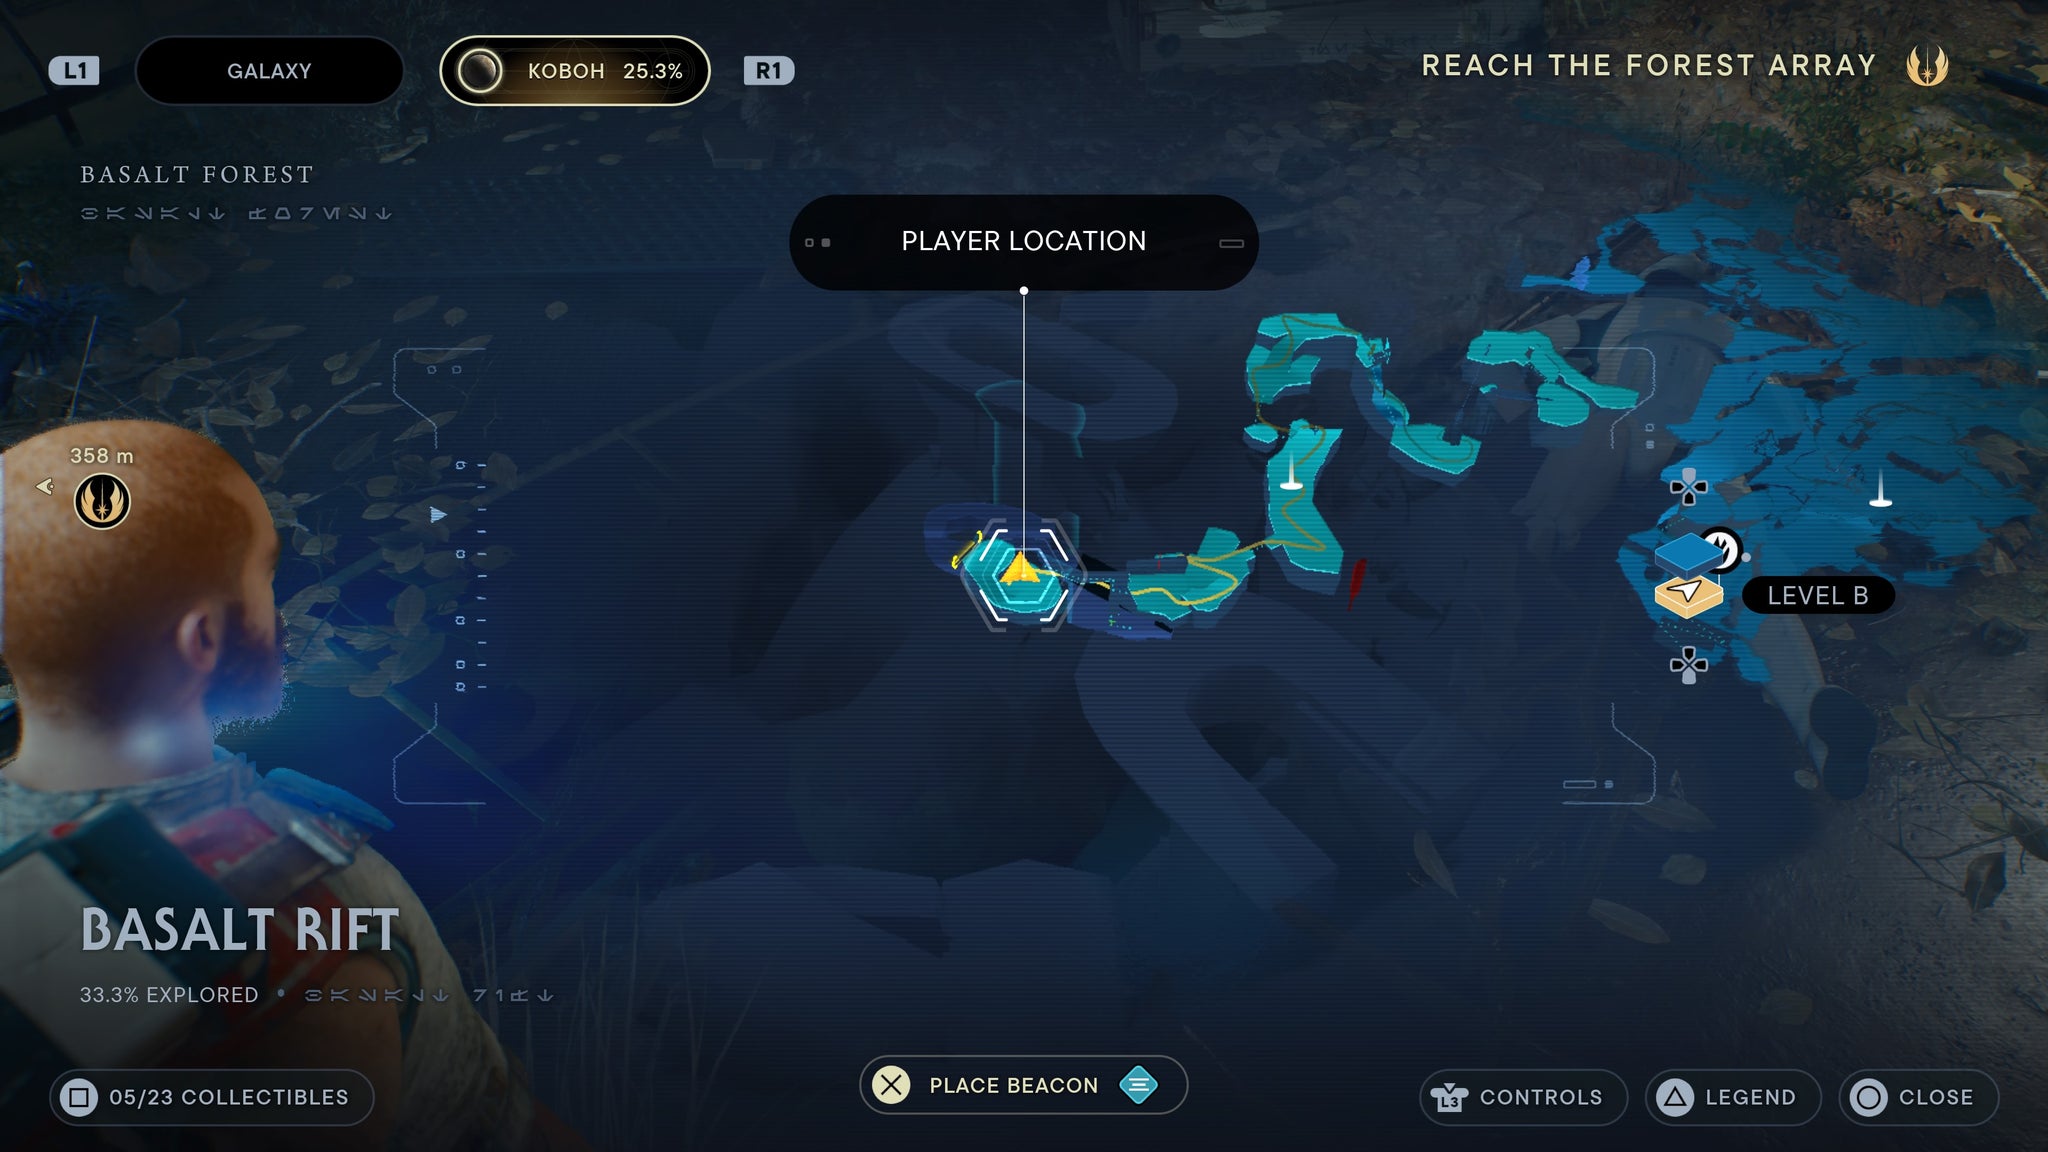
From the Basalt Rift meditation point, cross over the shortcut and down the hill towards the high republic ruins. Once you reach the giant bilemaw at the bottom of the path, drop down to the left side of the path. There, you’ll be able to scan a pool near a waterfall.
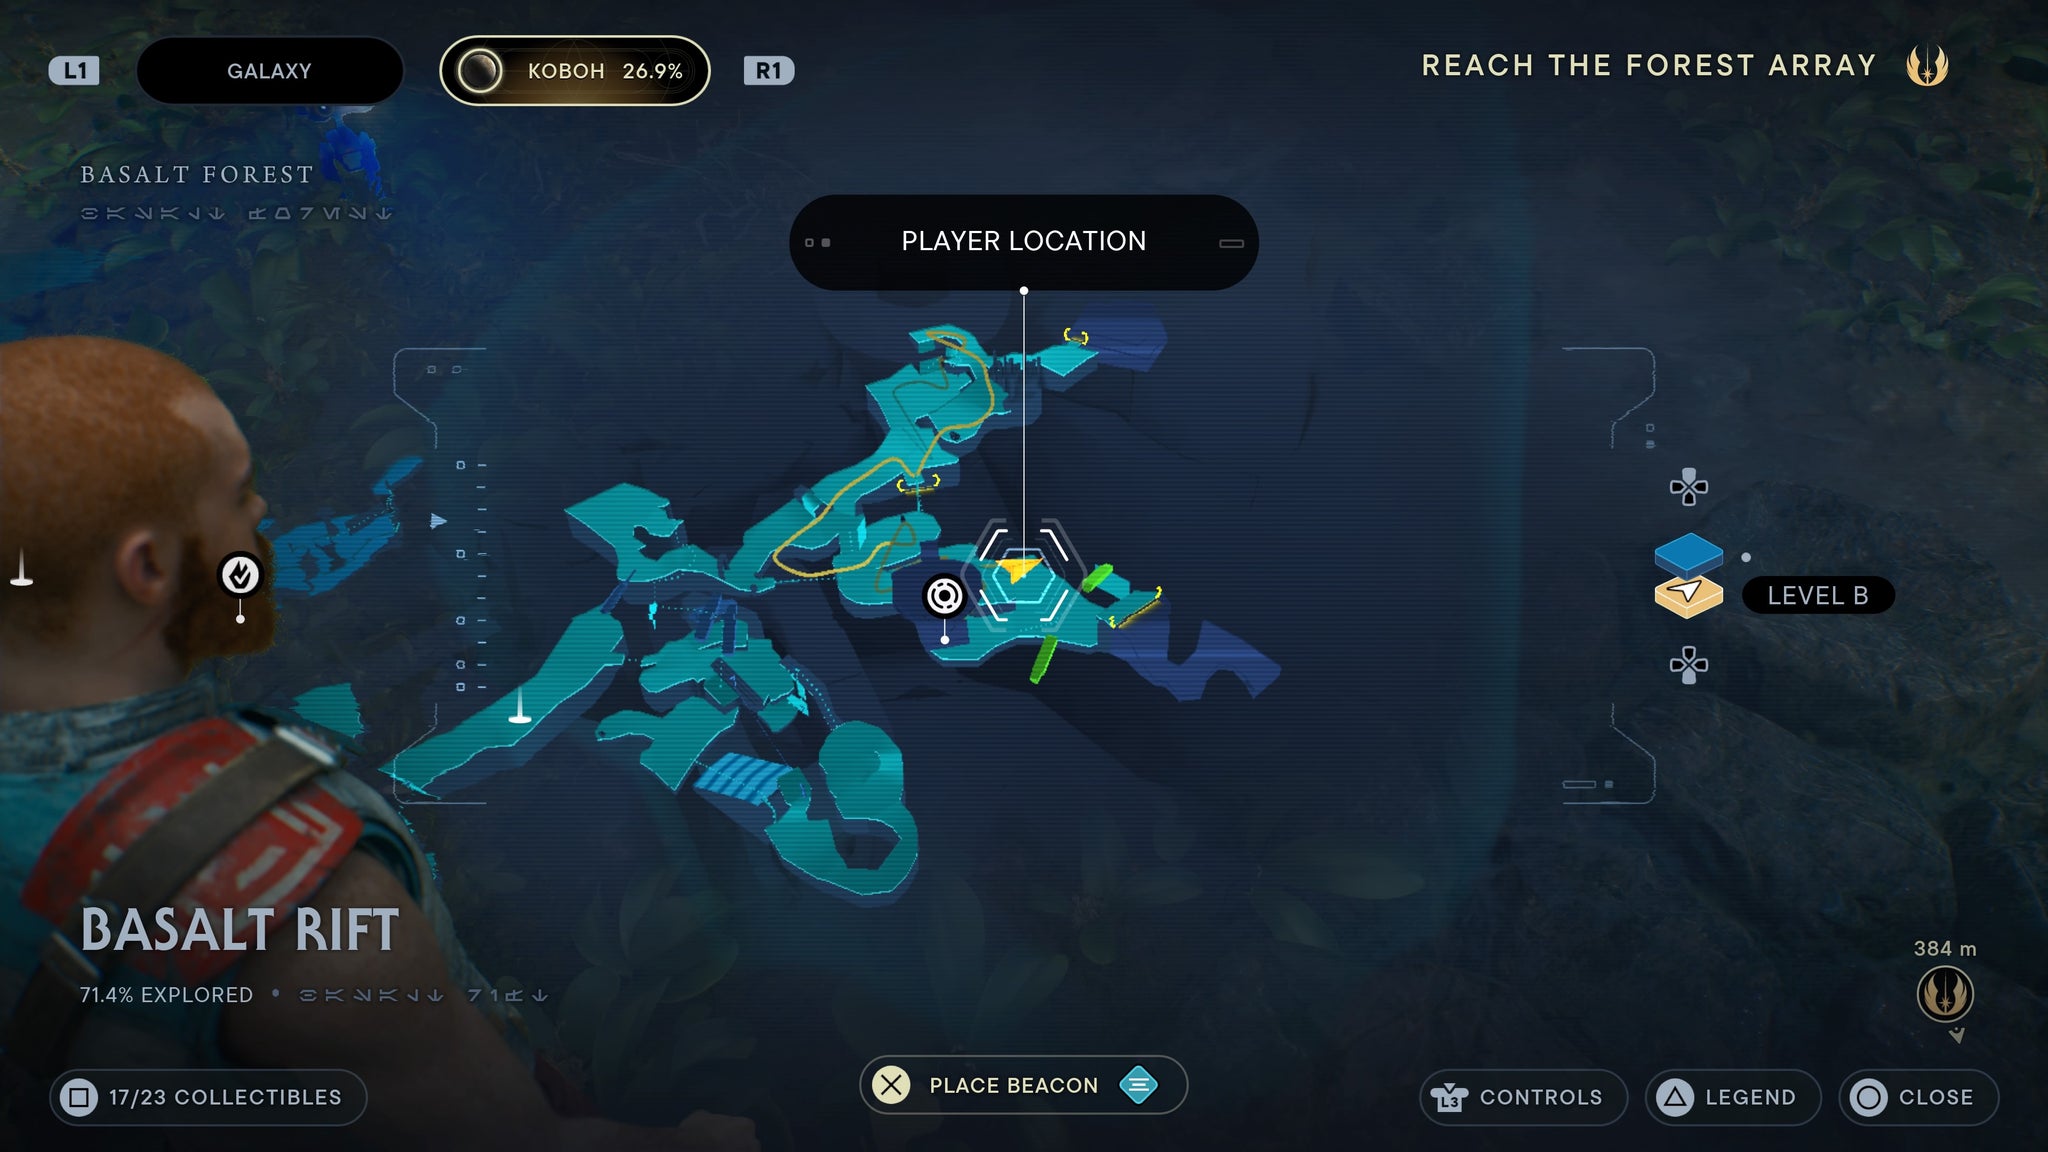
Scan the small pool on the ground!
Make you way past the bilemaw via the rock pillars and use the vines to climb across the pit of spores. Once you land at the opposite platform, you’ll be able to scan the dust directly ahead of you.
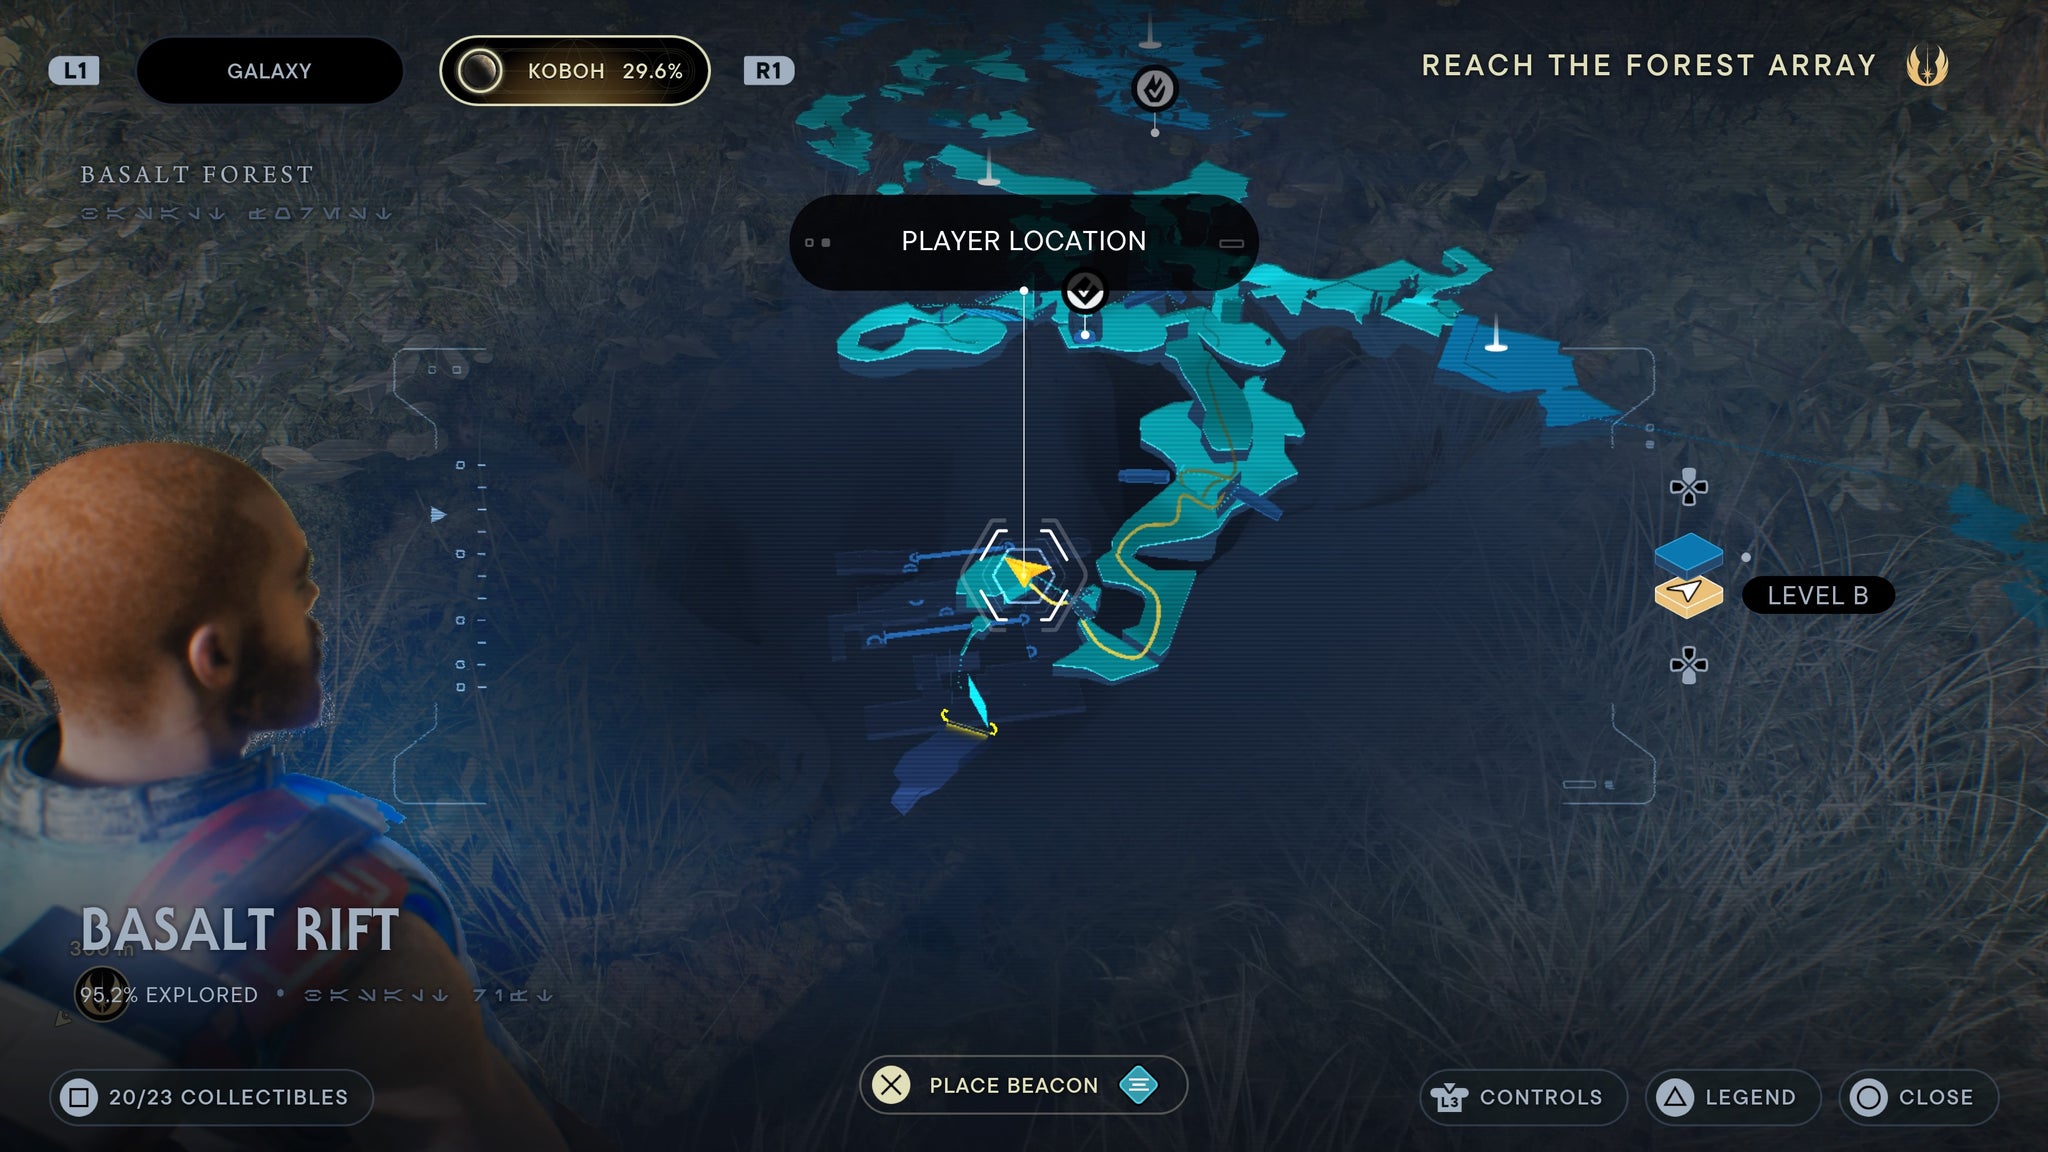
Don’t get too close!
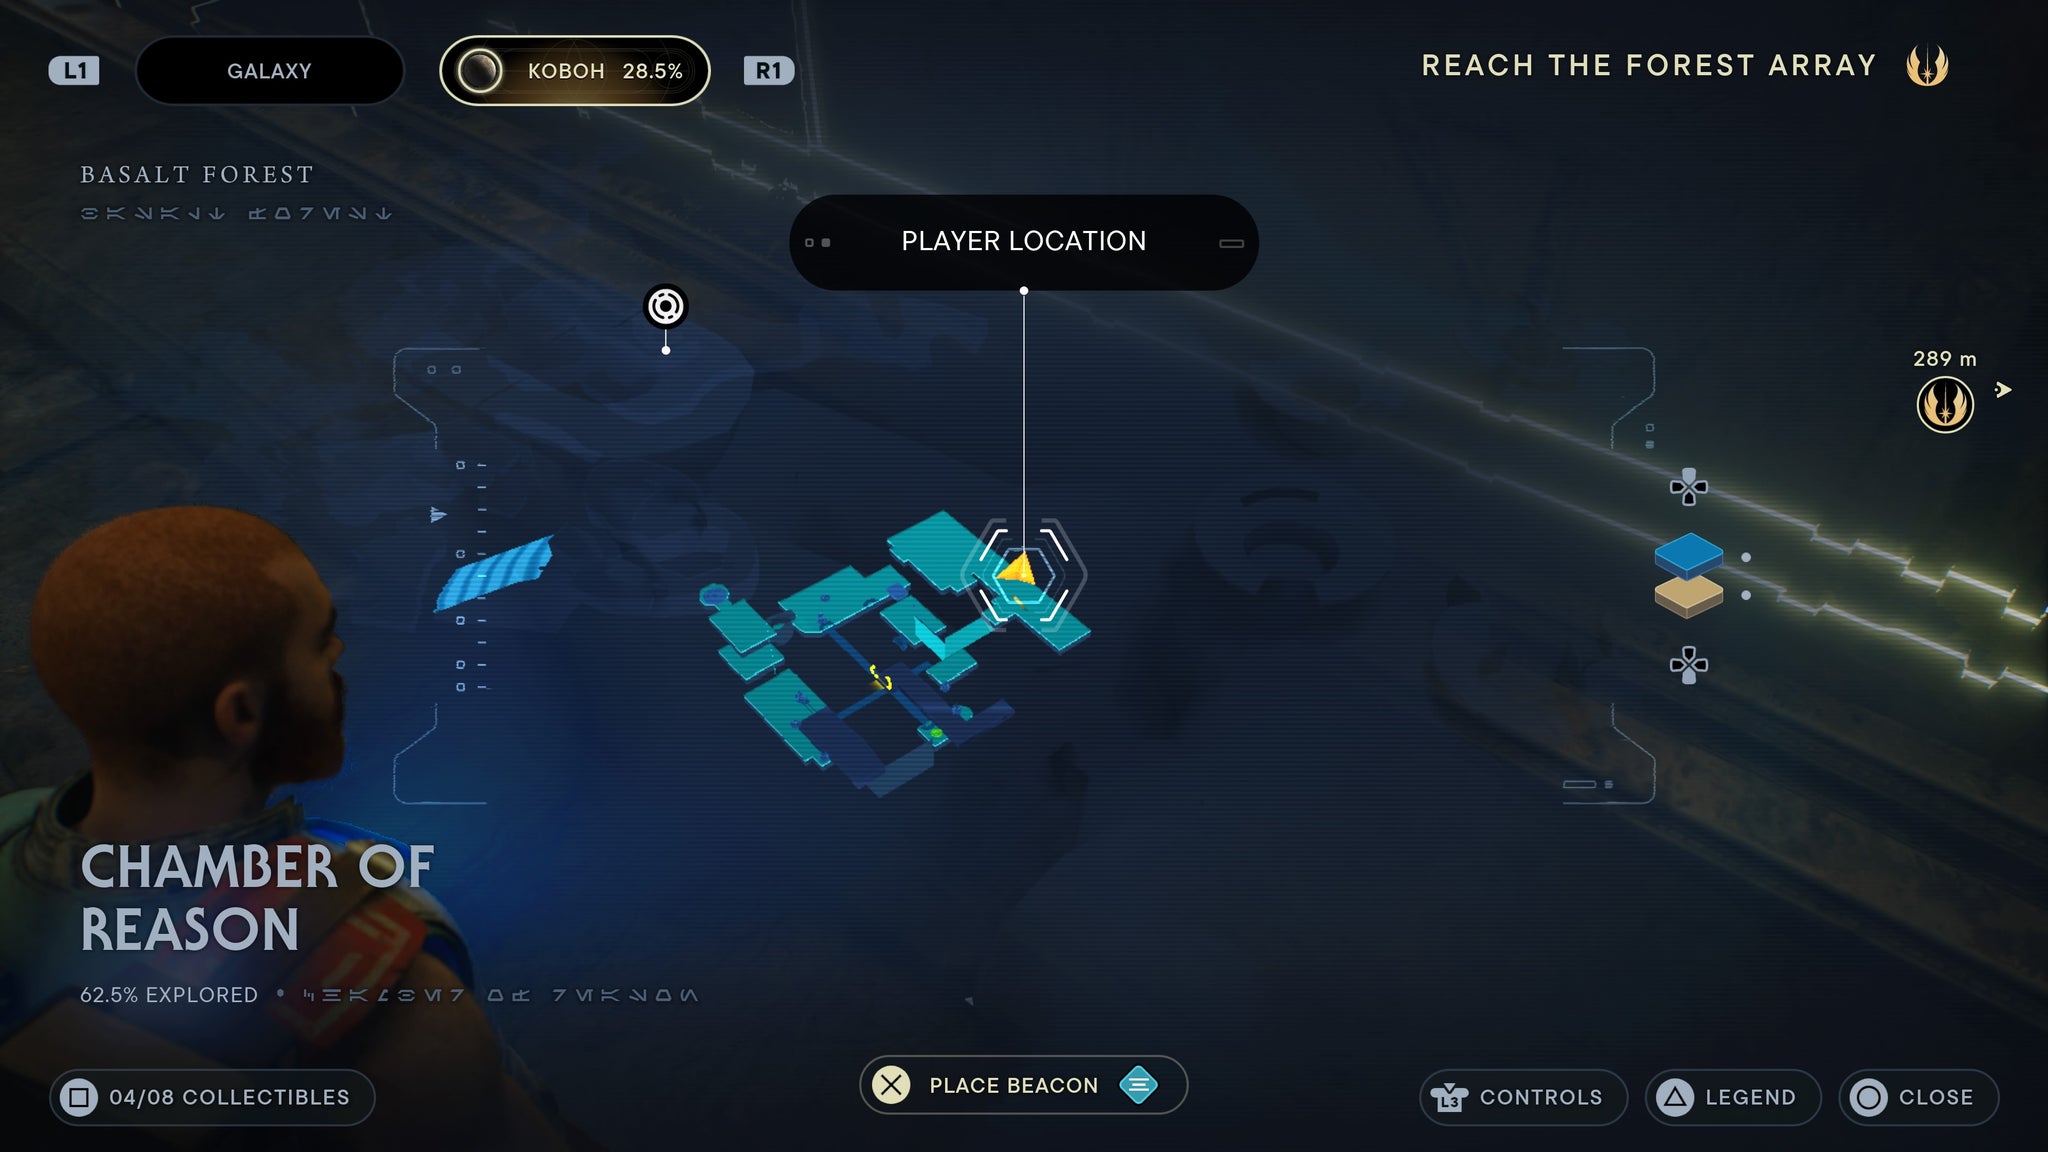
Chamber of Reason
As you descend down the rope into the chamber, turn around and jump to the platform behind you. Turn right and squeeze through the gap. Once through, turn left and a force echo will be waiting.
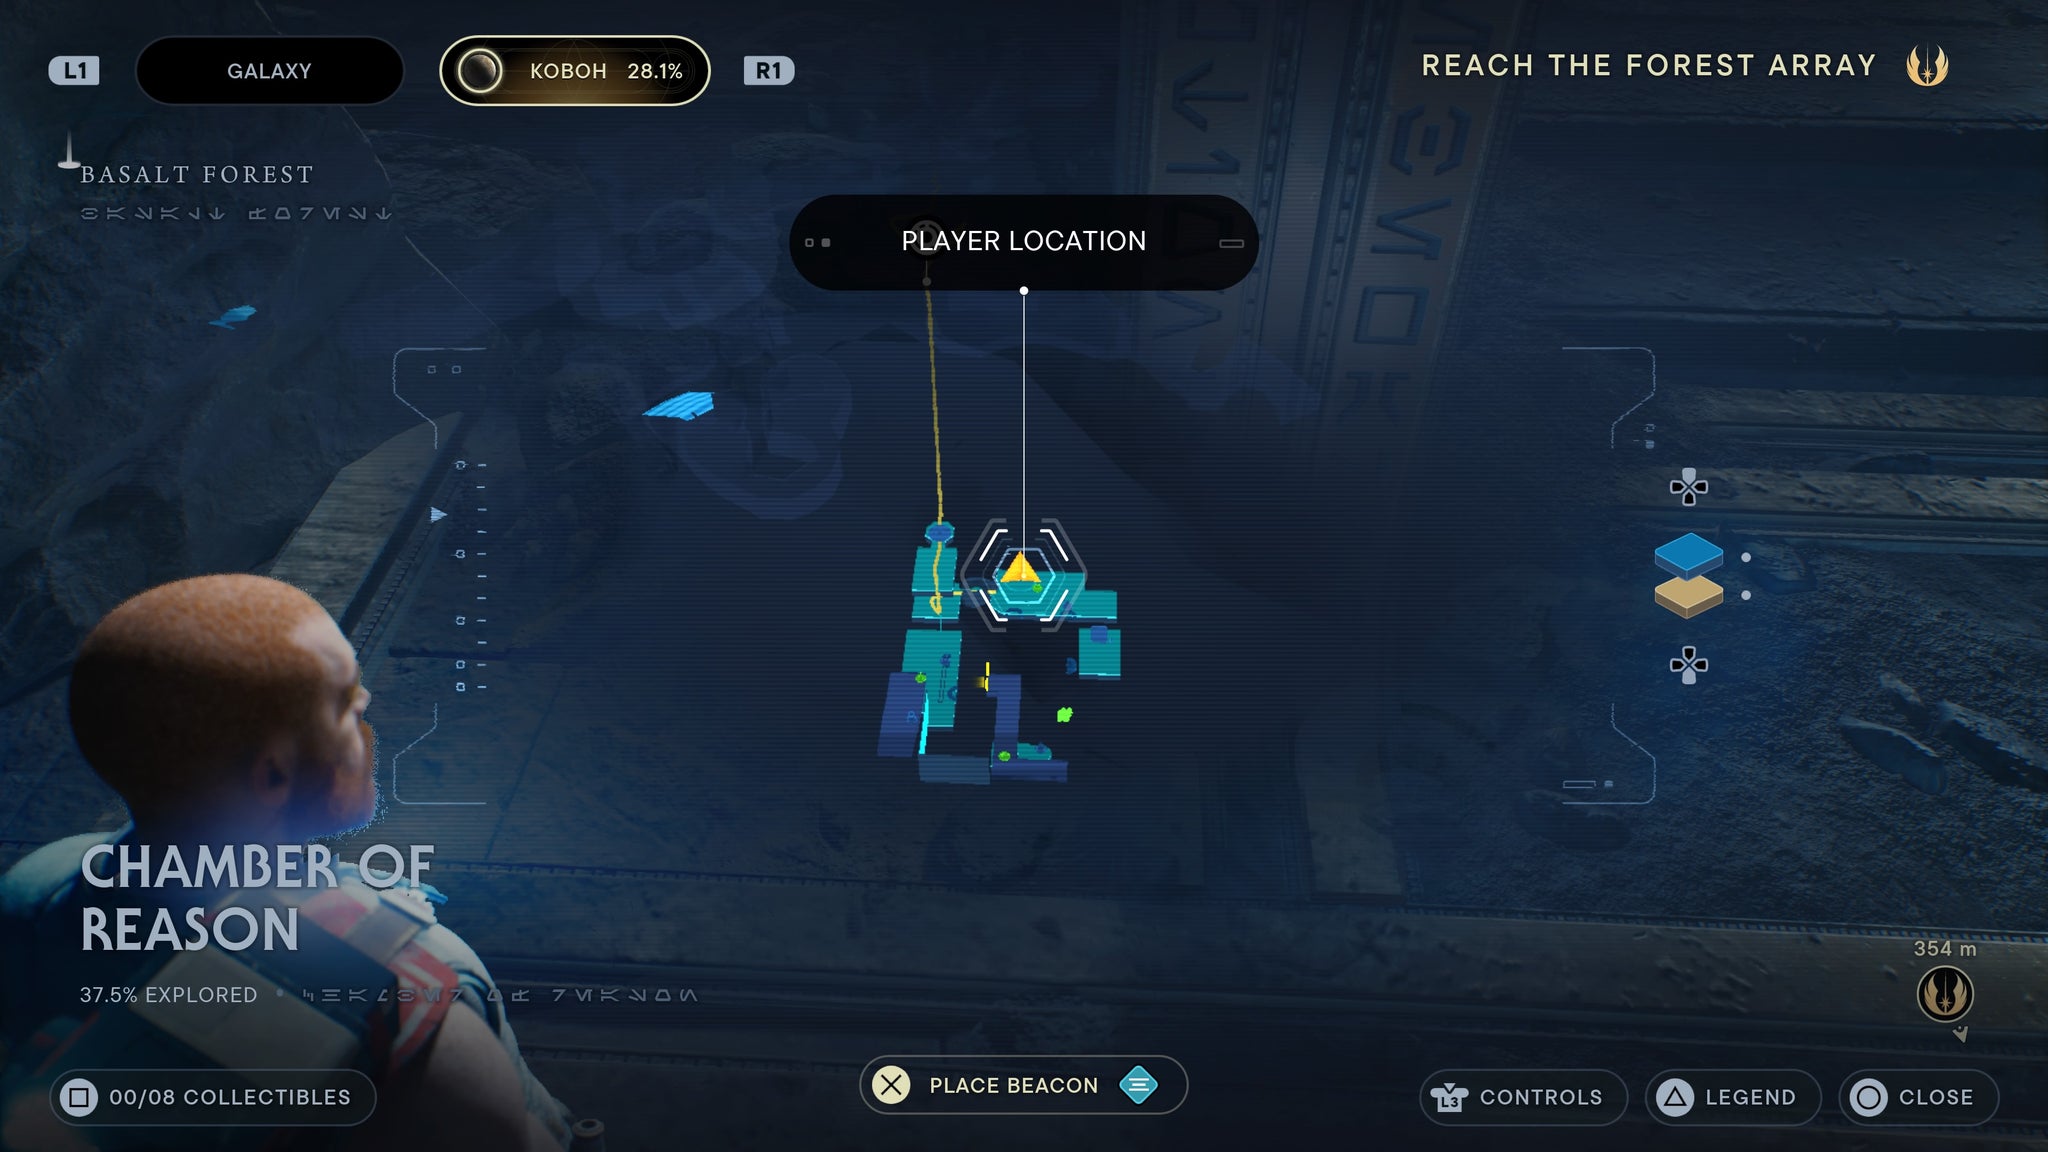
Right by the wall.
As you descend down the rope into the chamber, turn around and jump to the platform behind you. Turn right and squeeze through the gap. Once through, run forward and take the lift down to the platform below. Once there, look left for a force echo.
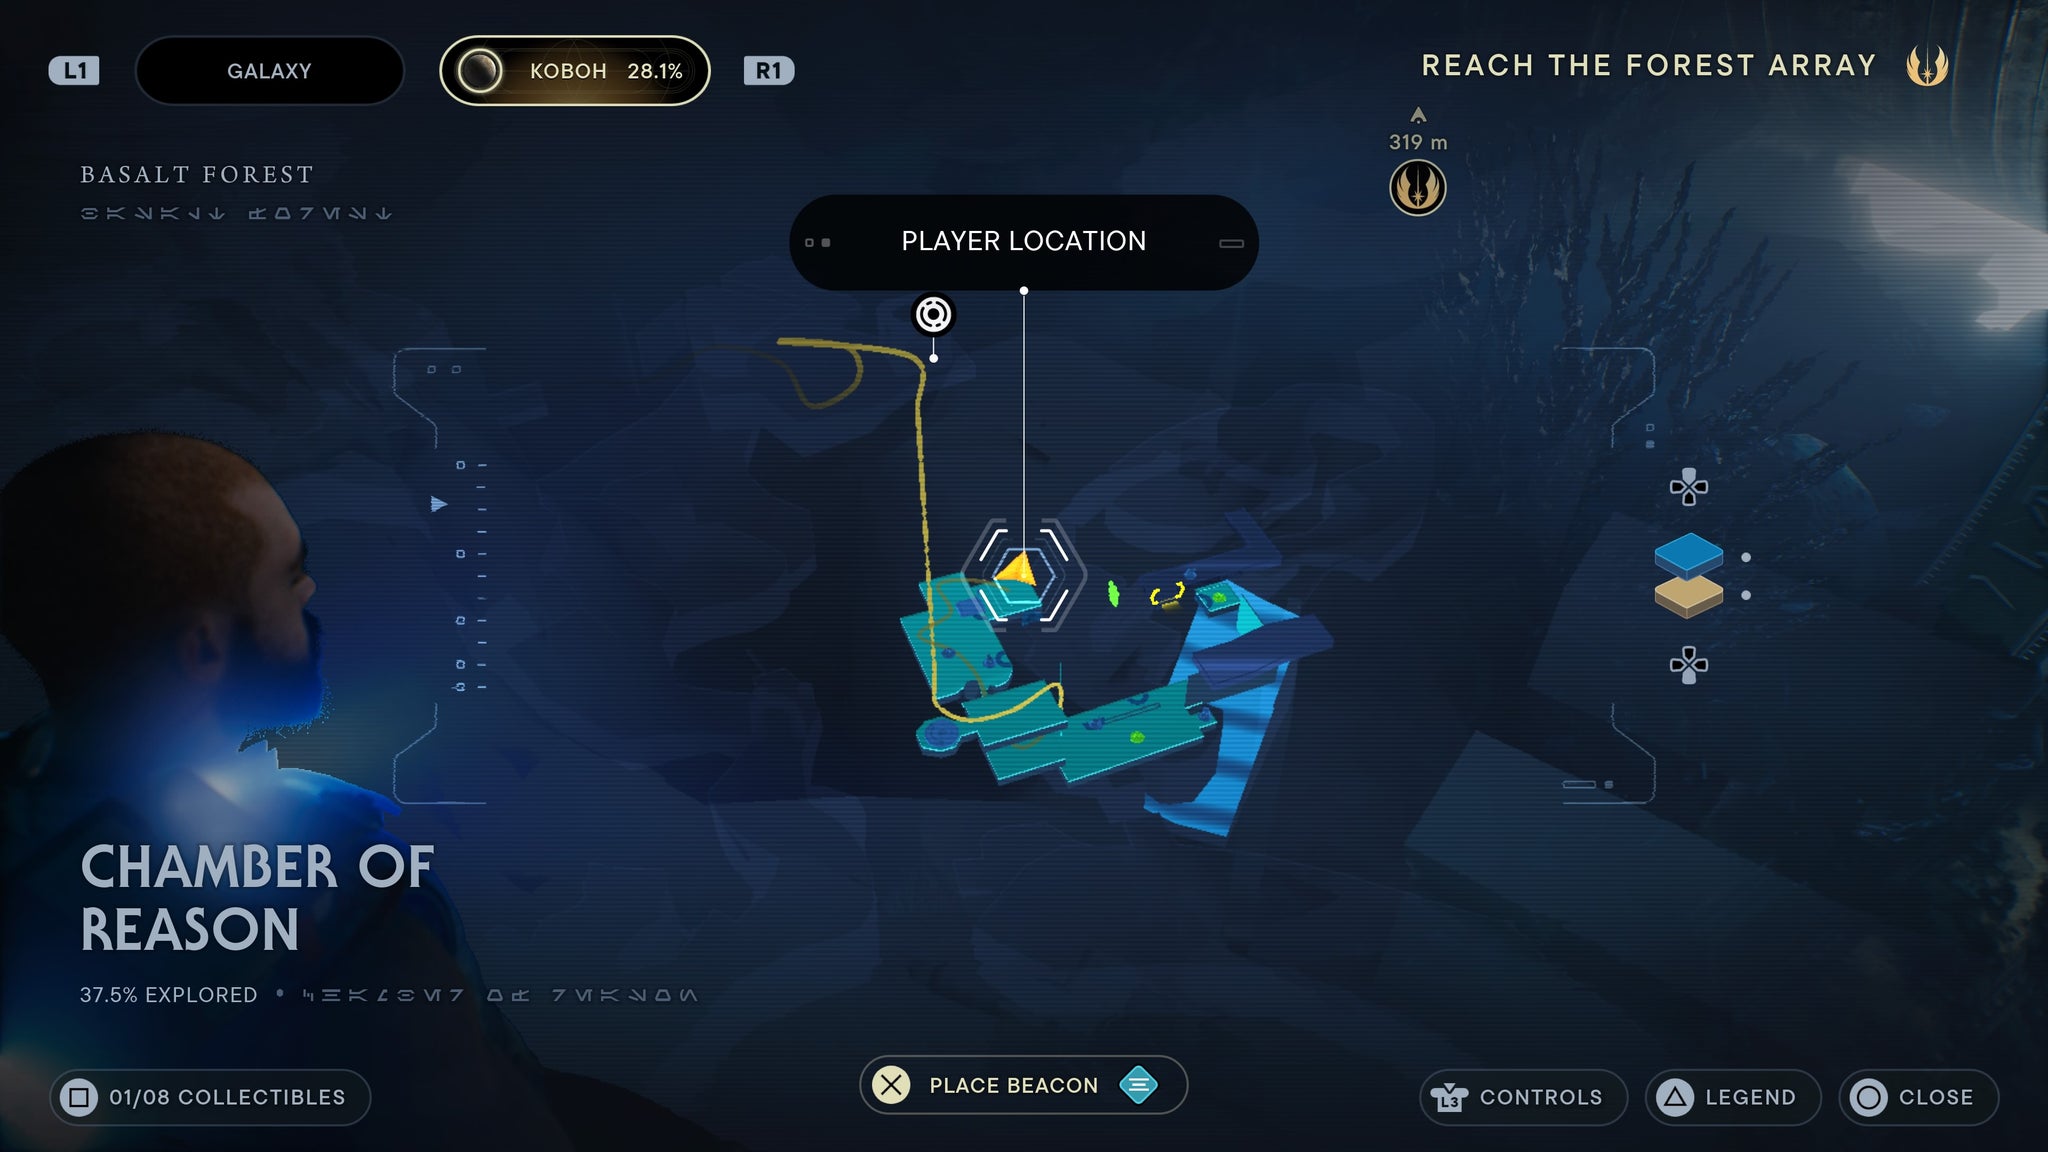
Take the elavator down.
Using orbs to create bridges across the chamber, make your way to the far end of the chamber from the entrance. Once there, leap over to the isolated platform, then wall run up to the next level. Once a level higher, turn right and you’ll find a force echo waiting against a wall.
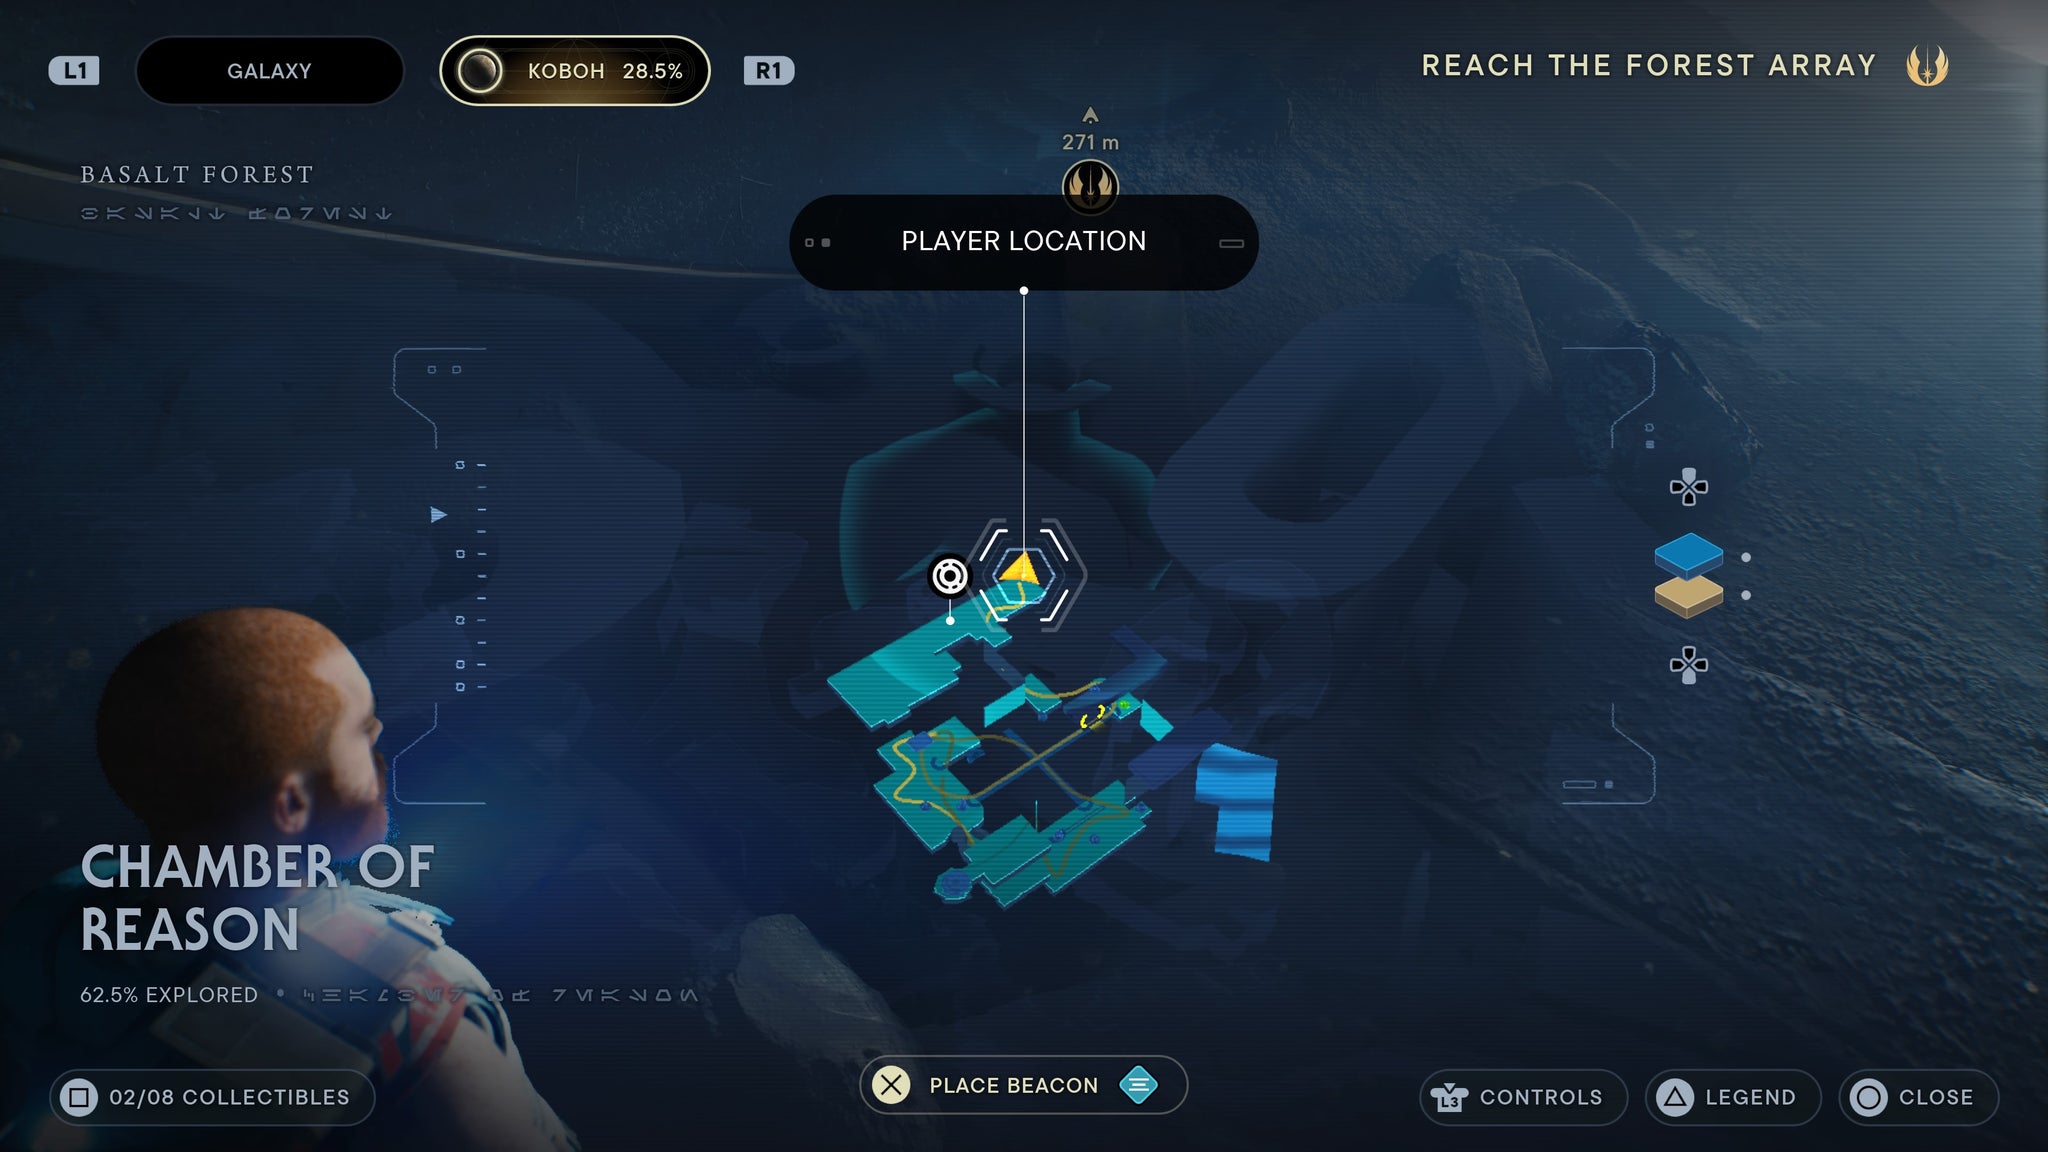
The first echo on the second floor.
Using orbs to create bridges across the chamber, make your way to the far end of the chamber from the entrance. Once there, leap over to the isolated platform, then wall run up to the next level. Once a level higher, turn right and walk to the end of the room. From there, drop down to the echo below!
Or, you could create a bridge as intended.
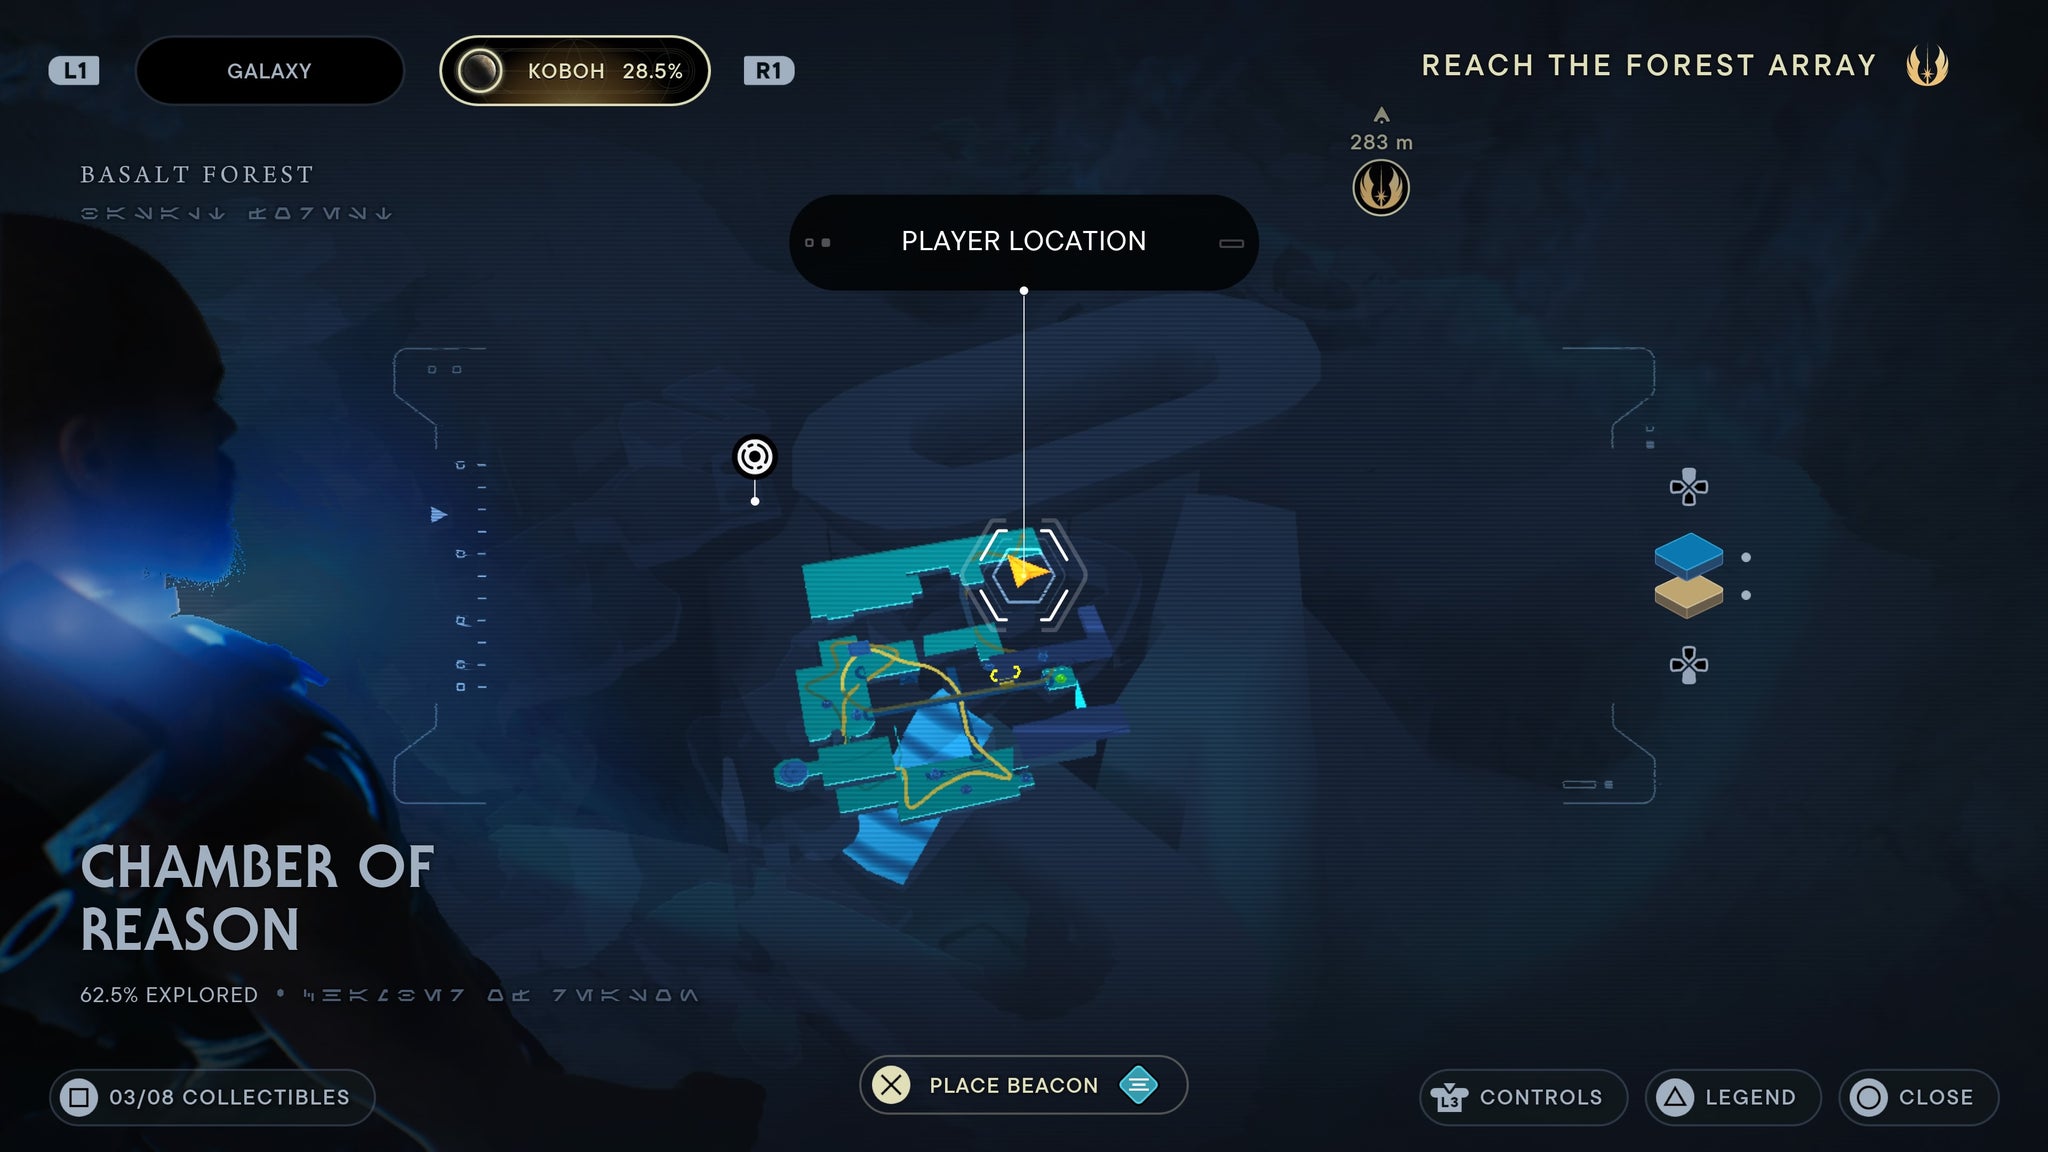
Using orbs to create bridges across the chamber, make your way to the far end of the chamber from the entrance. Once there, leap over to the isolated platform, then wall run up to the next level. Once a level higher, turn left and walk to the yellow wall in front of you. There will be a painting you can scan on it.
Keep your eyes on the right yellow wall!
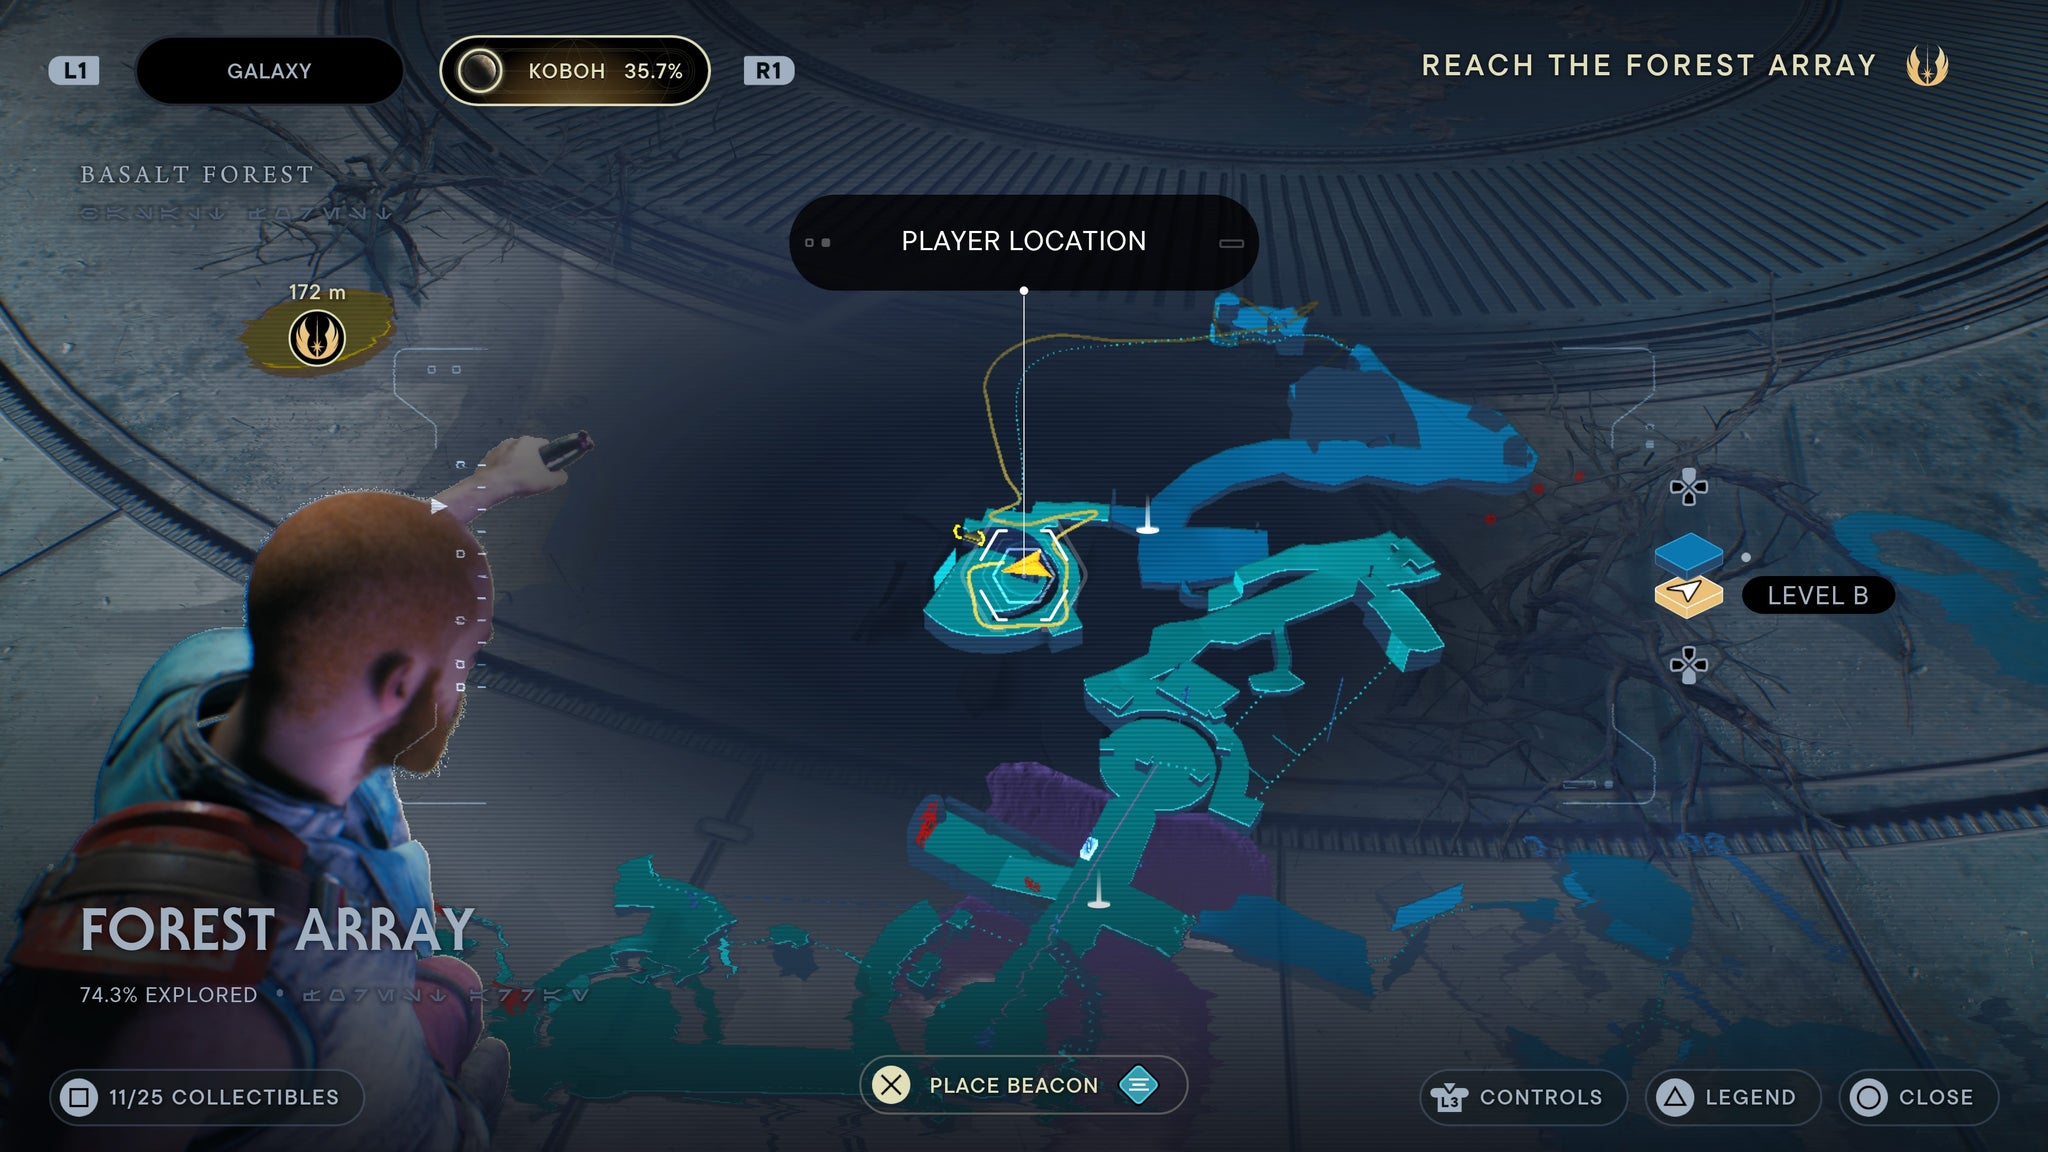
Forest Array
From the meditation point, walk left and scan the black barrier.
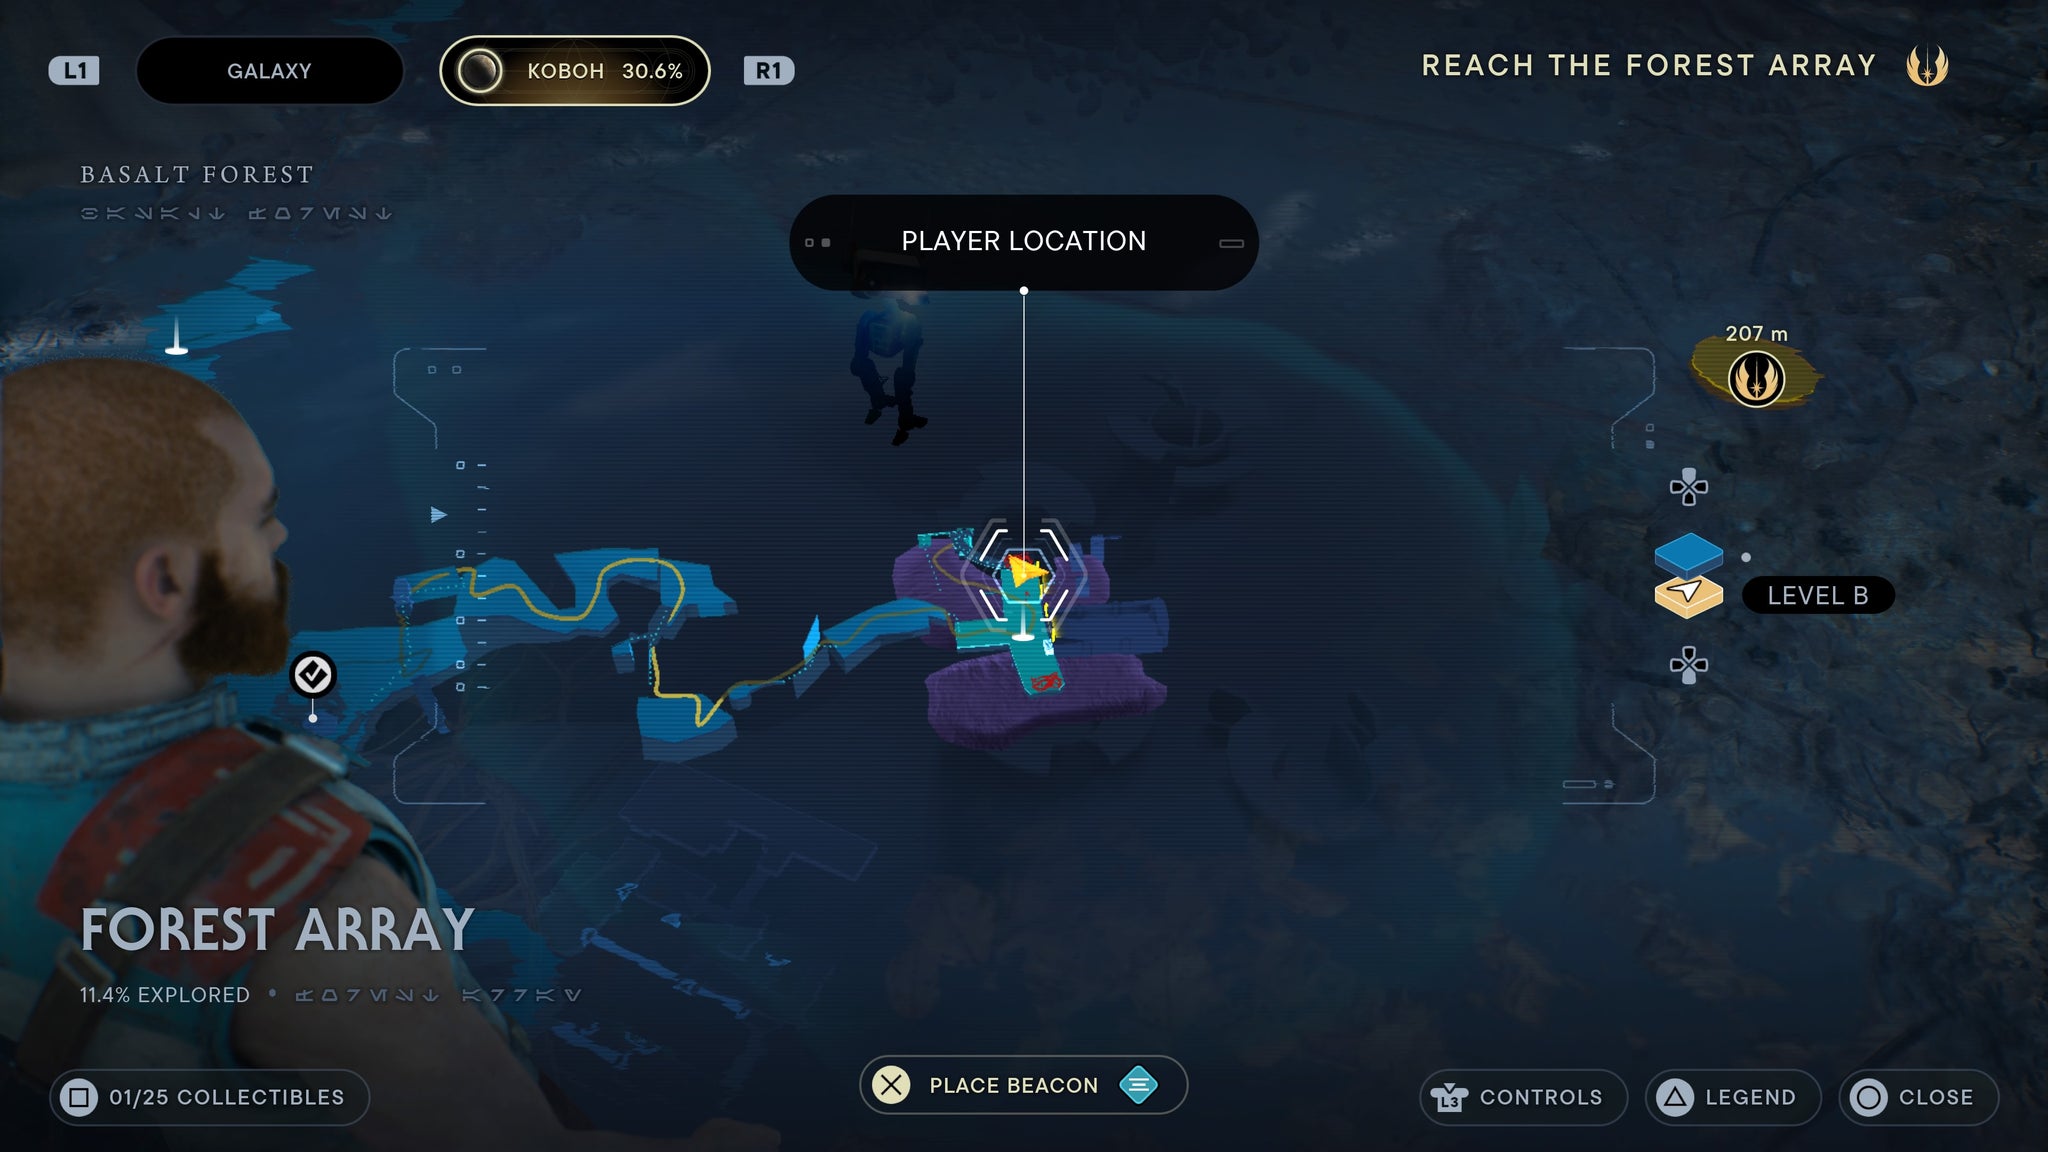
As soon as you get tot he Forst Array, scan this!
Take the zipline shortcut near the meditation point and climb under the giant bird. It will knock you down to the ground, where you can climb up a nearby grate. Once up, walk forward and look right for a scannable.
I the bird is already gone, you can climb up from the ground.
Take the zipline shortcut near the meditation point and climb under the giant bird. It will knock you down to the ground, where you can climb up a nearby grate. Once up, walk forward and then left. At the end of the walkway, you’ll reach some plant life you can scan.
If you’ve opened the door shortcut, this is a quick trip.
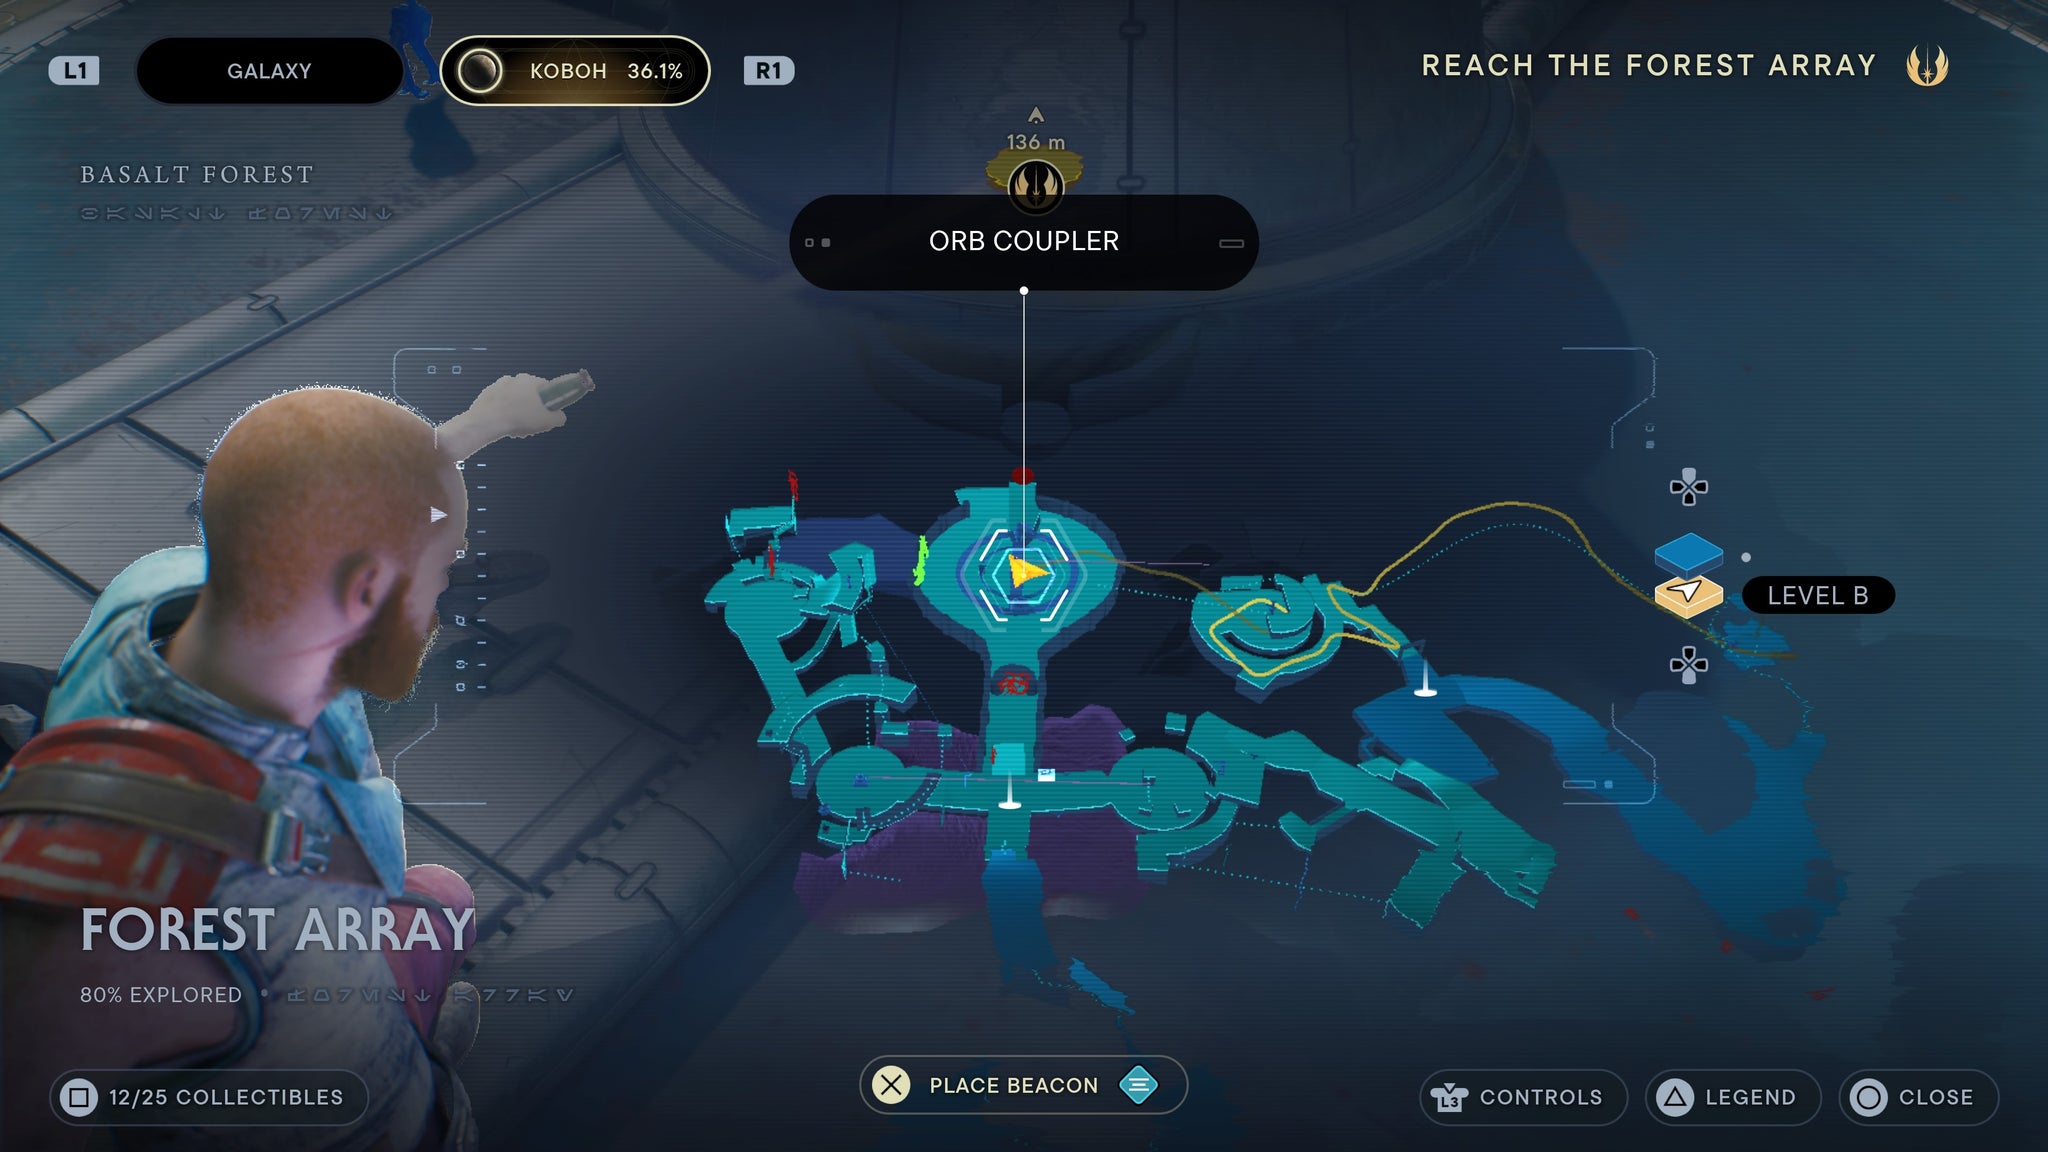
Take the zipline shortcut and make your way down to the buildings below. From there, walk back towards the meditation point and climb up the nearby circular building. Slide down then scan the object in the centre.
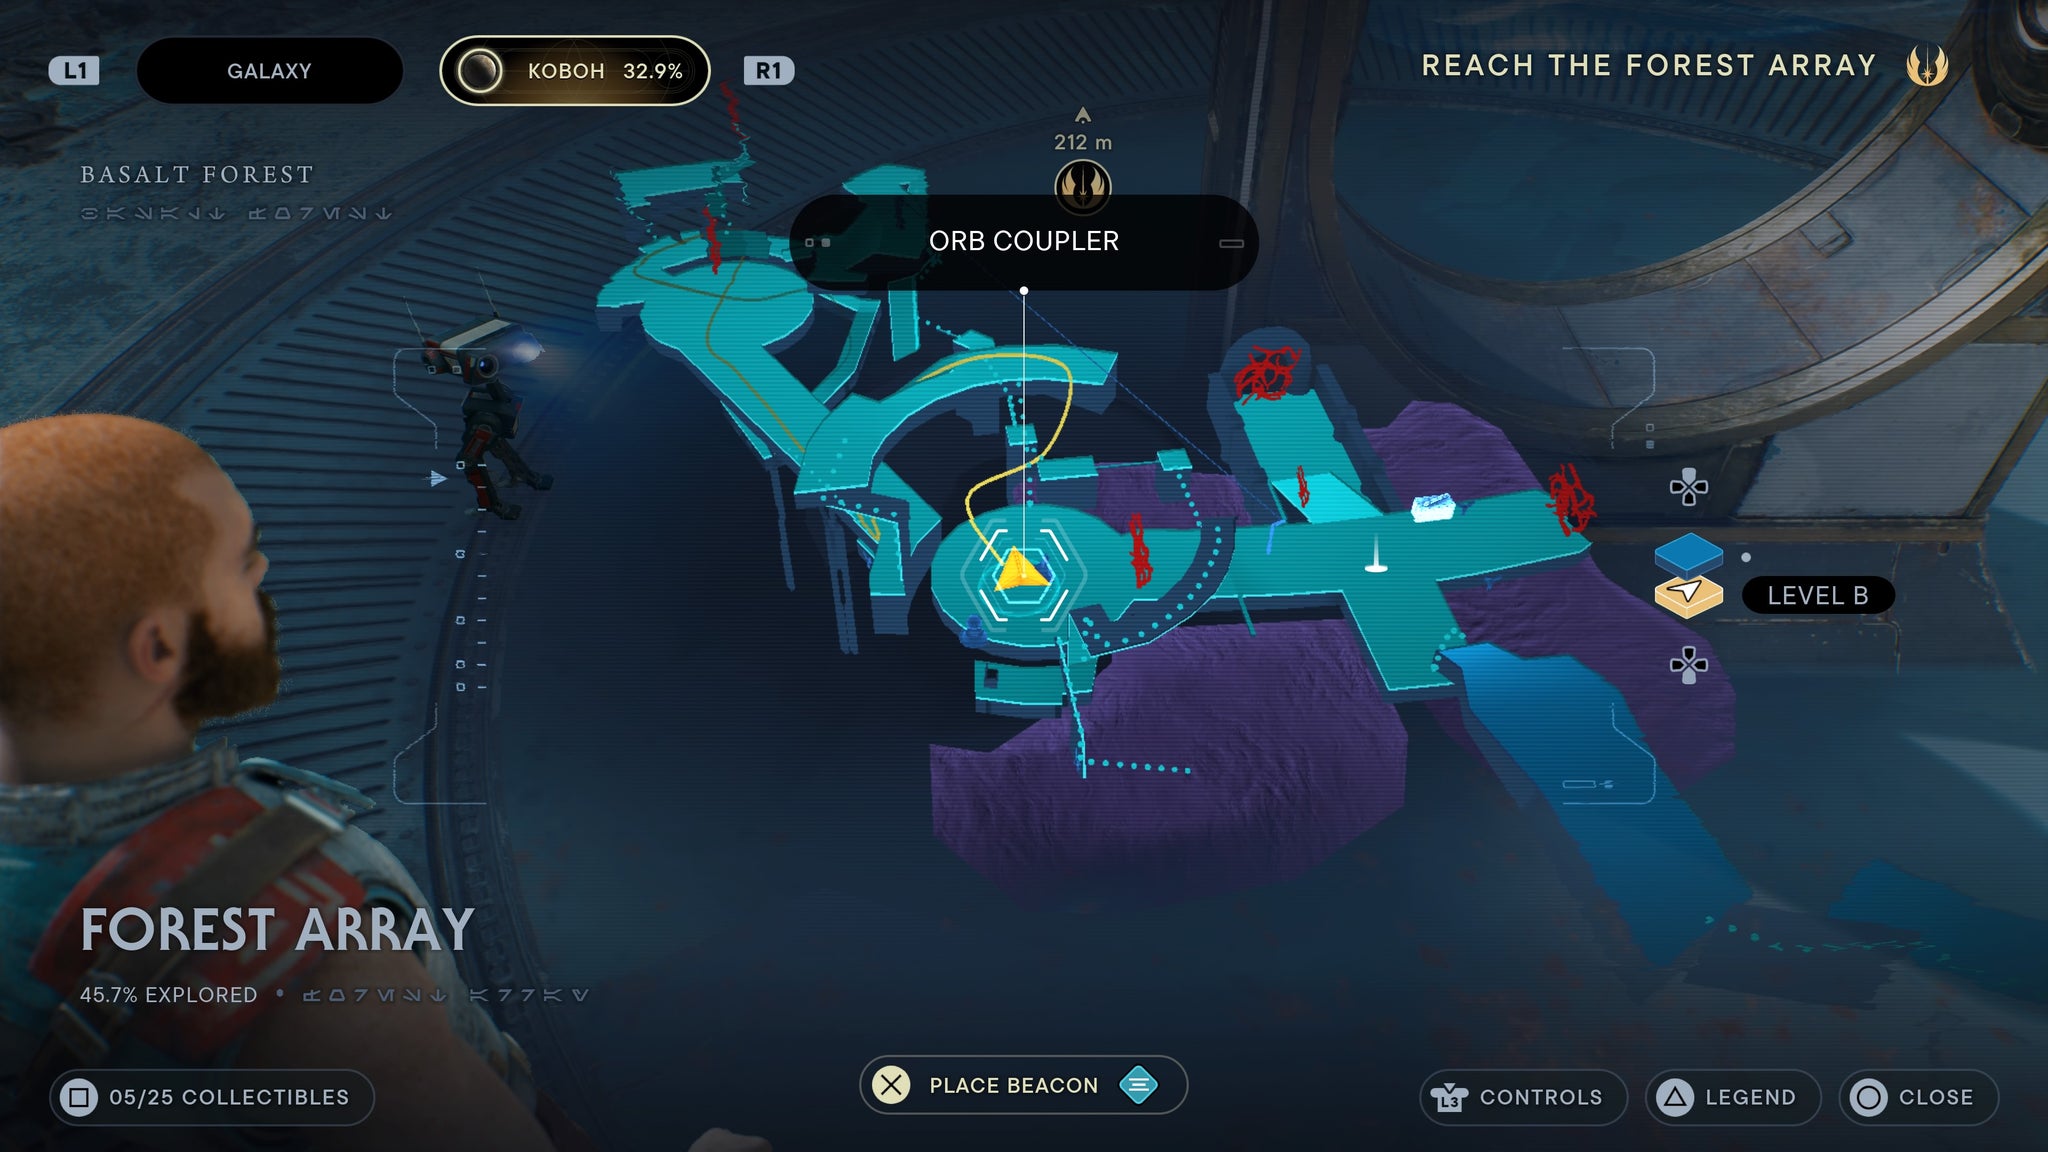
You’ll need this orb later!
Inside the large circular building you enter after your first time Relter glide, you’ll fight several storm troopers. After your fight, scan the shields leaning against a wall on the bottom floor.
Kill the troopers, then scan the shields.
Use the Relter to glide into the circular beam location at the centre of the Forest Array. From there, scan the central beam device.
Another orb shooting out a beam! Very important.
Rehabilitation Wing
Following your fight with Dagan Gera, travel around the outside via a metal beam. On a railing is a force echo.
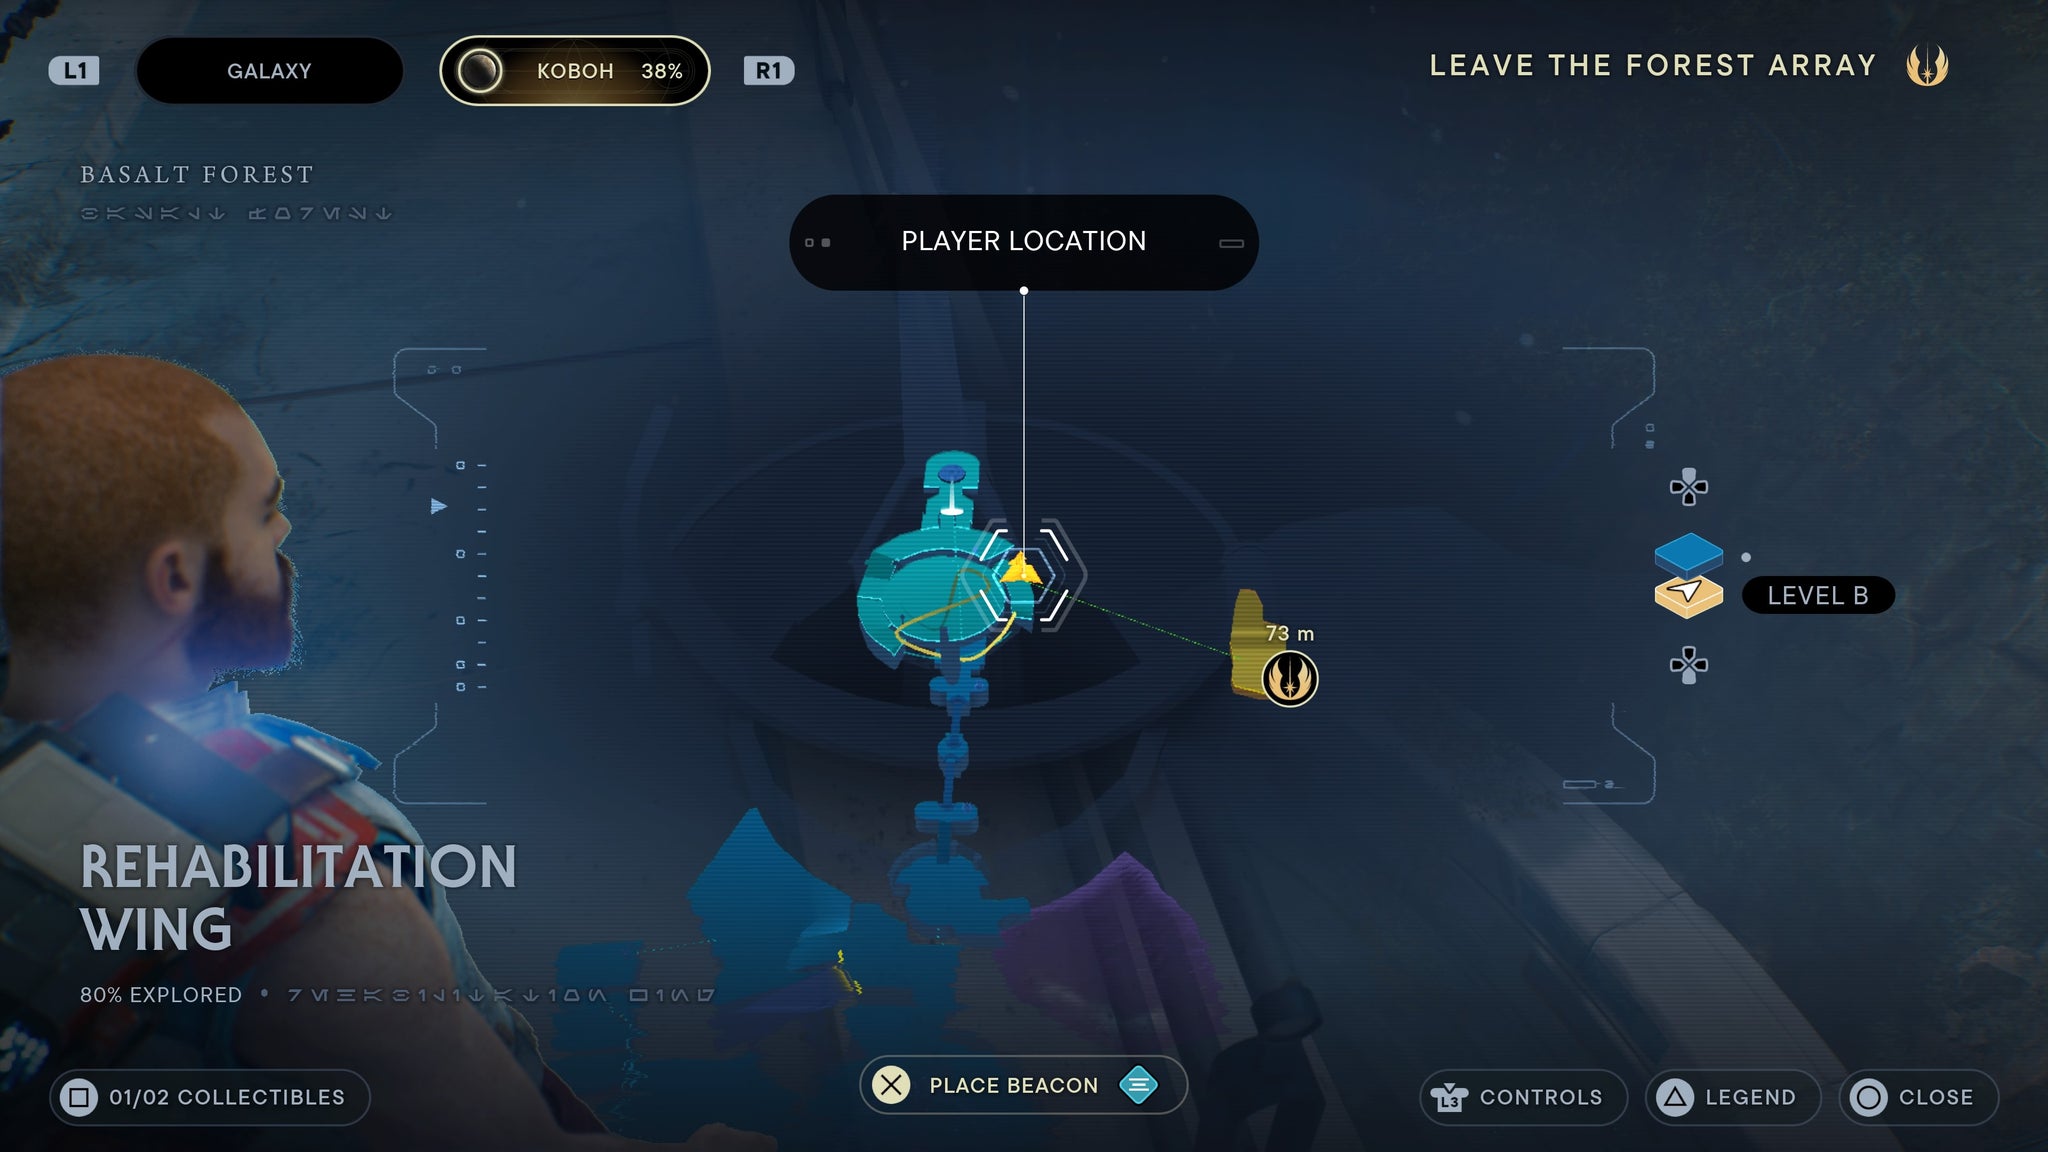
Make sure you get this before you leave the tower!
Nekko Pools
From the meditation point, wall run up the left slope and grab to the vines. Scale the vines and shimmy all the way to the right. Once there, drop and slide down. Once you’re on your feet, look right for a scannable point.
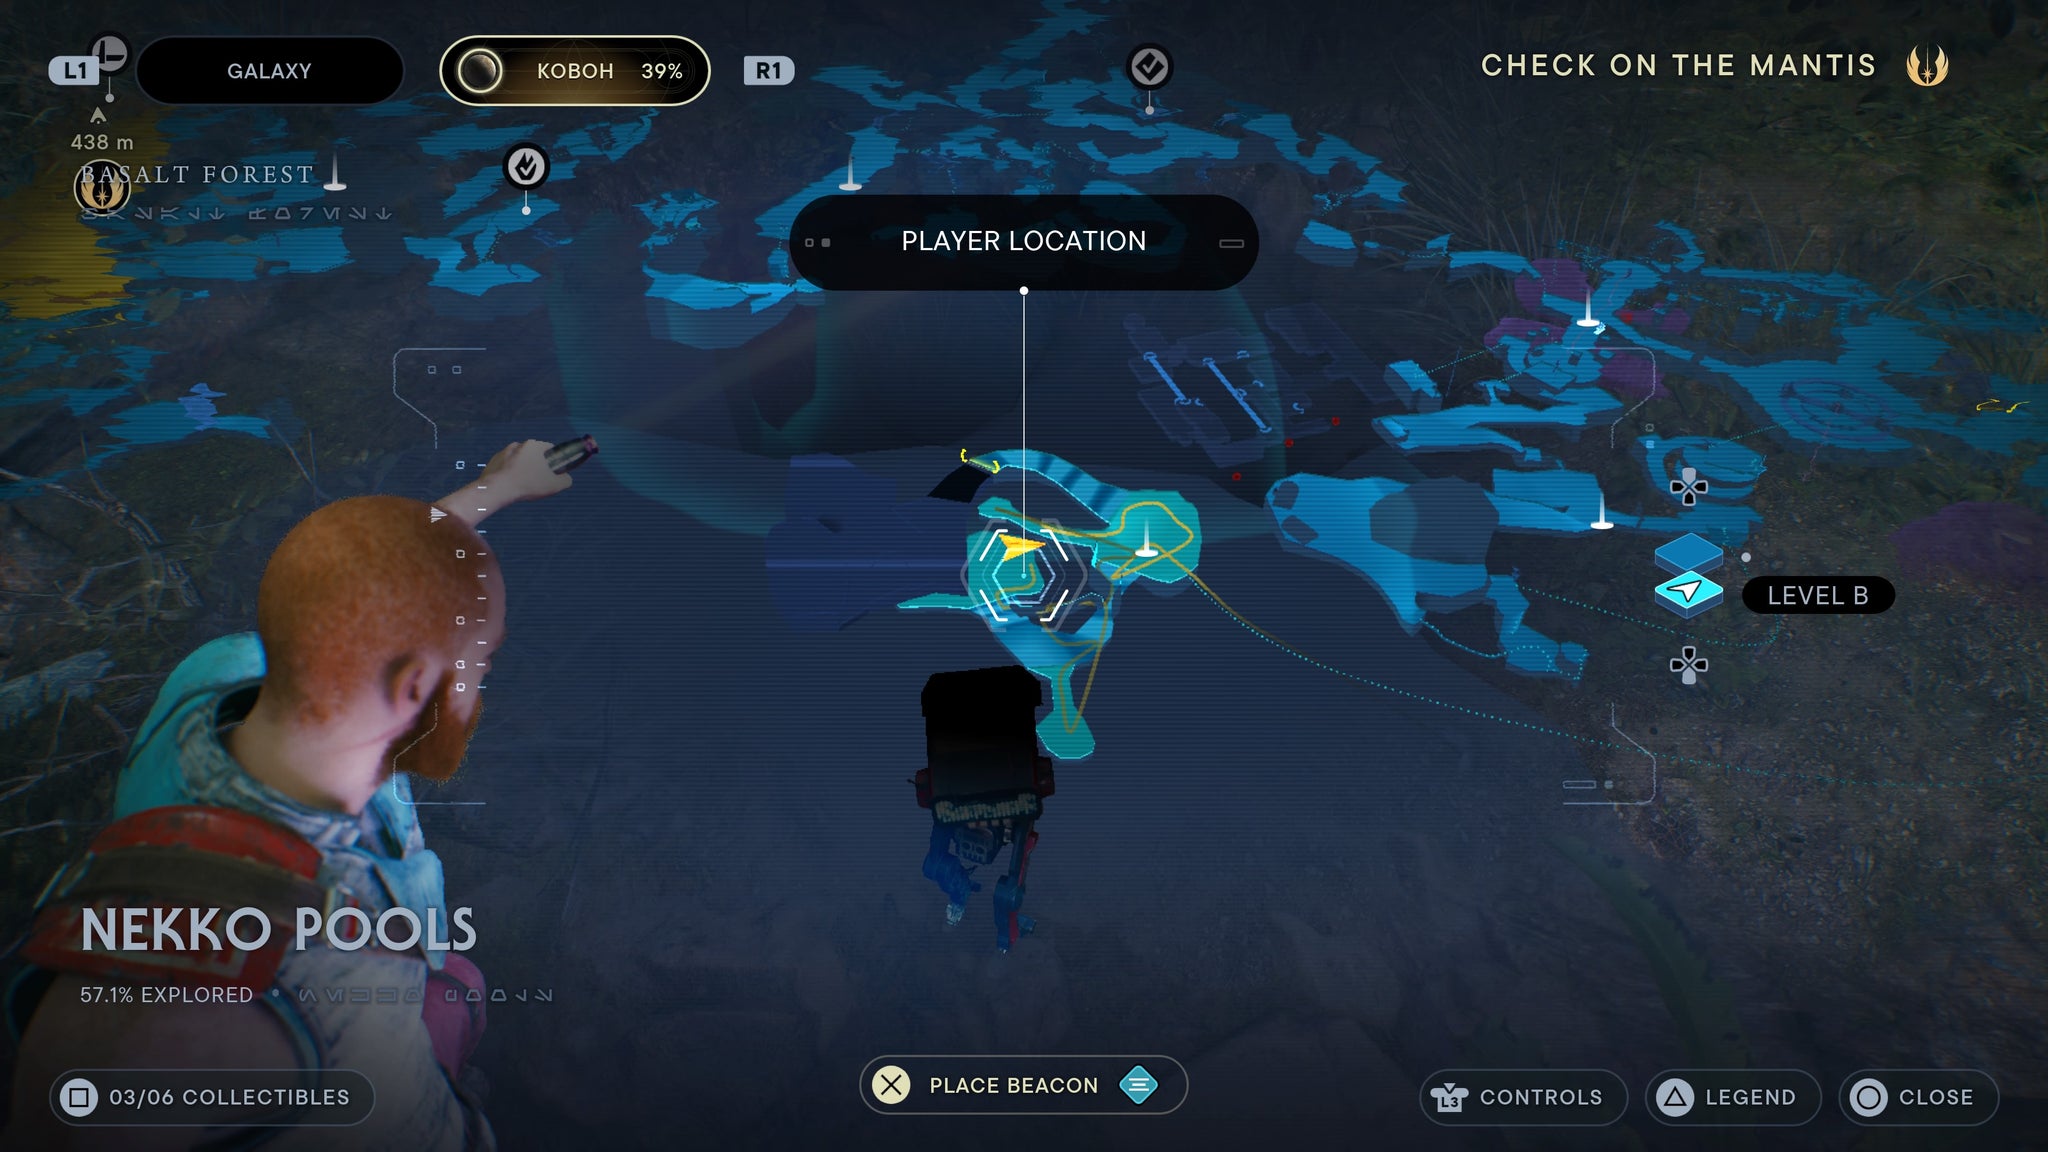
Slide down, then scan the ground.
Bygone Settlement
From the meditation point, wall run to the grates and traverse them until you reach ah higher walkway. Walk straight ahead until you reach a large building you can walk into - inside is your scan.
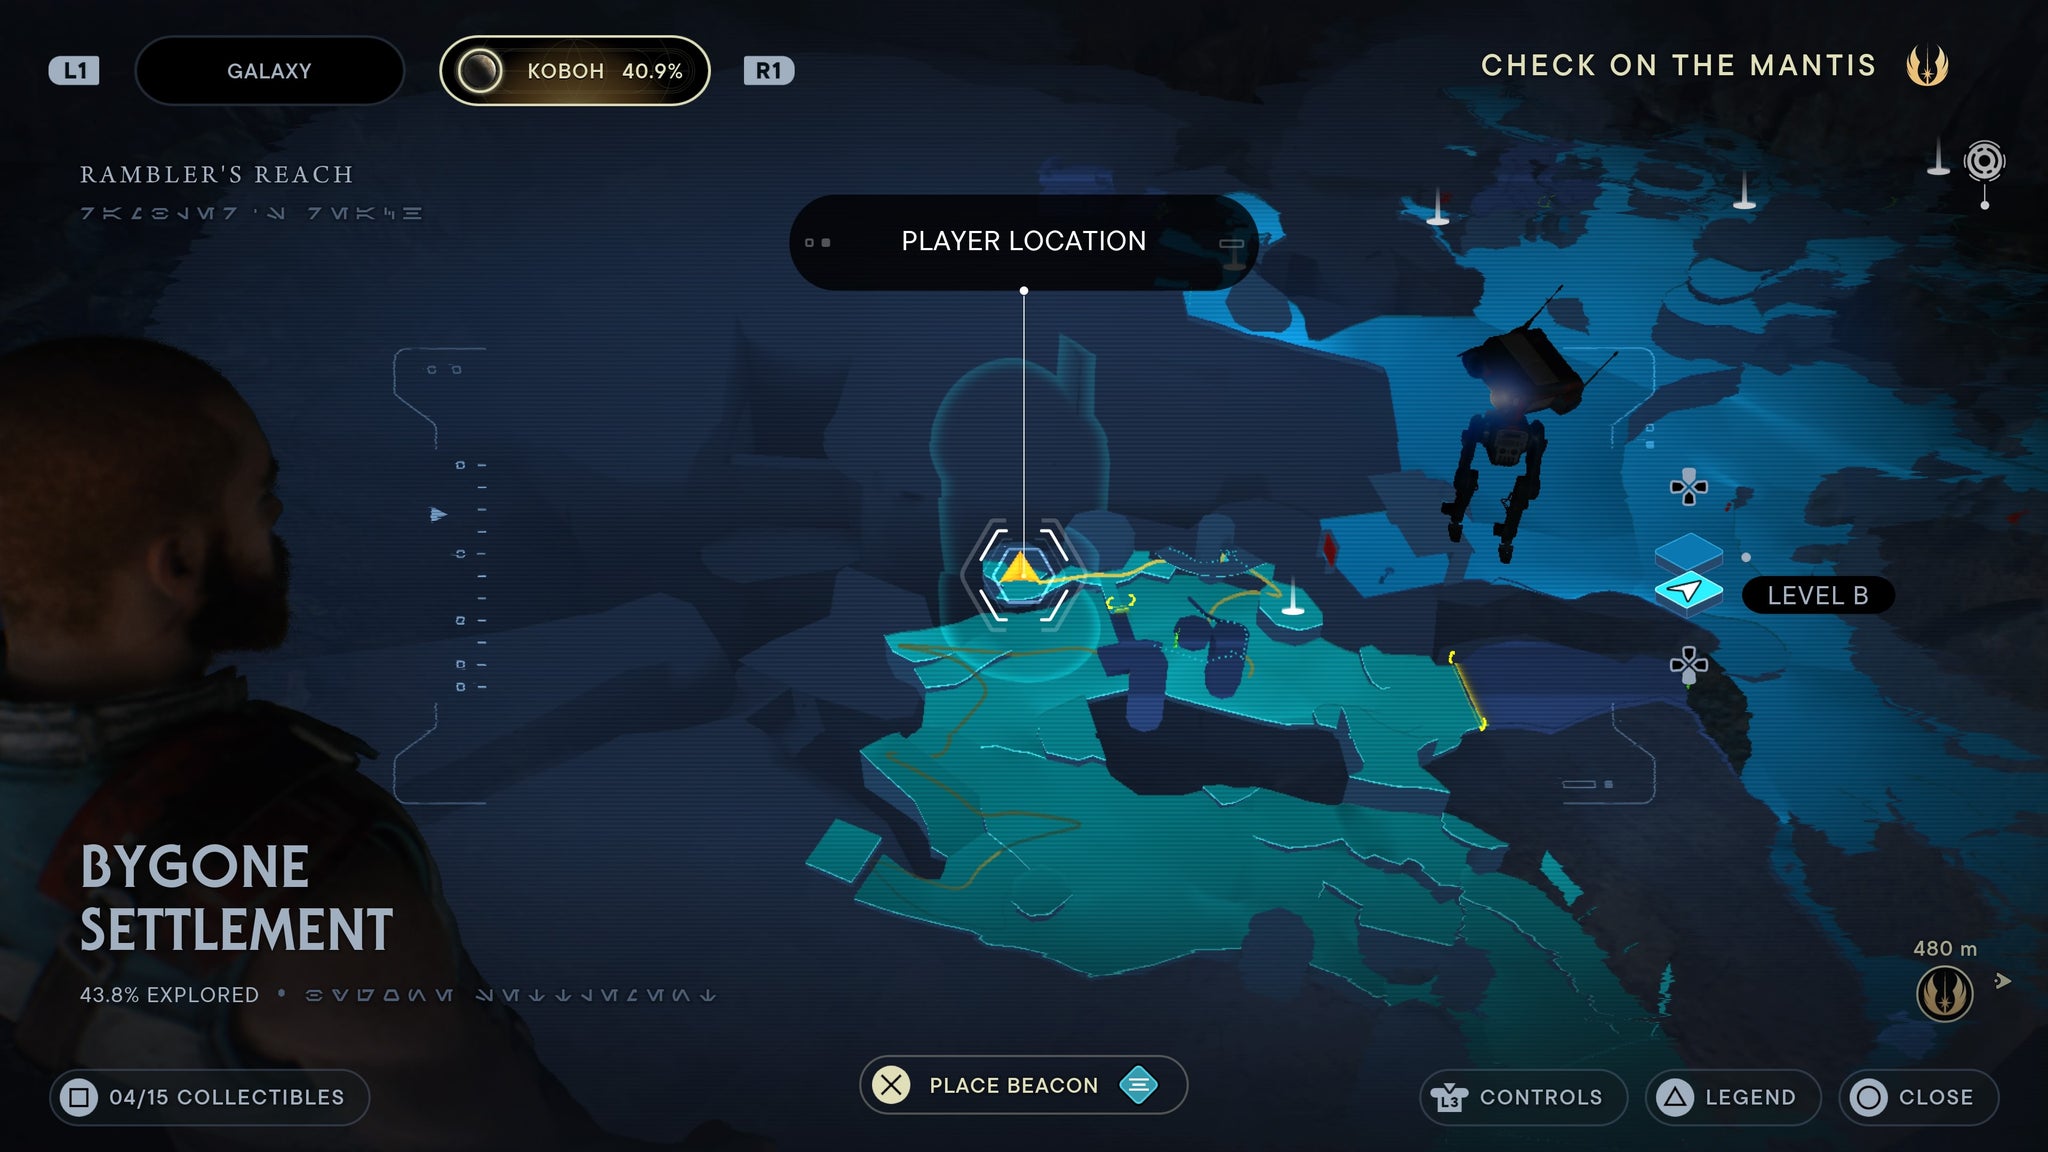
Enter the room, then scan the rubble.
Requires air dash. Make your way across the higher level of the area via the zipline by the meditation point. When you get to the sandcrawler, scan the door.

Scan the sandcrawler!
Ingenious Fissure
Proceed through the Ingenious Fissure, across the yellow pipes and across the runnable walls. When you land near the locked door that leads back to the Southern Reach, you’ll come across a cage you can scan.
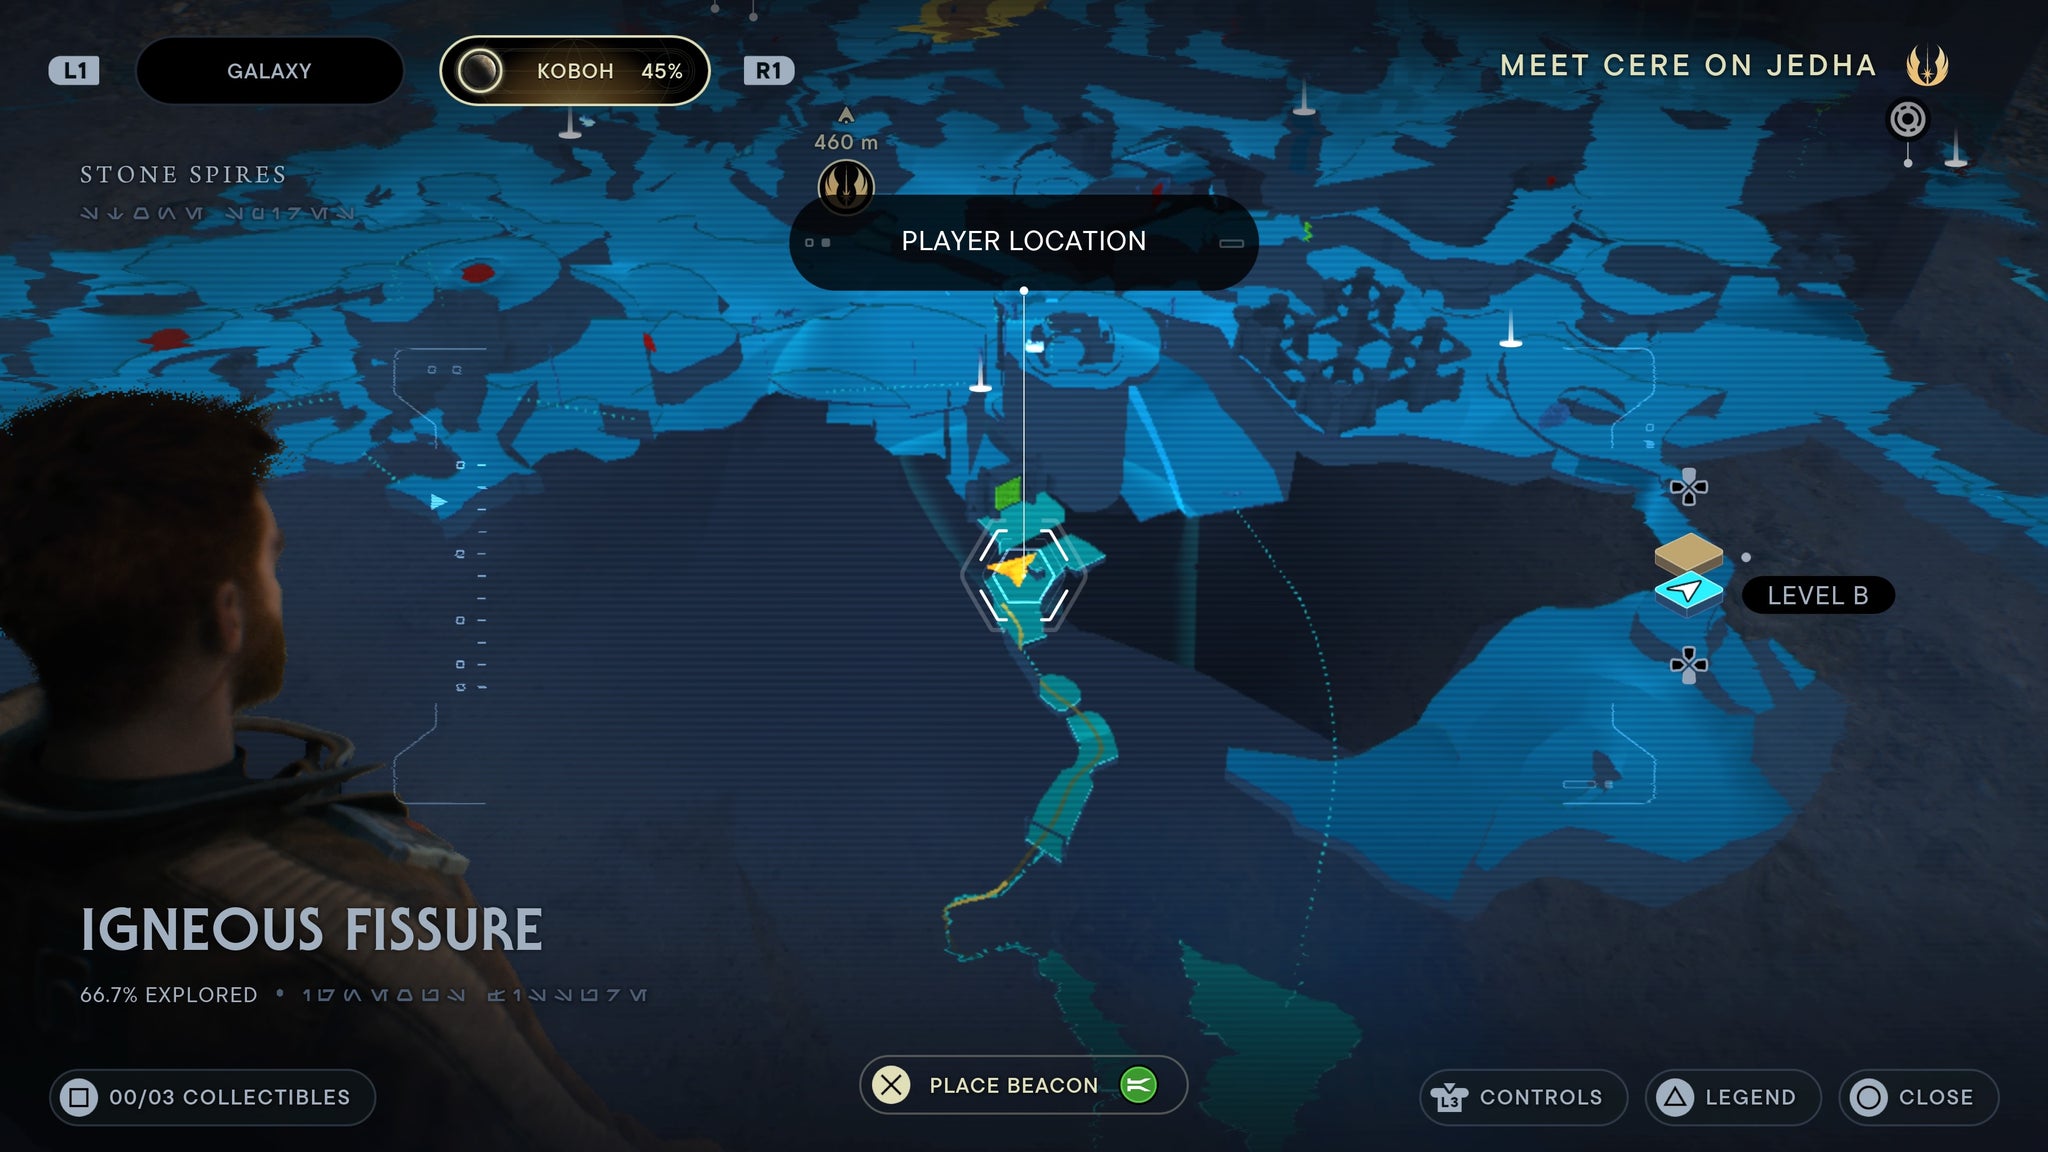
Scan the big box!
Proceed through the Ingenious Fissure, across the yellow pipes and across the runnable walls. When you land near the locked door that leads back to the Southern Reach, you’ll come across a small building. Walk to the other side of the building and you’ll find a body with a force echo on it.

Walk around the small house.
Foothill Falls
Cross the zipline into Foothill Falls. Walk left, and you’ll find a force echo by the water pool.
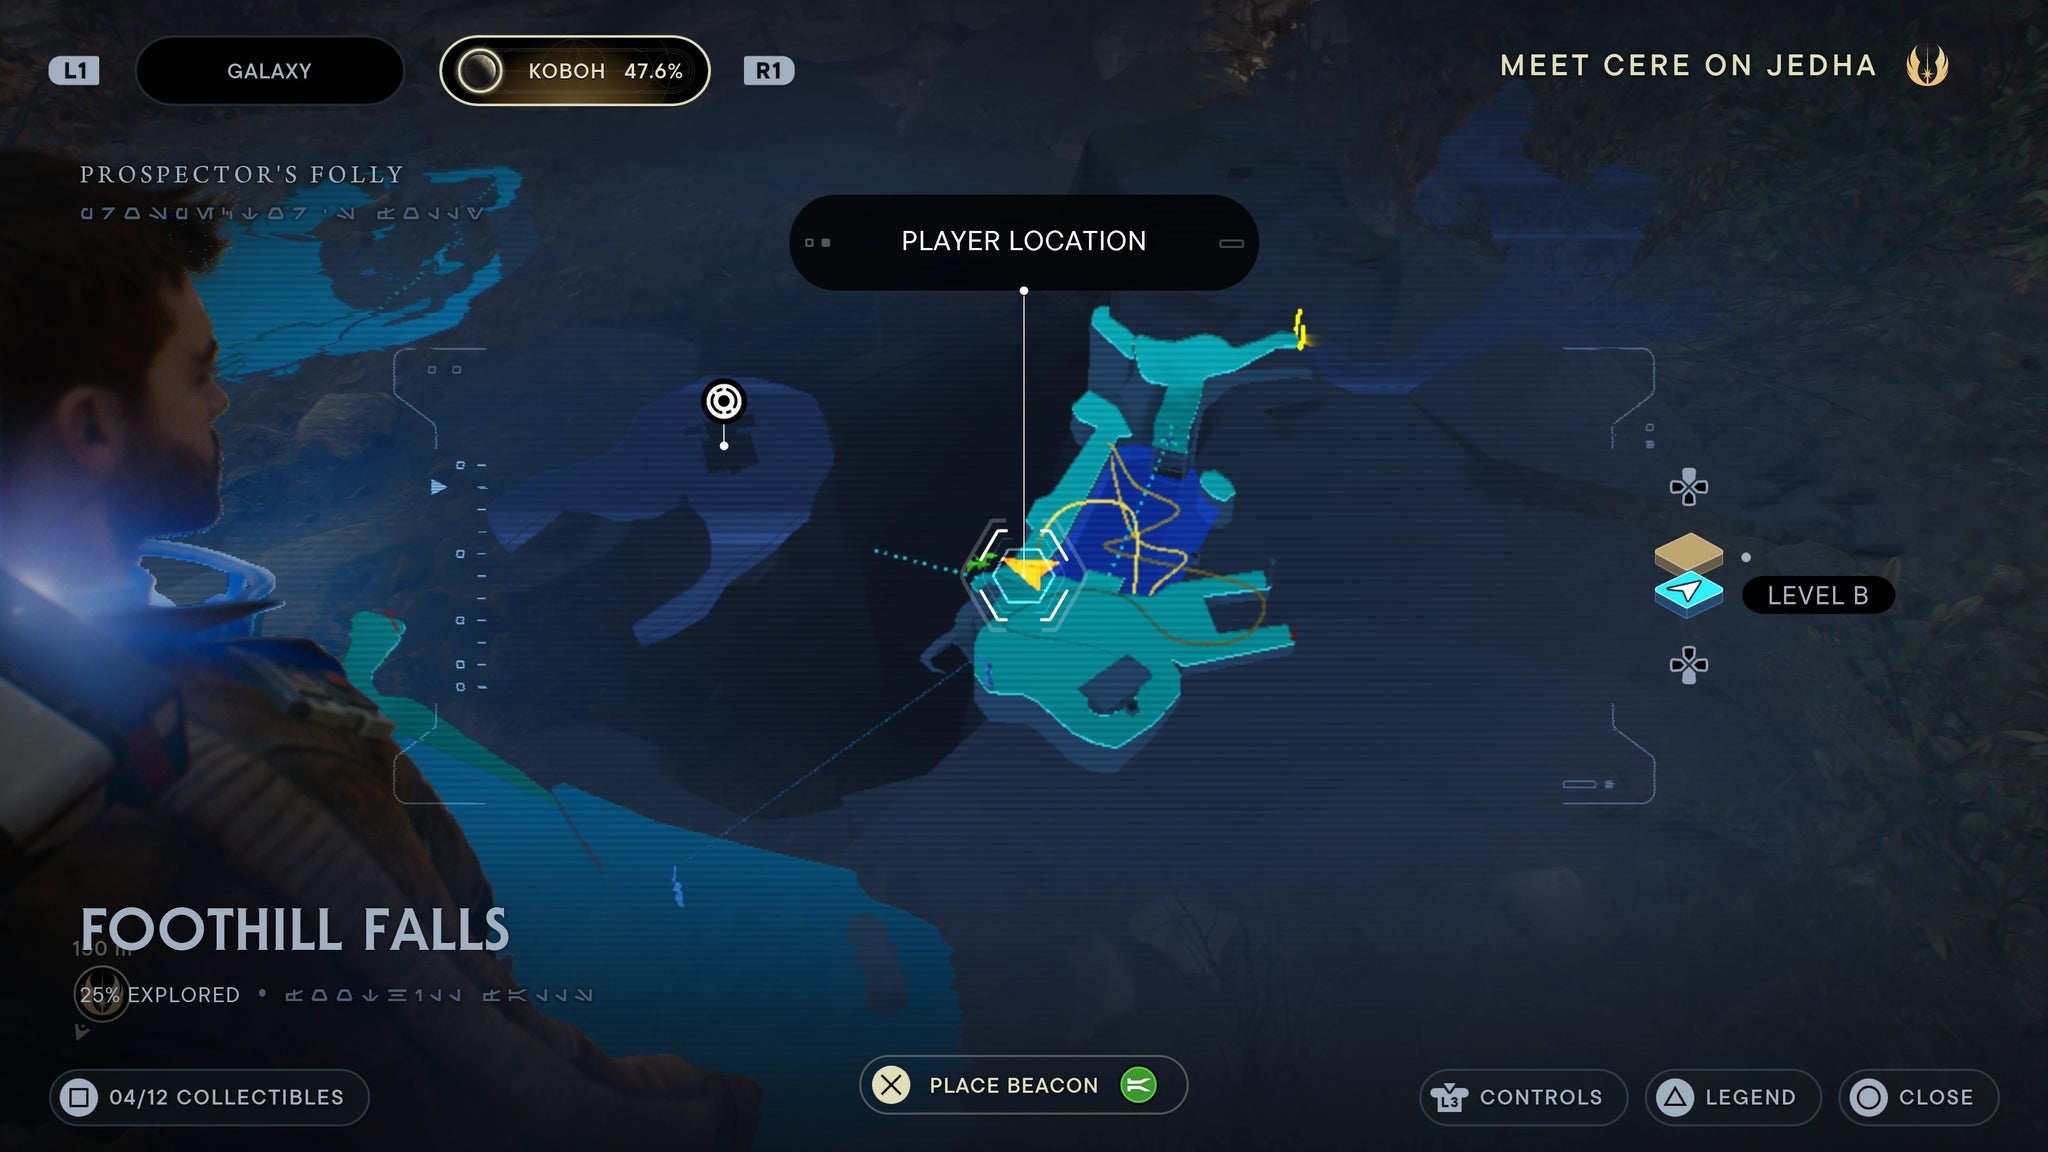
Next to the water!
Cross the zipline into Foothill Falls. Walk forward, then scan the railing inside the nearby tram entrance.
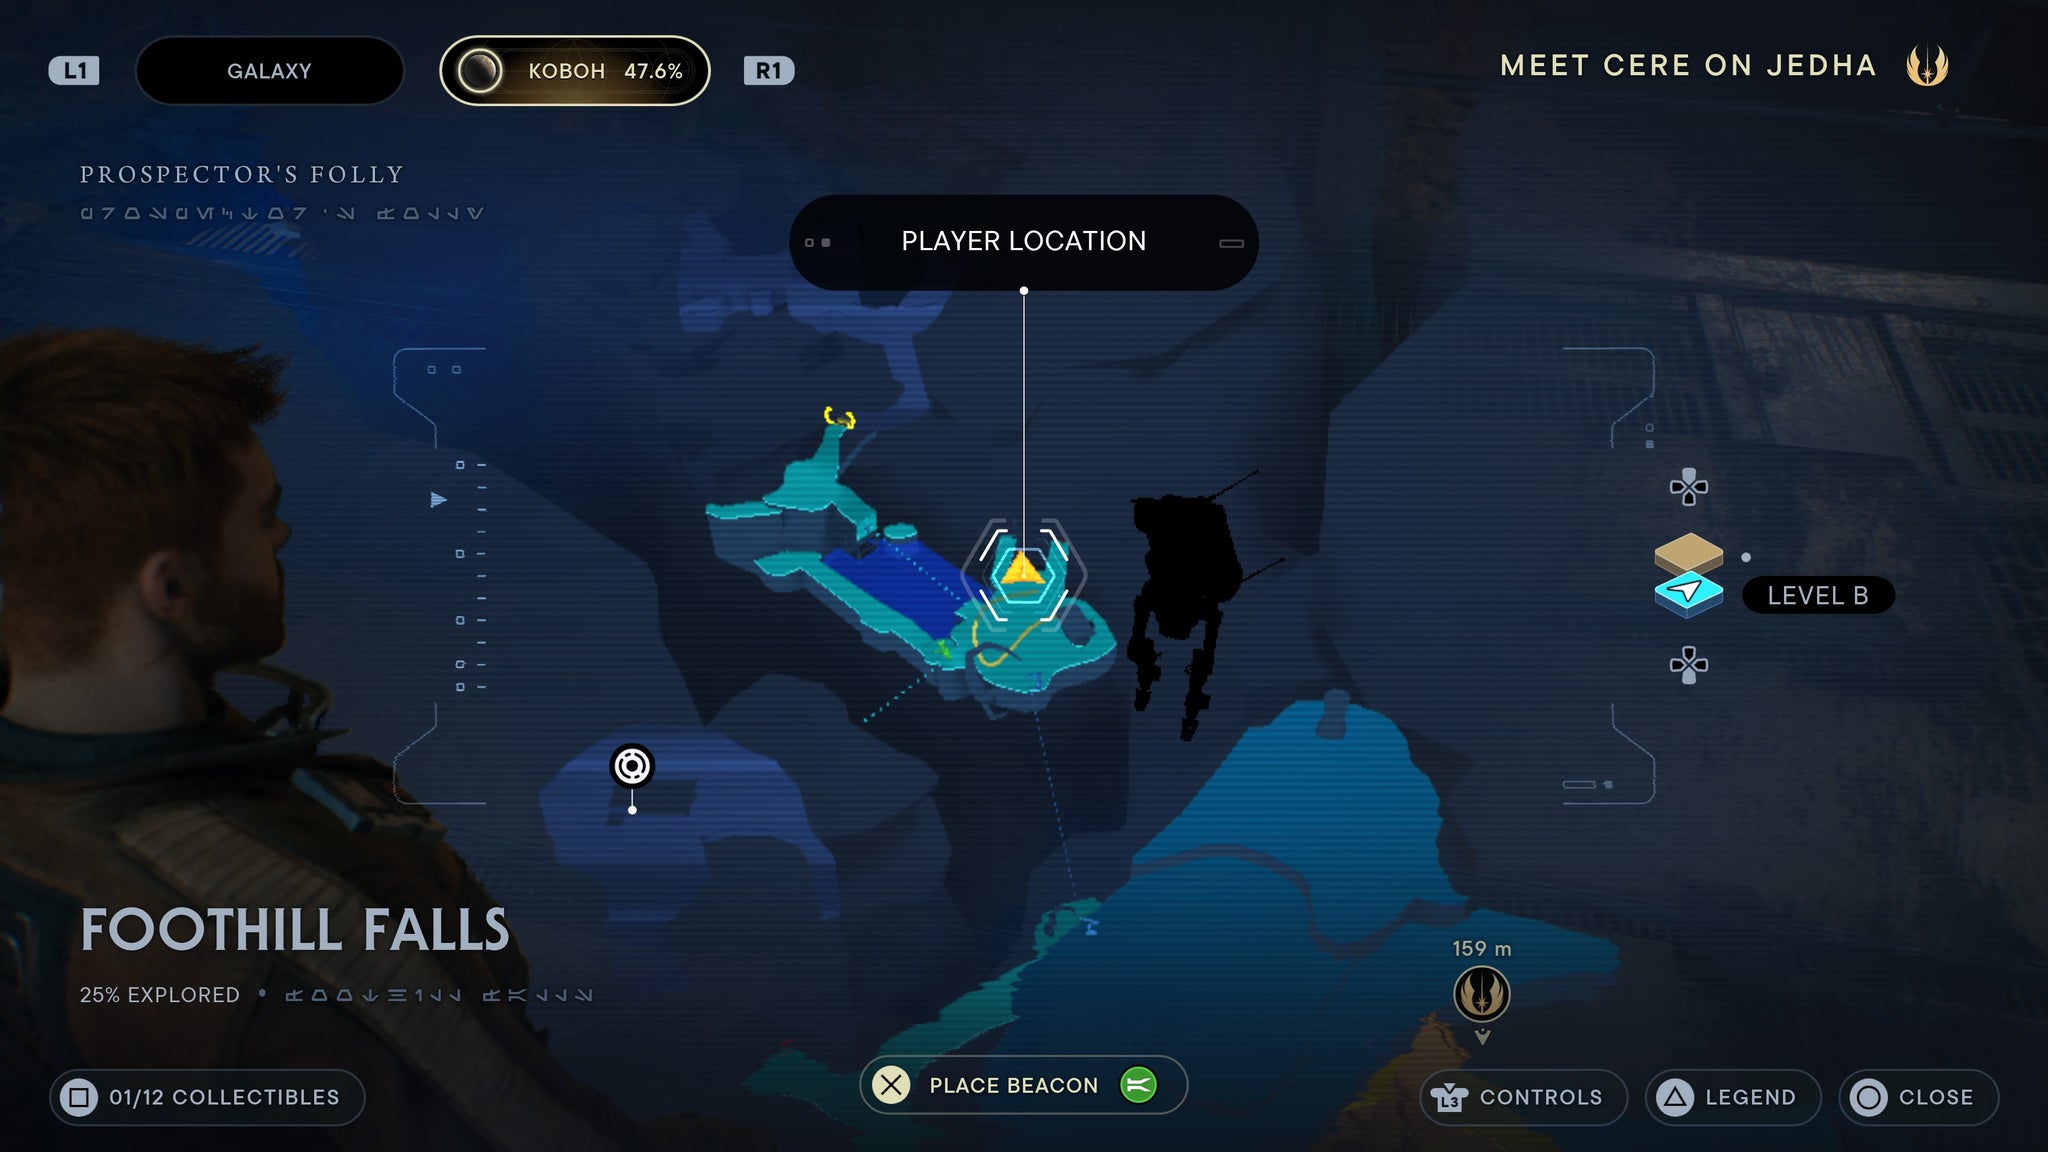
Right by the tram.
Requires relter gliding. Cross the zipline into Foothill Falls. Walk forward, then look left. Take the relter down, then walk left along the path. At the bottom of this path is a scan.
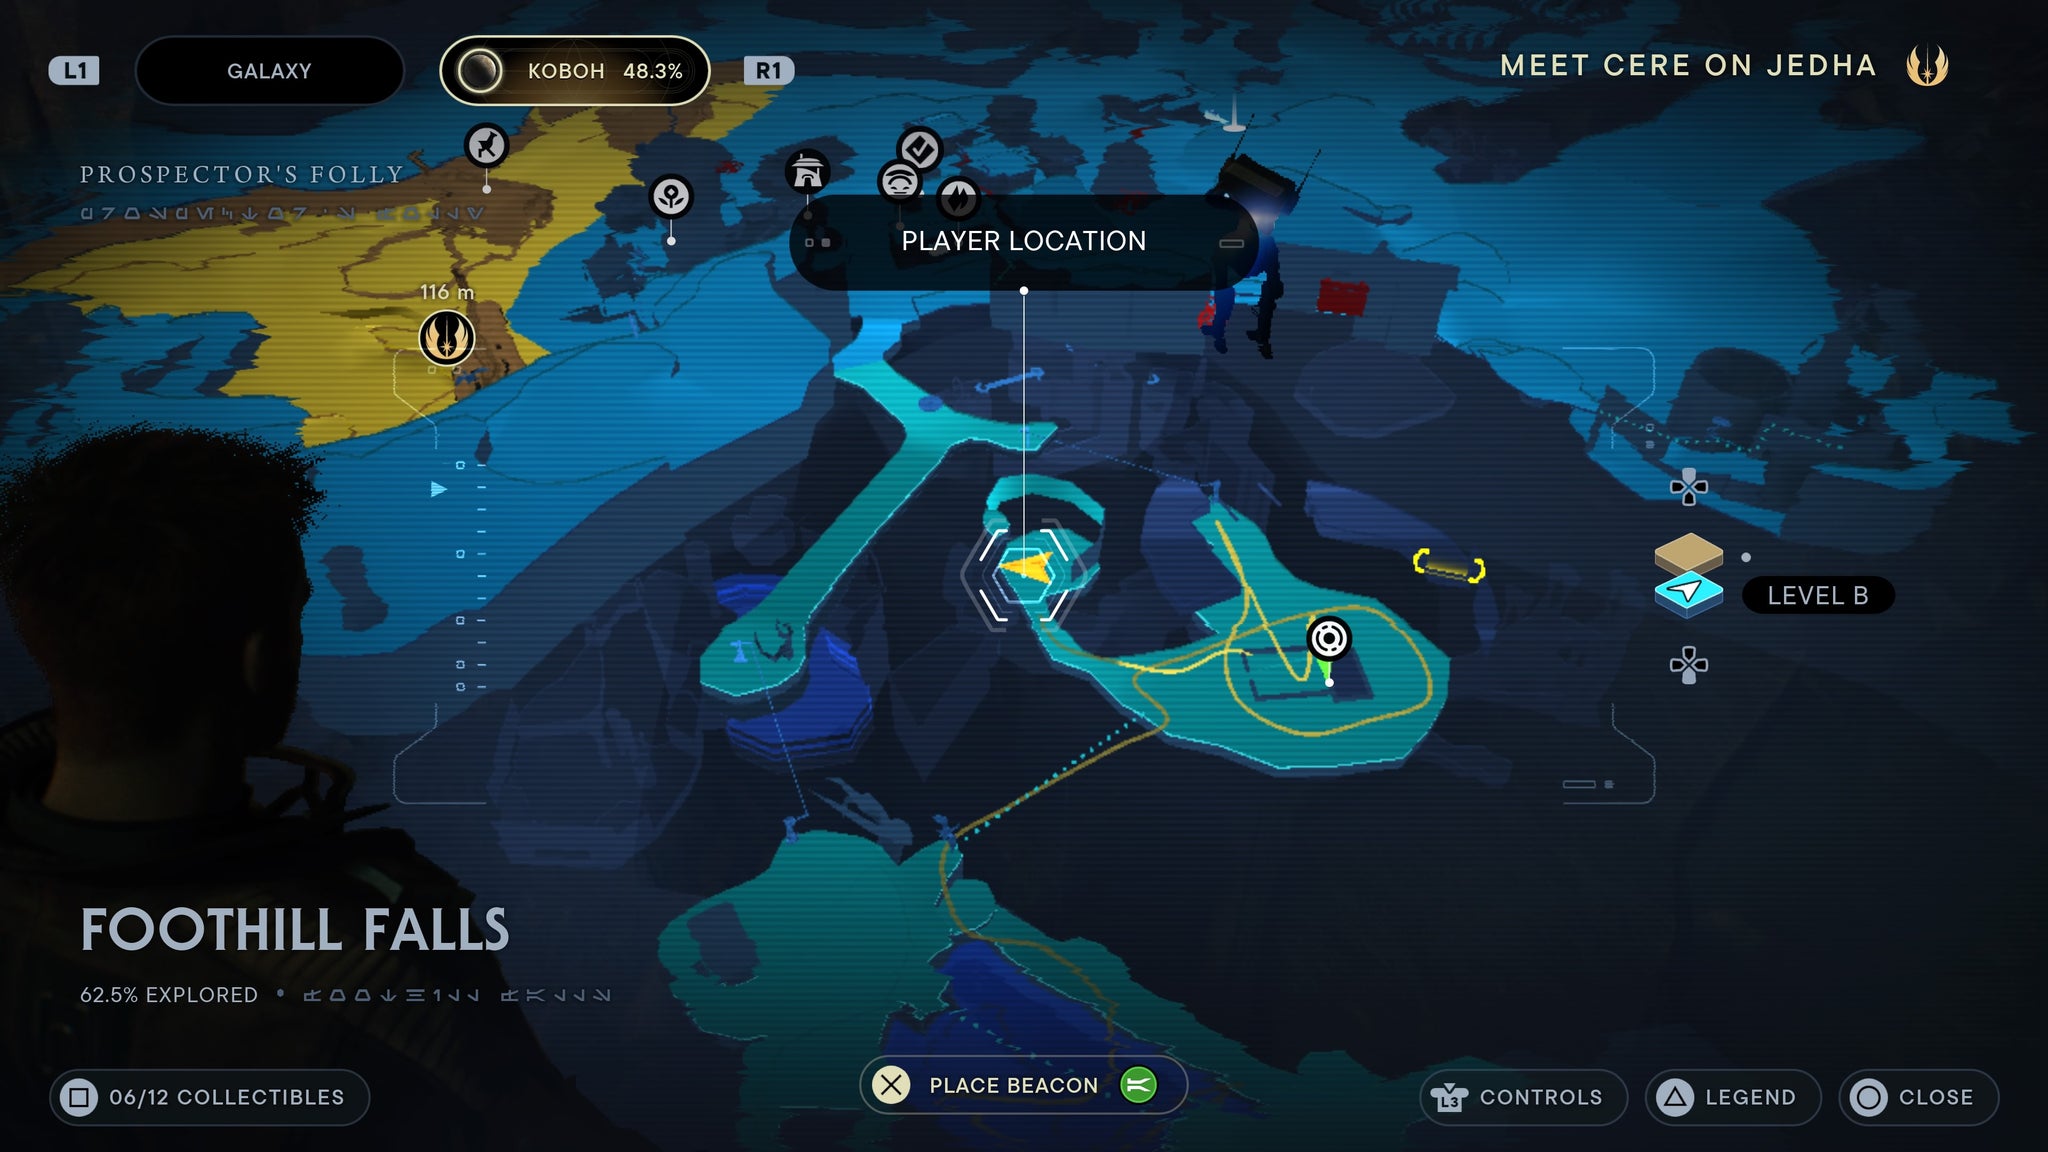
On the groudn to your left.
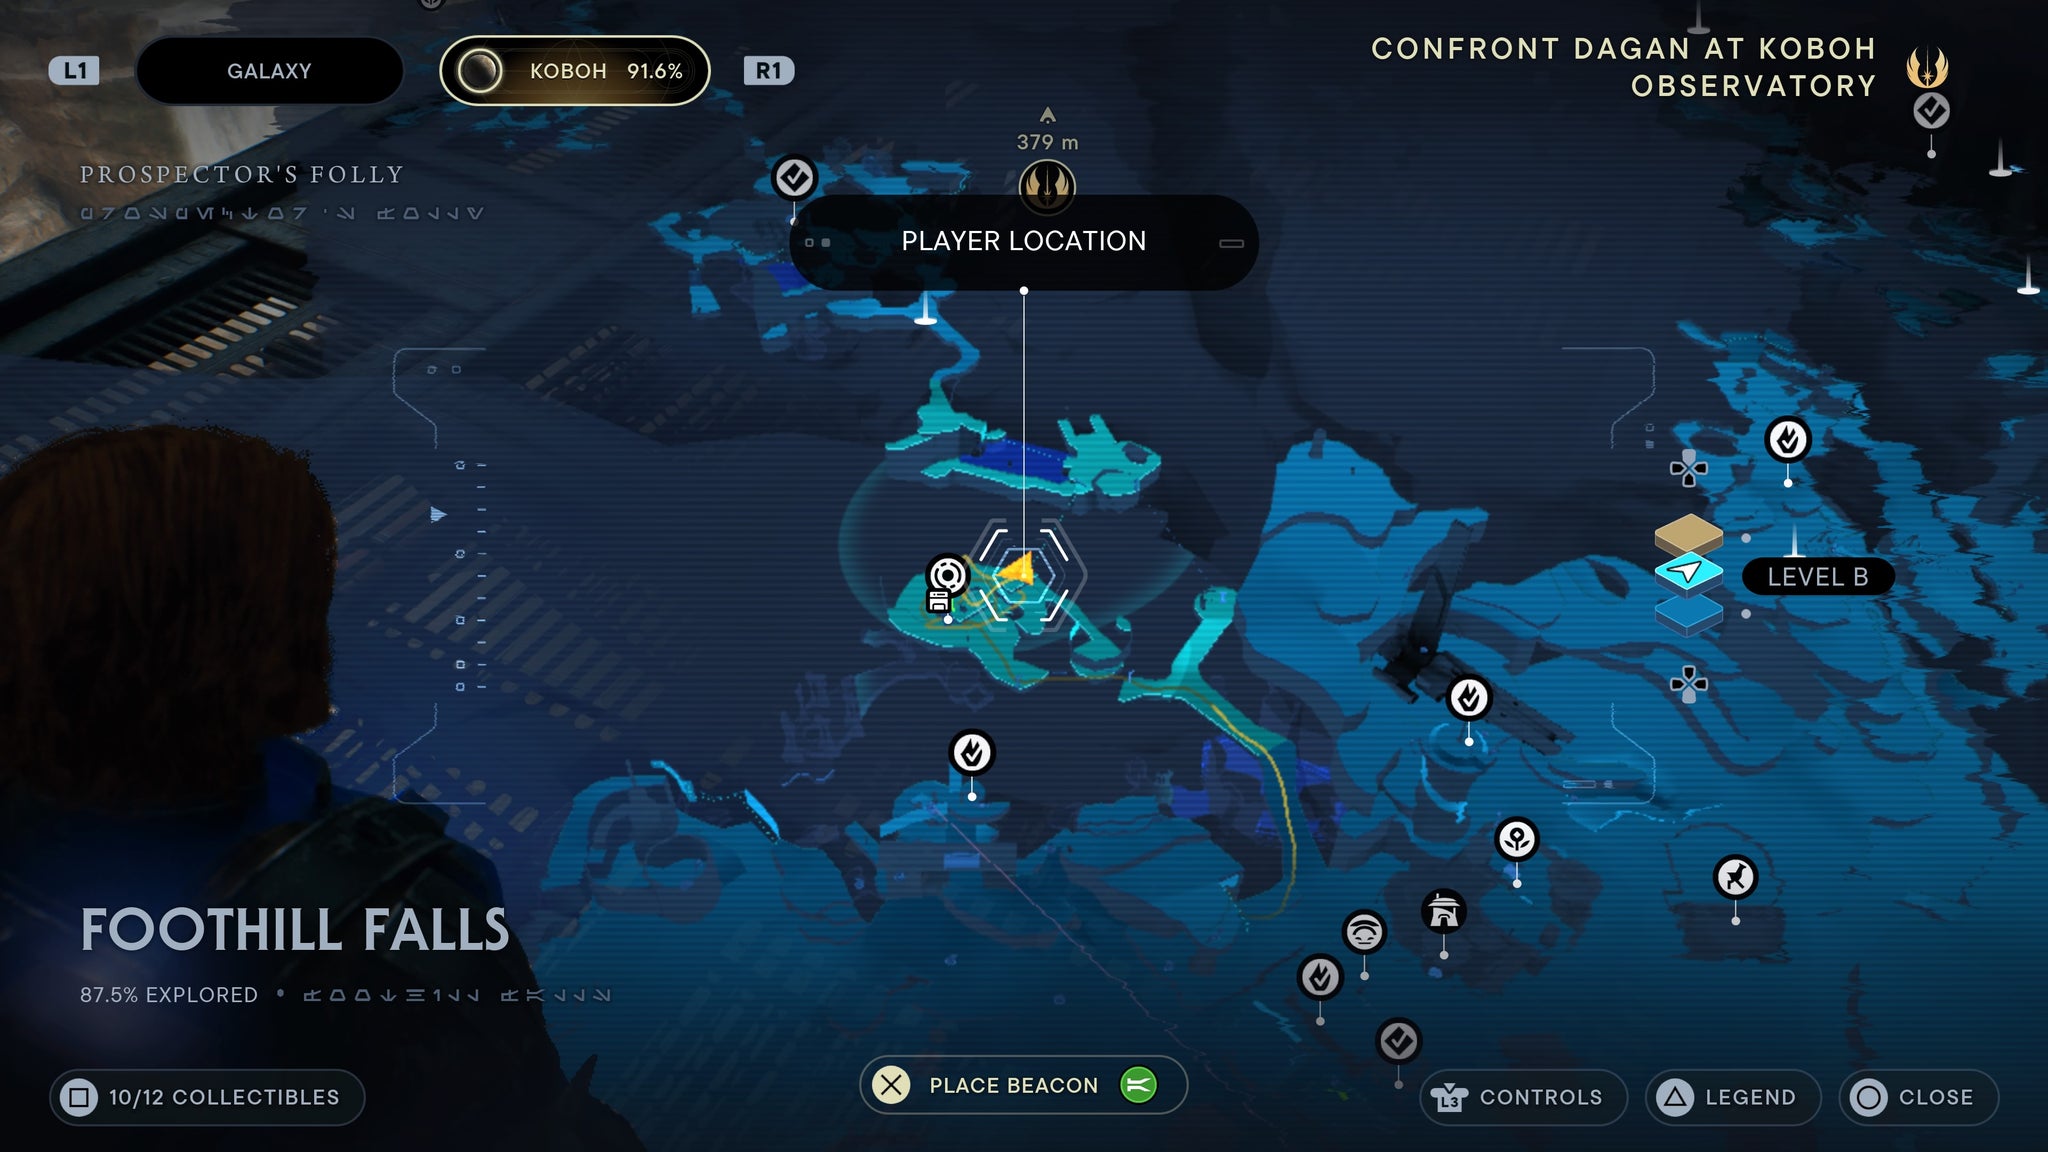
Climb up and scan the hut.
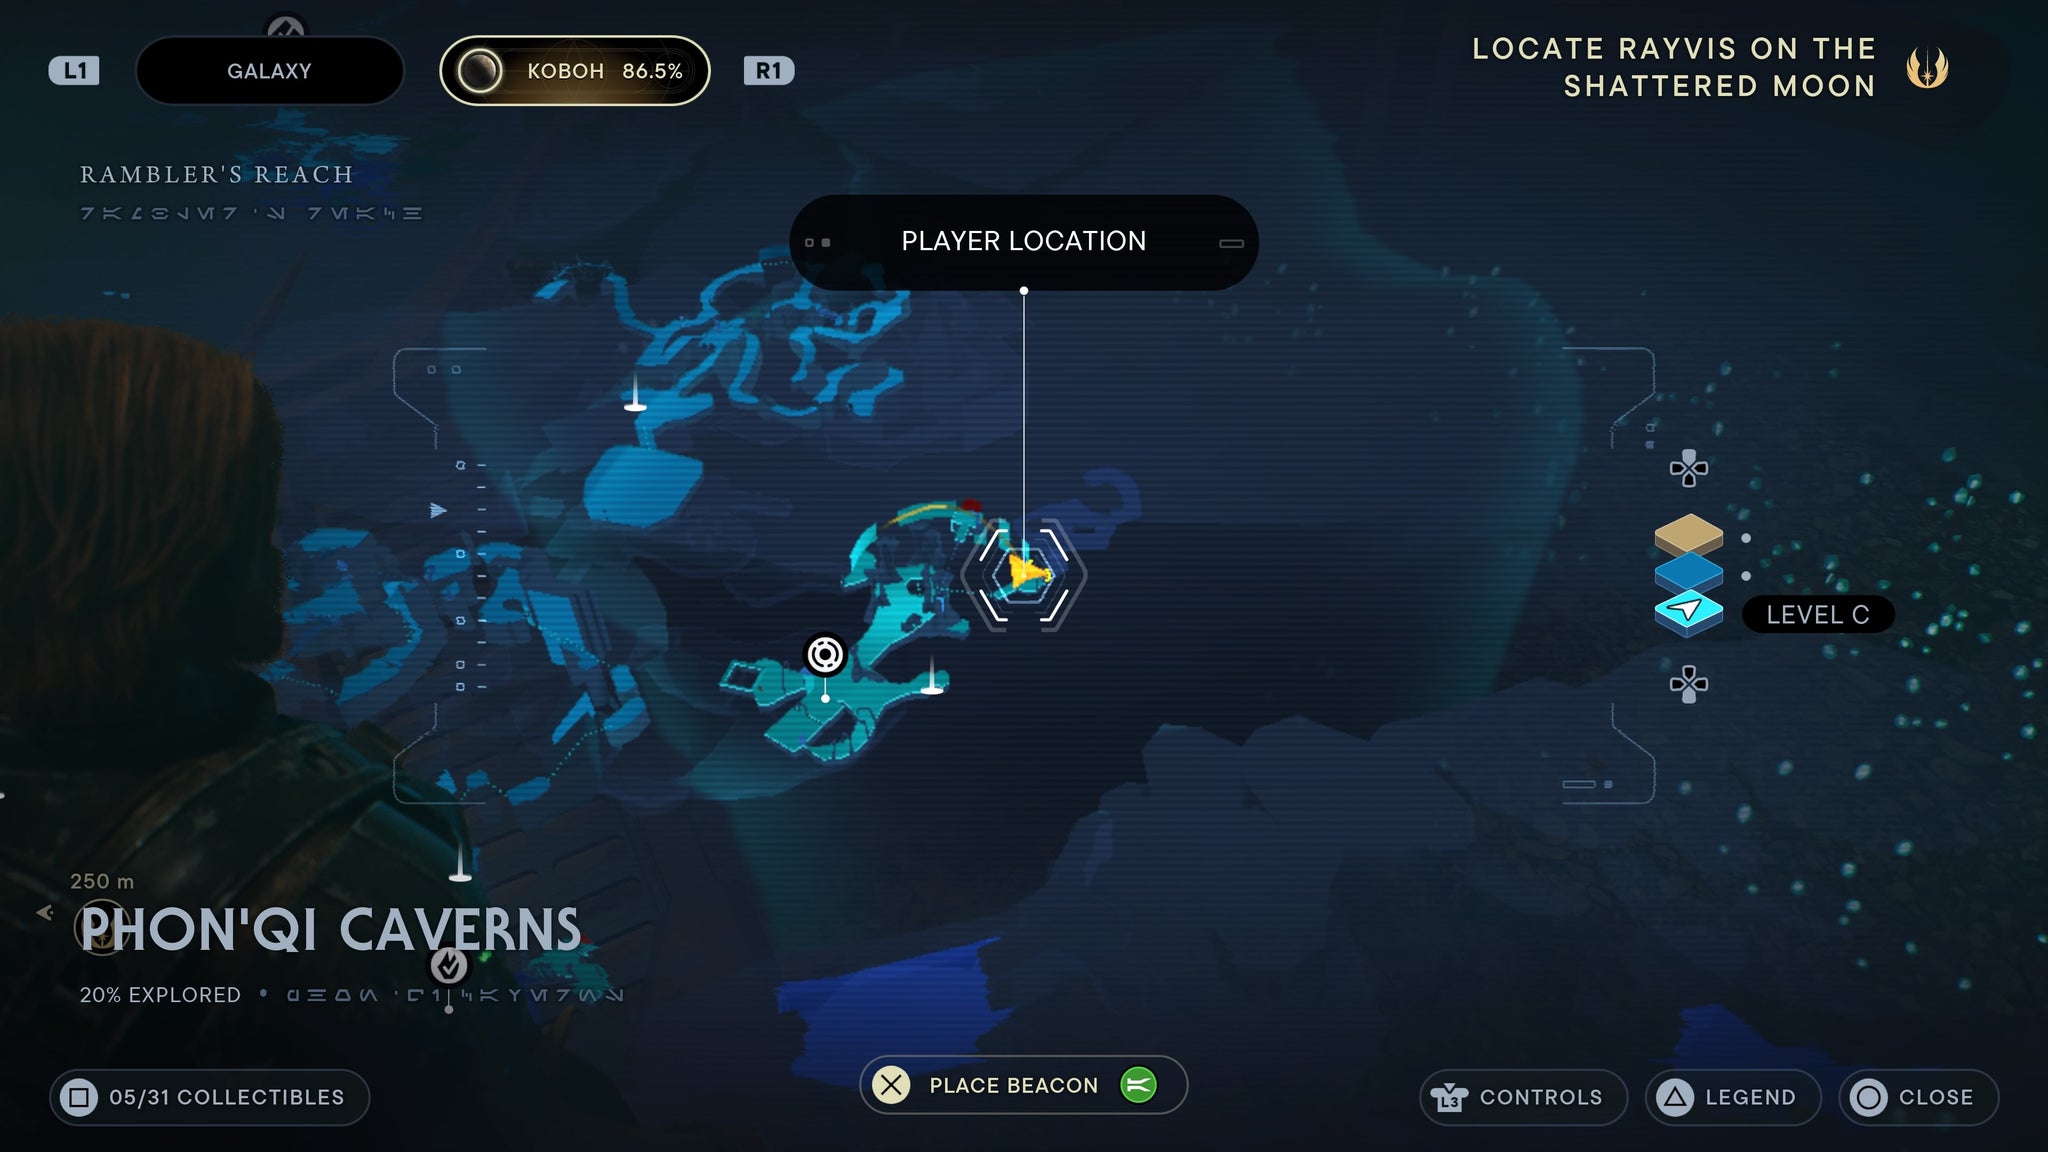
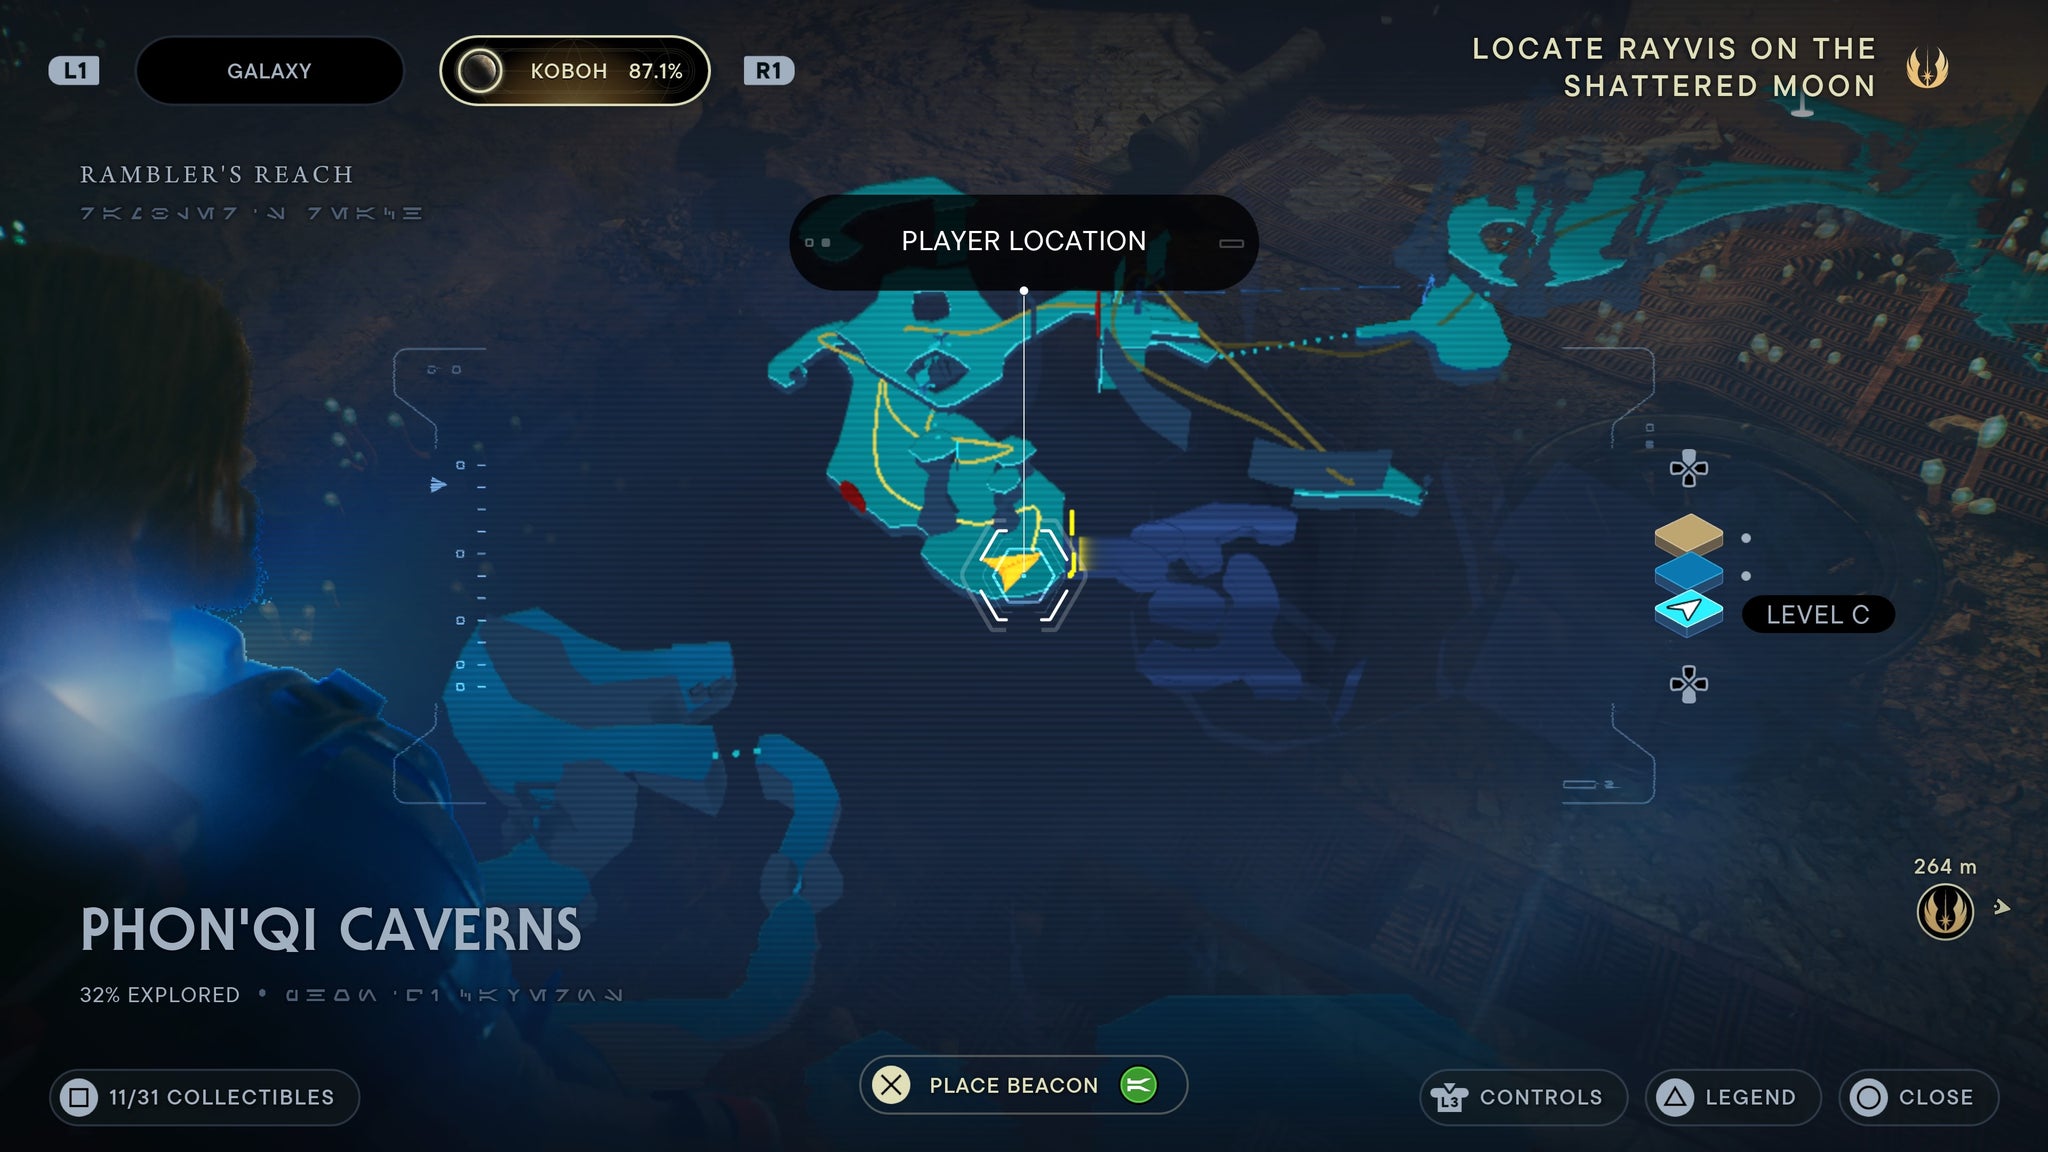
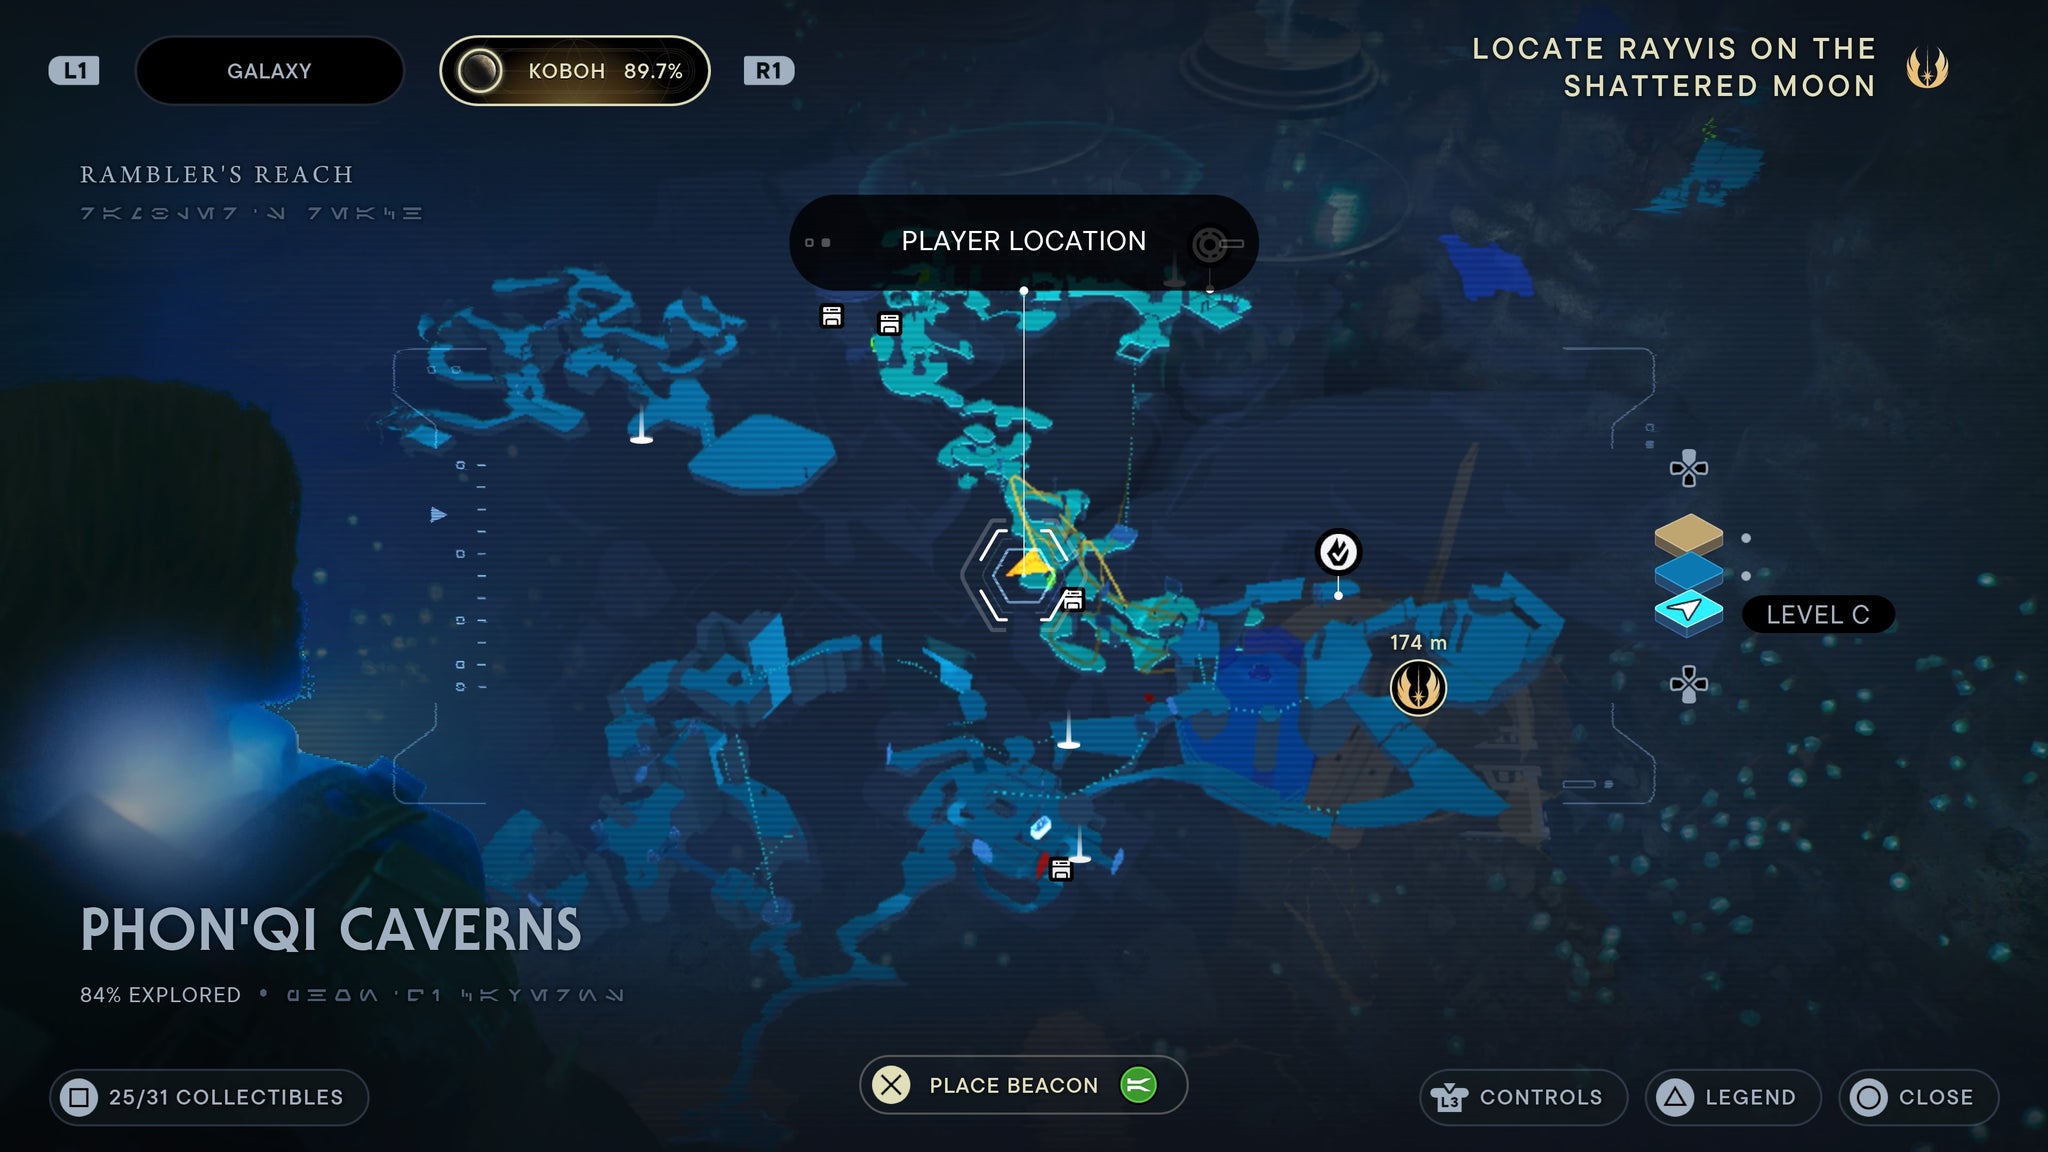
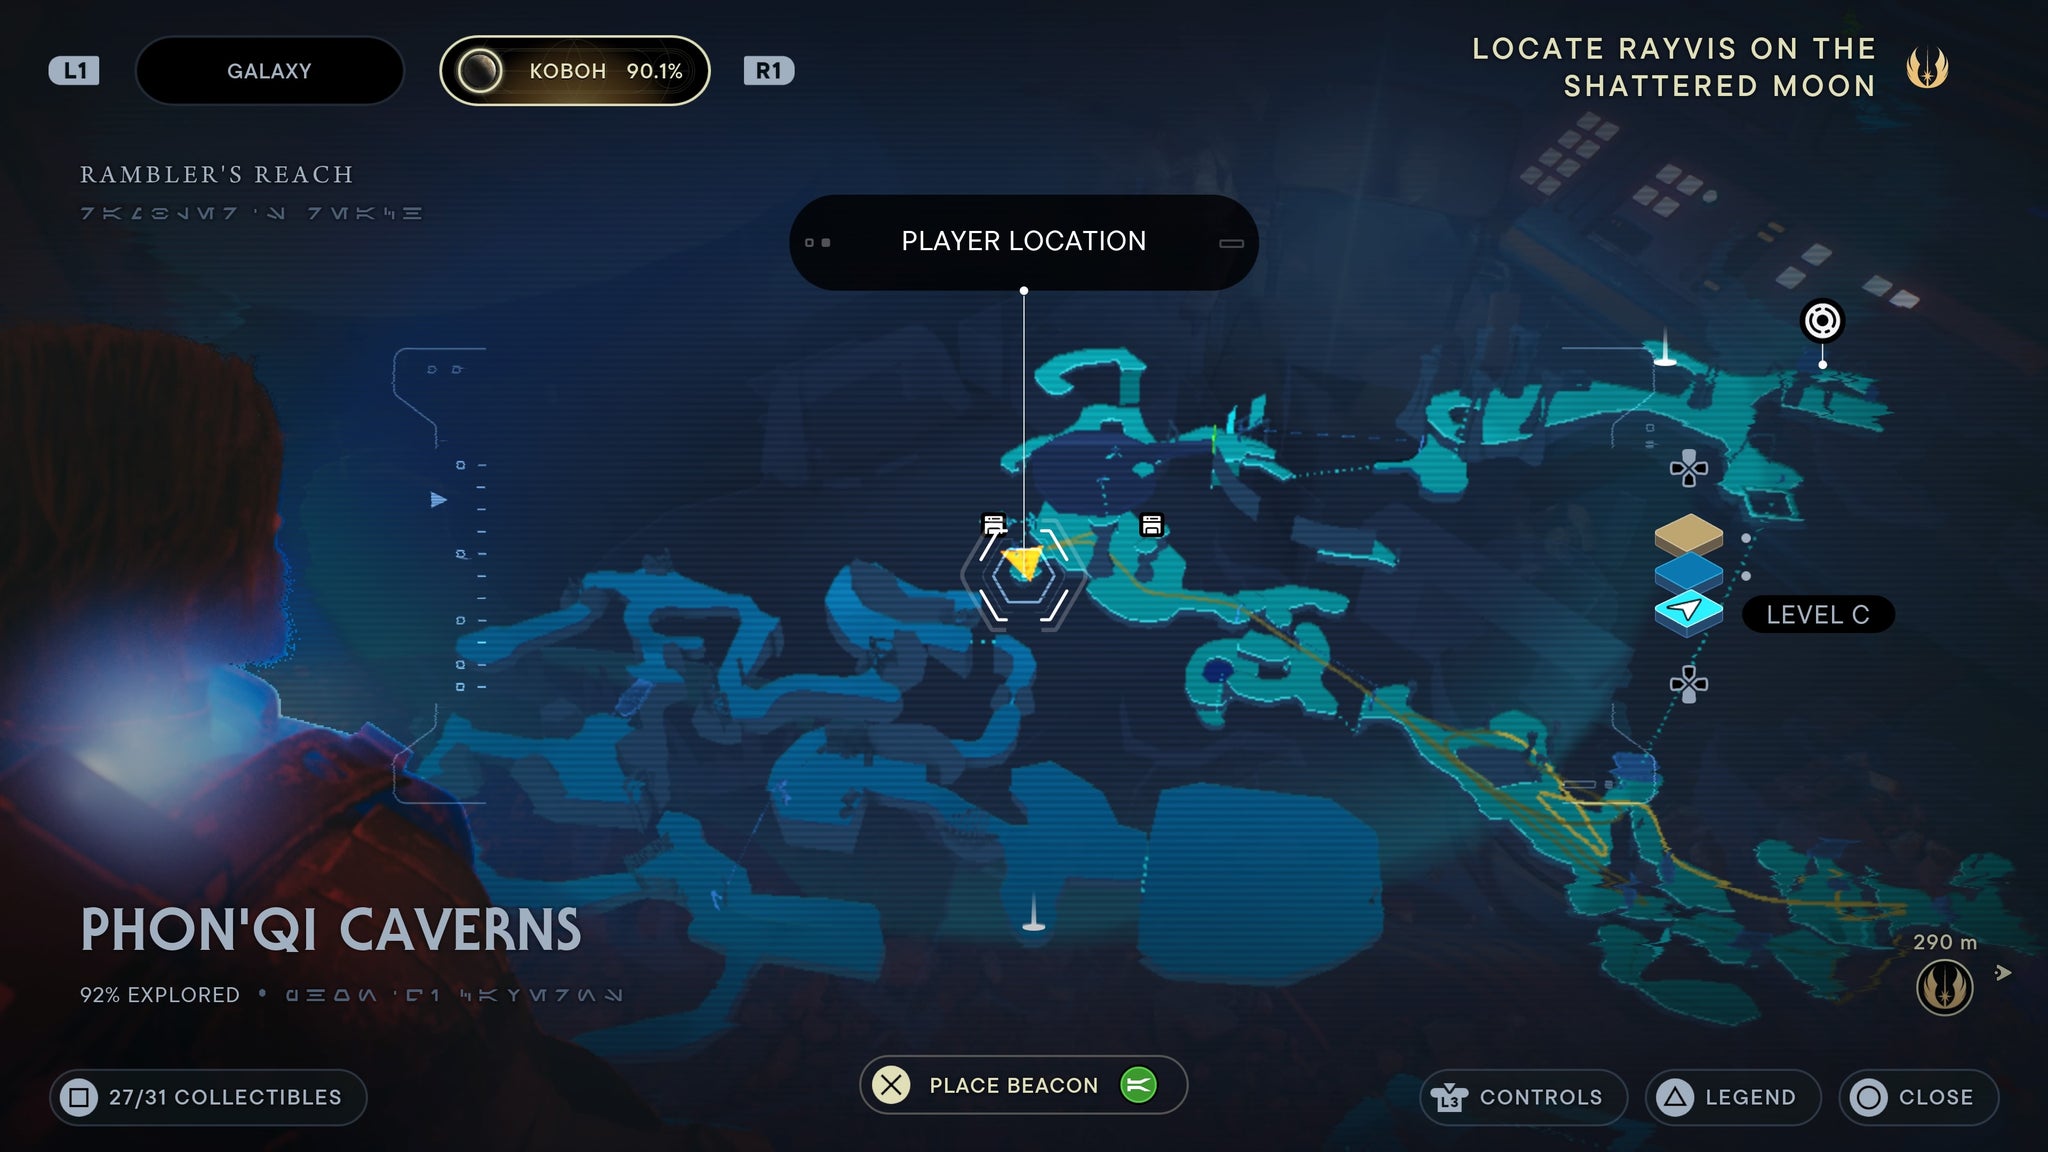
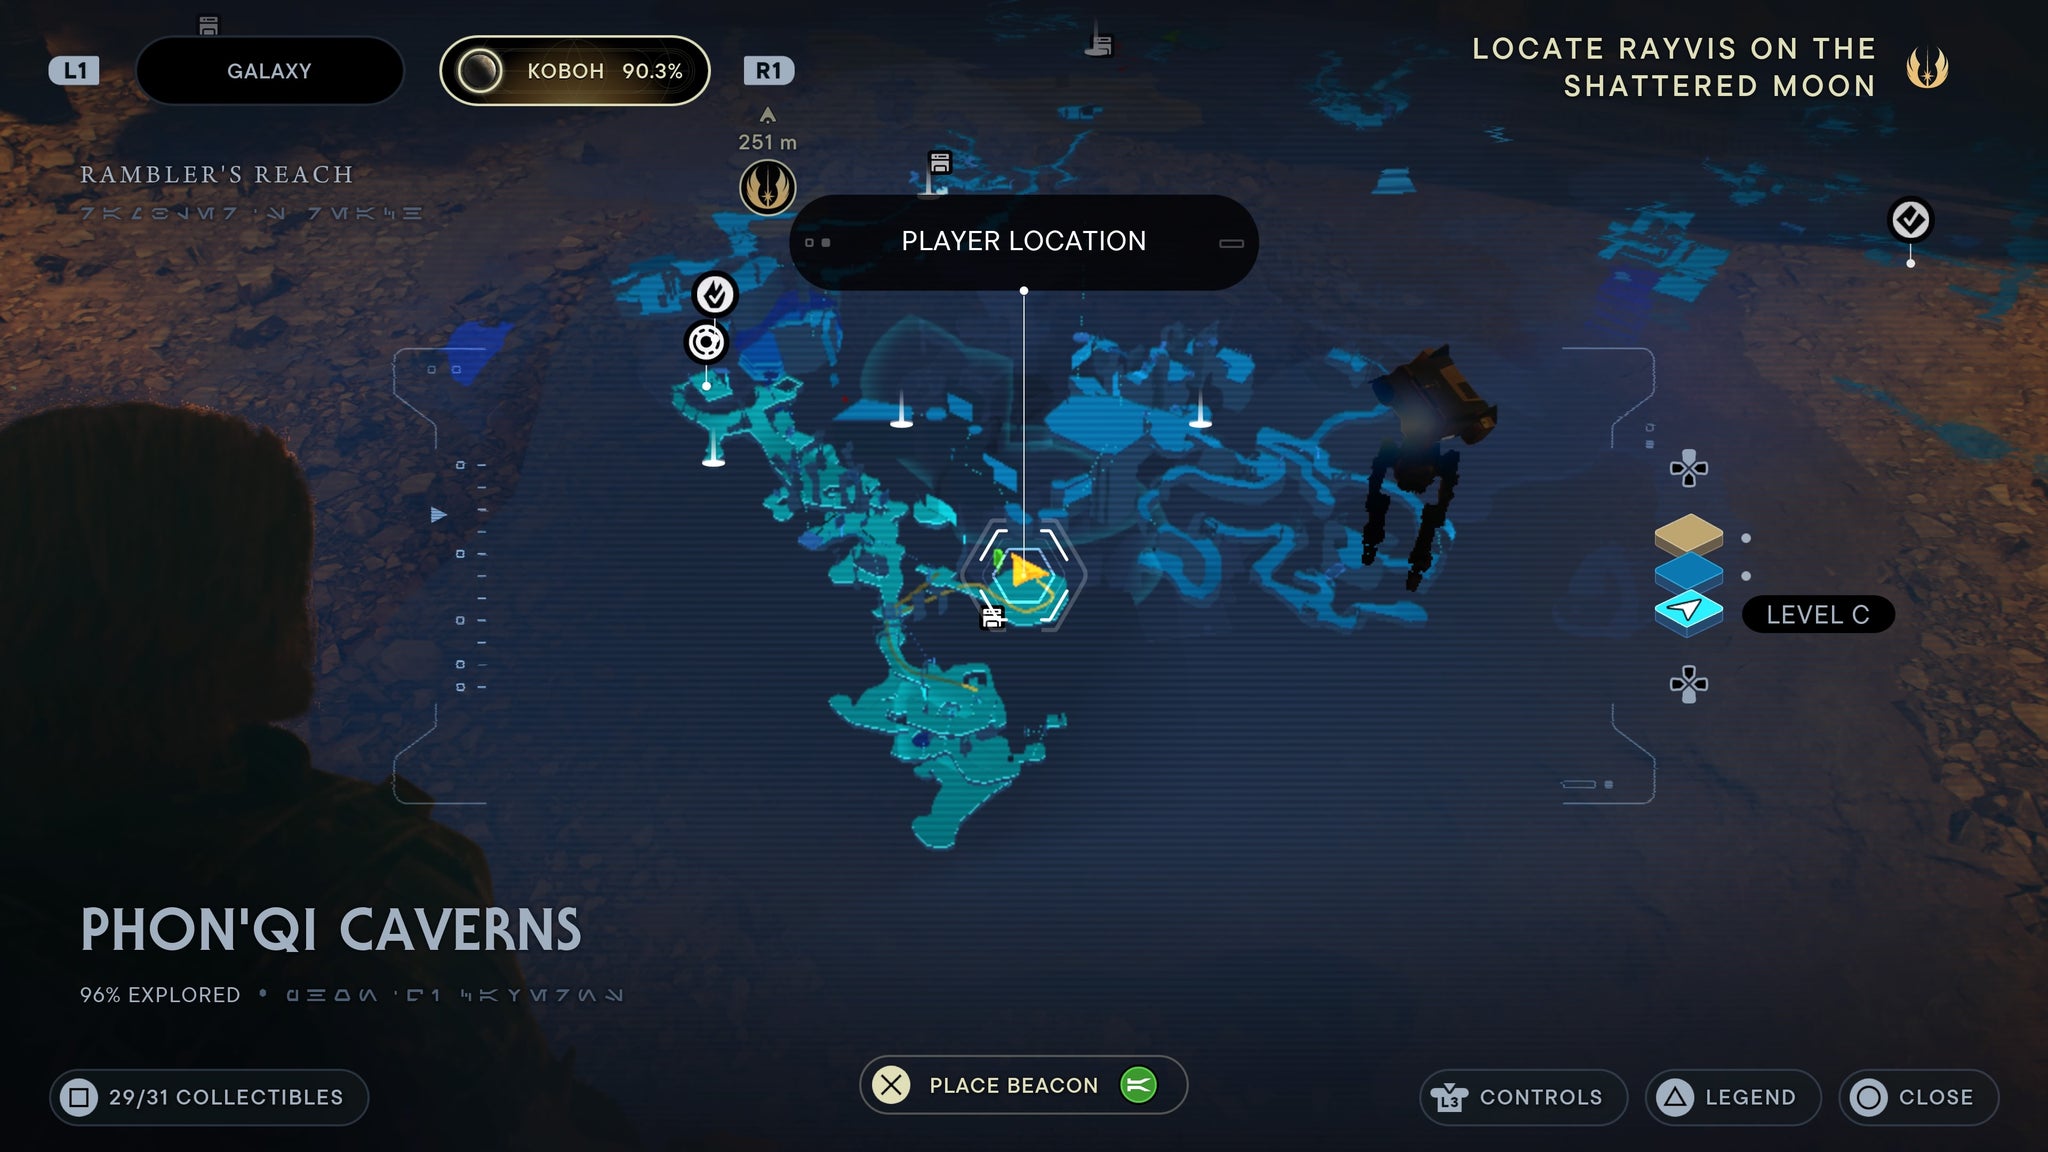
Phon’Qi Caverns
From the hut in the Foothill Falls, drop down via the basement door at the back. As you land, the force echo is in front of you.
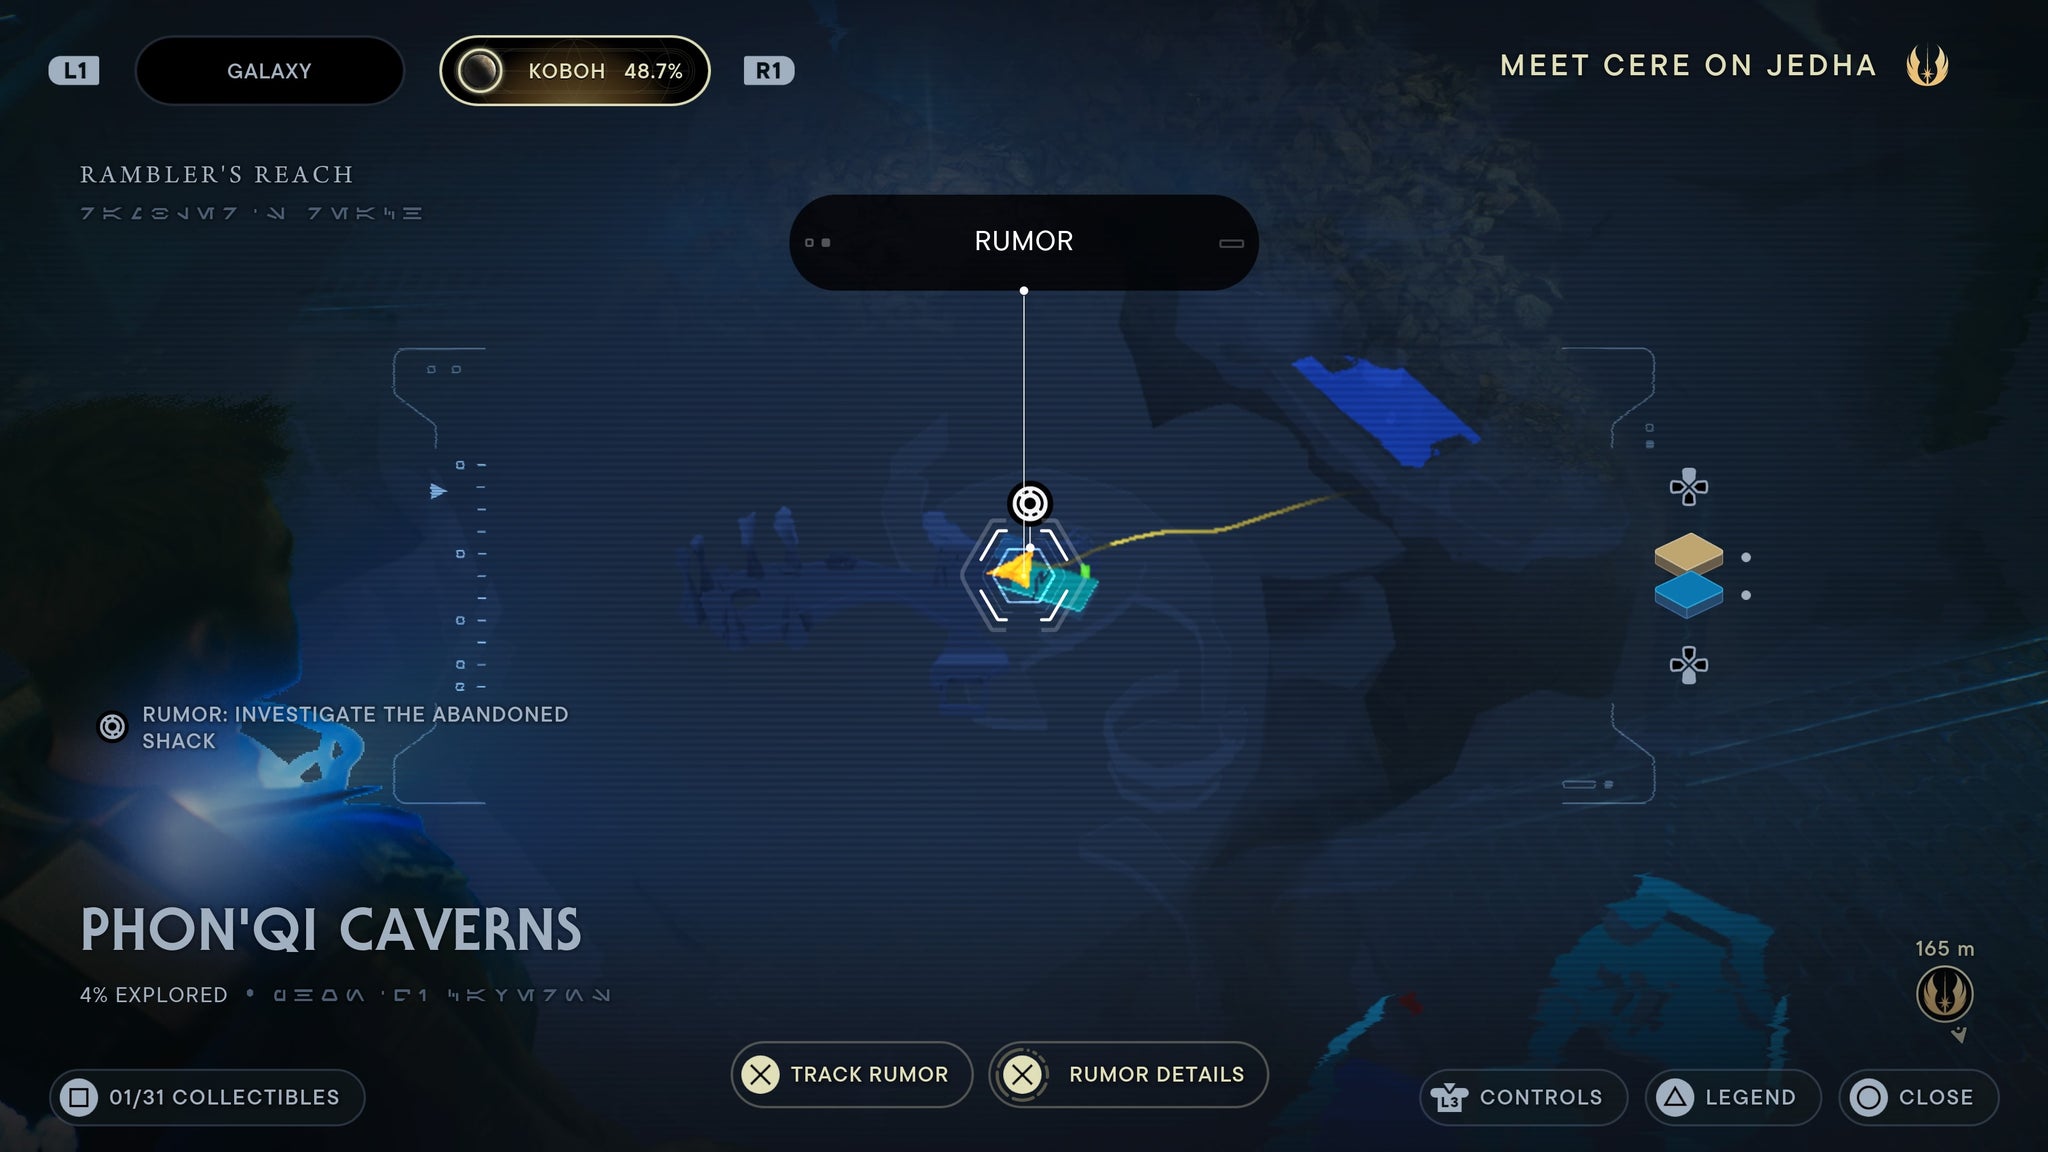
Down in the basement.
From the meditation point, walk right and you’ll find the force echo on the ground.
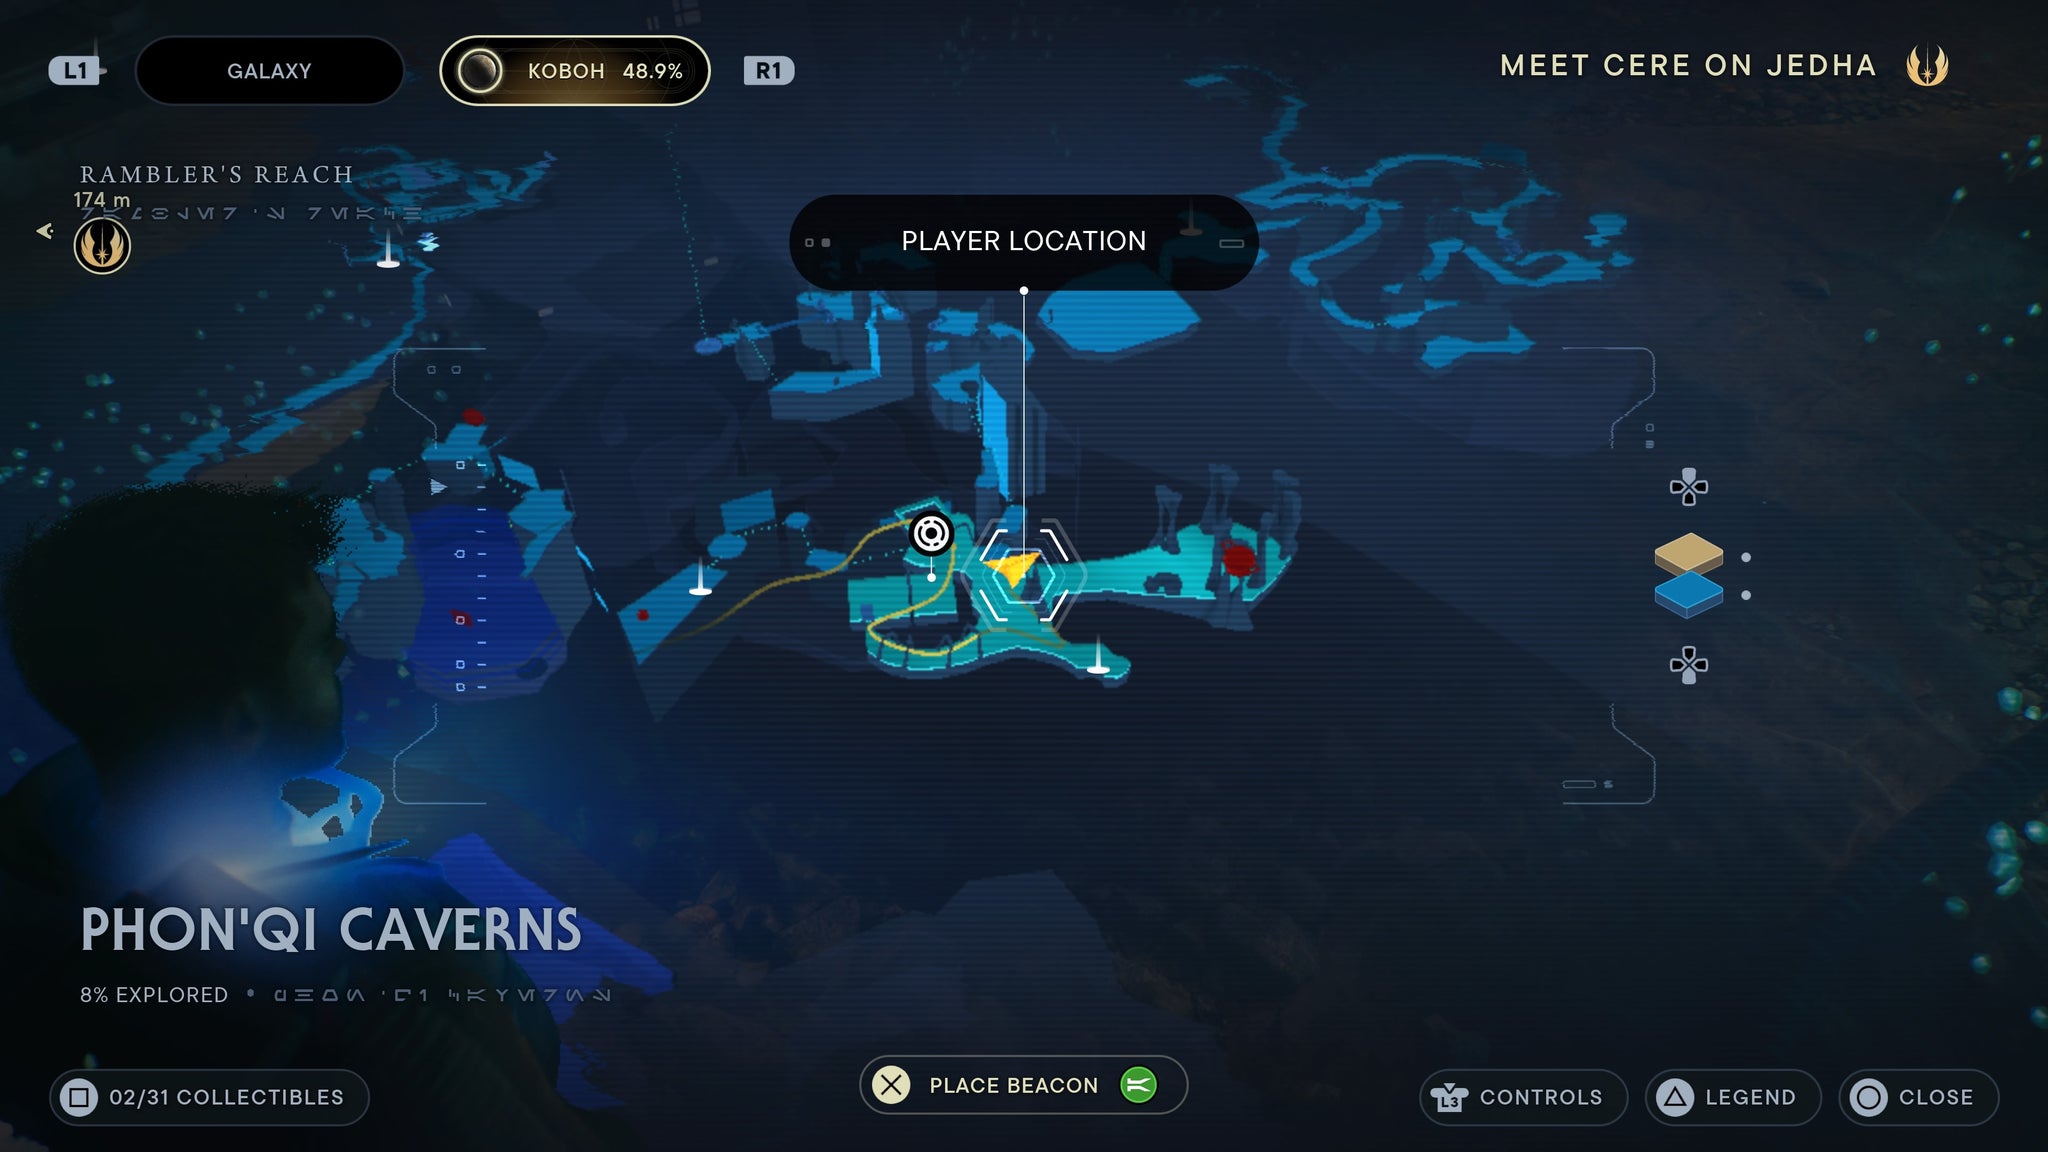
Near the meditation point.
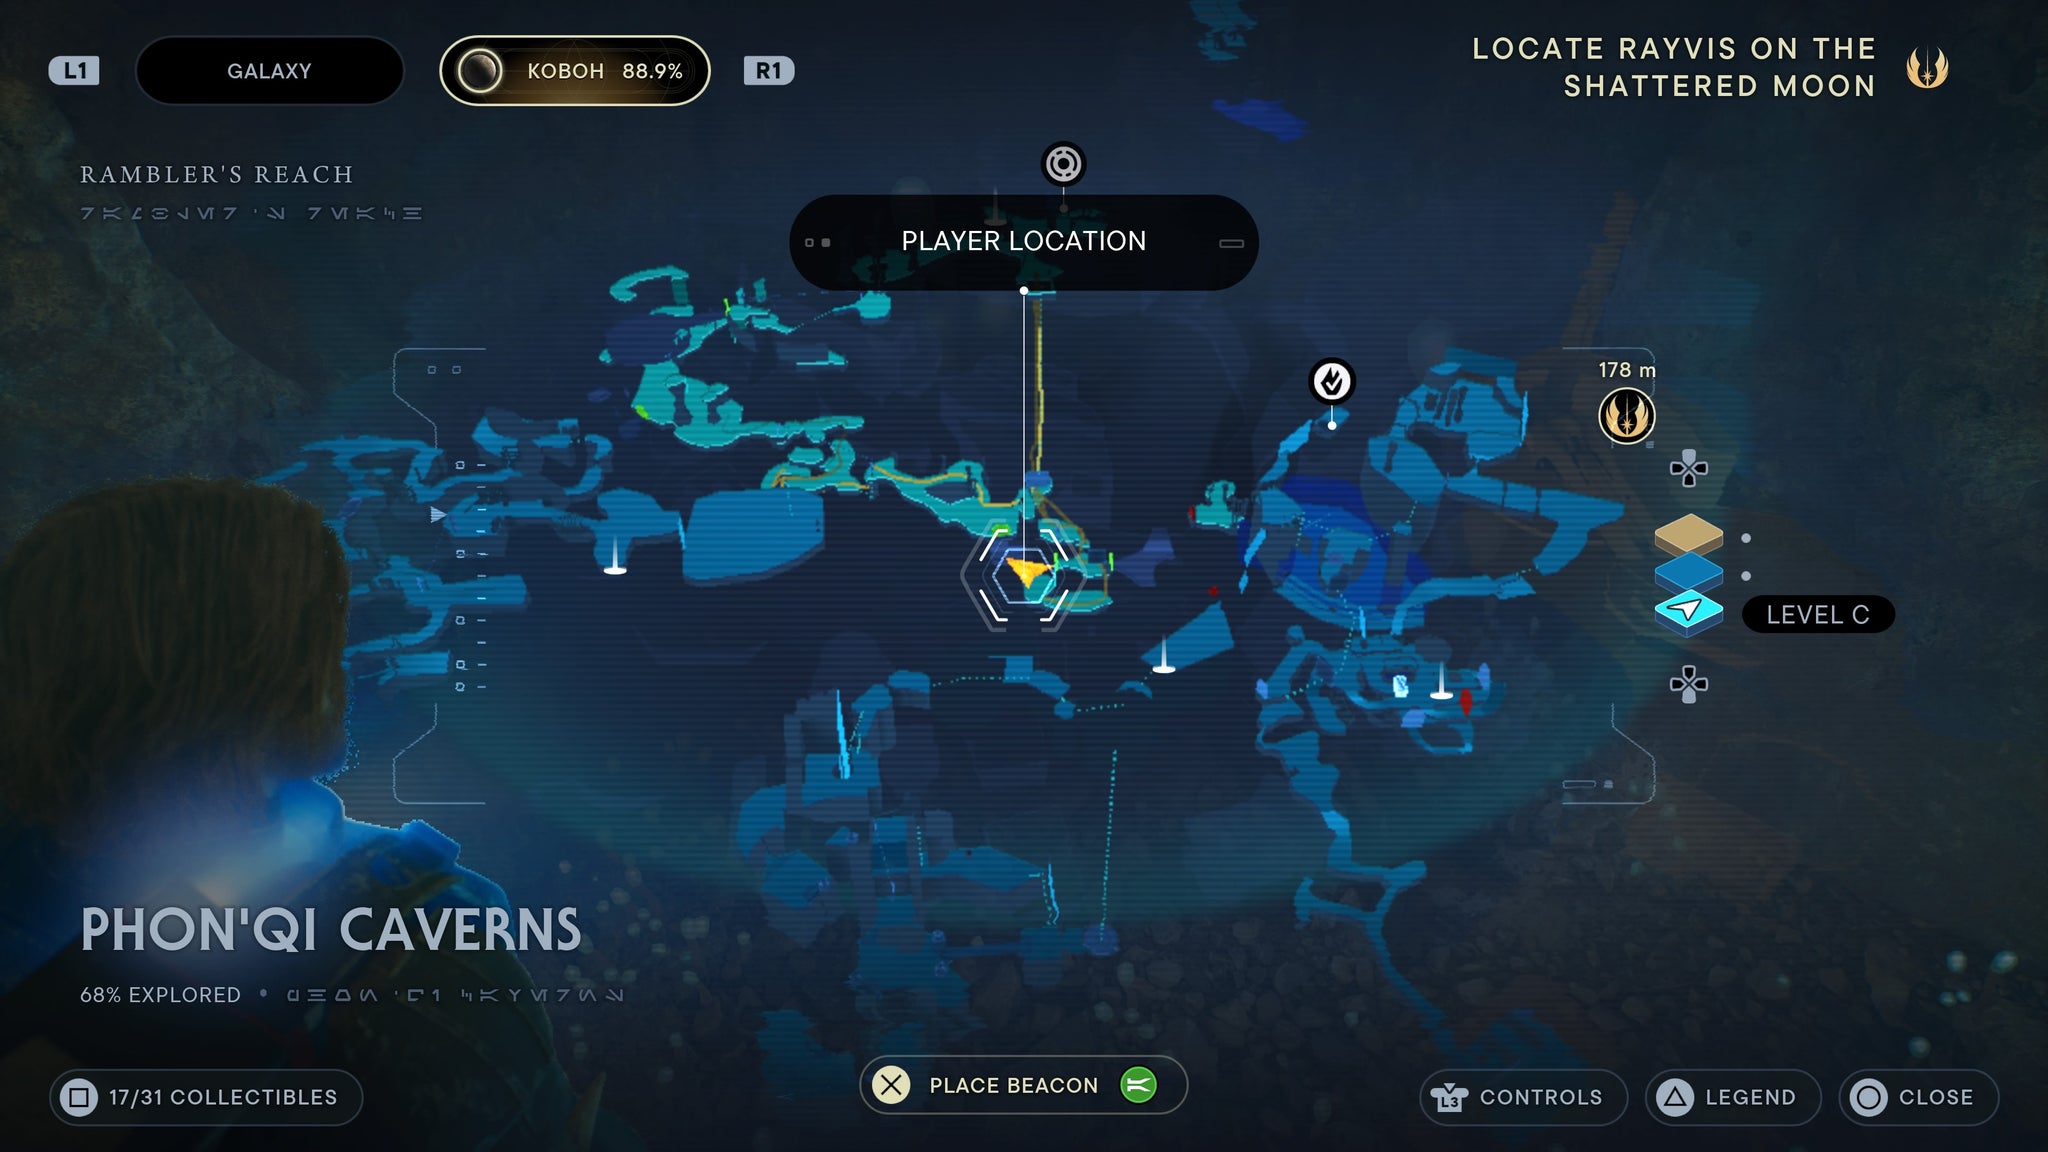
Requires force lift and slam. Make your way down into the caverns proper, then jump down to the right on a broken bridge. To the right, you’ll see a plant you can scan.
Jump down to the right and scan the plant.
Requires force lift and slam. Make your way down into the caverns proper, then jump down to the right on a broken bridge. Continue forward, clear out the droids in the next room, and you’ll find a force echo.
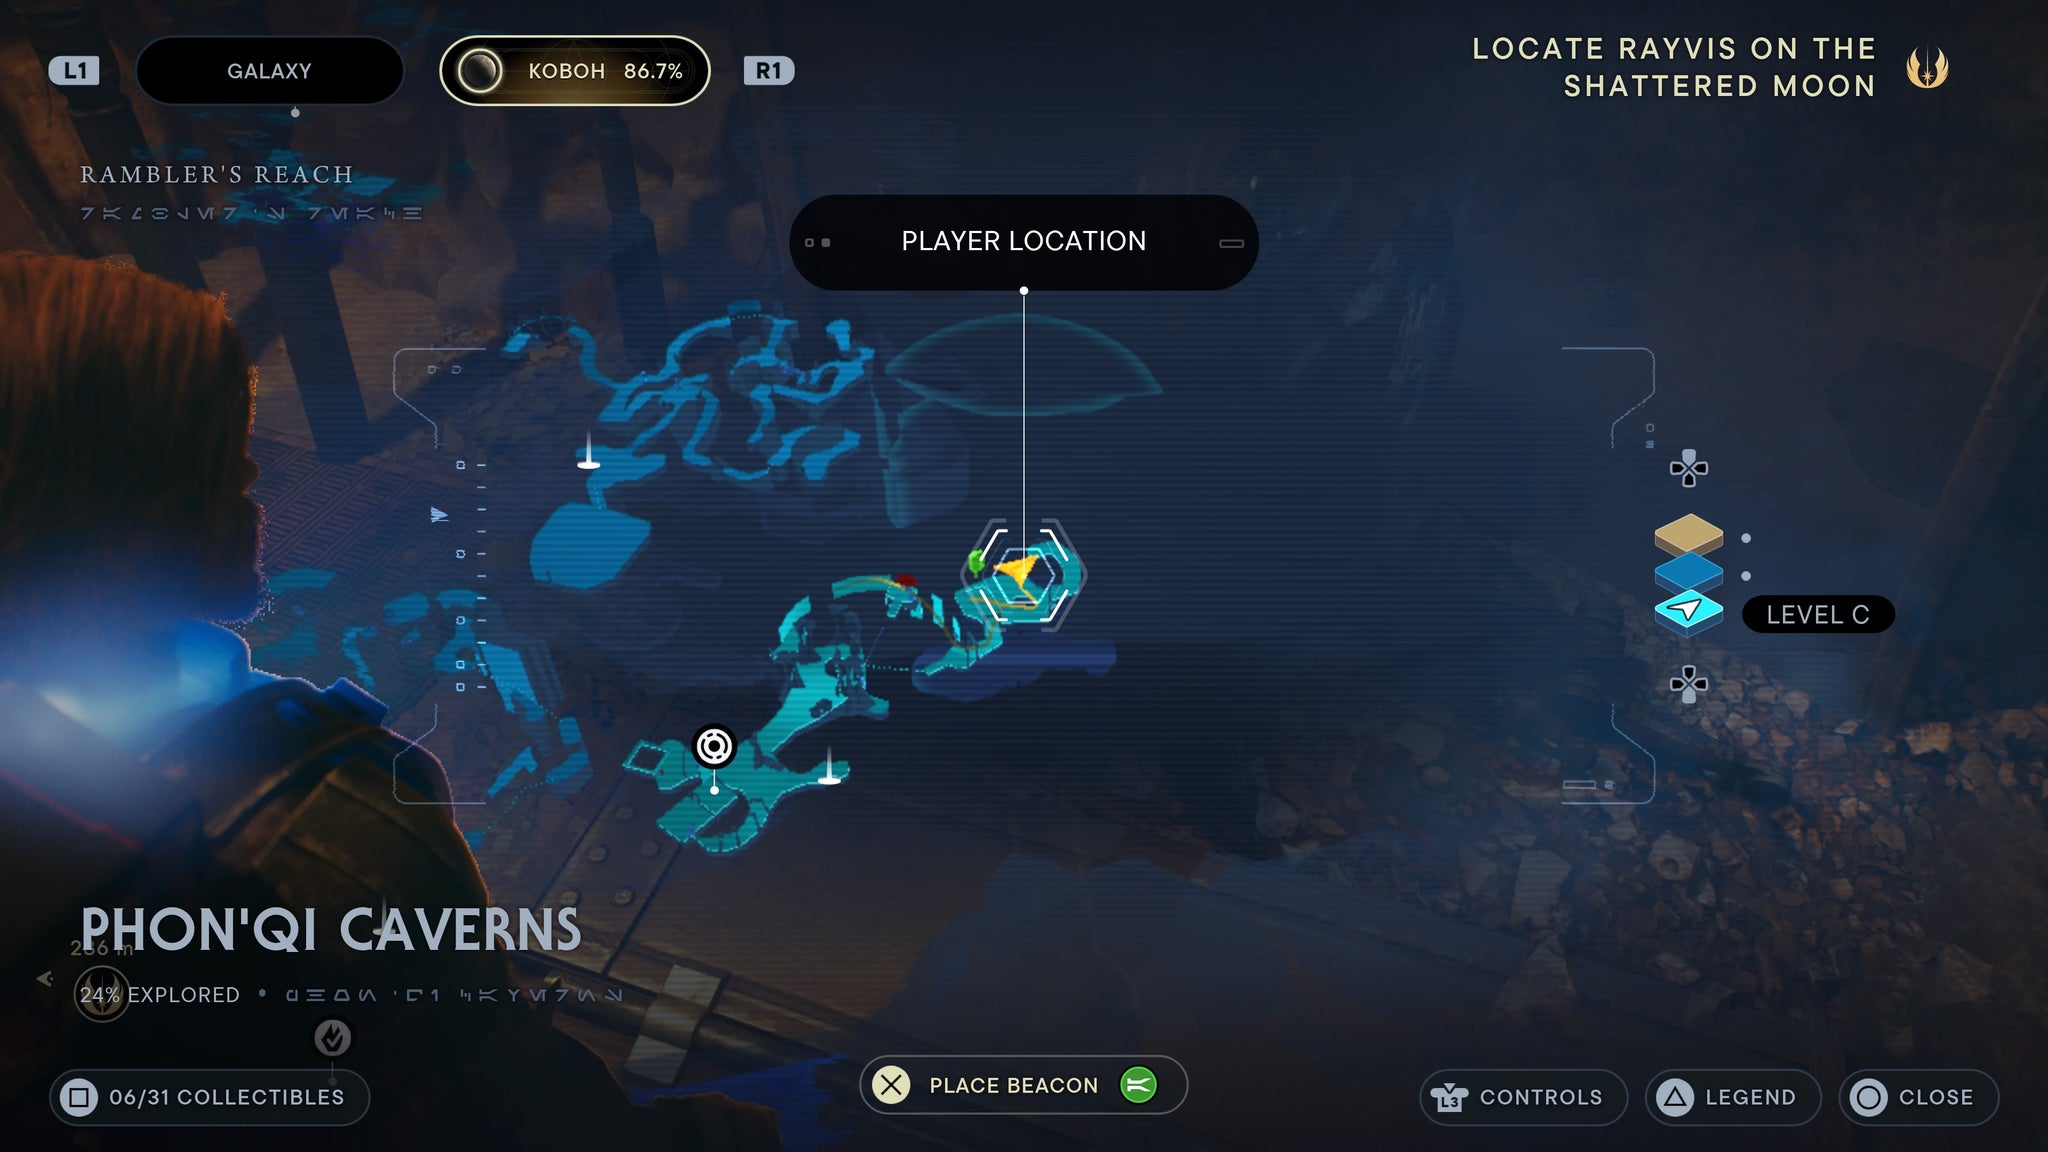
On a broken B2 droid.
Requires force lift and slam. Make your way down into the caverns proper, then jump down to the right on a broken bridge. Continue forward, clear out the droids in the next room, then fall down in the hole in the ground. You’ll find a terminal by a turret you can scan.
Take out the turret then scan.
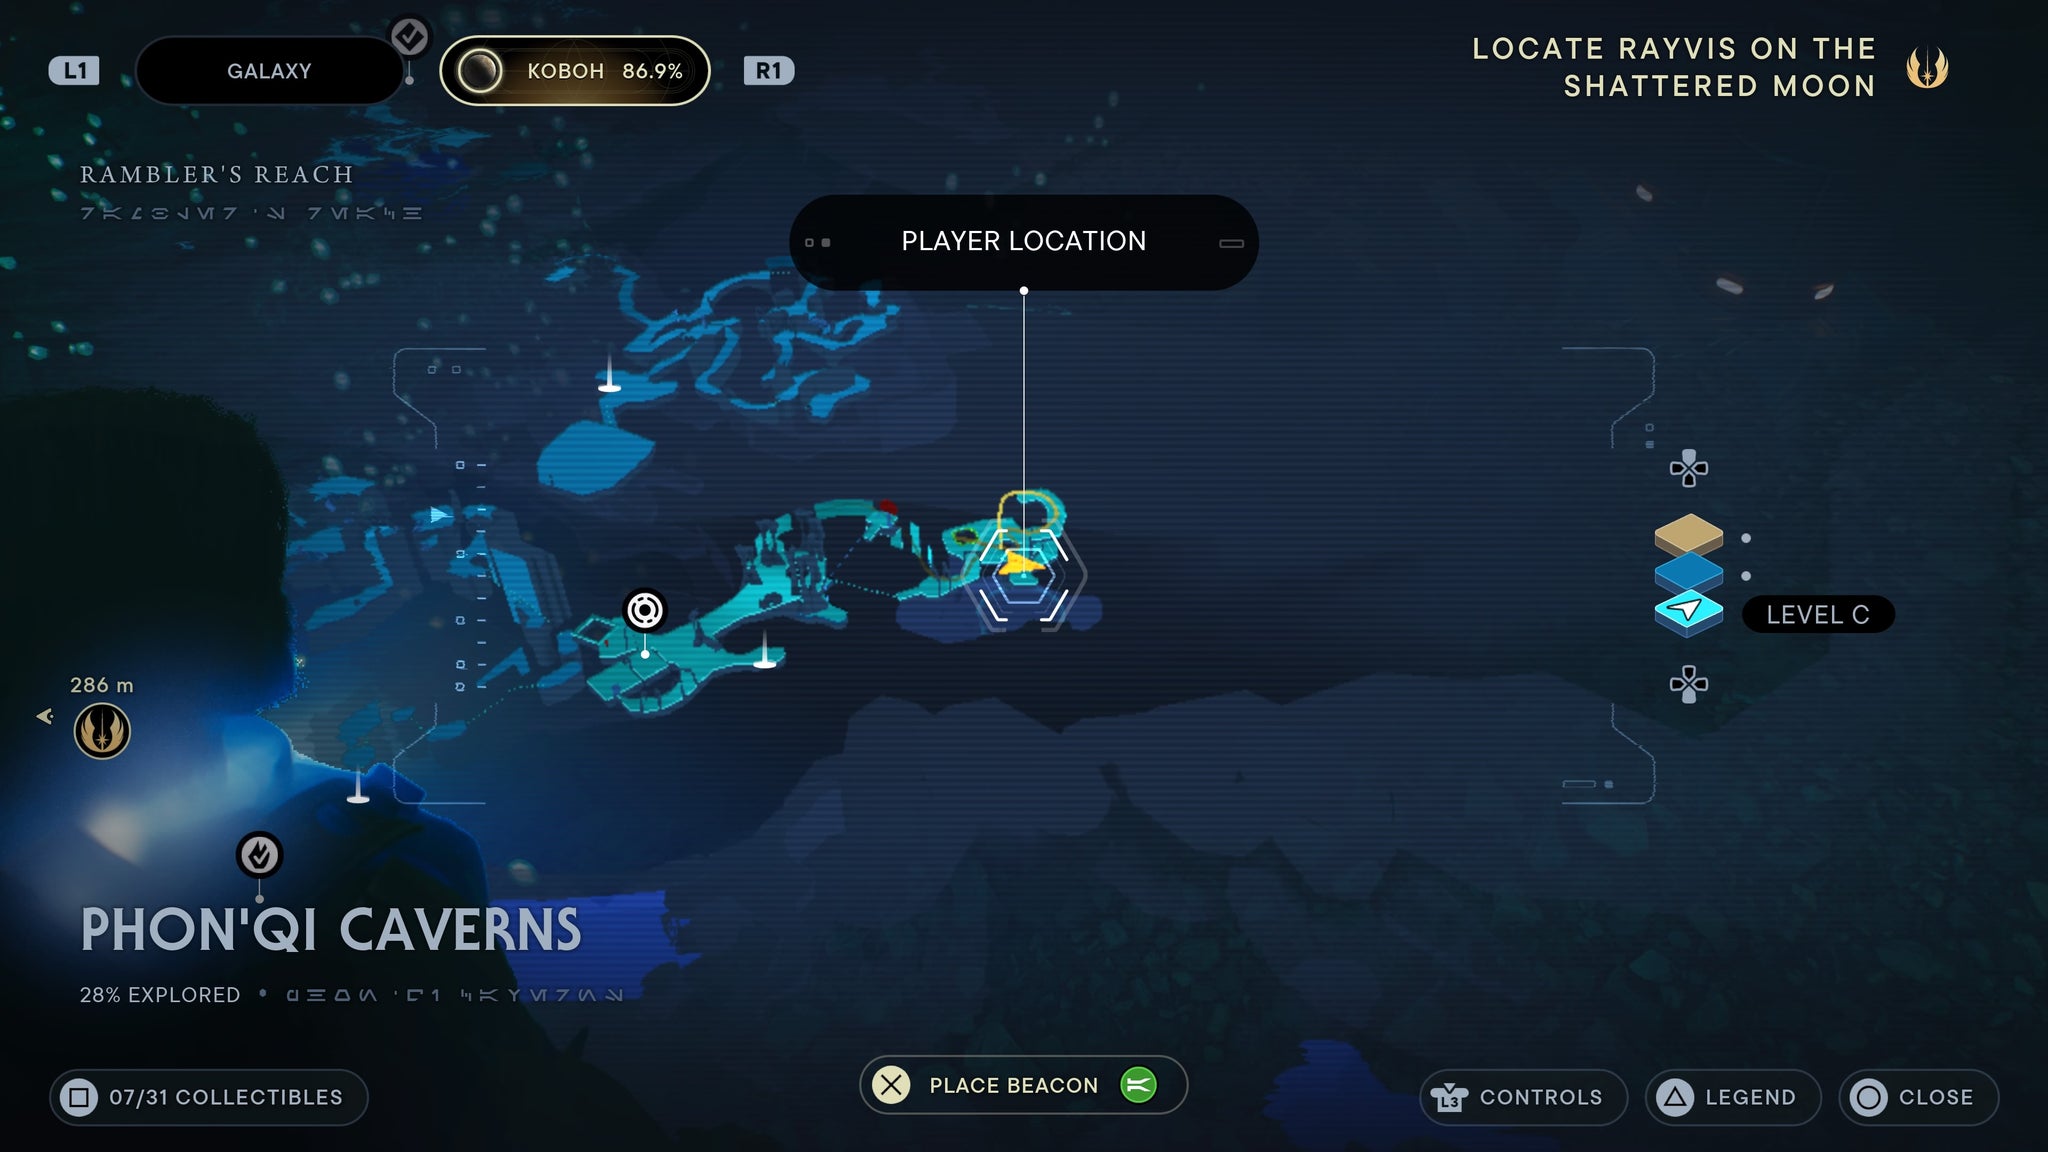
Requires force lift and slam. Make your way down into the caverns proper, then jump down to the right on a broken bridge. Continue forward, clear out the droids in the next room, pull down the boulder on the roof, then make your way down to the ground below. In the corner is a wall you can scan.
Jump down and scan those skeletons.
Requires force lift and slam. Make your way down into the caverns proper, then jump down to the right on a broken bridge. Continue forward, clear out the droids in the next room, pull down the boulder on the roof, then make your way down to the ground below. By the electrified door is a force echo.
You want to head left of the purple door.
Requires force lift and slam. When you are dropped through the trap door, jump up and through the forcefield, then you’ll find a scan on a corpse on the other side.

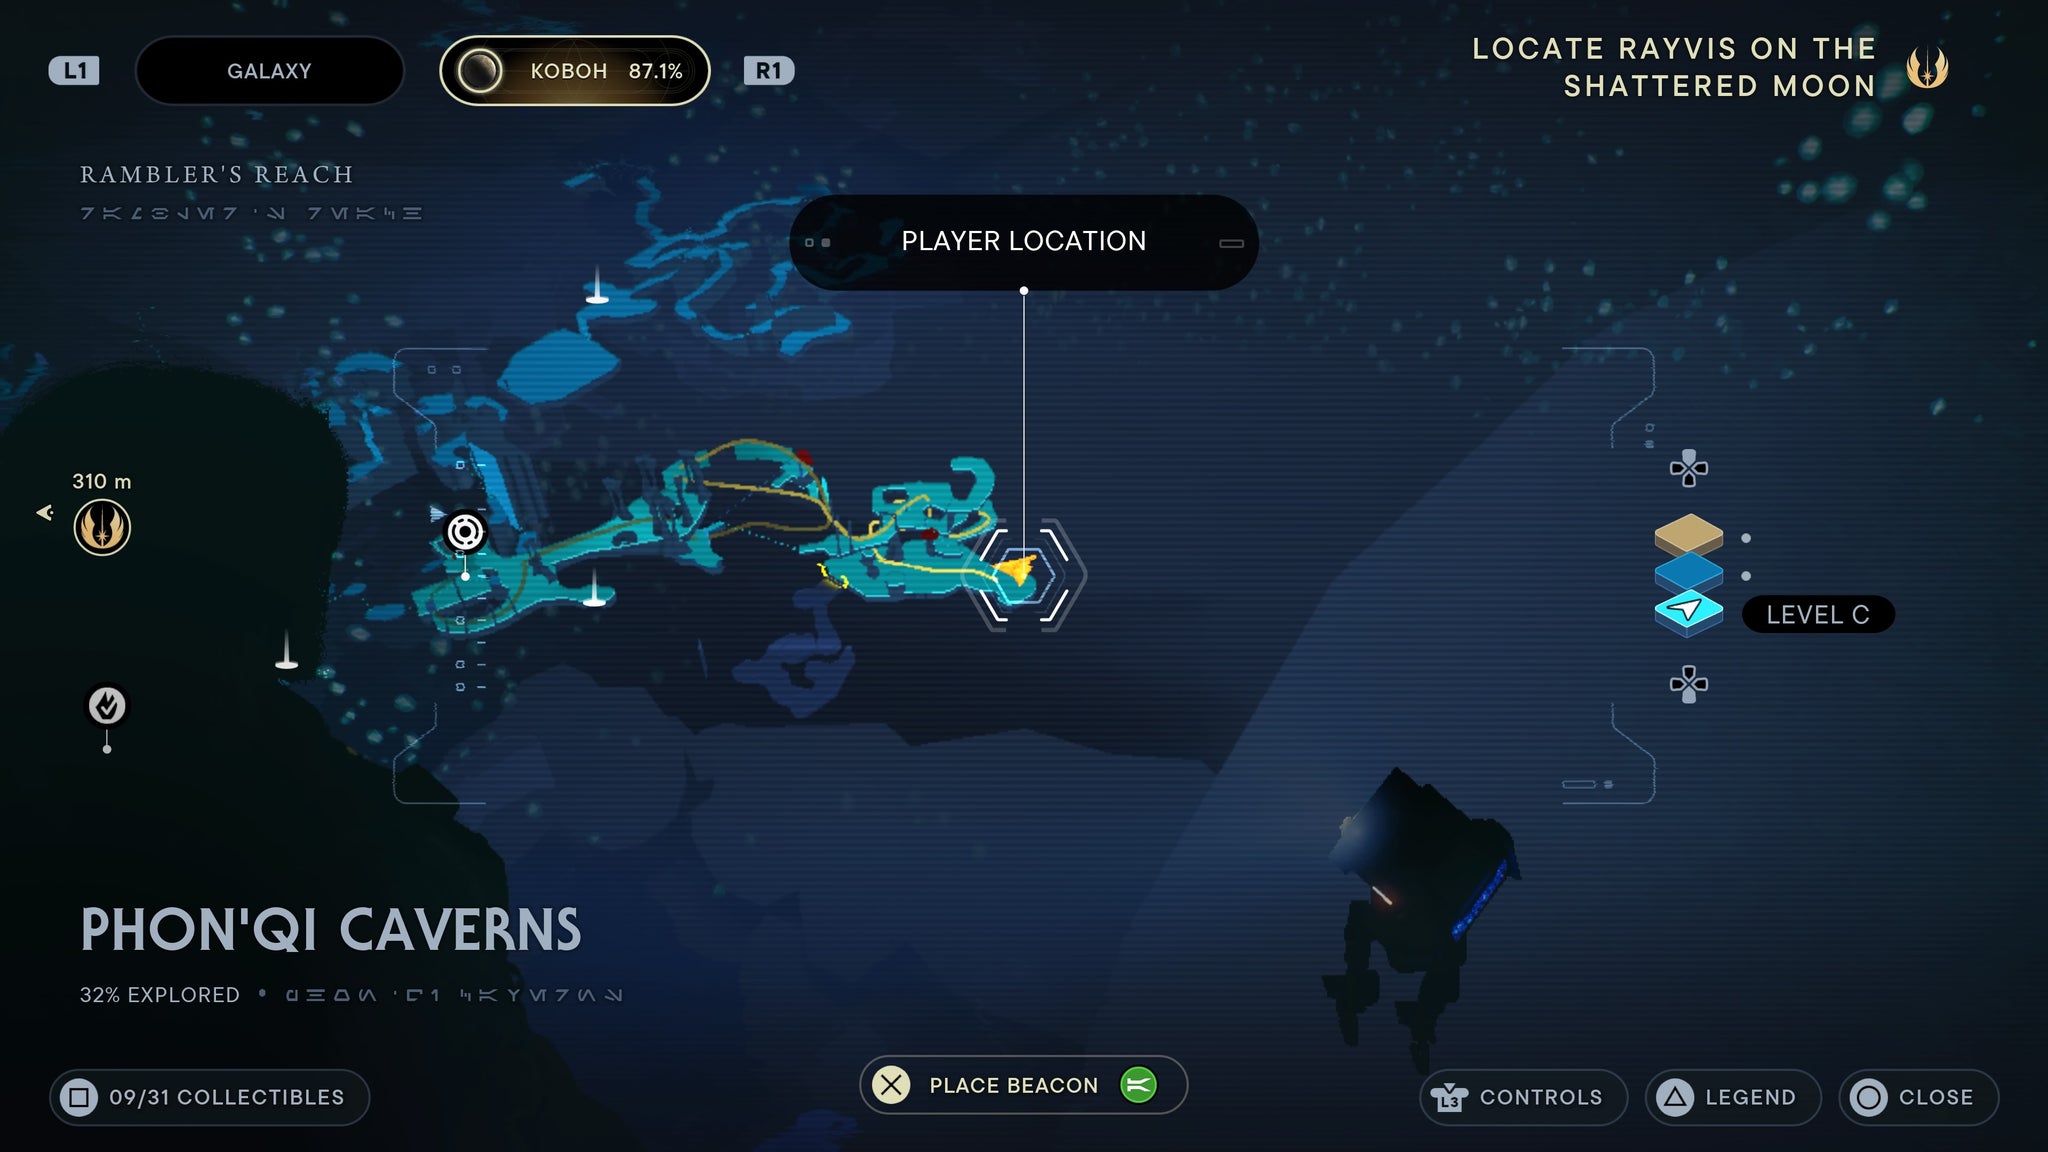
Poor guy.
Requires force lift and slam. When you are dropped through the trap door, jump up and through the forcefield. Use a acid plant to burn through the electrified door, then you’ll find a force echo.
On another body, on the ground.
Requires force lift and slam. After the triple boss fight, slice through the door and you’ll find a force echo.
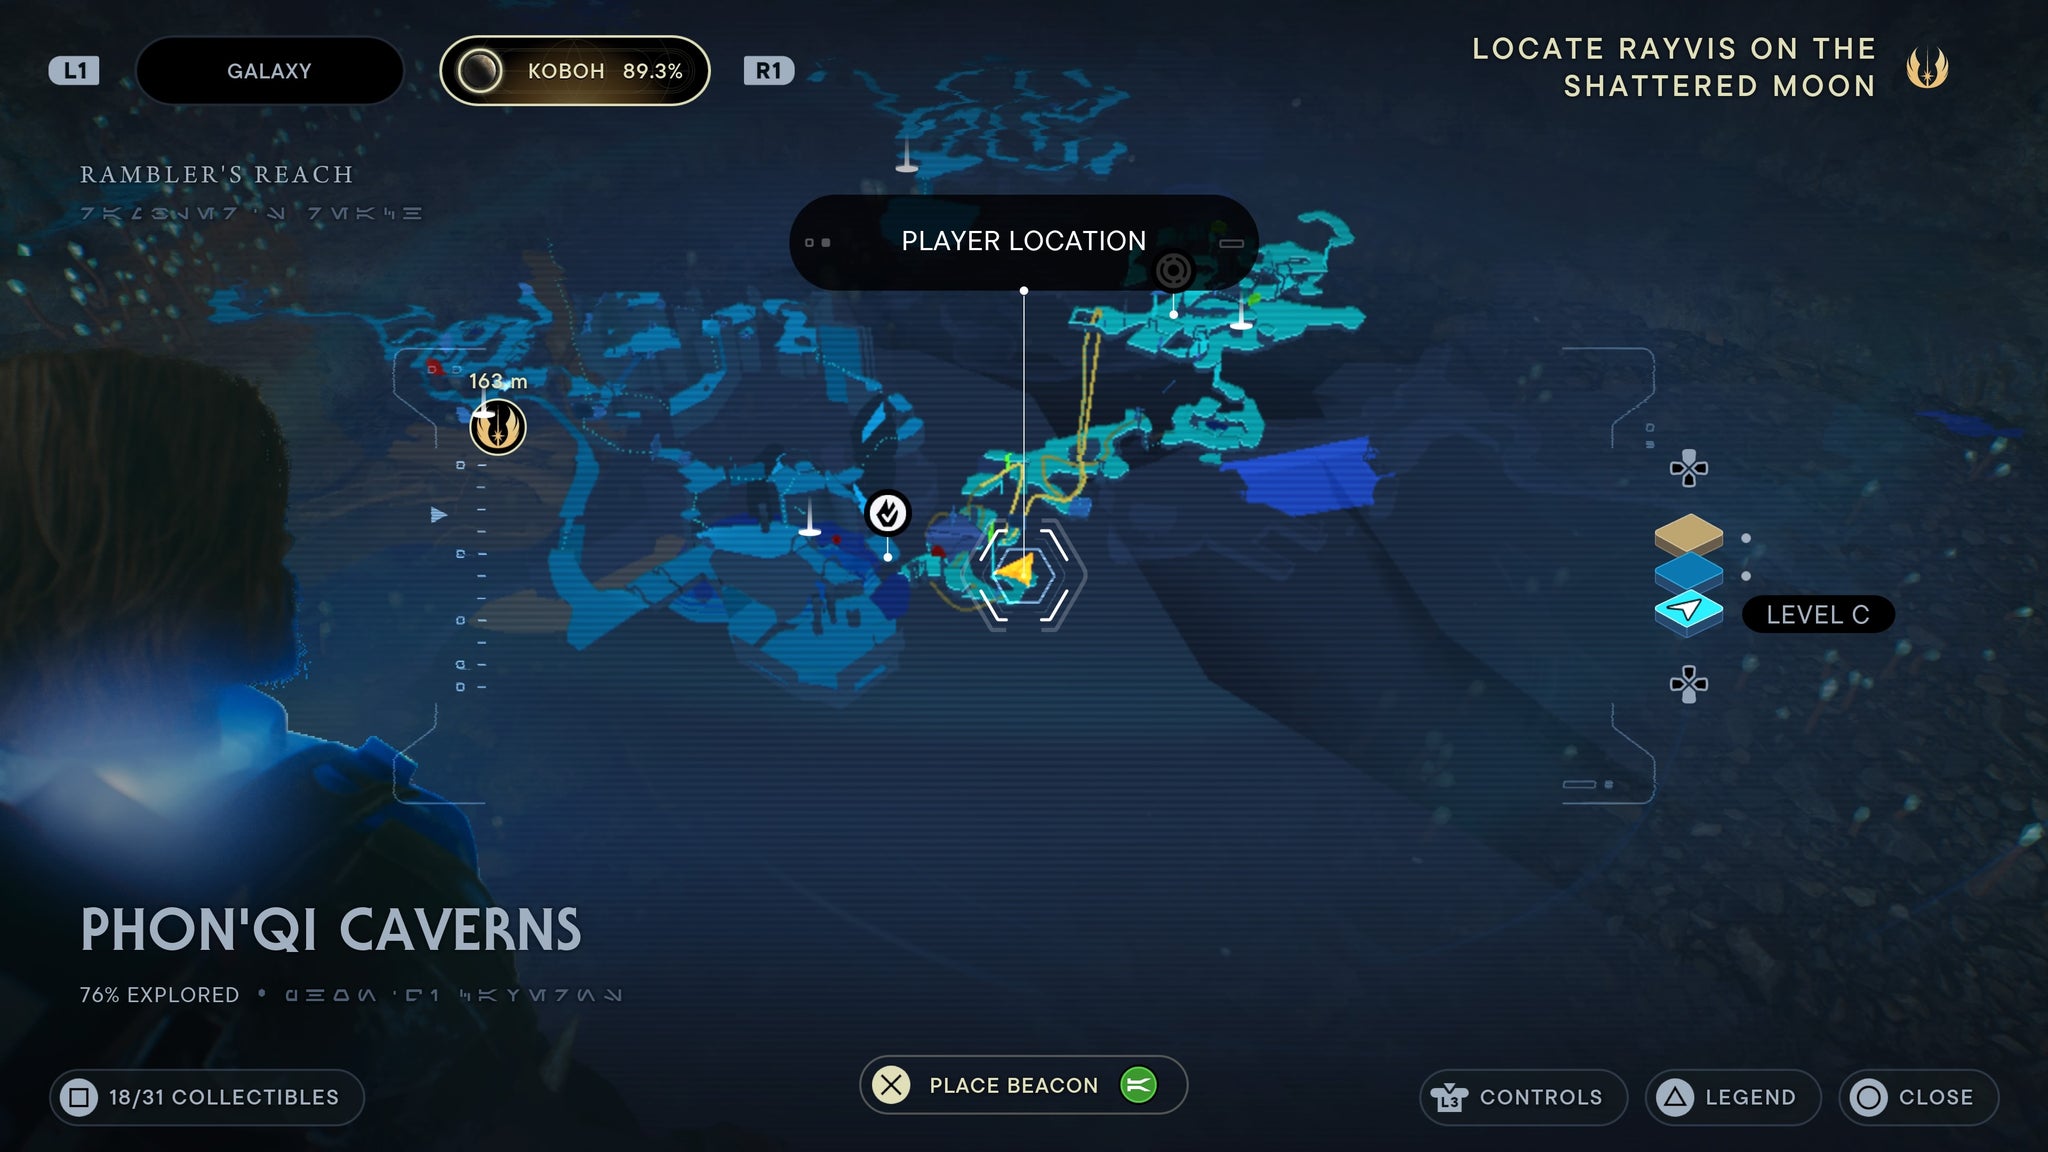
Kill the bosses then slice the door.
Requires force lift and slam. After the triple boss fight, jump up the wall and dash through the forcefield, and you’ll find a terminal you can scan.
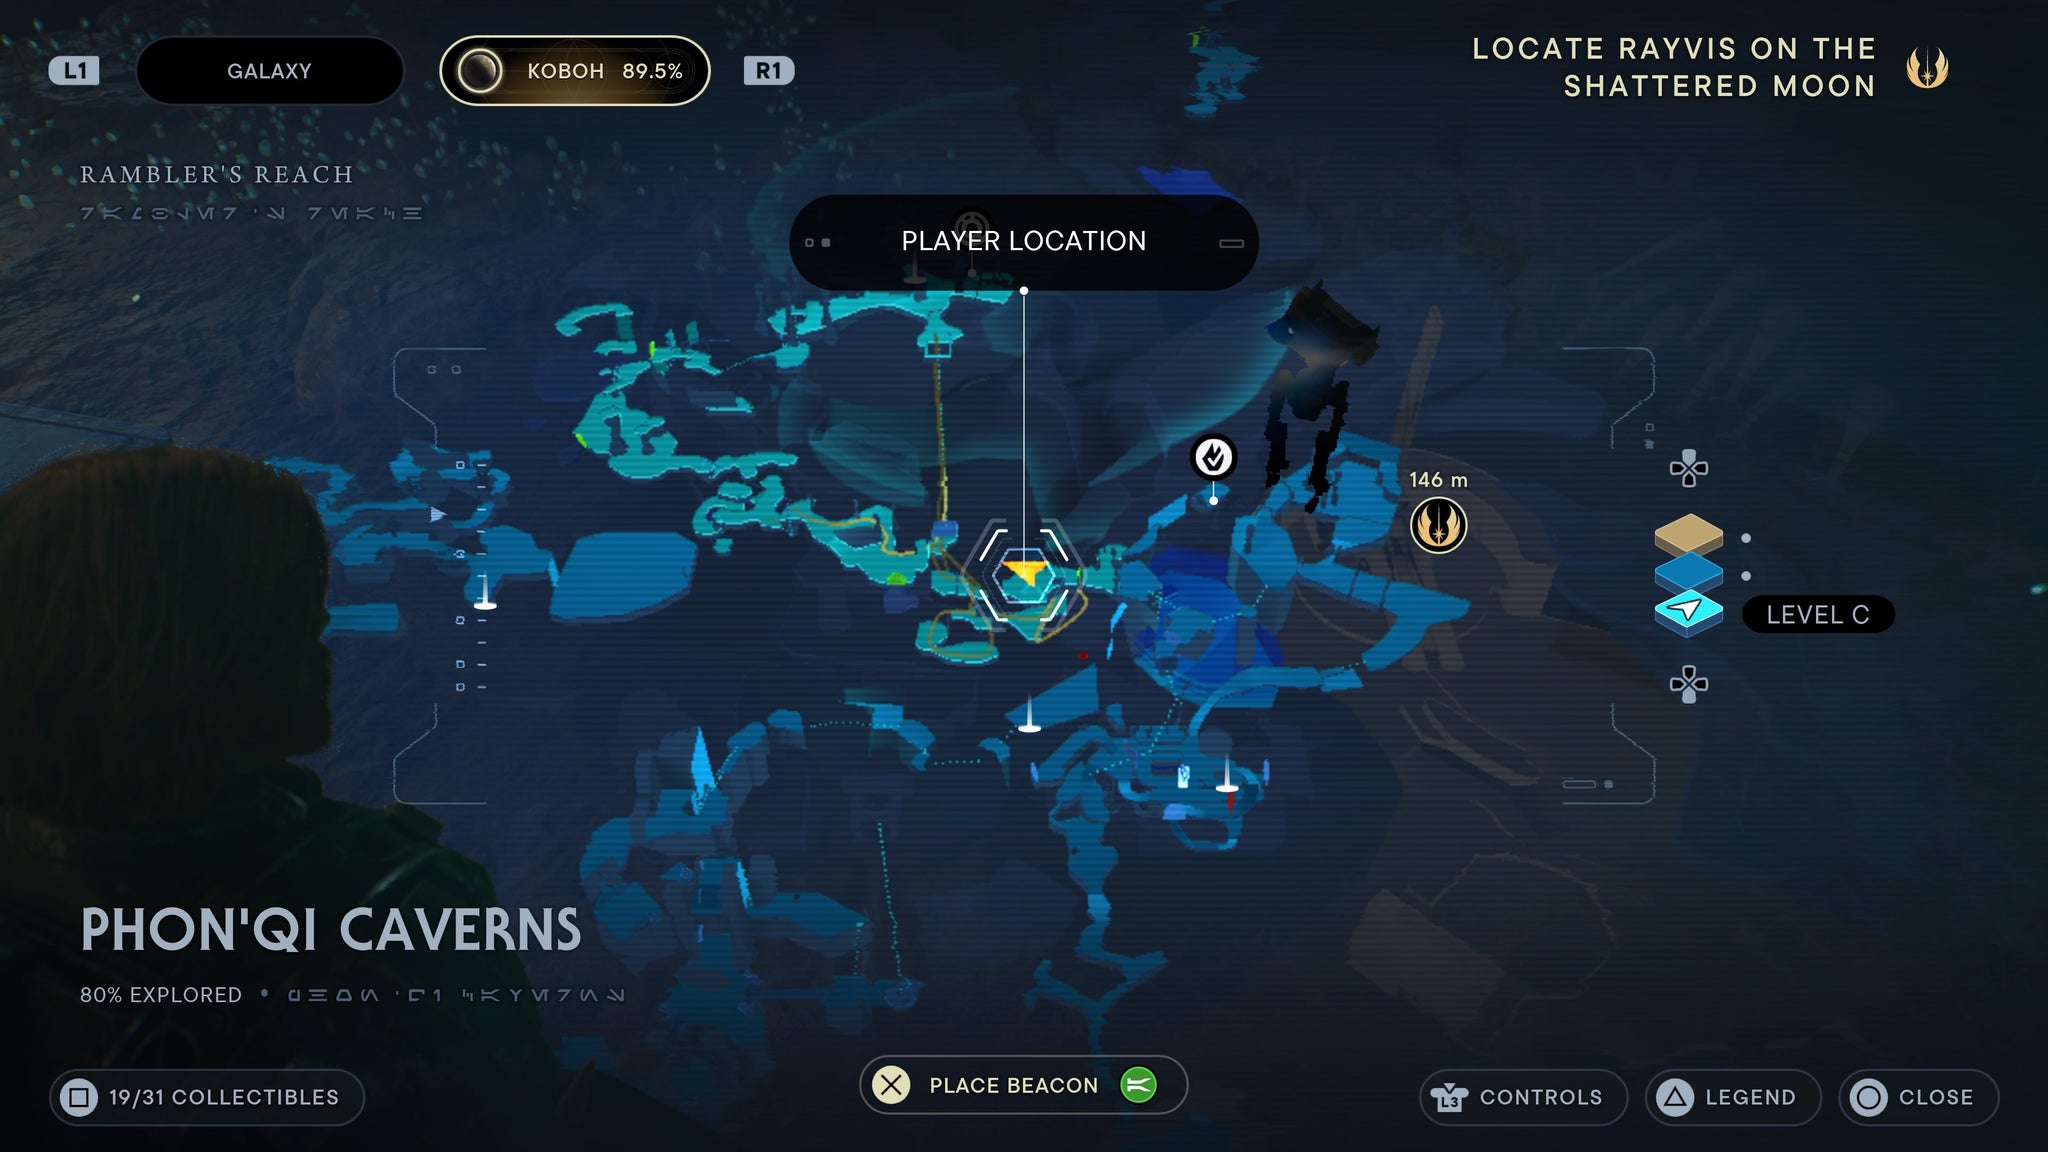
You’ll reach a room with a terminal you can scan, near a white forcefield.
Requires force lift and slam. Head to the large room filled with pots. Grab an acid plant and throw it at the electrified door. Inside you’ll find a force echo.
Melt the door then scan the pots to the right!
Requires force lift and slam. Use an acid plant to break open the electrified door in the room you drop down into. A boss will spawn. Once they are dead, you’ll find a force echo on a chair inside.
Get to the chair in the red room!
Requires force lift and slam. Grab an acid plant from the lower bridge in the large entry room, then throw it up at the electrified door near the zipline. Inside, you’ll find a door you can scan.
Look left as you enter.
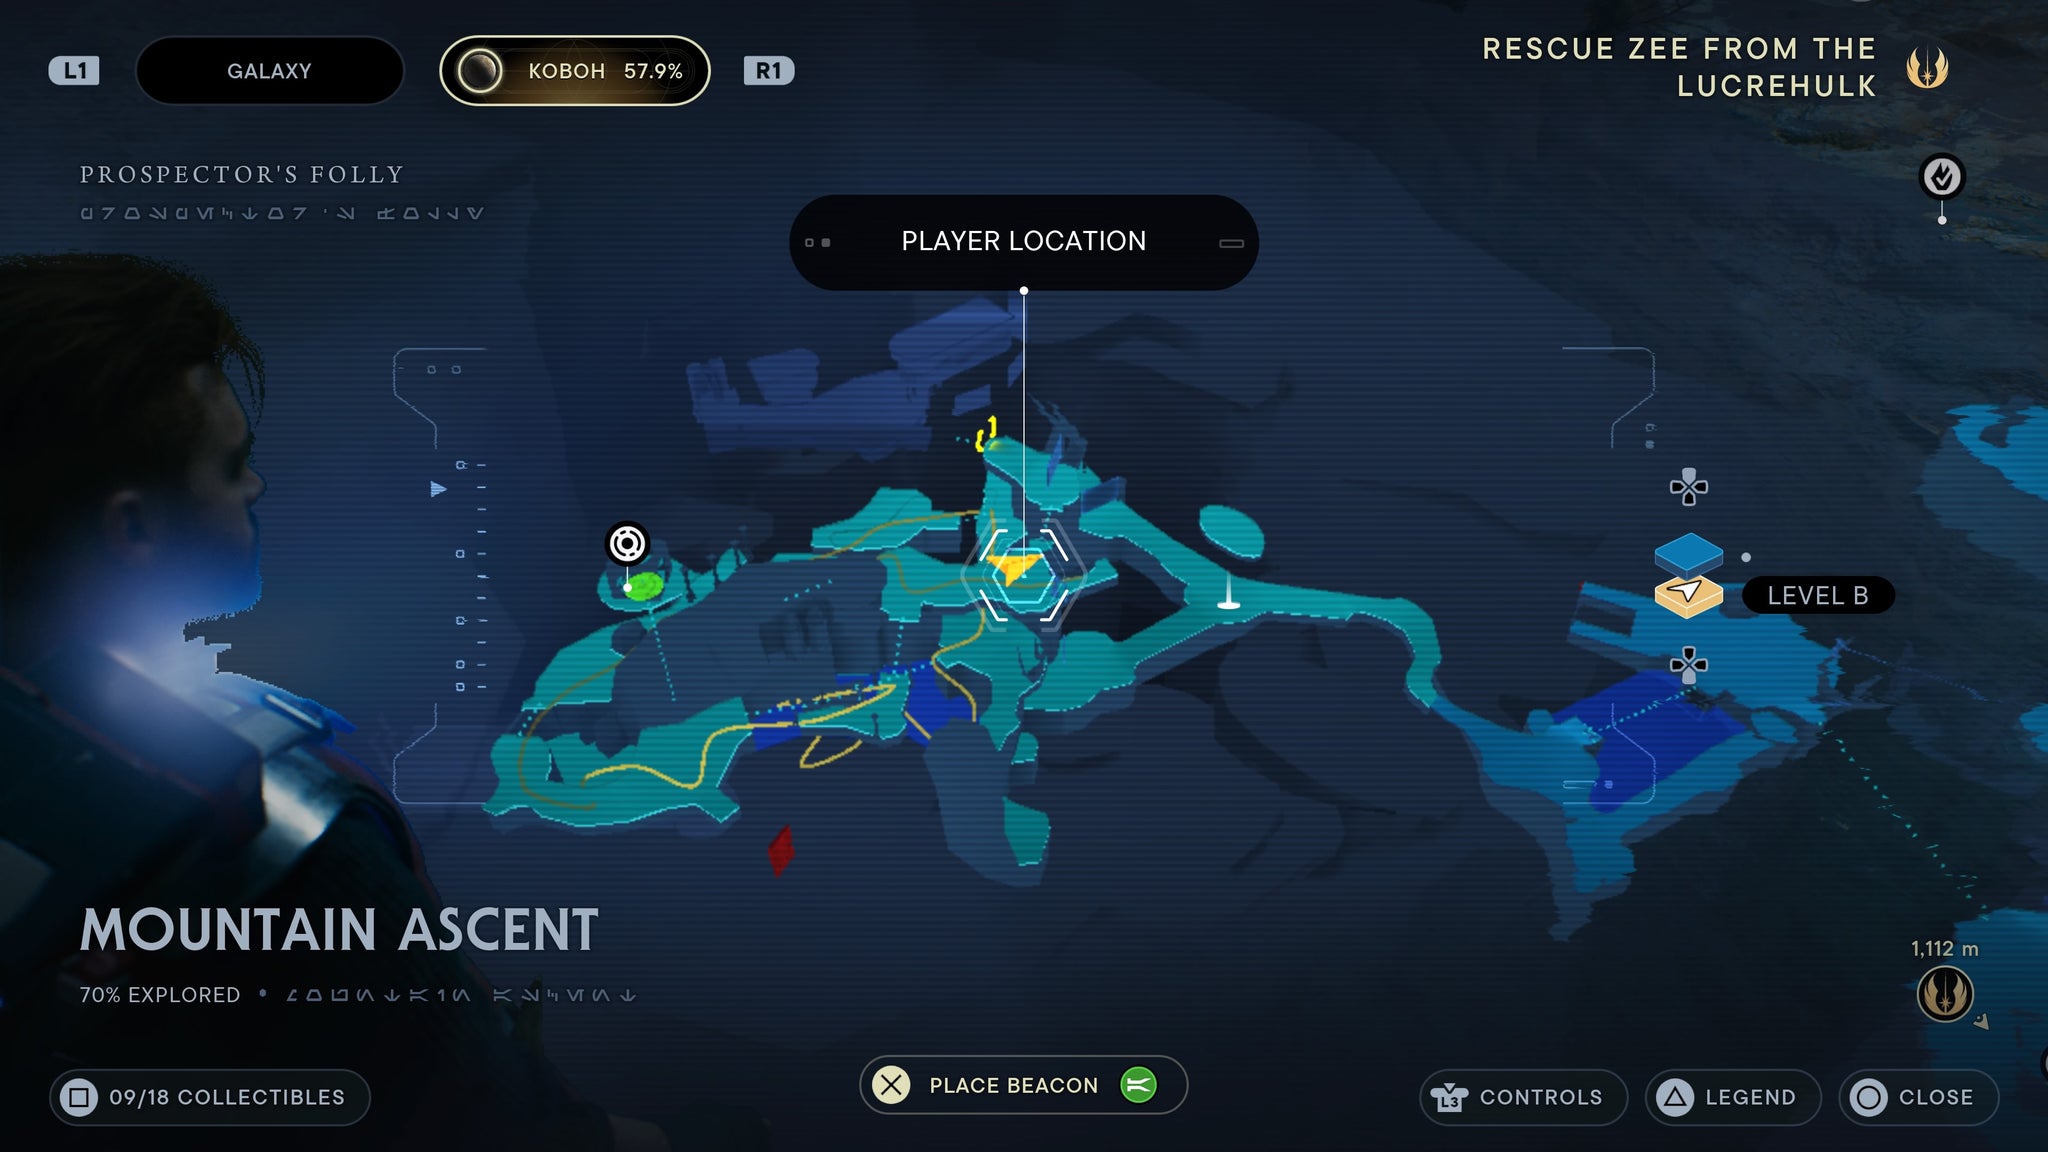
Mountain Ascent
From the meditation point, walk down the path to your left and there’ll be a force echo there.
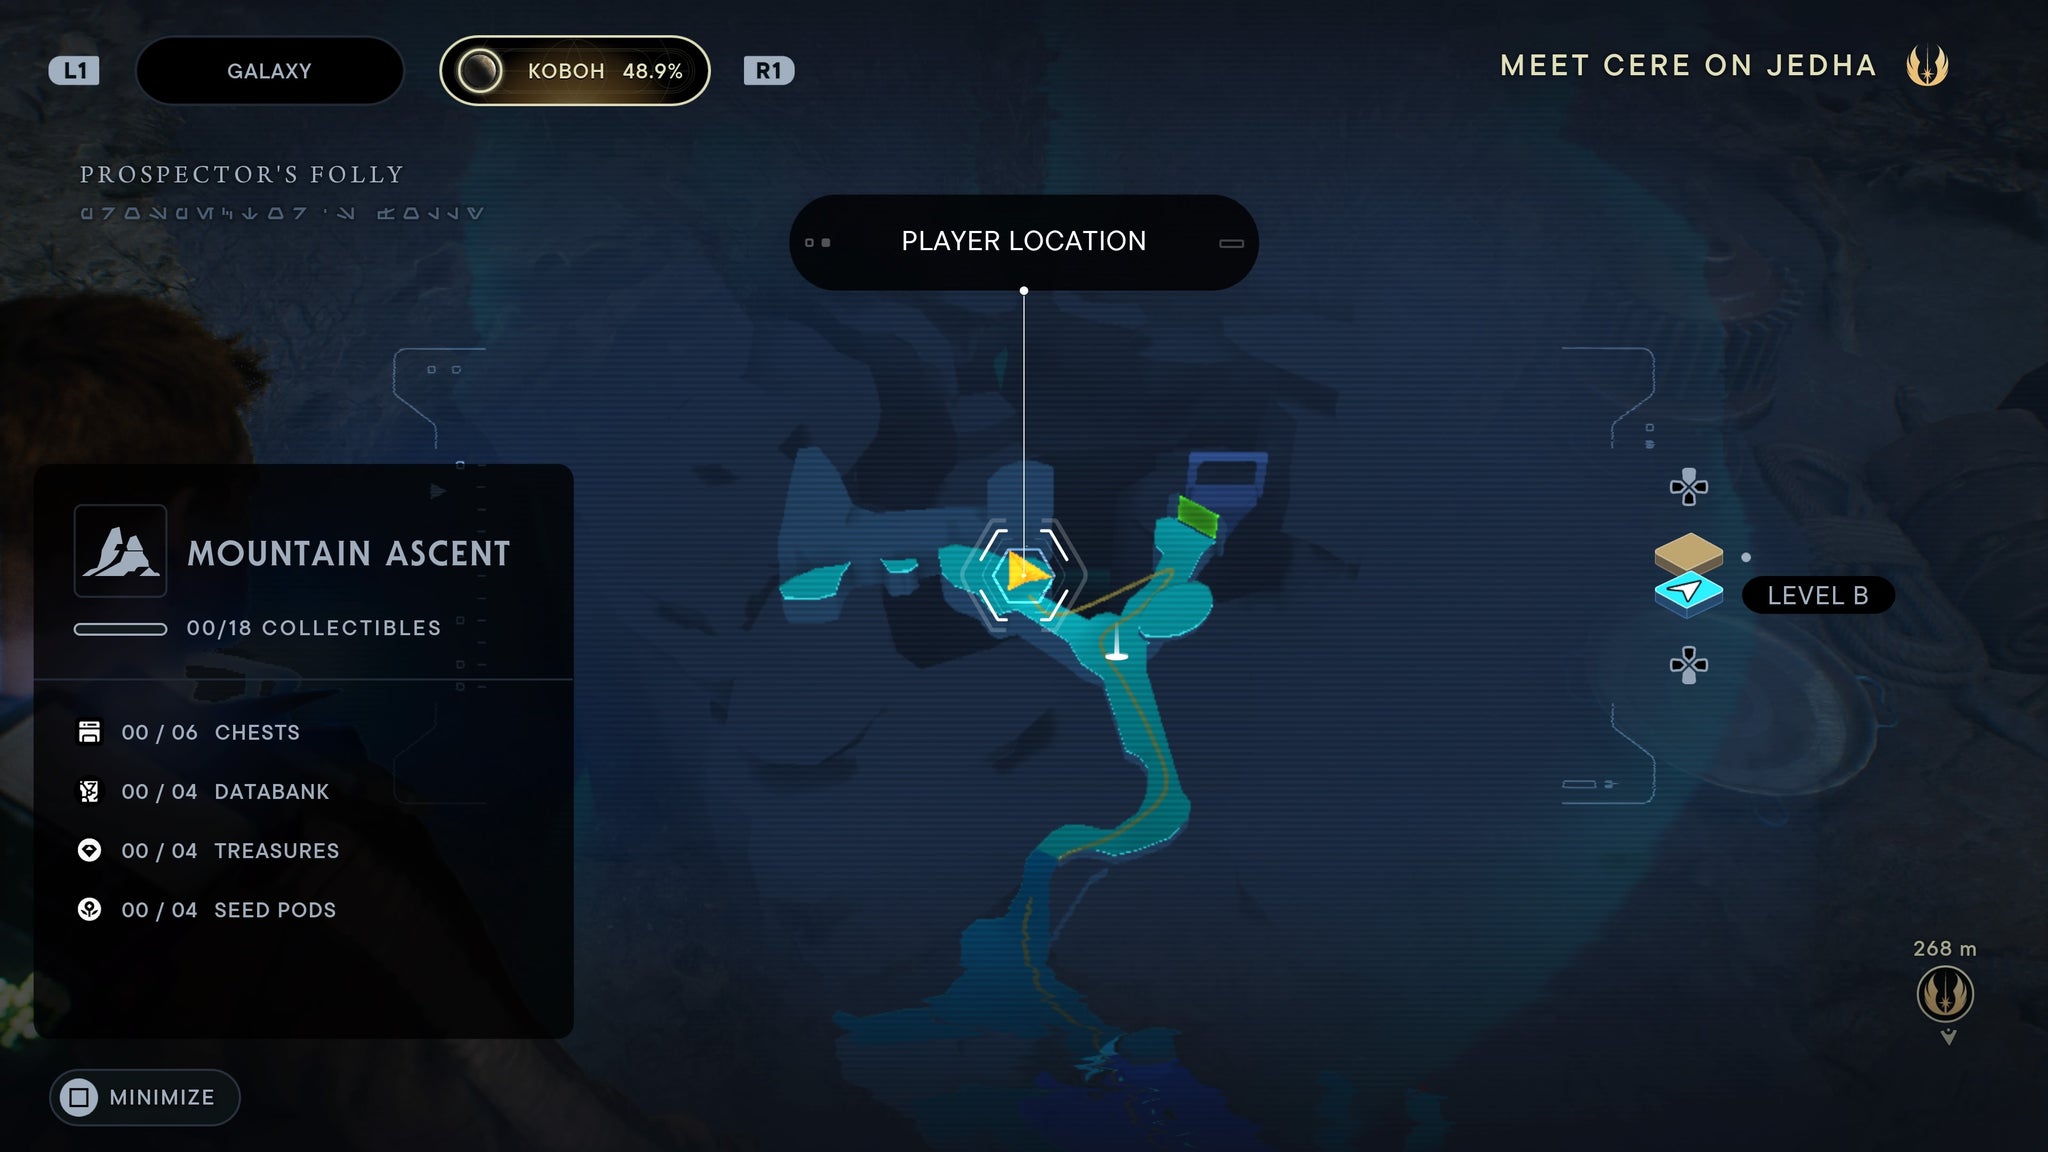
Right by the meditation point.
From the meditation point, either dash through the green forcefield or convine the storm trooper to let you through. Once you do, scan the terminal.

Through the forcefield.
Requires forcefield dashing. Found in Mountain Ascent. From the meditation point, dash through the nearby barriers and run left until you hit water. Once you do, grapple to the wall and run across. Then walk down into the pit ahead and scan the tie fighter.

By the TIE fighter
Requires forcefield dashing. At the higher level of the zone near the rope shortcut. Scan the blue hut.
By the hut!
Requires force lift and slam. Found in the Mountain Ascent. Make your way to the back of the Mountain Ascent and force lift up the door. Jump in and kill all the bugs inside, then you’ll find a scan.
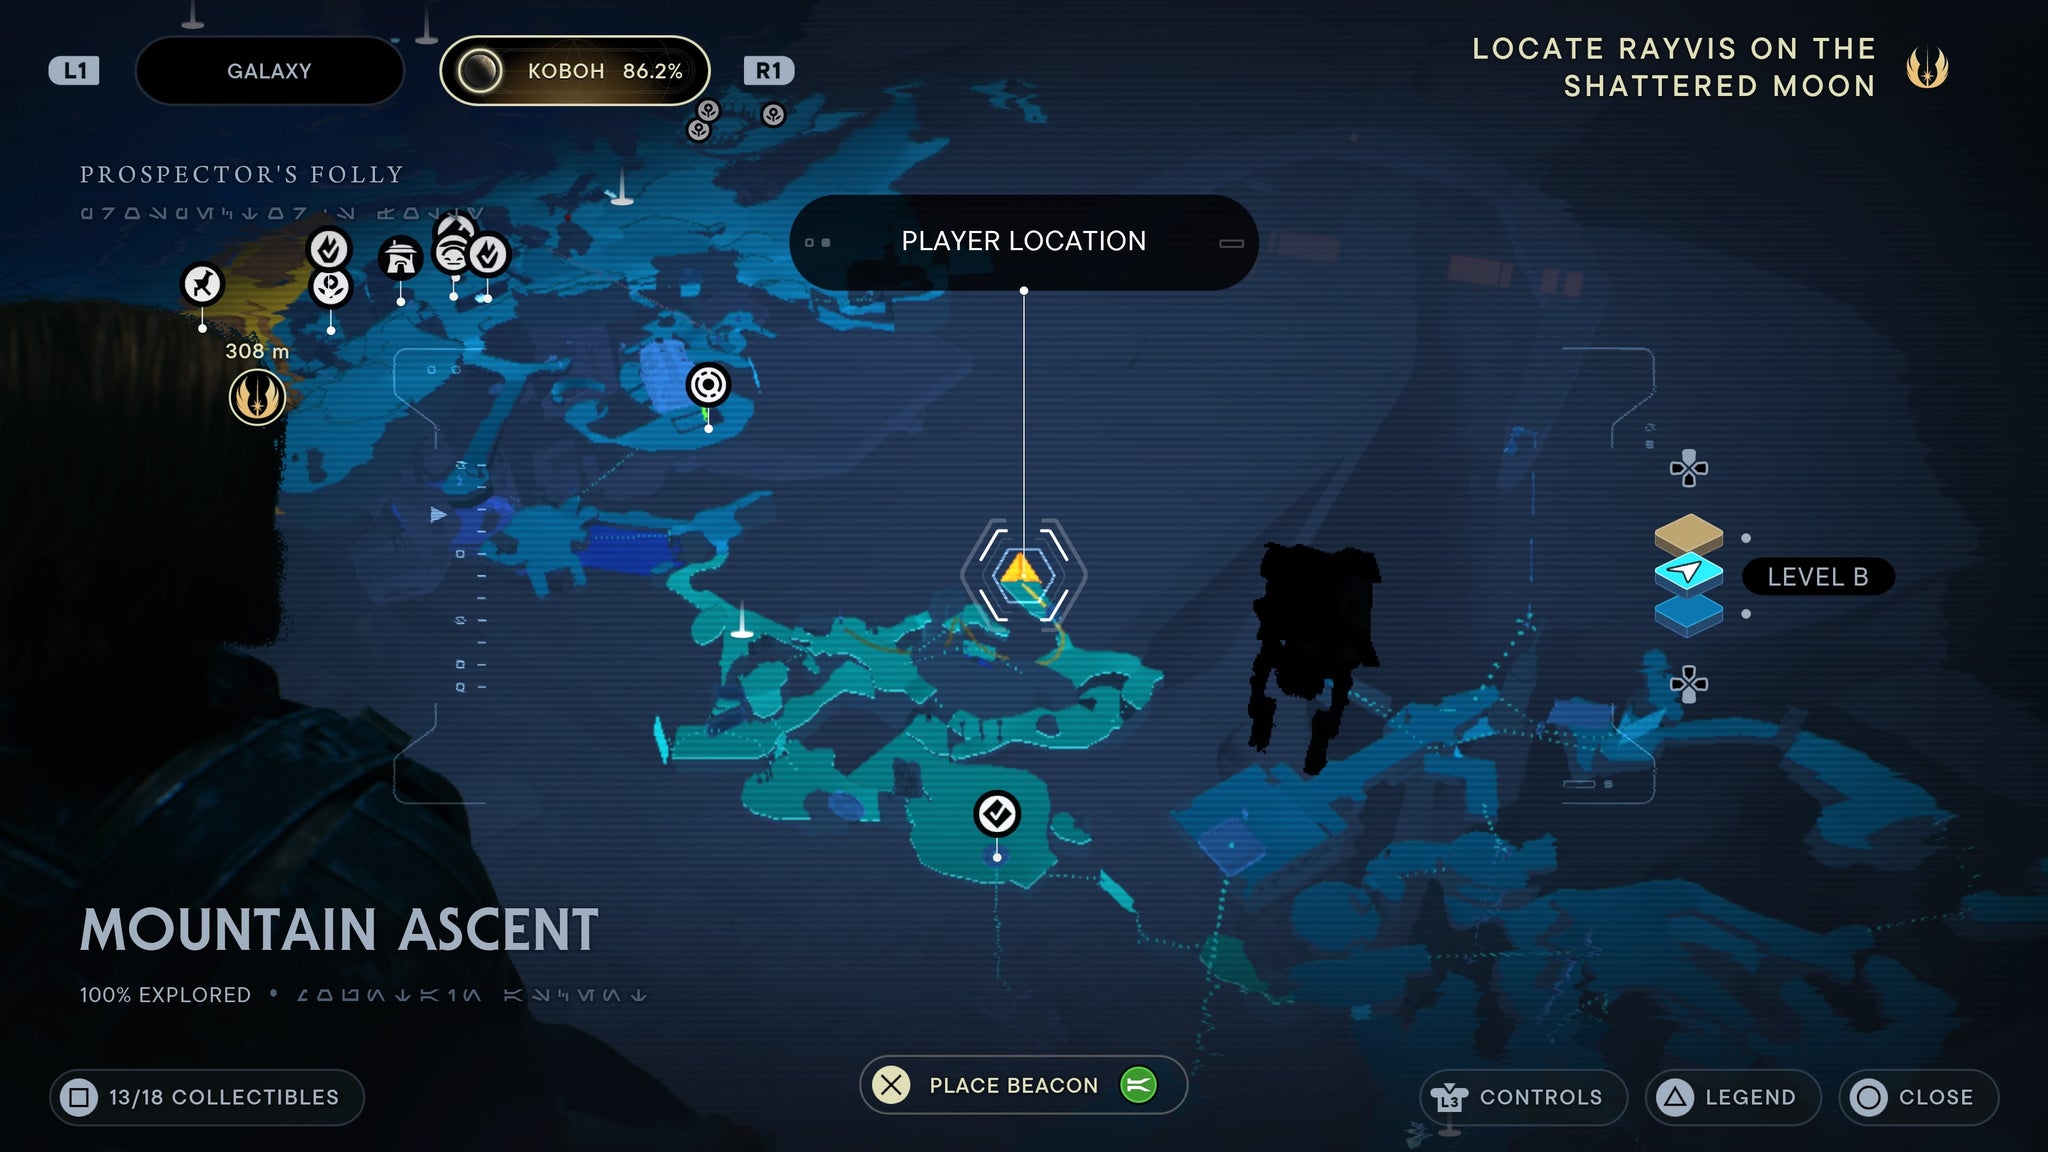
Clear out the bugs and scan the nest.
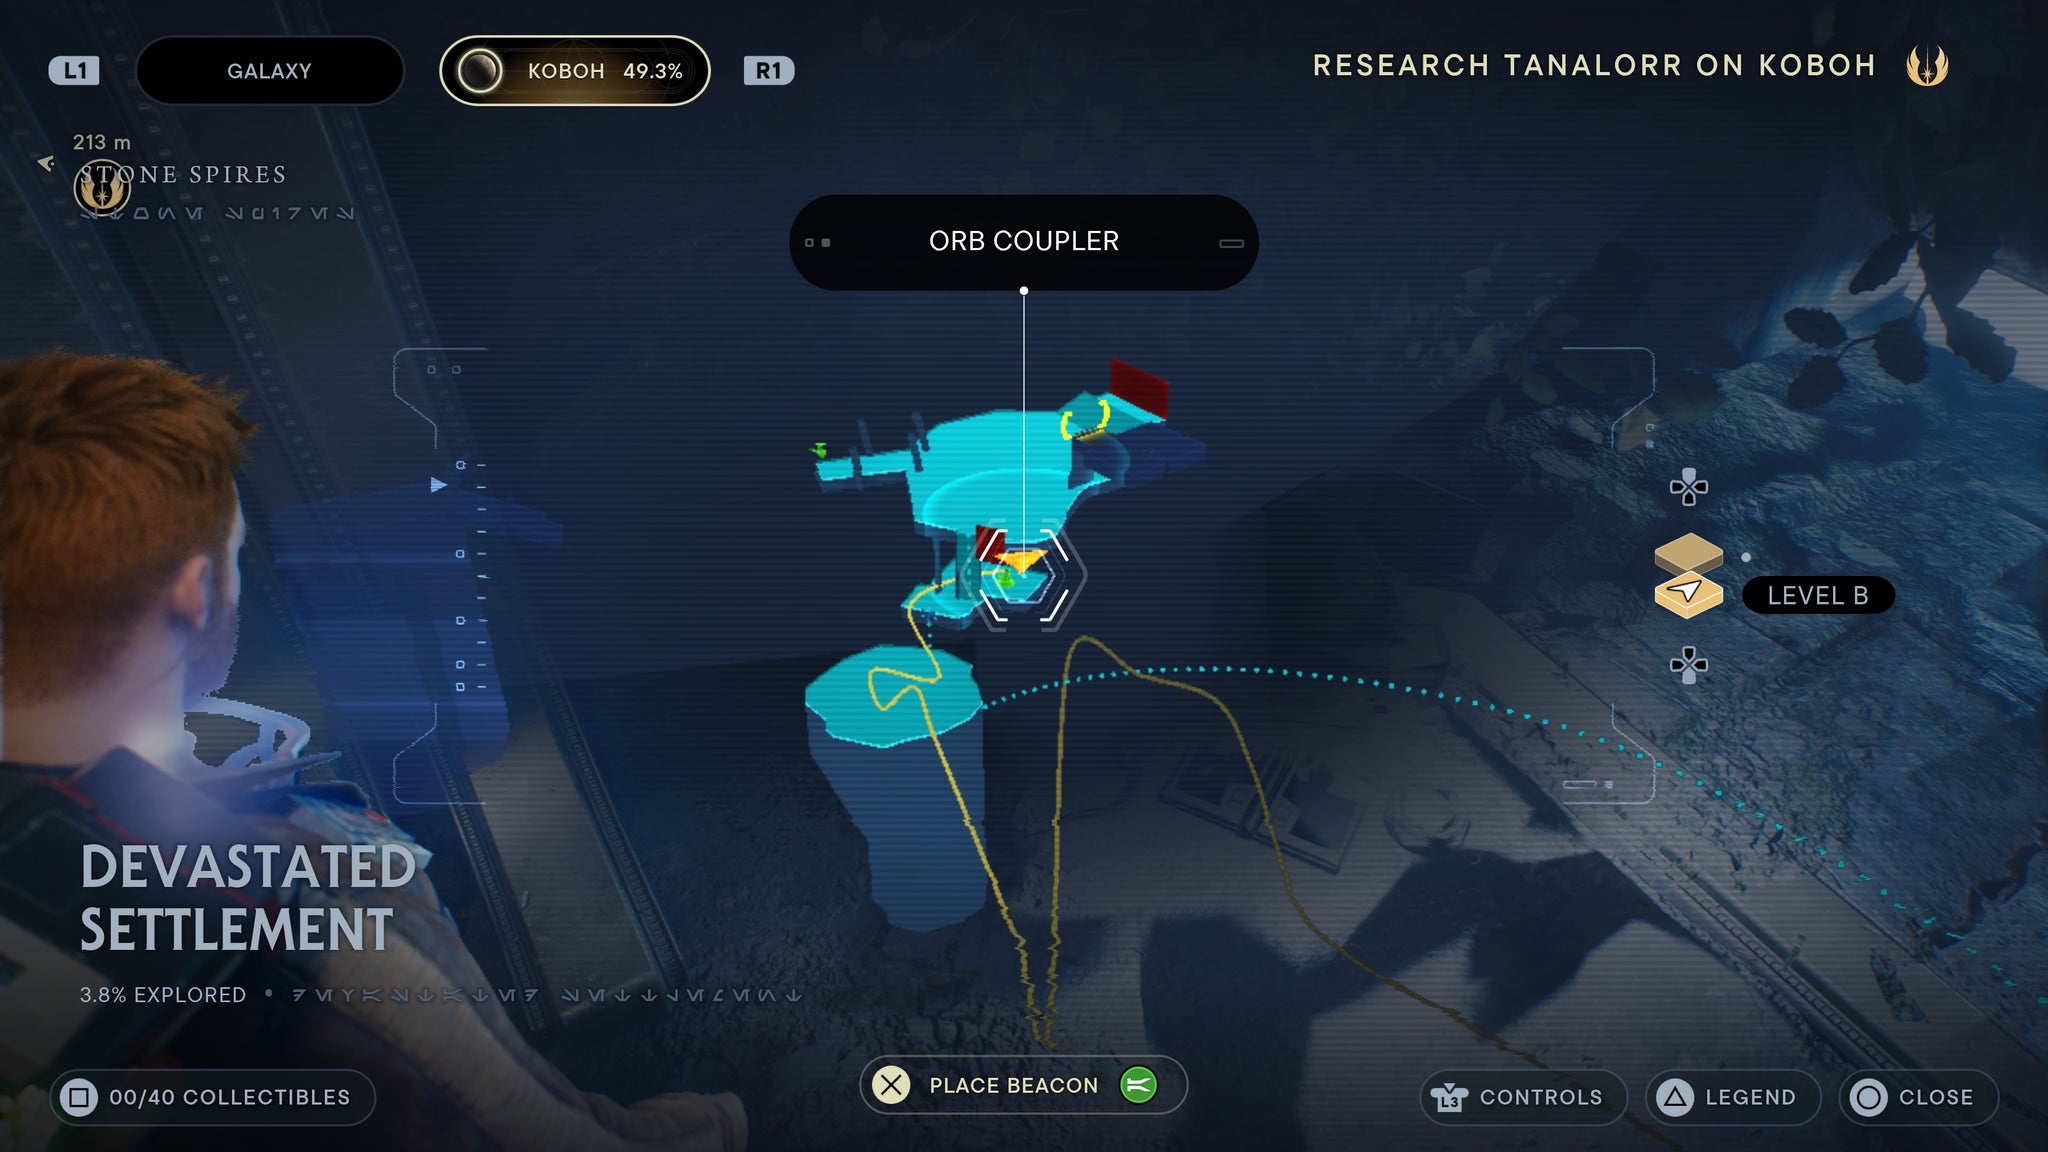
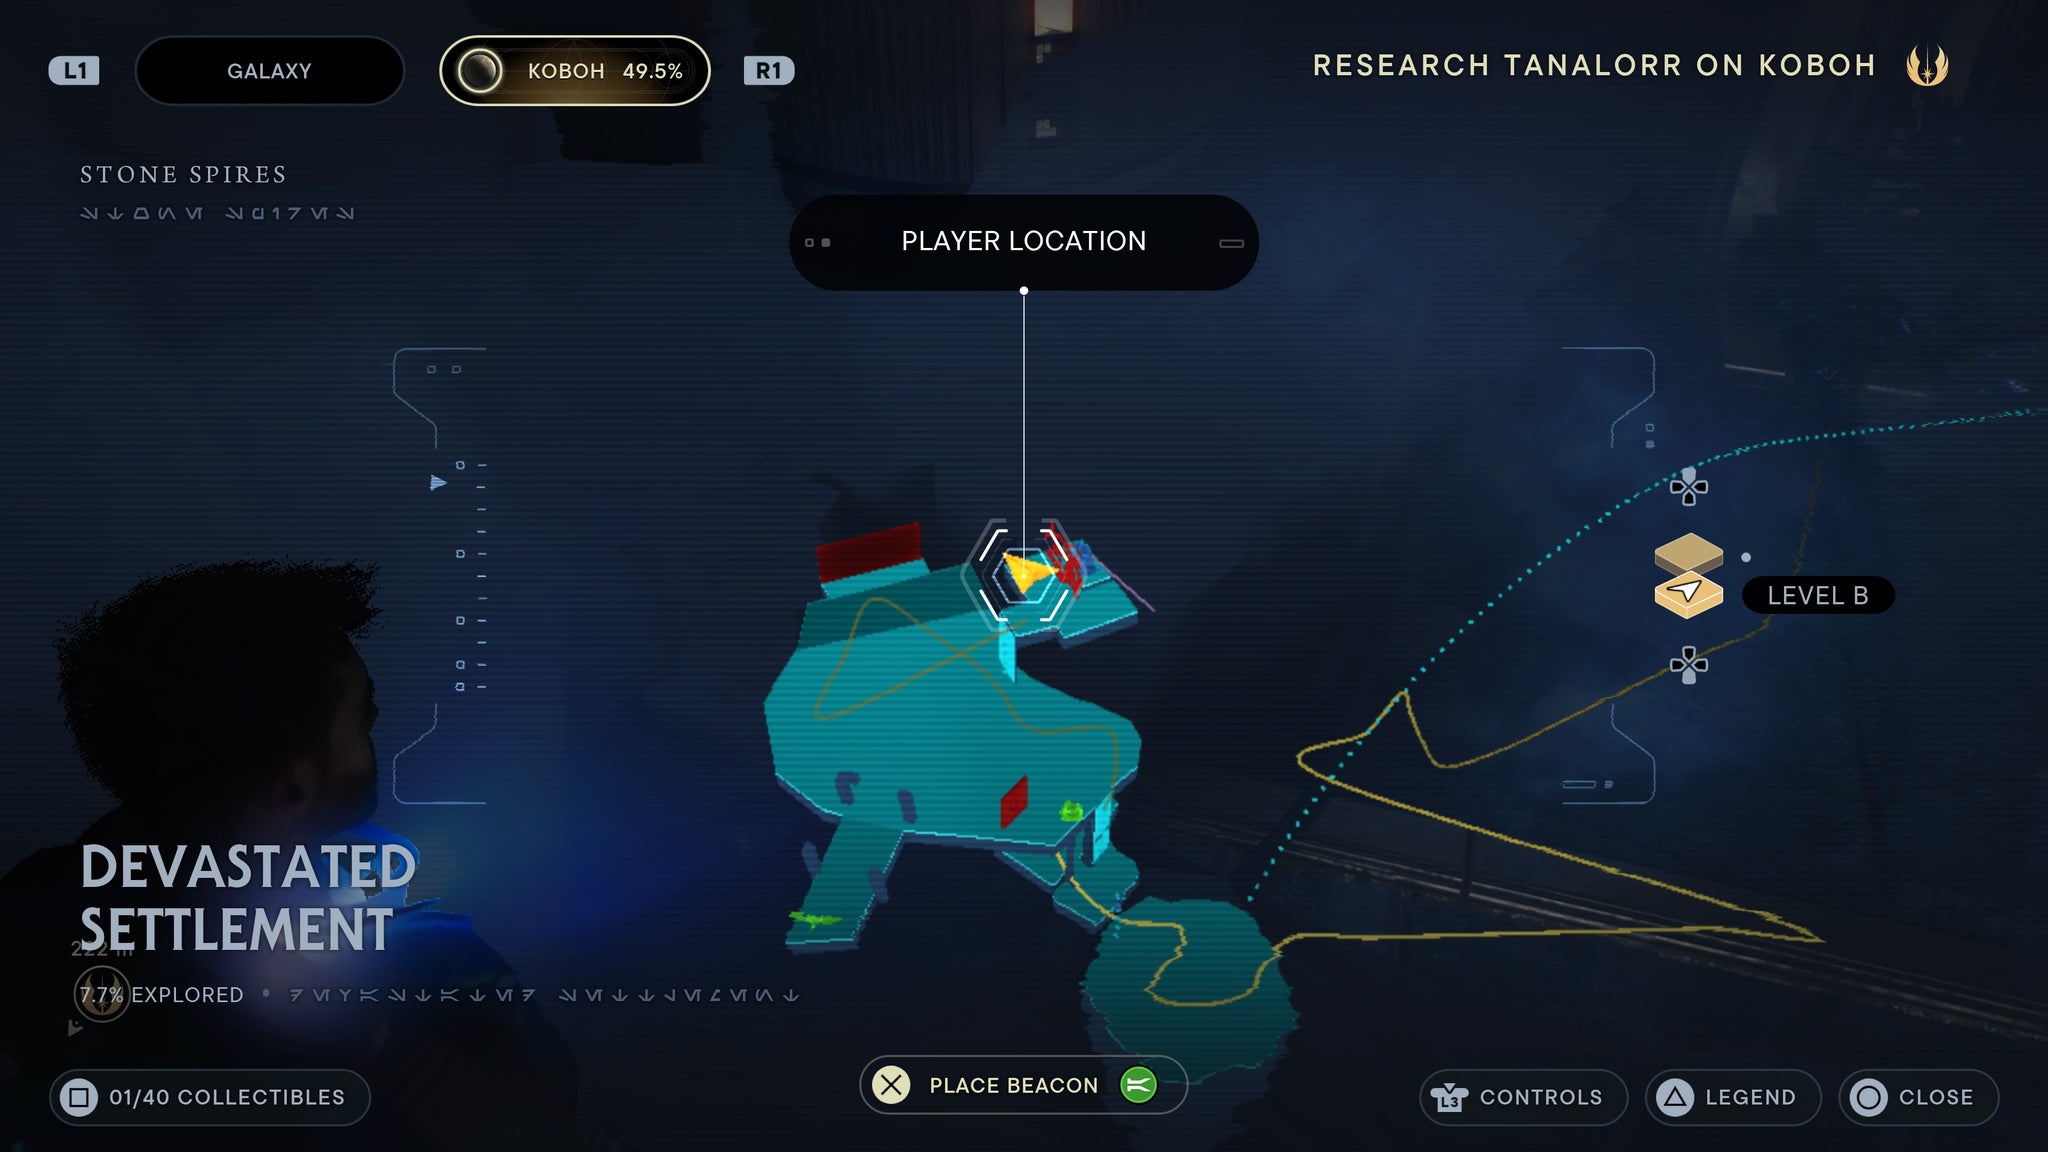
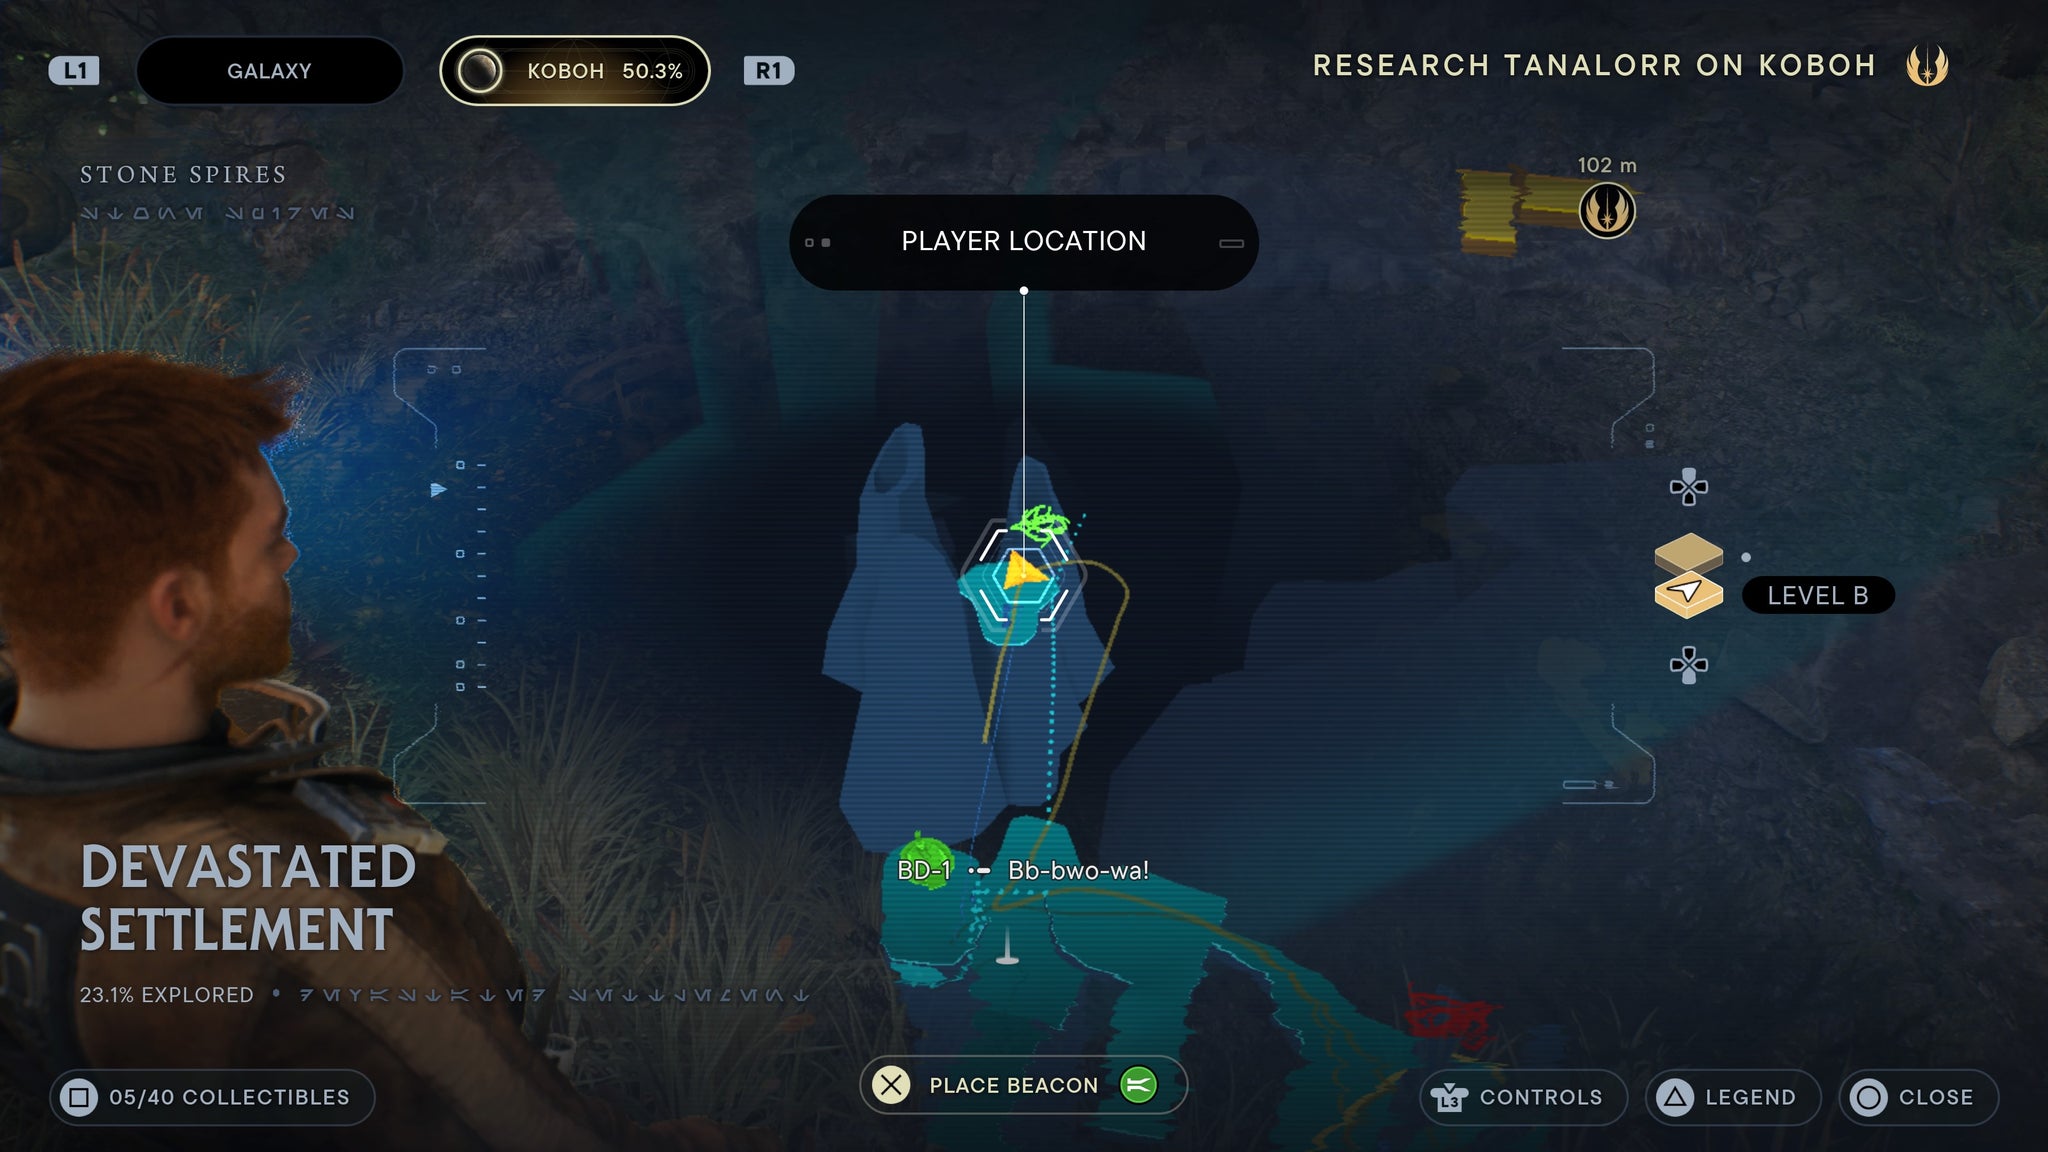
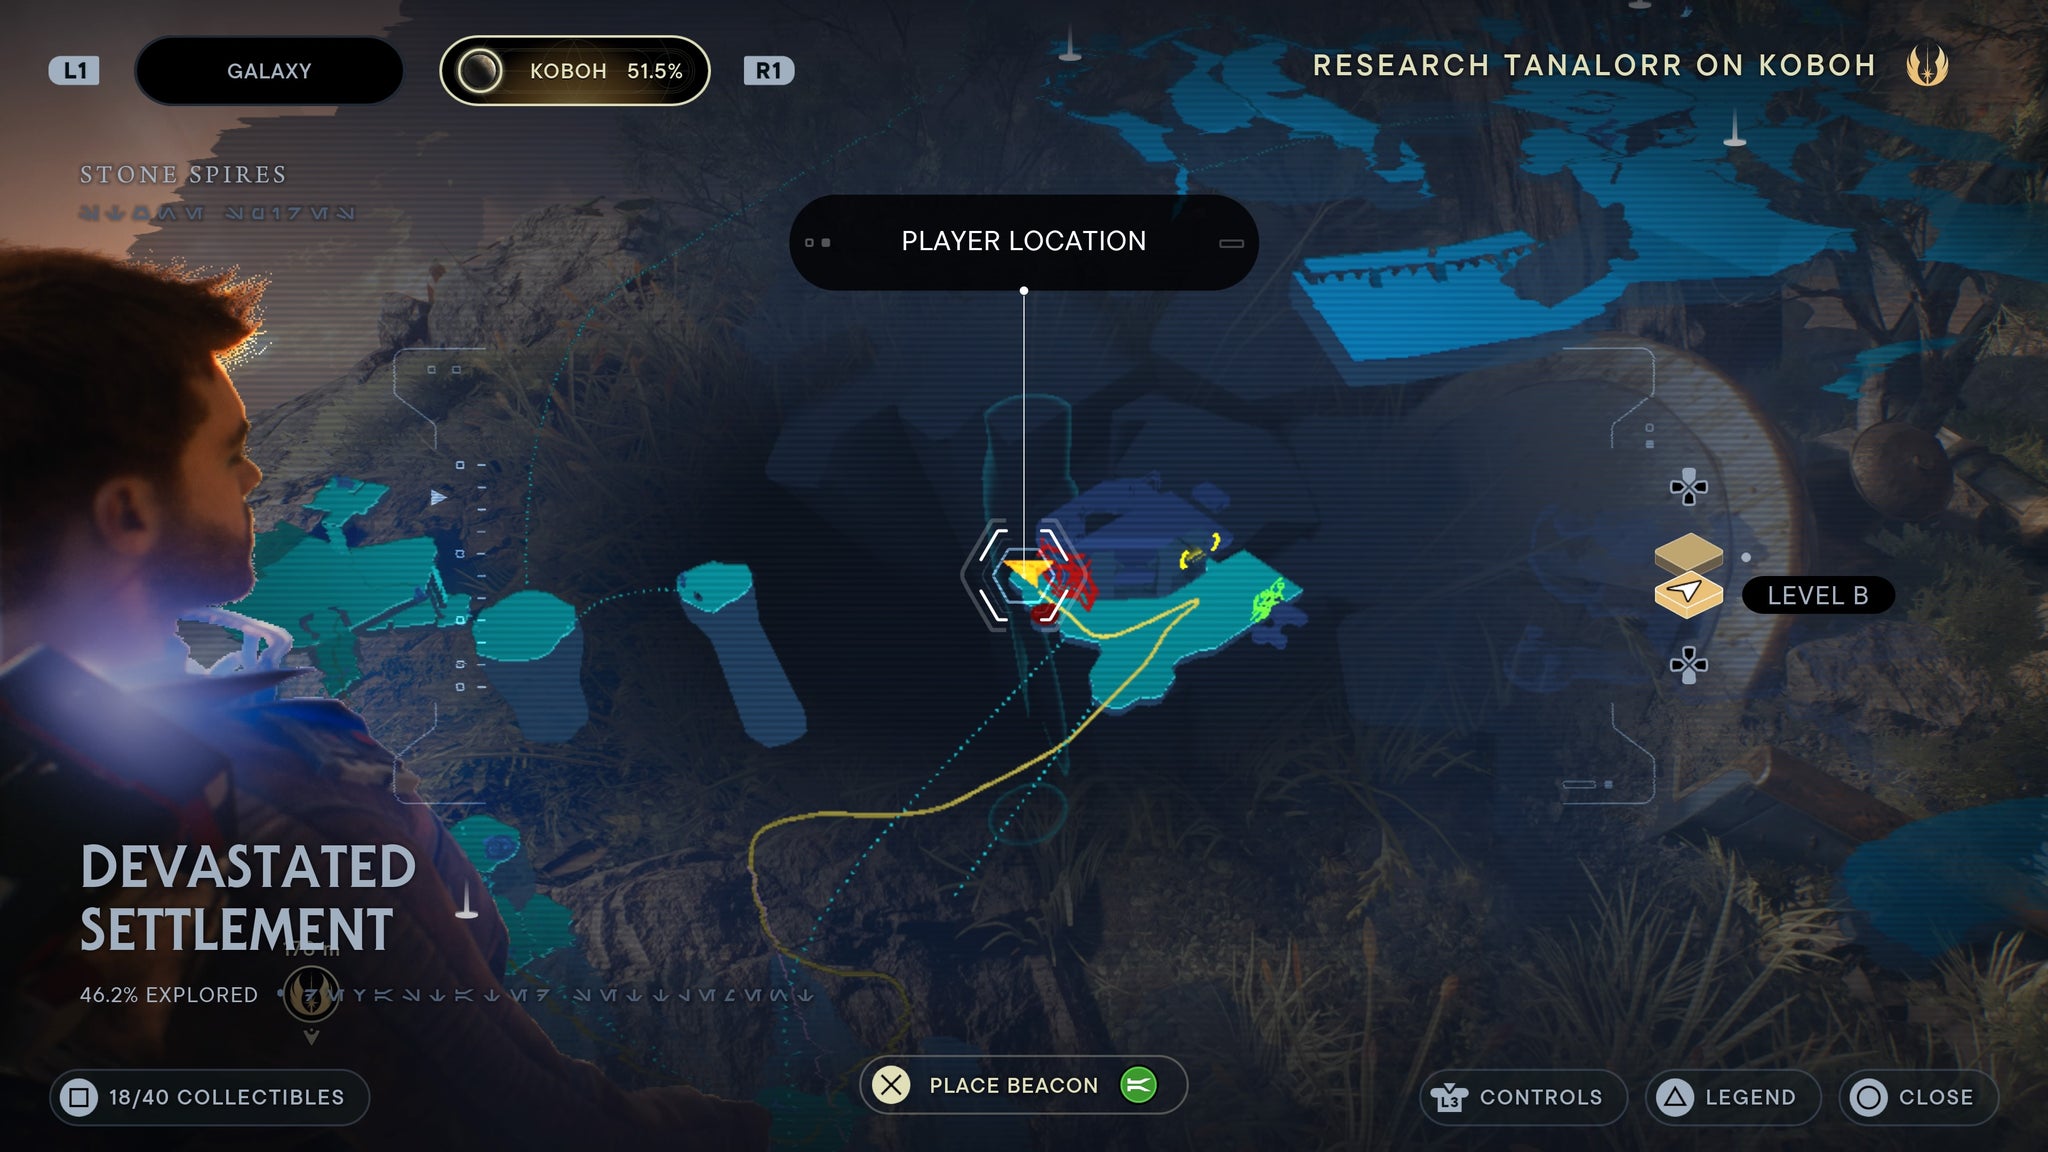
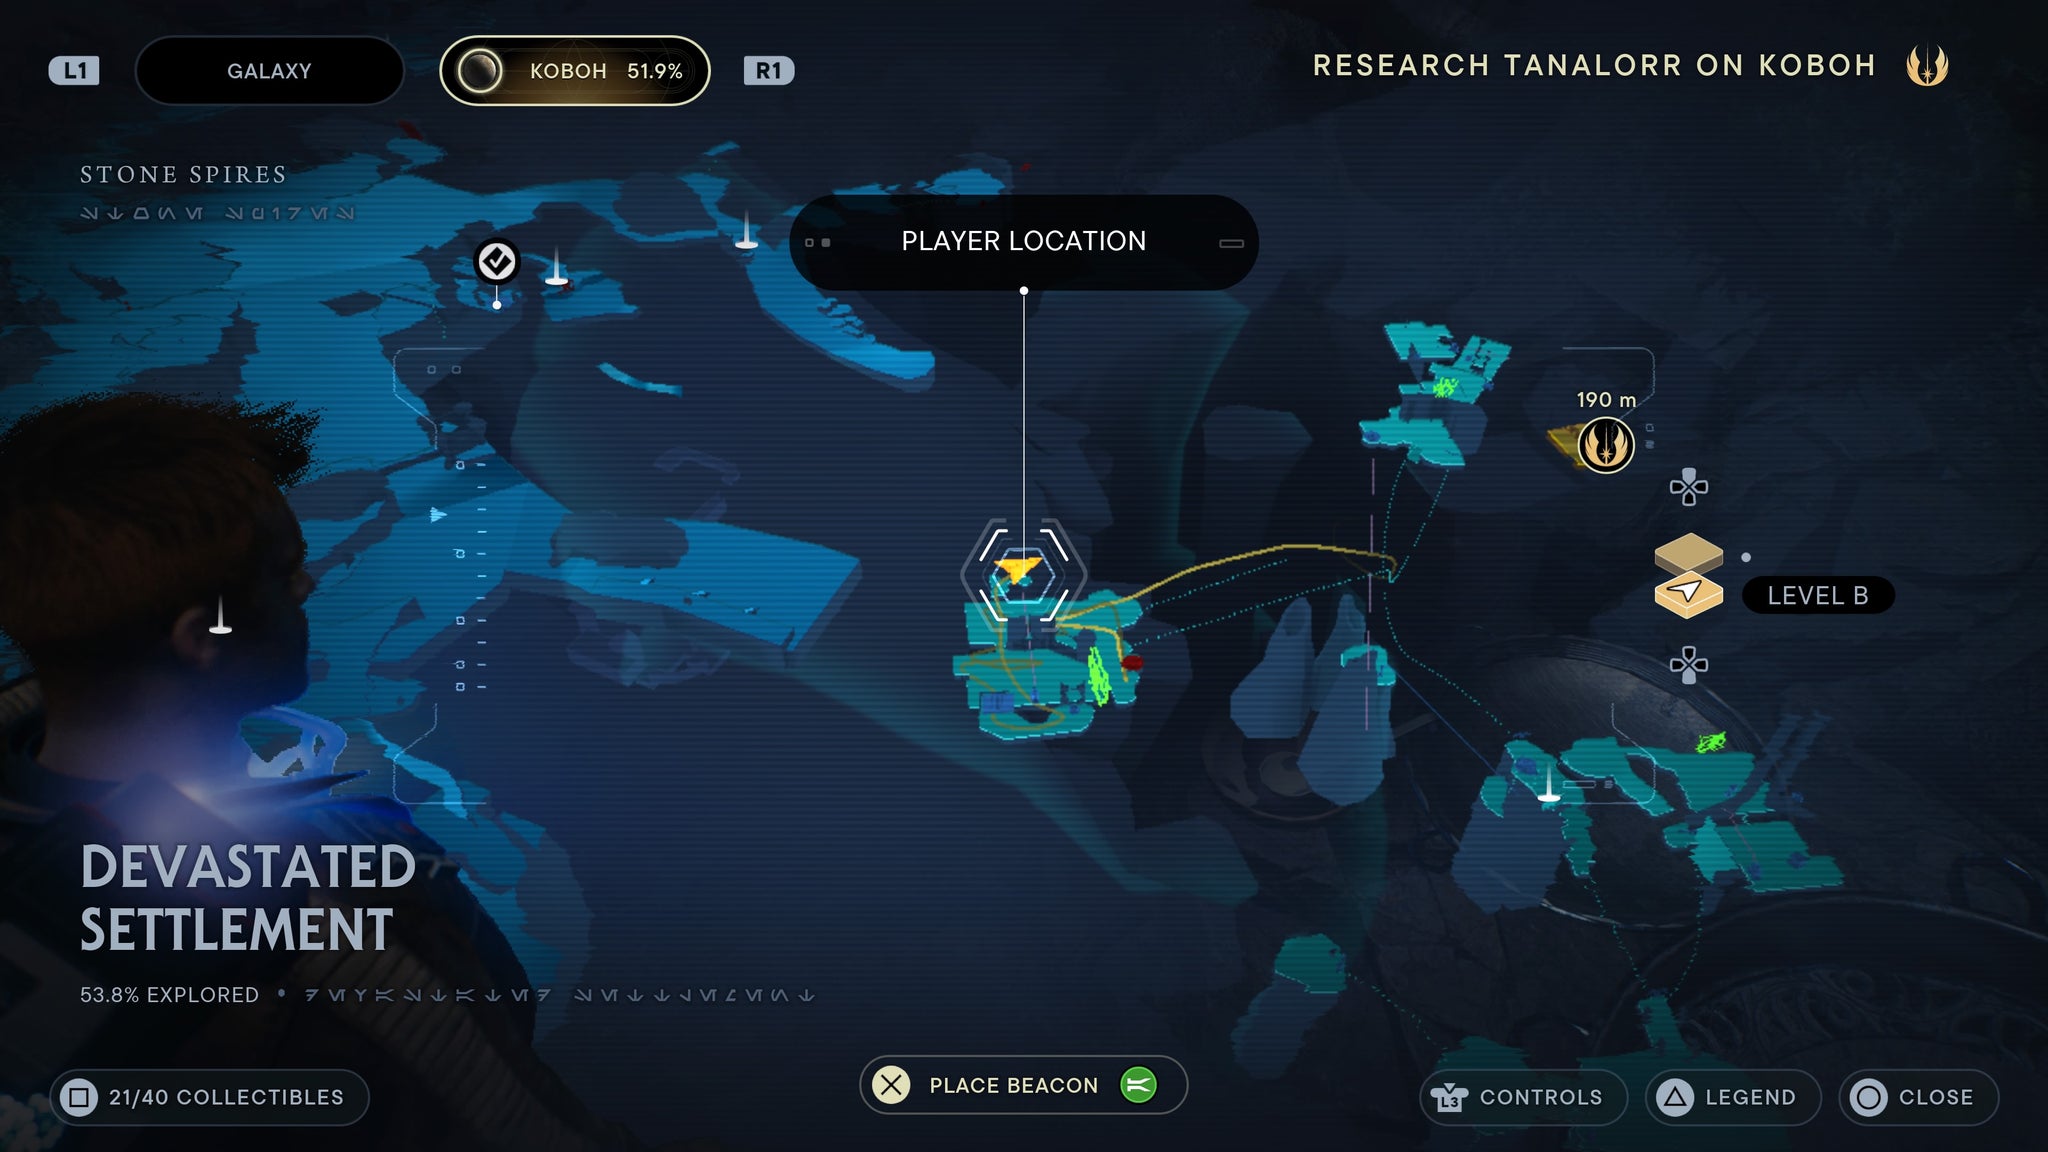
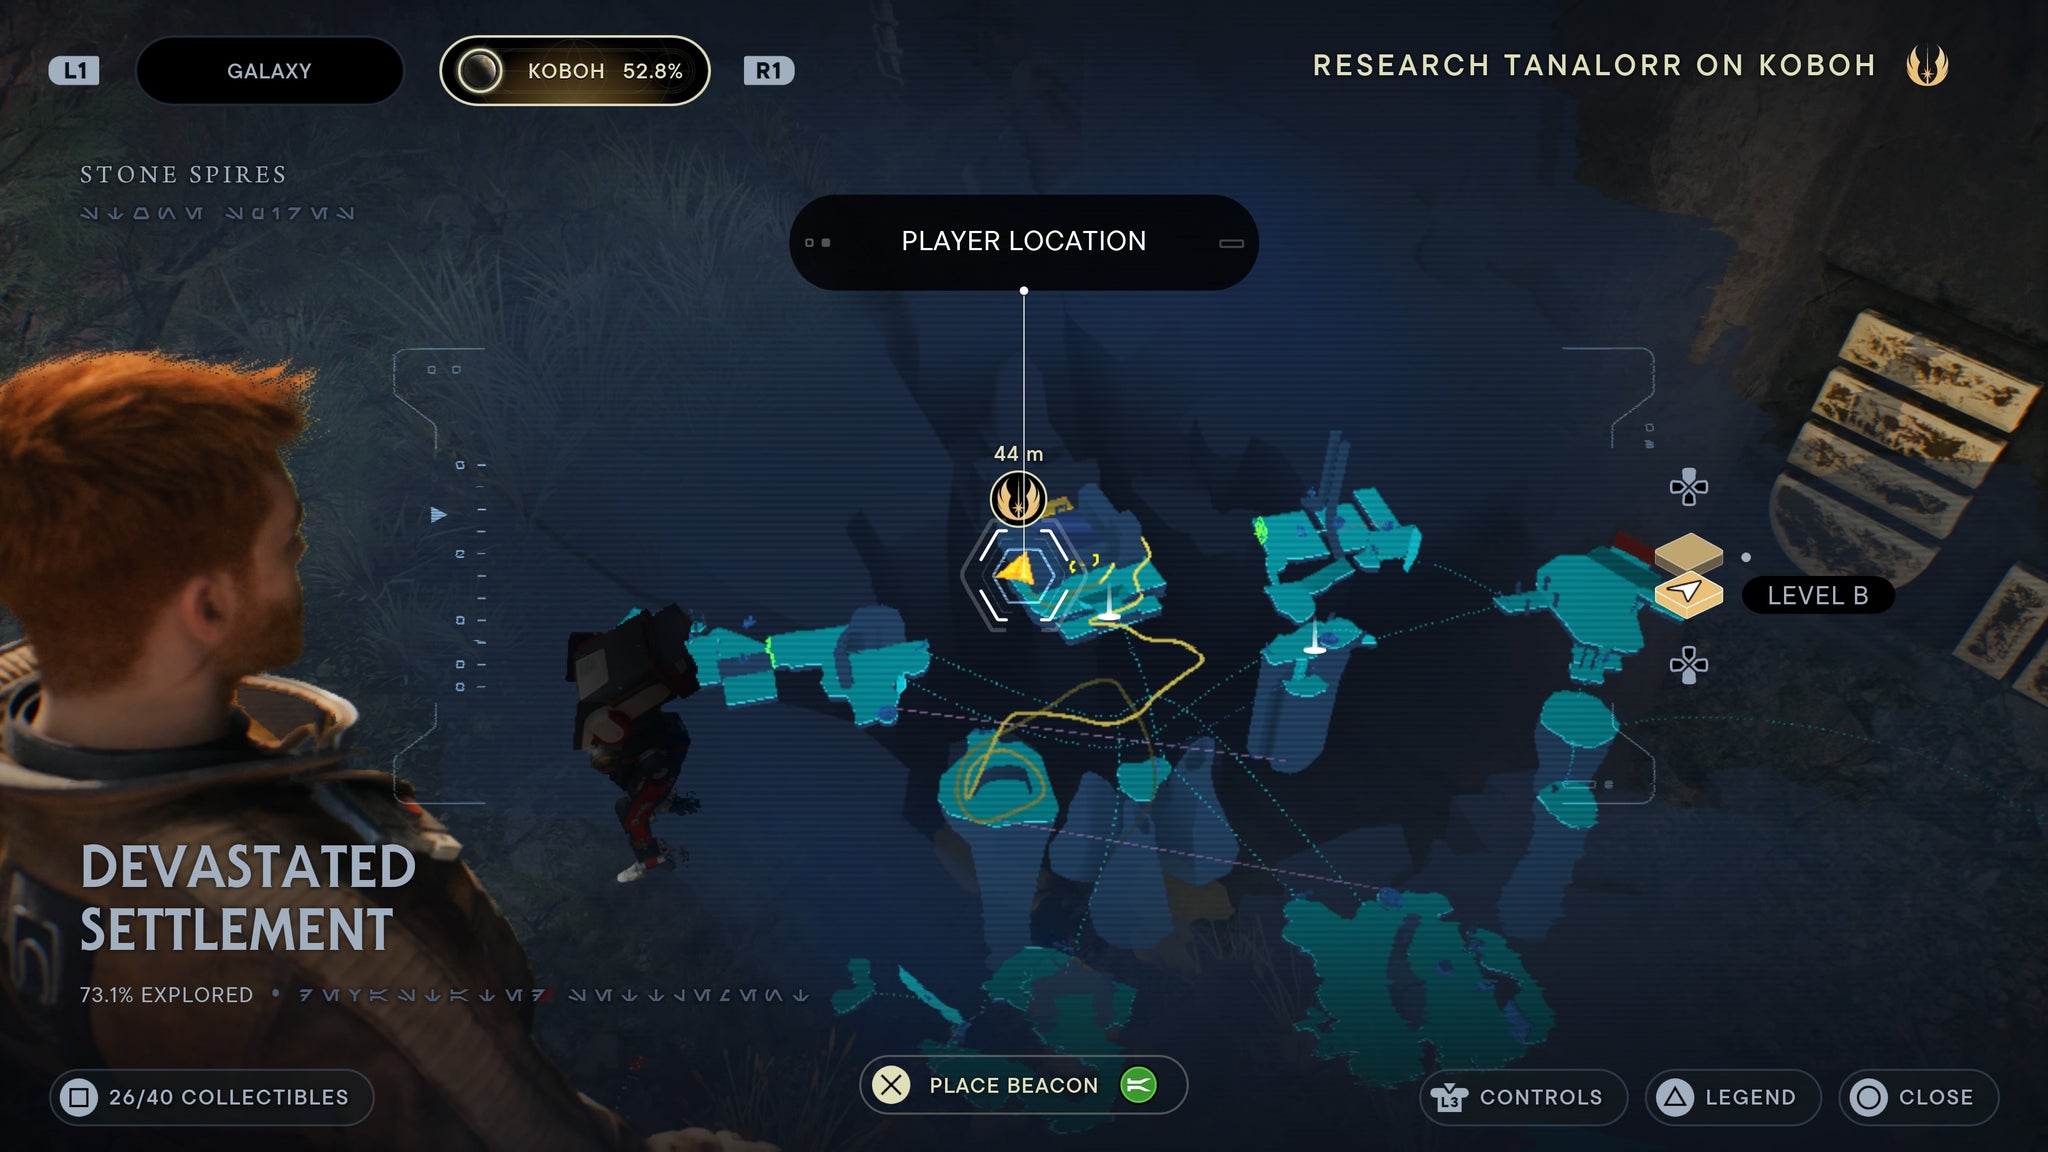
Devastated Settlement
From the arena where you fight your first bounty hunter, climb up and enter the room ahead of you. To your right is a force echo.
Near your first bounty hunter
From the arena where you fight your first bounty hunter, climb up and scale the wall to the Goroco above. Kill it, then climb up the wall to your right. In that room is a force echo.
By the beam.
From the meditation point, climb up to the platform above and enter the dark room ahead of you. Inside, squeeze through the gap and pull the box down. Climb on the box, then up on the higher platform. From there, walk left. There’s a force echo there.

Jump up and look left.
From the meditation point to zipline down to the platform ahead of you. From there, scan the thermal vent.
Scan the vents!
From the meditation point, ue the relter to fly ahead and use the vent (unlocked via the beam device above) to fly across to a platform with three droids on it. Once there, turn right and scan the glowing blue wall.

scan the bronze wall!
Once you have the Koboh Grinder, destroy the crystals back up from the room with the two goroco in it, then climb the wall up. Once up, look right, and you’ll find a force echo.

Back up to the room near the Goroco.
Once you’ve unlocked two central steam vents, use a relter to glide up to the platform where raiders and gorgers are fighting. Walk left, and you’ll find a force echo.
Glid down tot he second highest side section, then walk left.
Once you’ve unlocked two central steam vents, use a relter to glide up to the platform where raiders and gorgers are fighting. Enter the building to your left, then place the orb on the pedestal to create a beam. Walk back outside, then use the grinder to clear the crystals left of the bea, Inside is a force echo.
On the plates and pots on the floor.
From the Grand Courtyard meditation point, walk left around the building to find a scan.
Walk left of the meditation point.
From the courtyard meditation point, enter the building and pass the boss arena. Take a left, then scan the blocked doorway.

Inside the building by the meditation point.
From the courtyard meditation point, enter the building and pass the boss arena. Enter the room with the broken device, then unlock the door to your left. Inside is a scan.
Inside the dark hallway.
From the courtyard meditation point, enter the building and pass the boss arena. Enter the room with the broken device, then head left. Once you reach a grapple point, look right for a force echo.
Right of the exit to the roof.
Once you open up the middle vent, use a relter to glide to a hidden platform left of the meditation point. You’ll be able to enter a hidden room with a scannable pile of rubble inside.
Scan the rubble, by a treasure.
From the grand Courtyard meditation point, squeeze inside the building and scan the door to your left.
Just on the left as you enter.
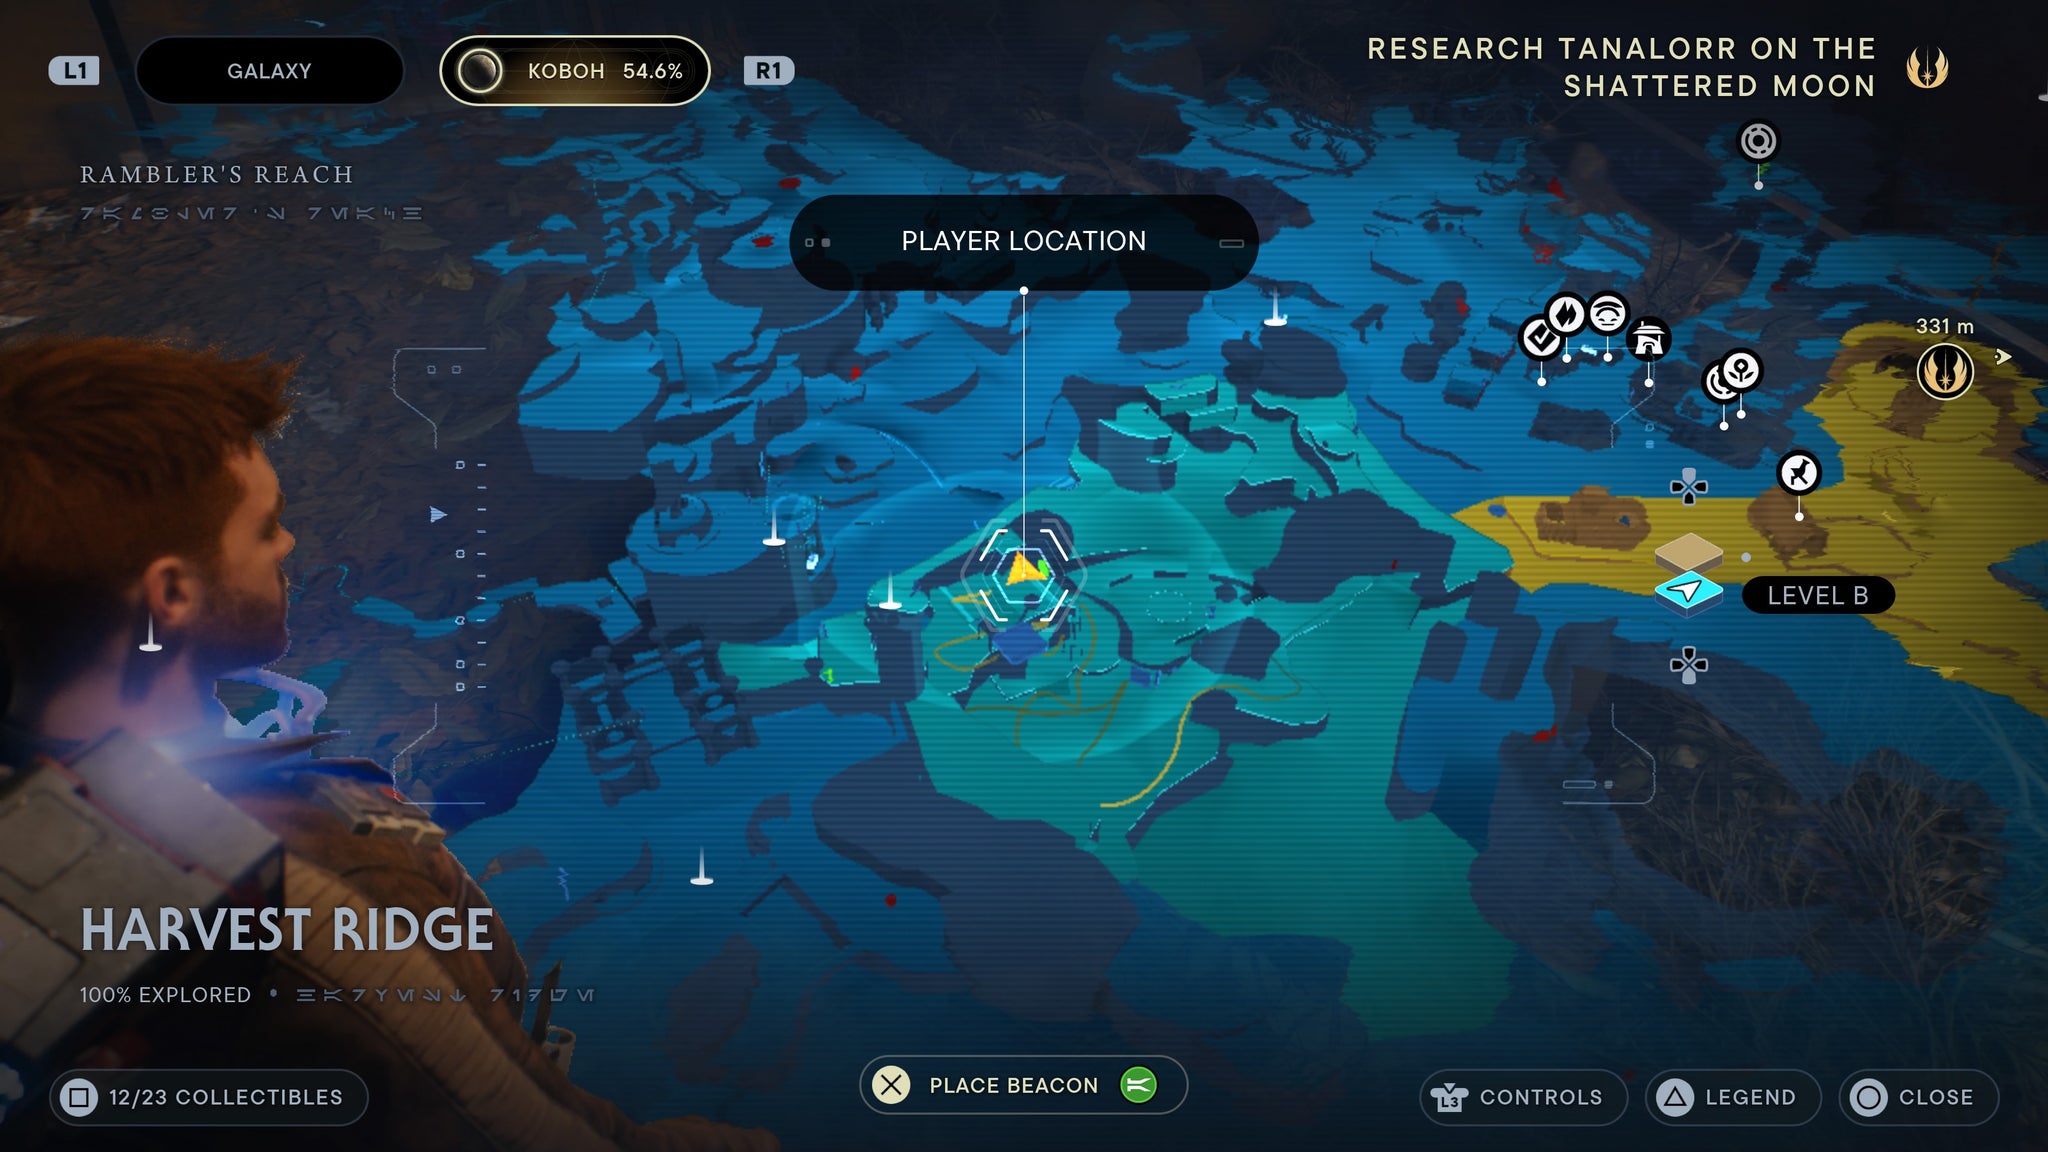
Harvest Ridge
Requires relta gliding and nekko riding. Climb up through the moldy depths. Use the nekko to get inside the large orange building, then you’ll find a force echo.
In the barn!
Chamber of Clarity
Use a box to climb up to the second floor of the room, to the right of the entrance. Walk to the right side of the room and you’ll see another cube you can pull out of the wall. Do so, and you’ll find a force echo you can scan.
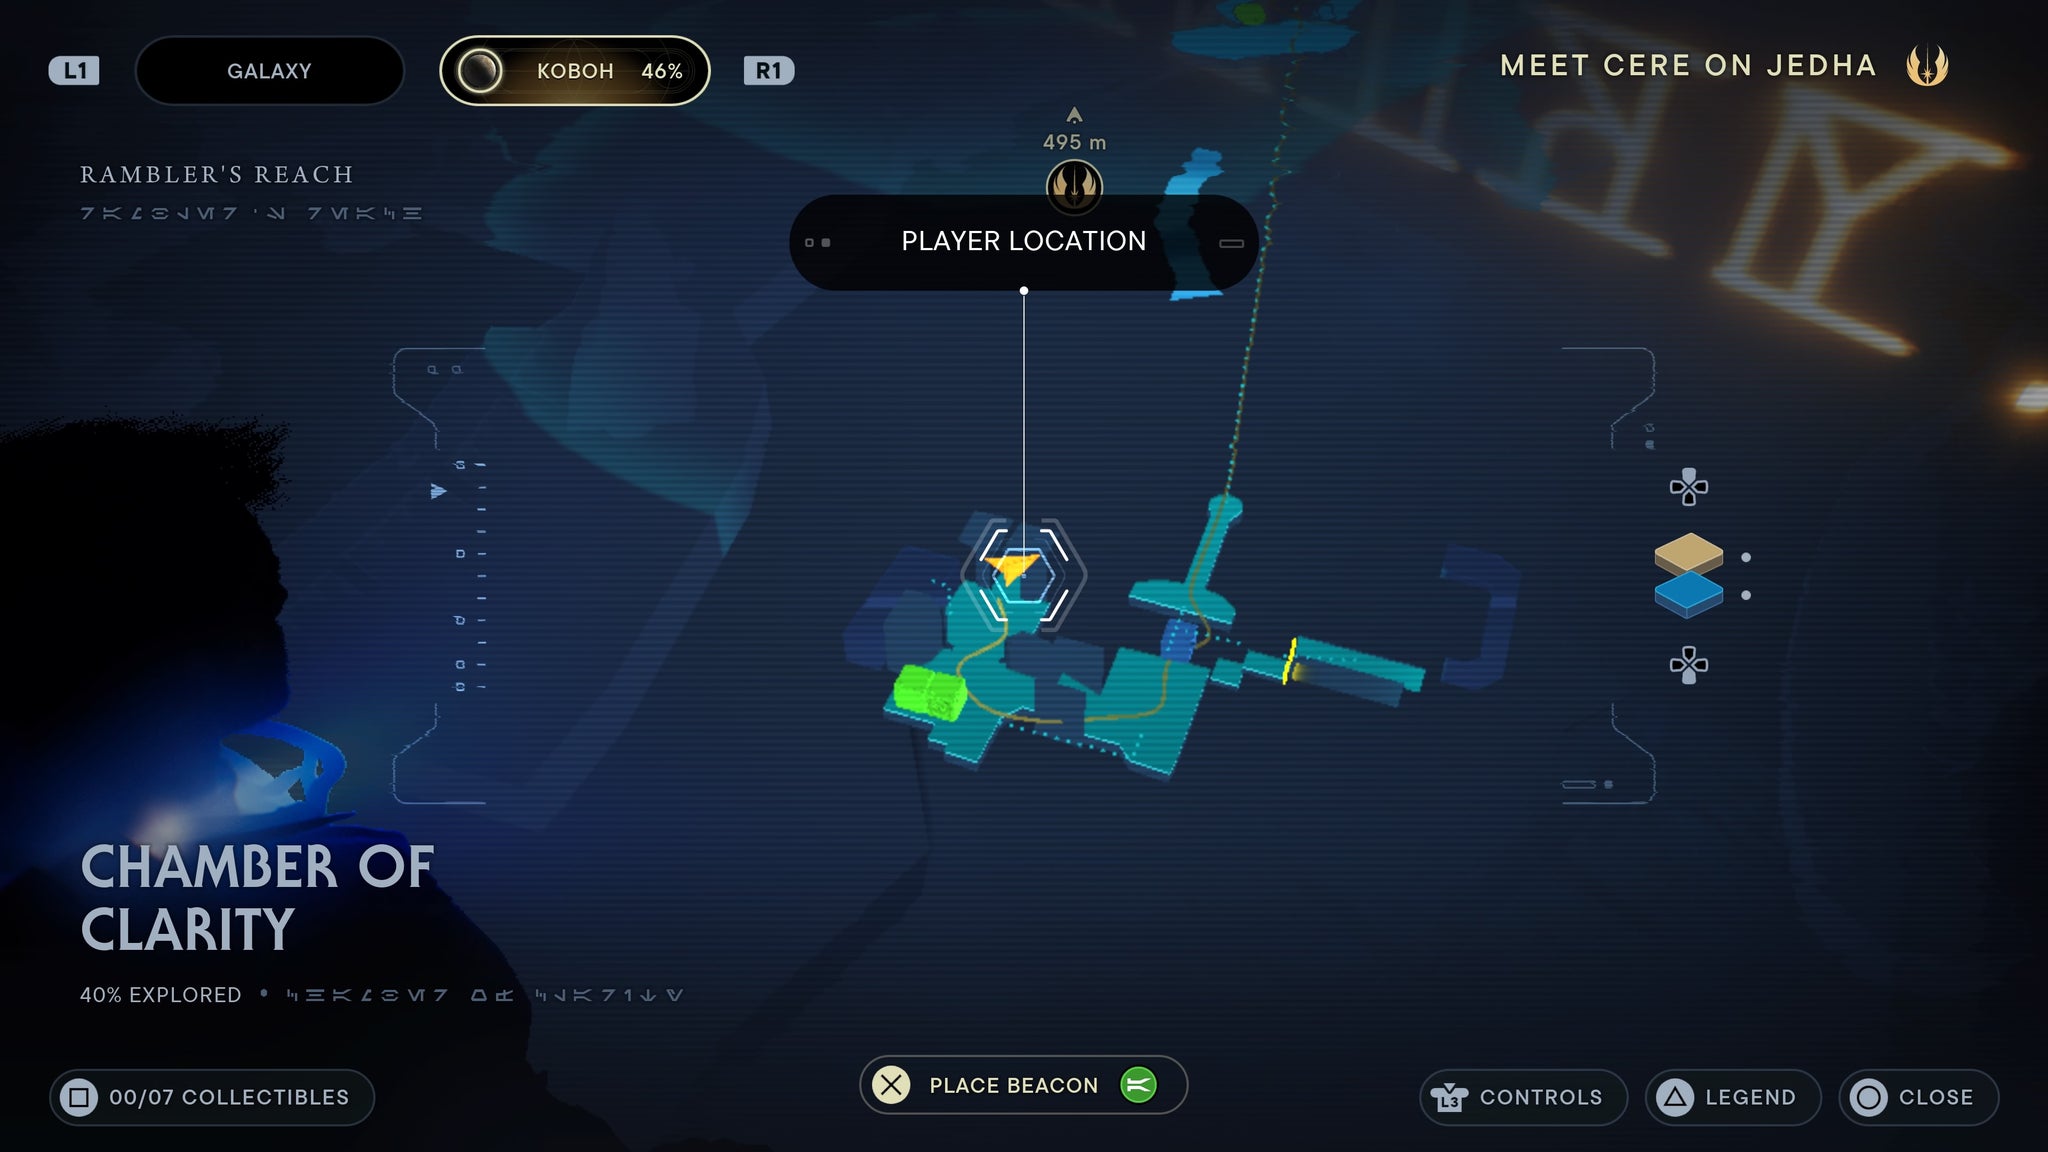
Behind the cube.
Use a box to climb up to the second floor of the room, to the right of the entrance. Walk to the right side of the room and you’ll see another cube you can pull out of the wall.Pull it to the left, then pull it back towards its original location. As it’s moving, climb the box and jump across. You’ll find a glowing wall you can scan.
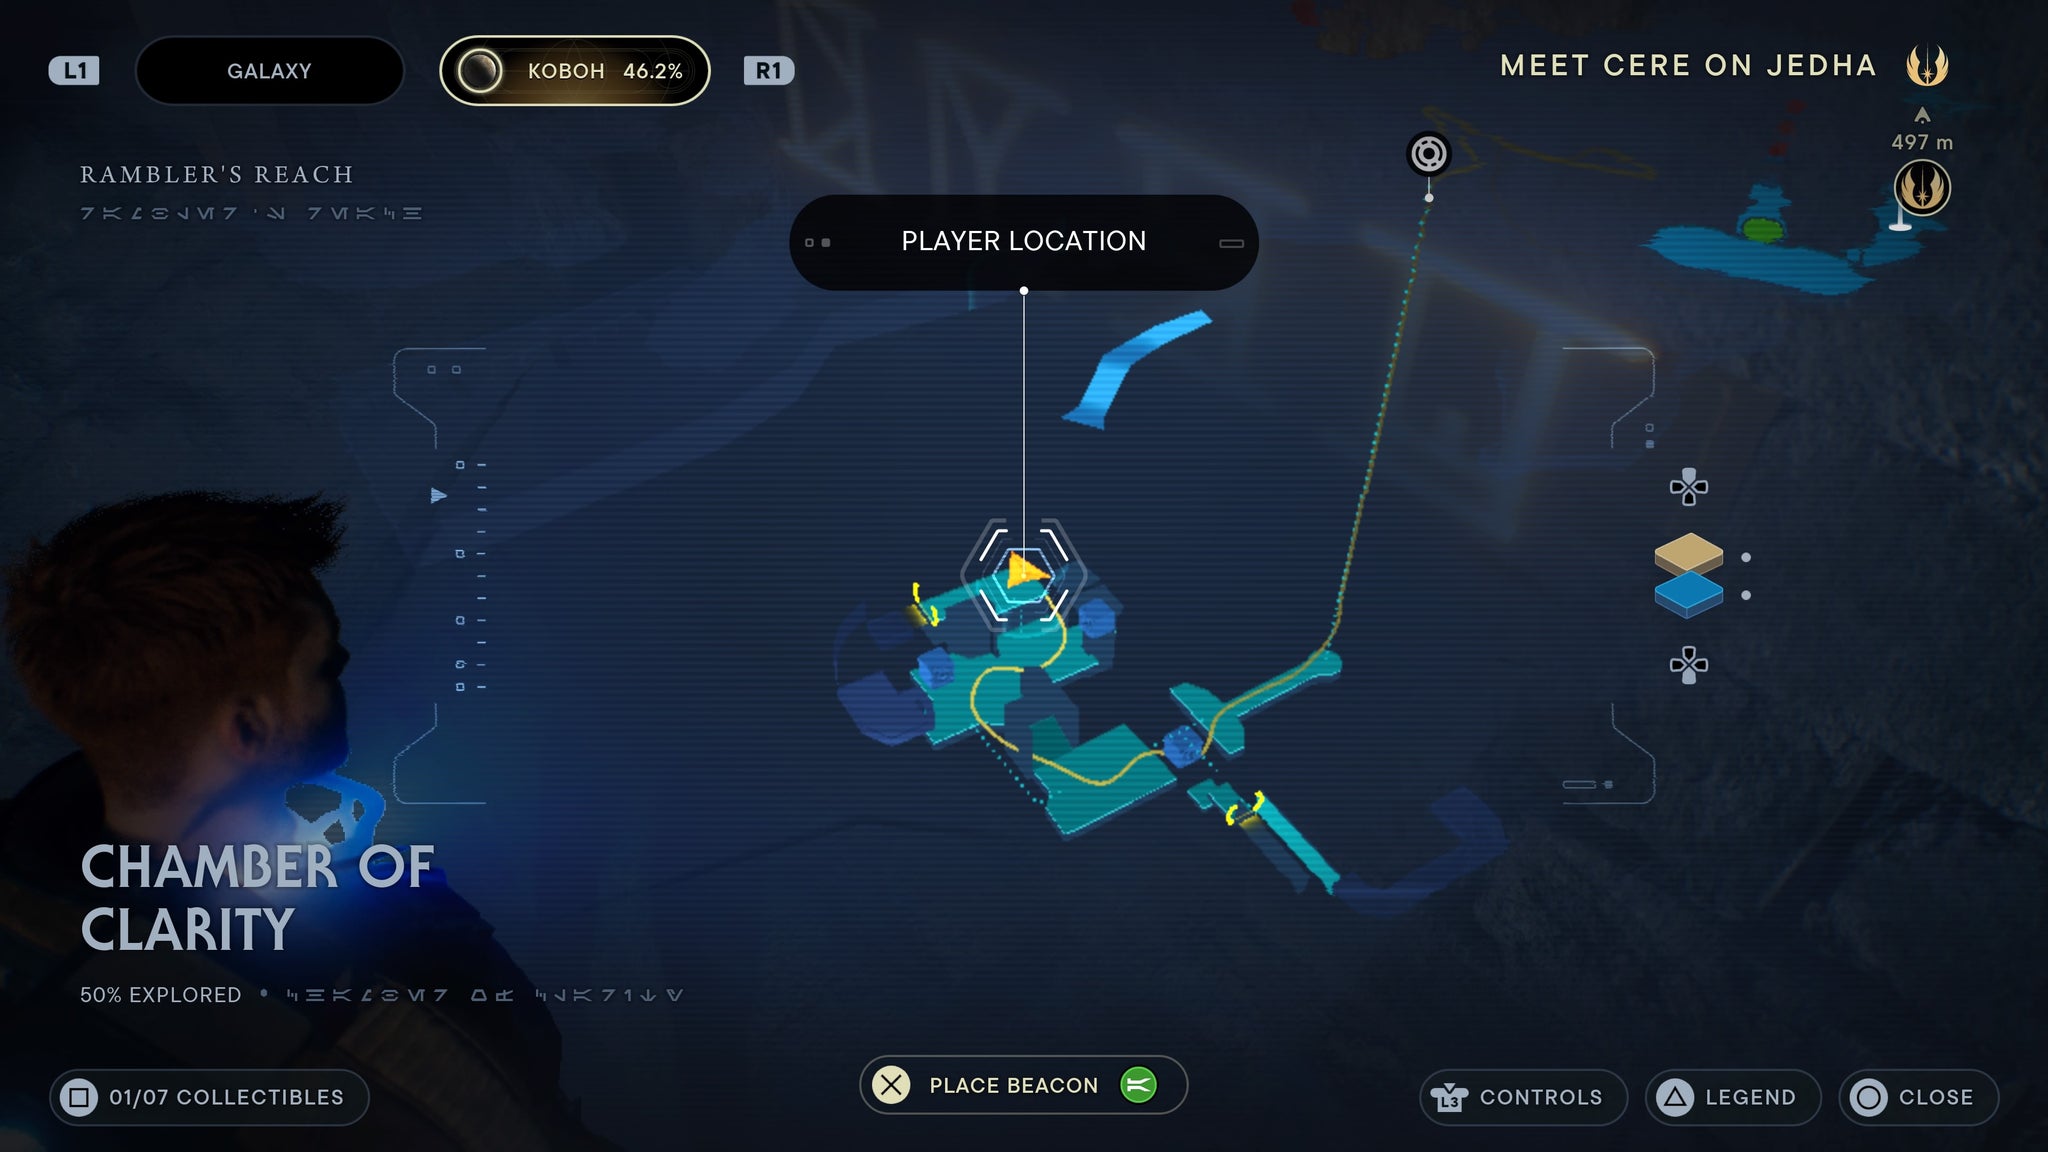
To the right!
Use two boxes to leap through a circular doorway on the second floor. As you jump through, you’ll find a force echo to the right you can scan.
Through the door you pull open!
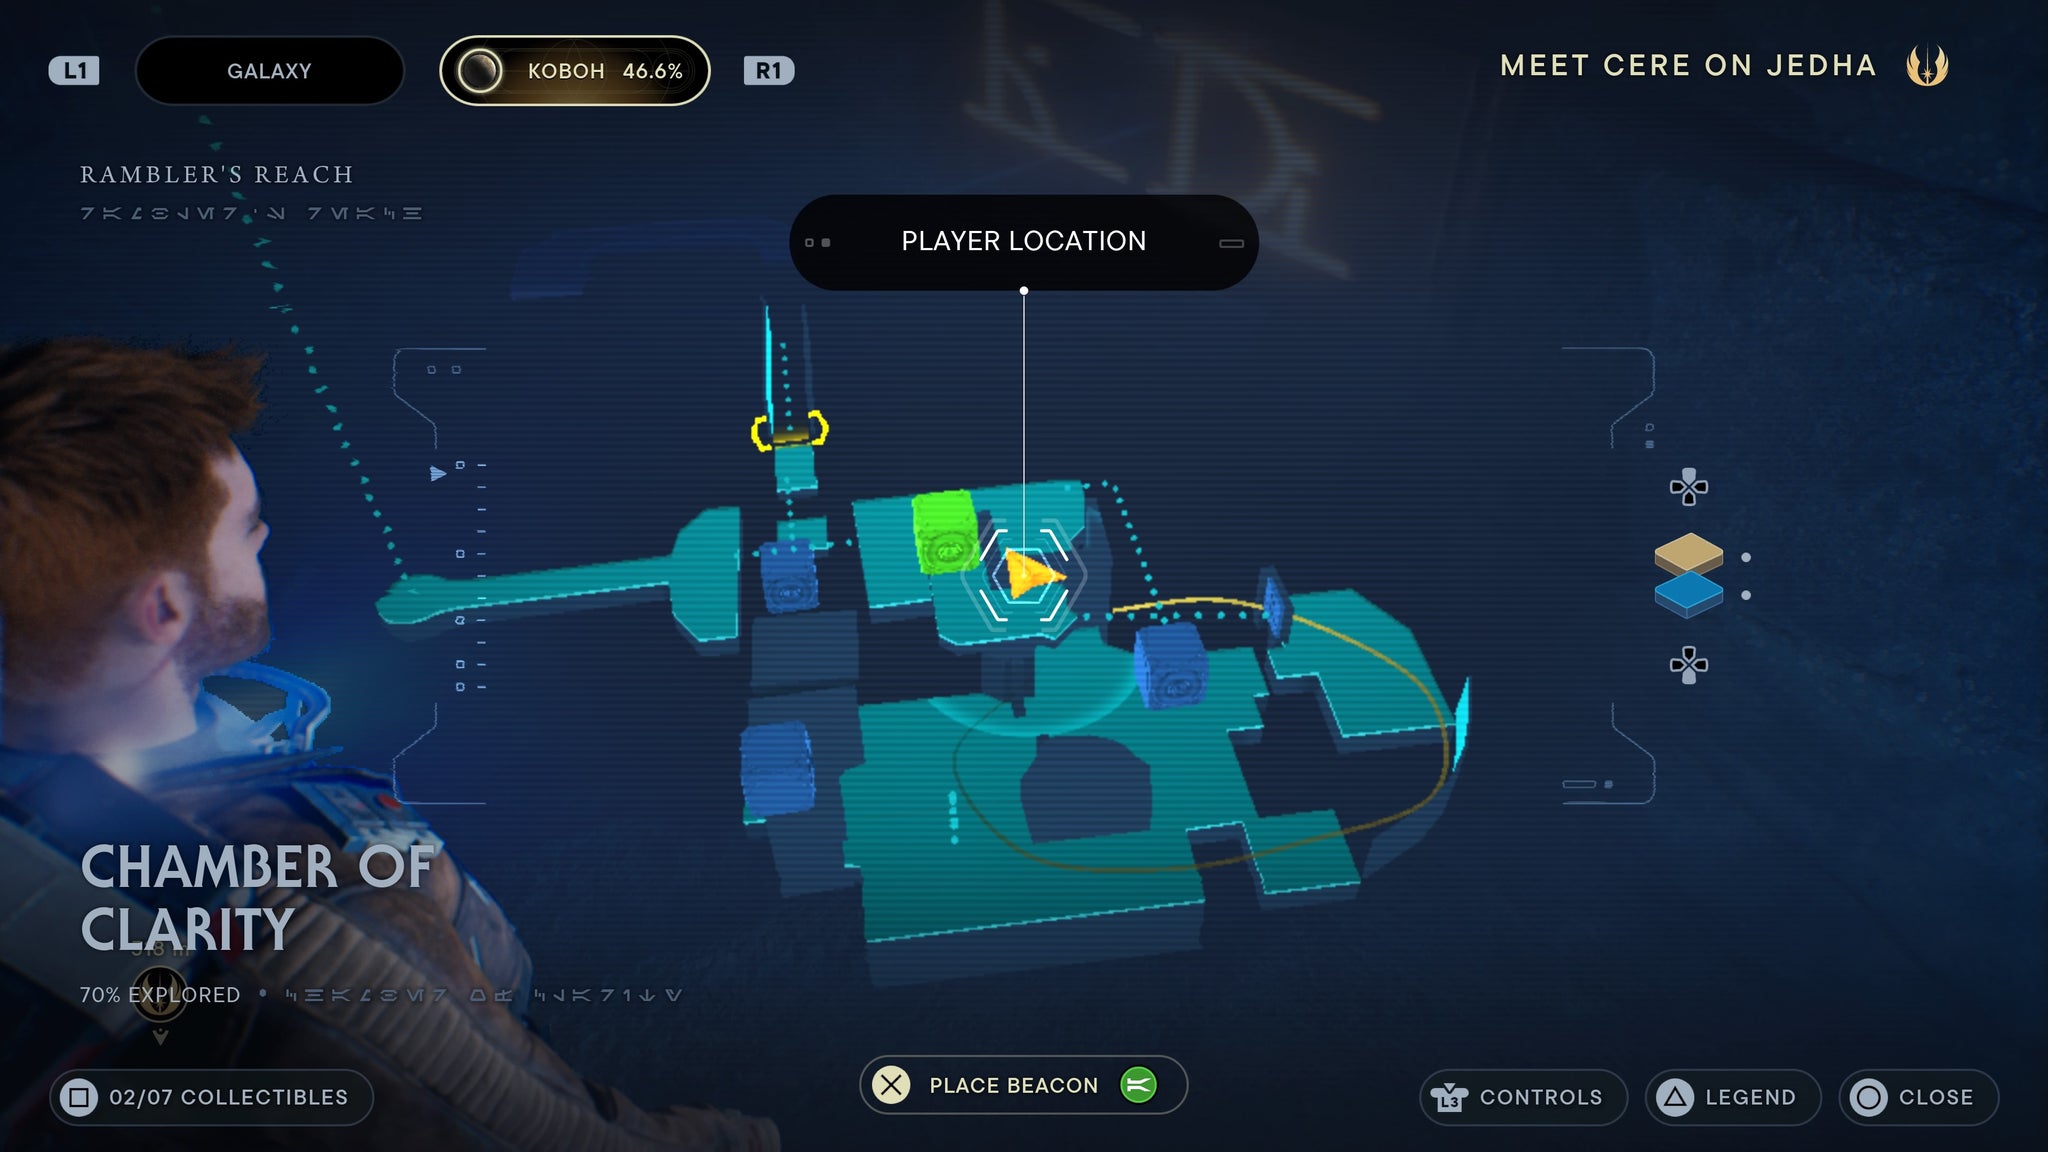
Make your way to the right side of the chamber nad use the boxes to jump into a dark blue hallway. Inside is a force echo.
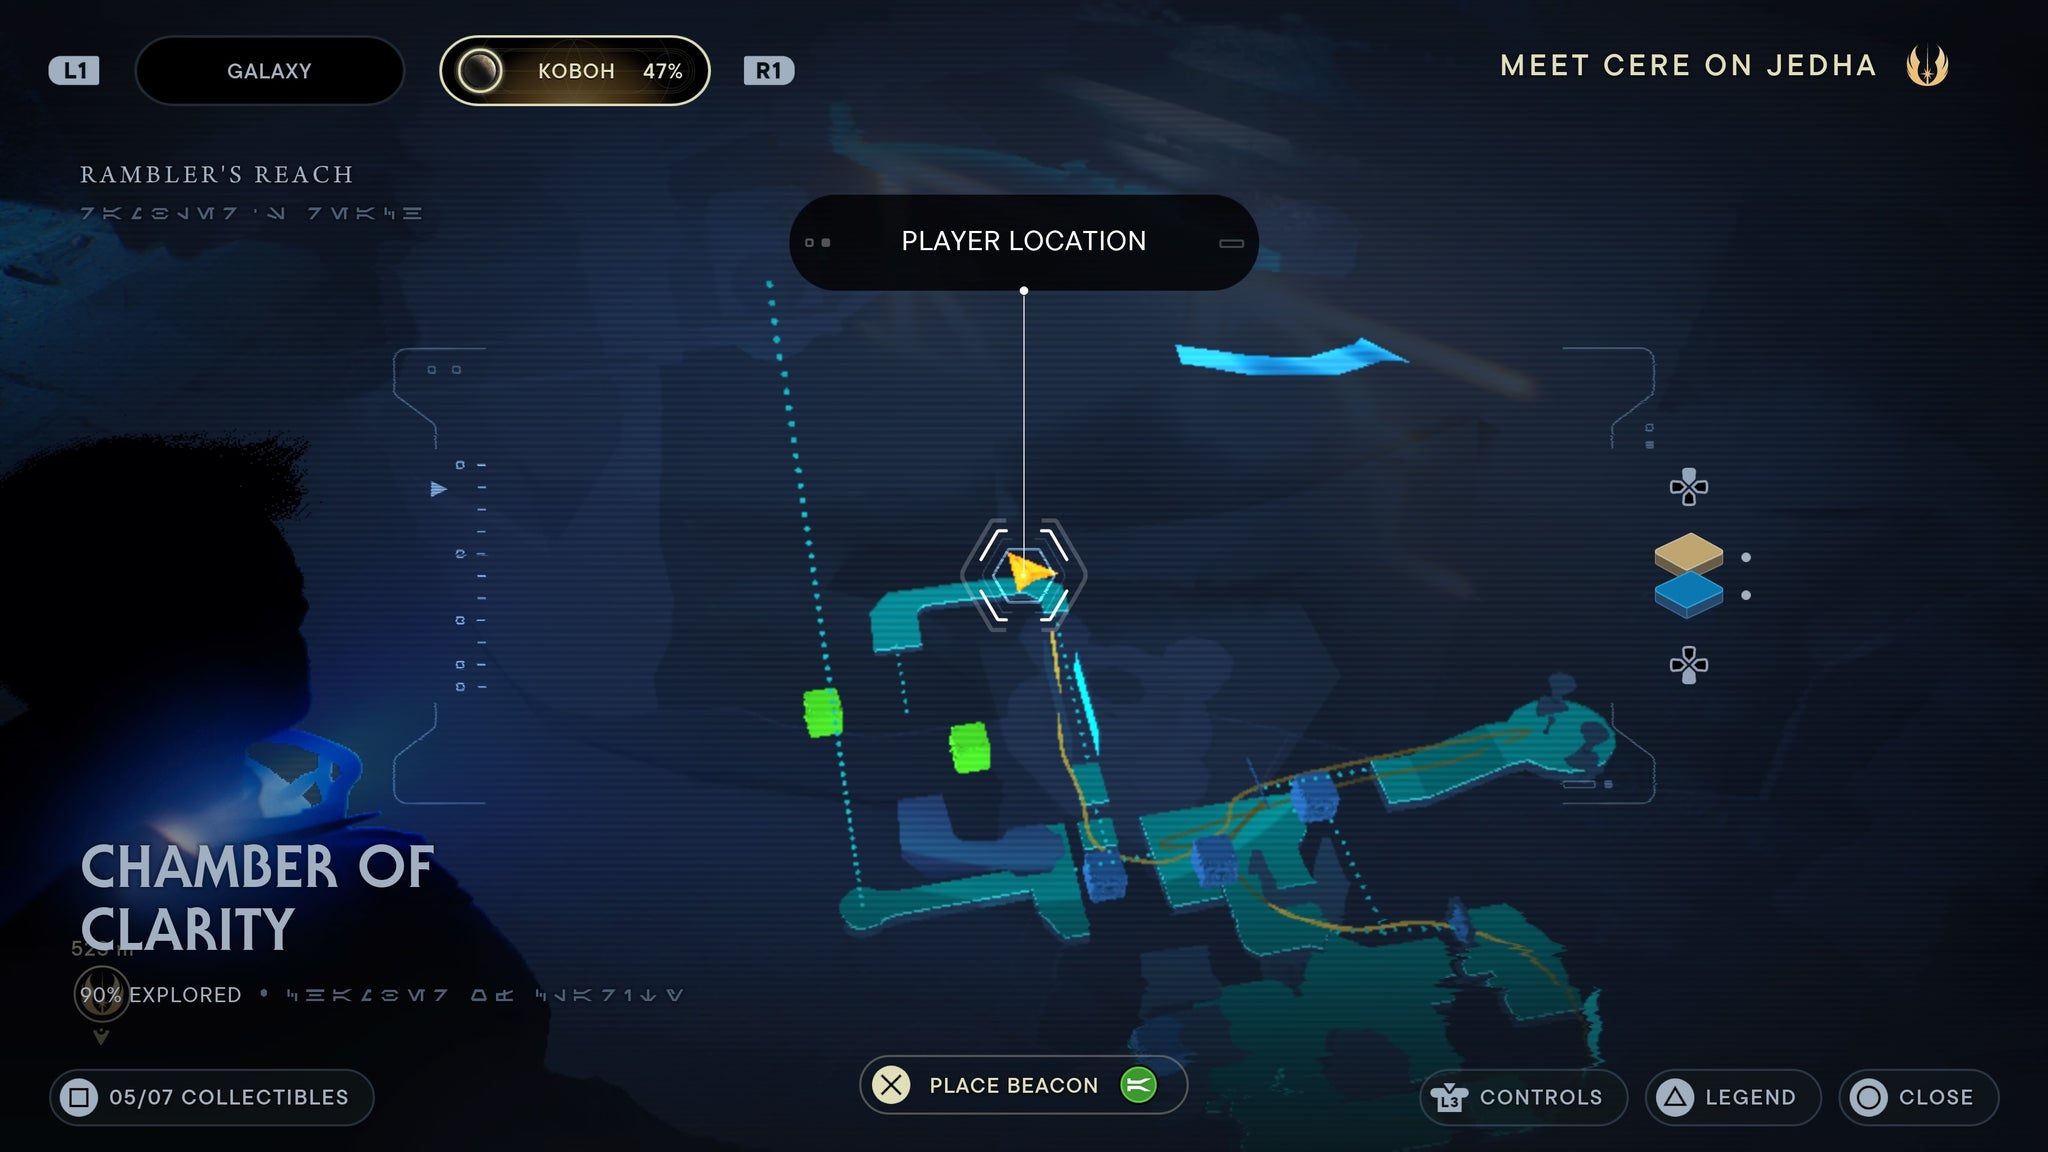
Glowing in the dark
Fogged Expanse
Walk down the main path from the meditation point, then take the right road when you reach split in the road. Straight ahead is a broken machine you can scan.
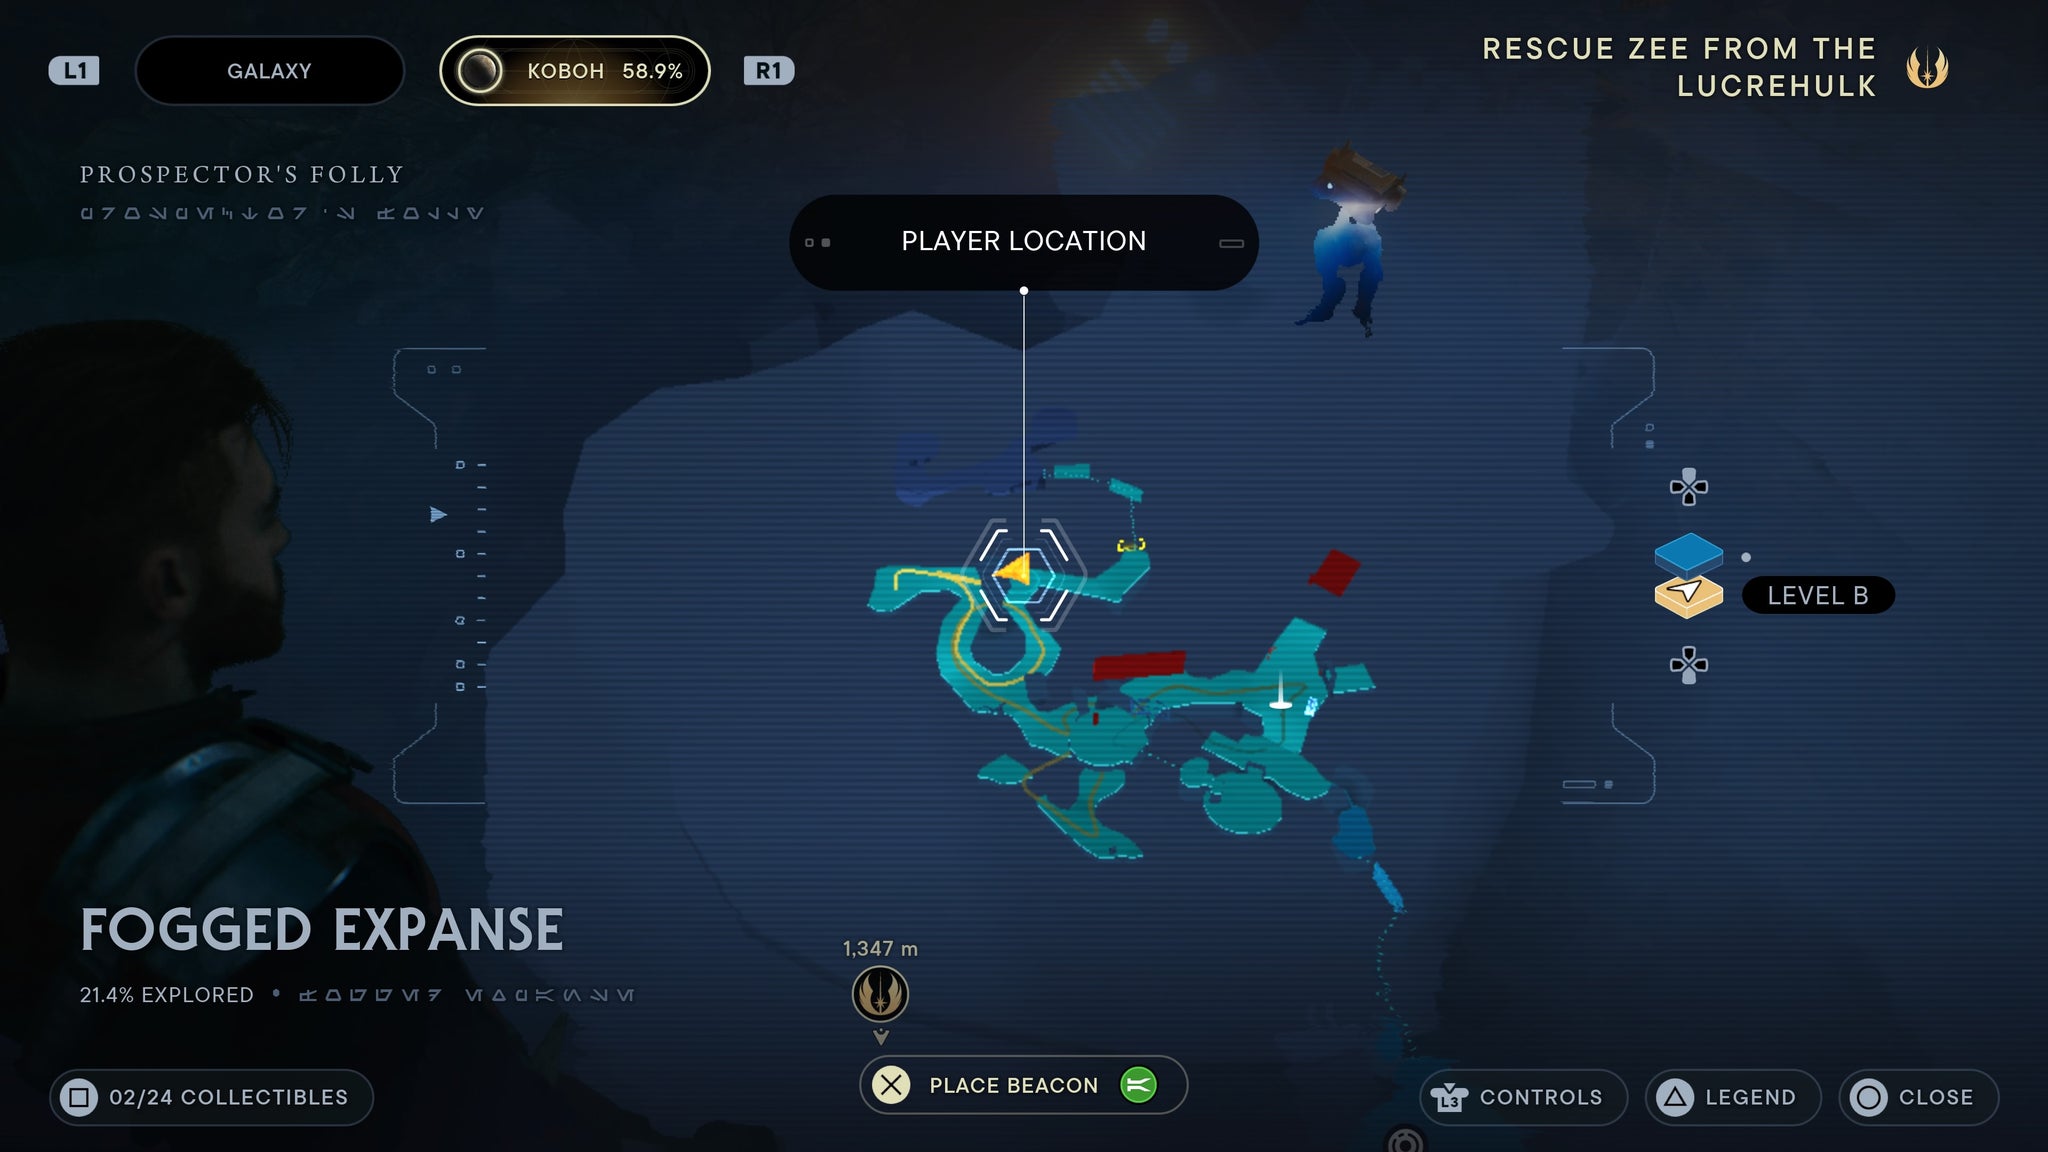
By the patrolling mogu.
Force pull the big doors open and kill the Mogu inside. Once they’re dead, you’ll find a force echo inside the lit room.
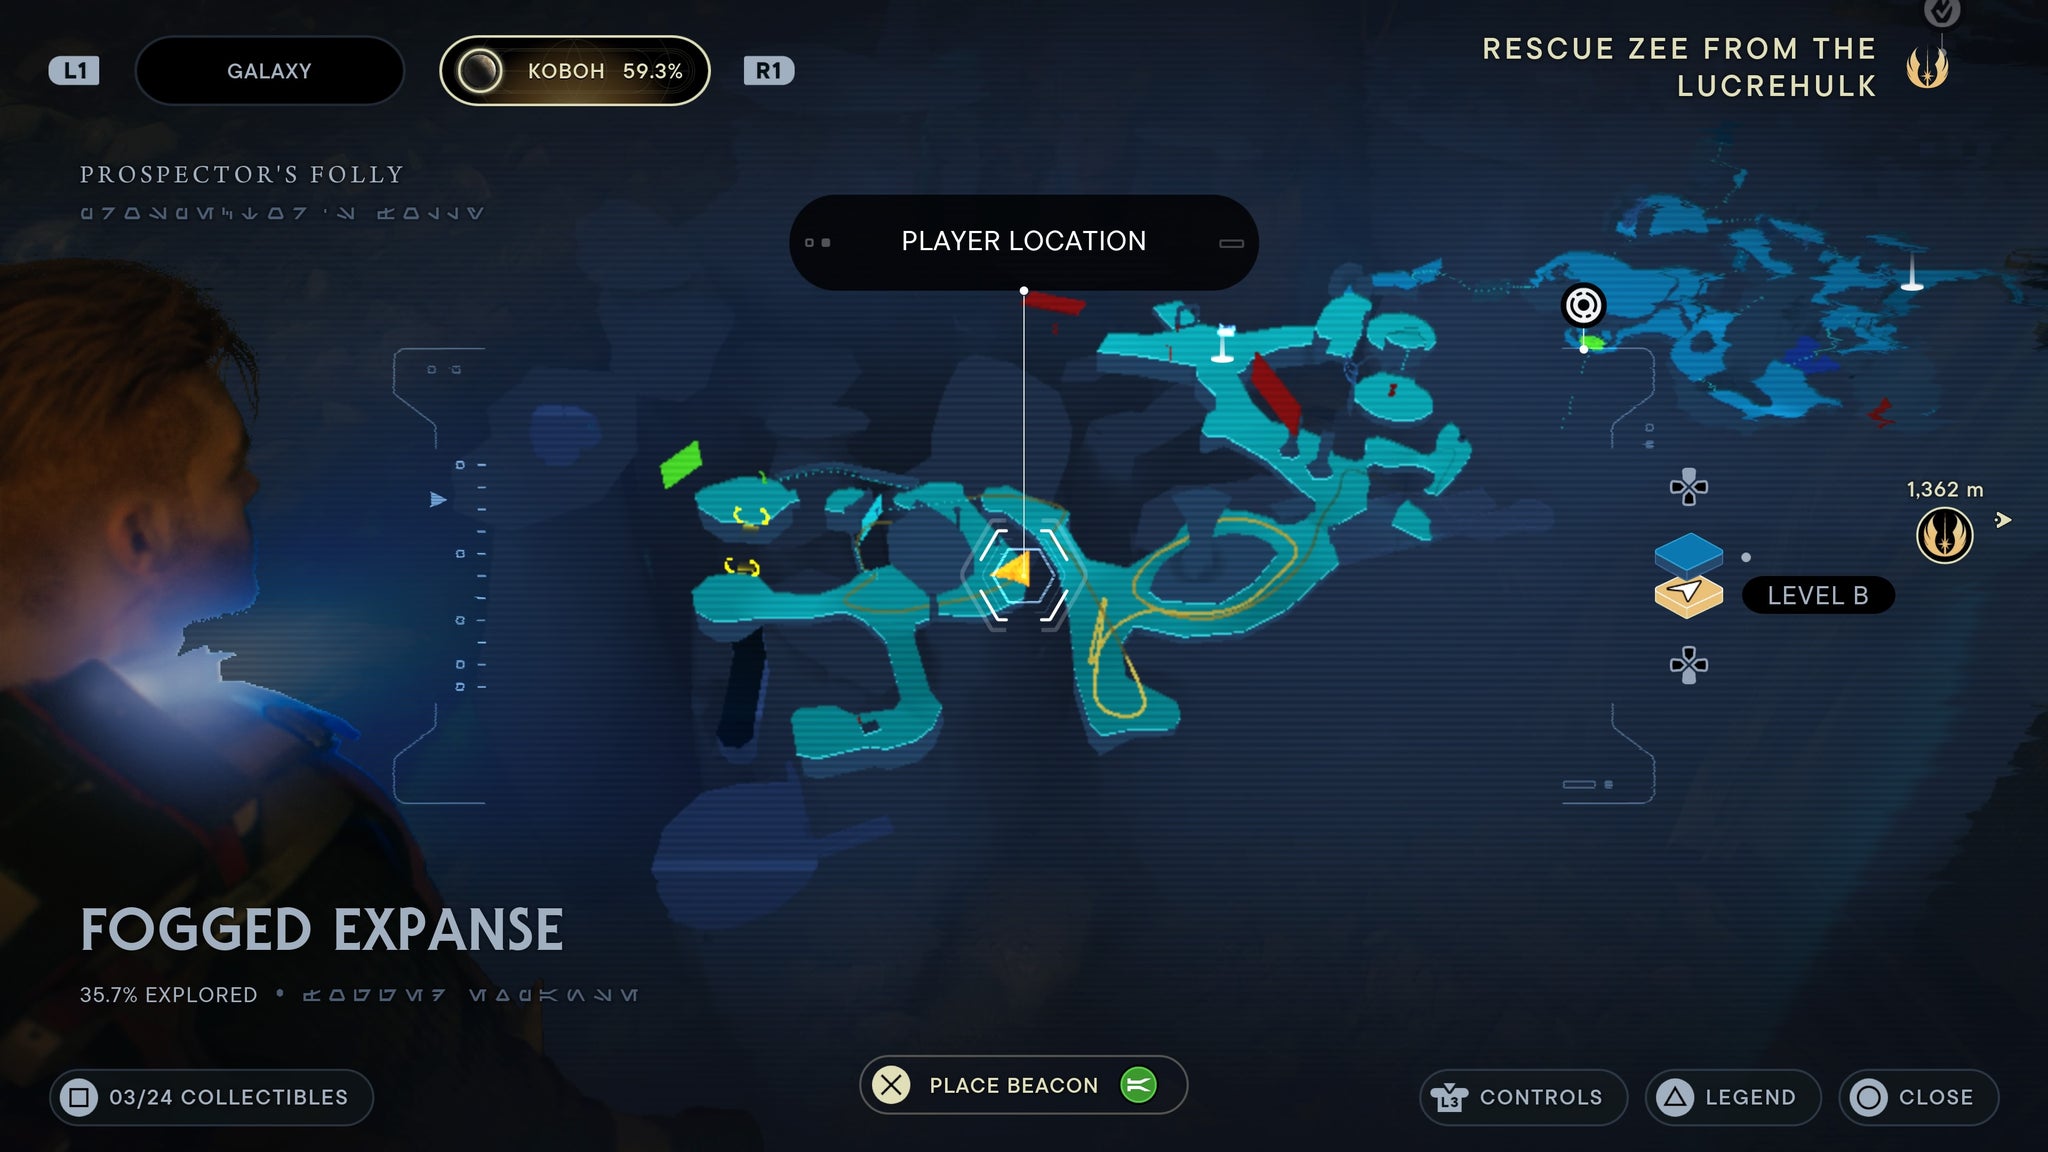
On the corpse in the corner.
Requires electro dart. Use the dart to move the wall by the meditation point and cross over. Then turn around and use this wall to run and jump up to the roof nearby. One up, hop over to the rocky platform nearby for a force echo.
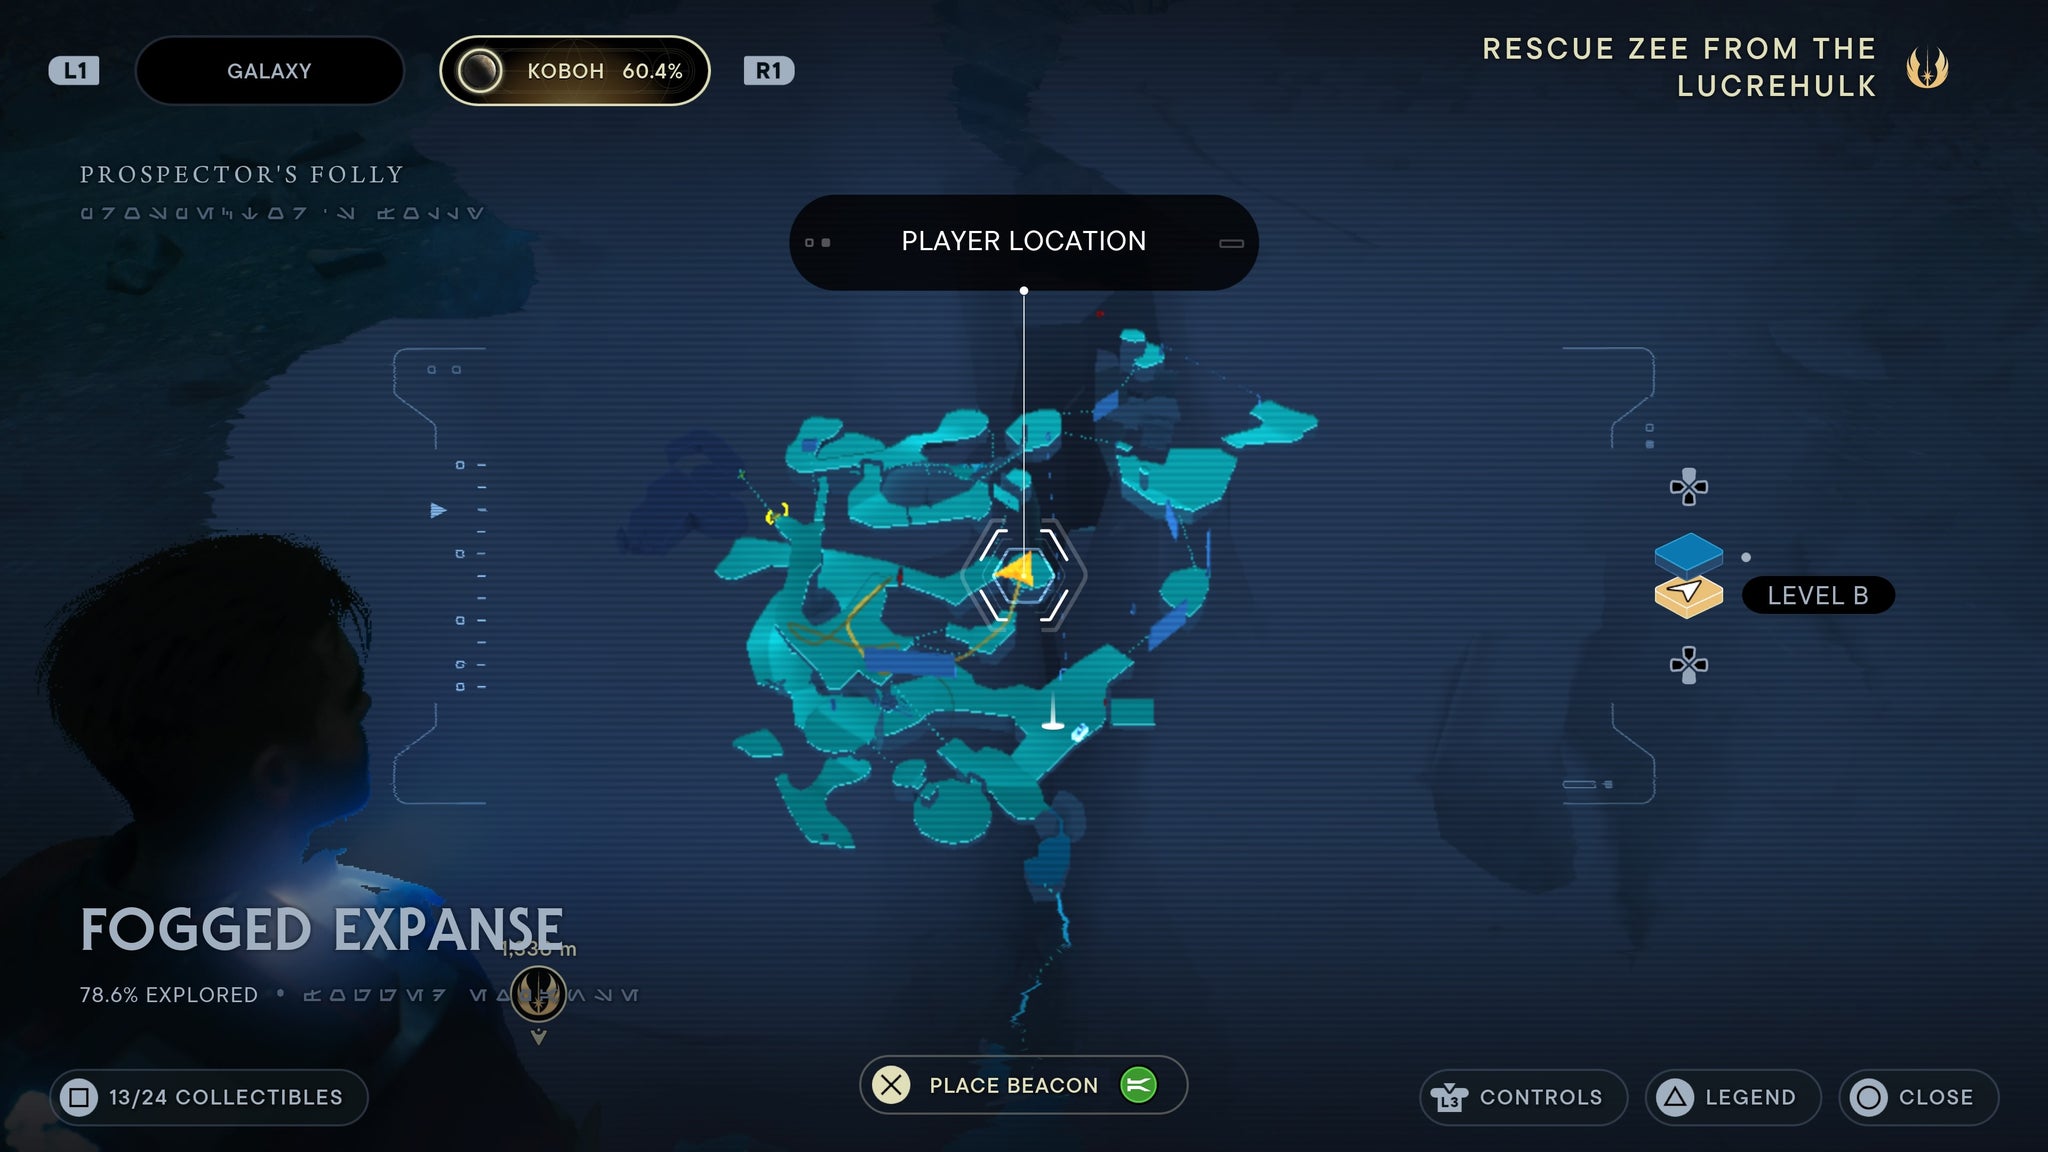
At the cnetre of hte paltform.
Marl Cavern
As you enter Marl Cavern, scan the storage tank to your right.
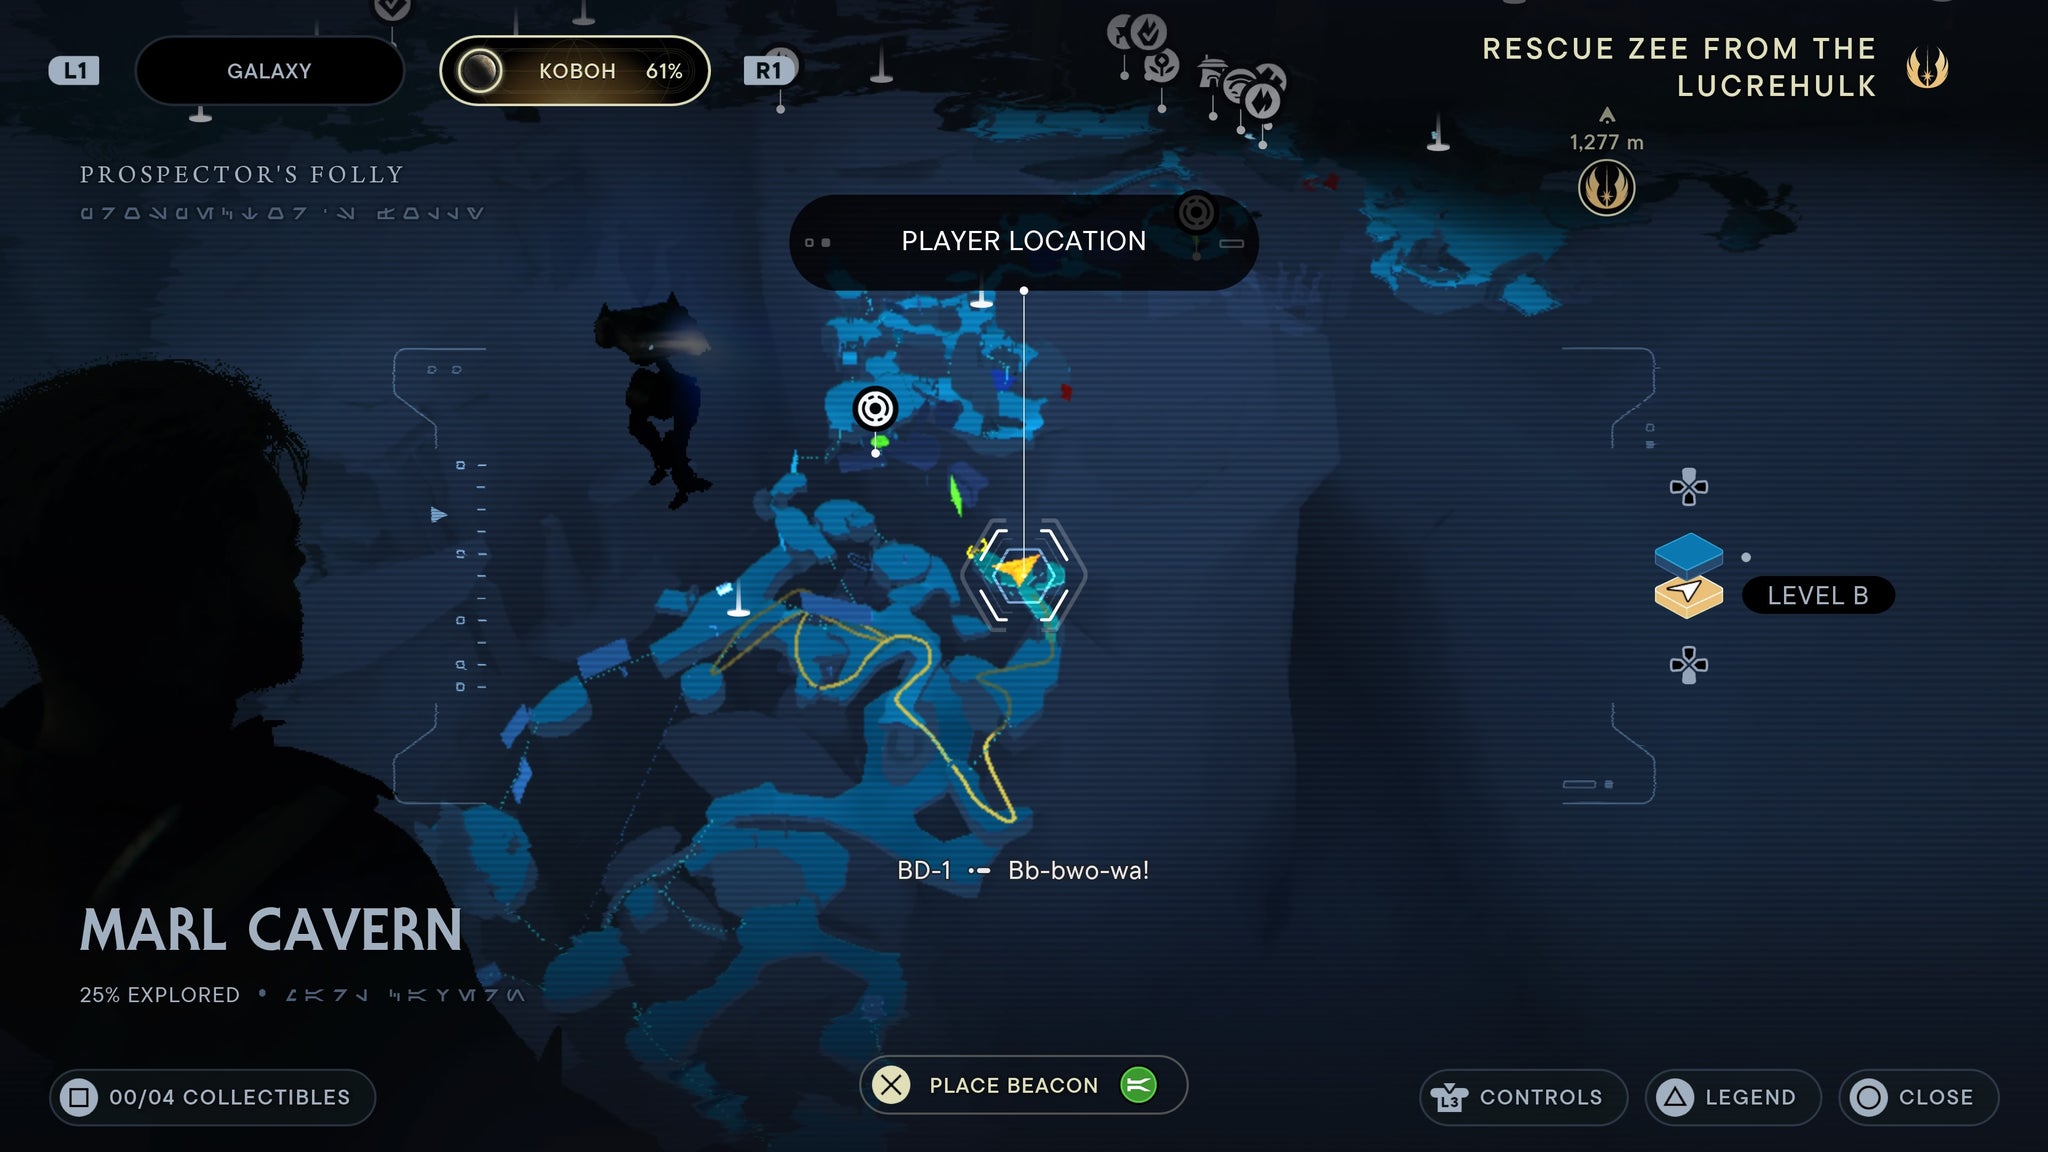
To the right as you enter.
Imperial Post 8L-055
Start by the elevator. There will be a box covered in fabric you can scan.
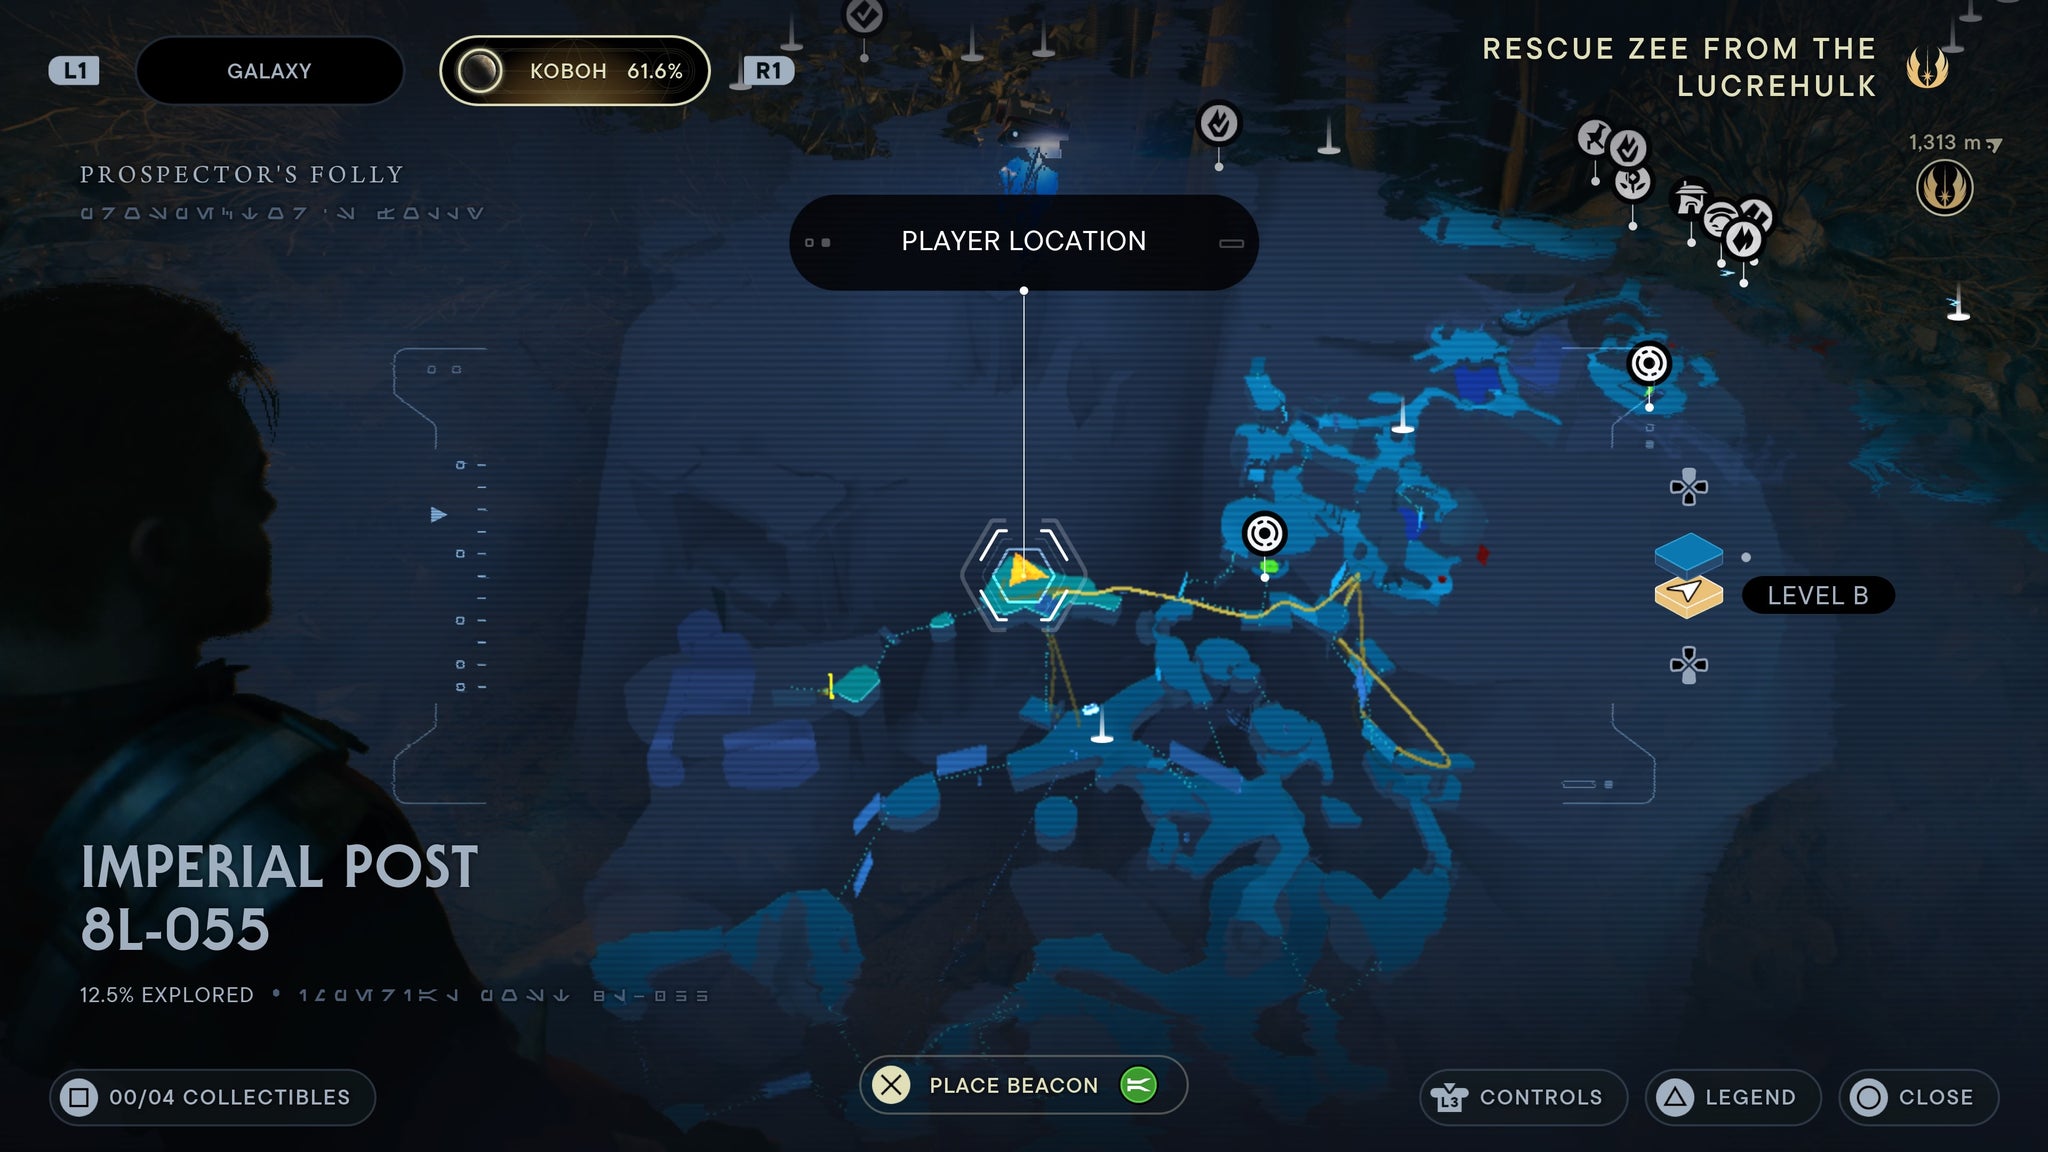
Scan the box here!
Climb up to the top of the hanger, wall run across to the left side of the room, then scan a terminal by the tie fighter.

Top of the room.
Summit Ridge
From the meditation point, look left of the elevator to find a force echo.
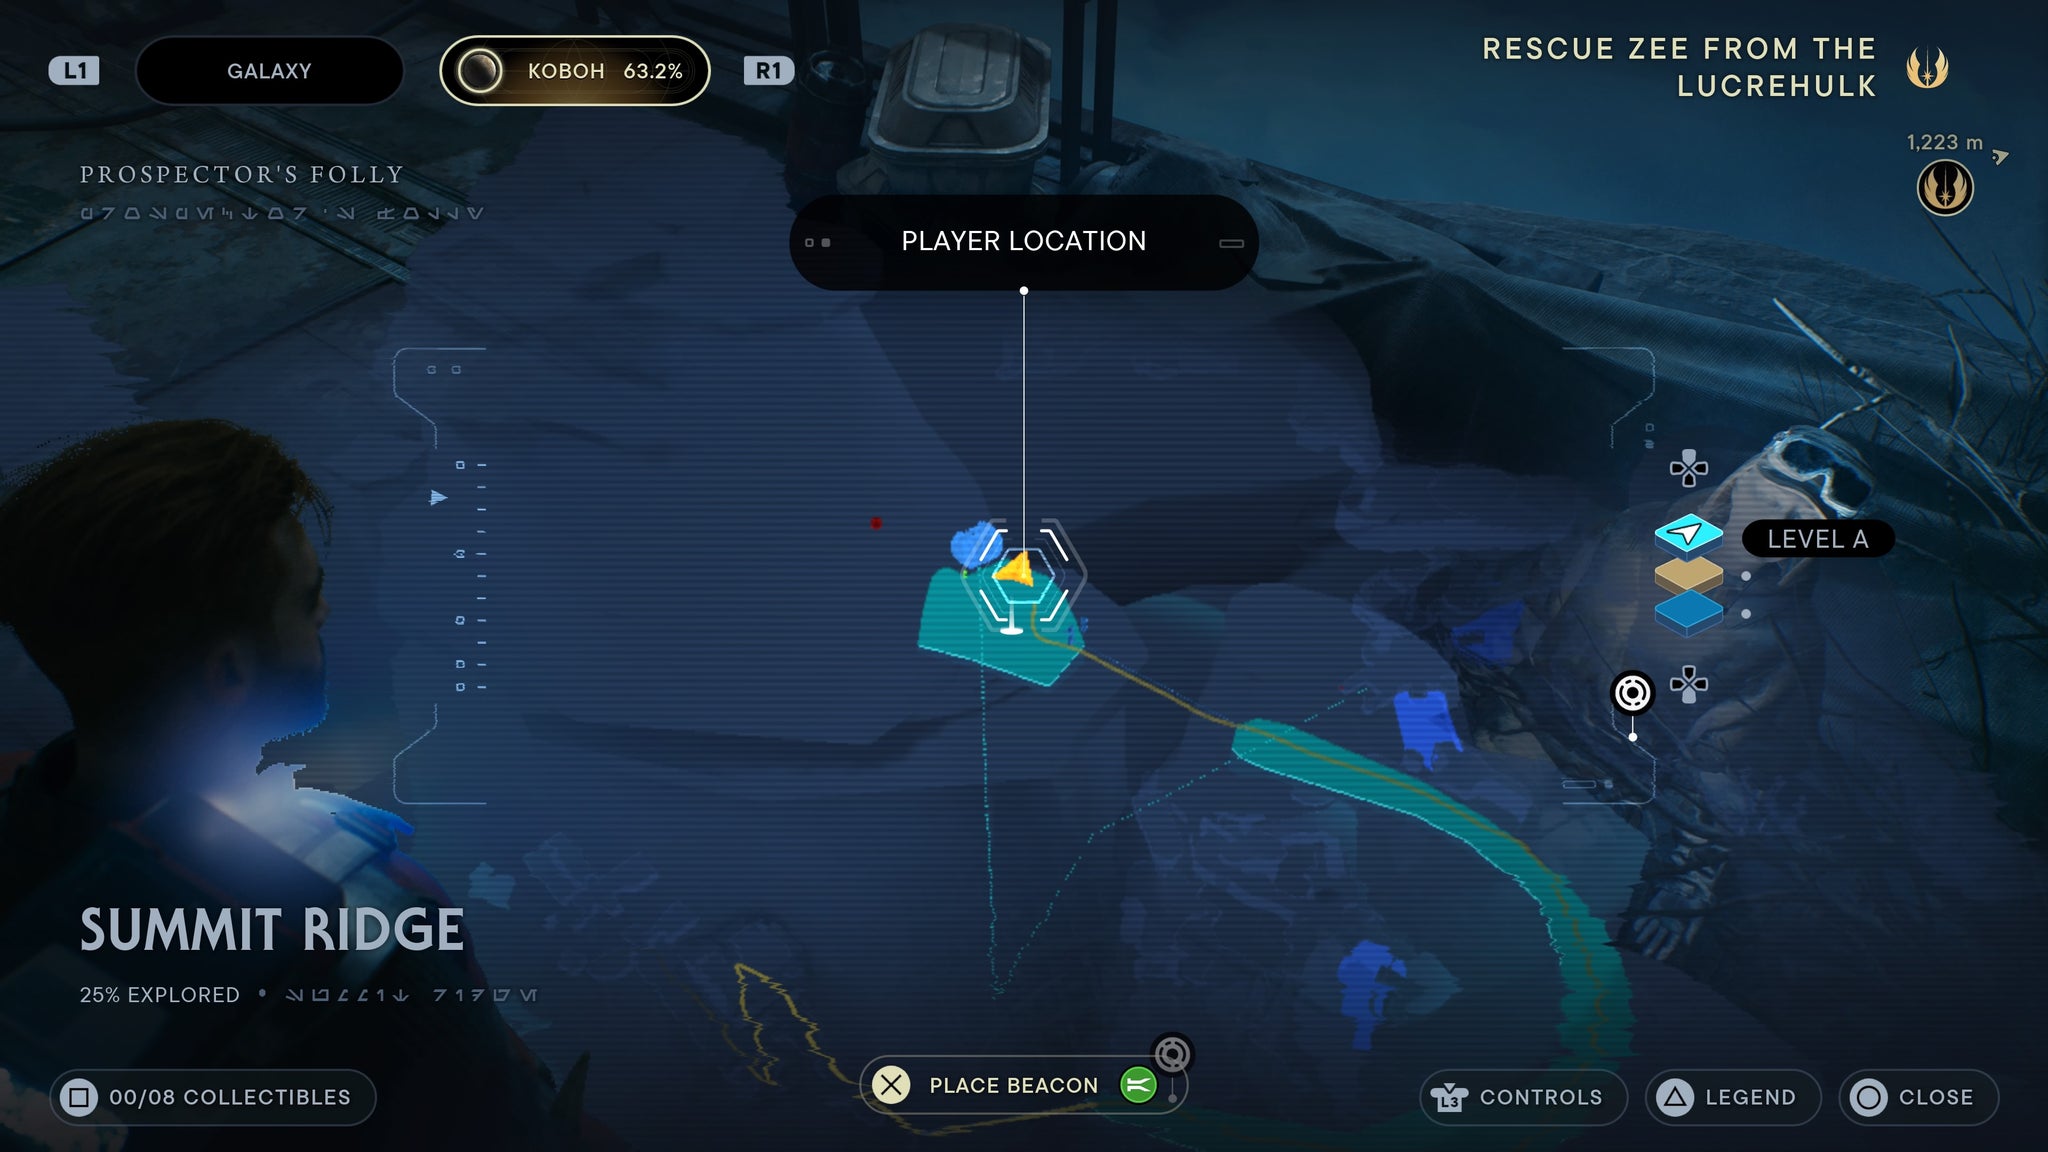
On a corpse.
Requires balloon grapple. Grapple across the balloon, climb up the vines, then down onto the other side. Scan the balloon spawner to the right.
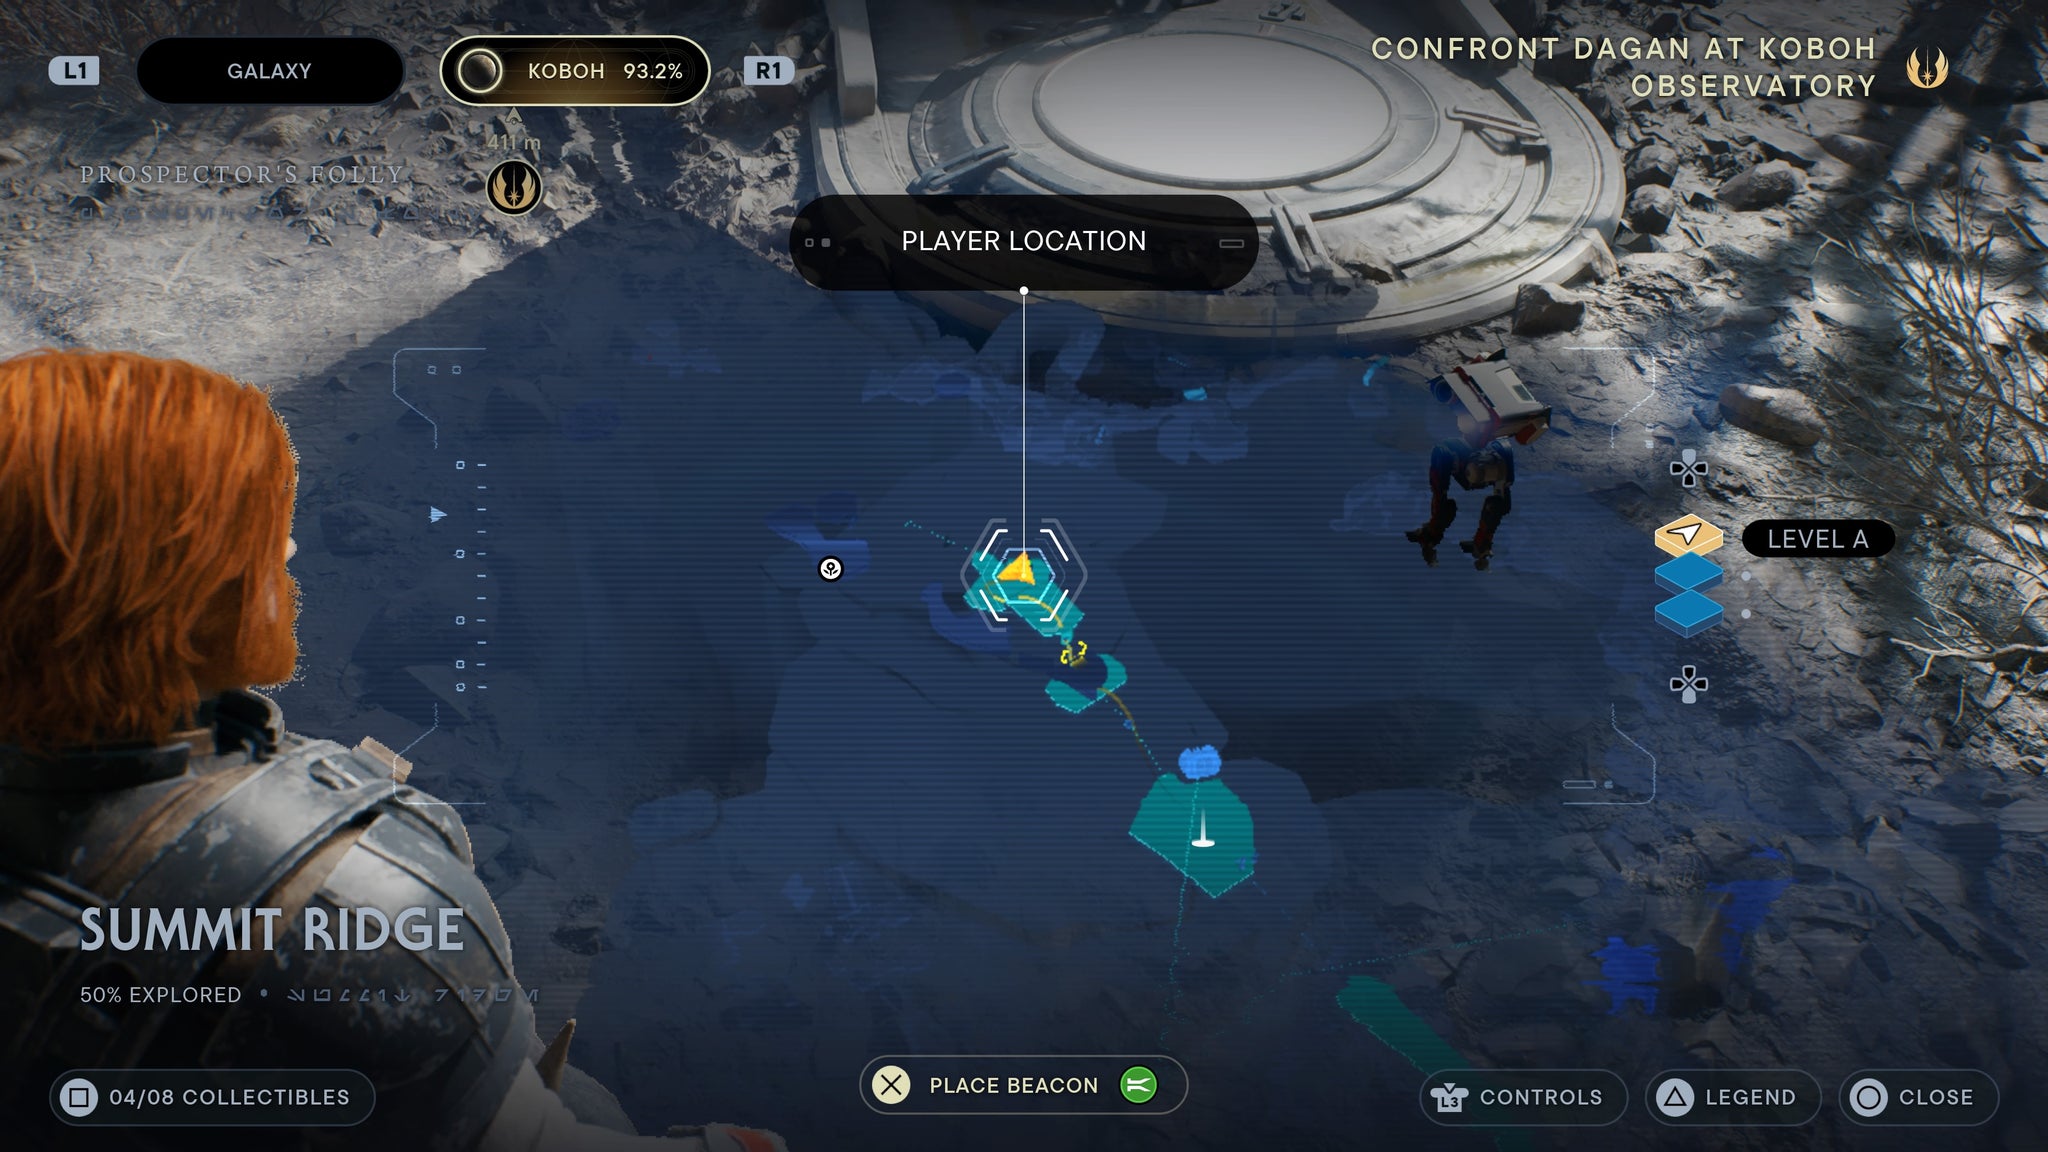
Scan the balloon spawner.
Chamber of Detachment
As you enter the Chamber, there’s an force echo on the wall ahead.
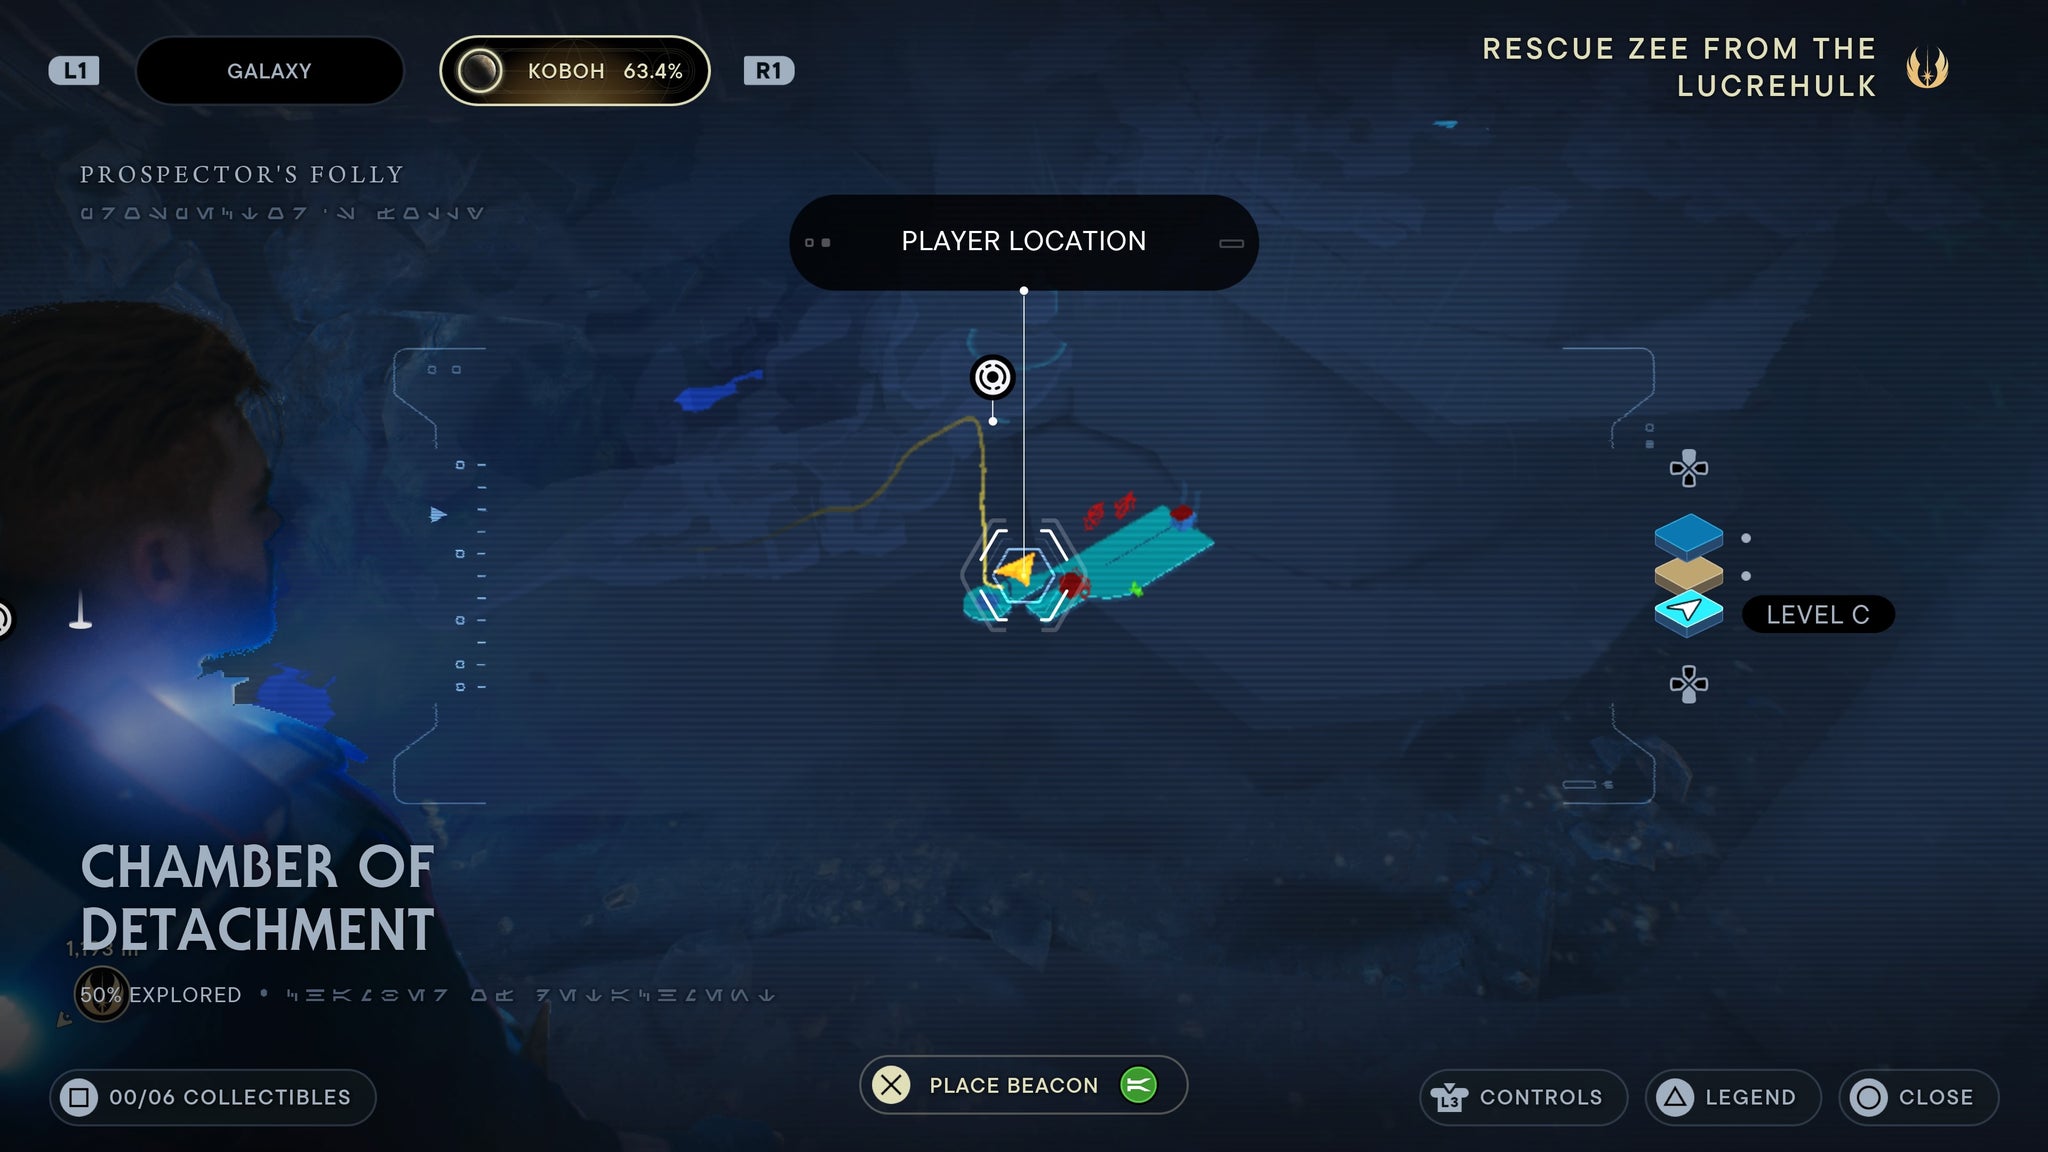
As soon as you enter.
Walk right as you enter the main room in the chamber, and there is a force echo against the wall.
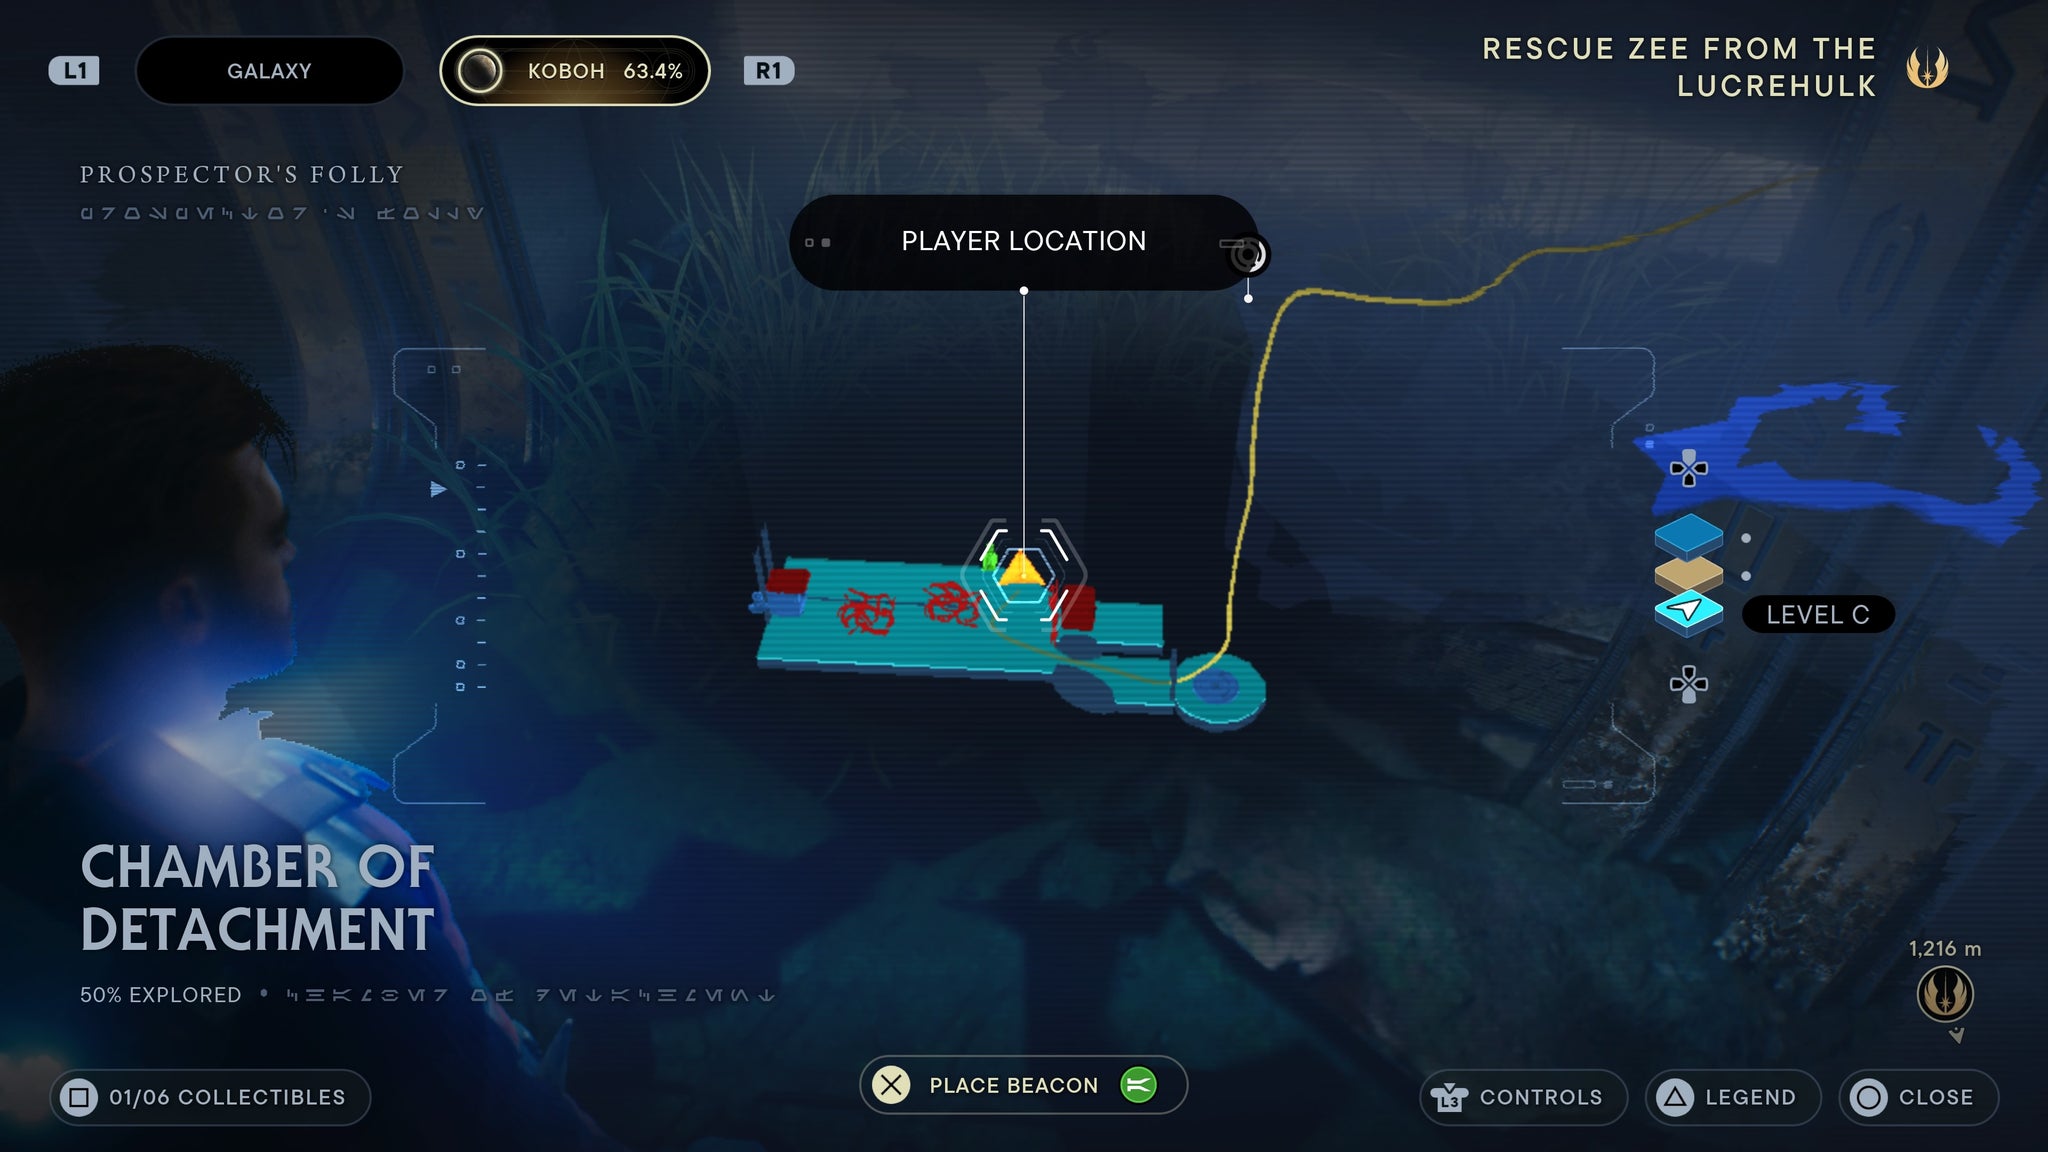
To the left of the room!
Walk straight ahead when you enter the main room in the chamber. To the right you’ll find a force echo.
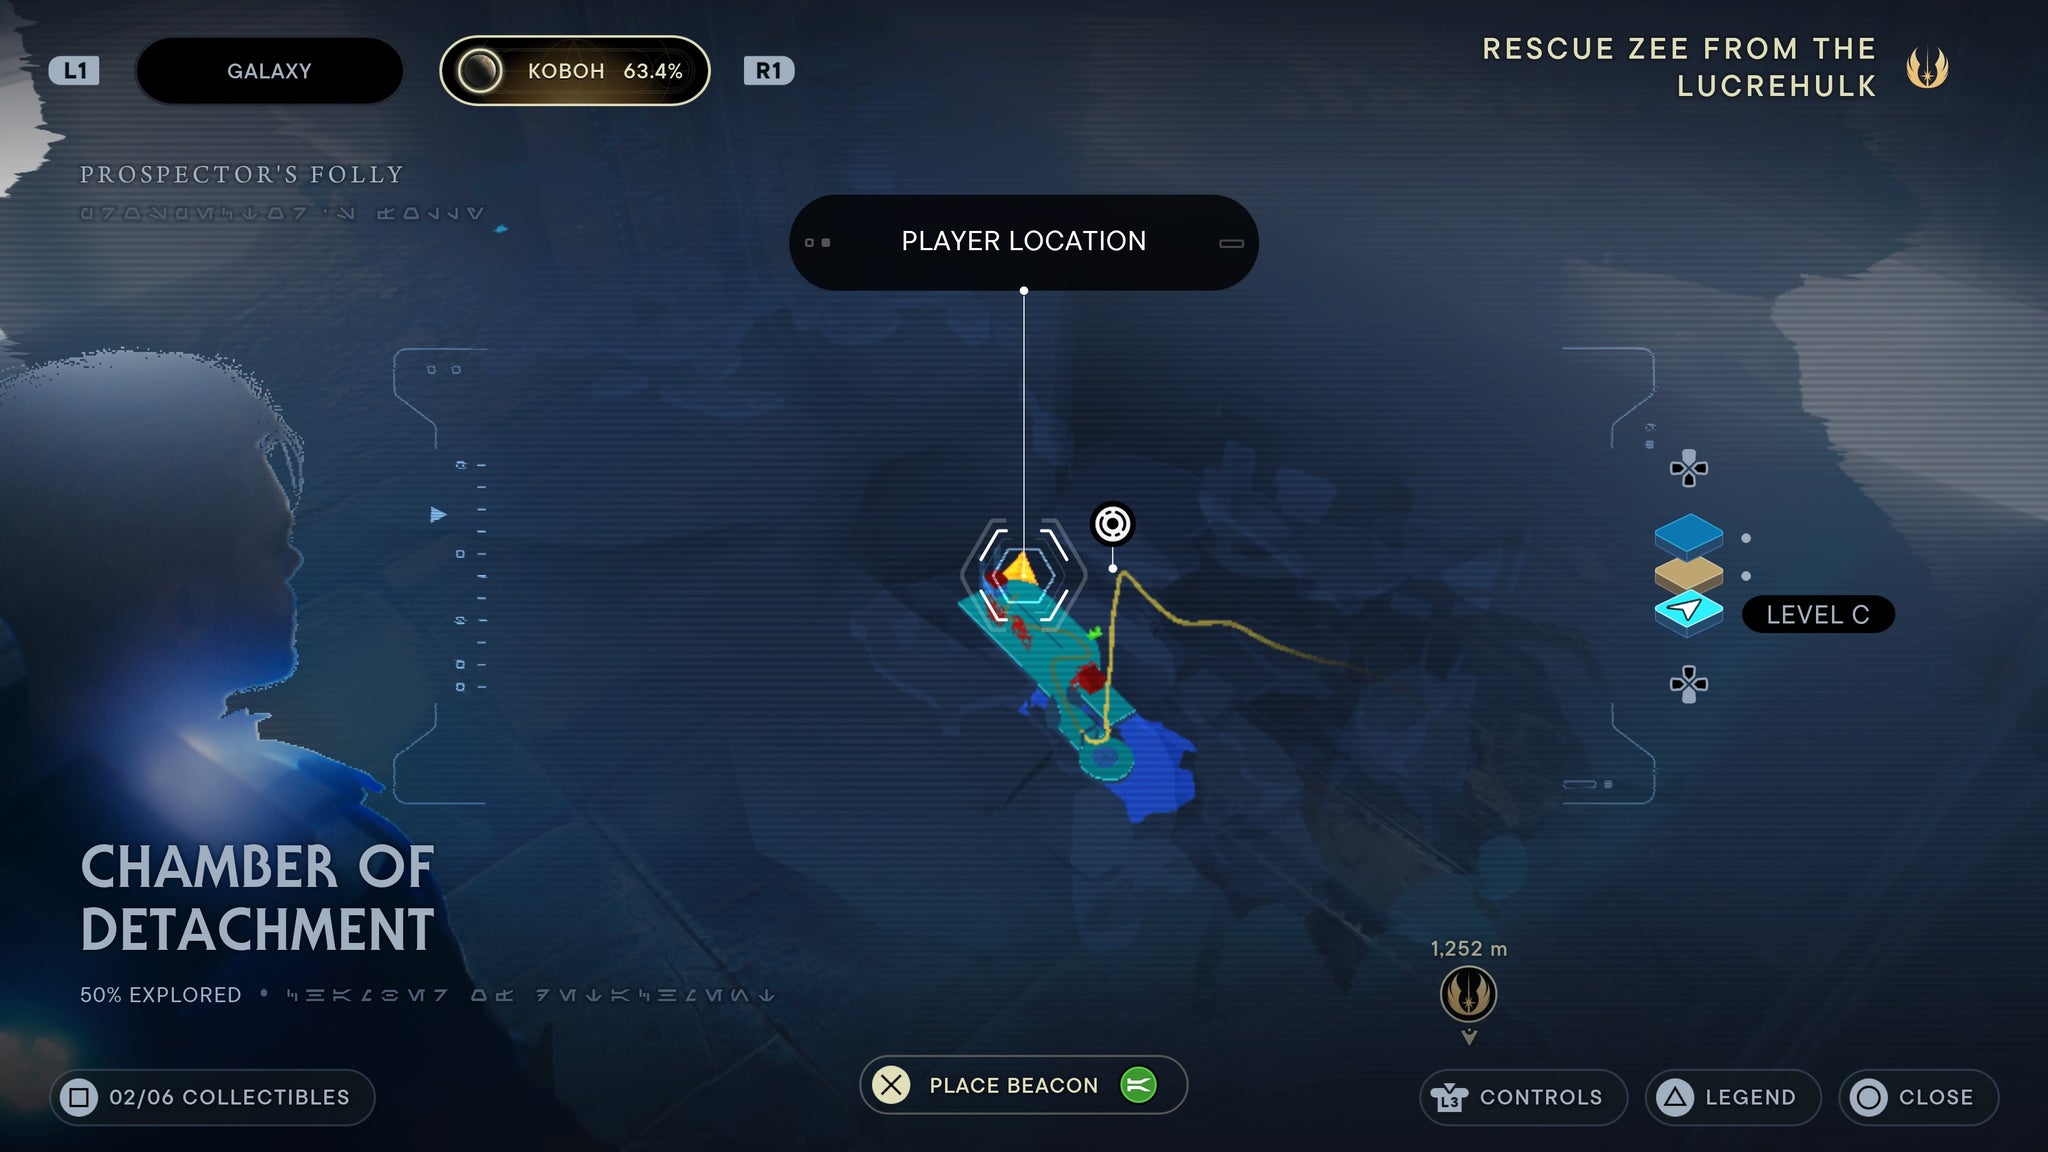
Walk right!
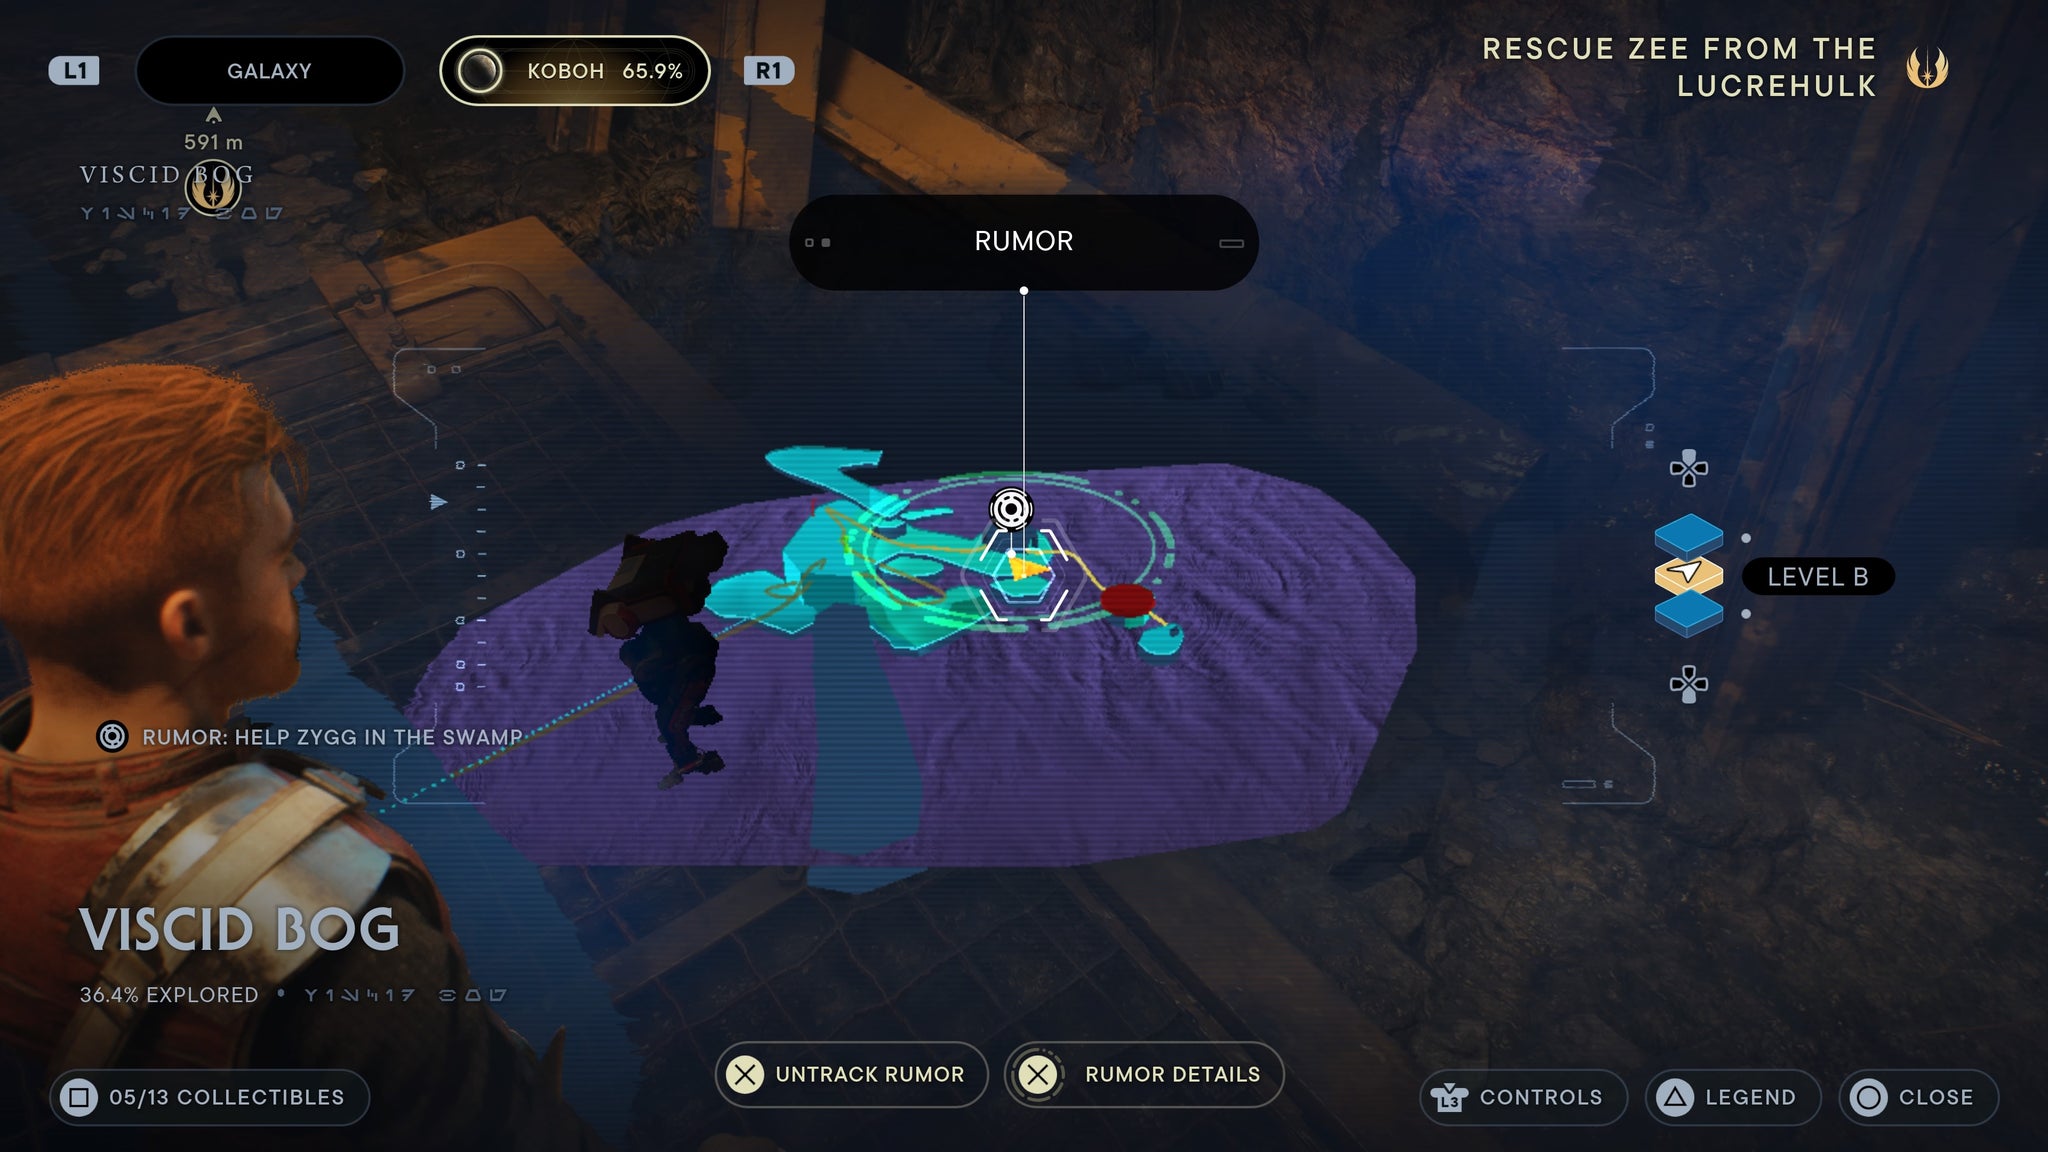
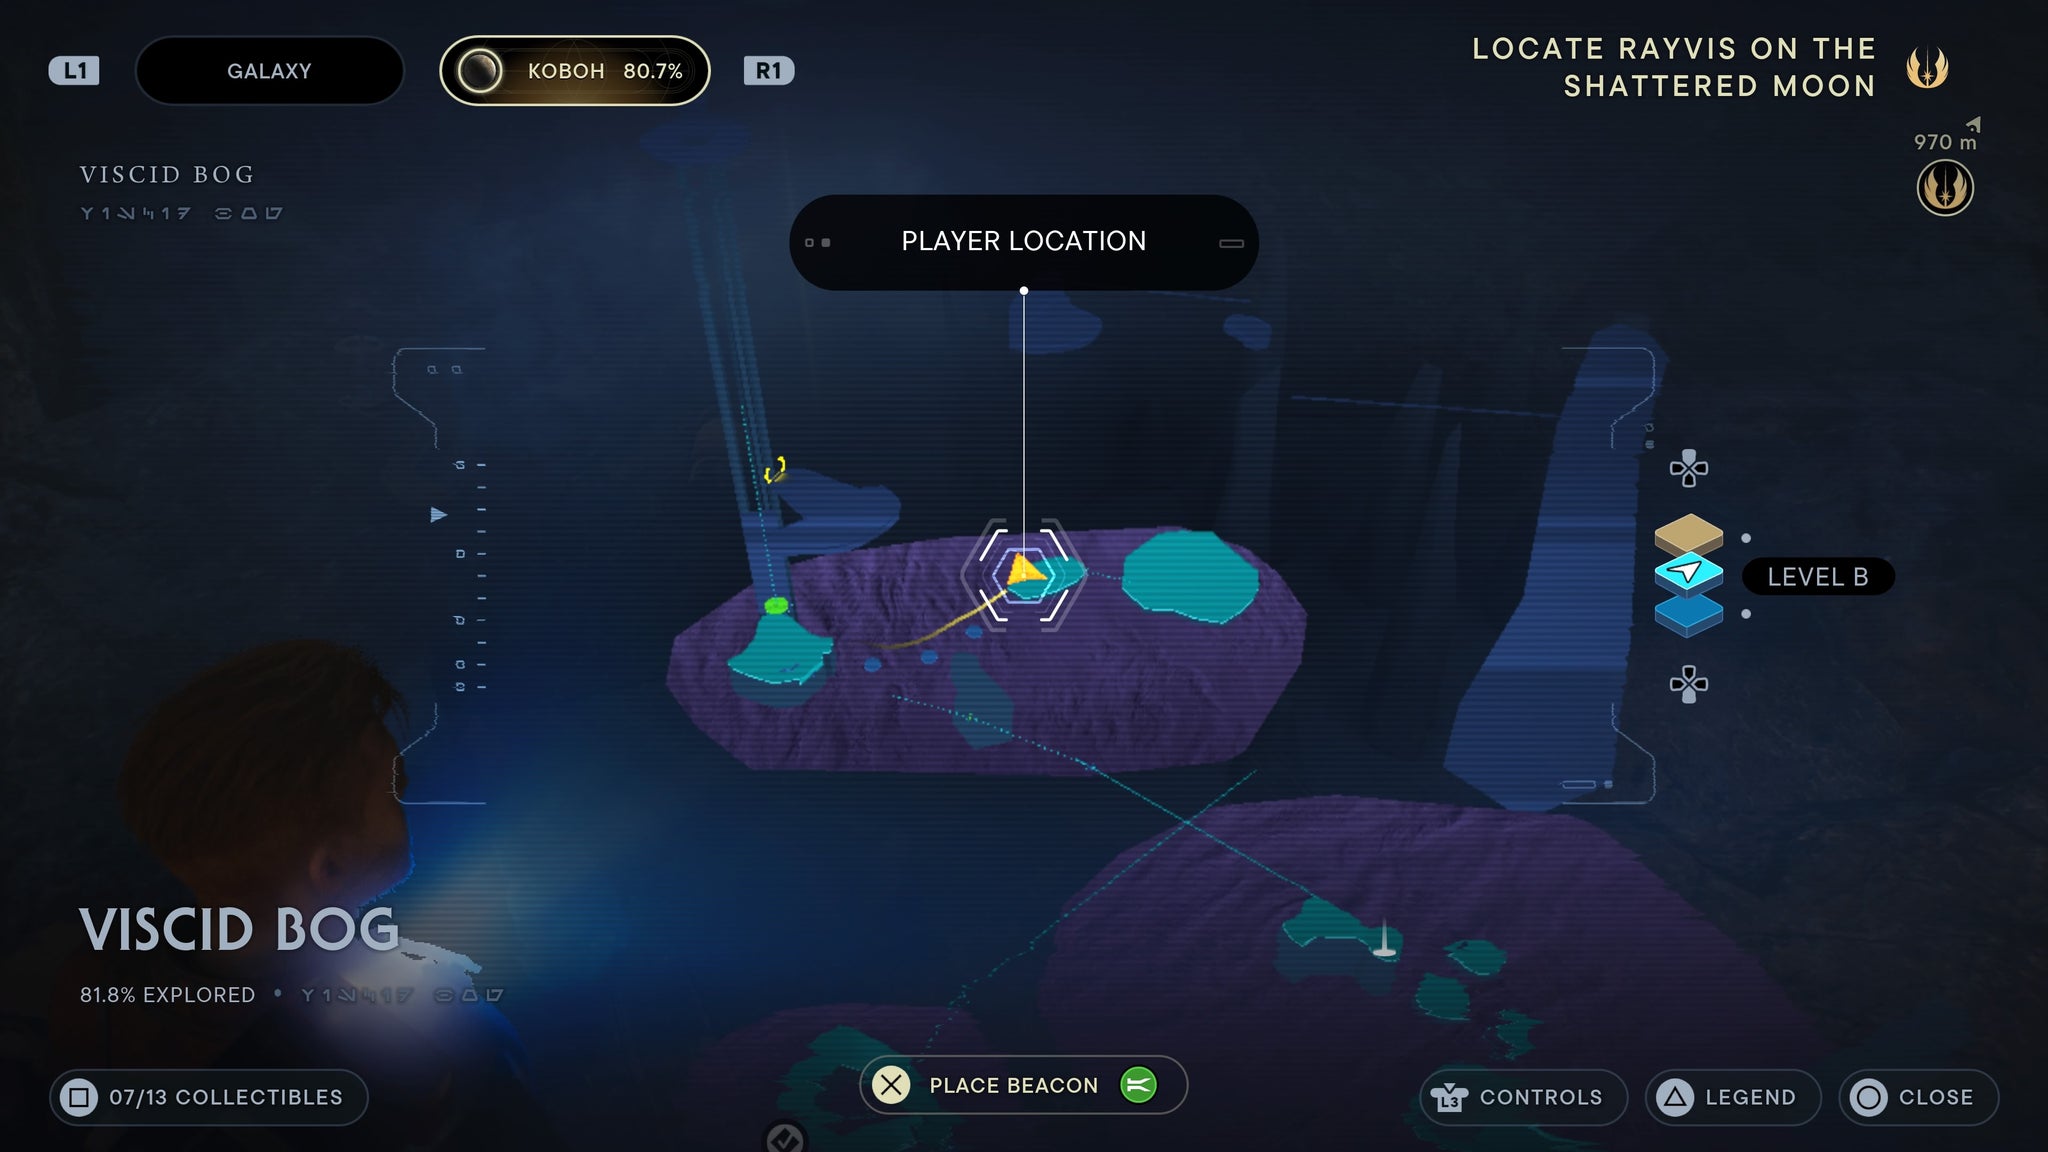
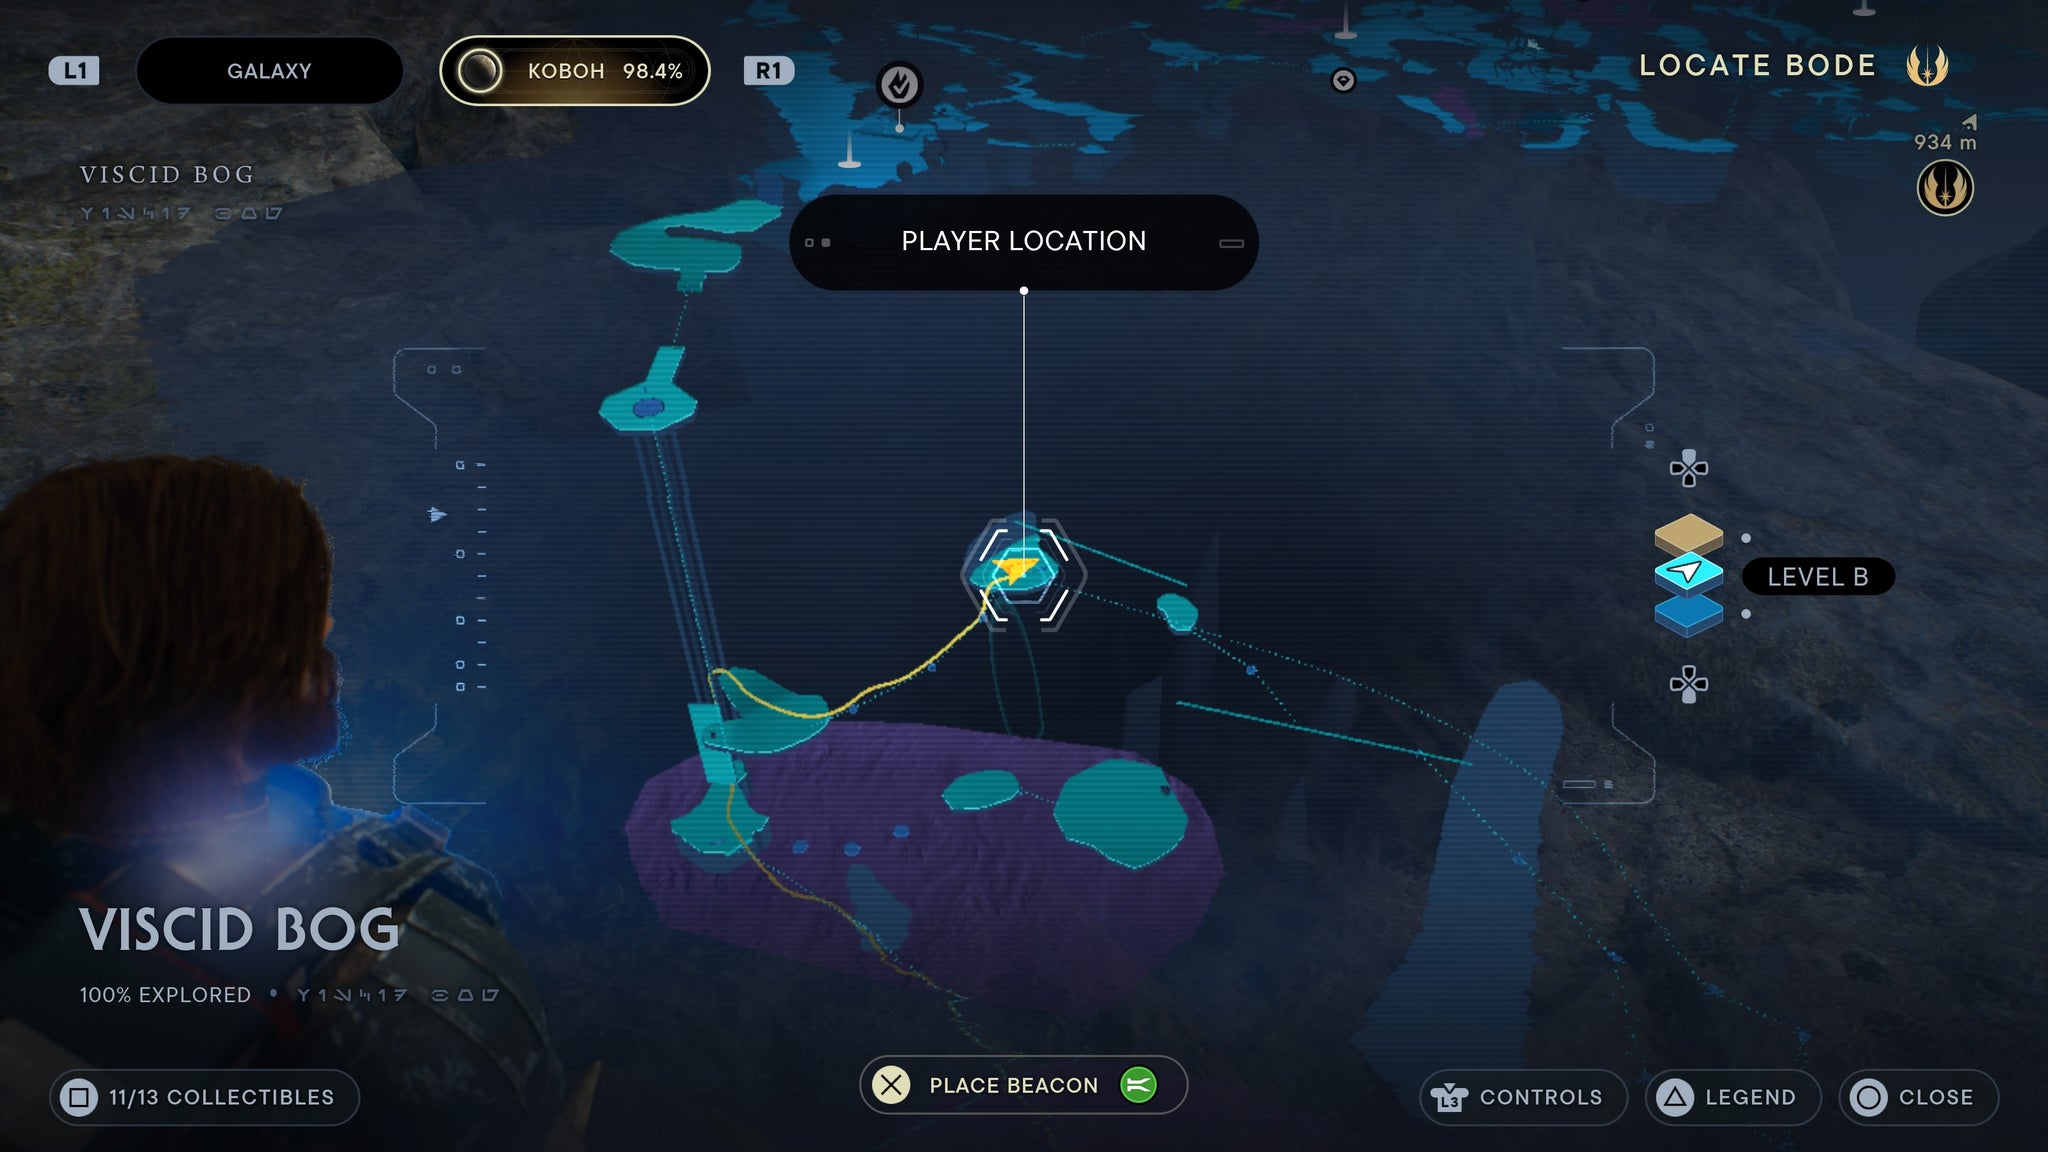
Viscid Bog
Take the relter down to the first platform, then walk straight ahead to find a force echo by some broken machinery.
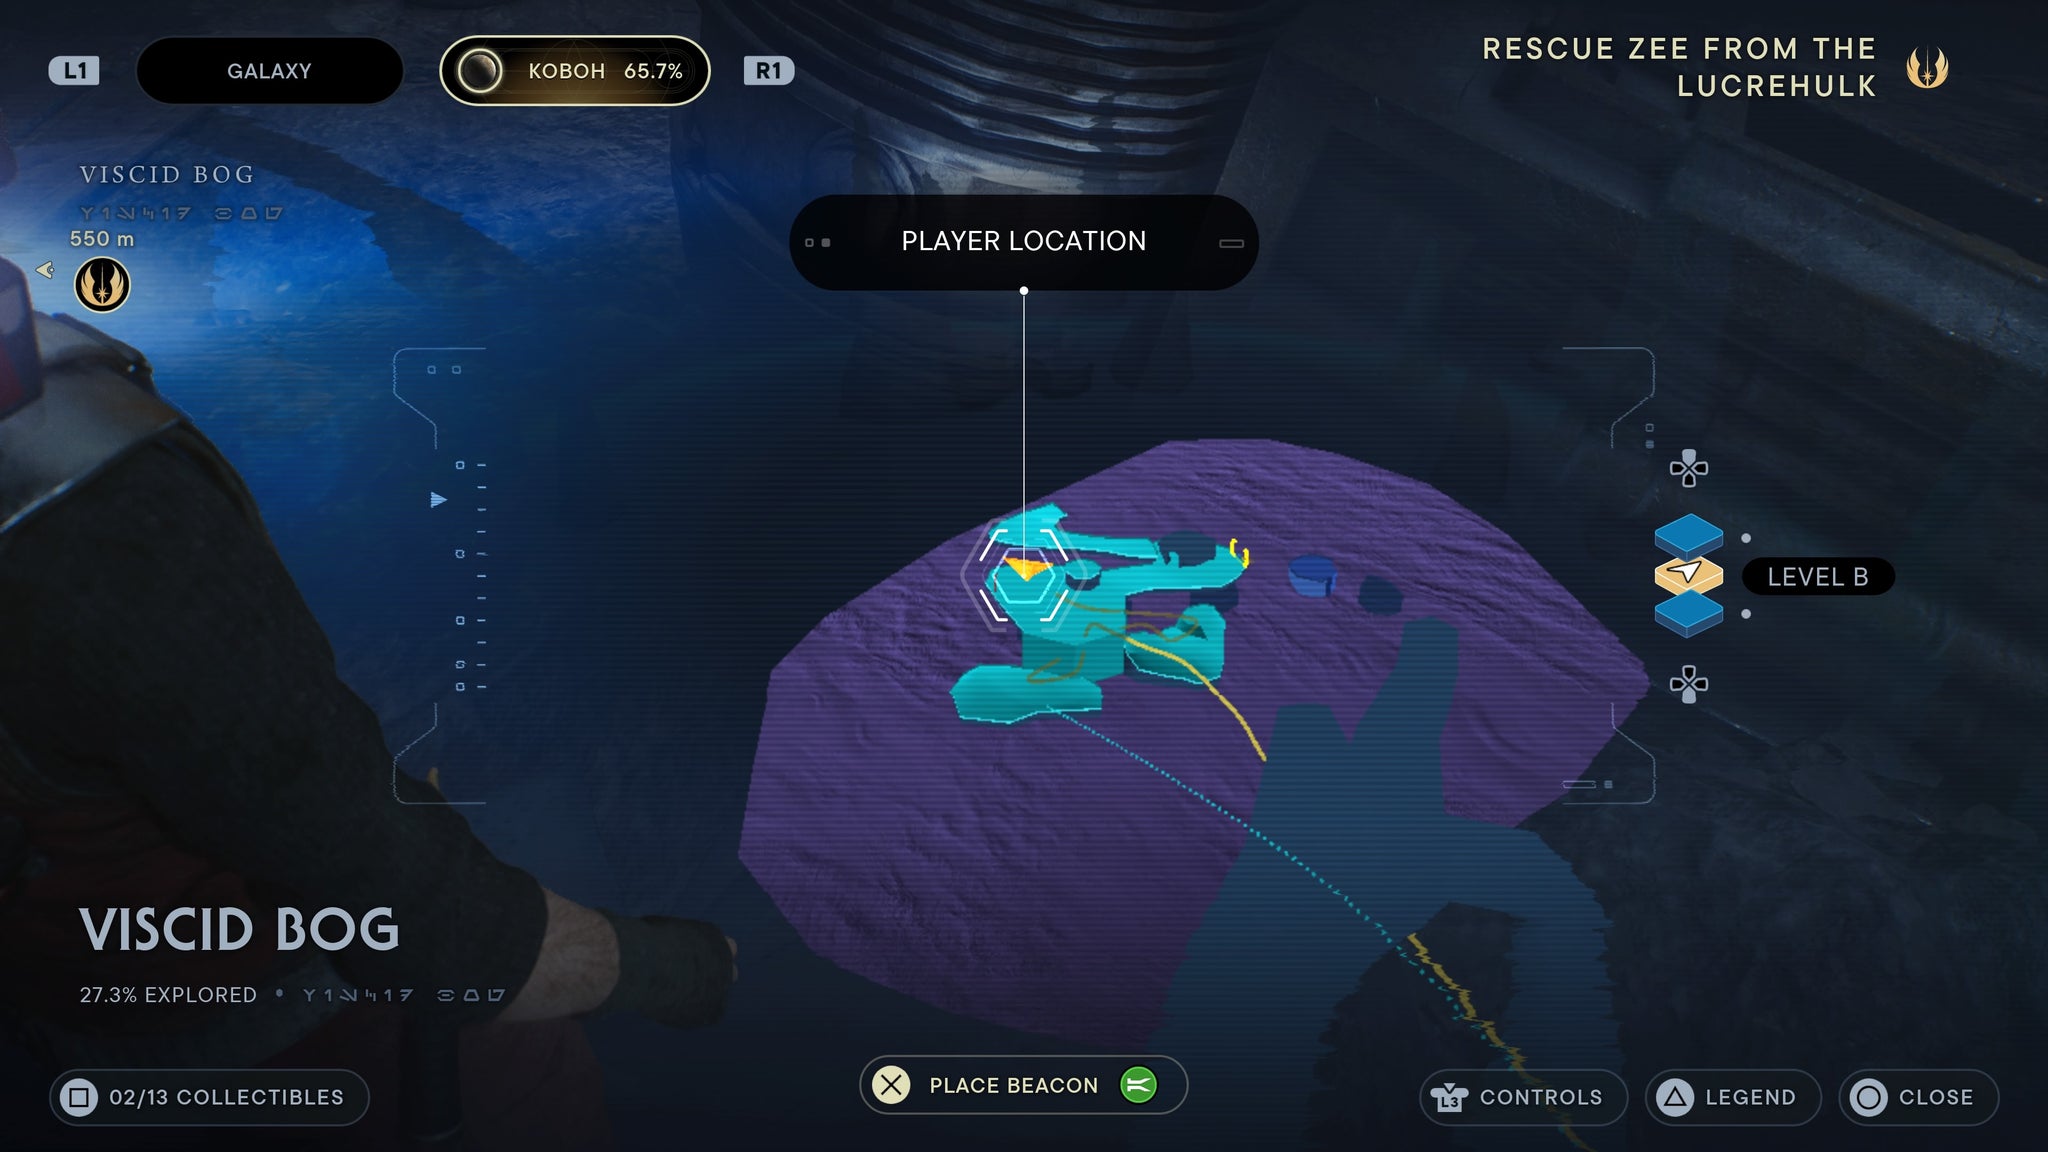
An echo by a broken machine
From the shack where you find Zygg, jump down to the platform outside and you’ll find a chest nearby. Next to this chest is a scan.
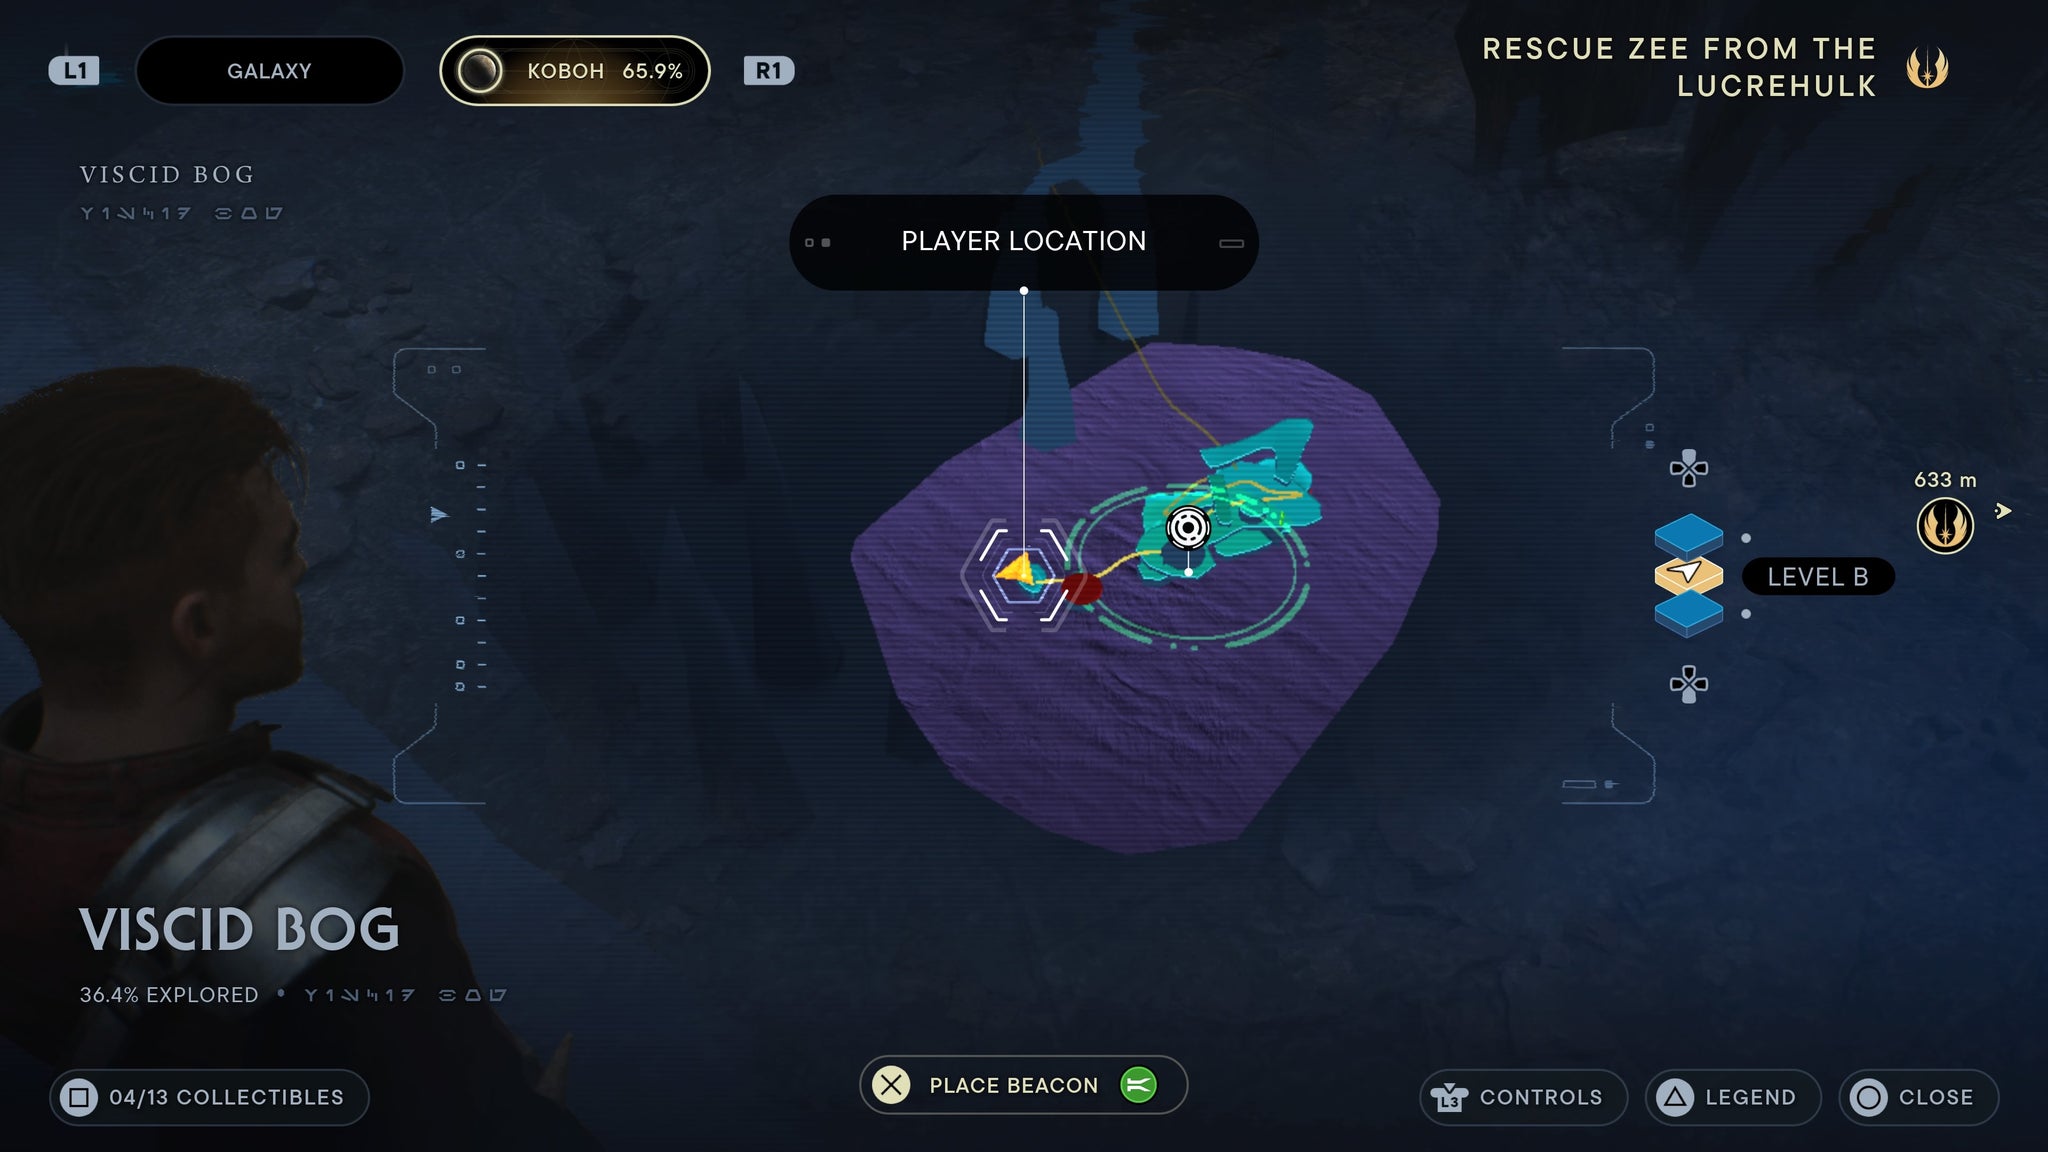
Right next to a chest.
In the tunnel beneath the shack where you find Zygg is a scan on the wall.
In the tunnel!
Requires force lift and slam. By the elevator back to the Gorge Crash Site, use the three stone pillars to reach a far platform with this force echo on it.
Get this on your secon trip to the bog.
Requires Balloon grapple. Jump through the hole in the large elevator, then grapple across the balloons to the nearby platform. On there, by a relter, is a force echo.
Past the elevator, on the cliffs by a relter.
Loading Gantry
From the meditation point, squeeze through the gap and scan the tank straight ahead.

Big tank, bottom floor.
From the meditation point, squeeze through the gap and scan the water tanks at the top of the ramp.
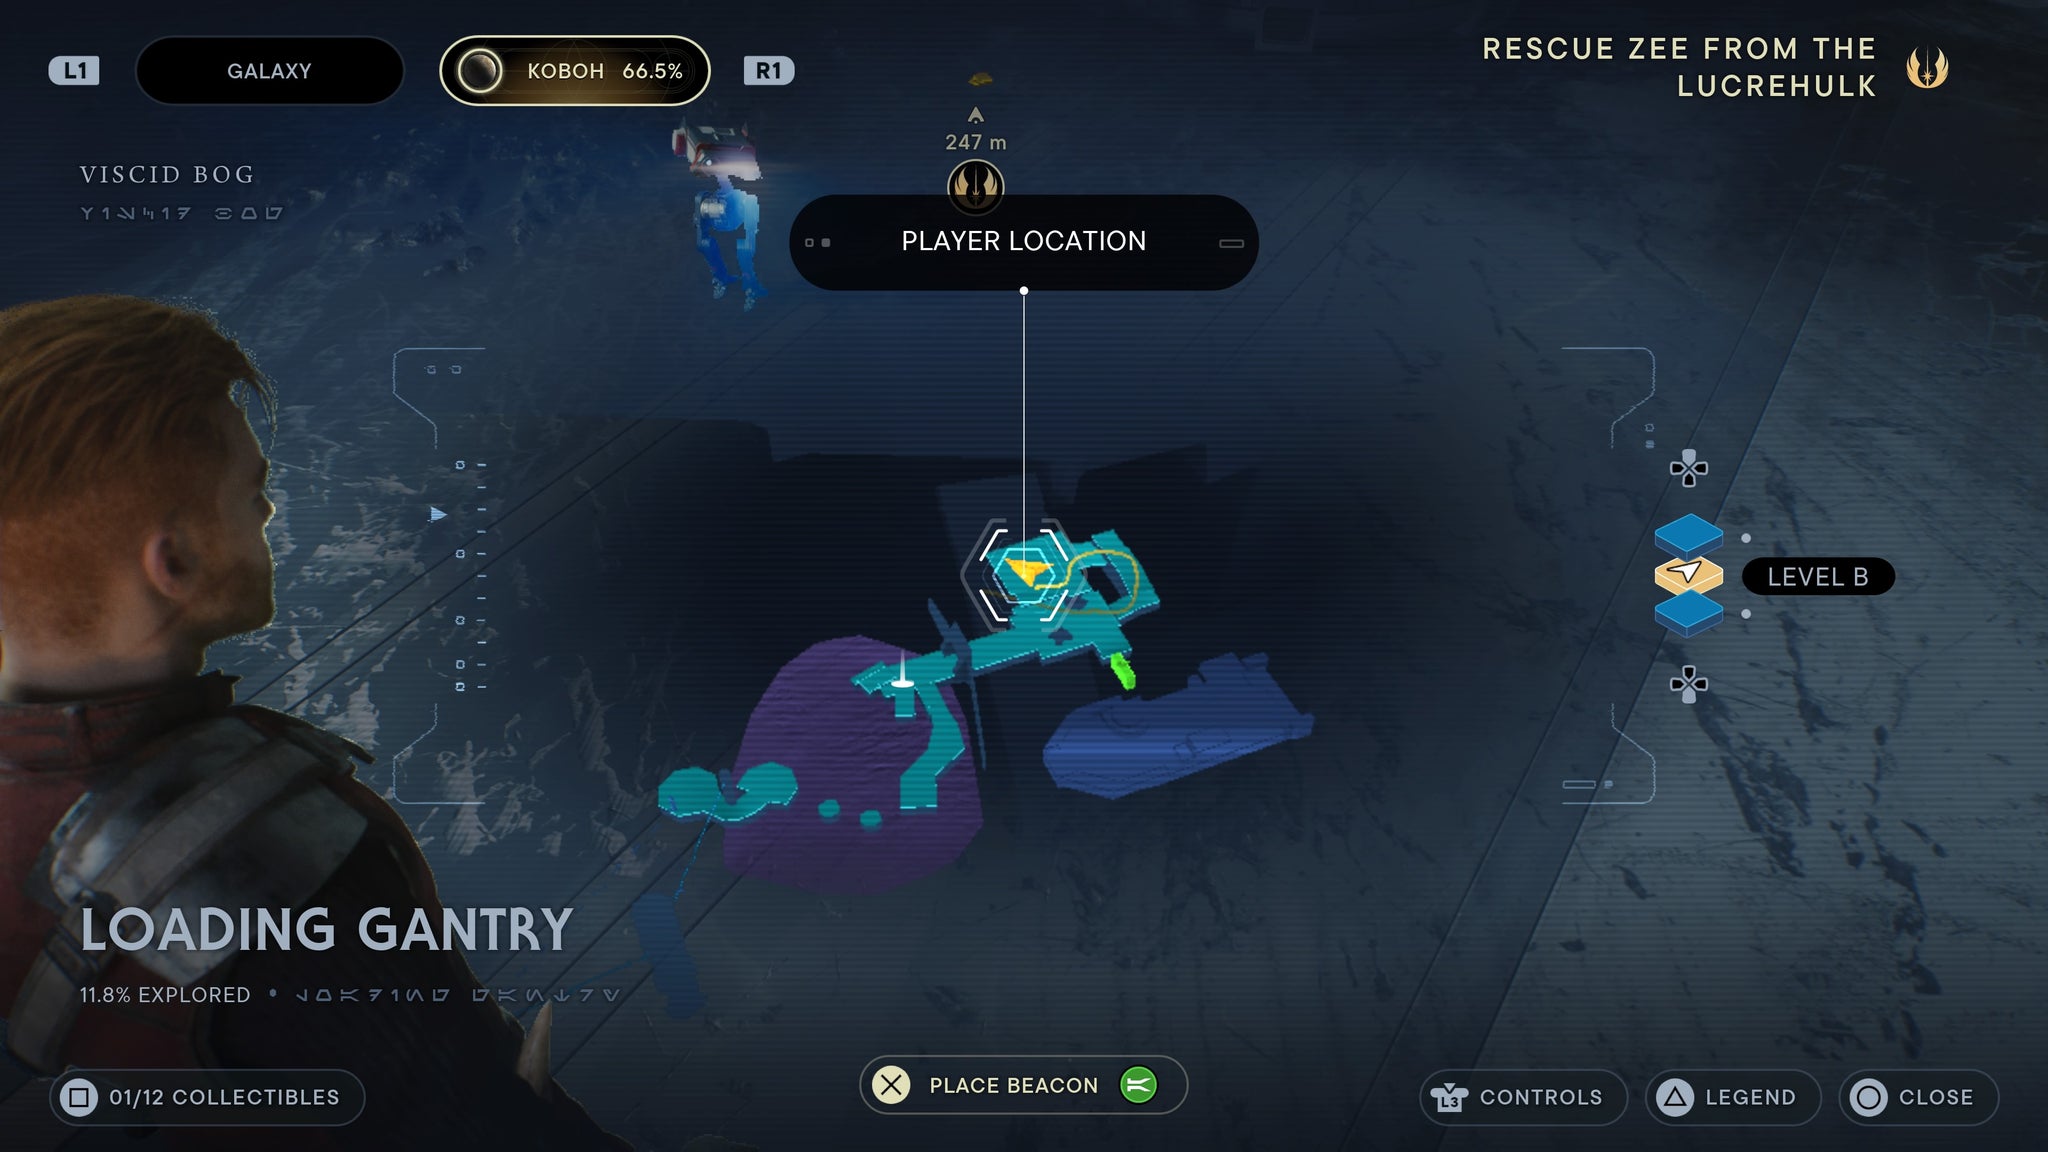
You’ll find two liquid tanks up the ramp.
From the back of the boat on the dock, jump up to a higher metal platform and you’ll find a force echo.
A short jump from the front of the boat.
Lucrehulk Core
Walk to the forcefield at the end of the first hallway, then keep walking. You’ll see a force echo on the ground.
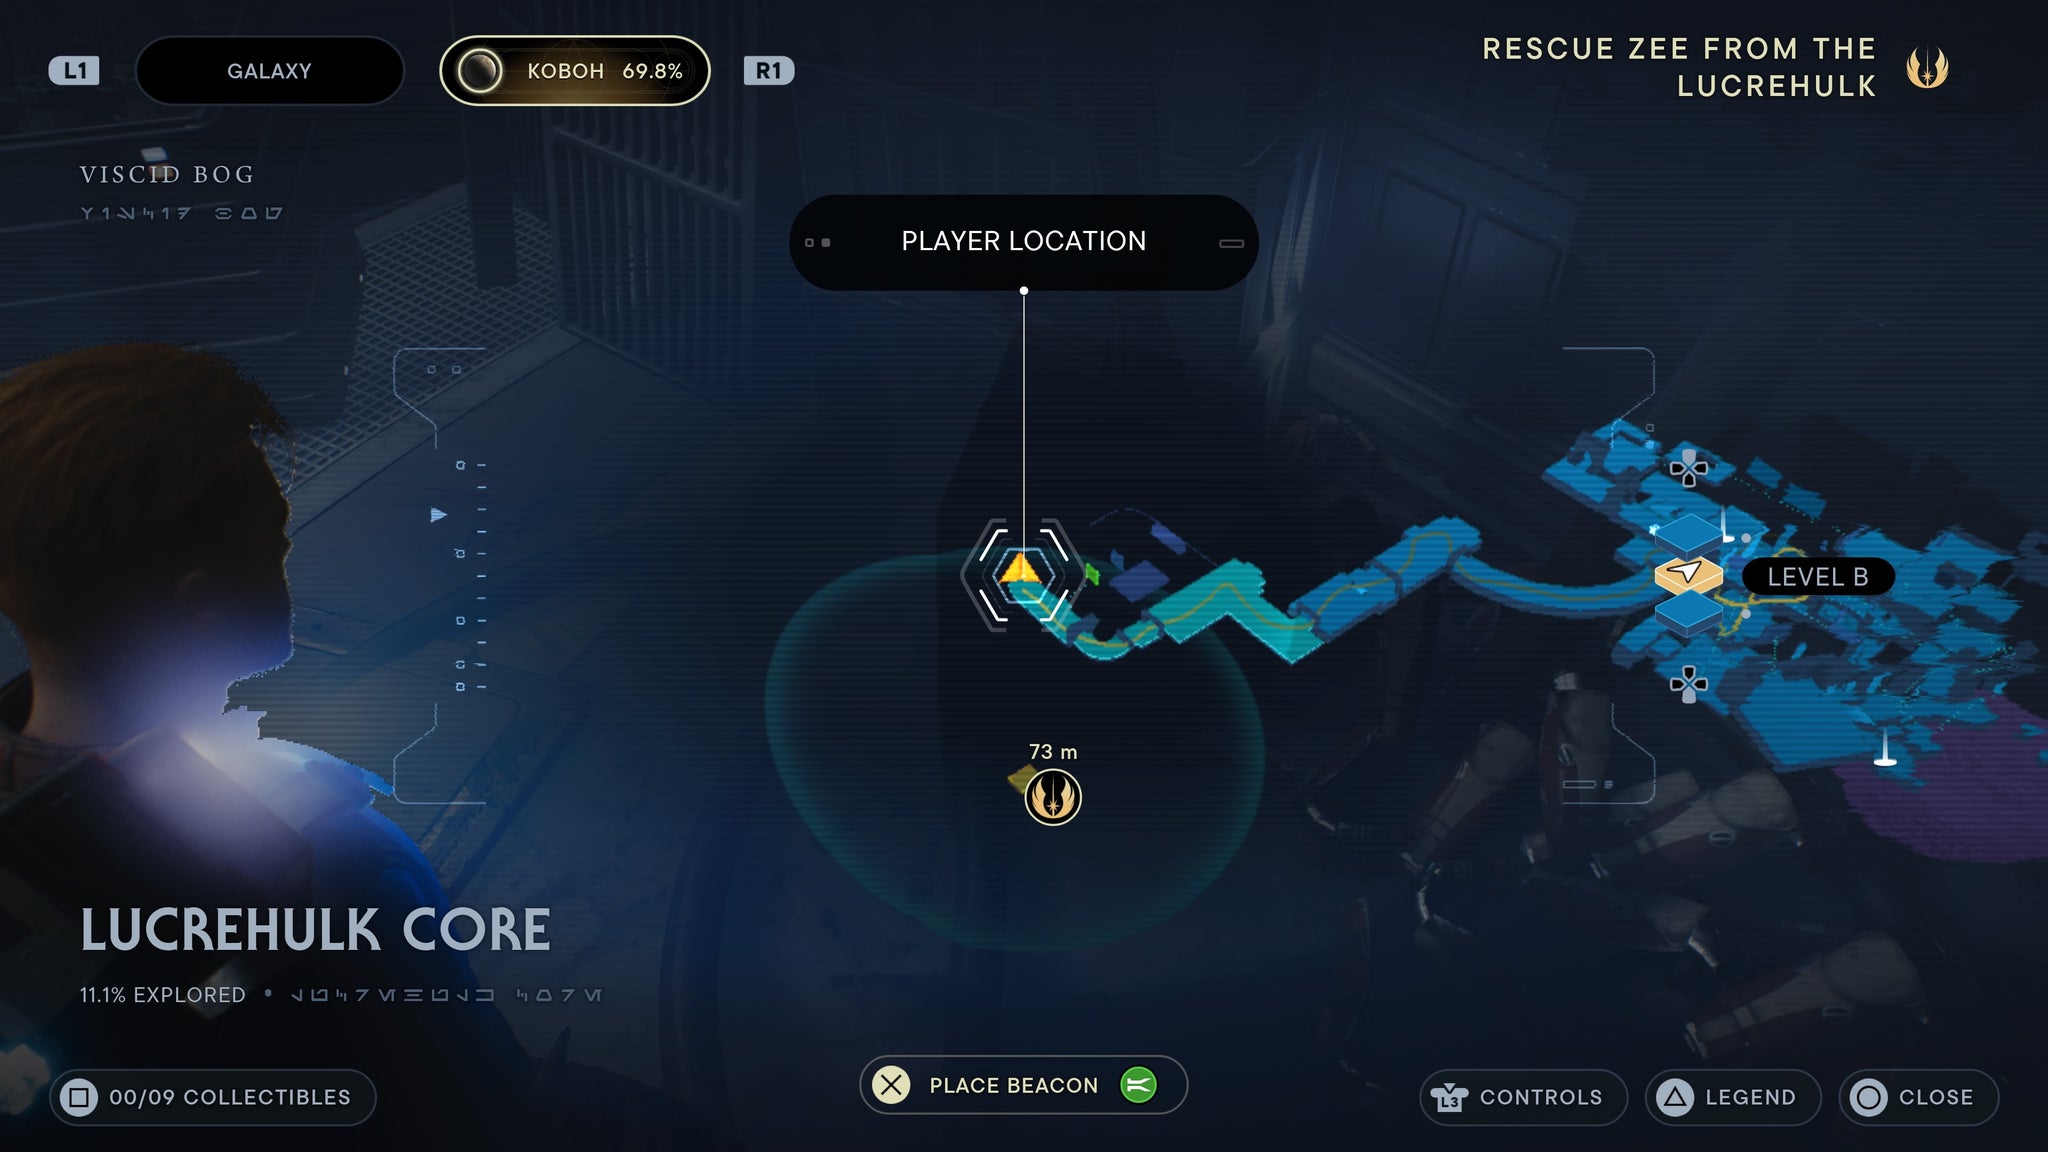
On a body!
From the meditation point, take the left path down past a locked door and you’ll find a force echo.
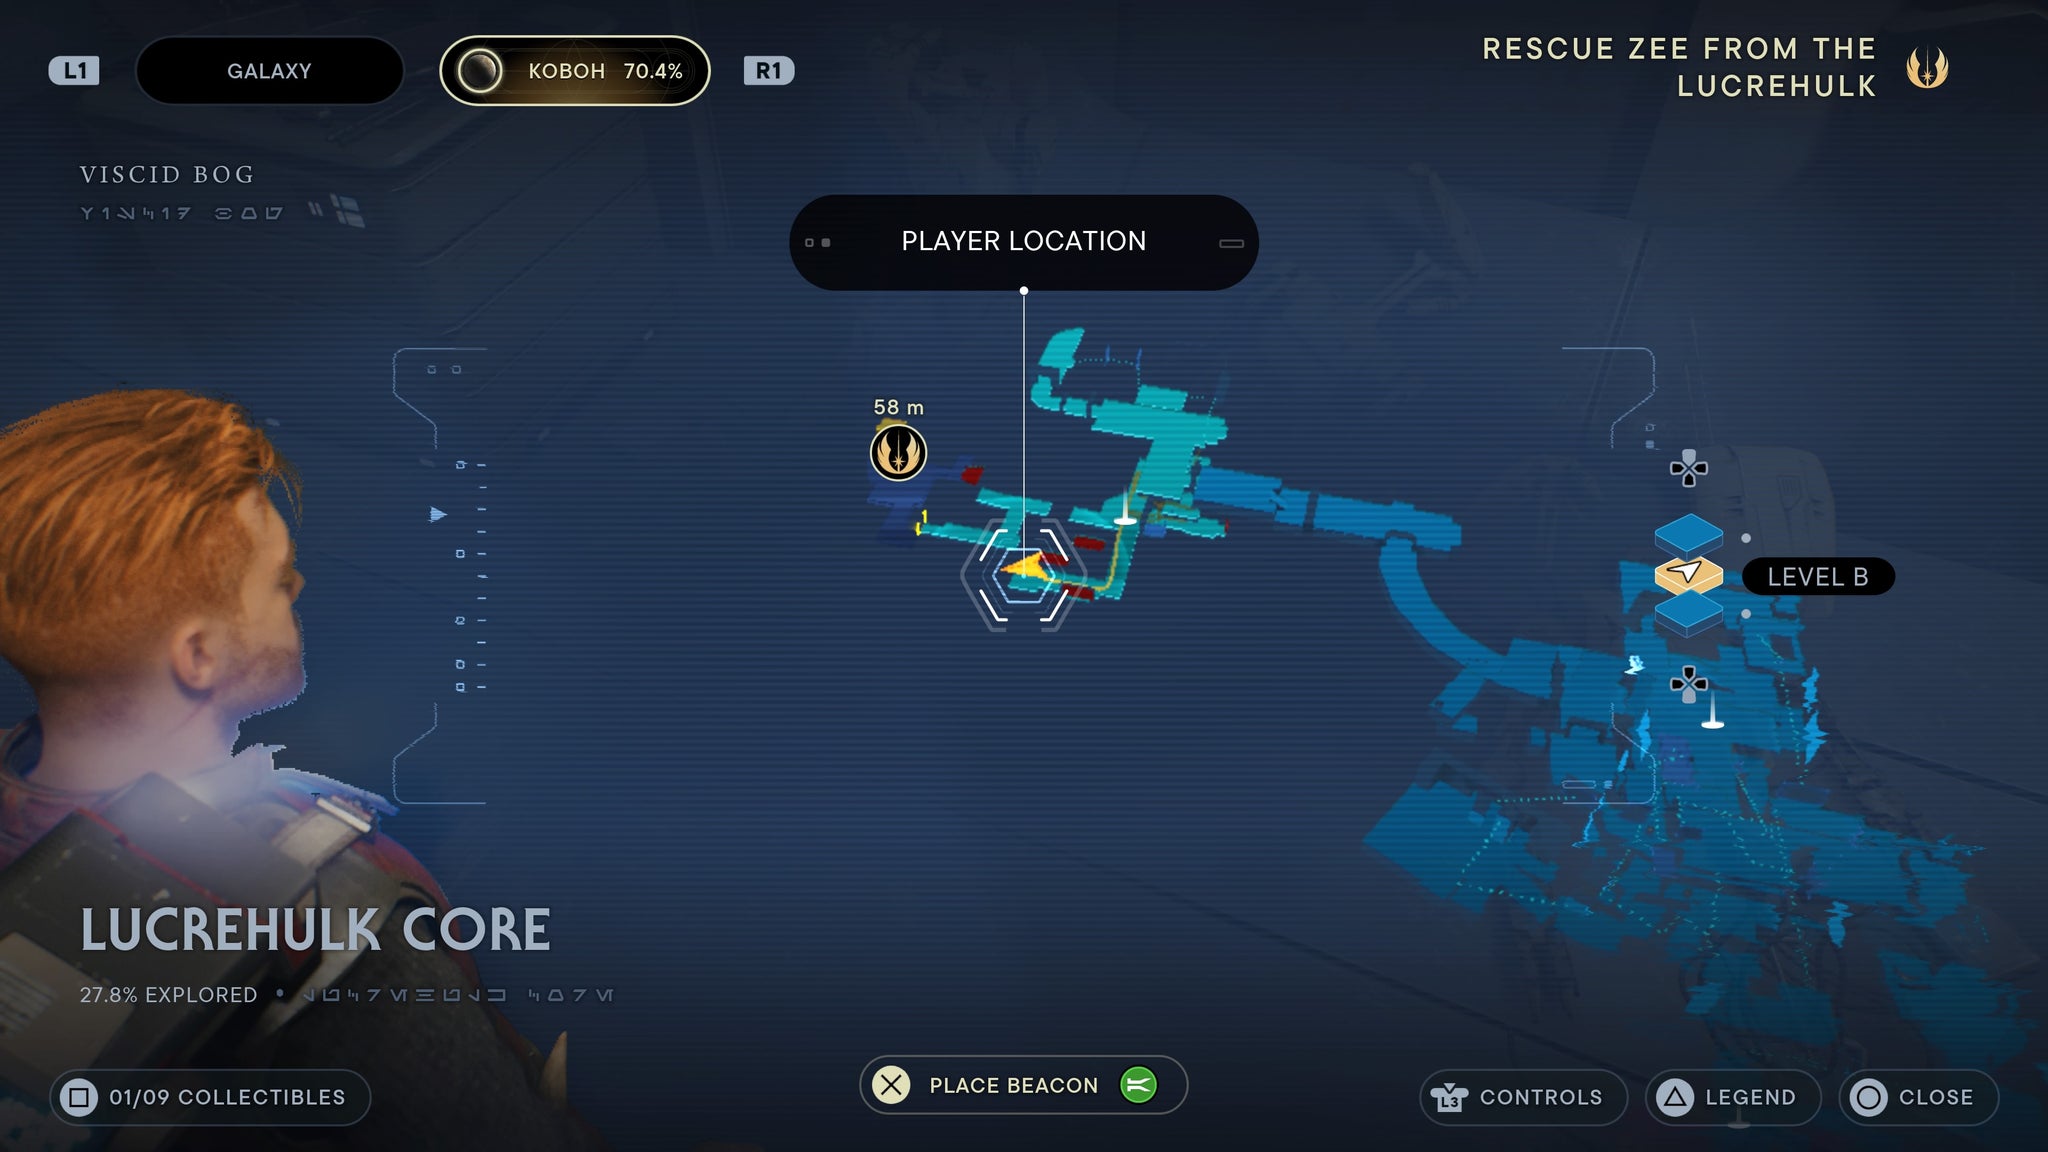
Near several broken droids.
Run past the box rail where four turrets start shooting at you, then take a left. You’ll see a corpse with a force echo on it.
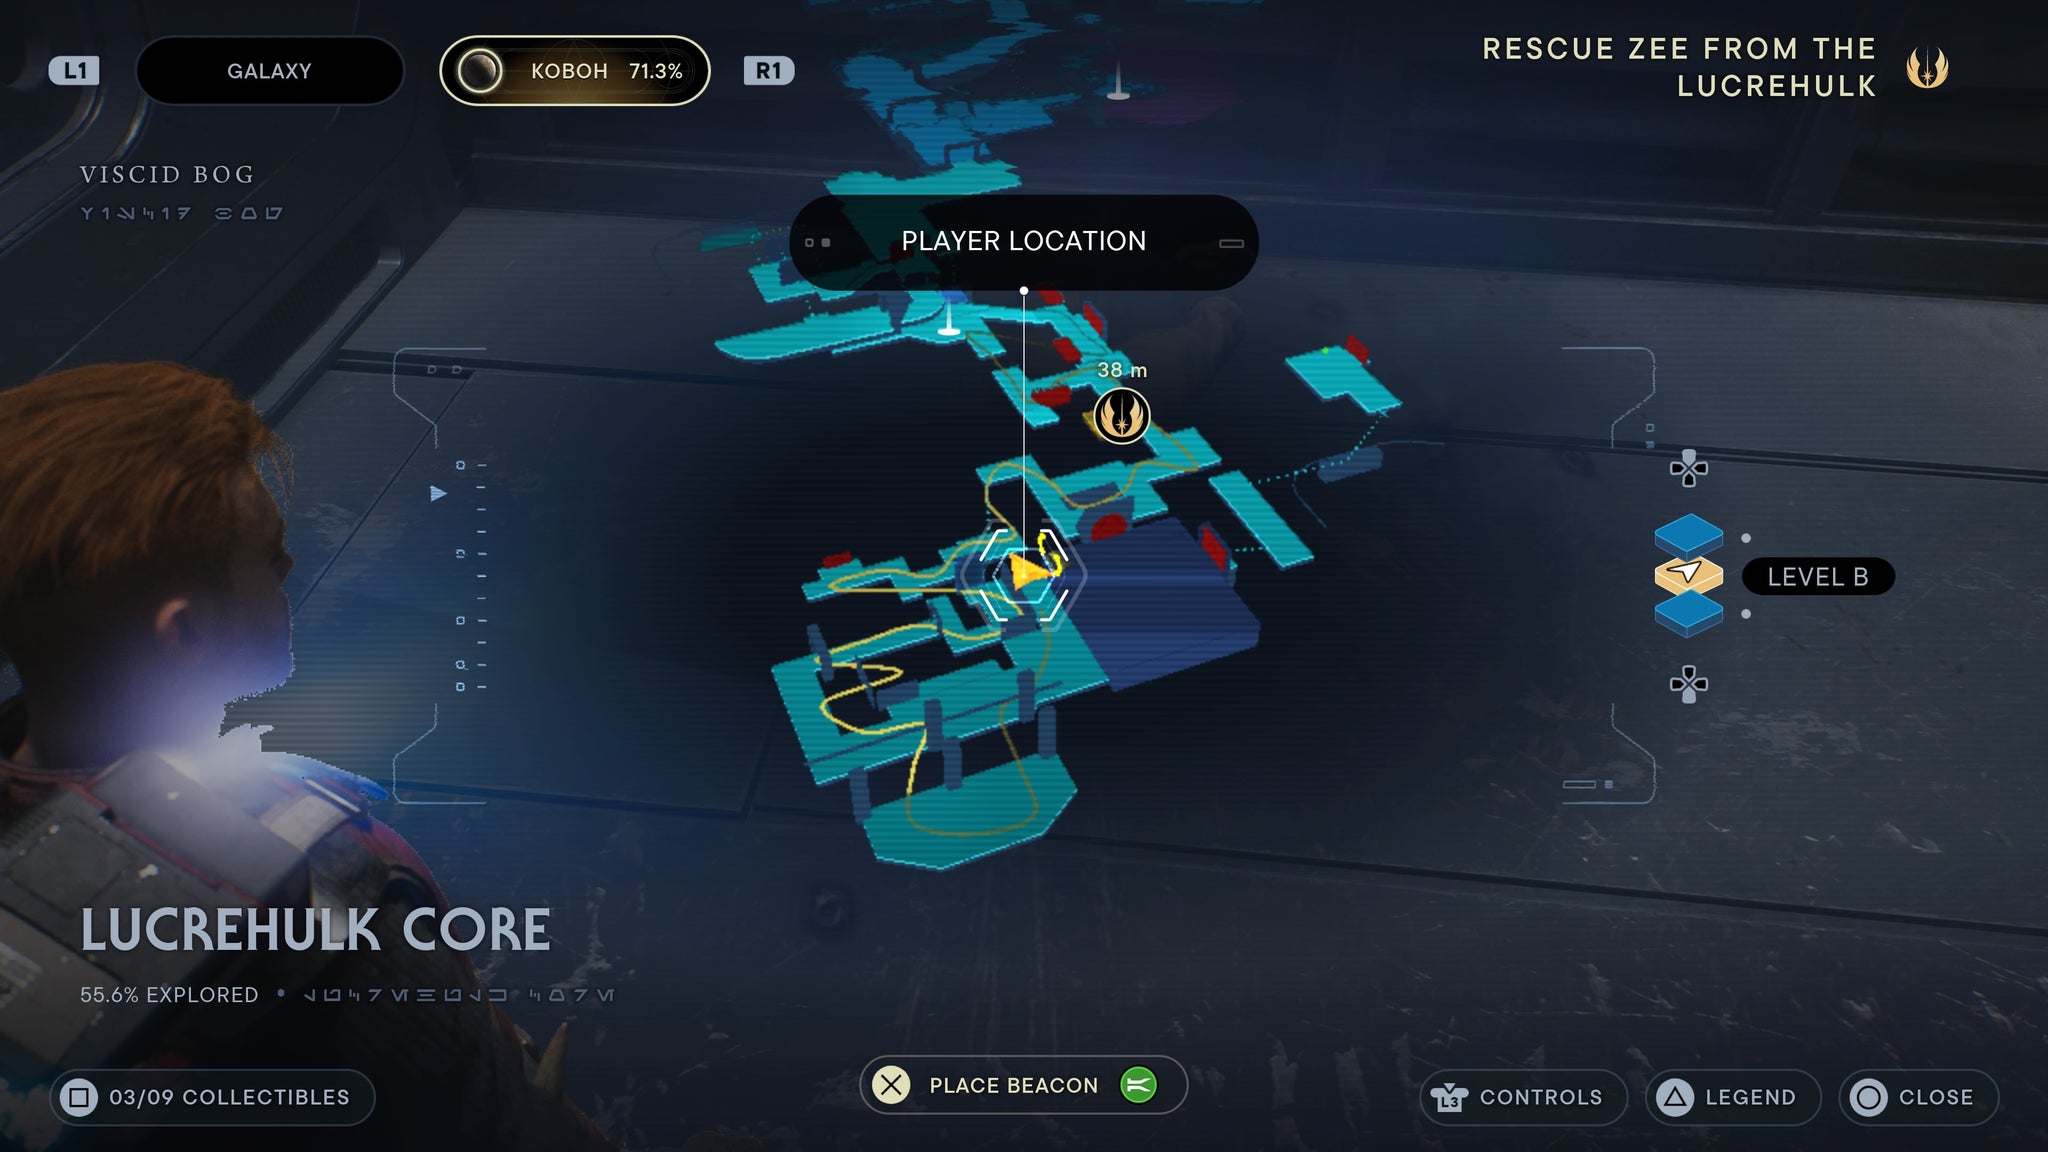
You can get this before you get force slam, but you may get shot up for it.
Yurt Barracks
As you walk into the Yurt Barracks, enter the yurt to your right. Inside is a brown crate you can scan.
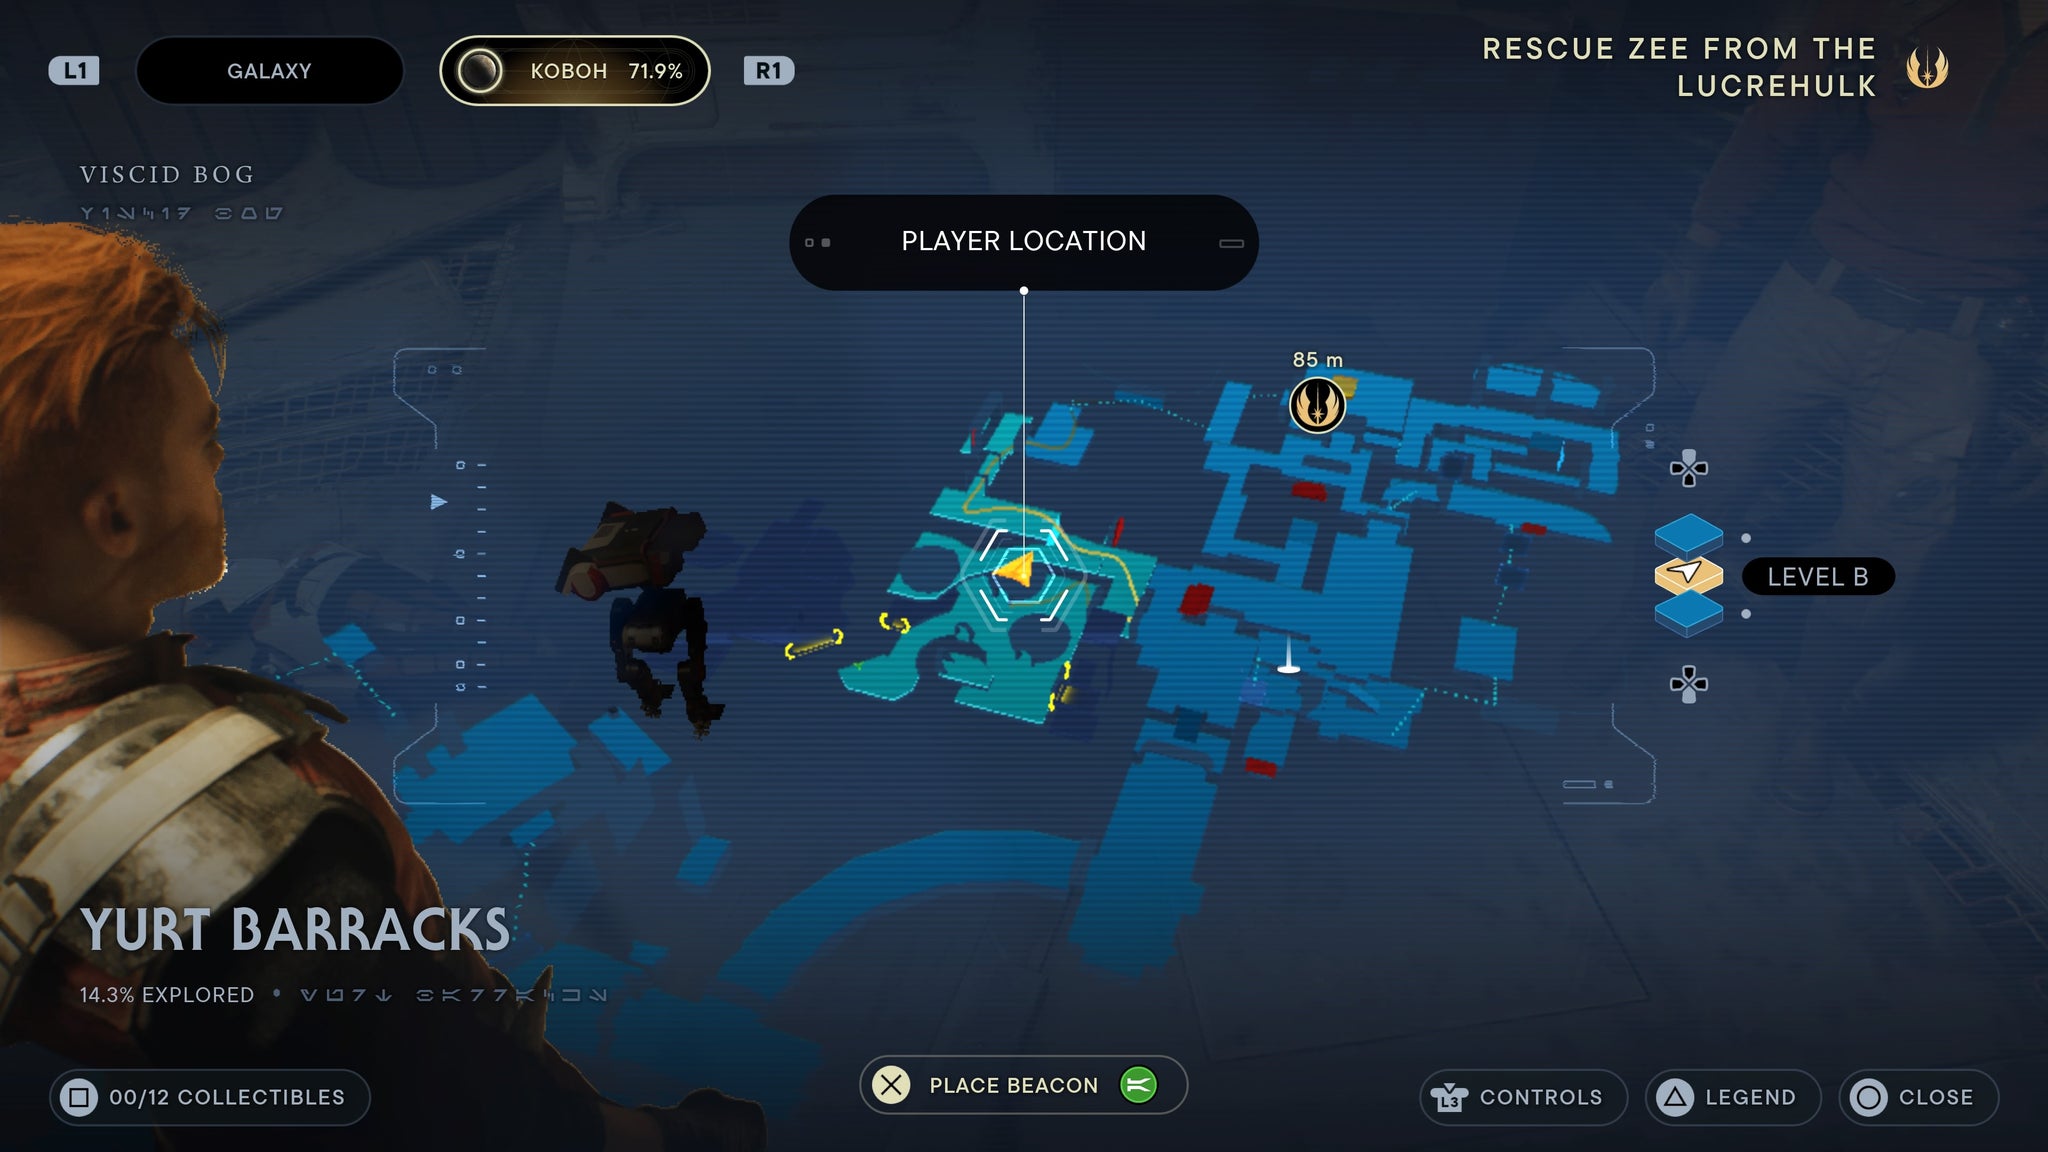
Inside one of the first yurts.
As you walk into the Yurt Barracks, walk straight and then right. You’ll see a force echo against the wall.
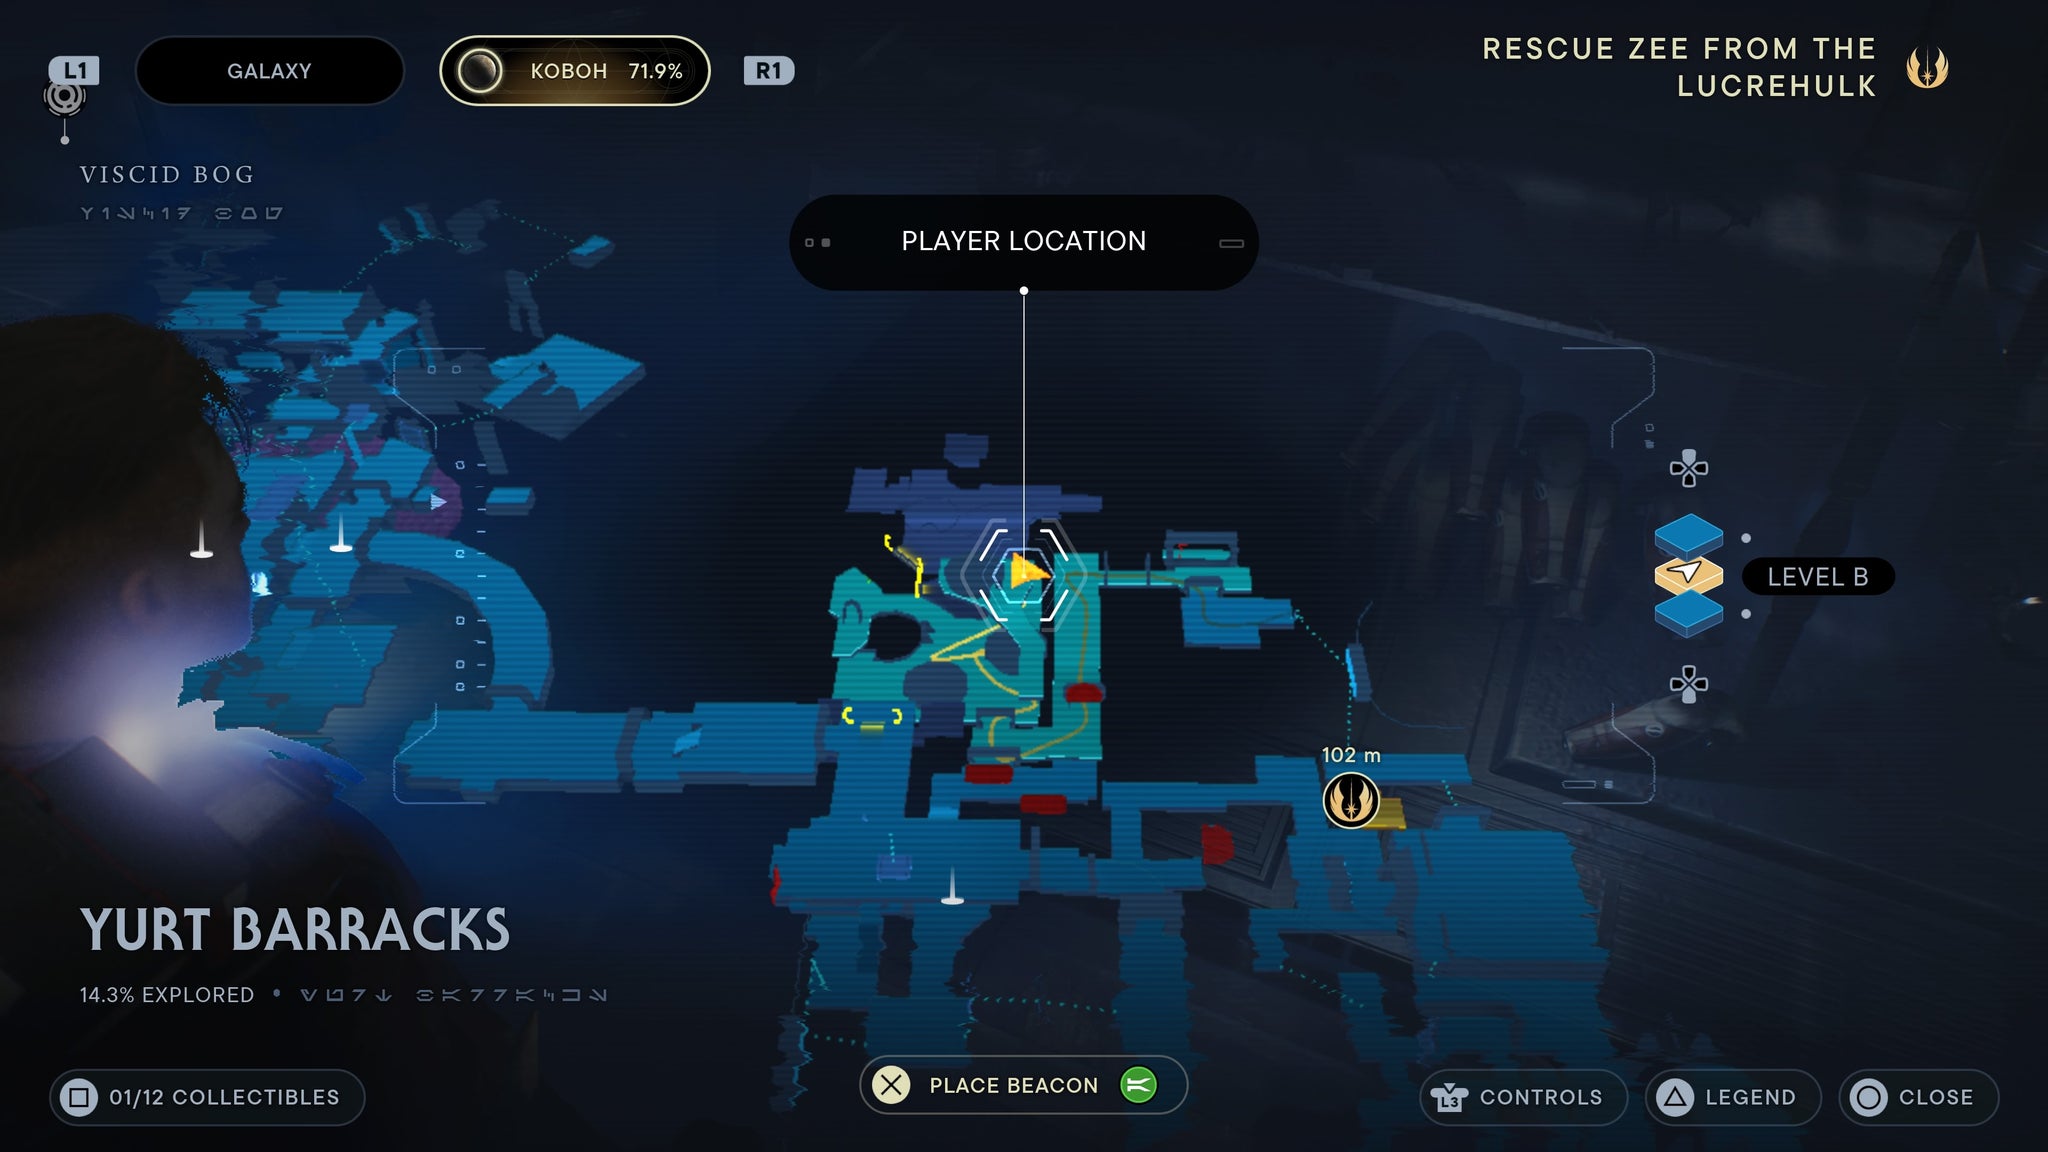
Hidden in the corner of the room.
As you enter the Yurt Barracks, turn right and walk through the cables. You’ll enter a red room. Use the wall ahead of you to climb upwards, then jump left to find a force echo.
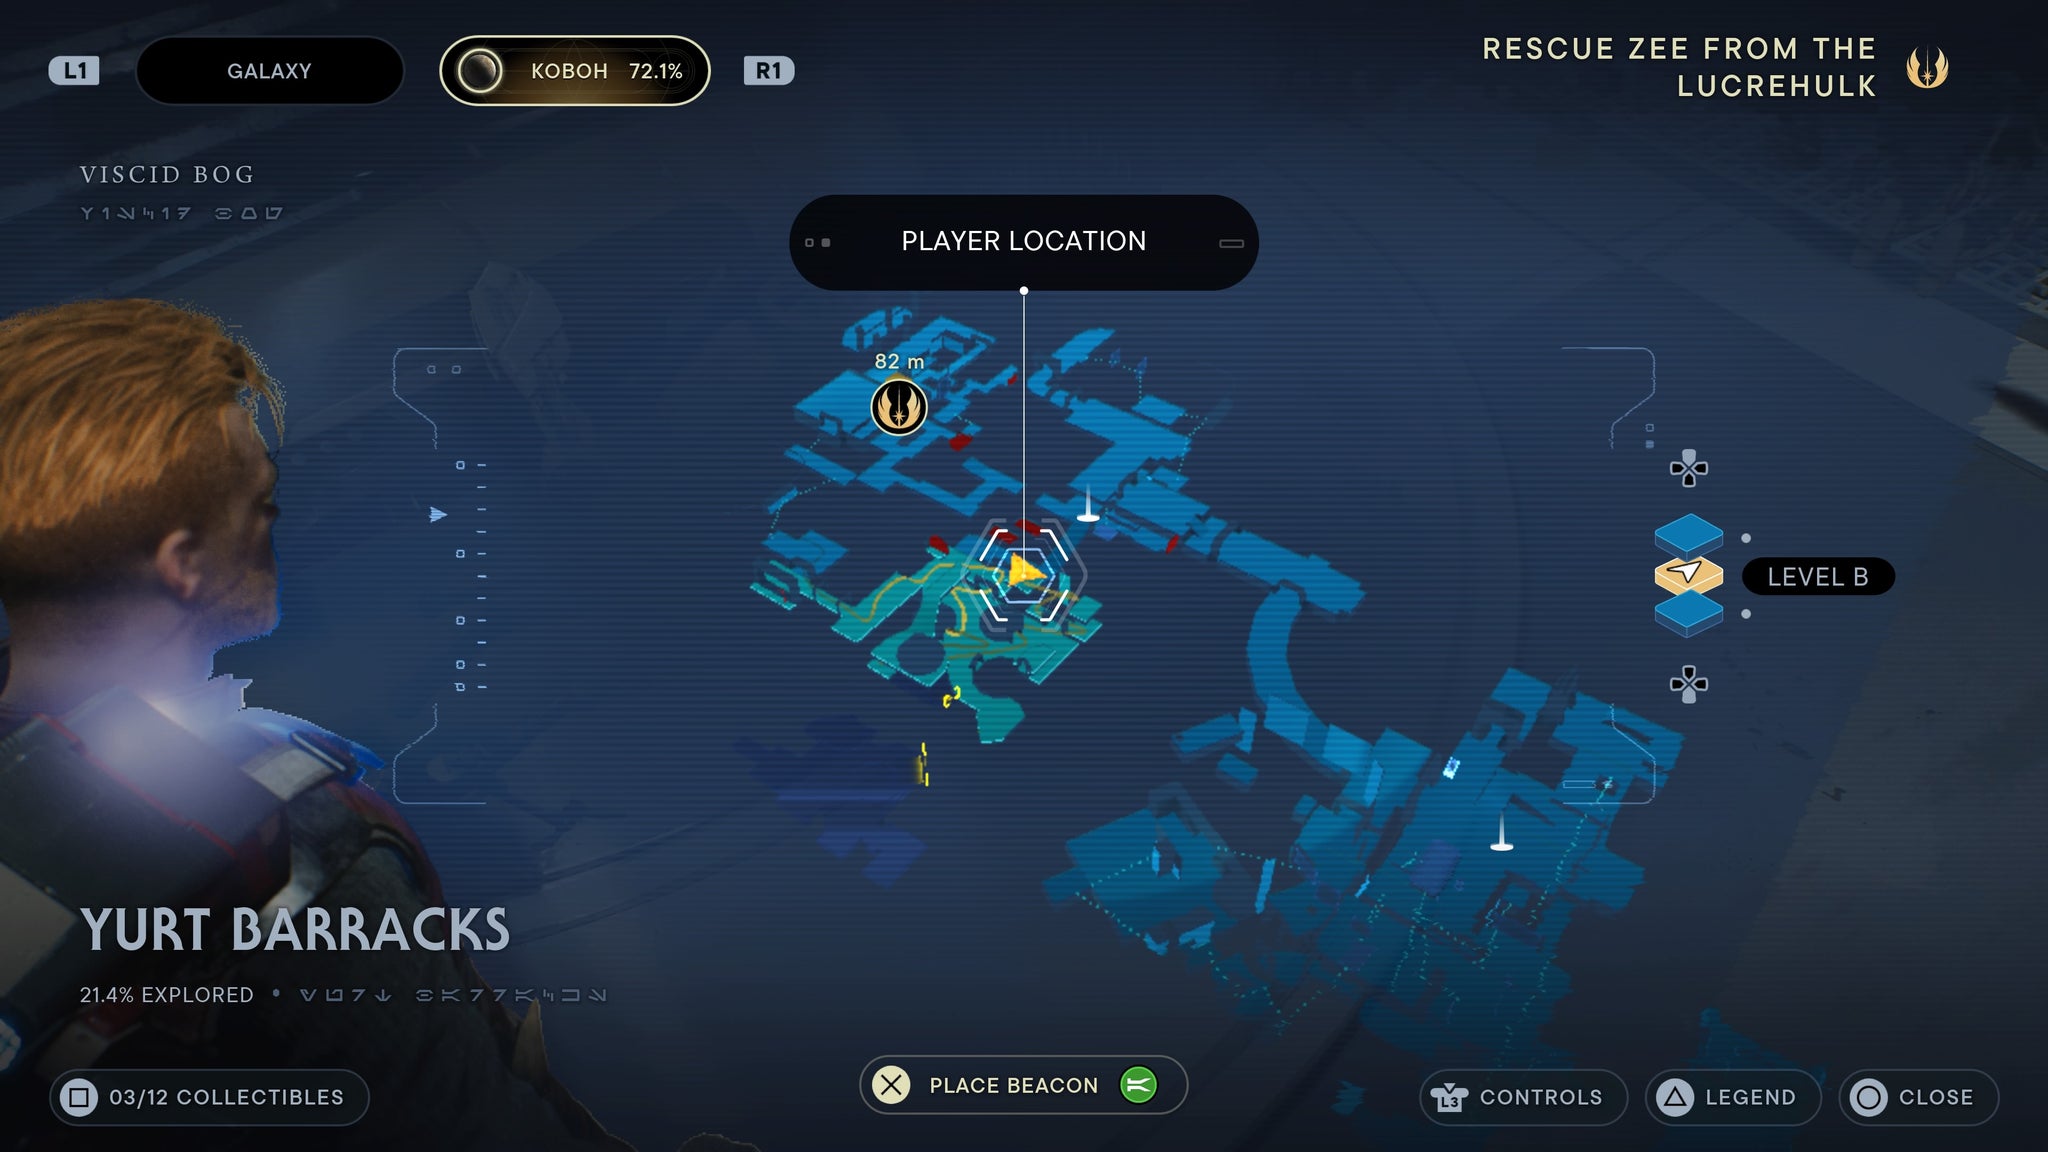
Up in the red room!
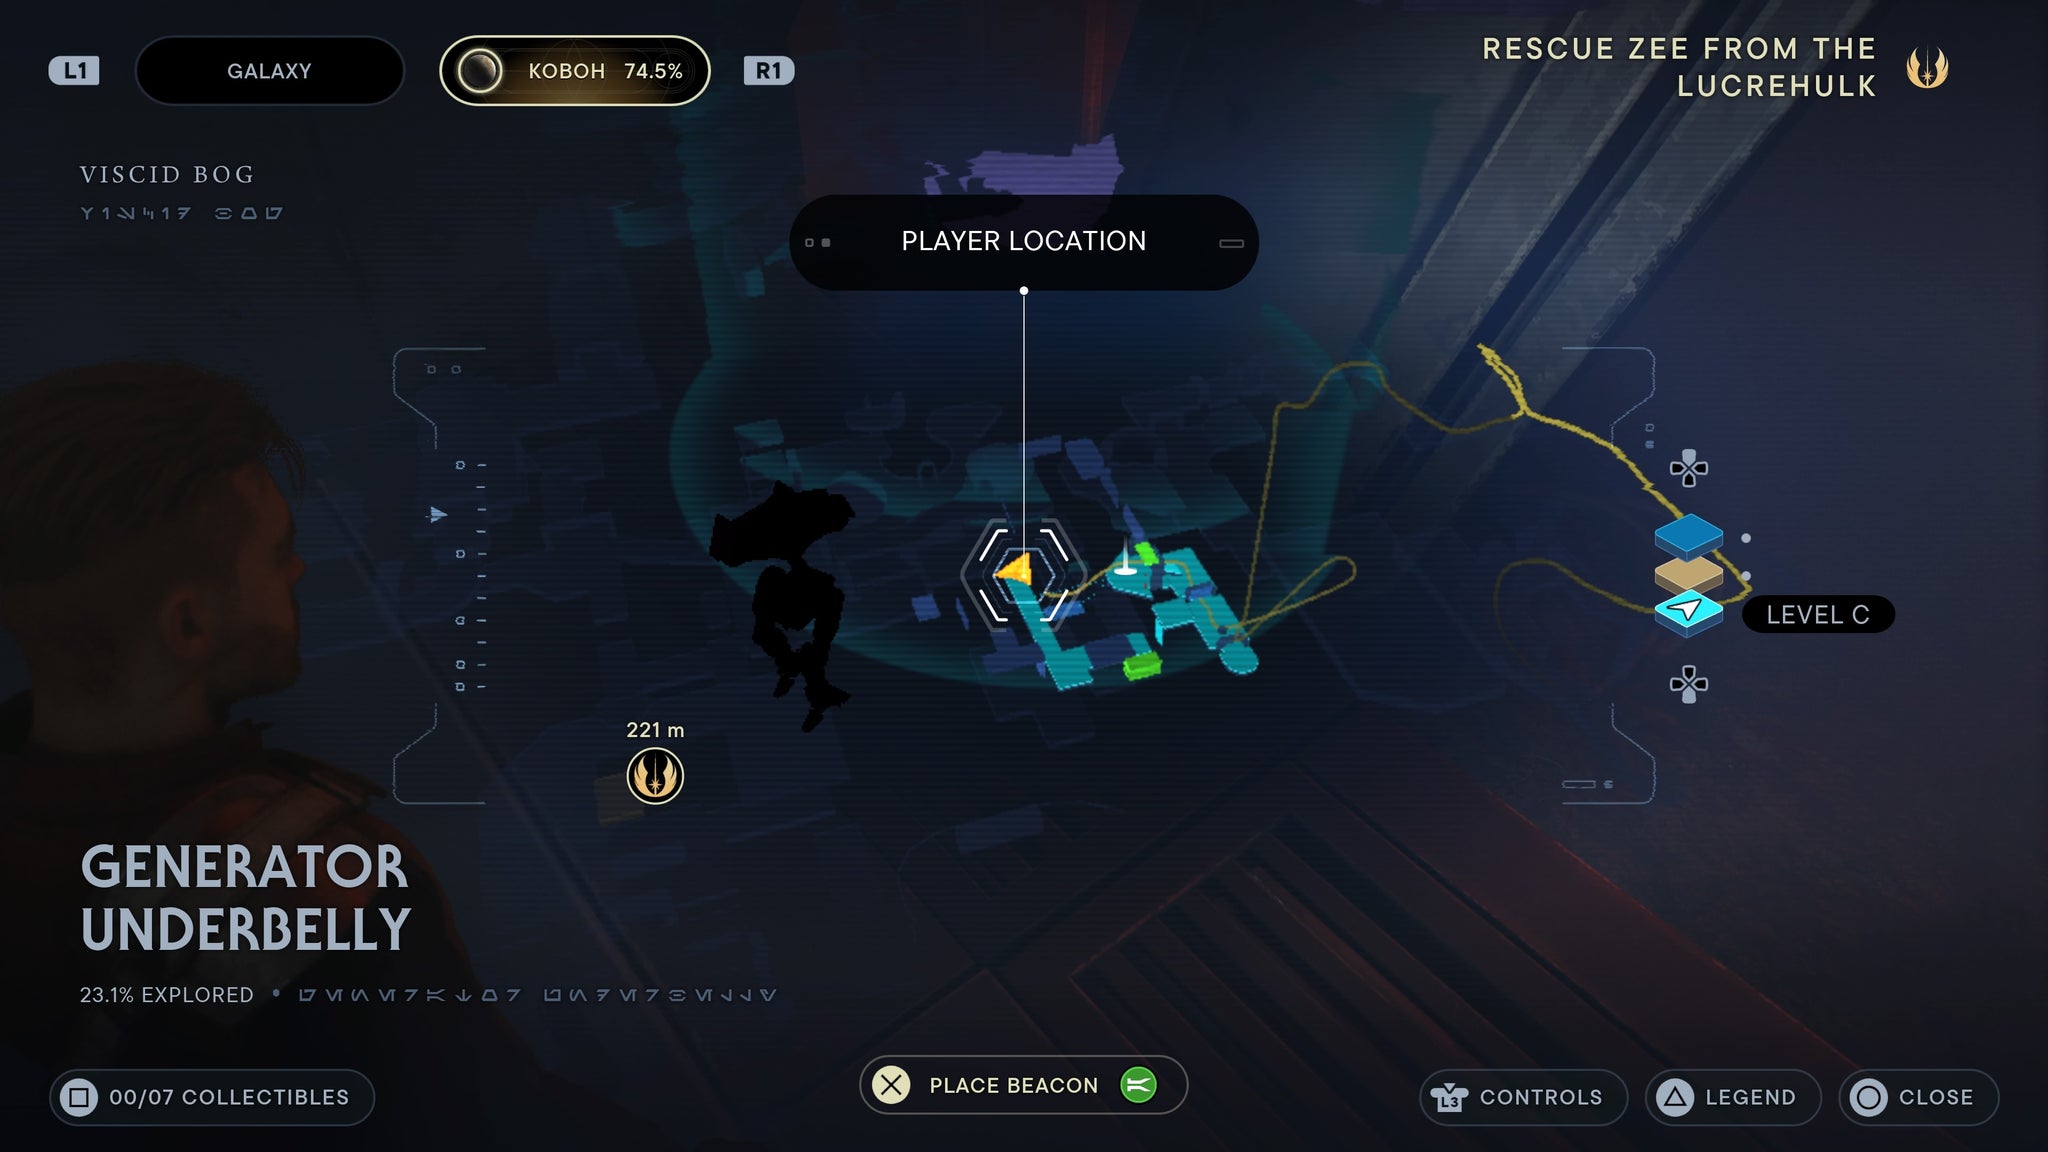
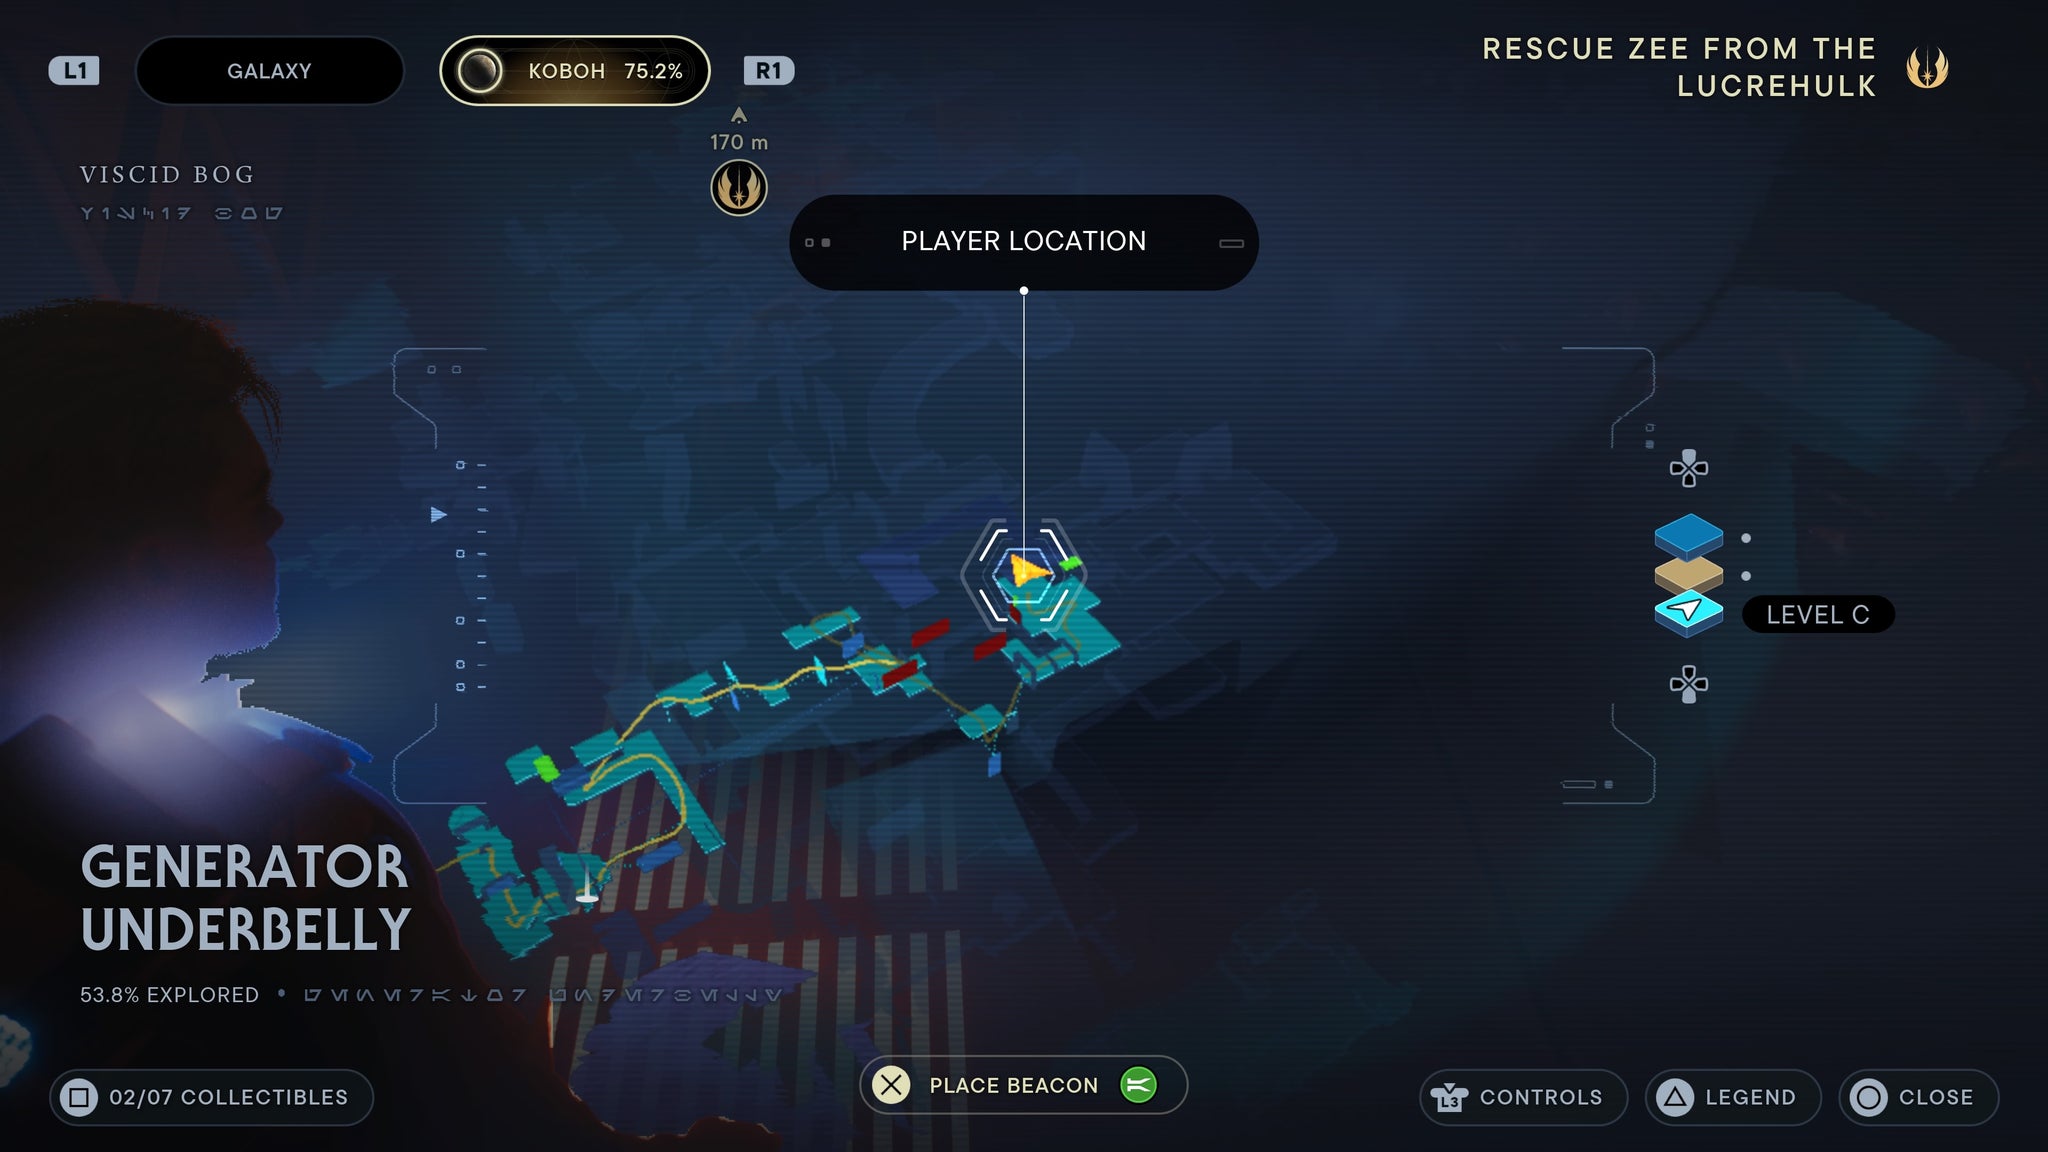
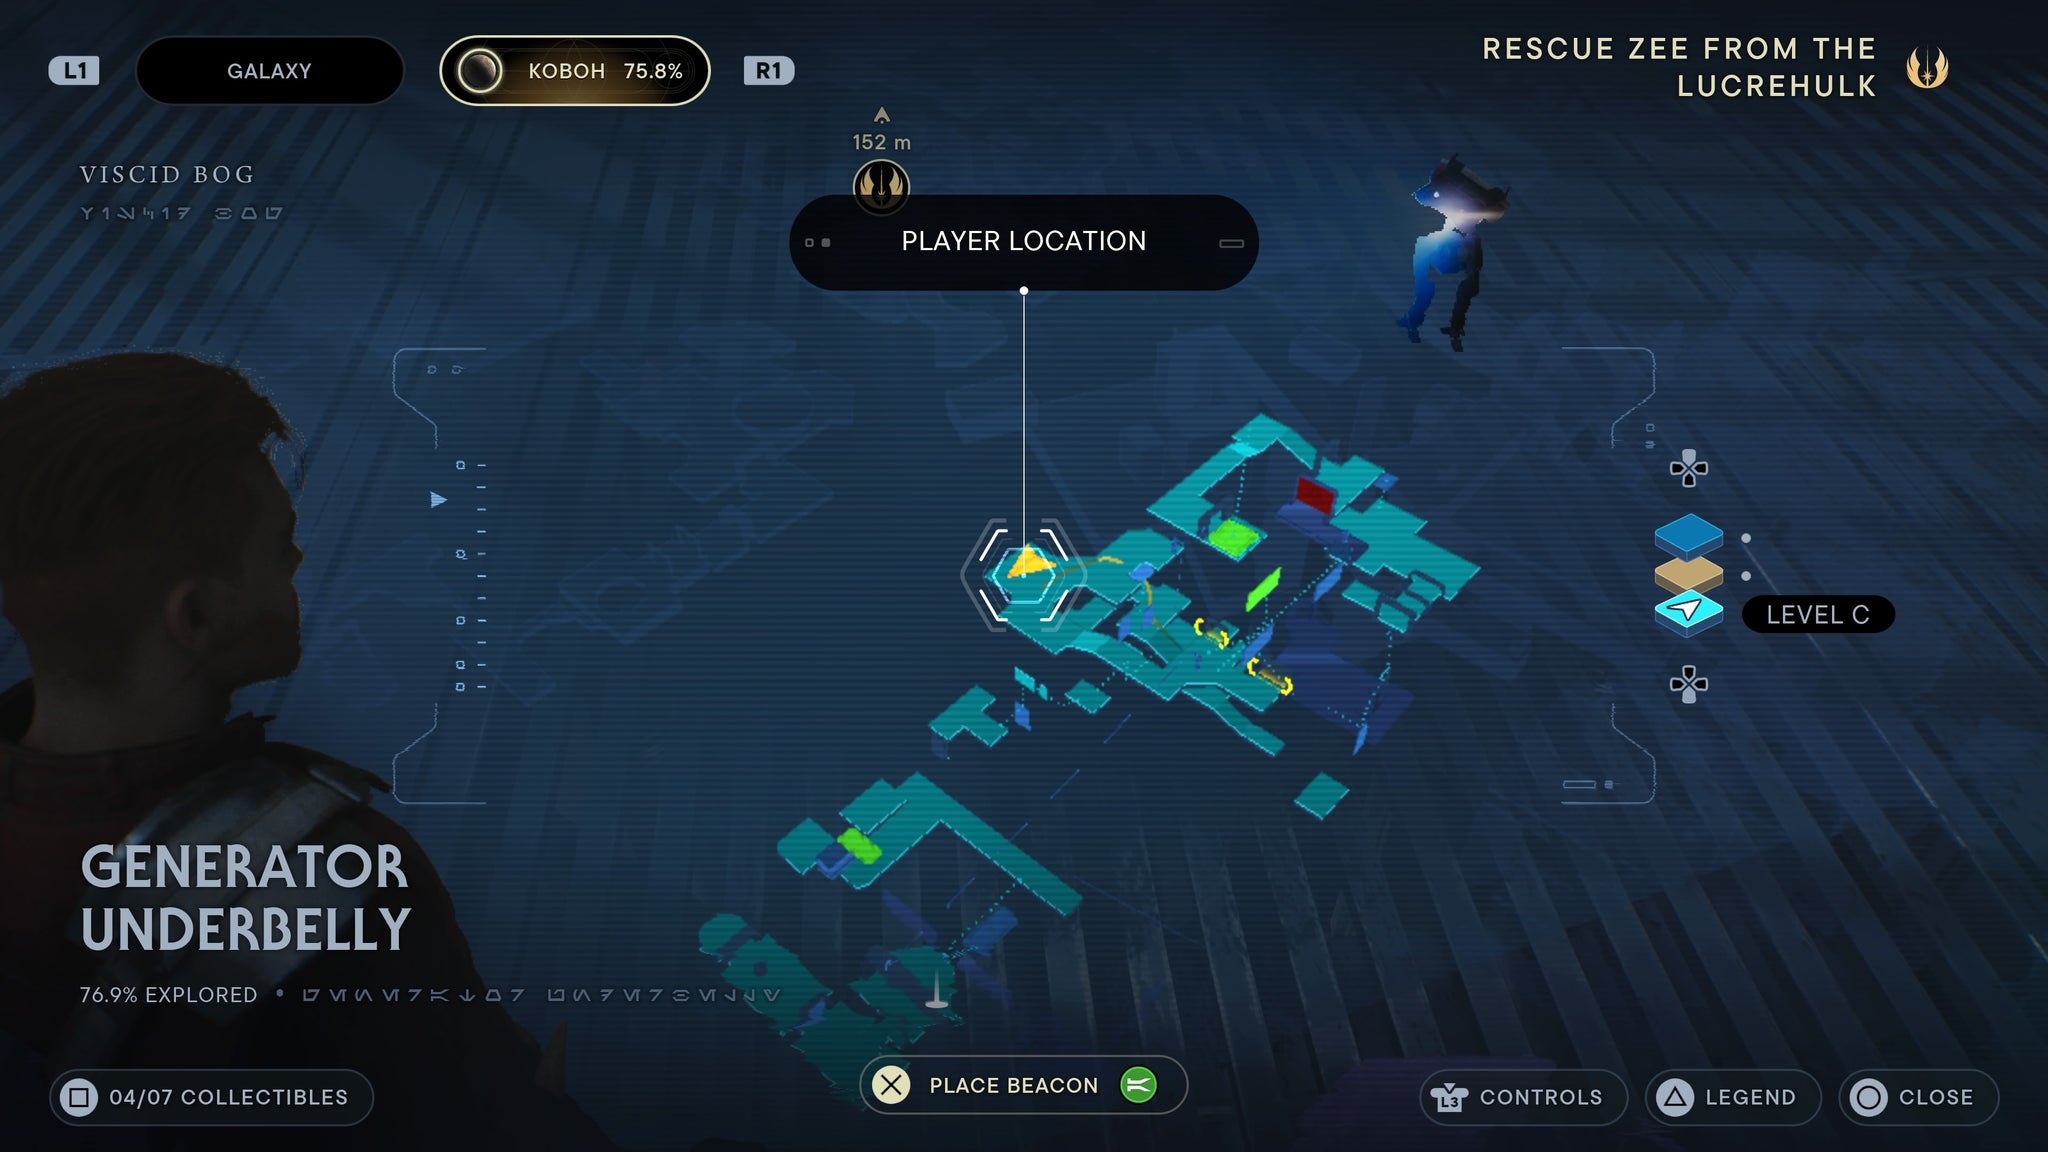
Generator Underbelly
From the meditation point, raise the platform and jump across, then turn right and scan the giant metal piston.
Scan the big metal piston!
Make your way up to the combat room with a stack of boxes in the middle. Behind the turret you can pull down is a force echo.
Behind the turret!
Take the rope shortcut up to the electrical generators where a boss fight was. Scan the left generator.
The left generator is buzzing and scannable!
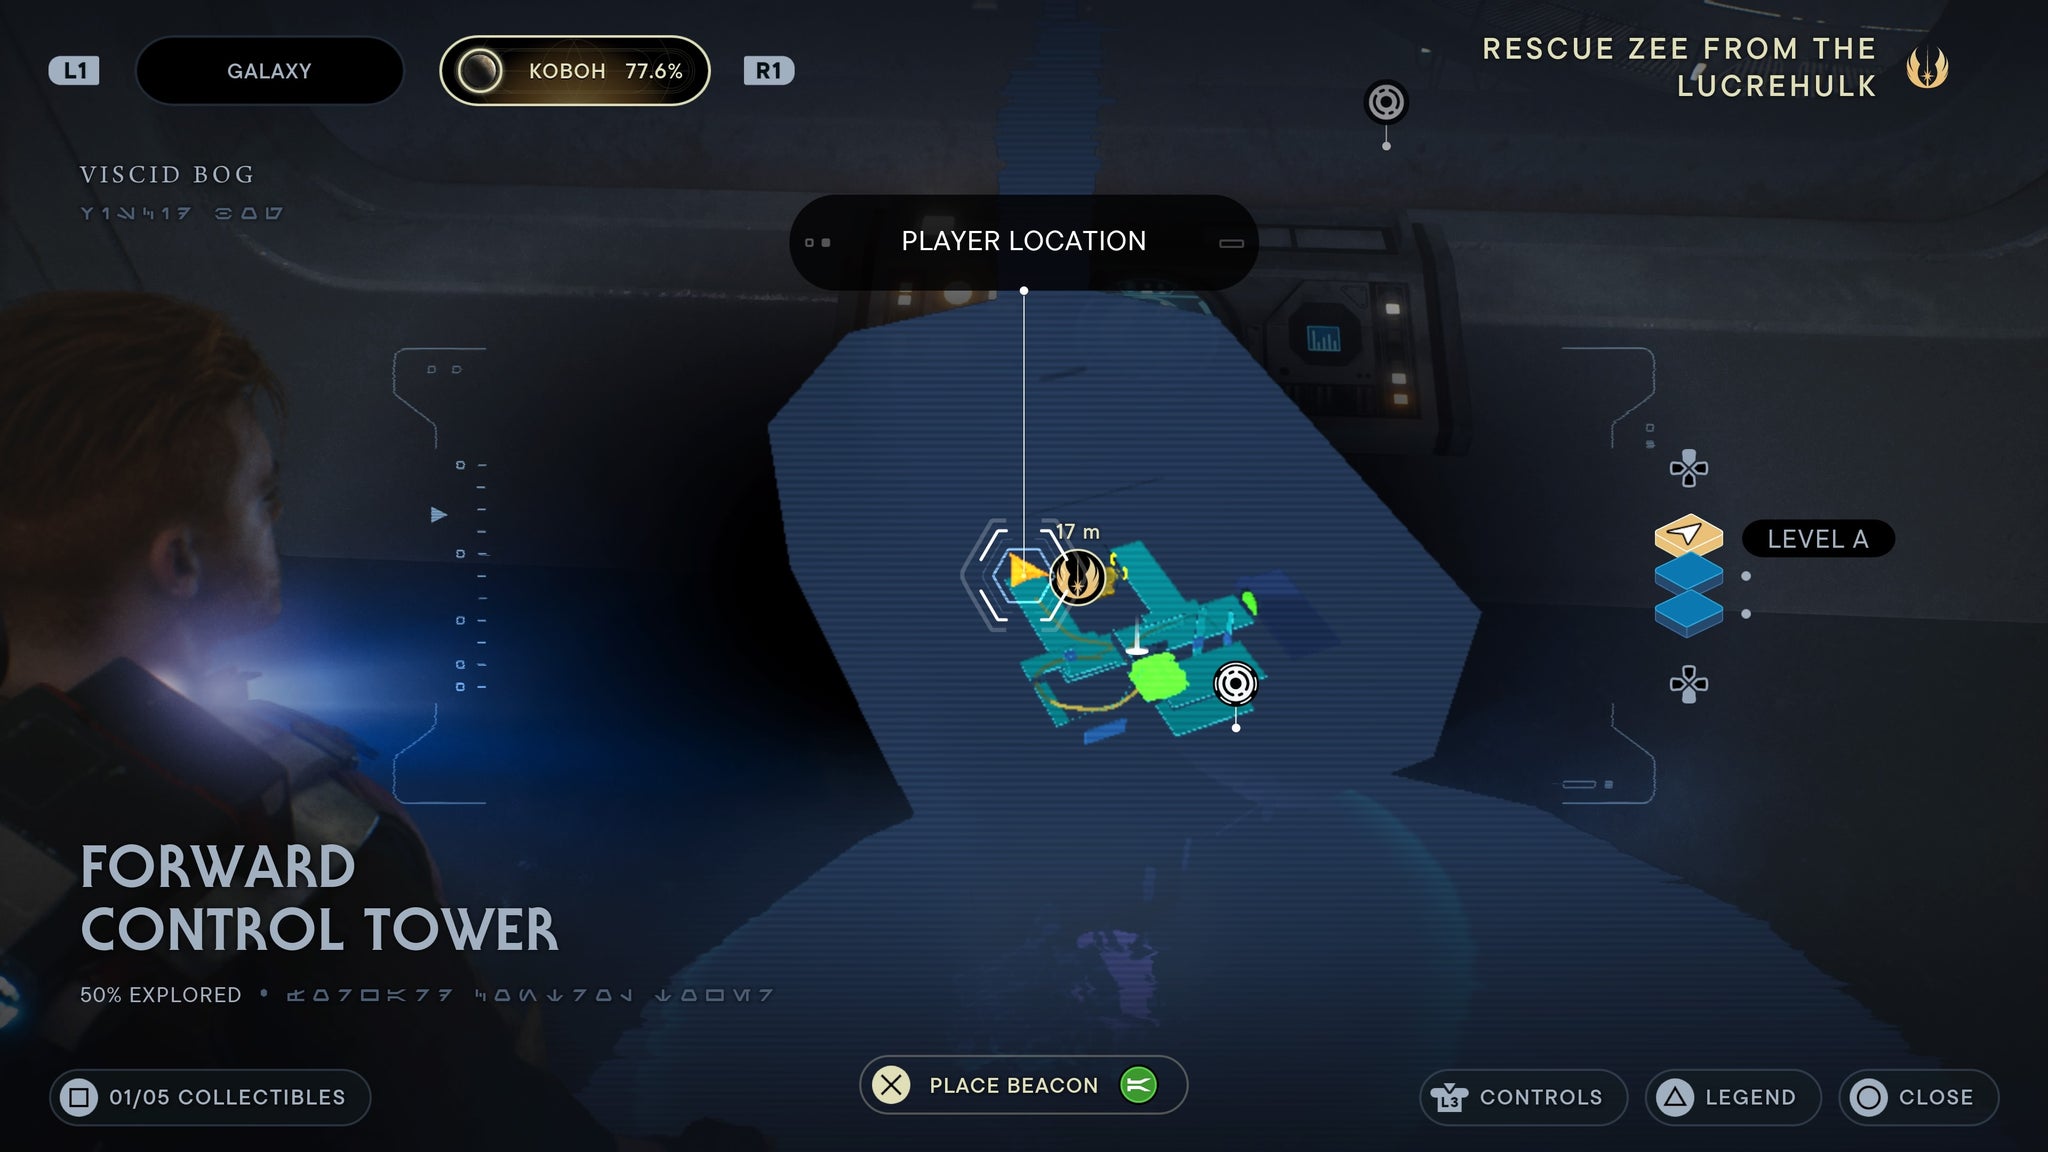
Forward Control Tower
From the meditation pont, walk left to a long hallway with a force echo at the end of it.
A force echo in front of a window!
From the meditation point, walk through the doorway right of the lift and then turn right to the escape pods. Walk down to the furthest door, and you can scan it.
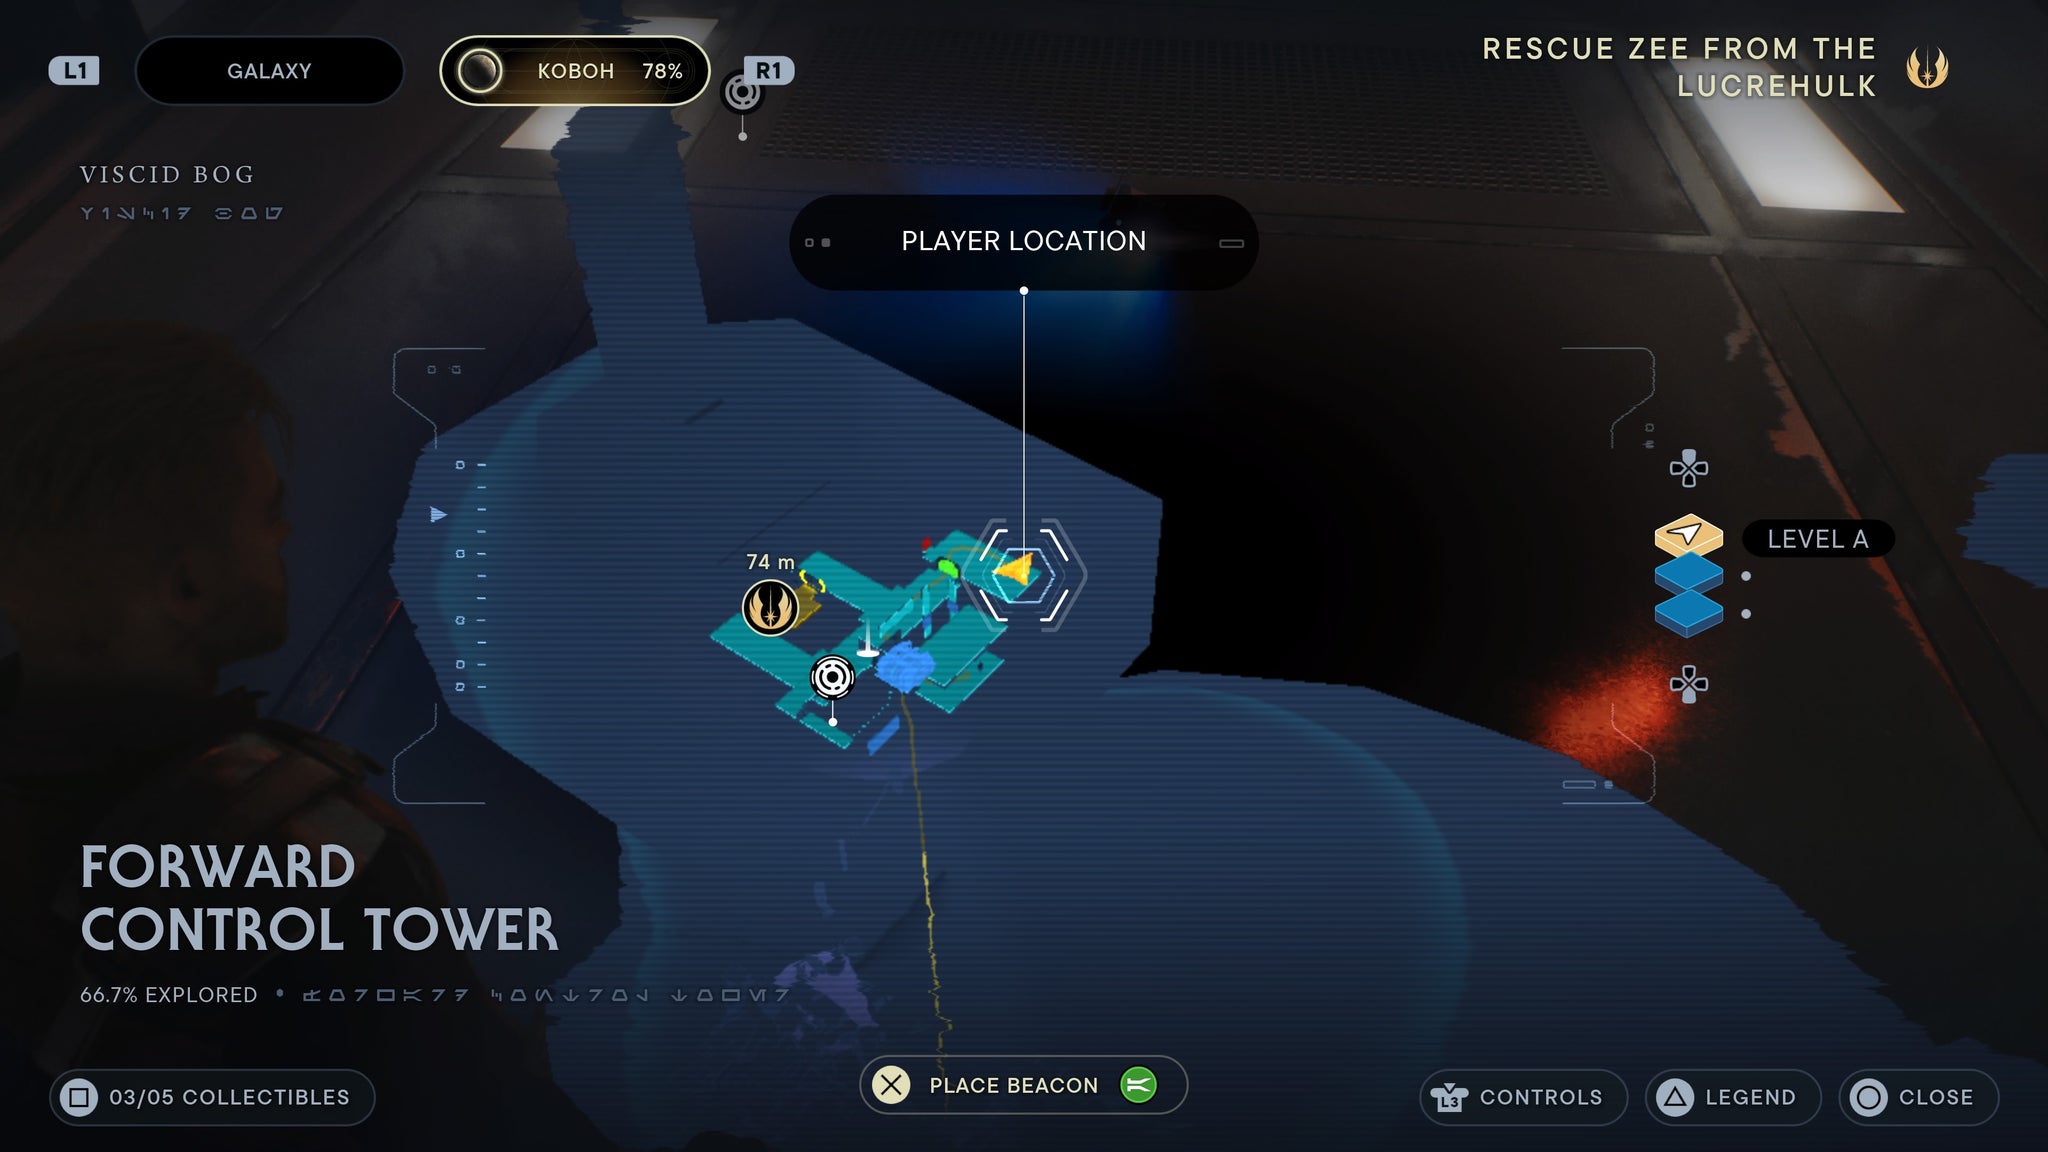
By the escape pods!
Chamber of Connection
Once you’ve burned down the second black crystal barrier, climb up to the higher level of the main room then go up the stairs to your left. At the end of this path is a force echo.
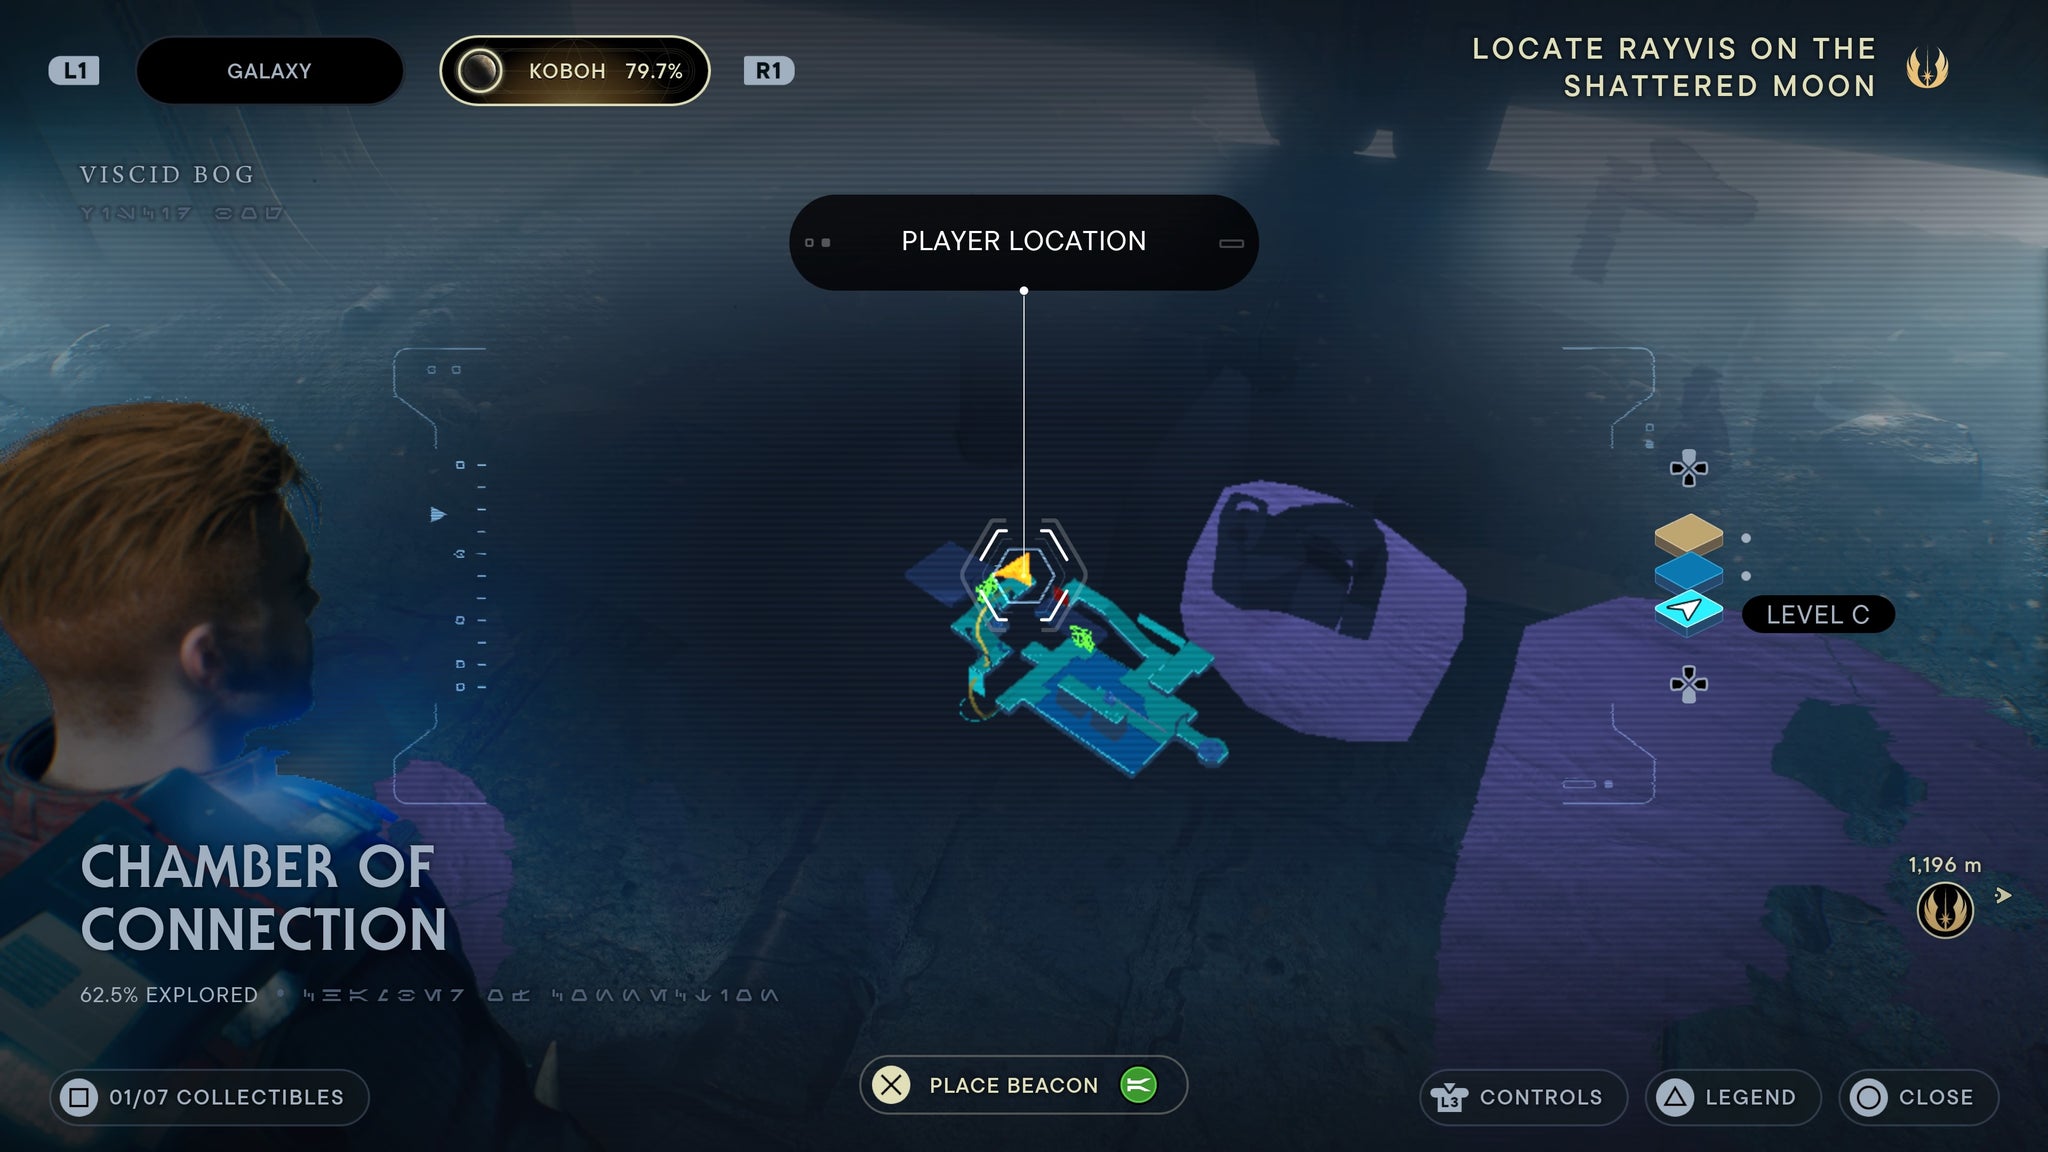
Up on the second floor.
Along the left side of the wall, between the two movable walls.
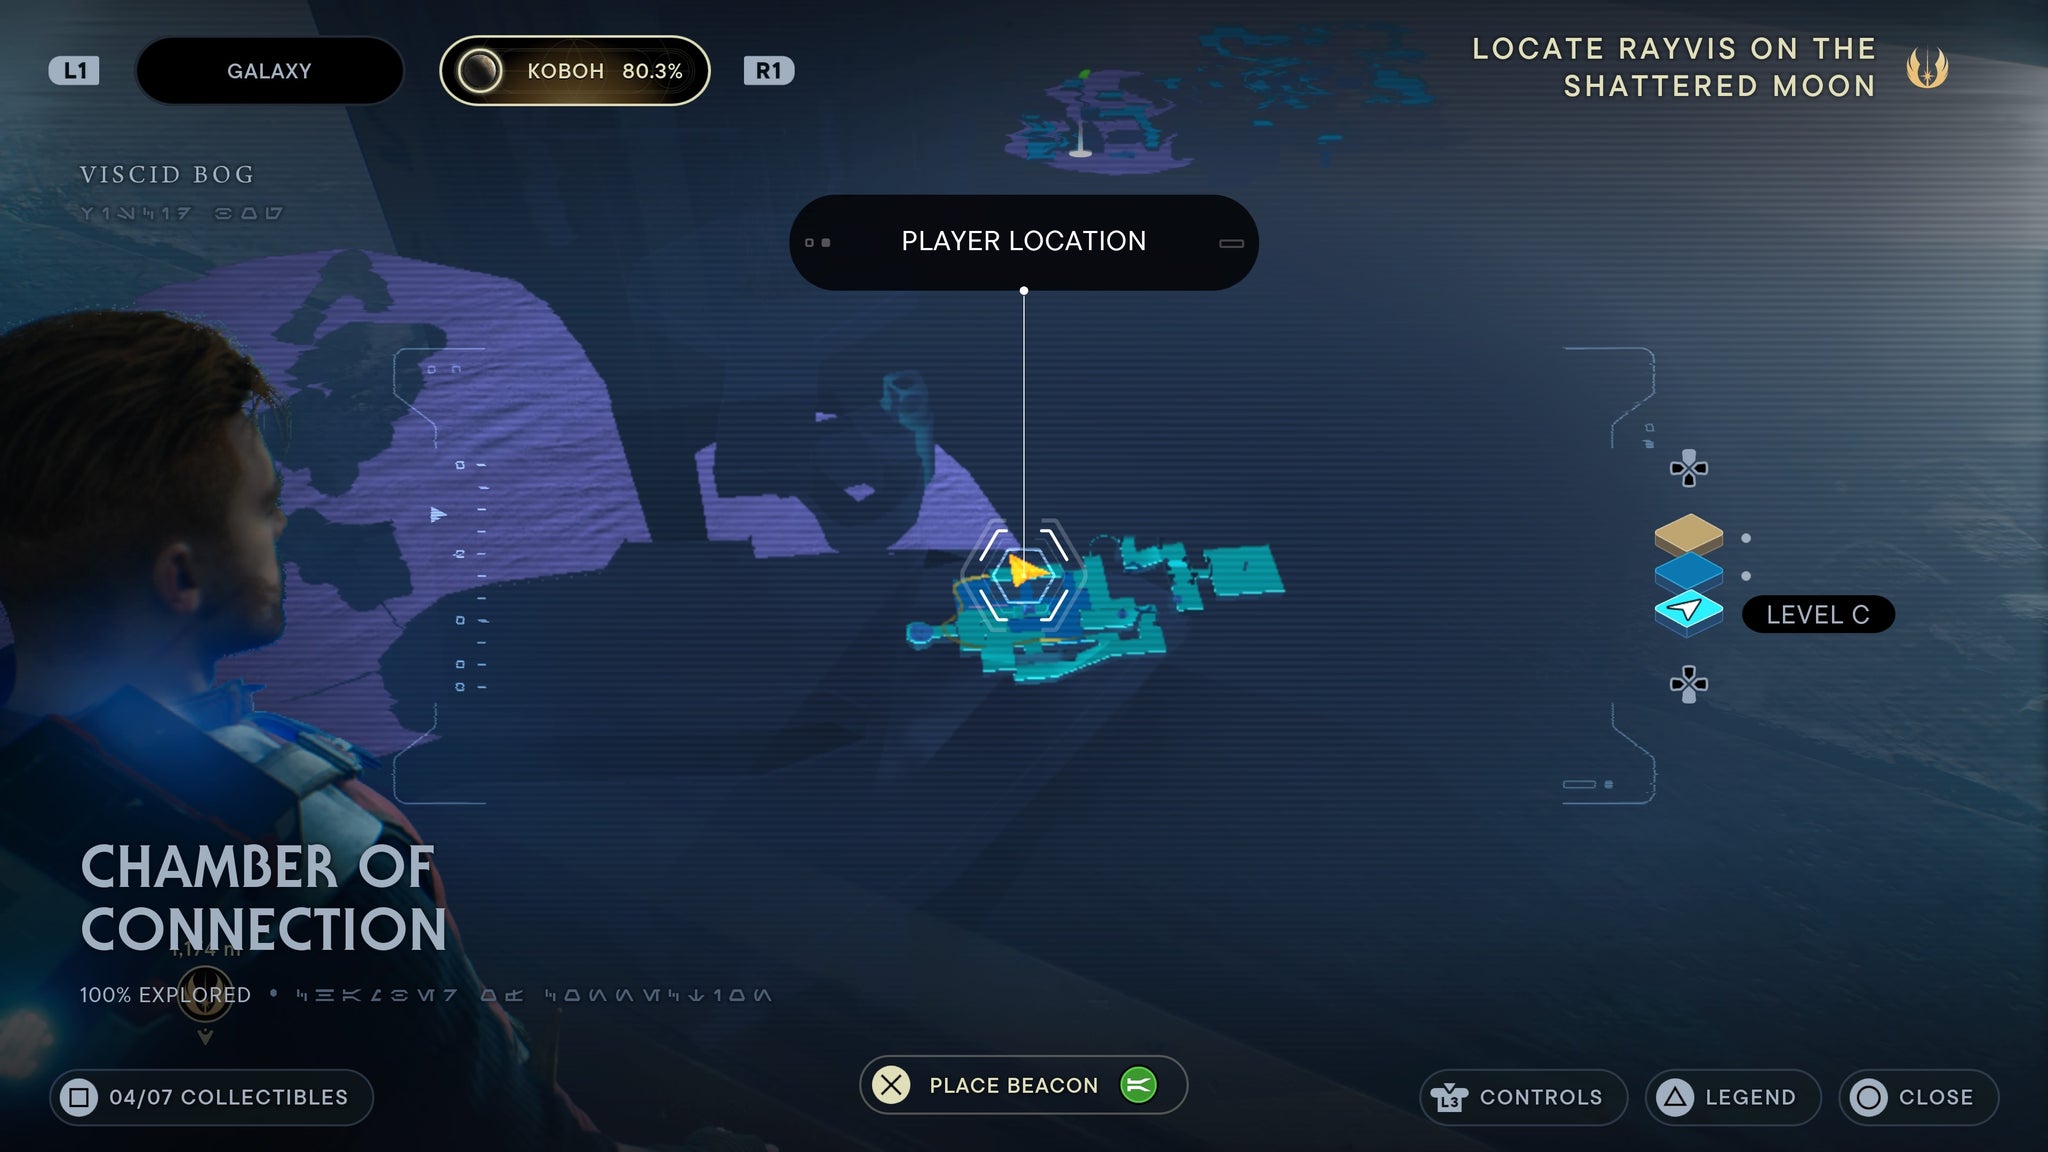
As you walk in, stick to the left.
On the second floor, by the second orb pedestal.
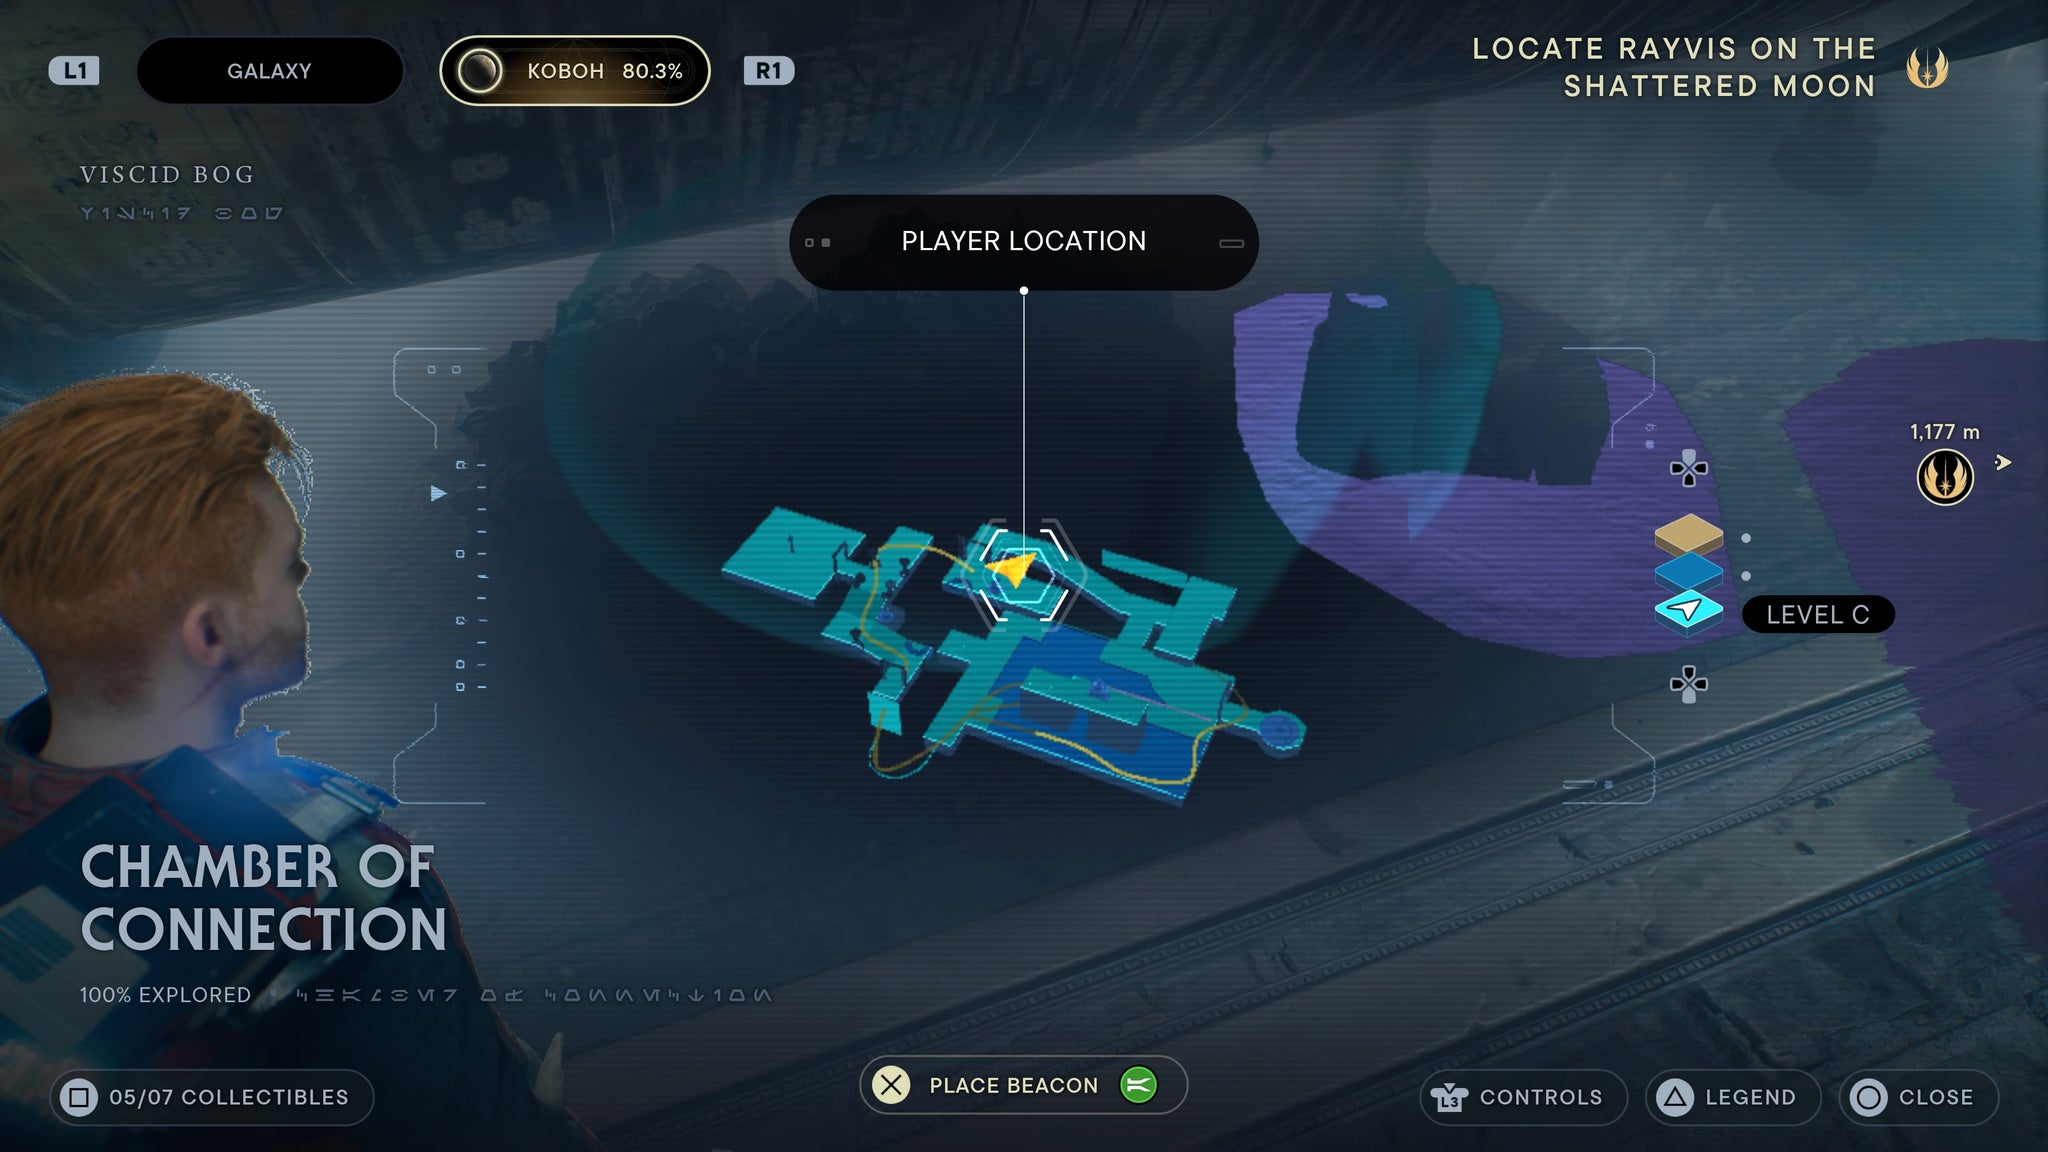
By the wall, by the orb pedistal.
In the back left corner of the final room.
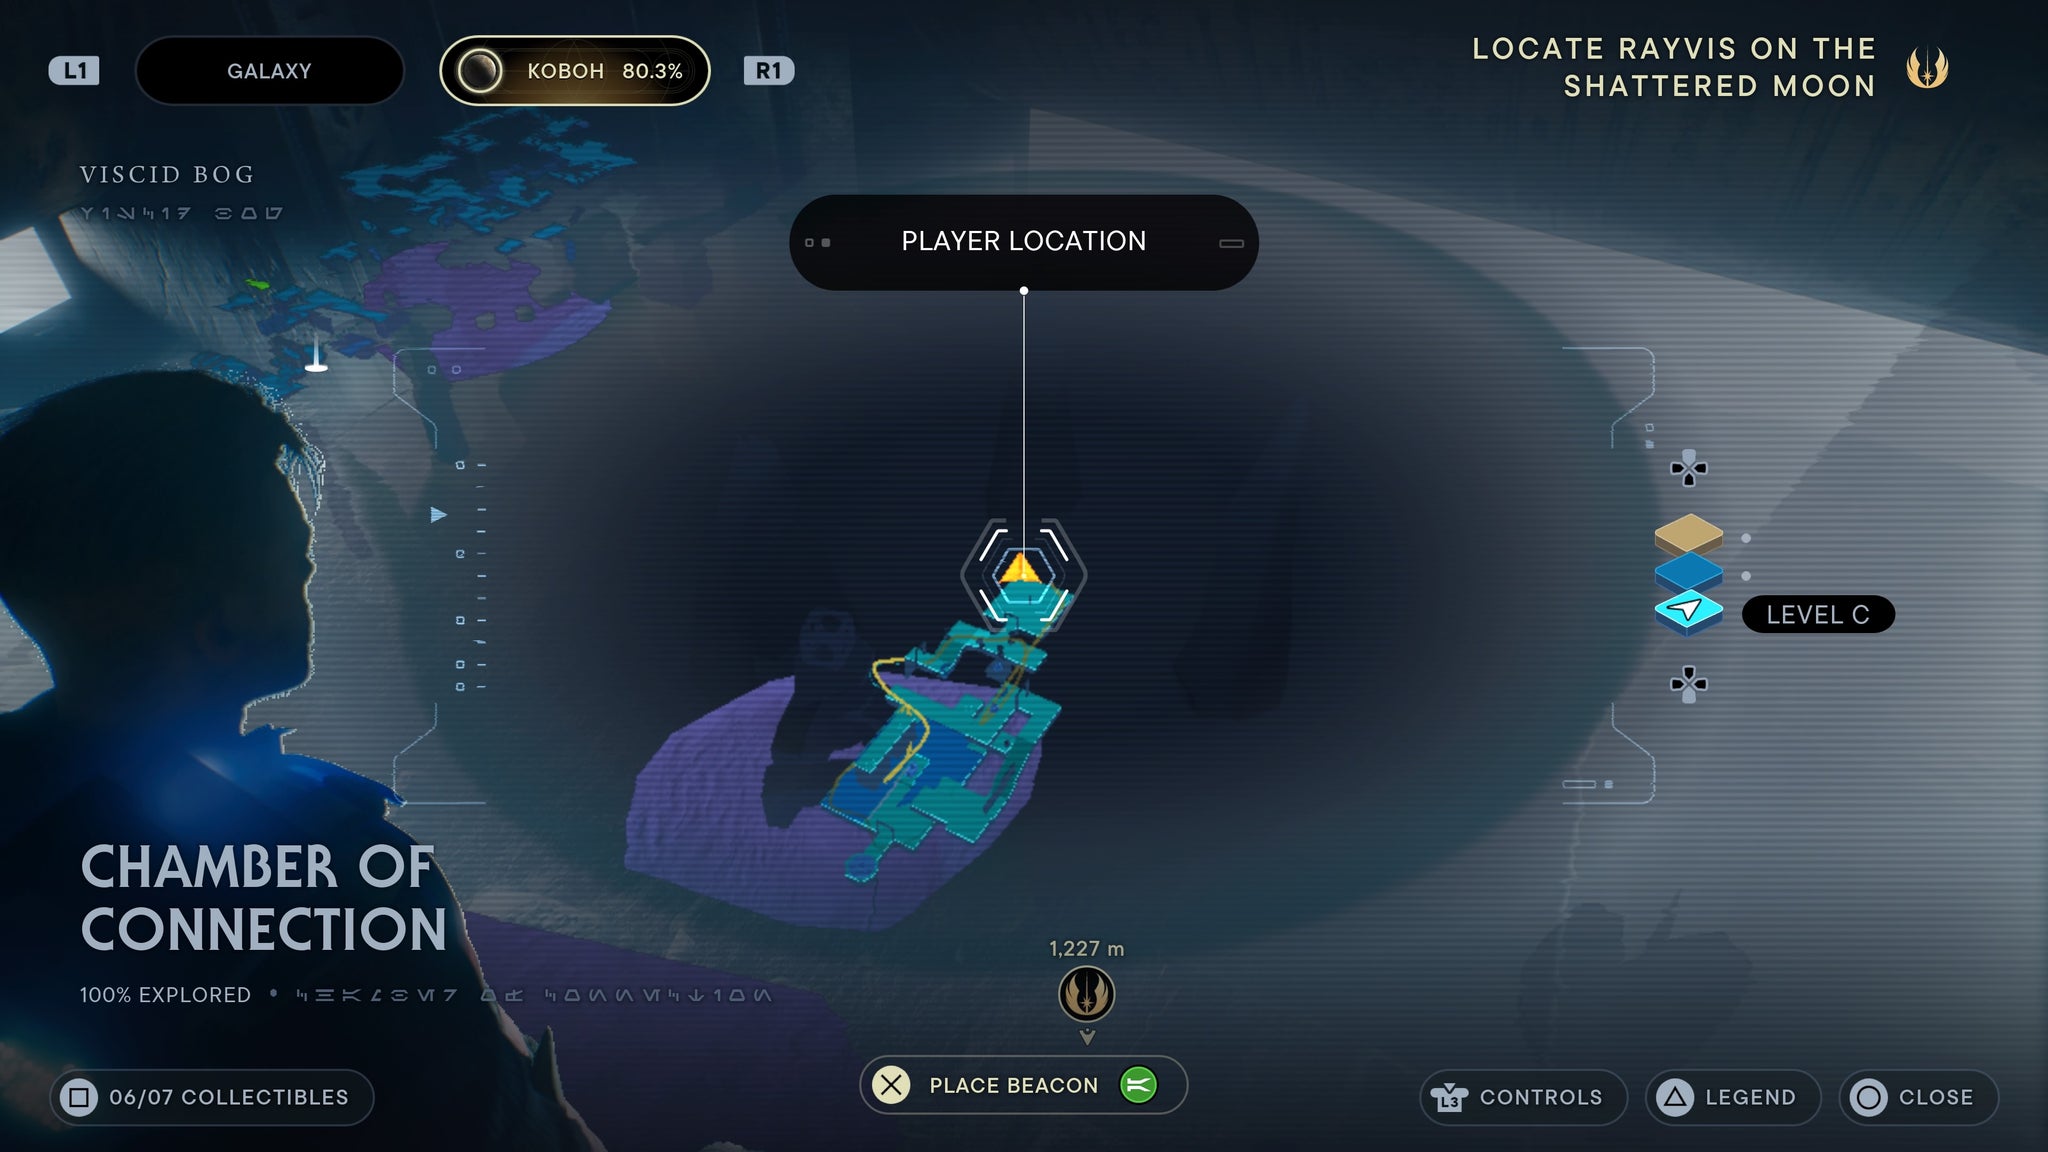
In the final room.
Water Treatment Works
Requires force lift and slam. Drop down through the hatch in the Southern Reaches, then walk into the large lit room. In there, scan the leaking tank.
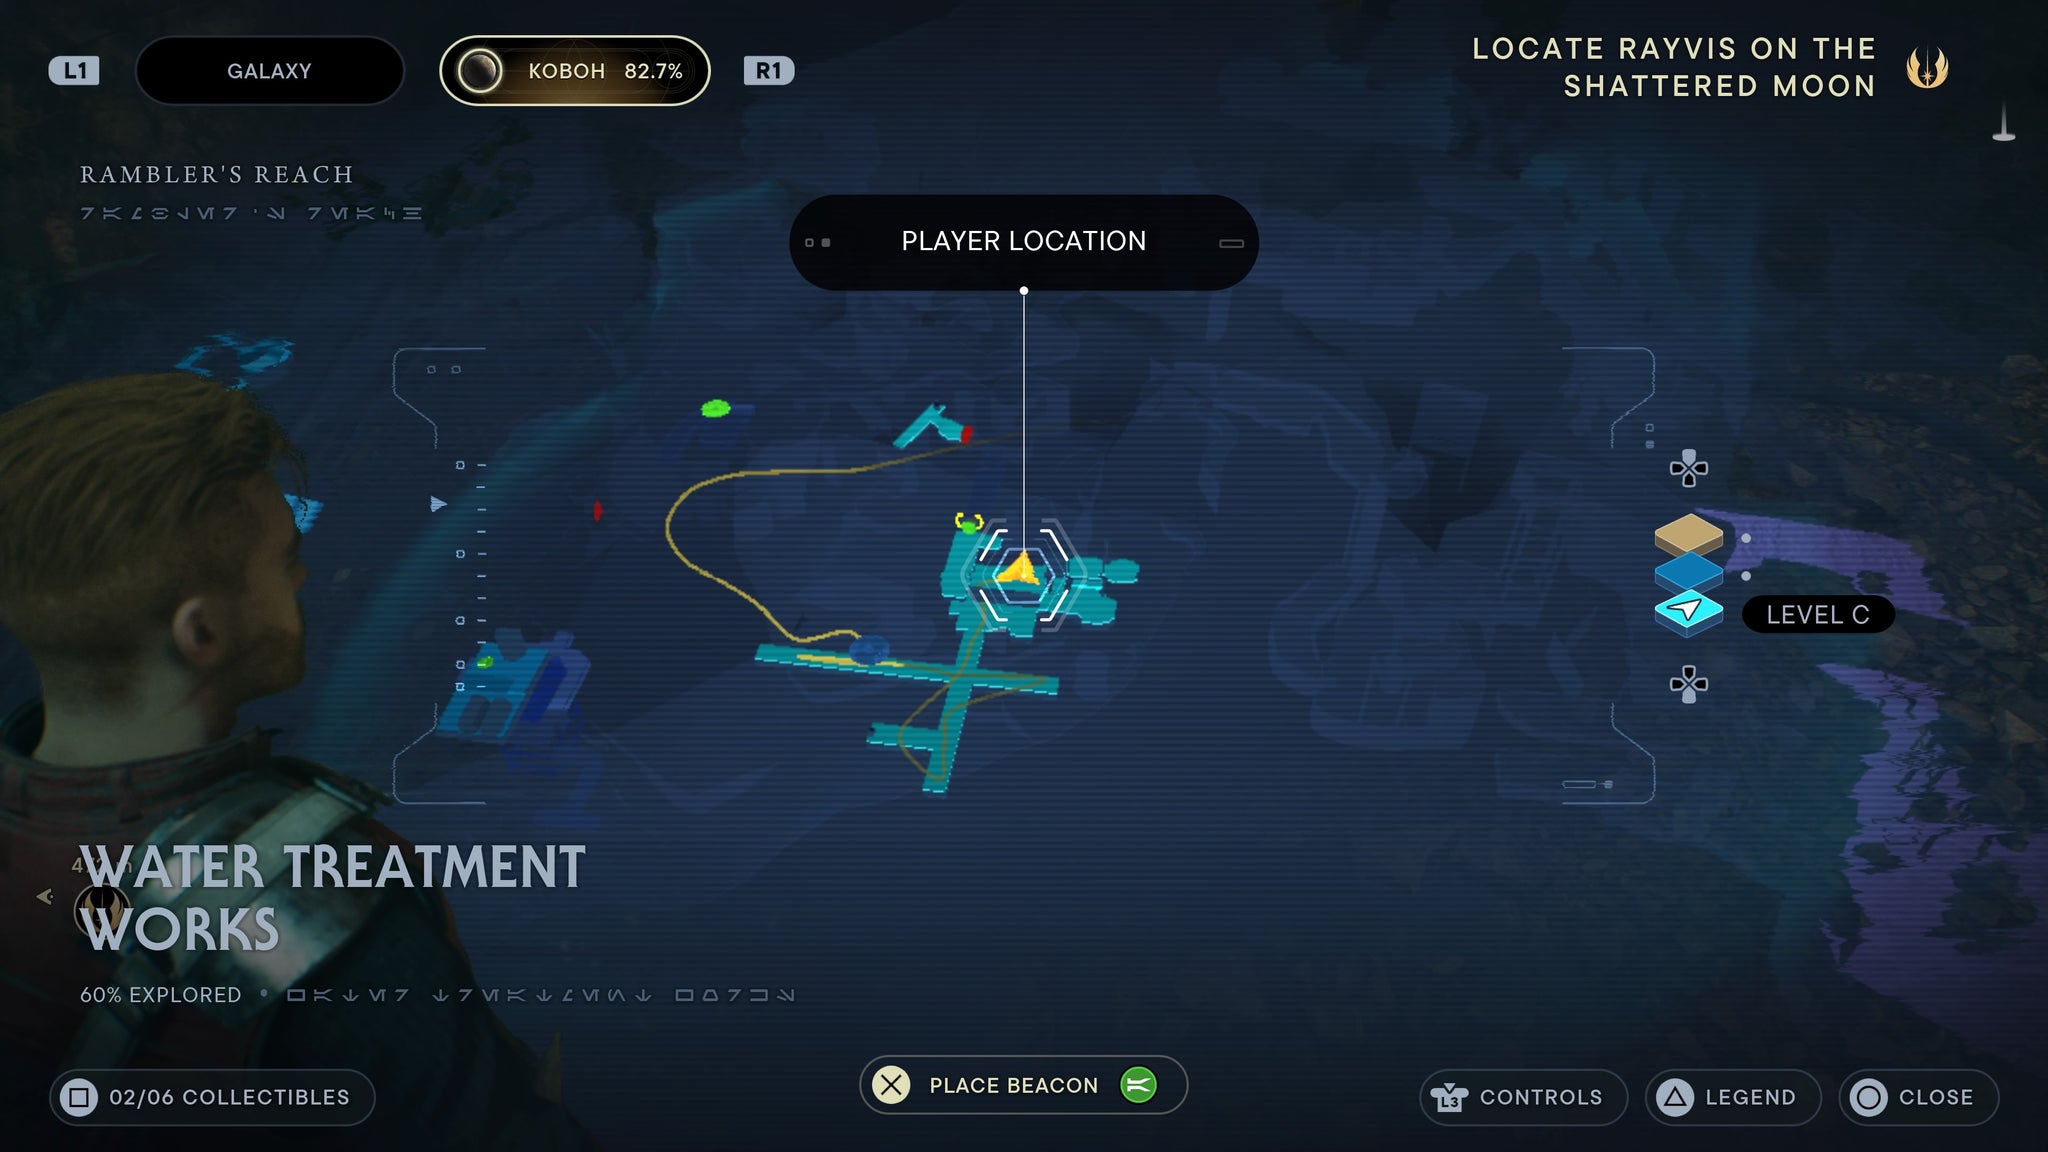
Scan the tanks!
Requires force lift and slam. Drop down through the hatch in the Southern Reaches, then walk into the large lit room. Make your way to the higher level and you’ll find a force echo on a corpse.
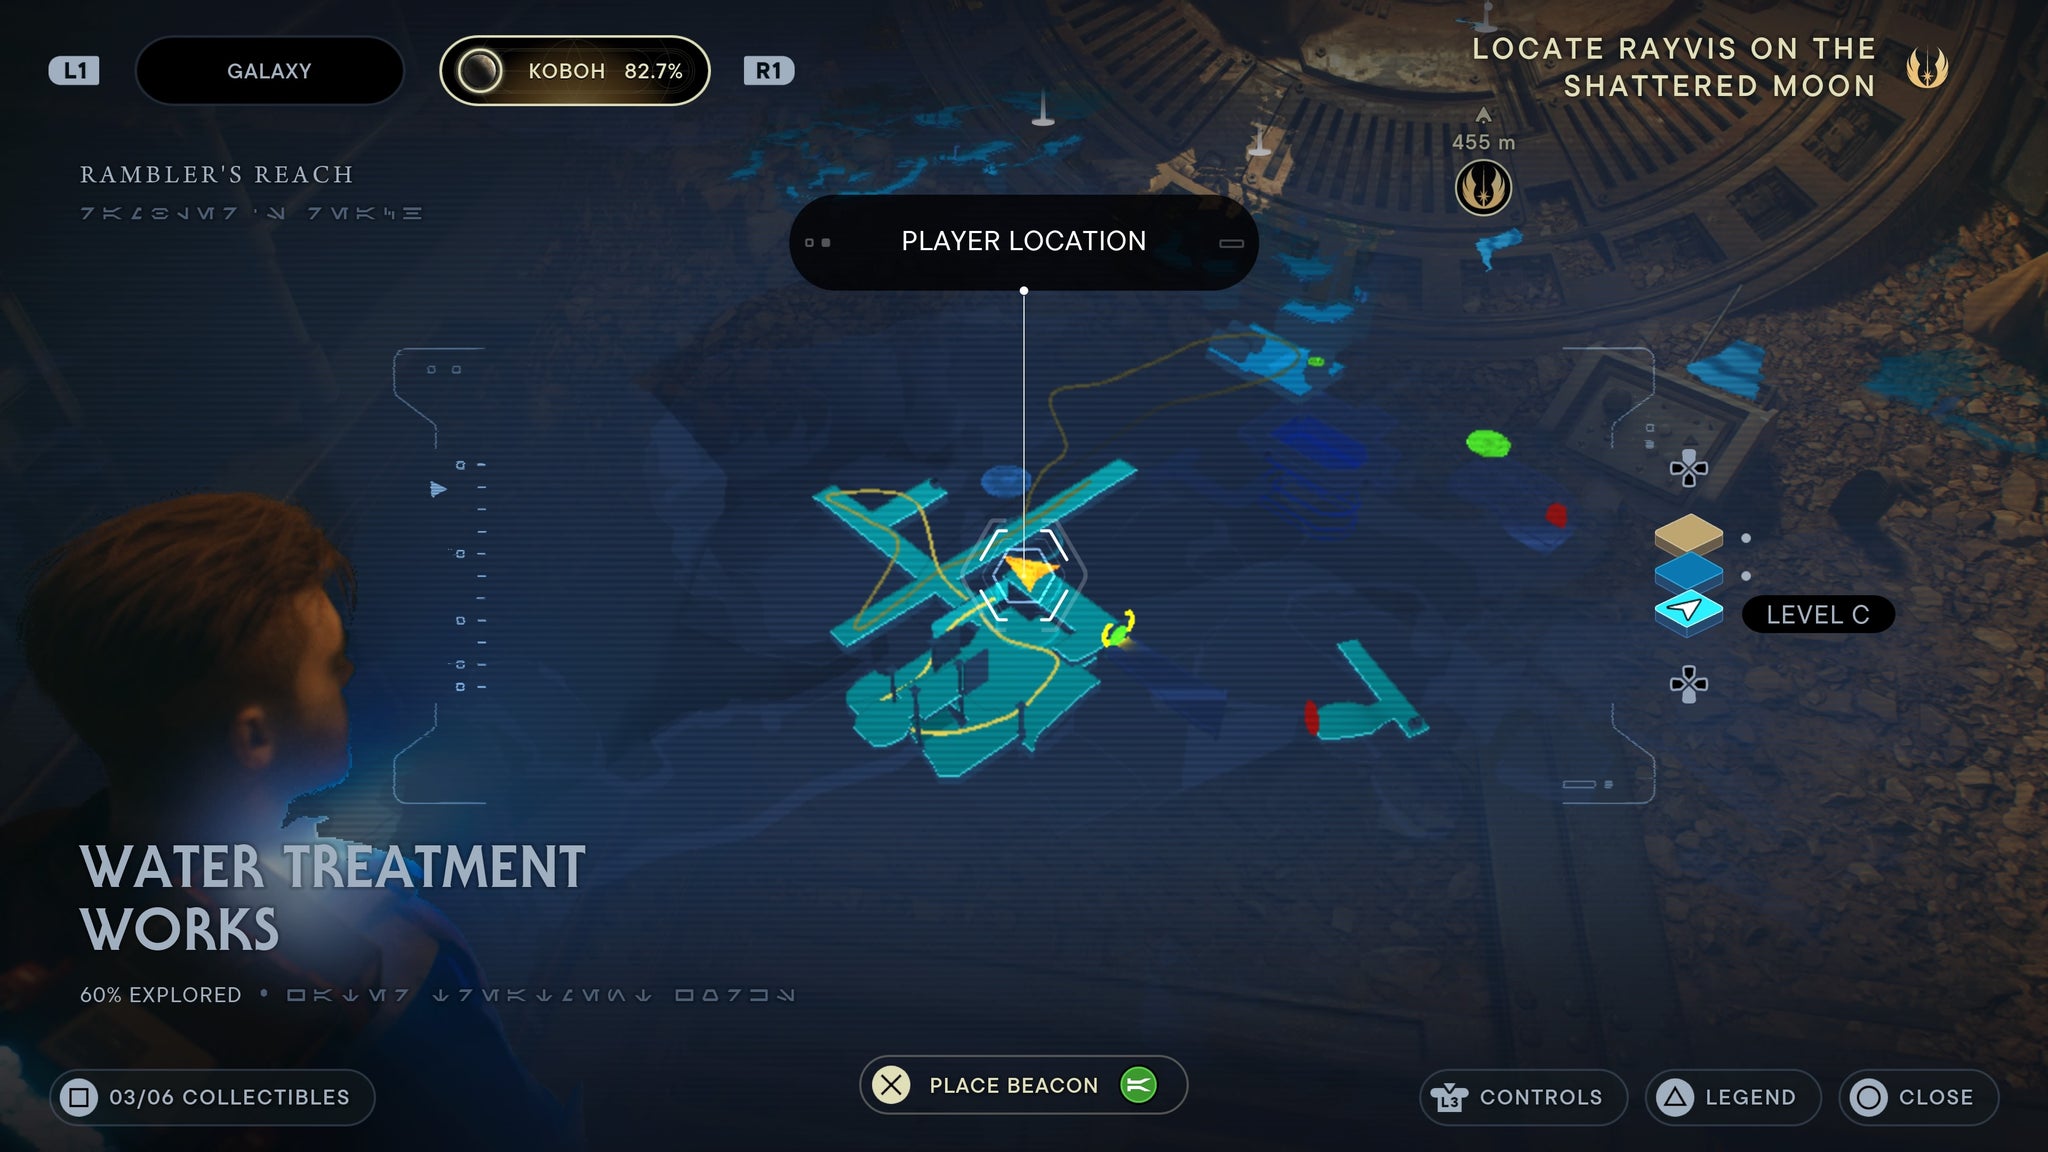
The one force echo here.
Flooded Bunker
Requires force lift and slam. Enter the warehouse in Southern Reaches, take out the turret, then drop down. You’ll find a datapad you can scan in a dark corner in the room below.
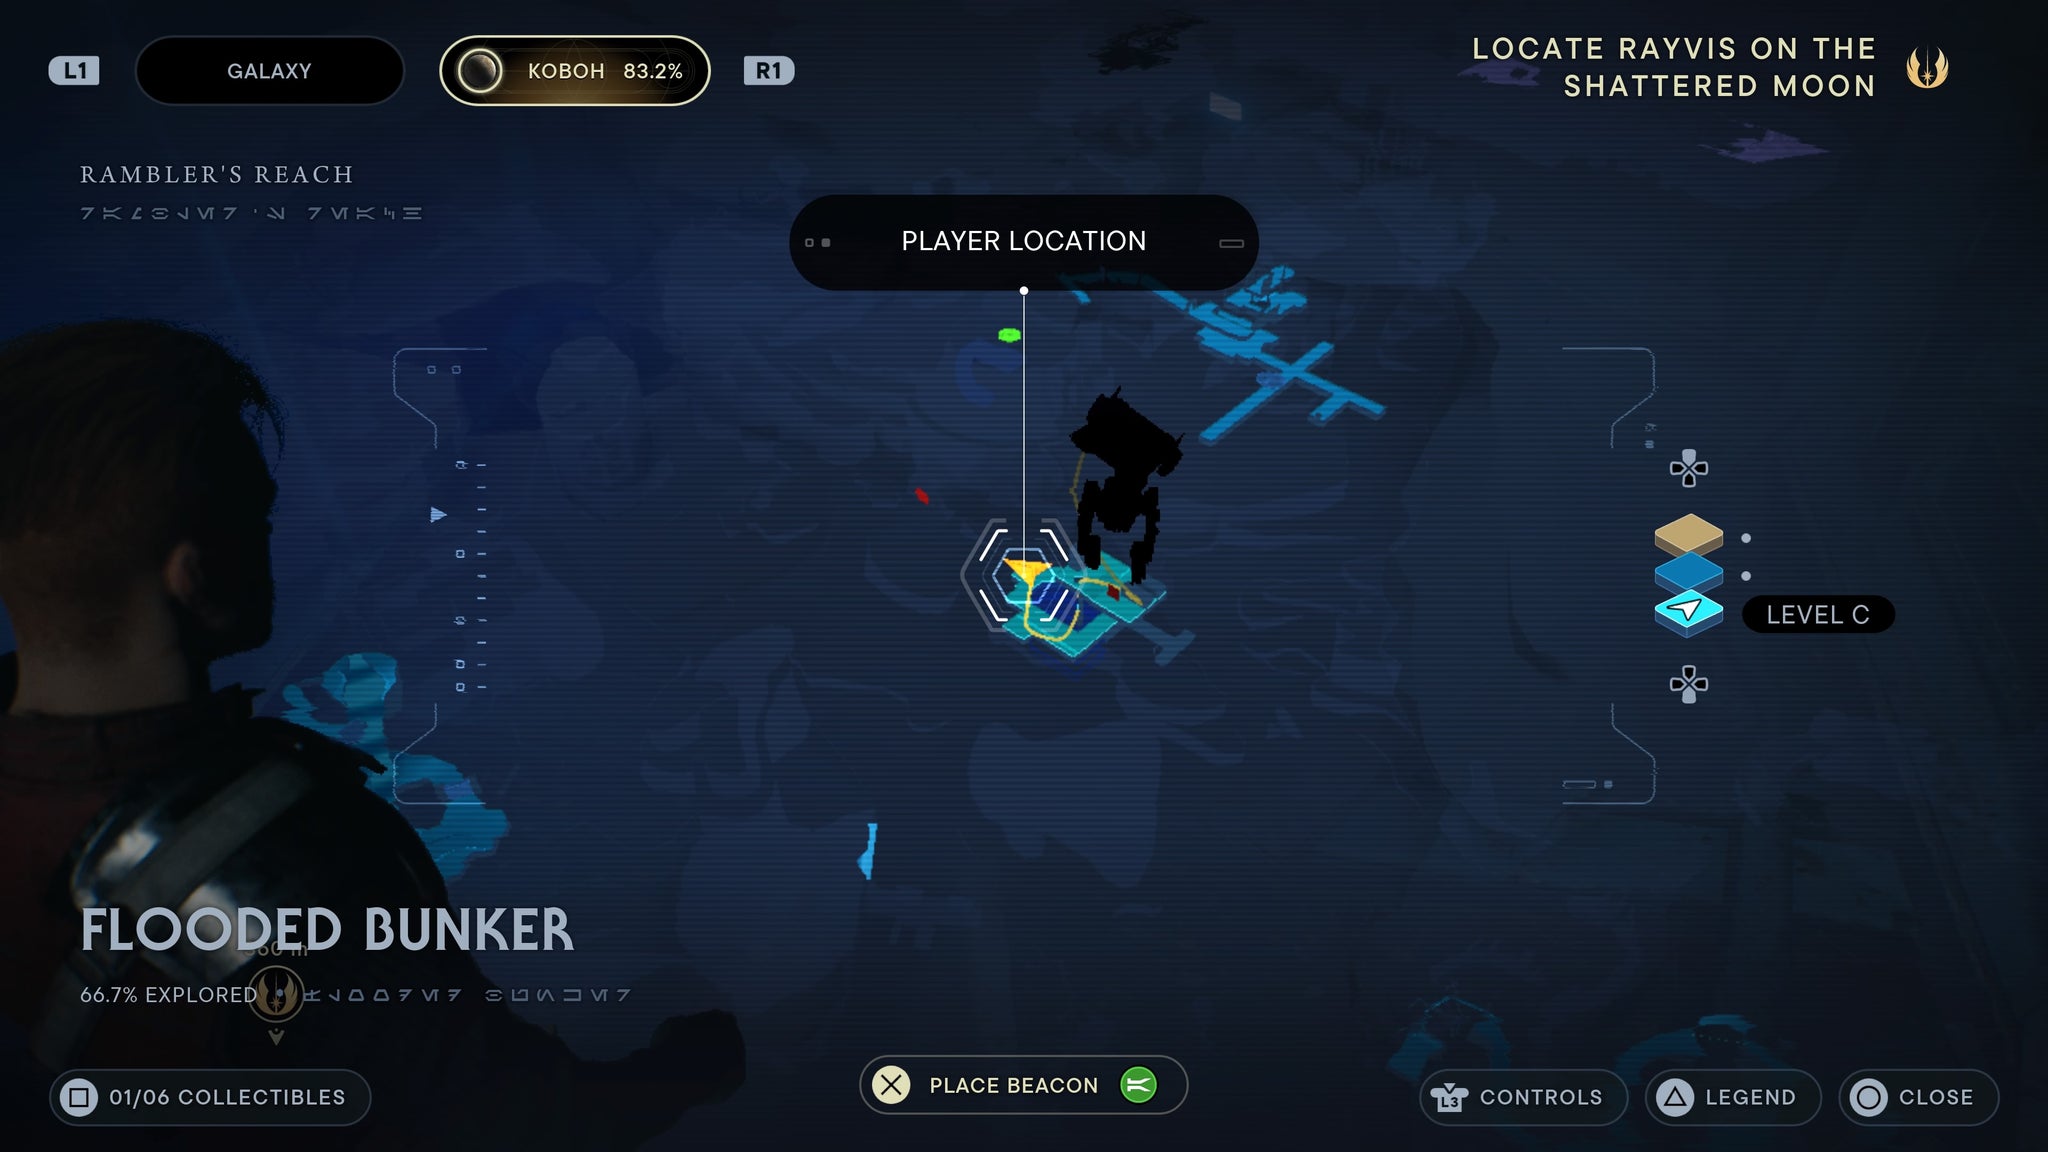
In the first room you drop down into.
Requires force lift and slam. Enter the warehouse in Southern Reaches, take out the turret, then drop down. Dive below and swim into the next room. Climb up via the vines, then scan the terminal.
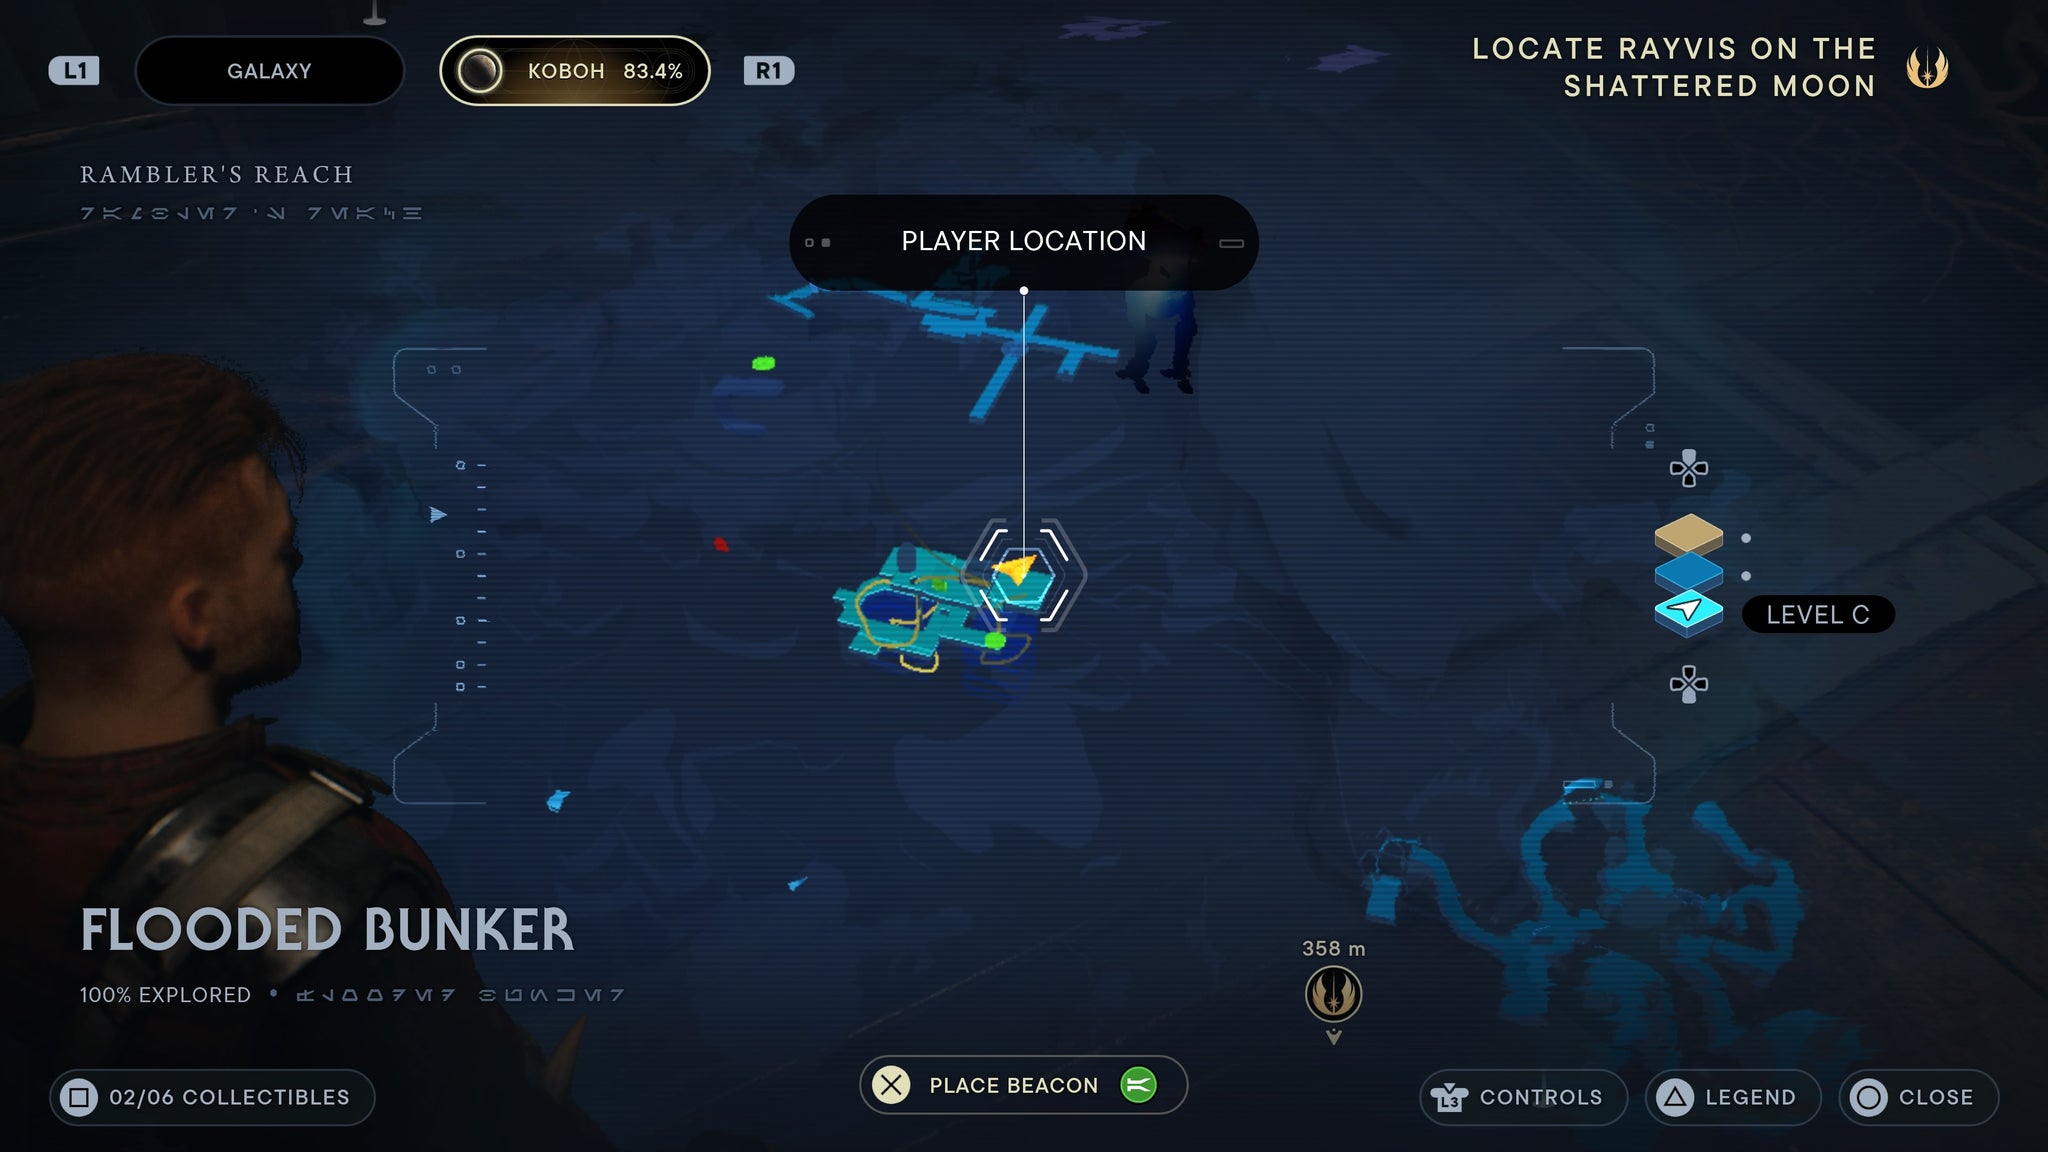
In the second room you have to swim to.
Corroded Silo
Requires force lift and slam. Enter the silo from the roof in Southern Reaches. Look left when you first reach two raiders. You’ll find a datapad you can scan.
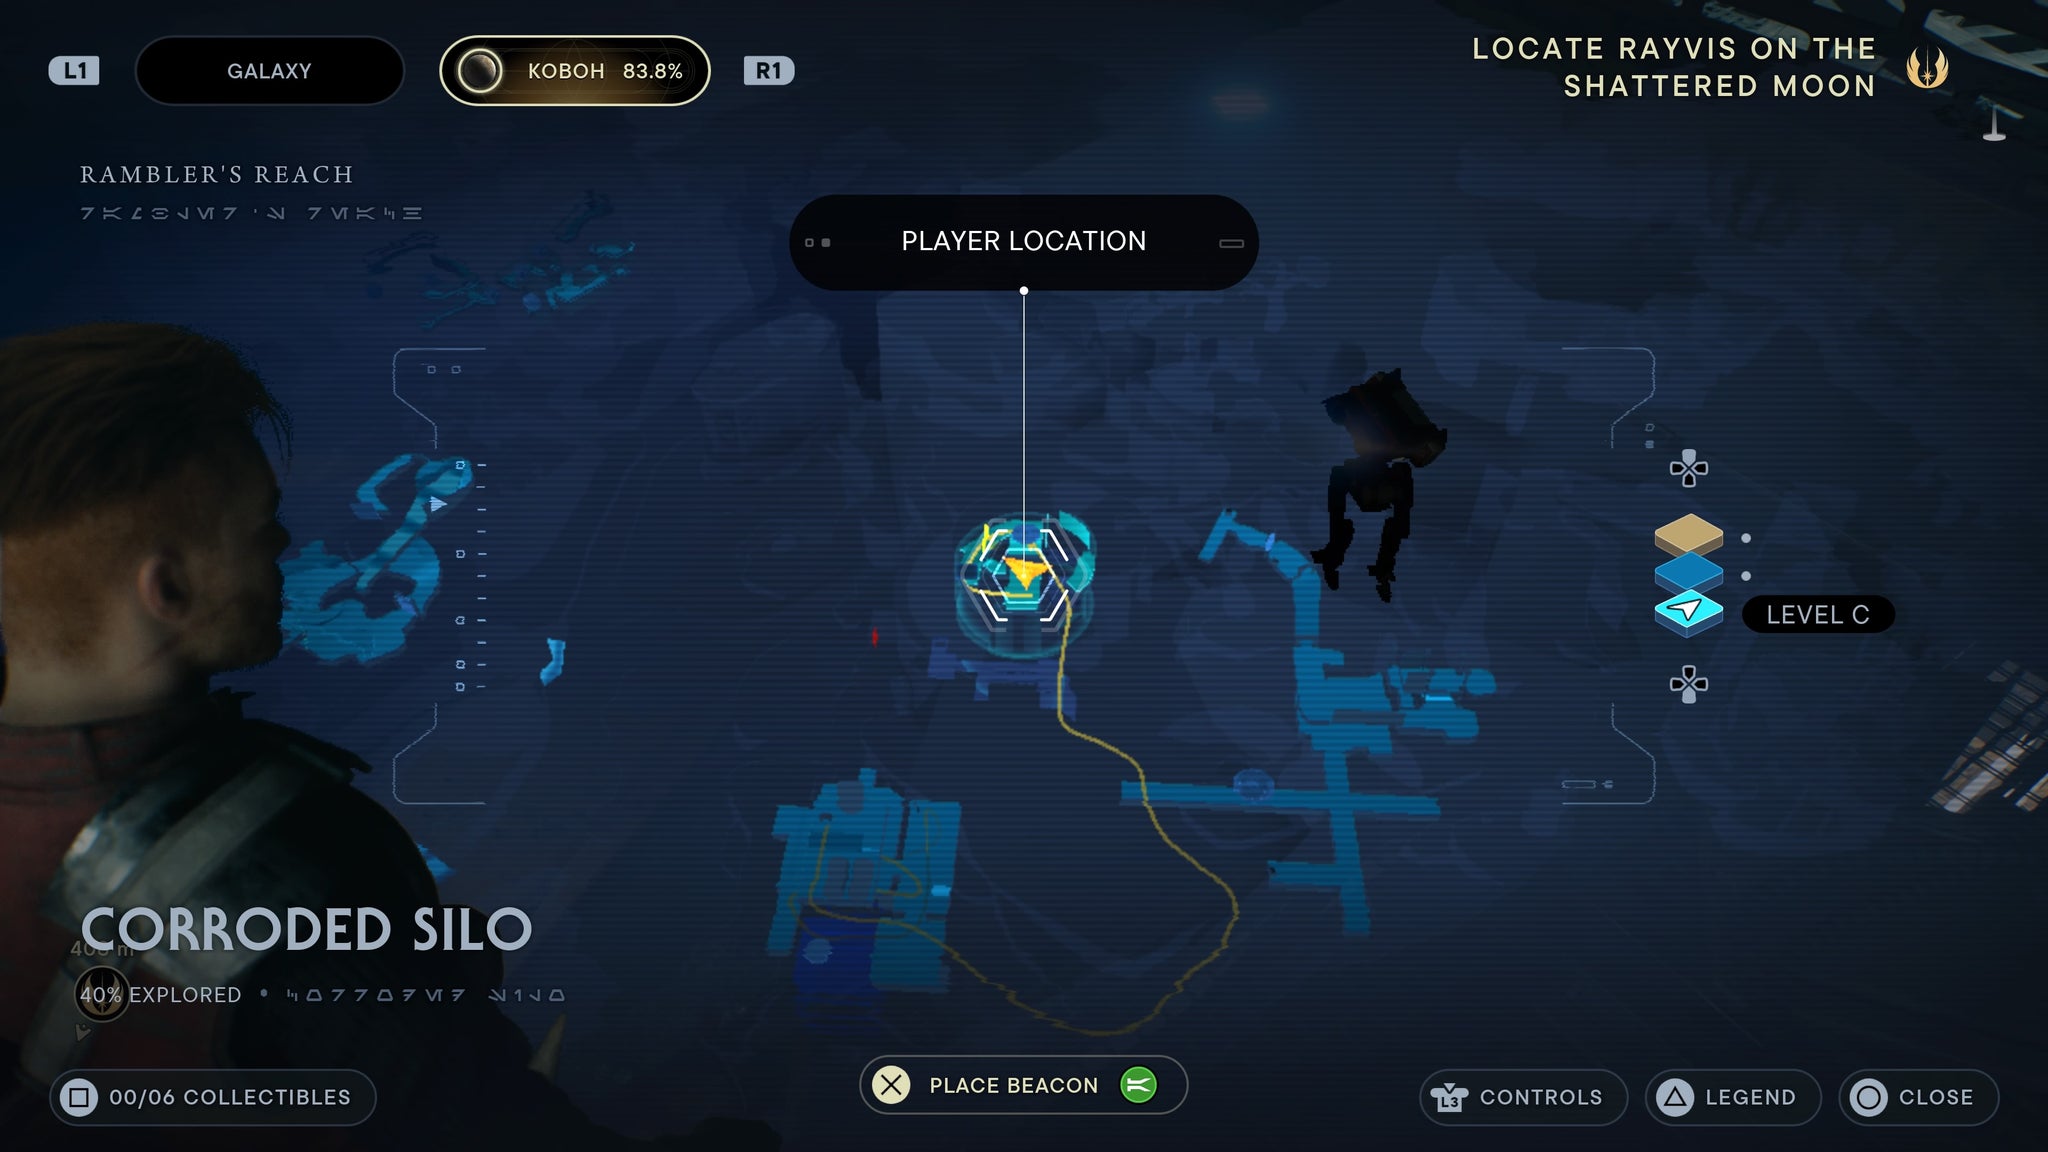
On a small box!
Requires force lift and slam. Enter the silo from the roof in Southern Reaches. Wall run across the silo and drop down to a corroded bridge with a B1 droid on it. There, you’ll find a datapad you can scan.

On the ground on a bridge.
At the bottom of the silo left of the chamber entrance.
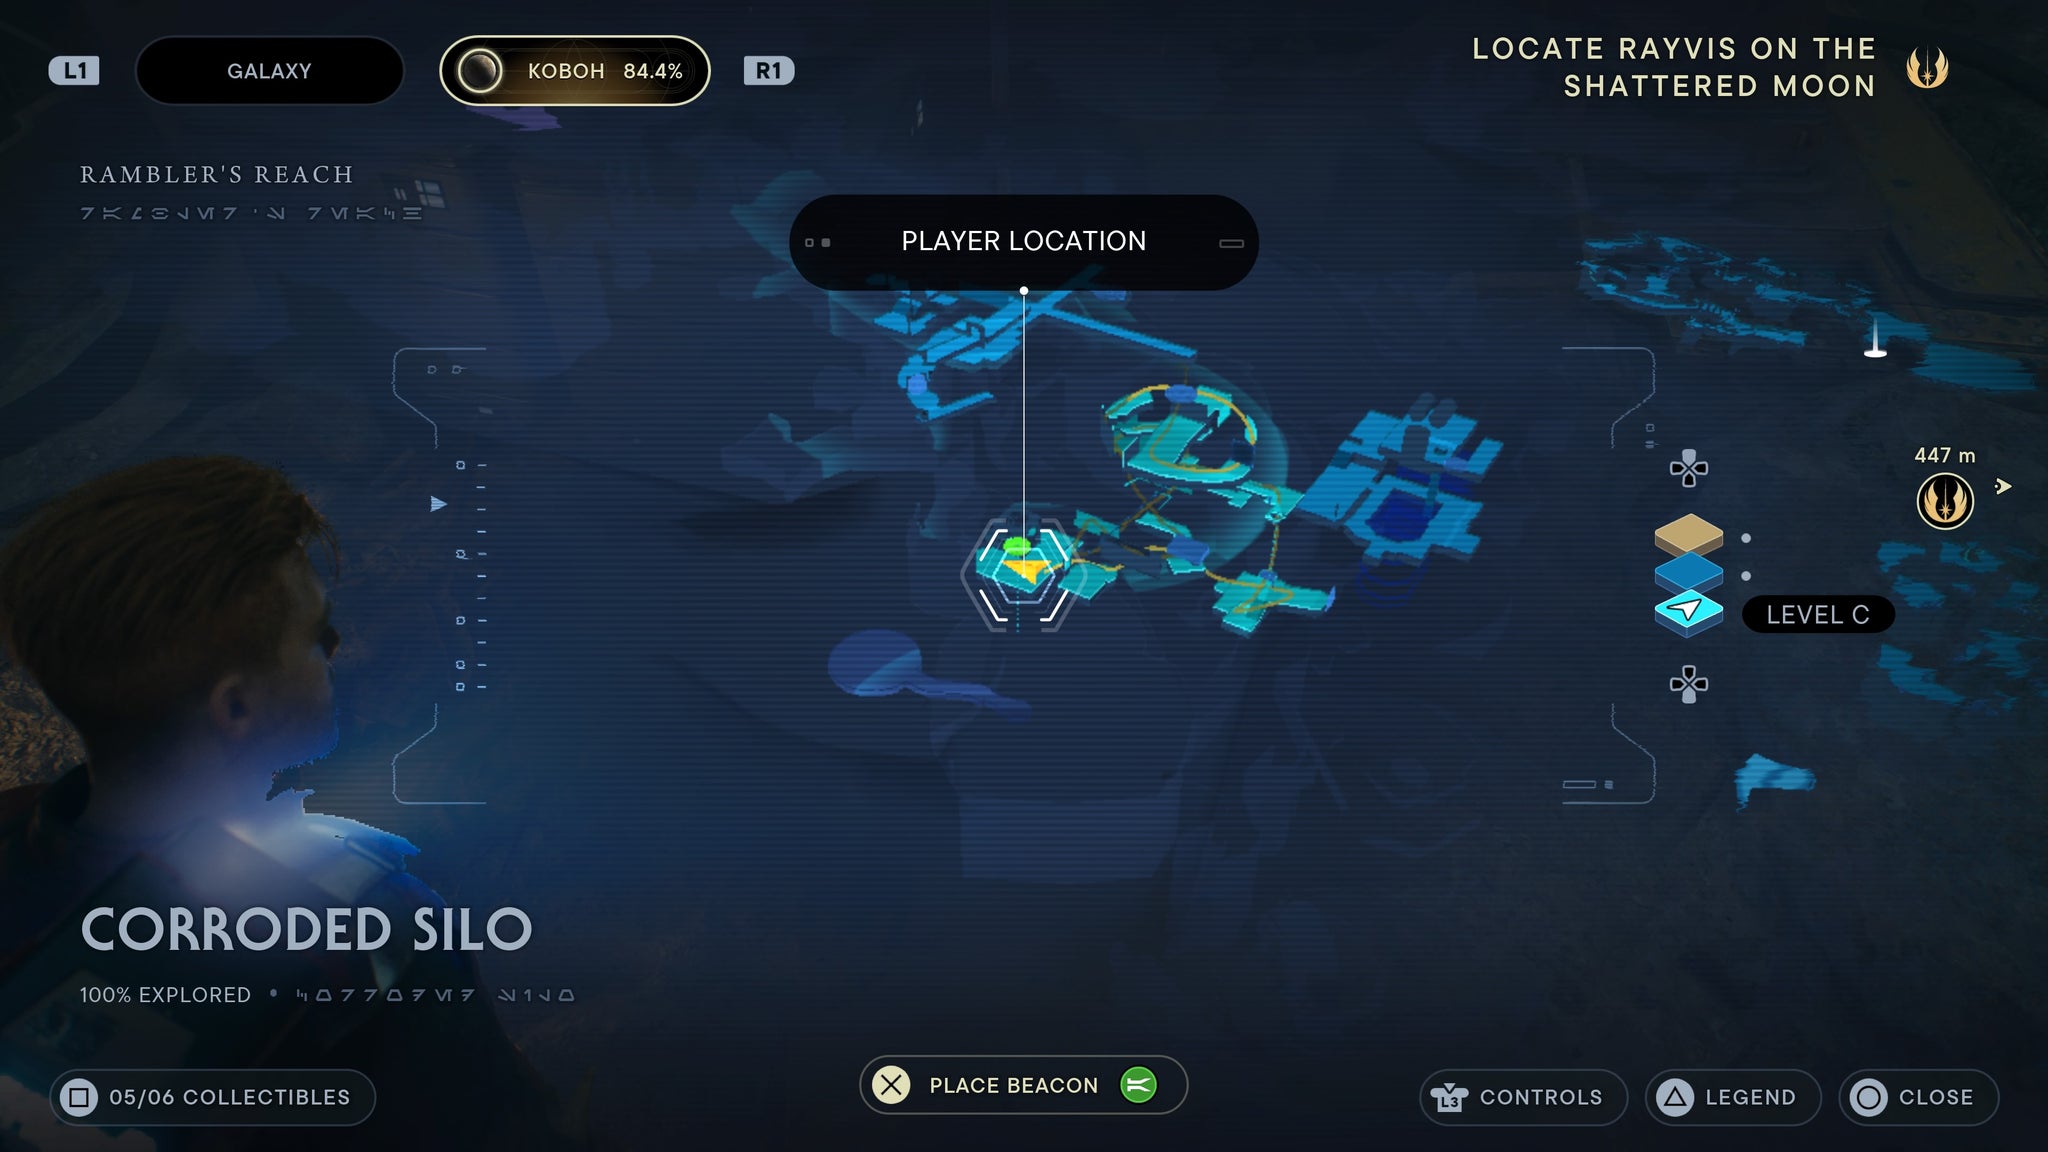
Right by the door to the chamber below.
Chamber of Fortitude
You can find a force echo on the right side of the boss arena.
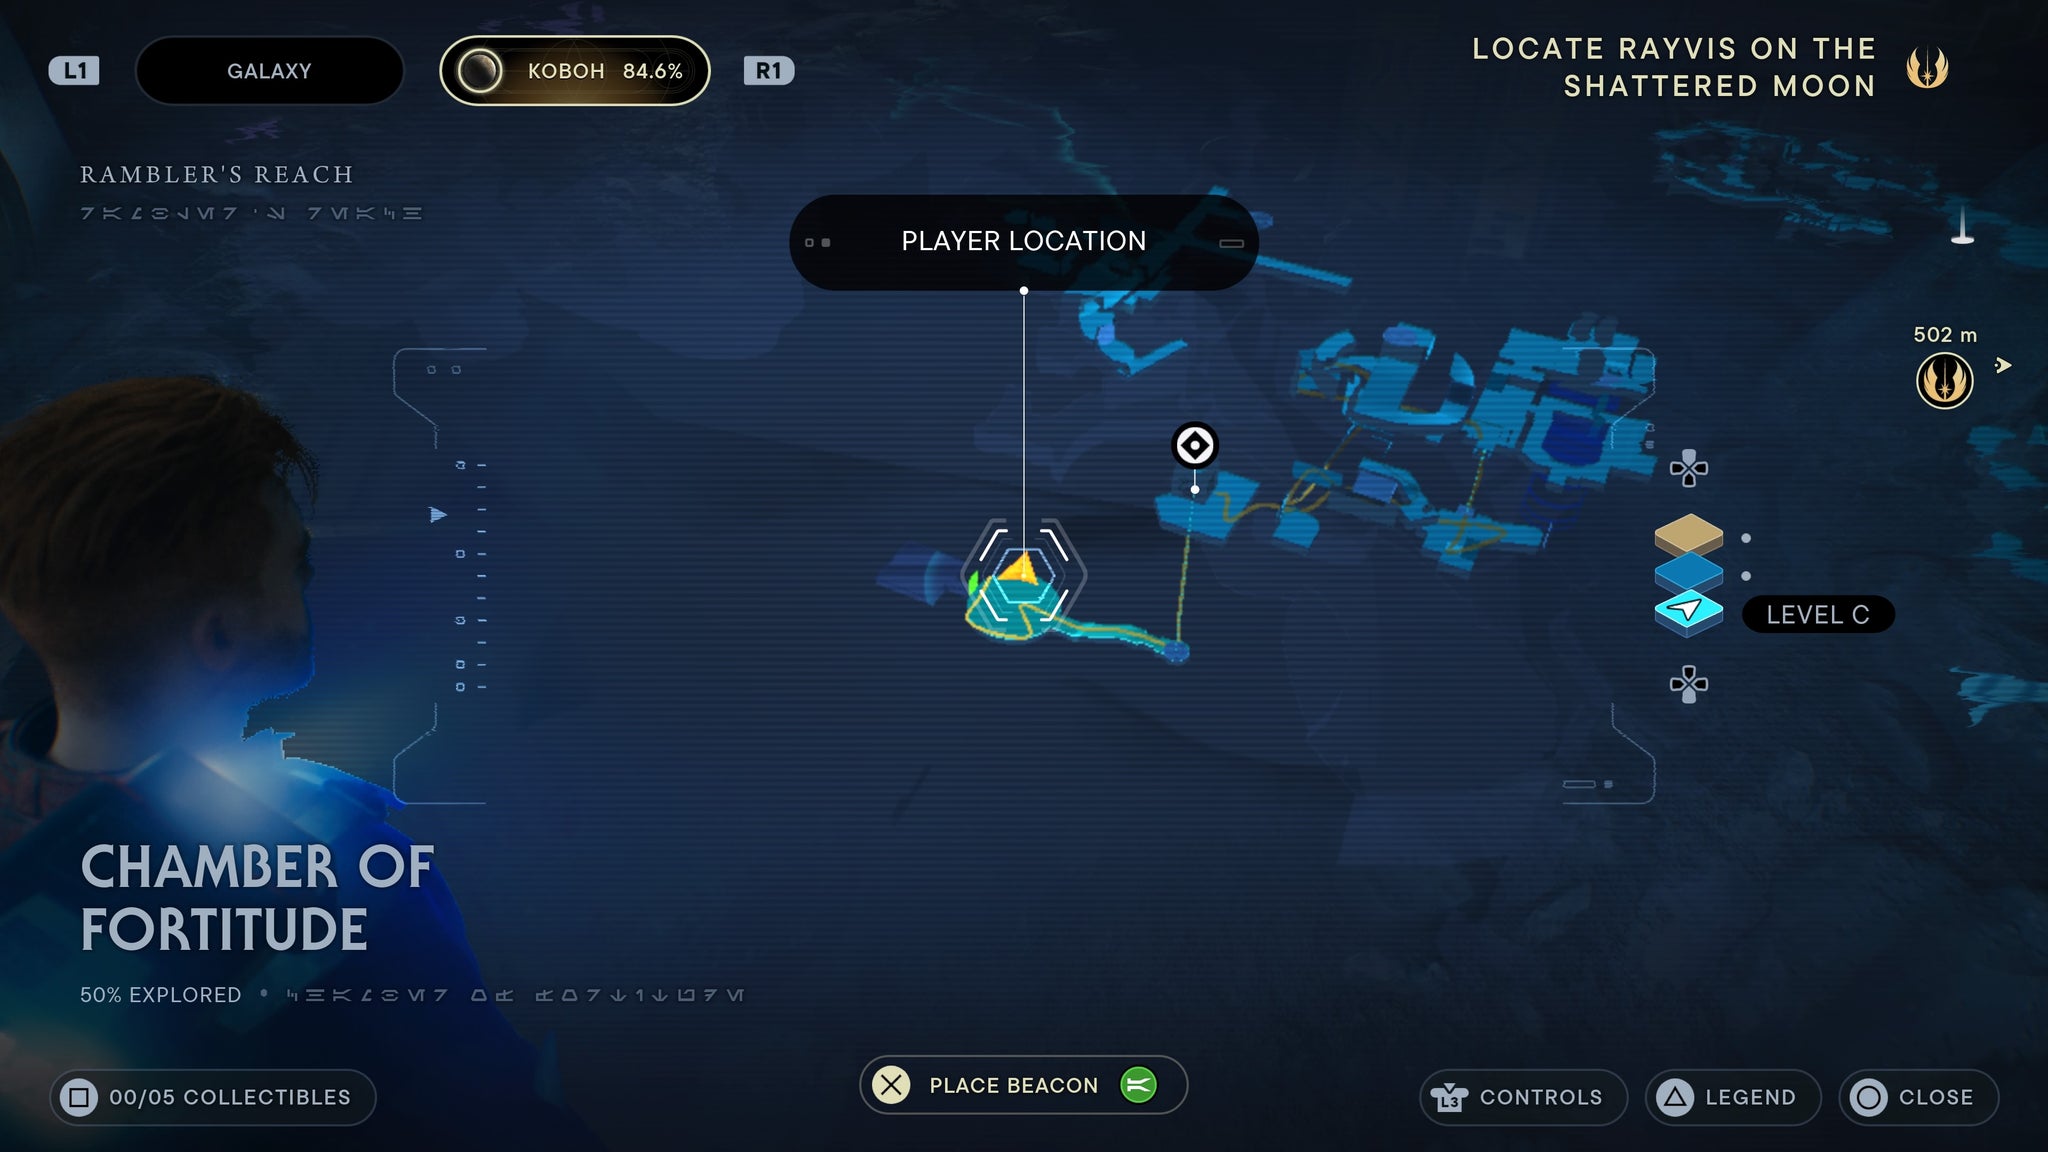
To the right!
You can find this on the right side of the statue room.
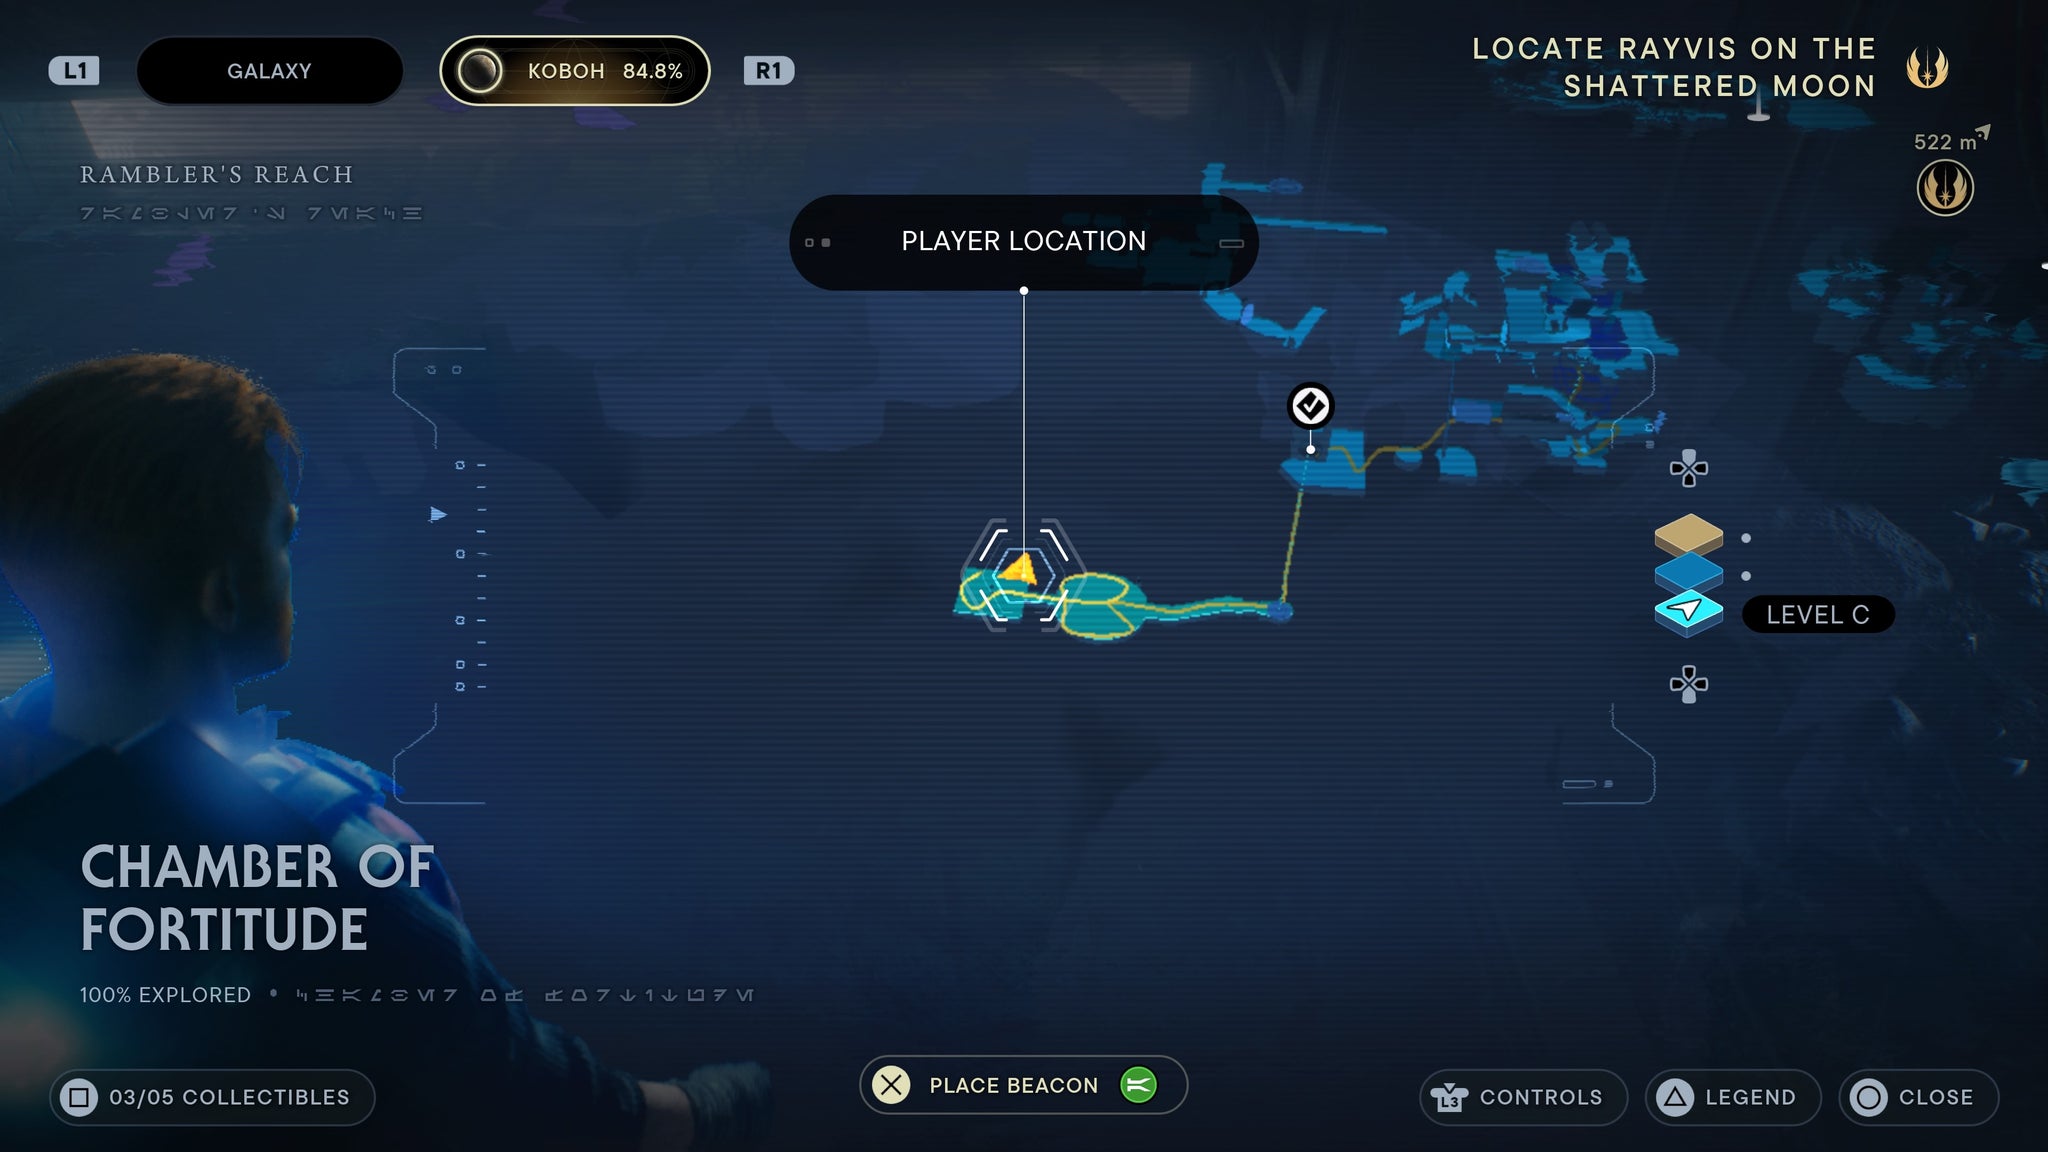
Right of the statue room.
Observatory Understructure
Found under the meditation point is a scan.

It’s a pile of rocks.
Climb up the rotating grates and jump up back to the central platform. Once you land and deal with the droids, walk left for a force echo.
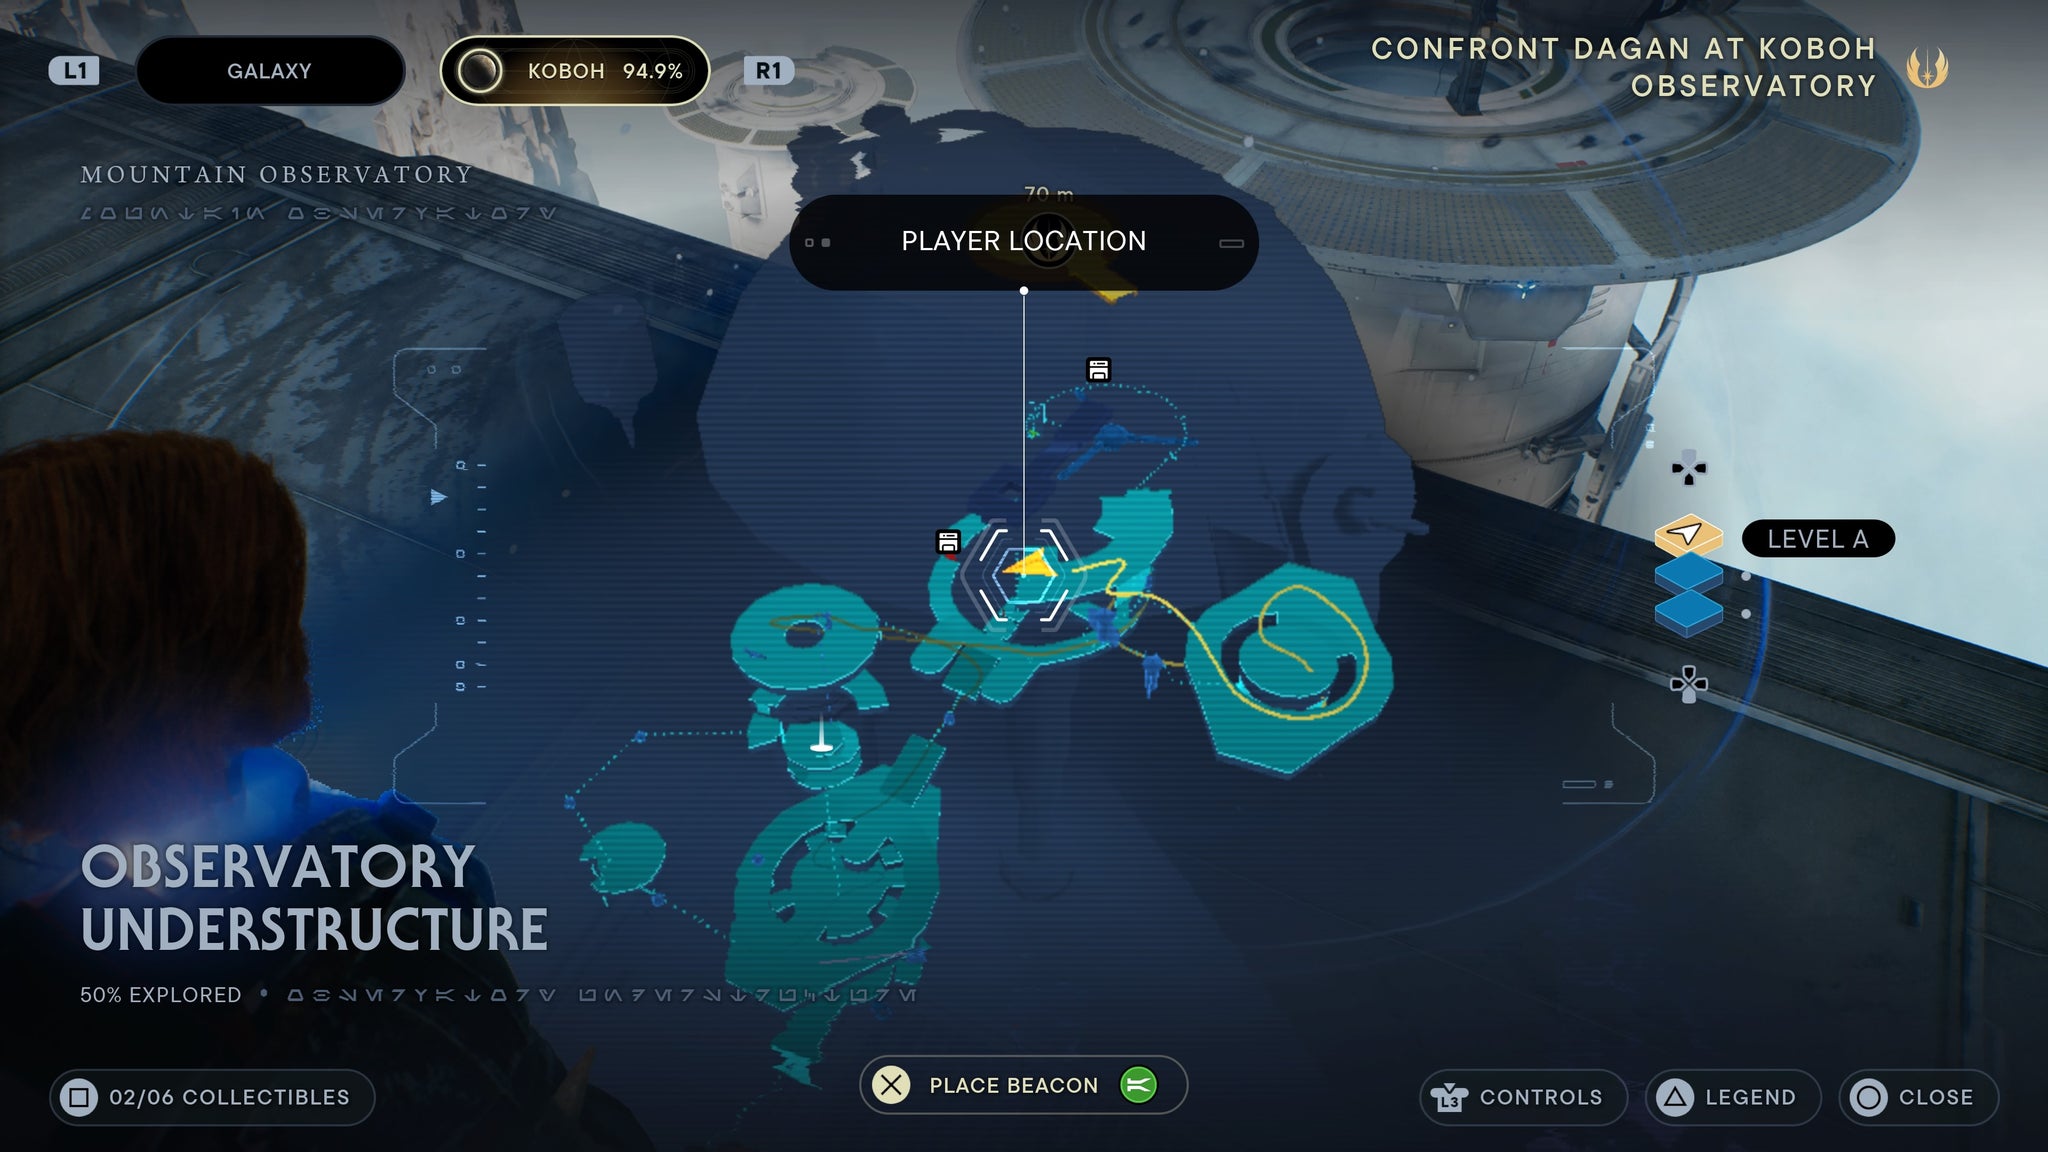
It’s by a window.
Diagnostics Corridor
After you meet up with Bode, use a ballon to jump up to the Diagnostics Corridor. As you enter, look right for a force echo.

On a storm trooper body.
Scan the centre of the room where you fight the two magna guard.
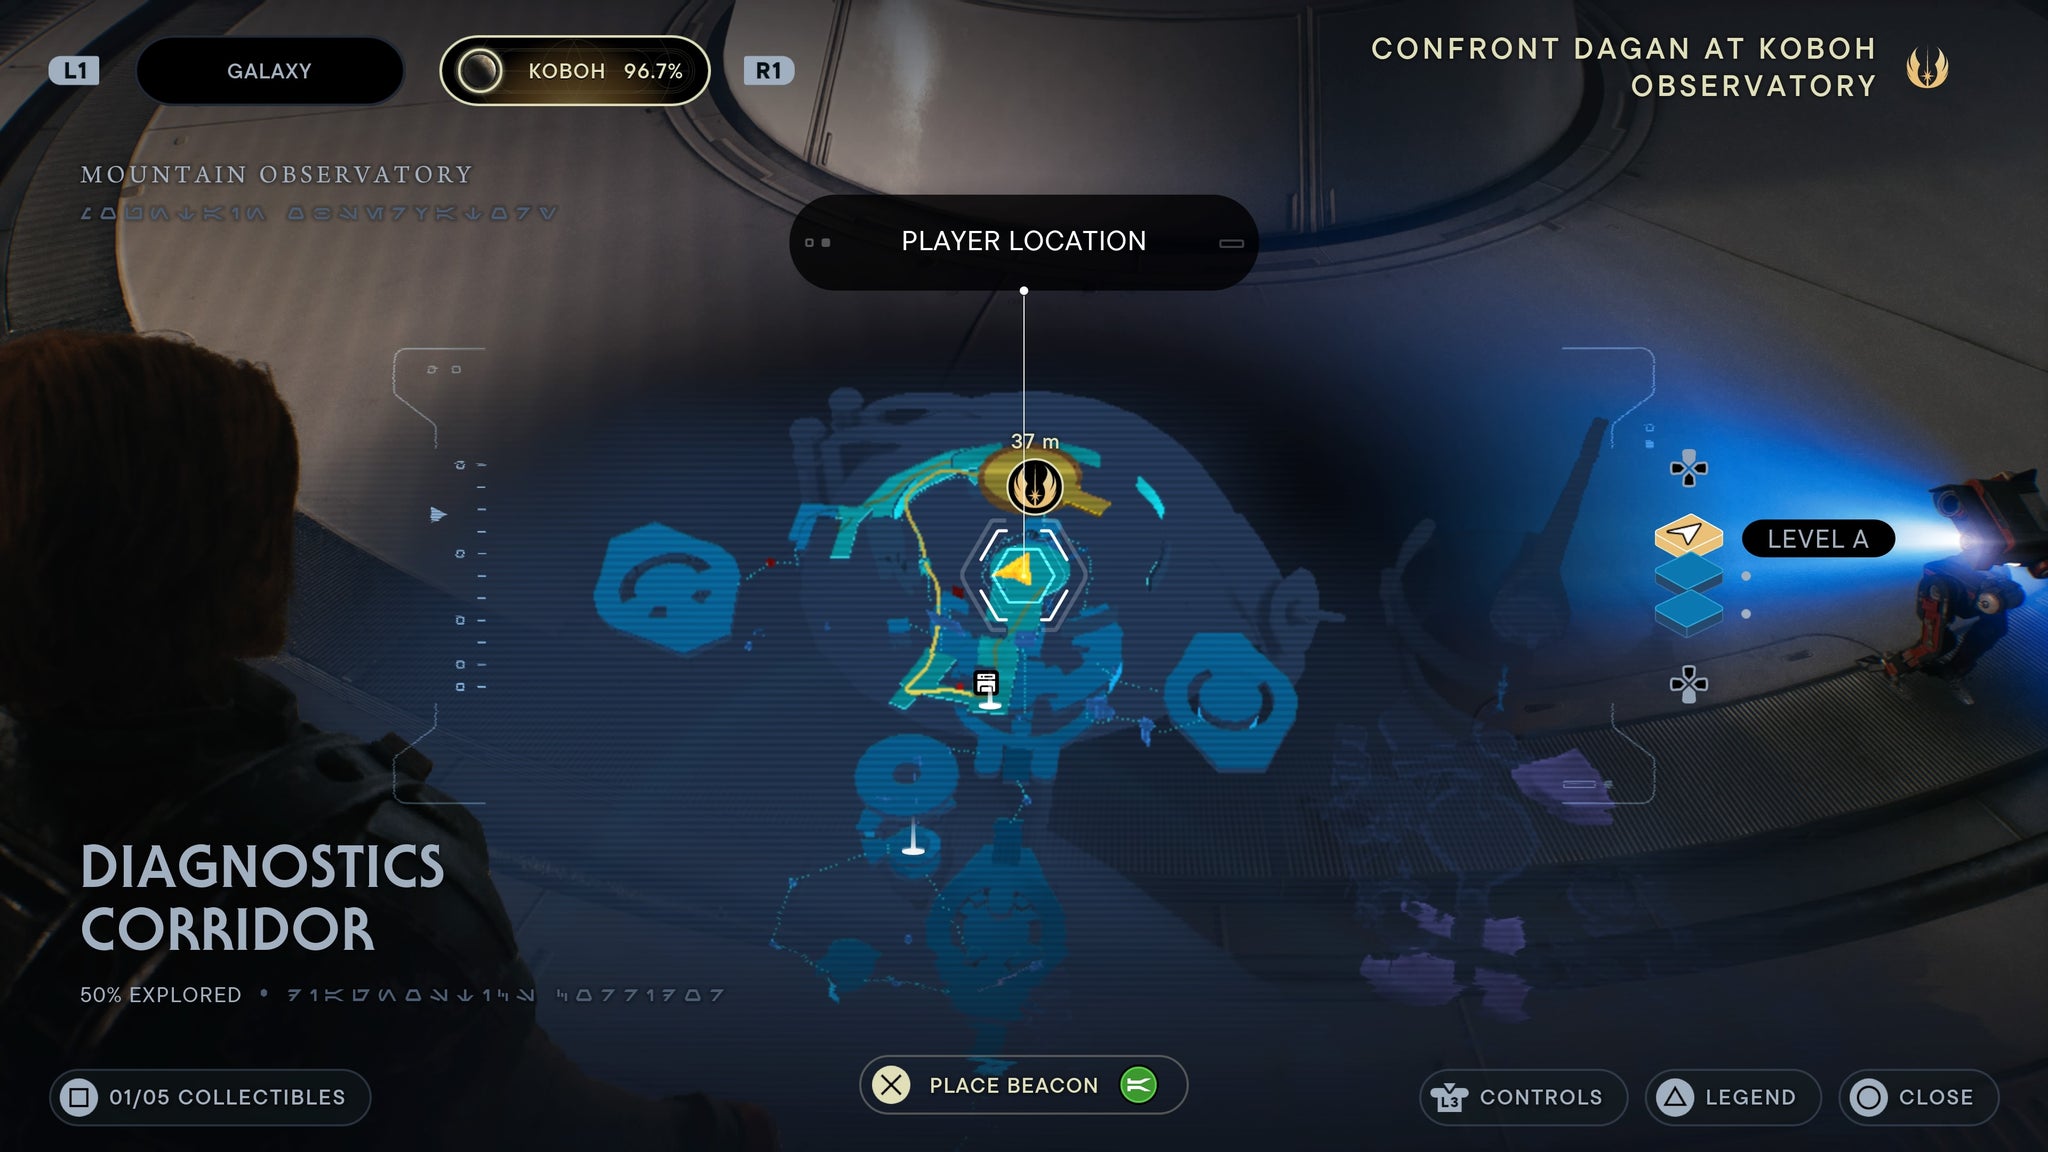
Scan the centre pillar you turn with the electro dart.
Alignment Control Center
Found in the main room in the alignment control center, by a blocked doorway, is a force echo.
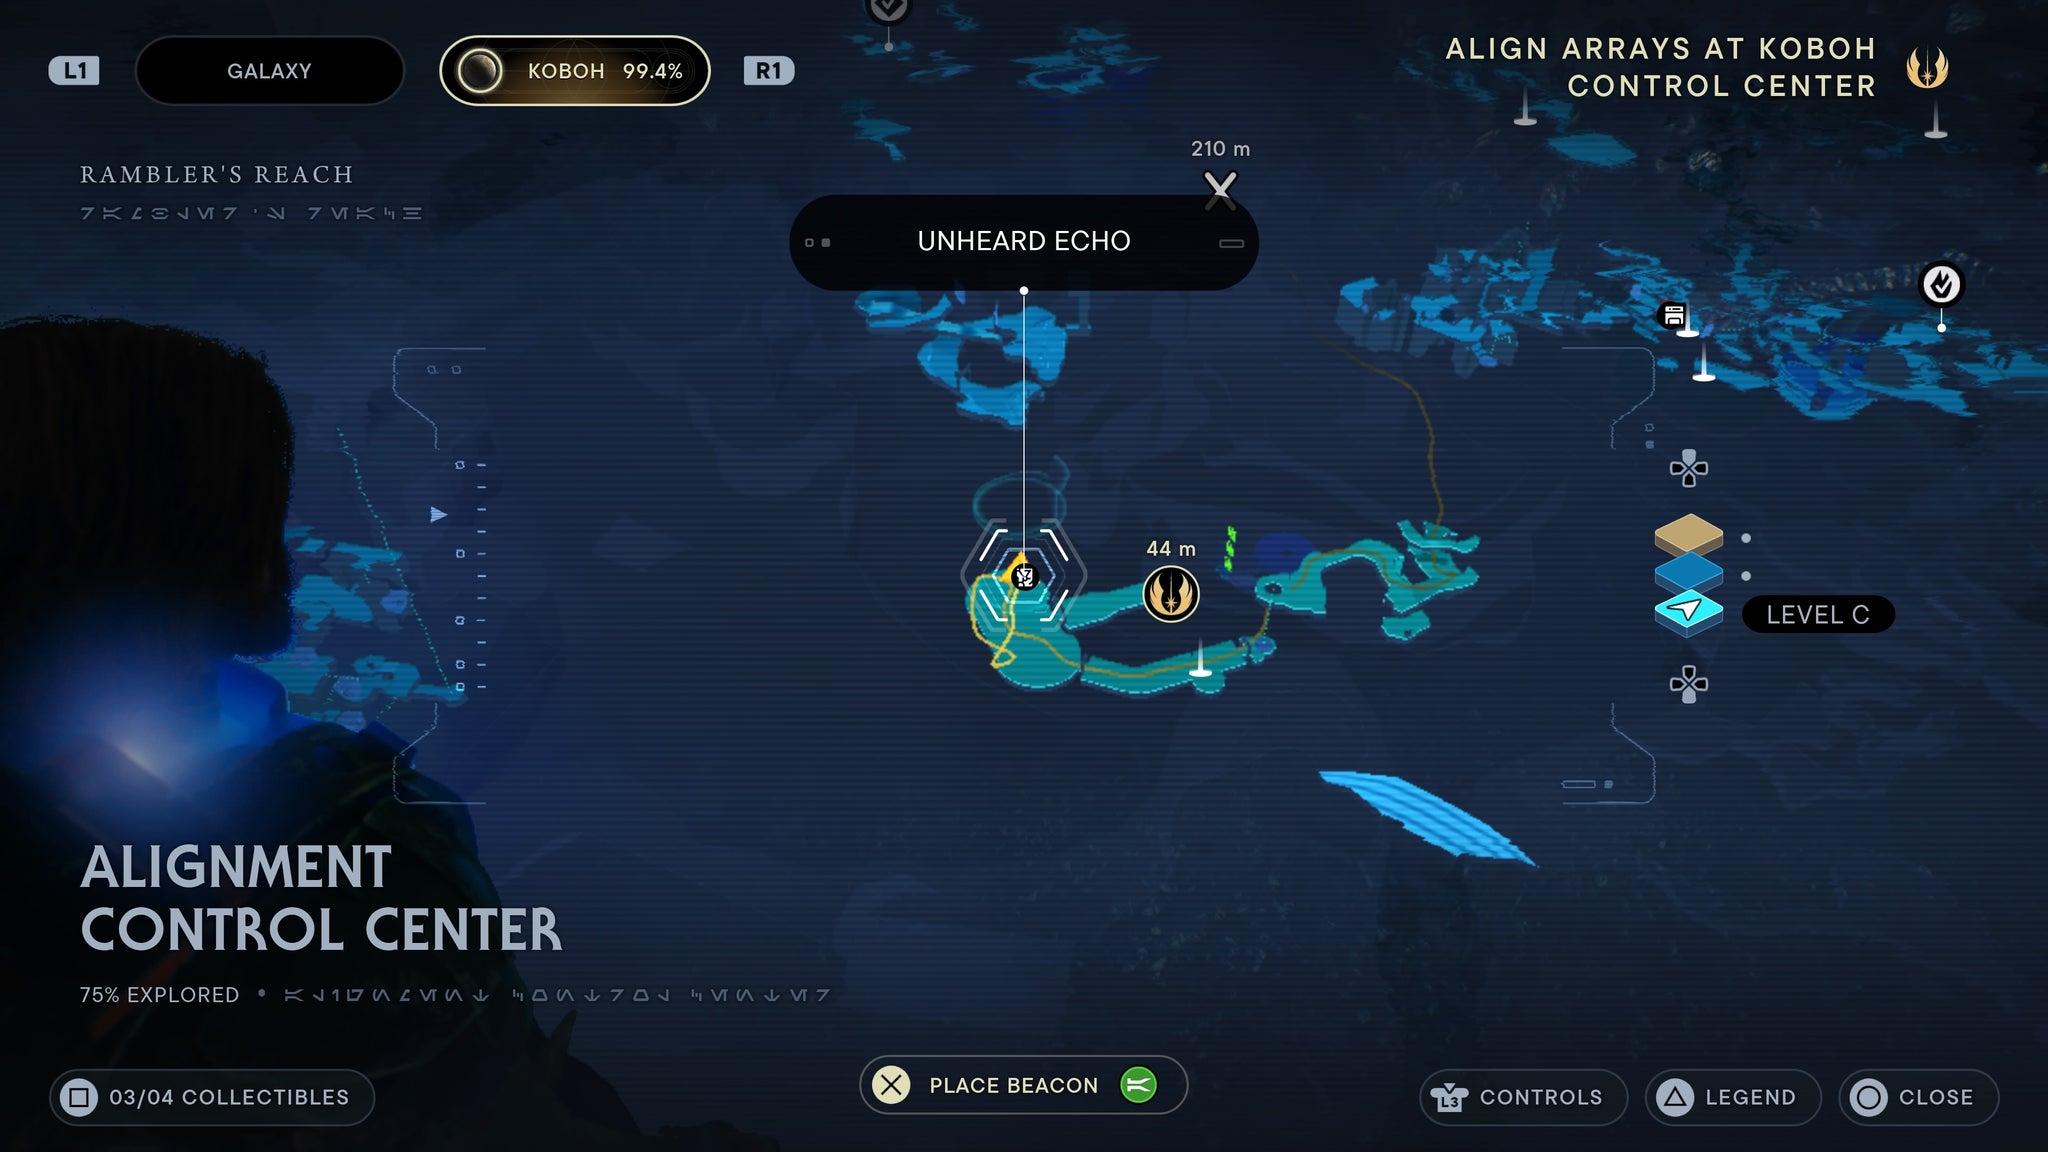
Left of the path to the big machine.
Observation Deck
Just below the observation deck meditation point, you’ll find a scan by a railing.
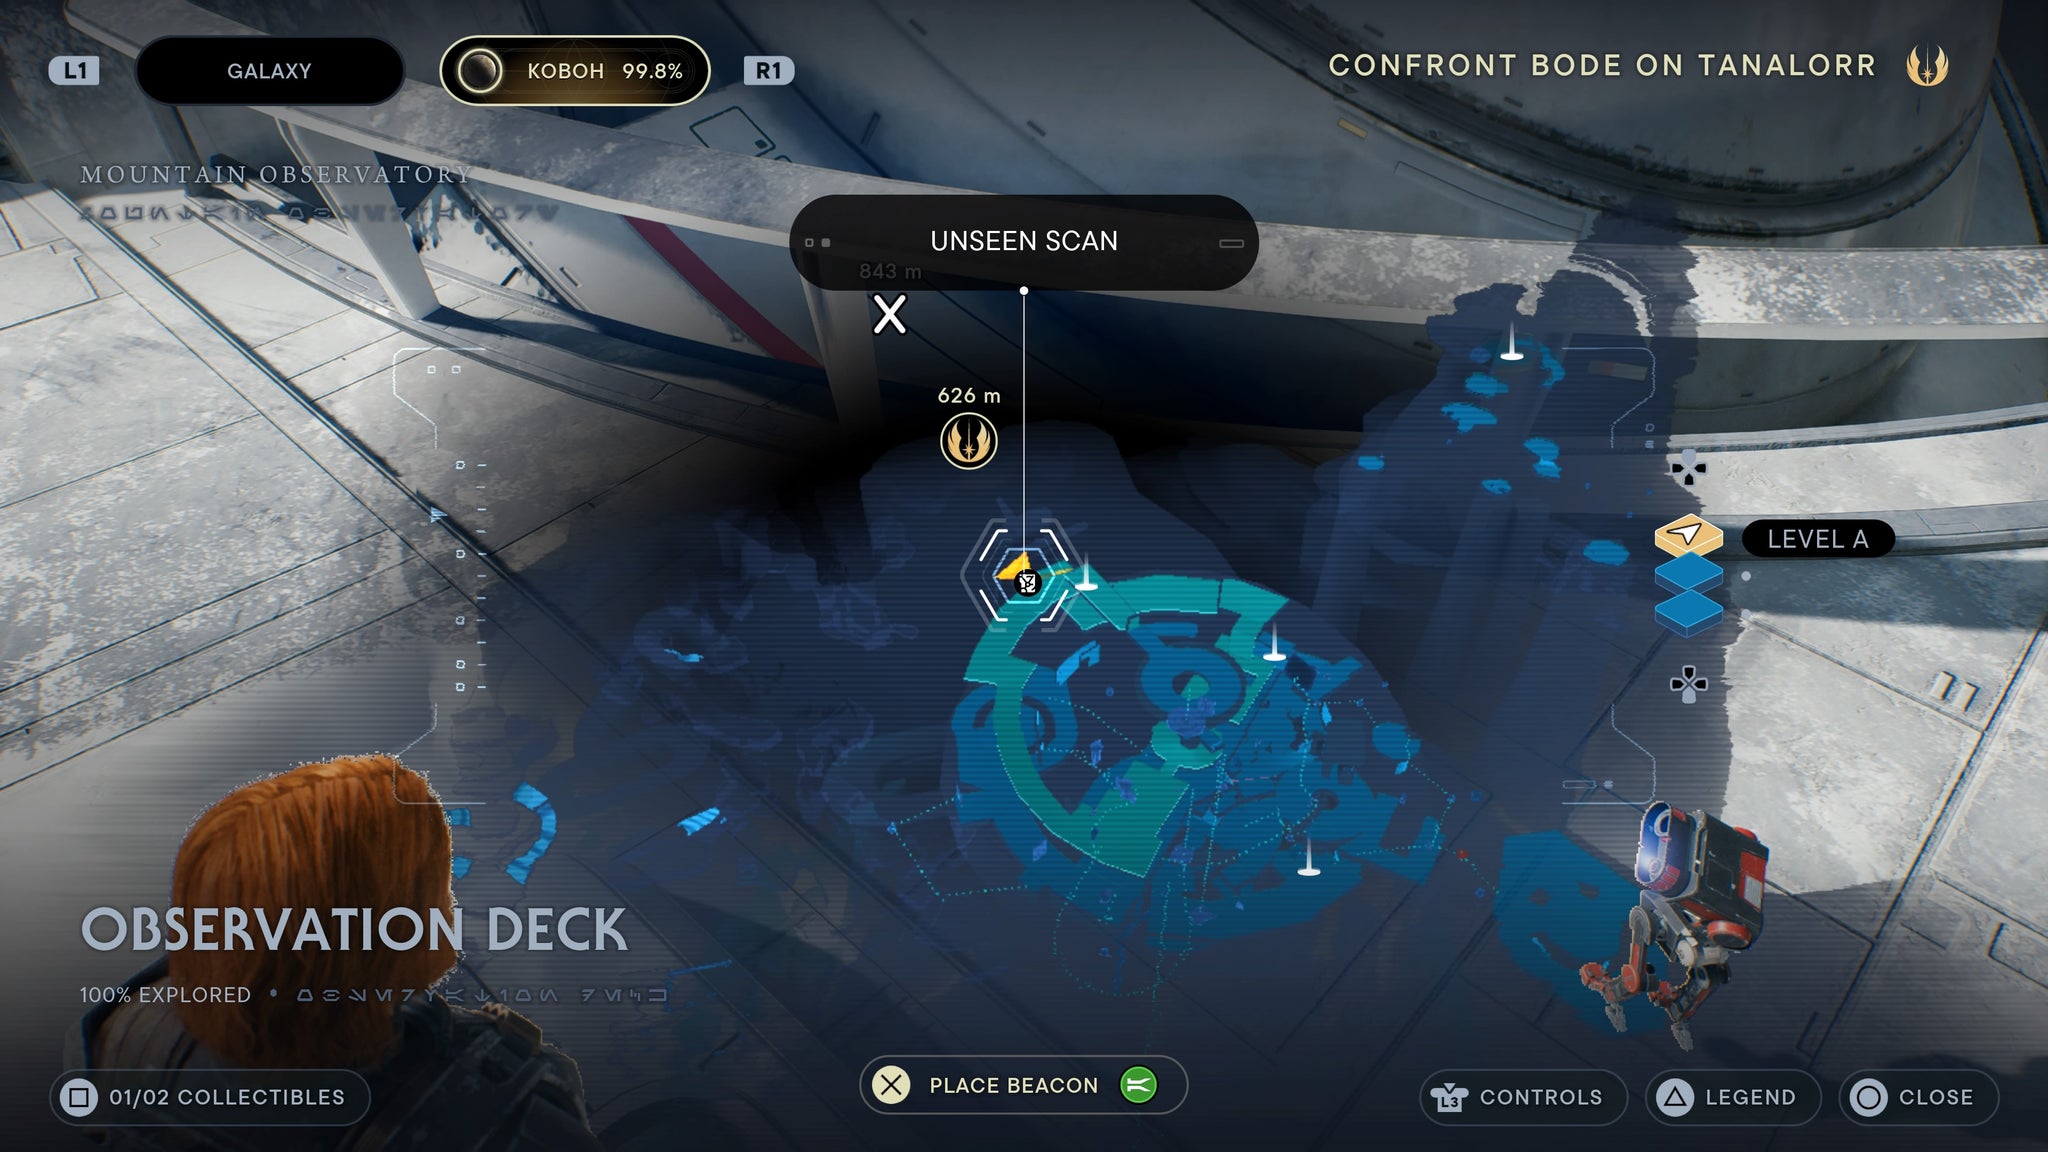
Drop down and hop the railing.
Jedha databank collectable locations
Monastery Walls
From the meditation point, walk right and stick to the cliff wall. You’ll drop down to a shrine that you can scan.
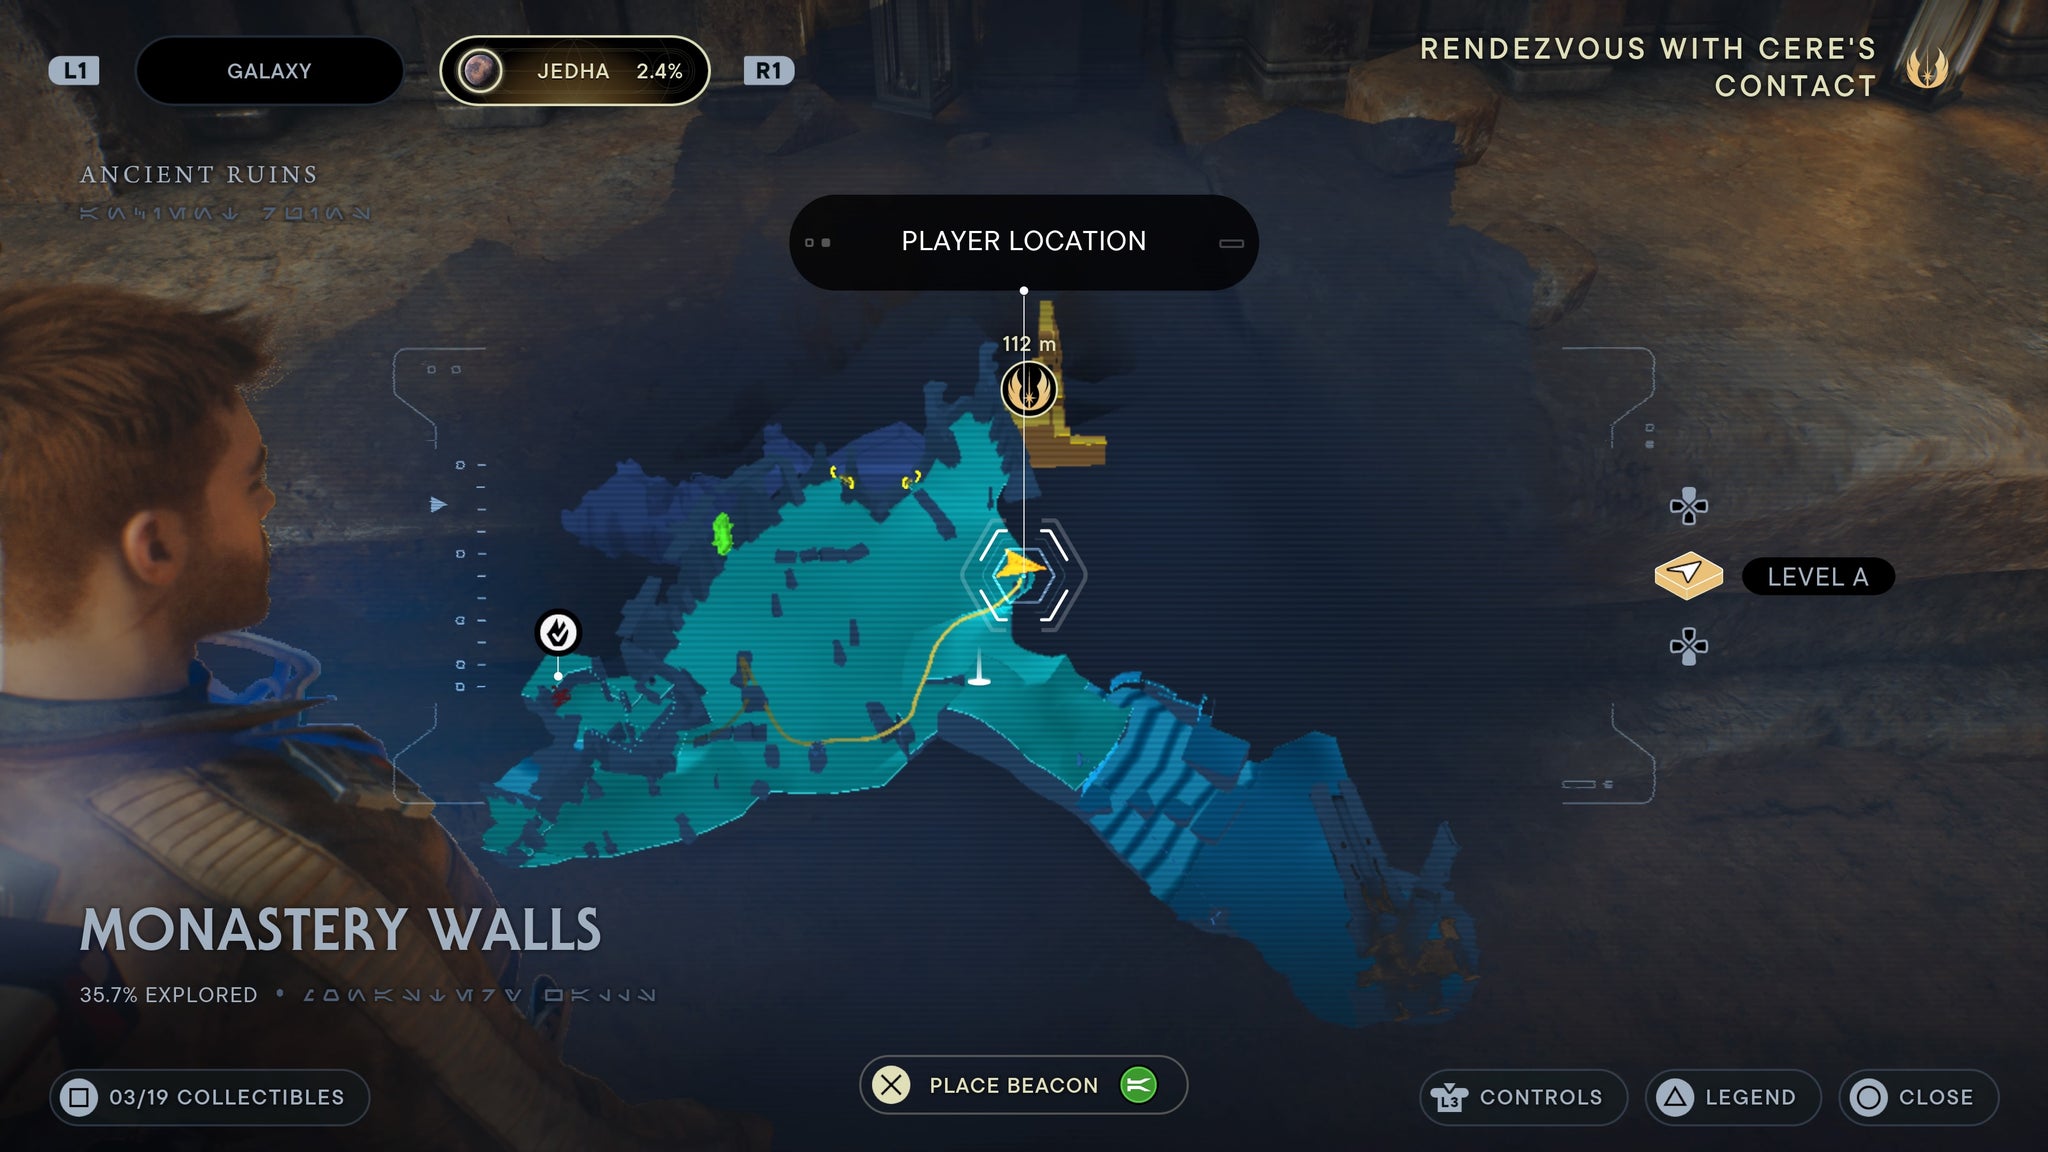
Stay right as you enter the zone, and follow the wall.
From the scorpion ambush pit, swing up to the platform above with all the tiny enemy crabs. You can scan the central stones there.
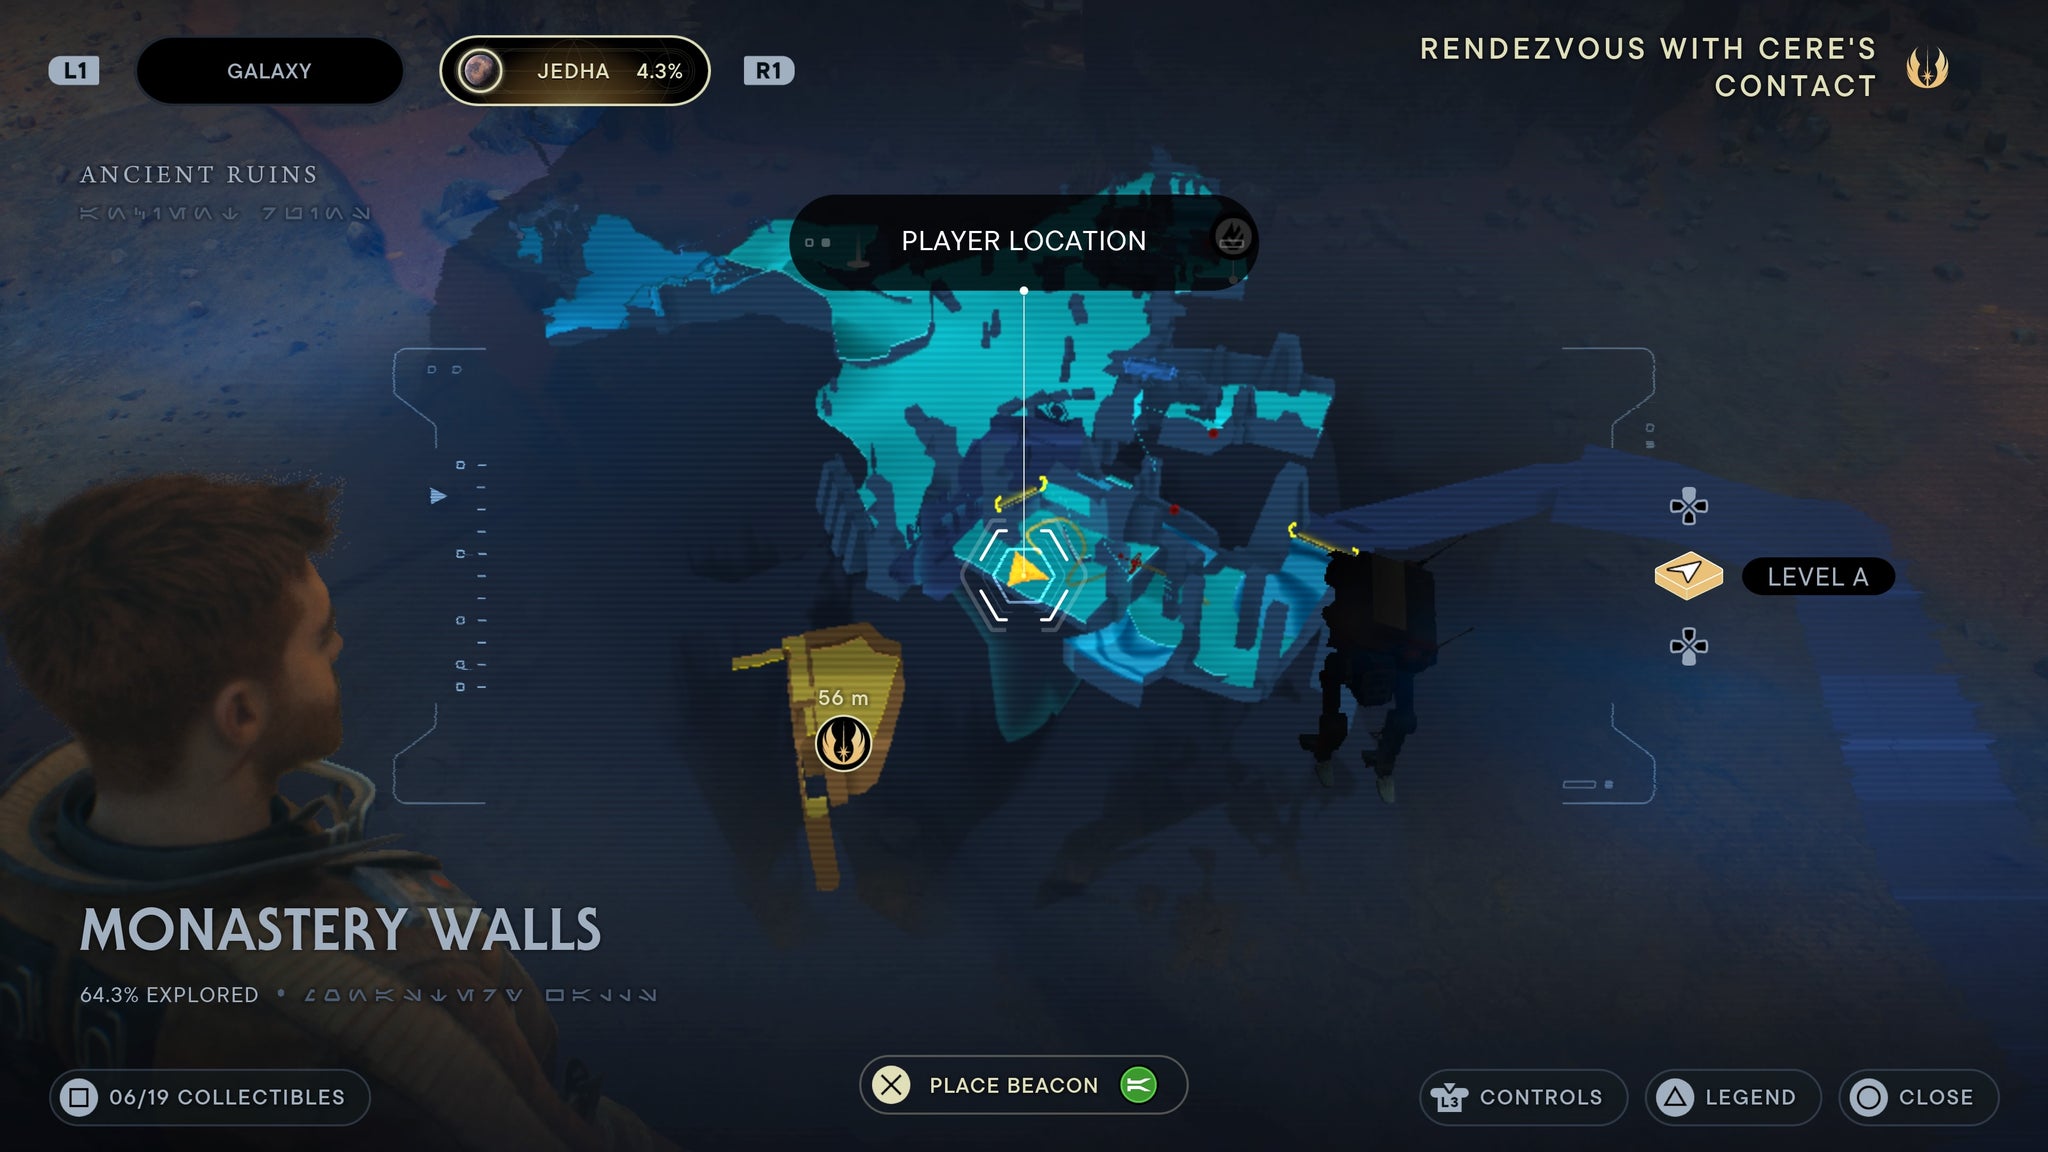
take out the crabs first.
Found on the far left side of the zone, near four small crabs.

By the crabs.
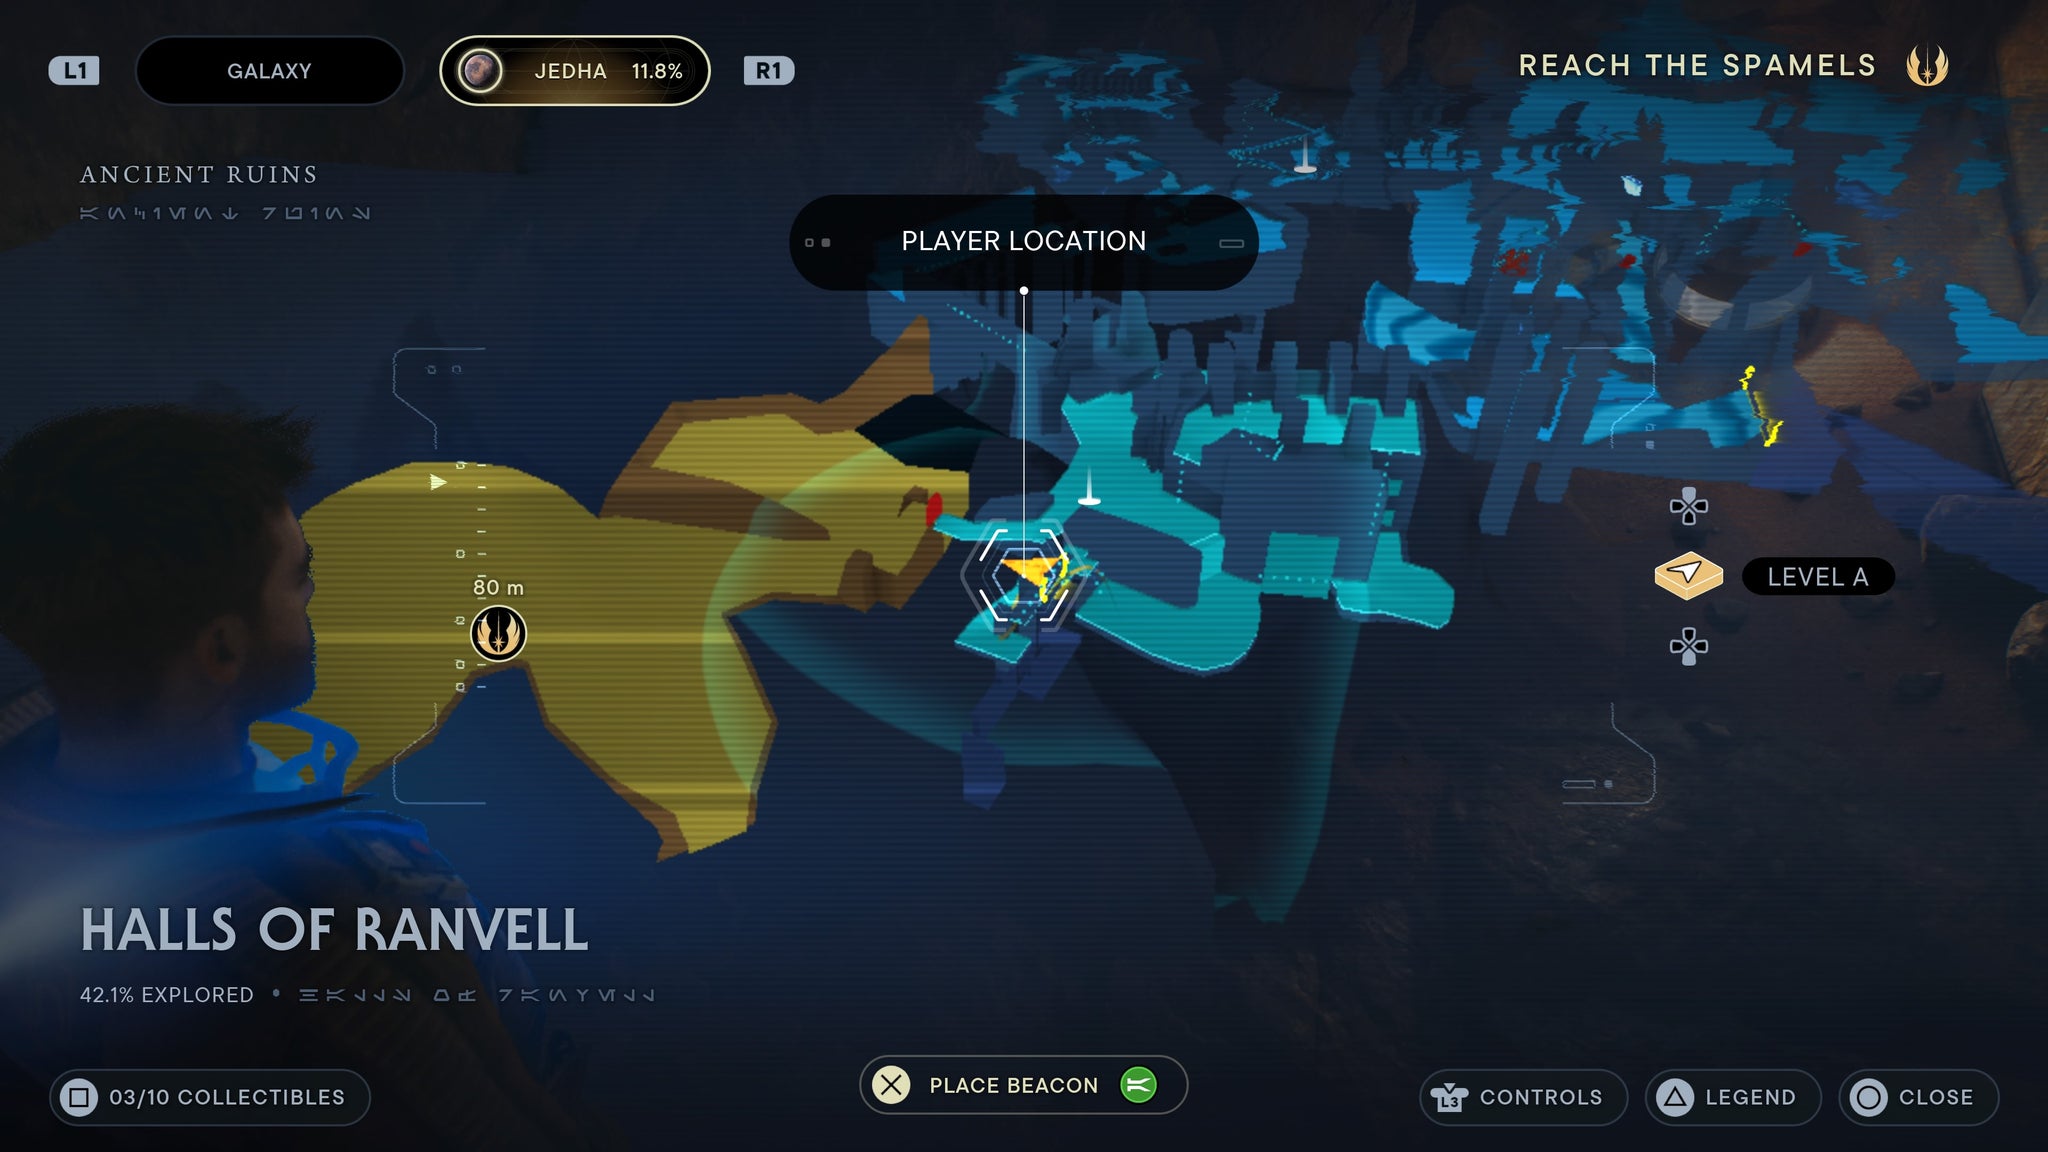
Halls of Ranvell
From the meditation point, walk into the nearby passage and you’ll find a force echo.
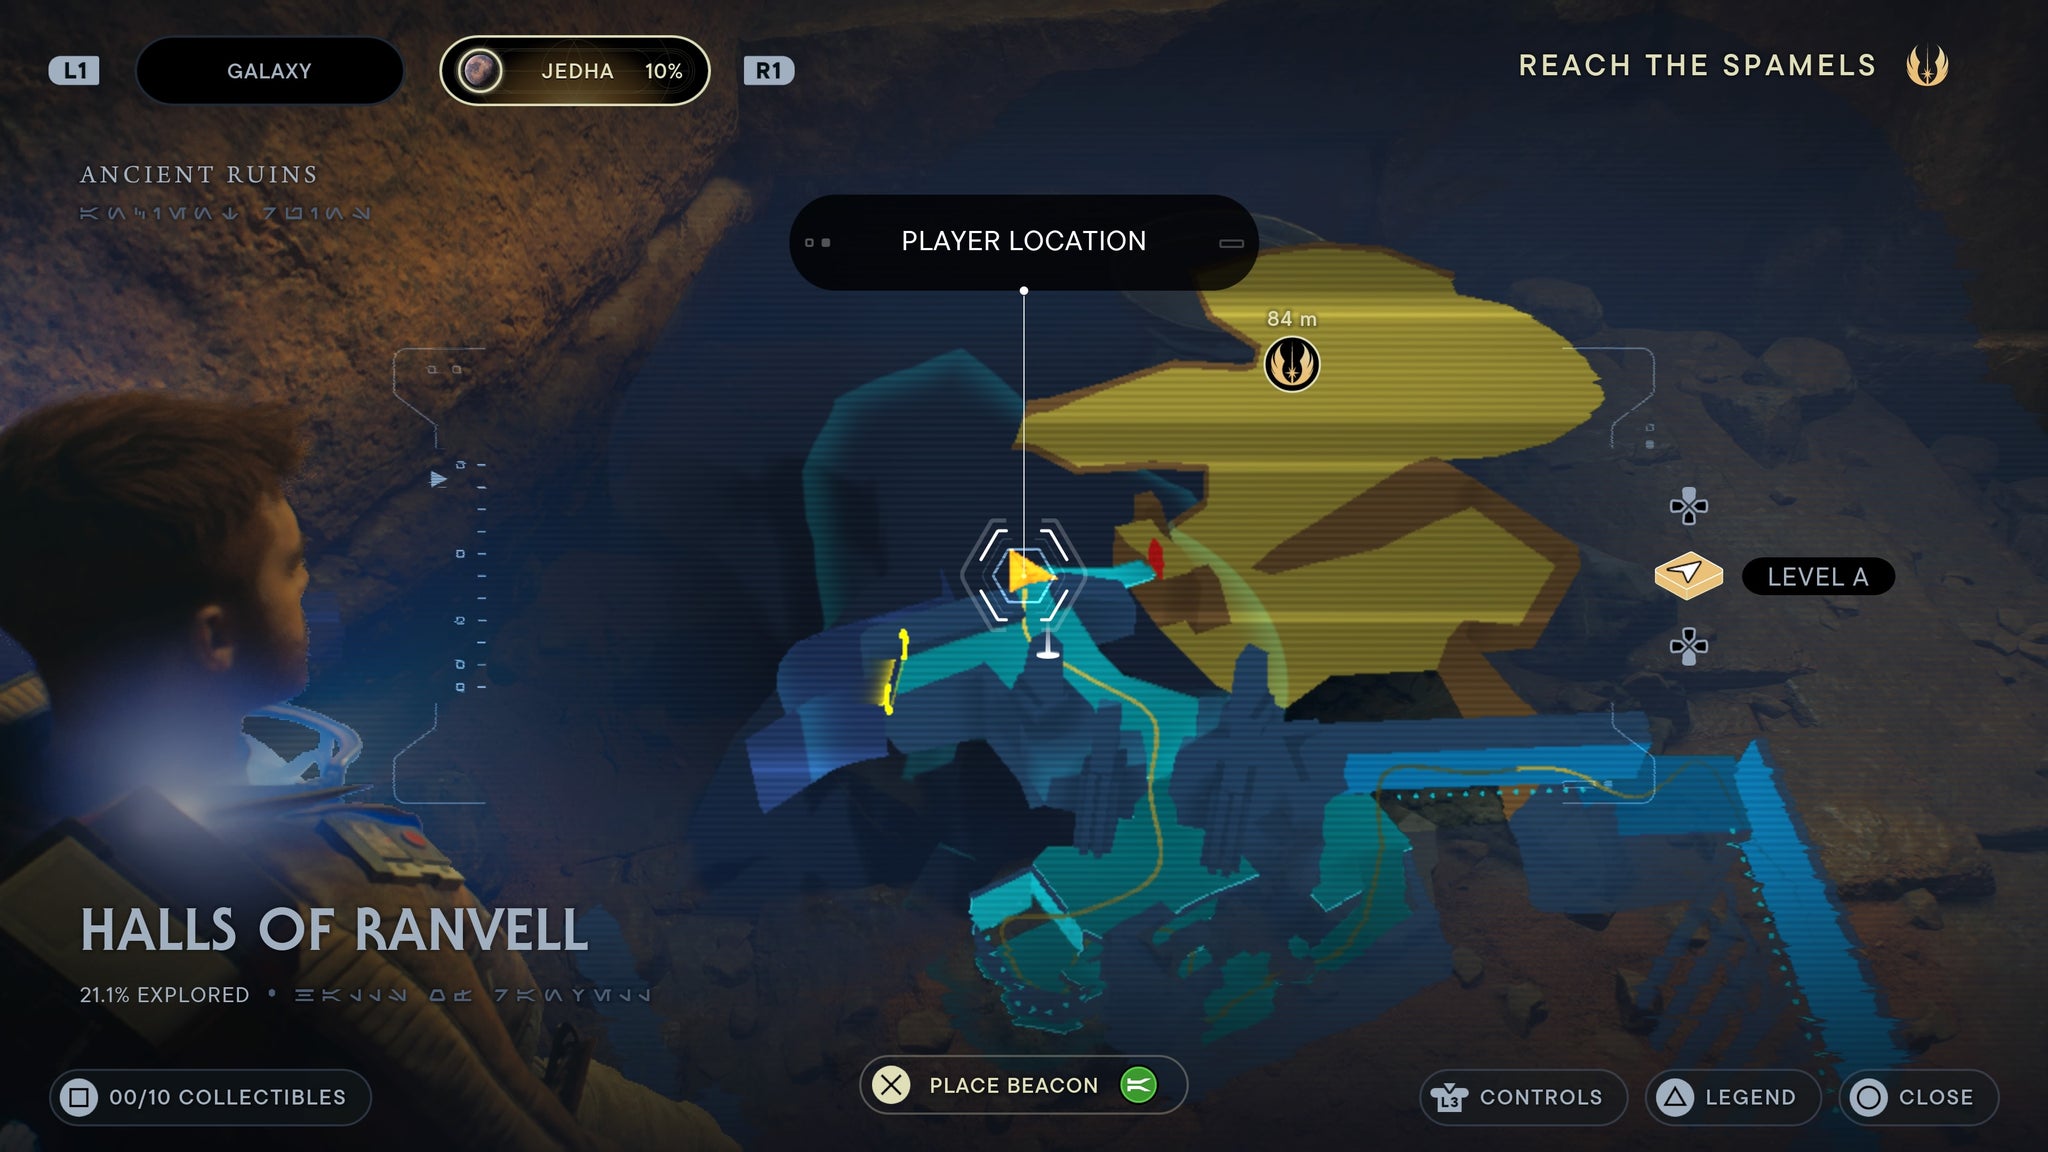
It’s just a short walk from the meditiaton point.
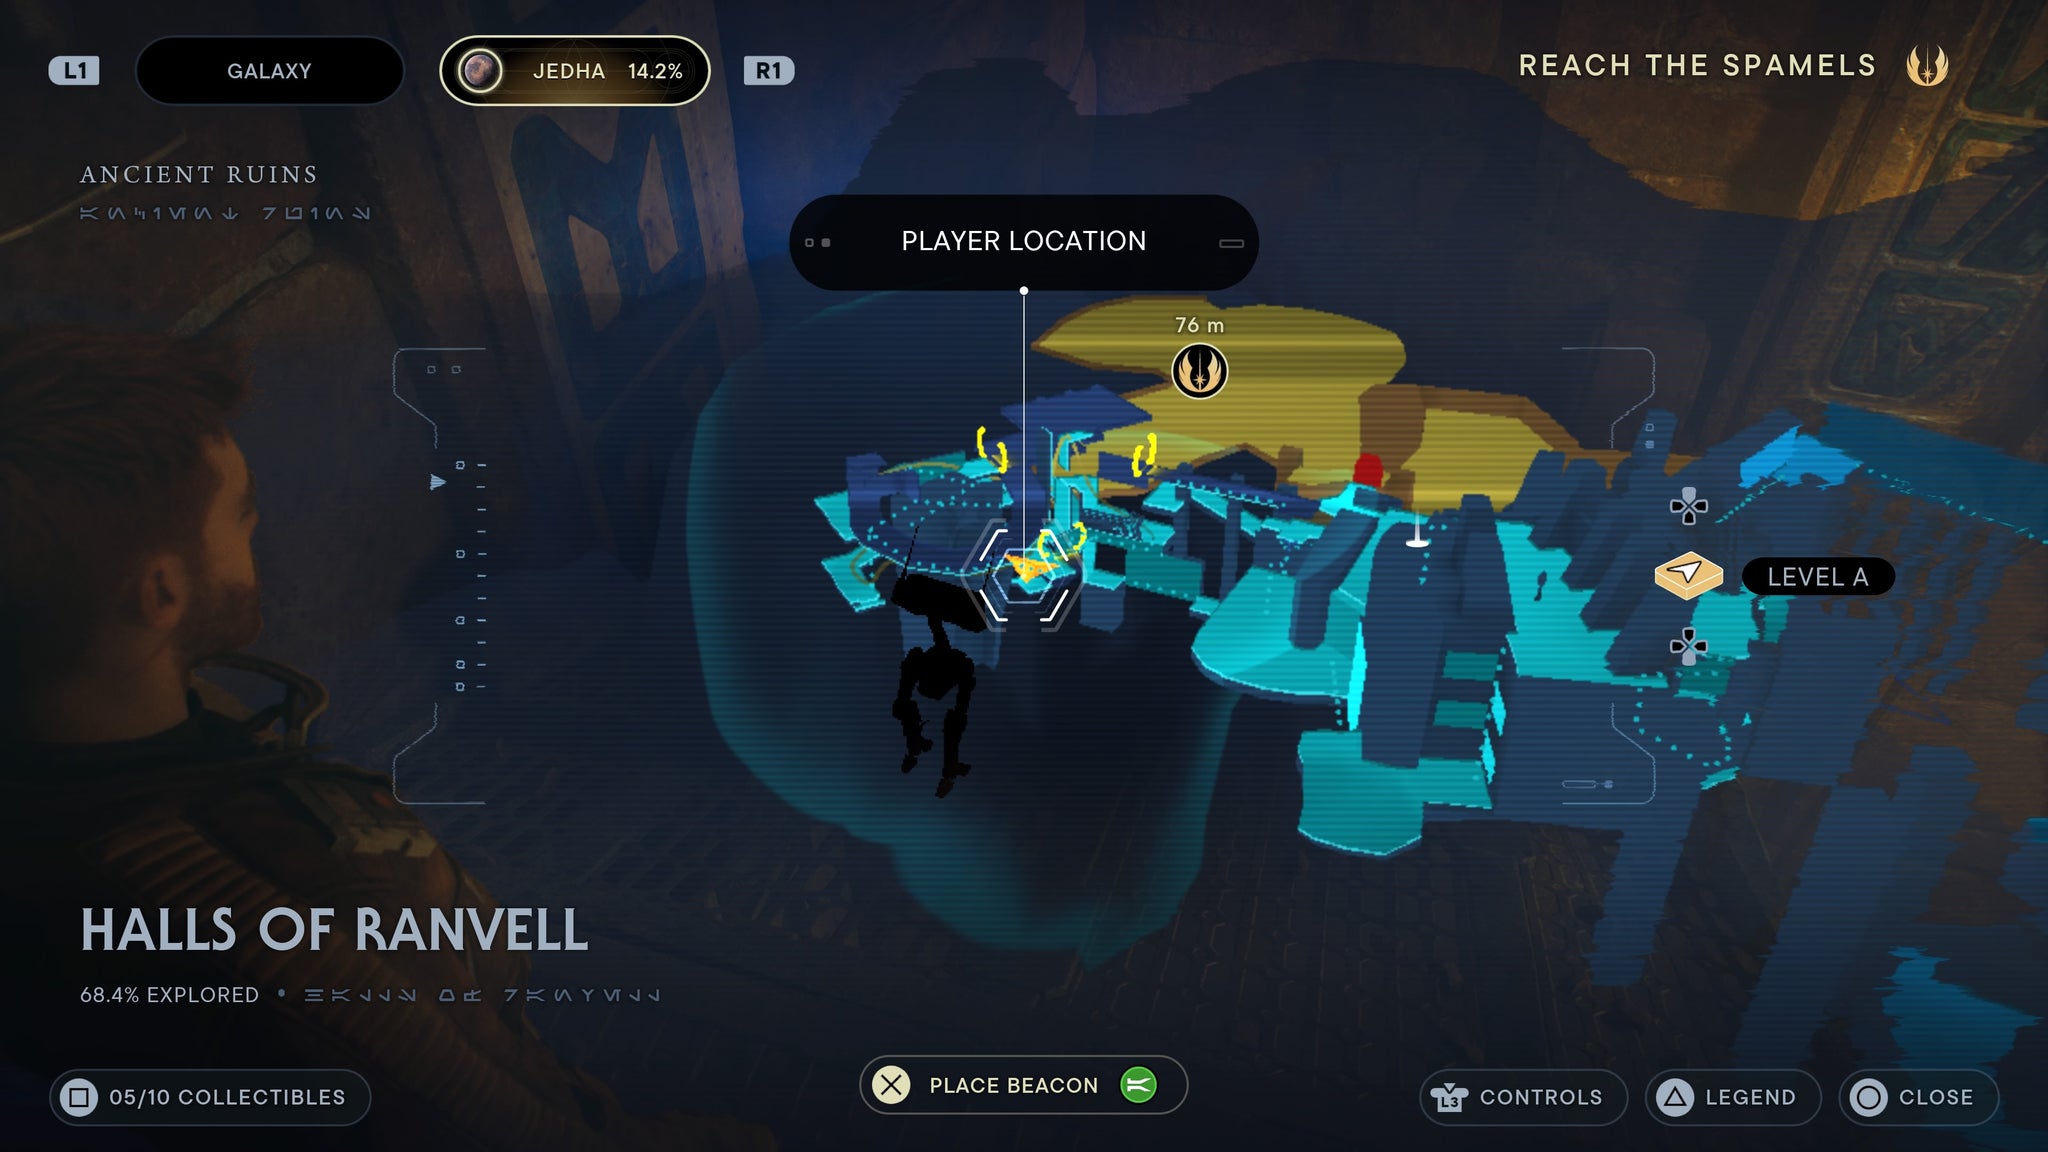
From the meditation point, walk down to the ledge with the storm troopers. Then grapple up into the nearby wall. From there, cross over via the ceiling and follow the path downstairs. To your left, past the flame trooper, is a shrine you can scan.
You may have missed it if you rushed up.
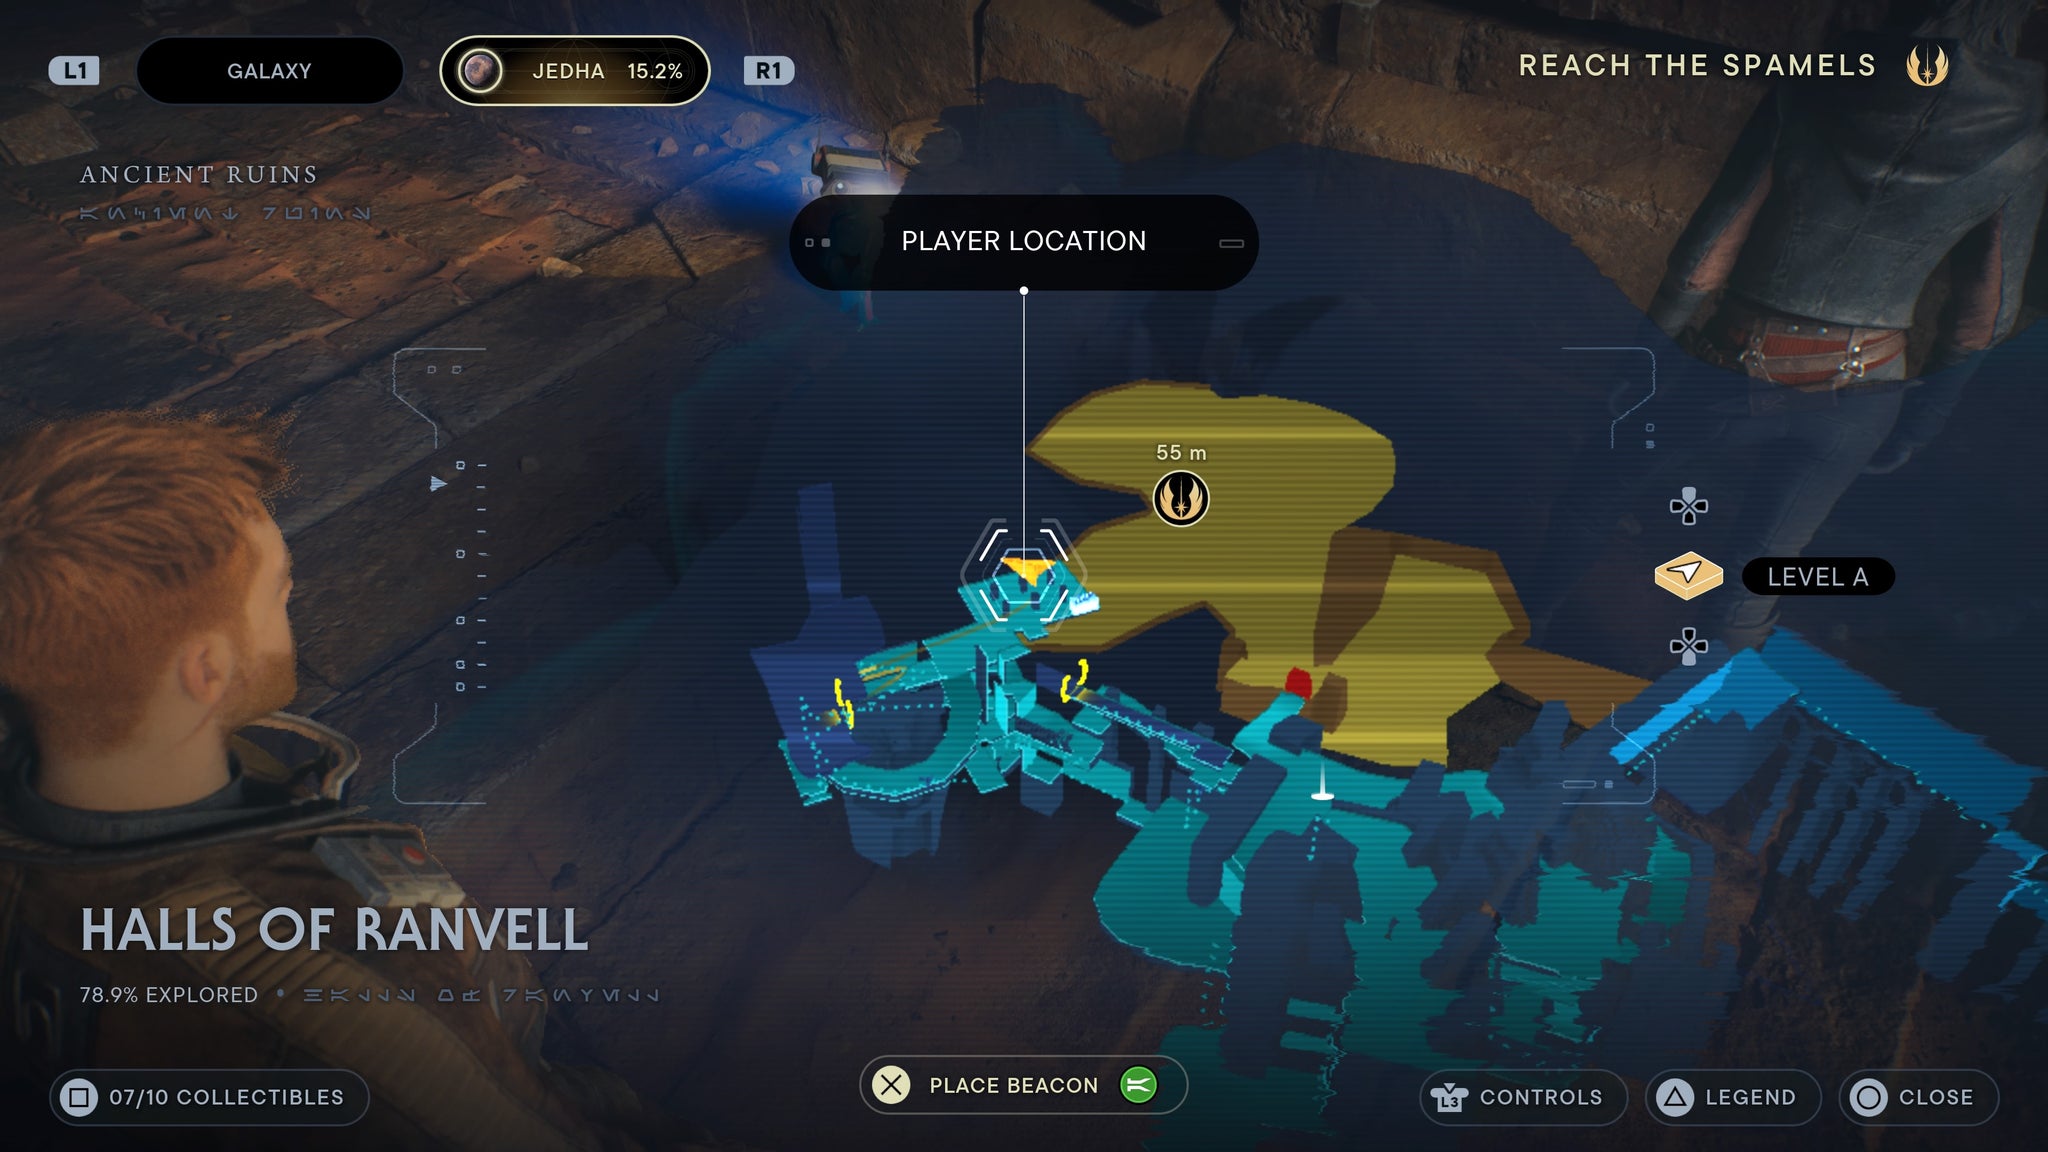
Proceed through the Halls until you reach a large glowing red room with many walls you can run across. Scale up one floor, then make your way inside a large stairwell headed down. At the bottom, is a scan.
Head all the way down.
In the room with the workbench and several storm troopers, scan the shrine in the wall
Built into the wall by the workbench!
Divine Oasis
Next to the tent, at the centre.
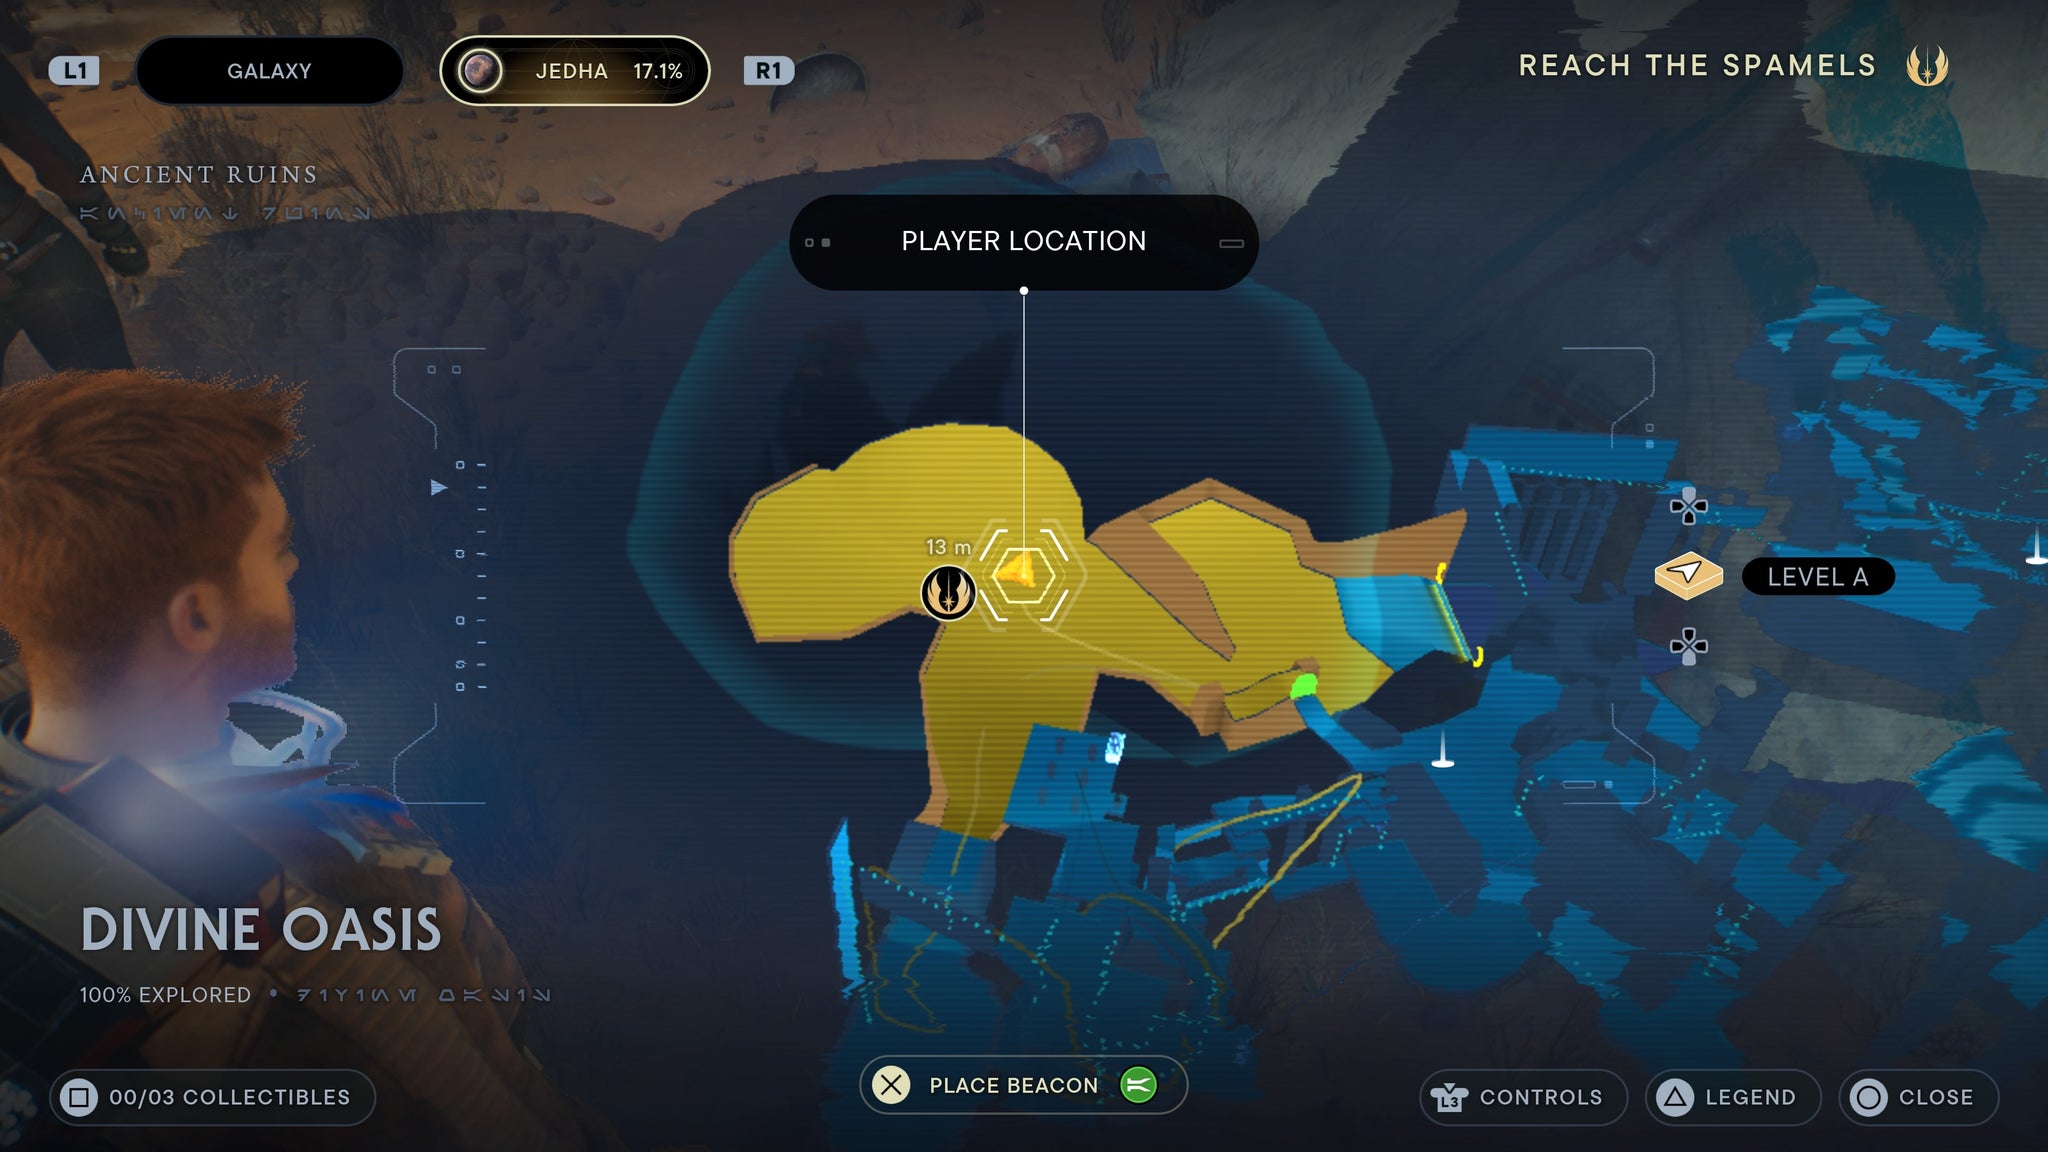
By the tent.
The Archive
From the meditation point, walk up the ramp. You’ll find a force echo in the corner in the next room.
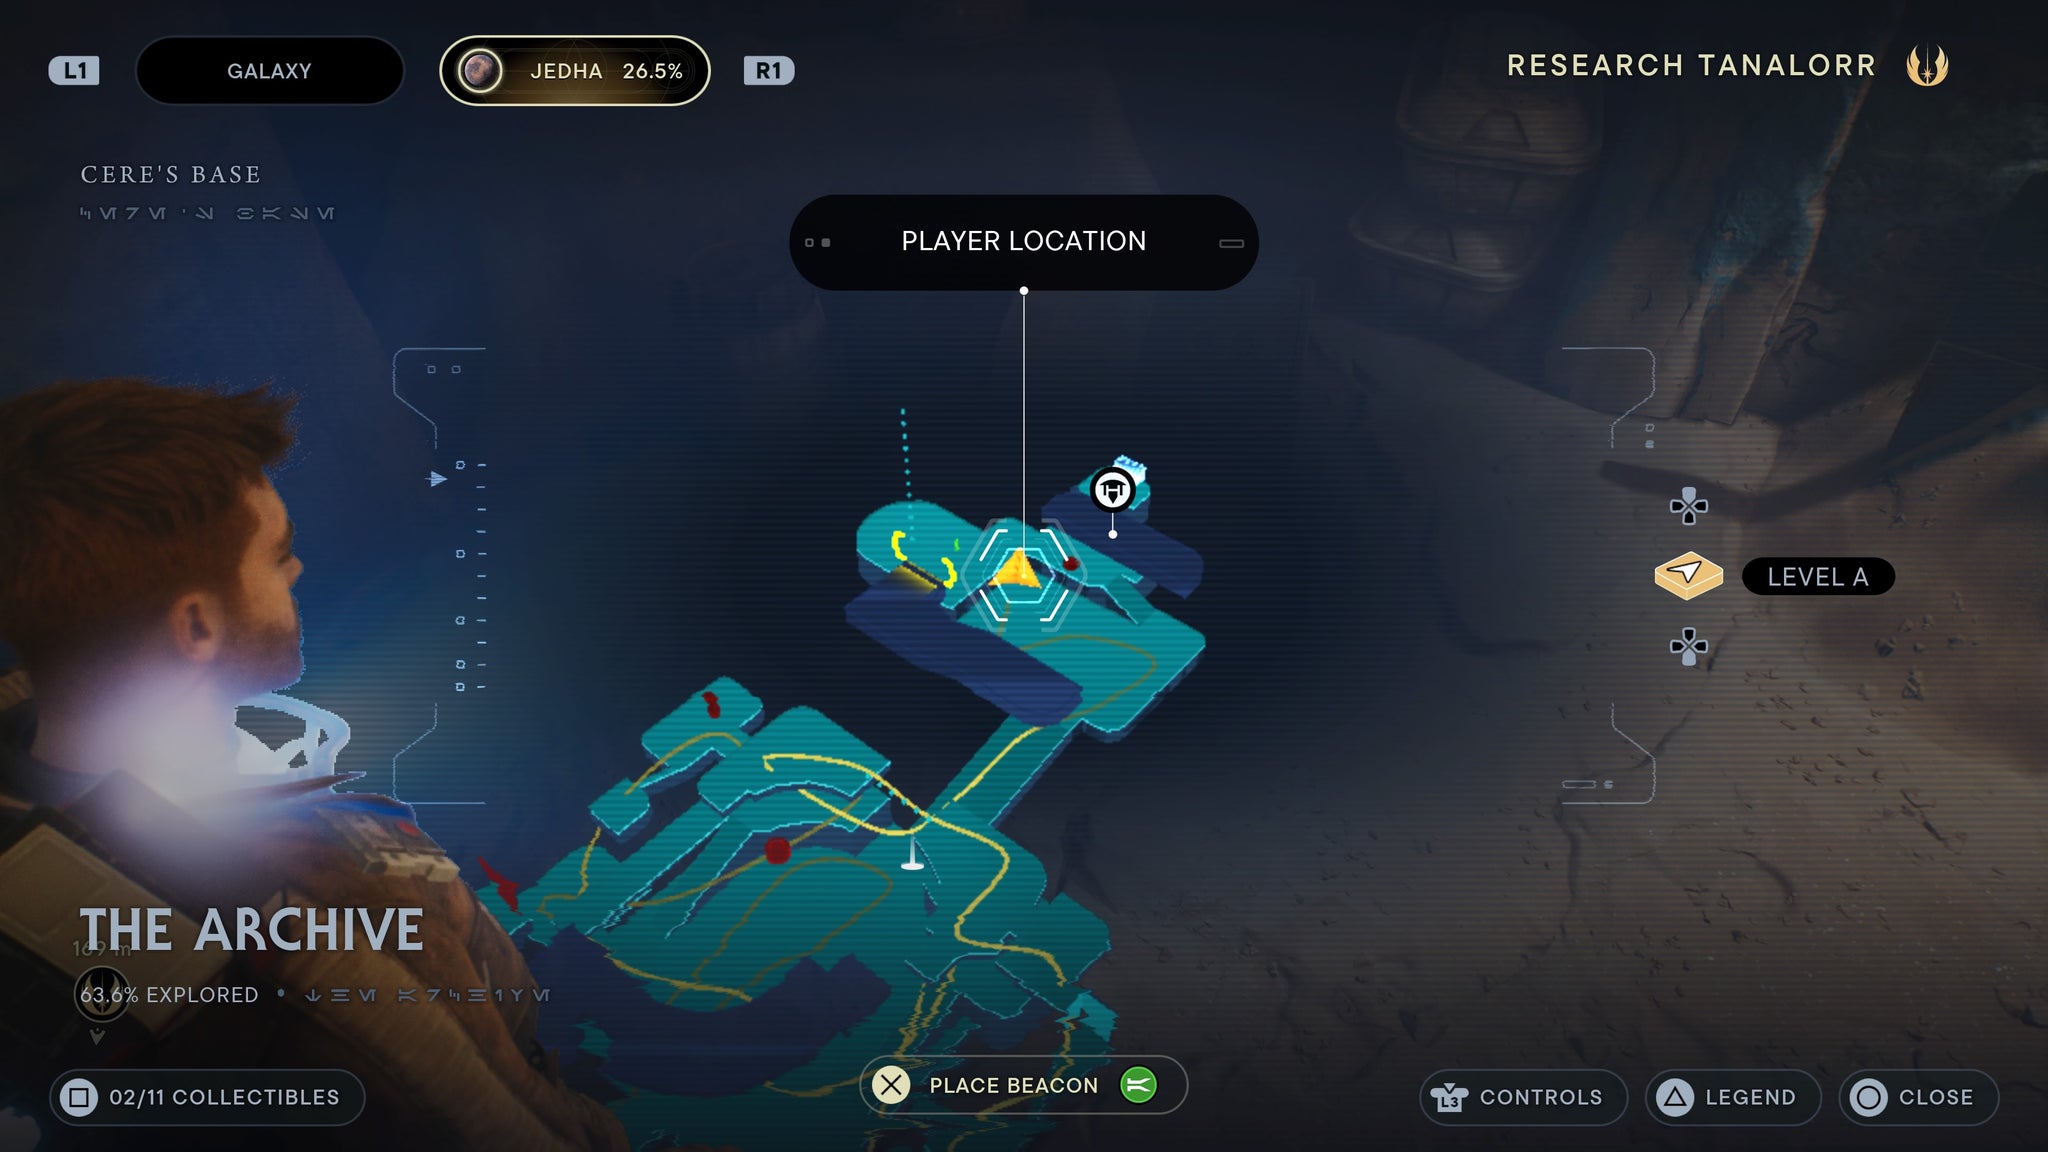
Right next to the medtitation point.
From the workbench, turn around and jump up to the platform to your right. From there, follow the path and you’ll find a force echo.

By the workbench.
Desert Passages
Requires acquisition of both strange devices on The Shattered Moon and Koboh. Follow Merrin and the path to the rest of jedha will be open. As you pass through the Desert Passages, look left for a force echo.
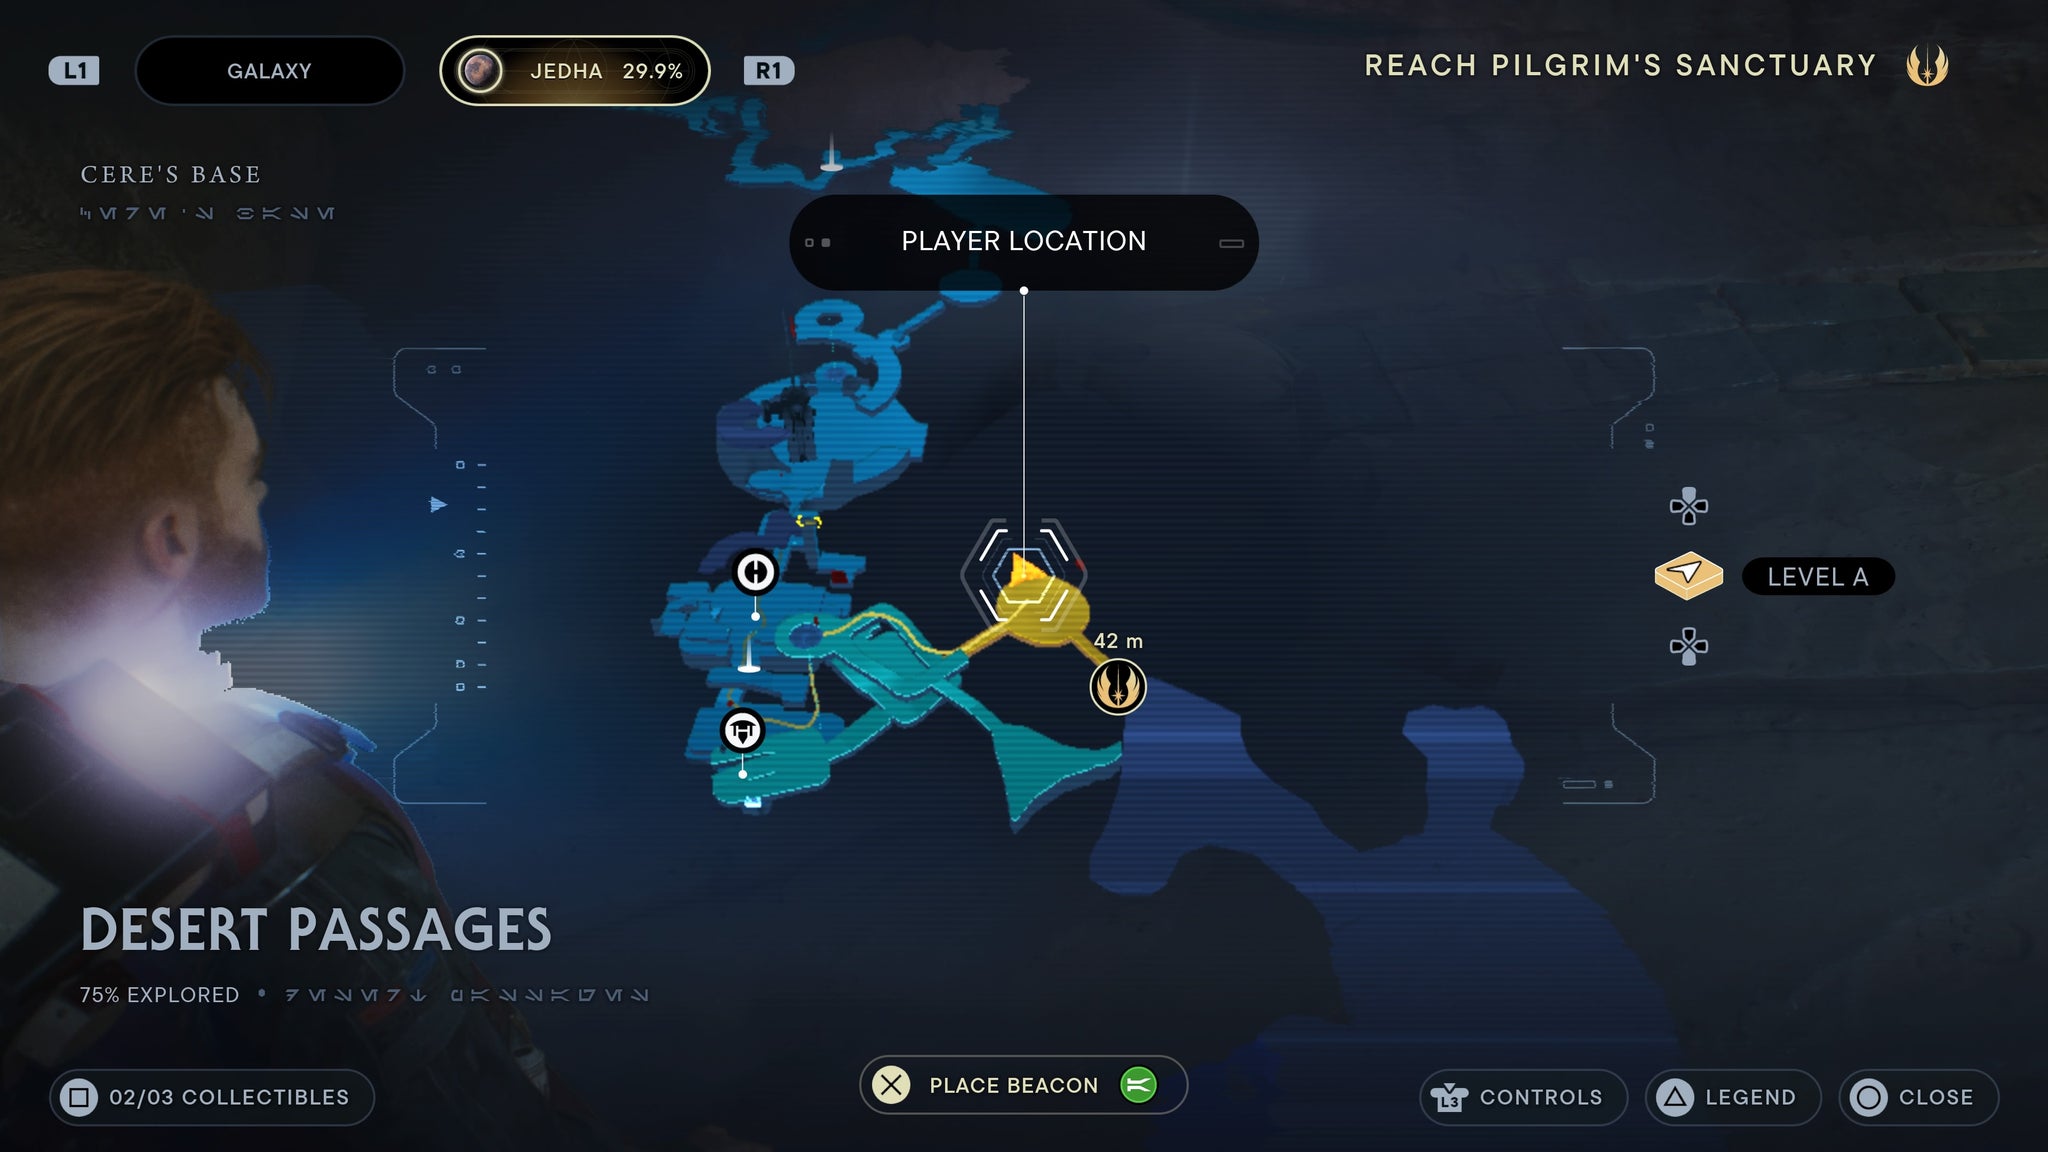
A force echo on the left as you exit.
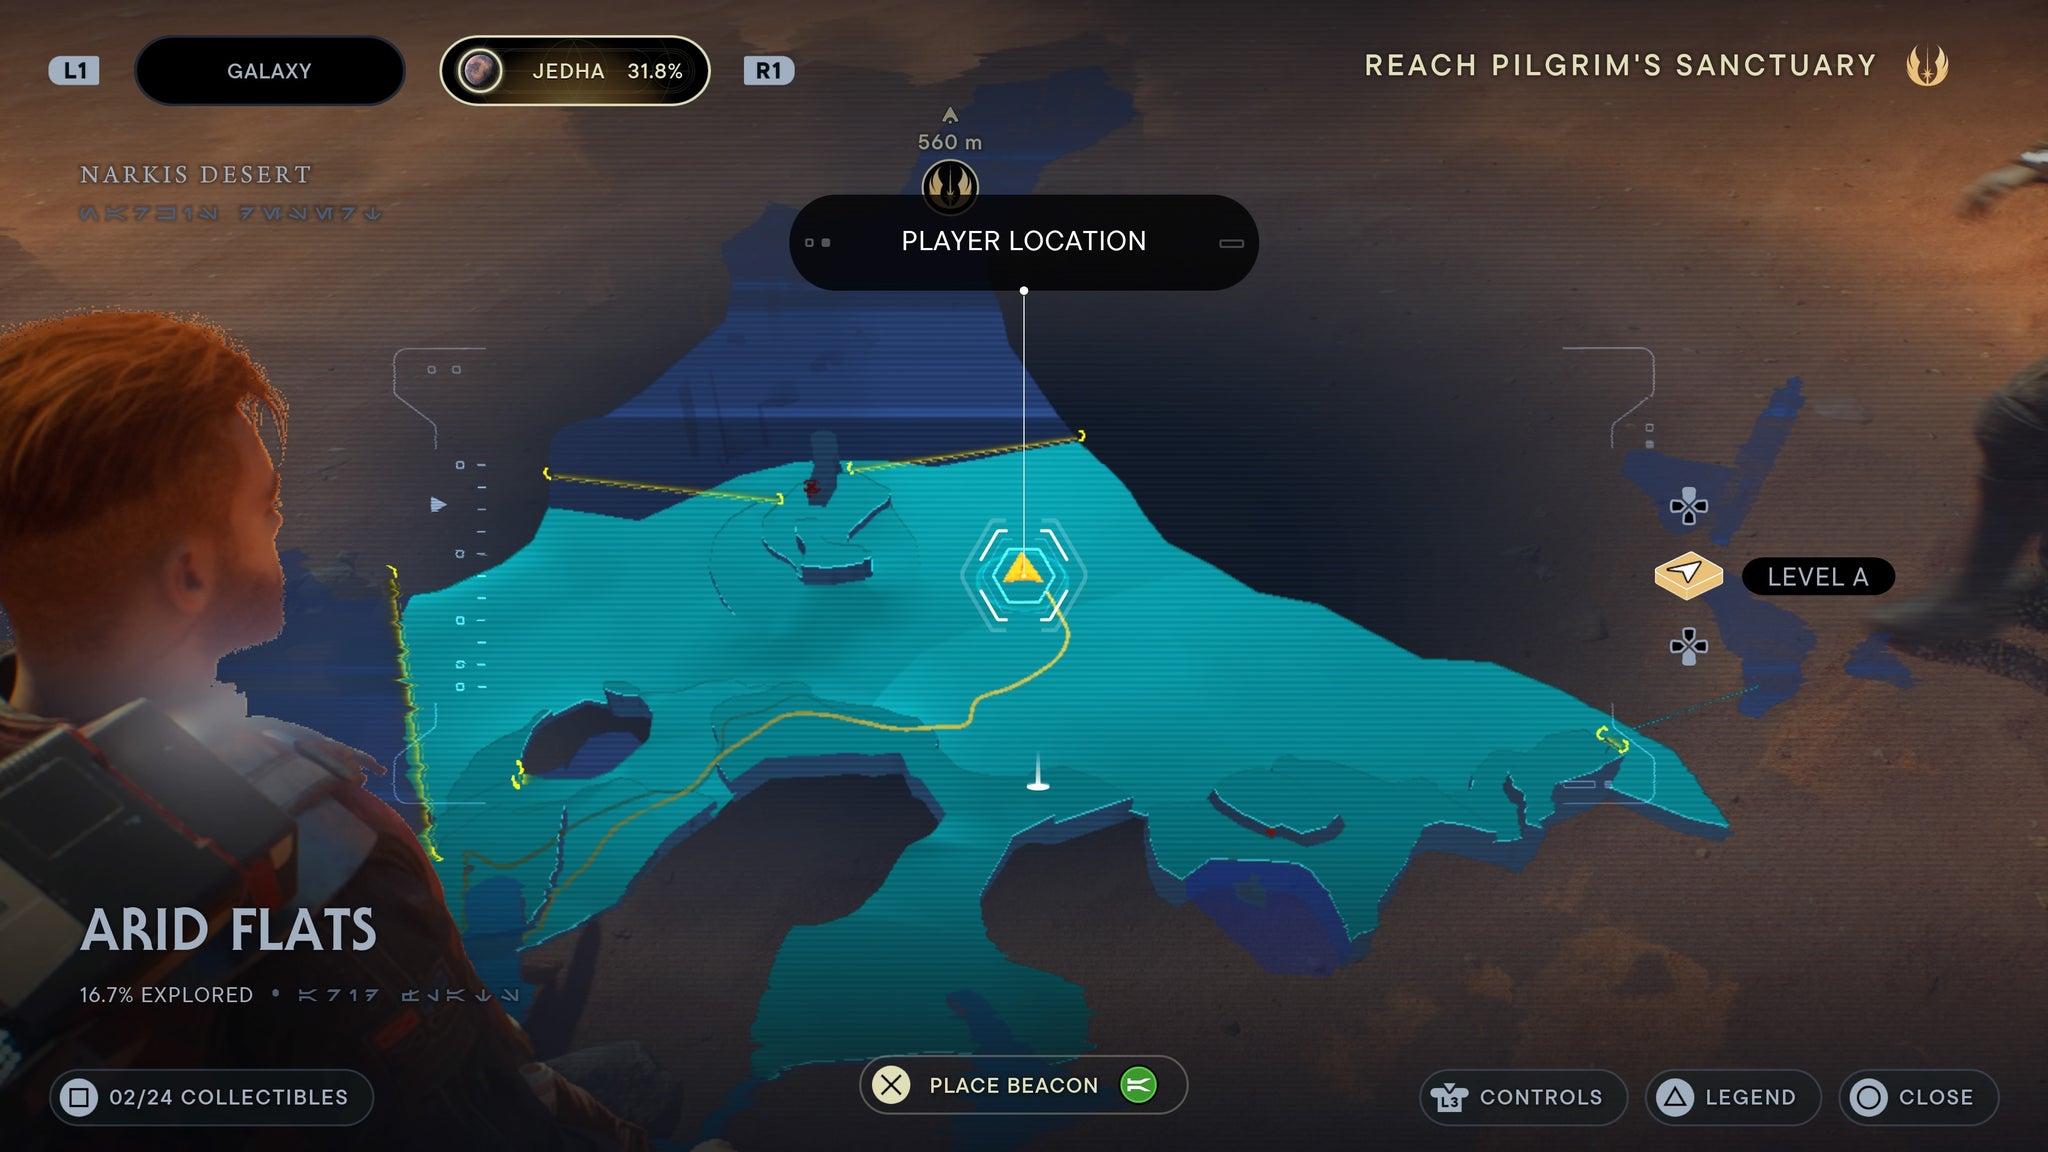
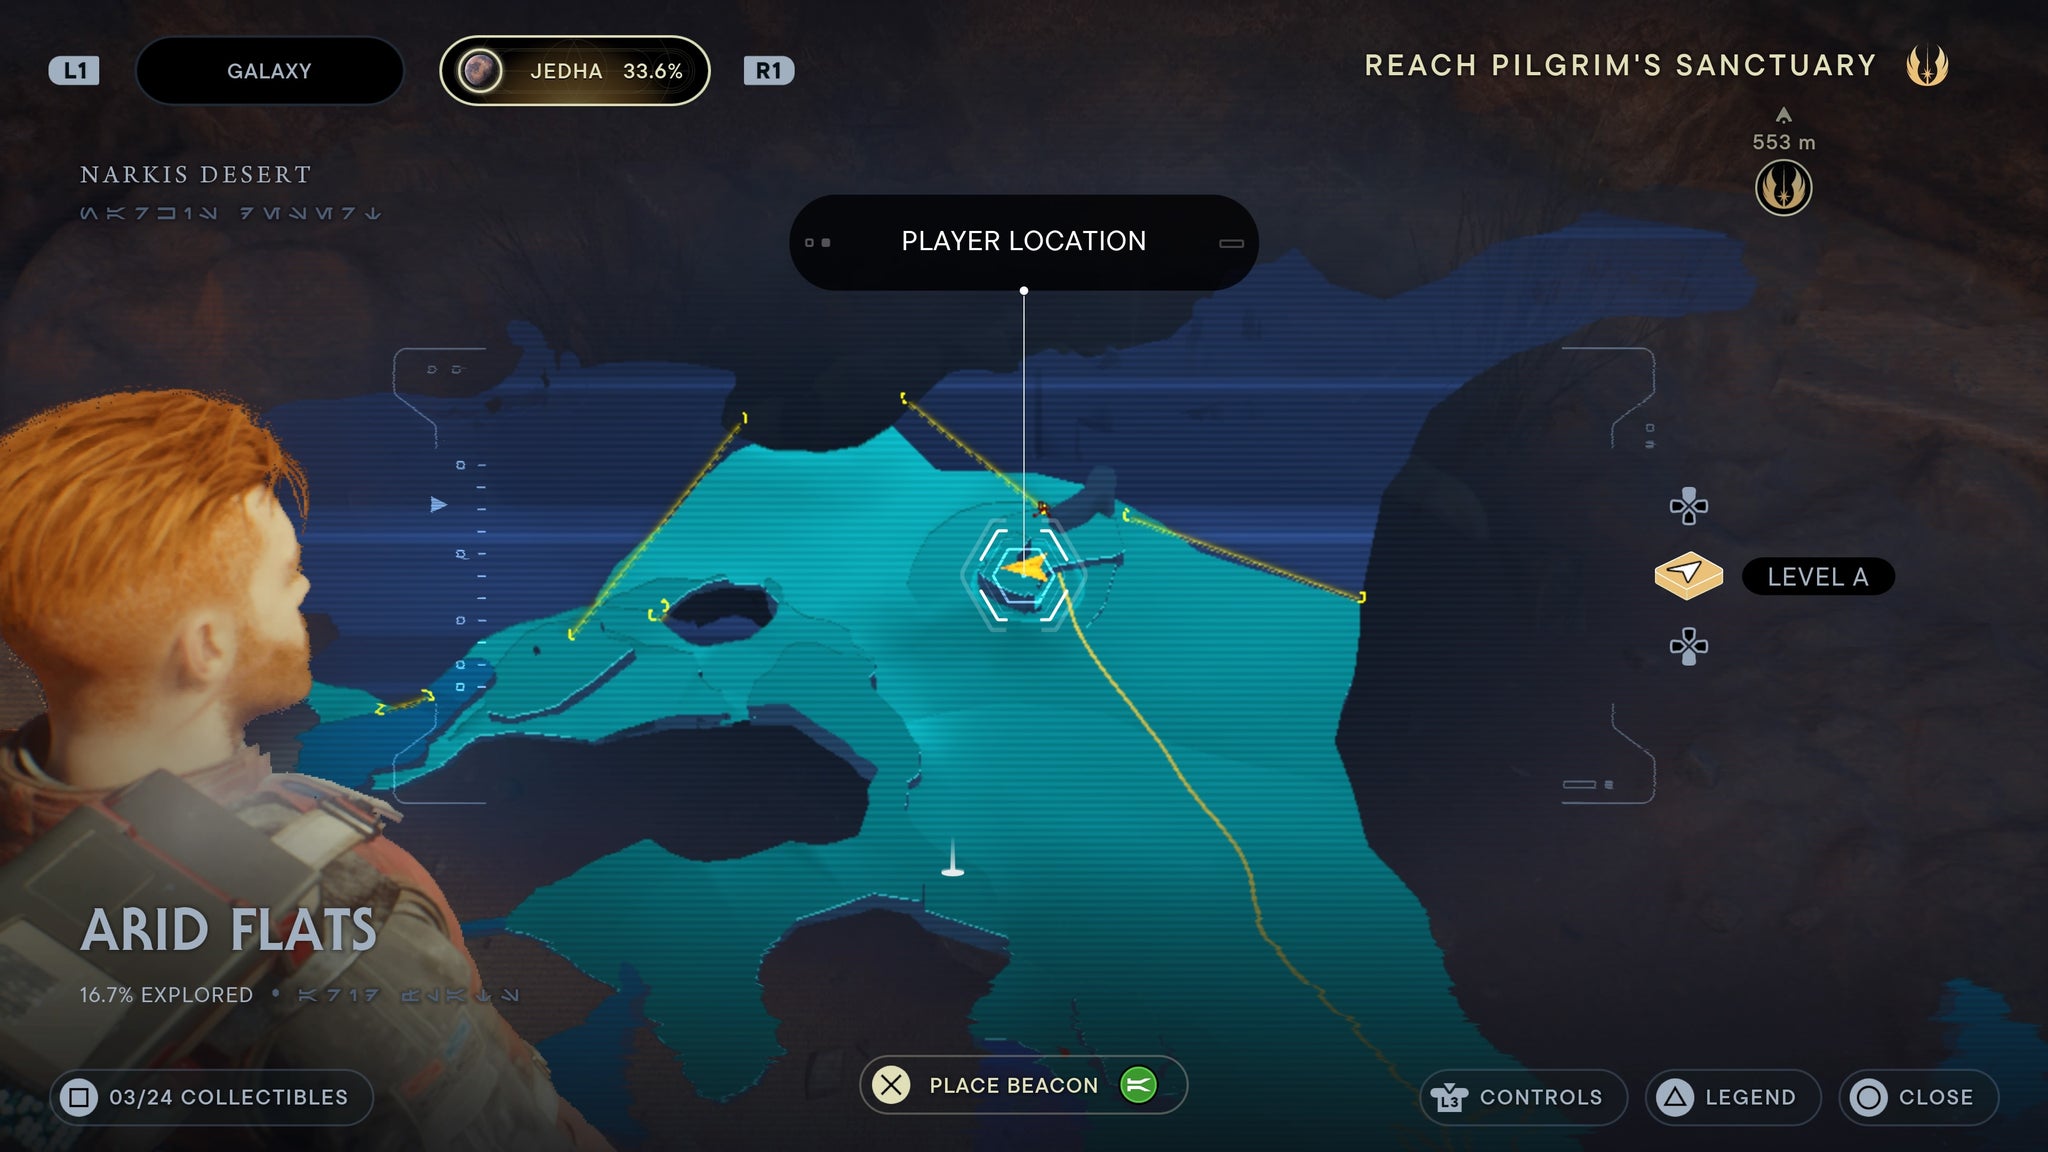
Arid Flats
As you enter Arid Flats from the Desert Passages, look right. You’ll see a force echo.
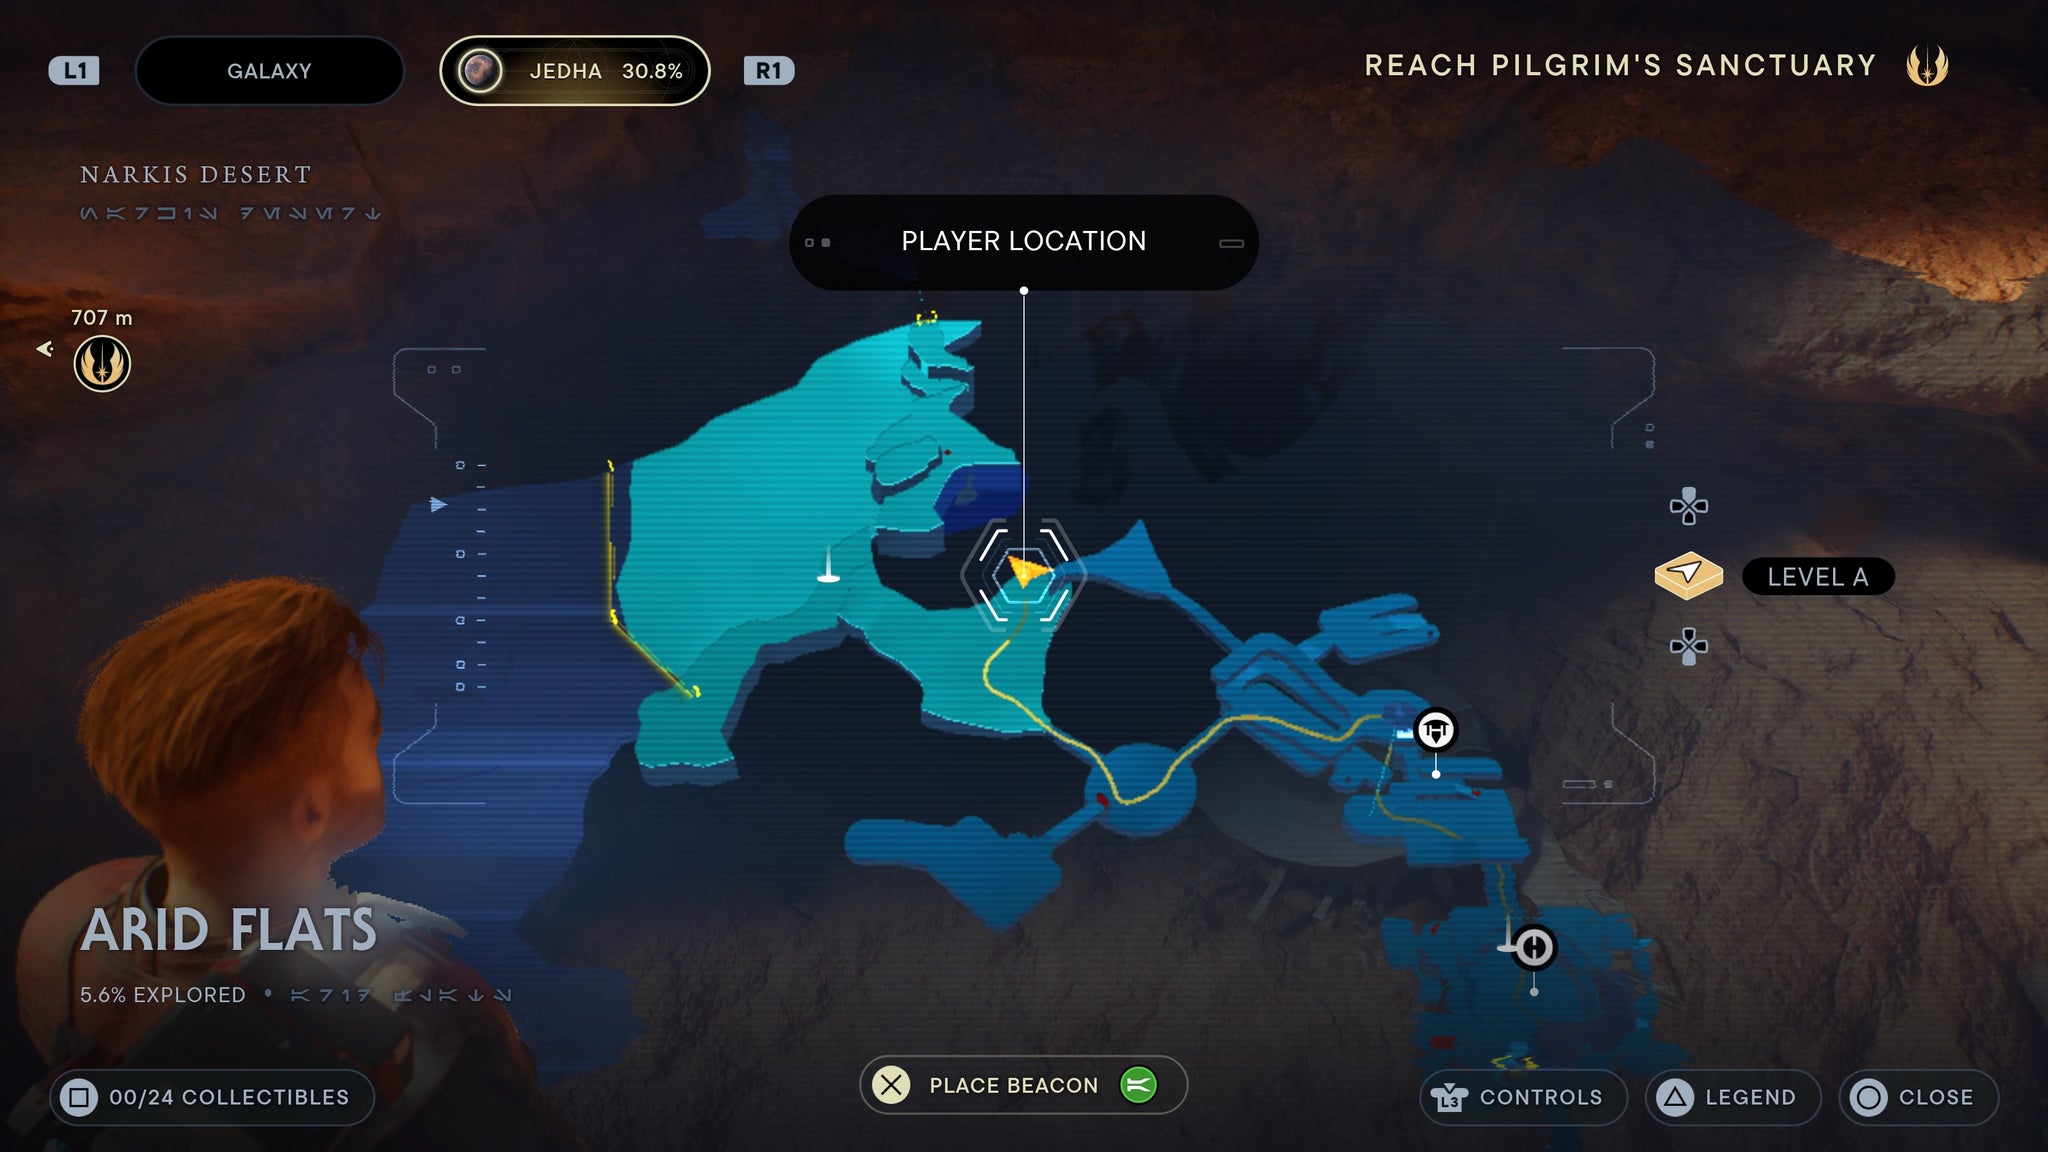
Right as you enter.
From the meditation point, mount up and ride straight ahead. You’ll find a force echo on a skeleton.
In the middle of the dunes.
From the meditation point, ride straight ahead to the rocks straight ahead. On these rocks is a dead storm trooper with a force echo on it.
On a Sotmr trooper body.
Ride left of the meditation point until you reach a small cave with creatures inside. You’ll find a force echo on the floor.

In a cave to the left of the meditation point.
Near the base of the bridge, by a metal pot. Below Wayfinder ’s Tomb.
By the broken bridge.
Found on a dead storm trooper by a pool near the Anchorite Base meditation point.

By the water.
A force echo can be found left of the Arid Flats meditation point, by a square rock.
By the rock.
Requires balloon grapple. Make your way to the front of the Path of Conviction, and use the balloons out side the front to leap to the upper ledge. Up there you’ll find a scan.
In front of the path, via the balloon.
Wayfinder’s Tomb
At the top of Wayfinder’s Tomb.
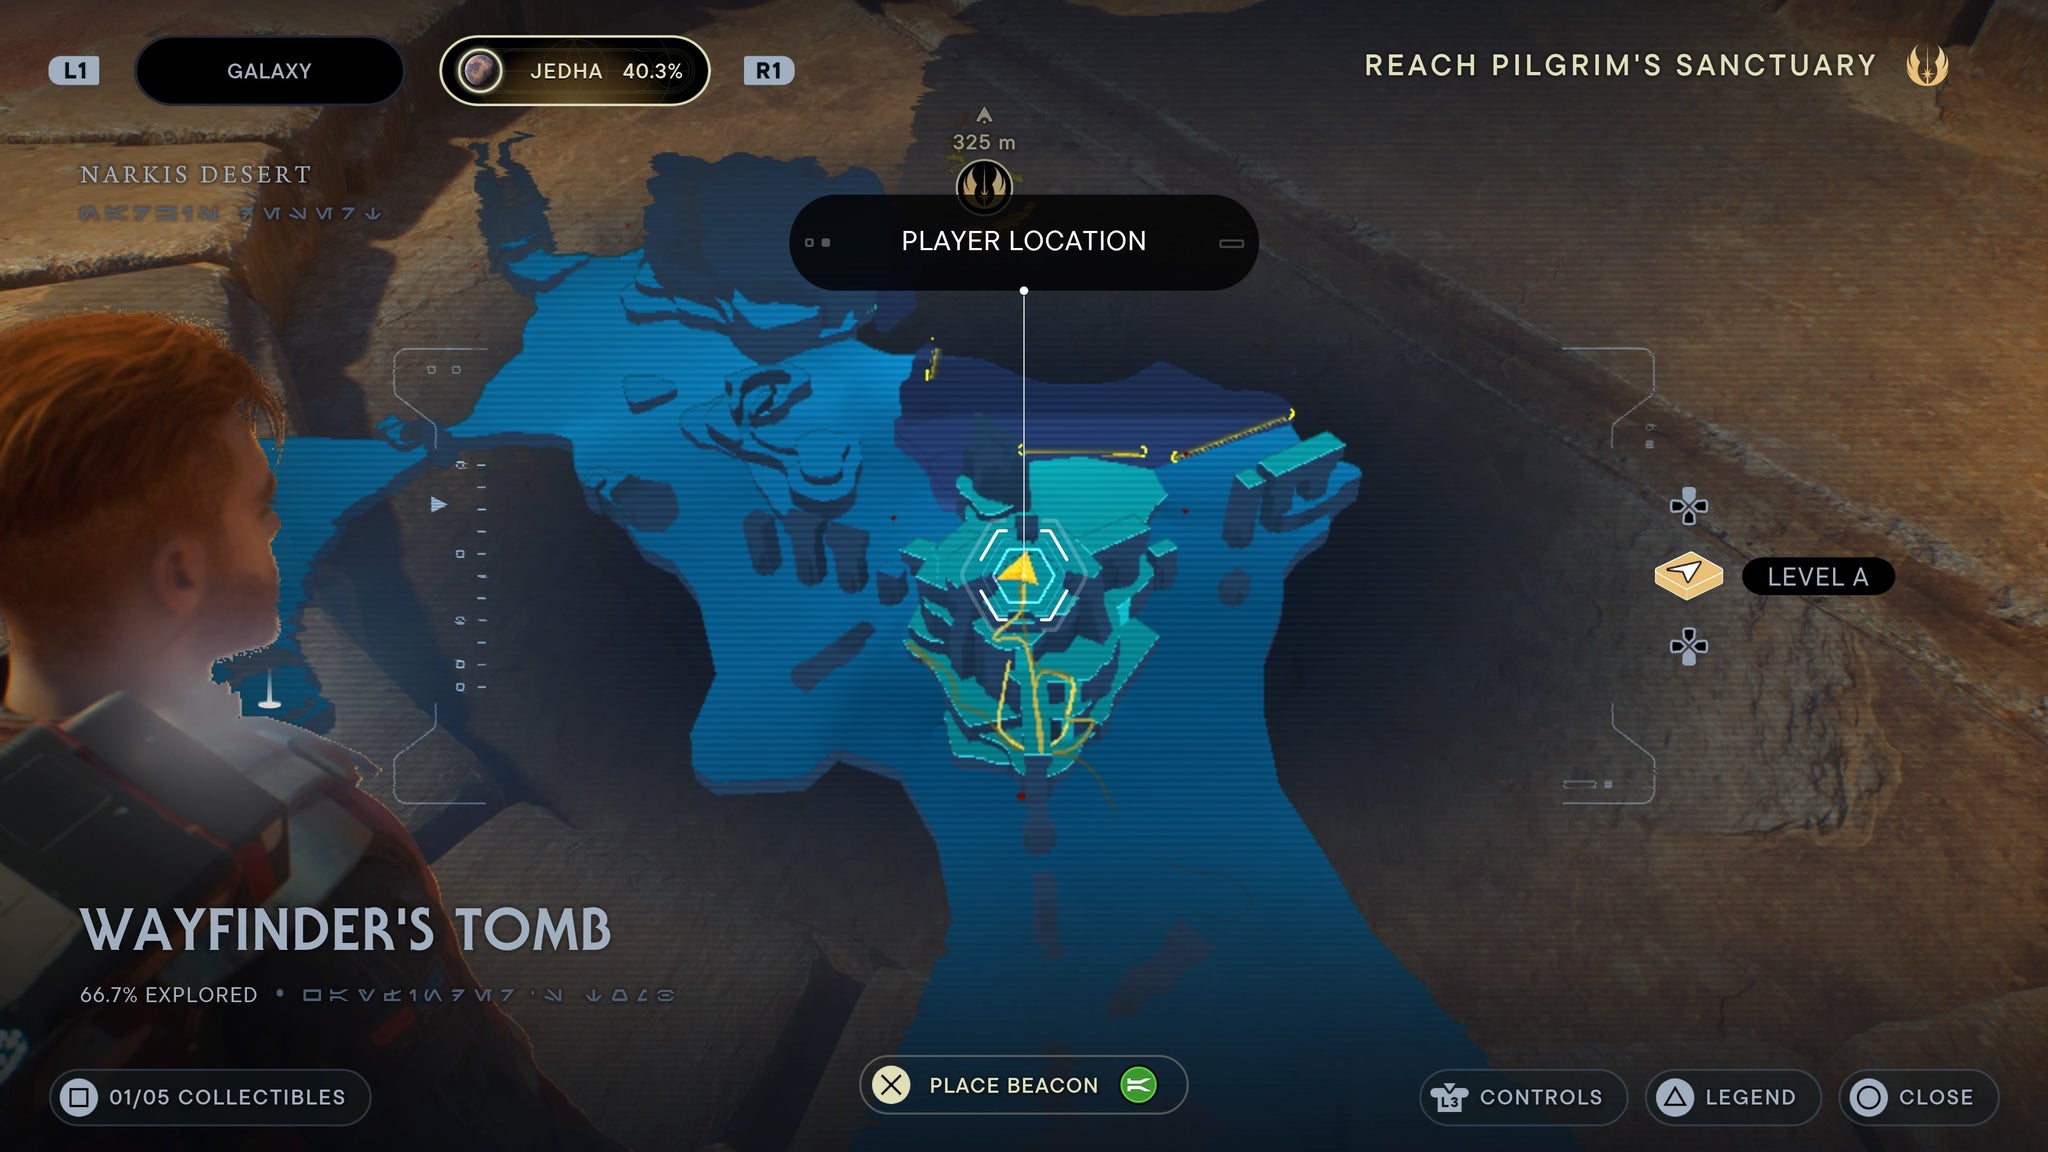
Scan the doors at the top.
Found in the Wayfinder’s Tomb. Requires Balloon grapple. You need to finish the three path puzzles found around the Arid Flats. Once they are all done, descend the elevator at the top of Wayfinder’s Tomb. Once down there, you’ll find a force echo.
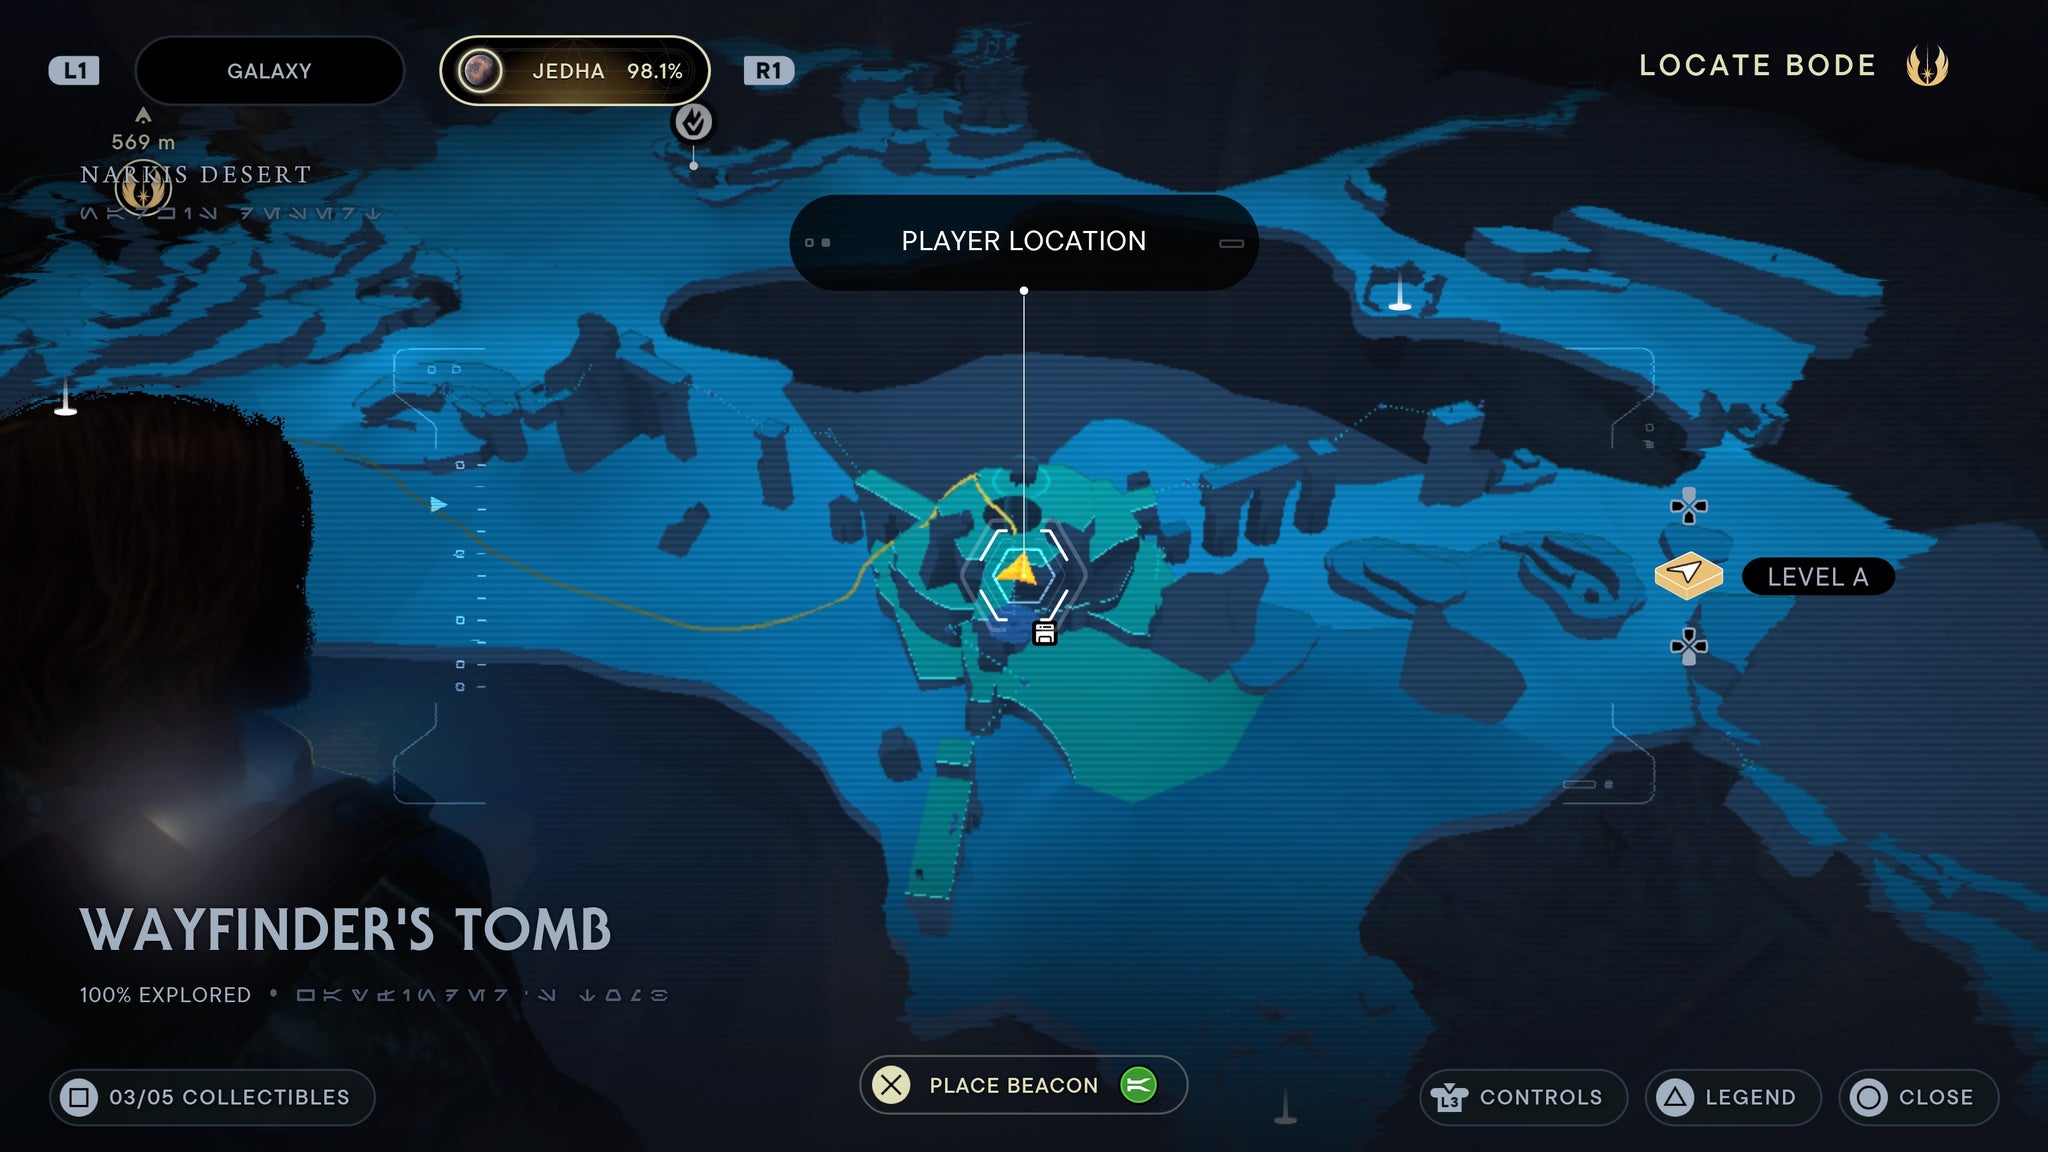
At the bottom of the tomb!
Trailhead Pantheon
As you enter Trailhead pantheon, scan the arch ahead of you.

Scan the arch as you enter.
Use the box to jump into the crypt. Straight ahead will be some skulls you can scan.

It’s be super dark, so keep an eye out!
Jump over the arches and into the building at the front the the Trailhead Pantheon. At the bottom is a scan.
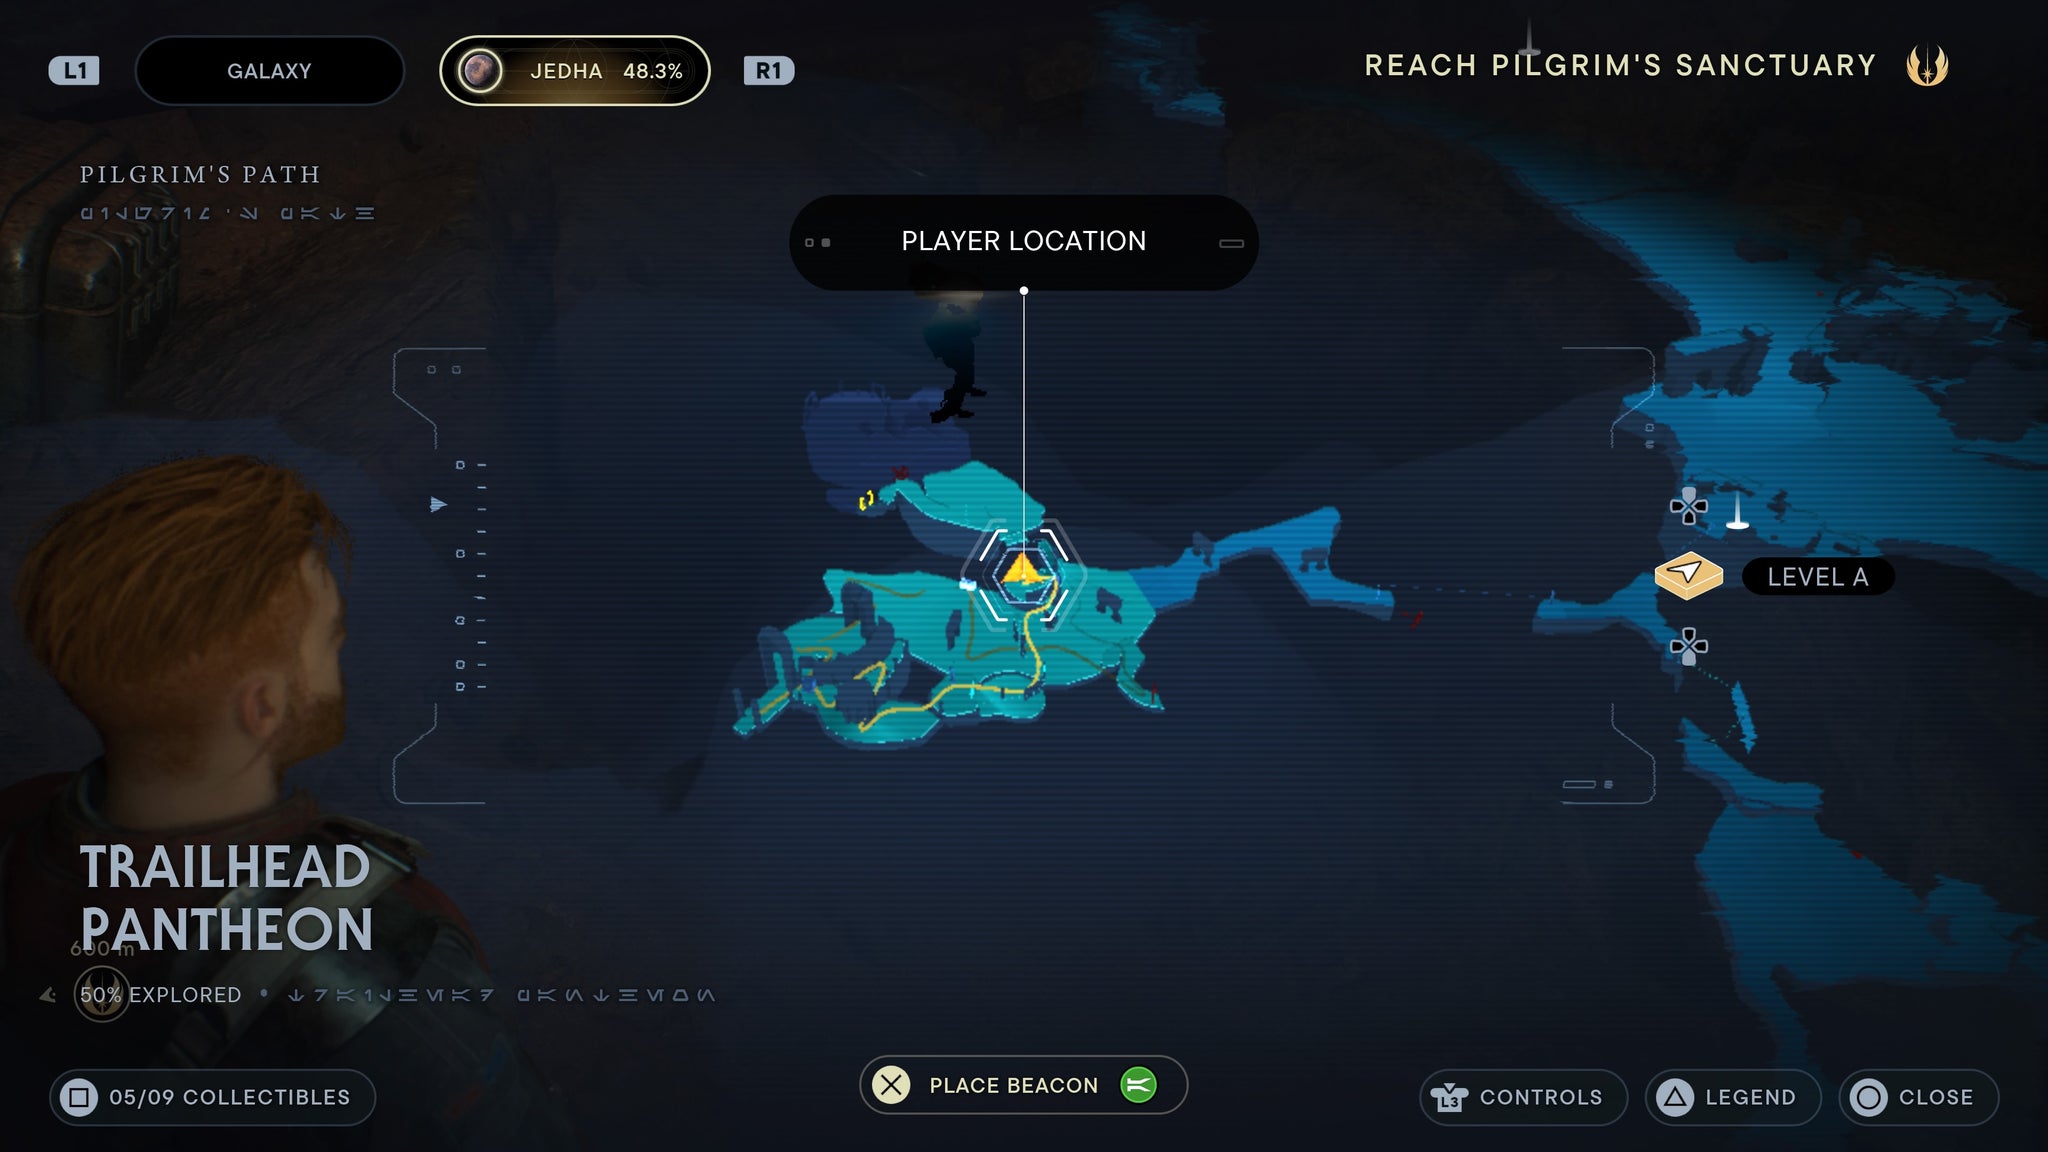
Look up at the wall for the scan!
From the meditation point, walk into the room with two storm troopers inside. Once they are dead, scan the wall.
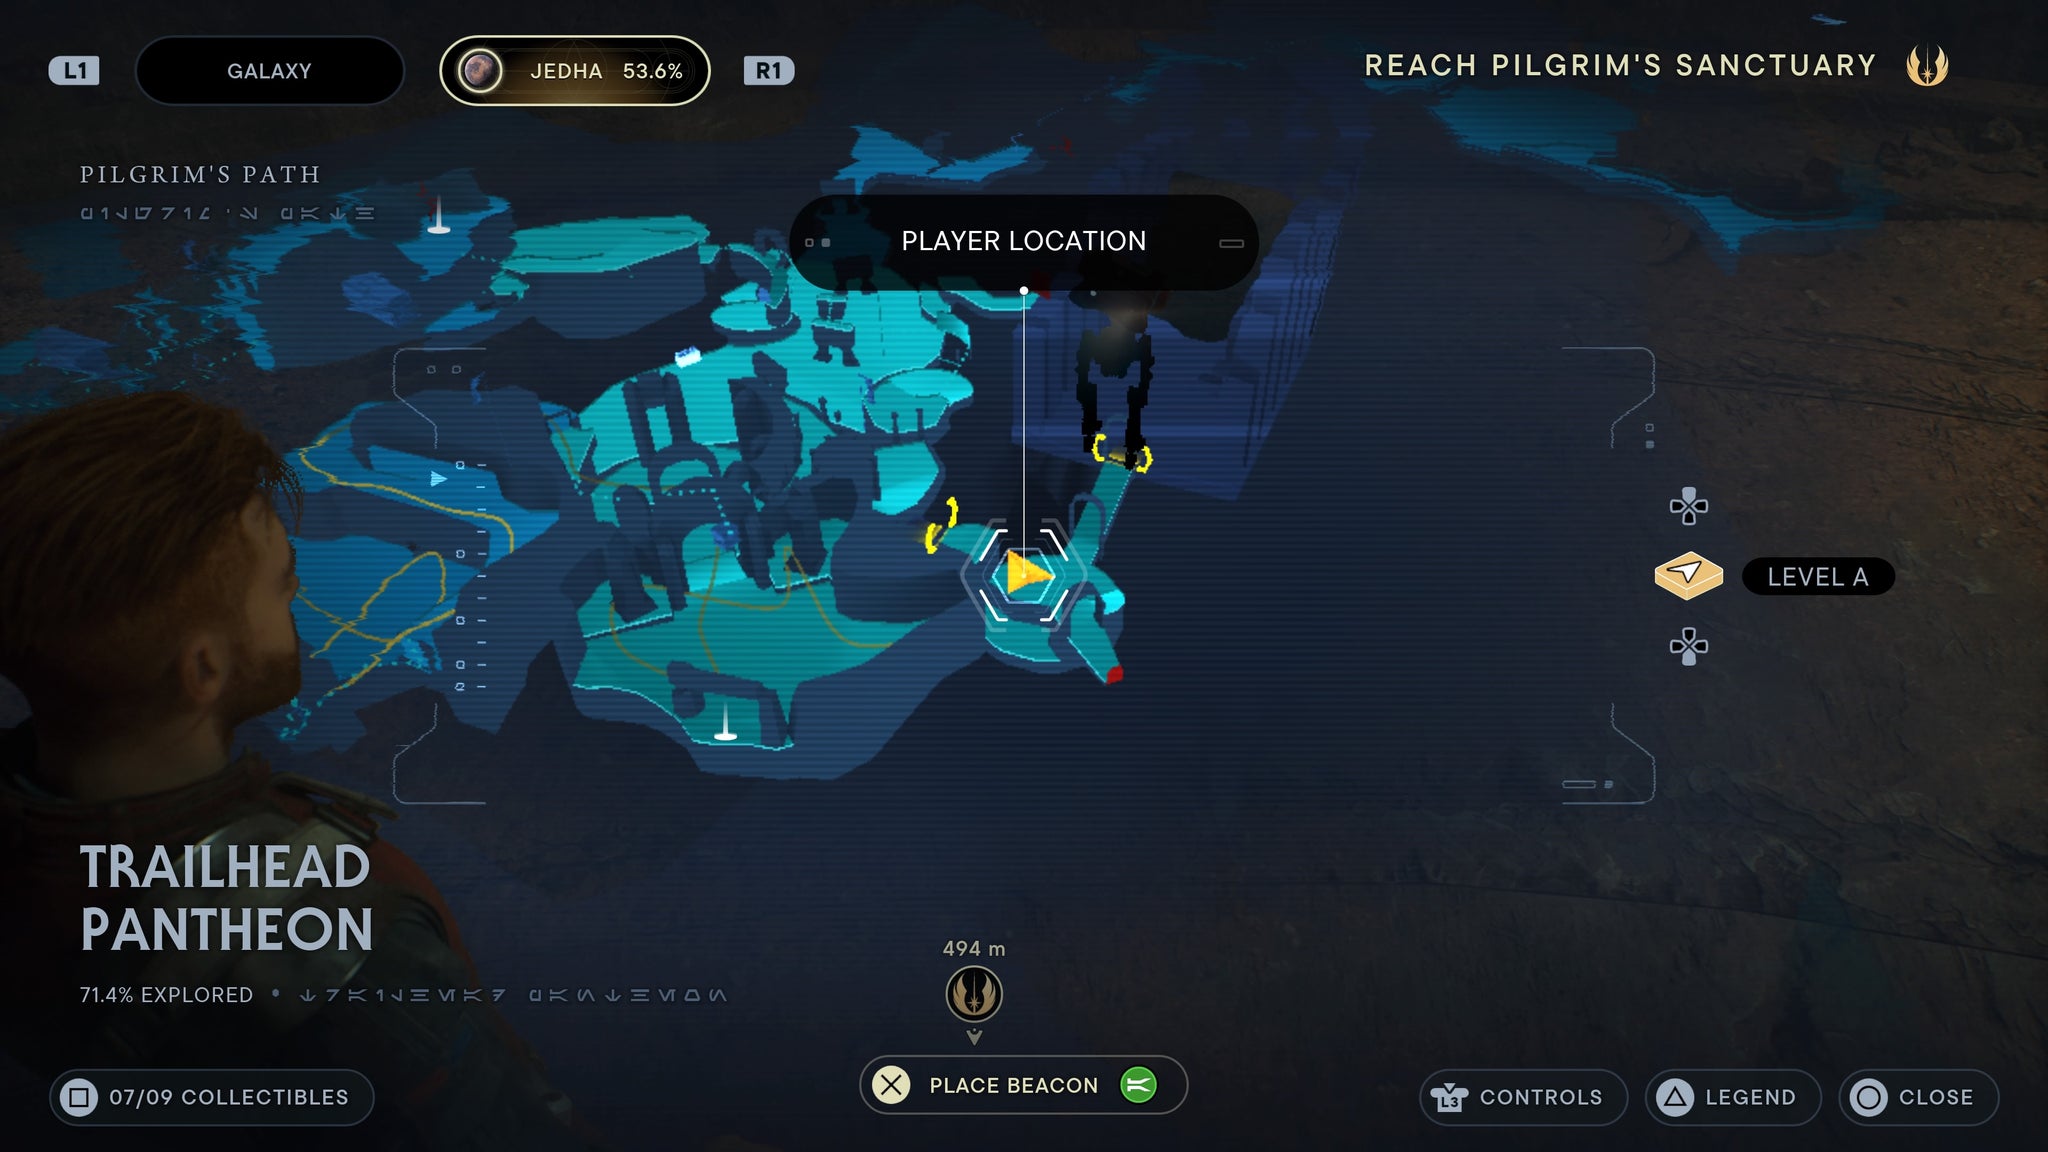
One last wall for the road.
Whistling Drop
From the meditation point, walk around the corner and you’ll find a force echo by a green forcefield.
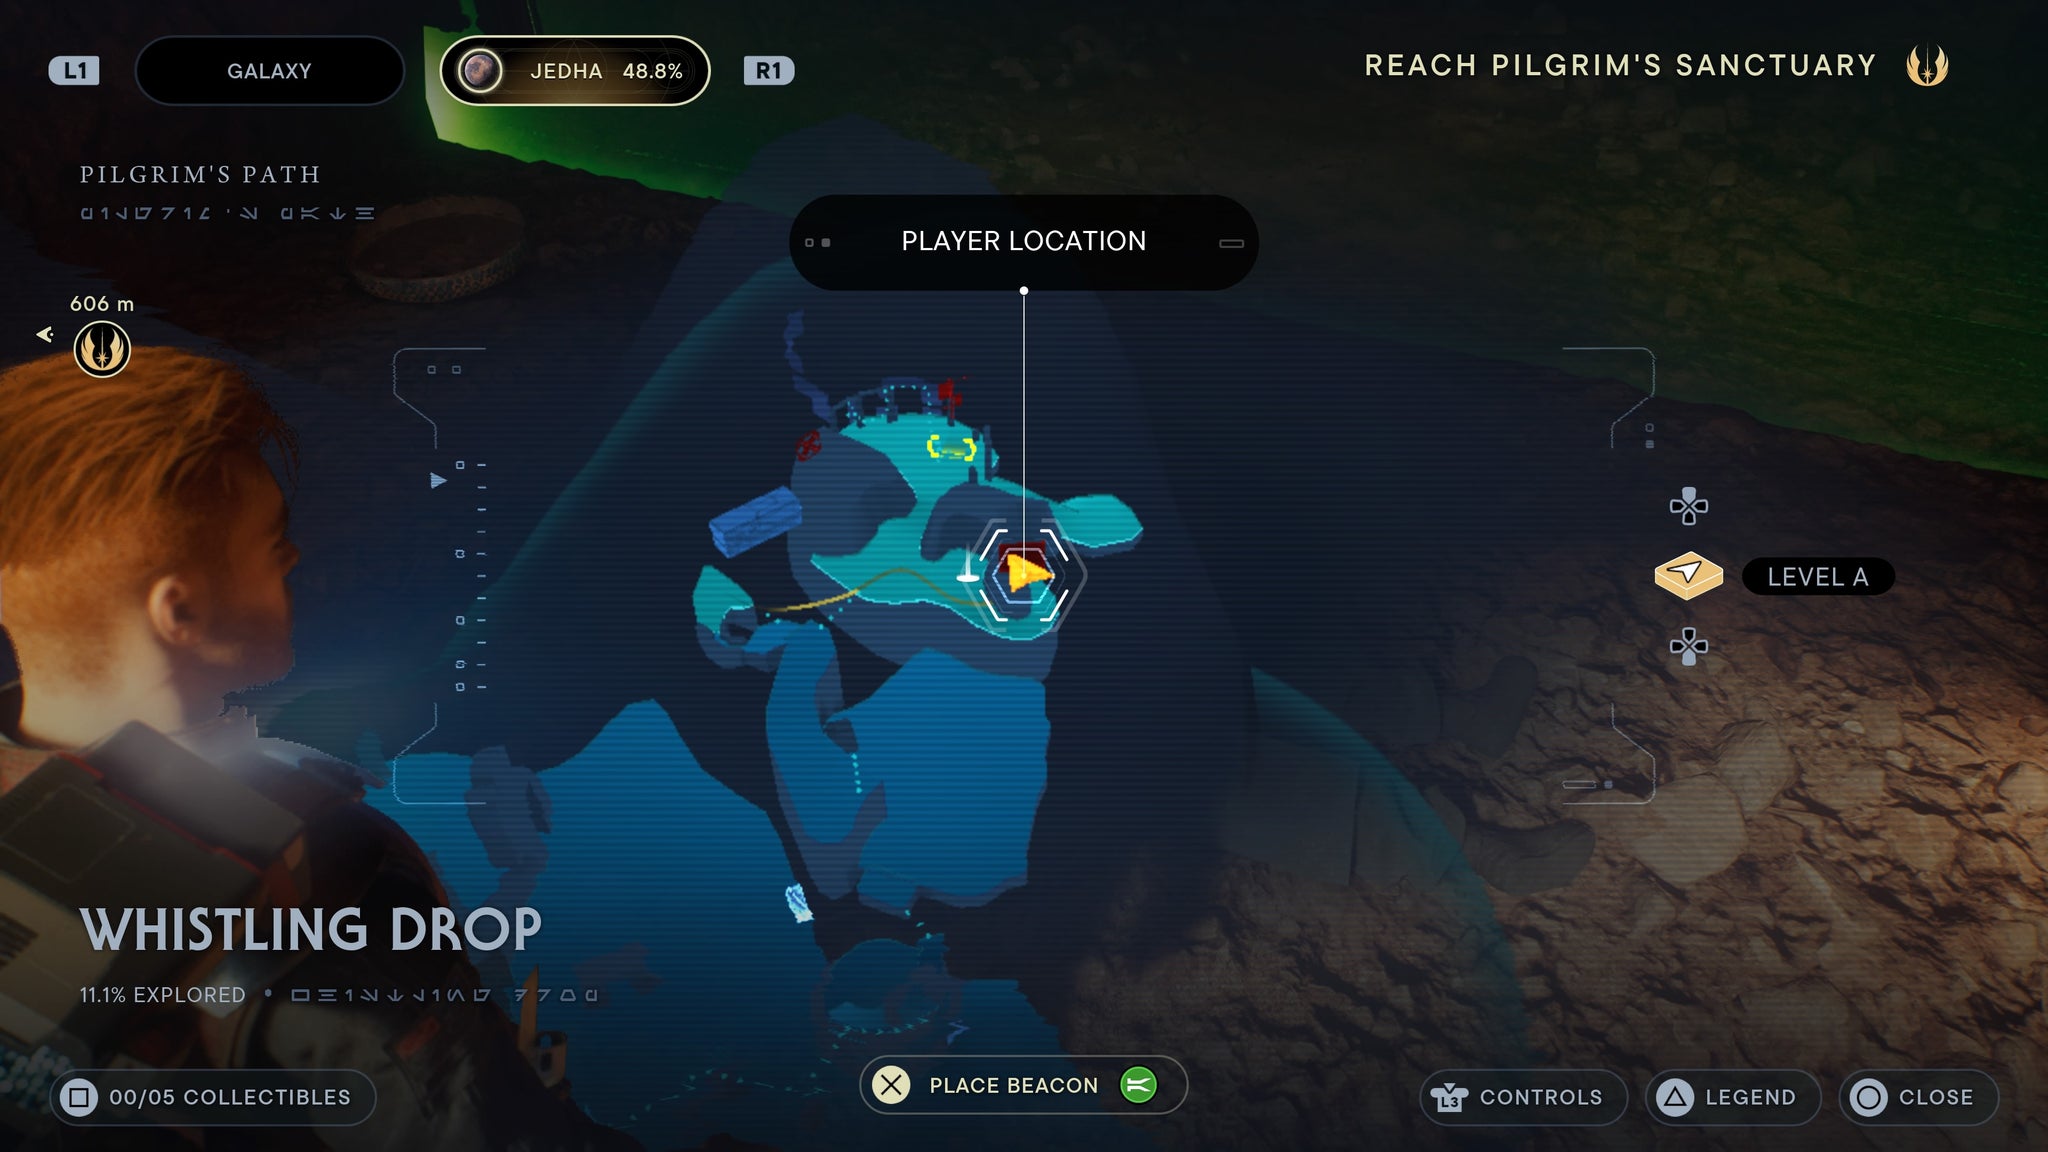
By the forcefield!
Next to the rope shortcut, scan the wall.
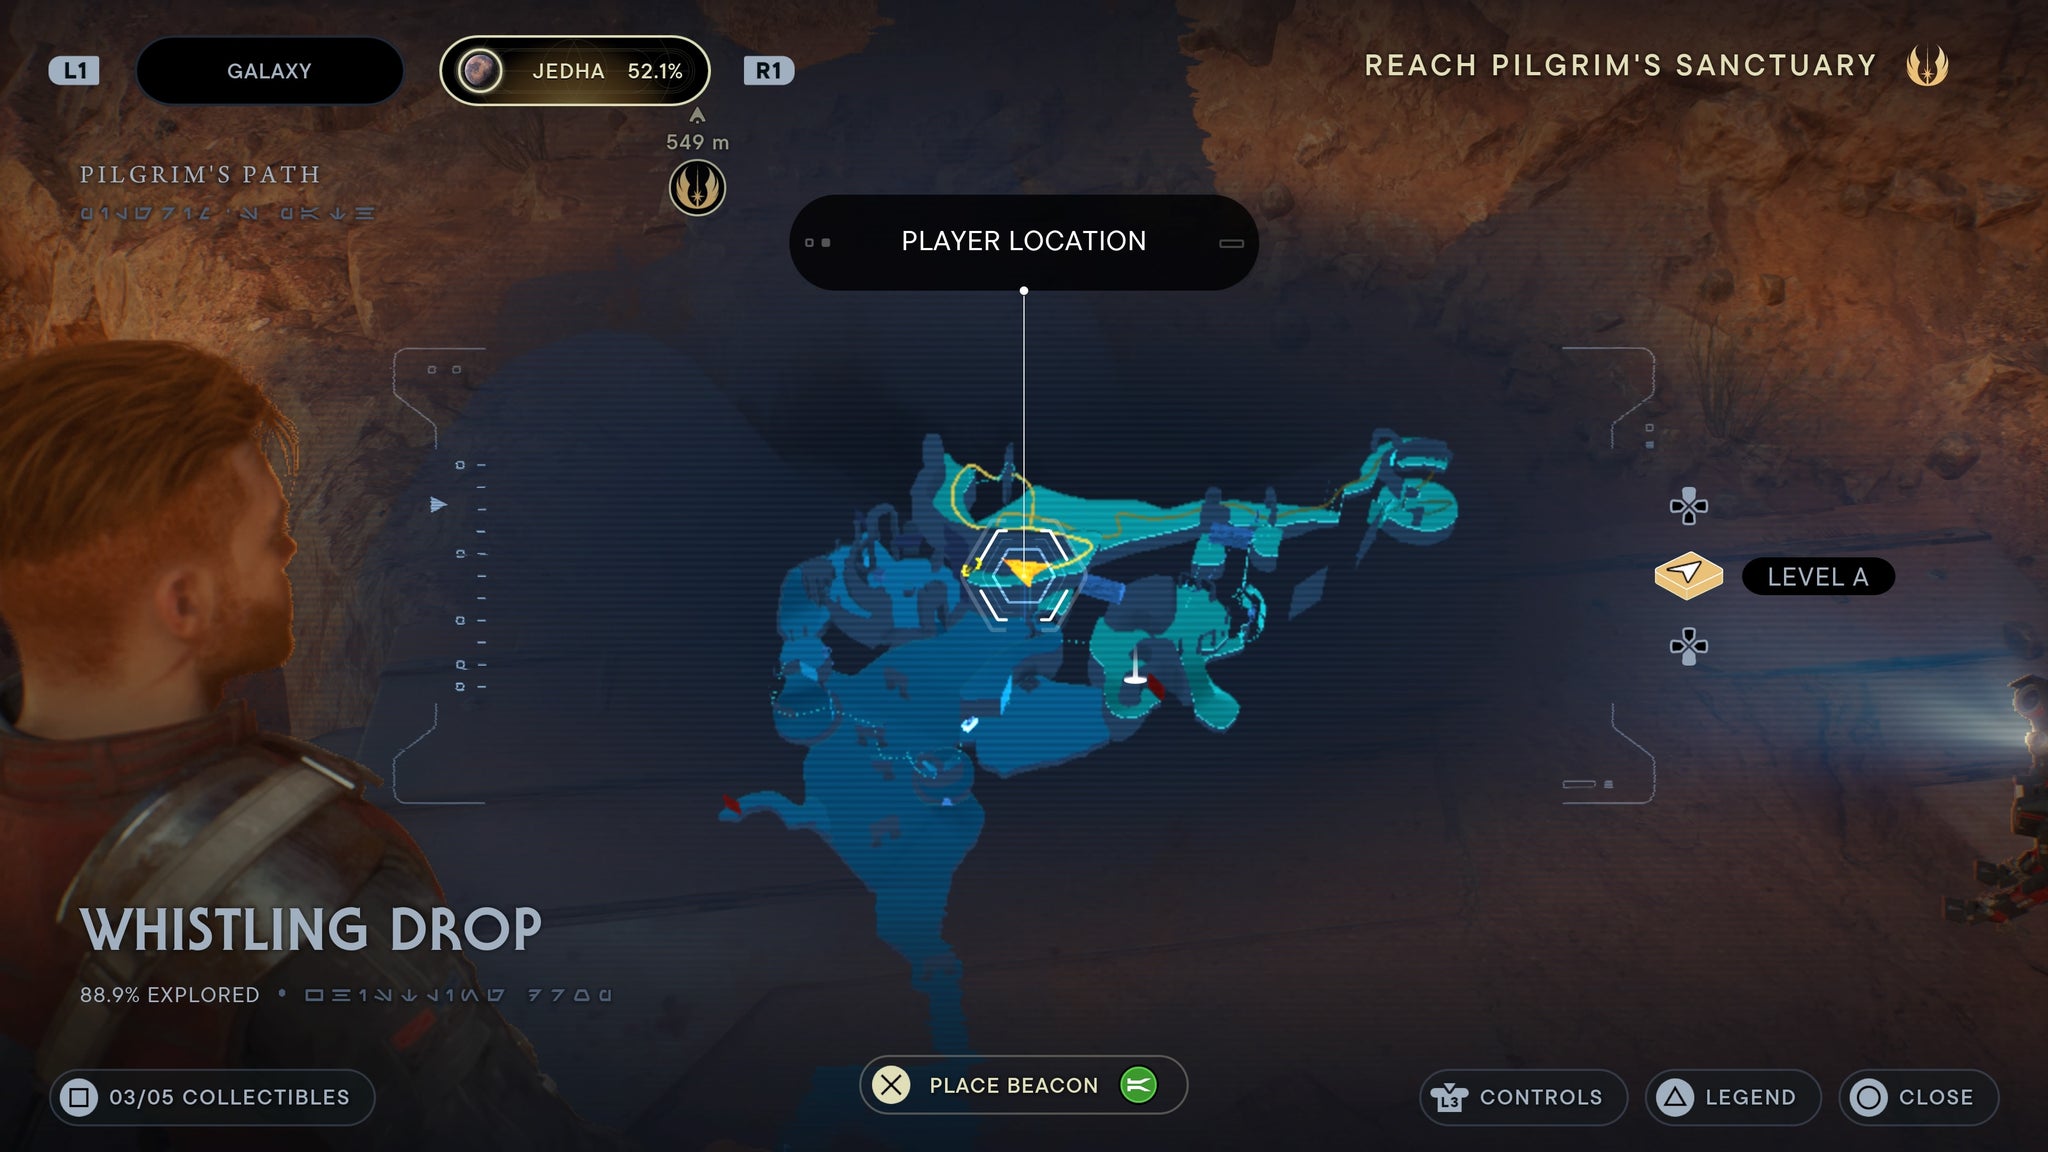
Right next to the shortcut.
Path of Persistence
Grapple up to the storm troopers, then walk to the left of the ruin doorway. You’ll be able to scan there.
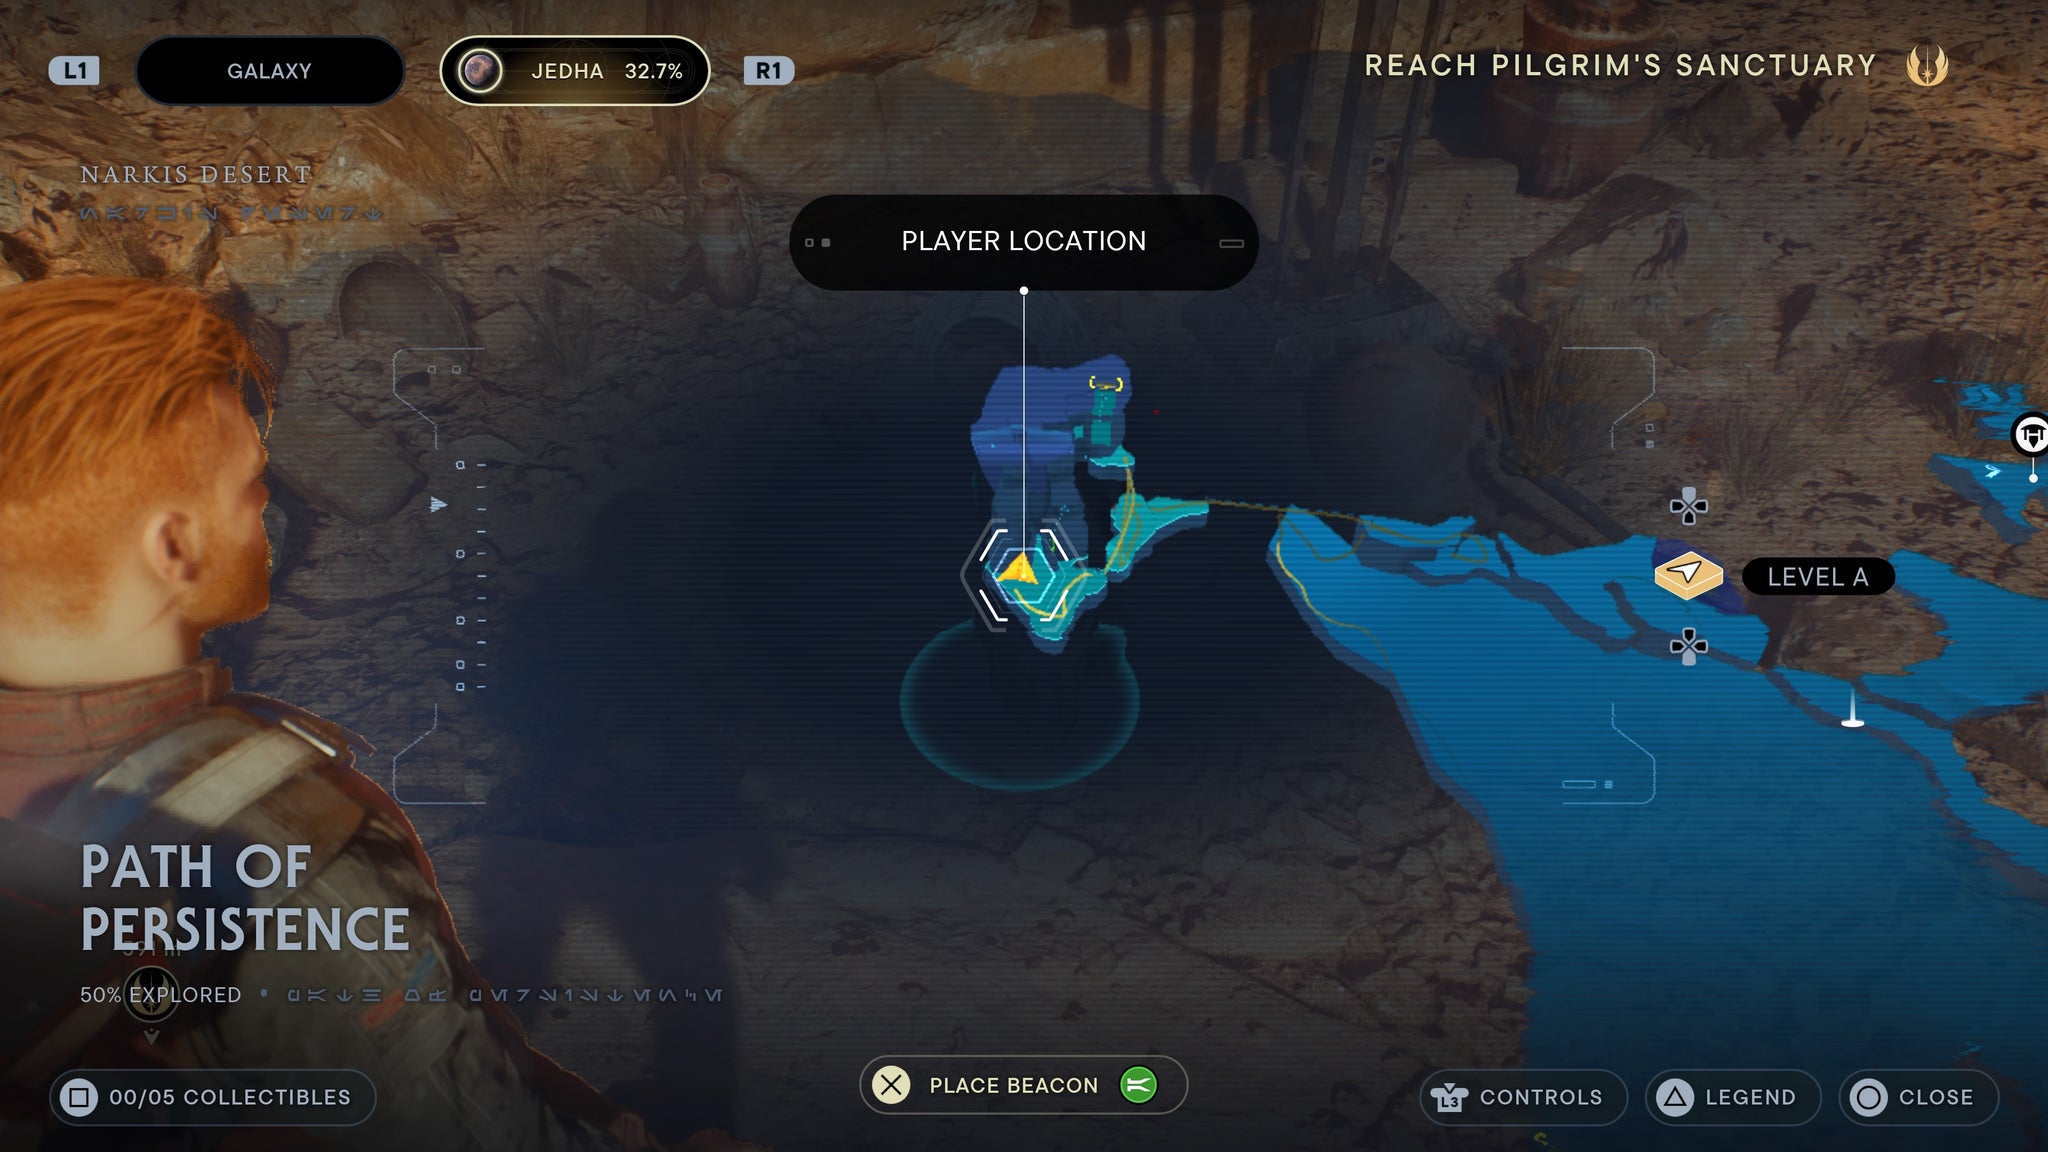
Grapple up first, and it’ll be nearby.
At the top of the Path of Persistence, by the orb.
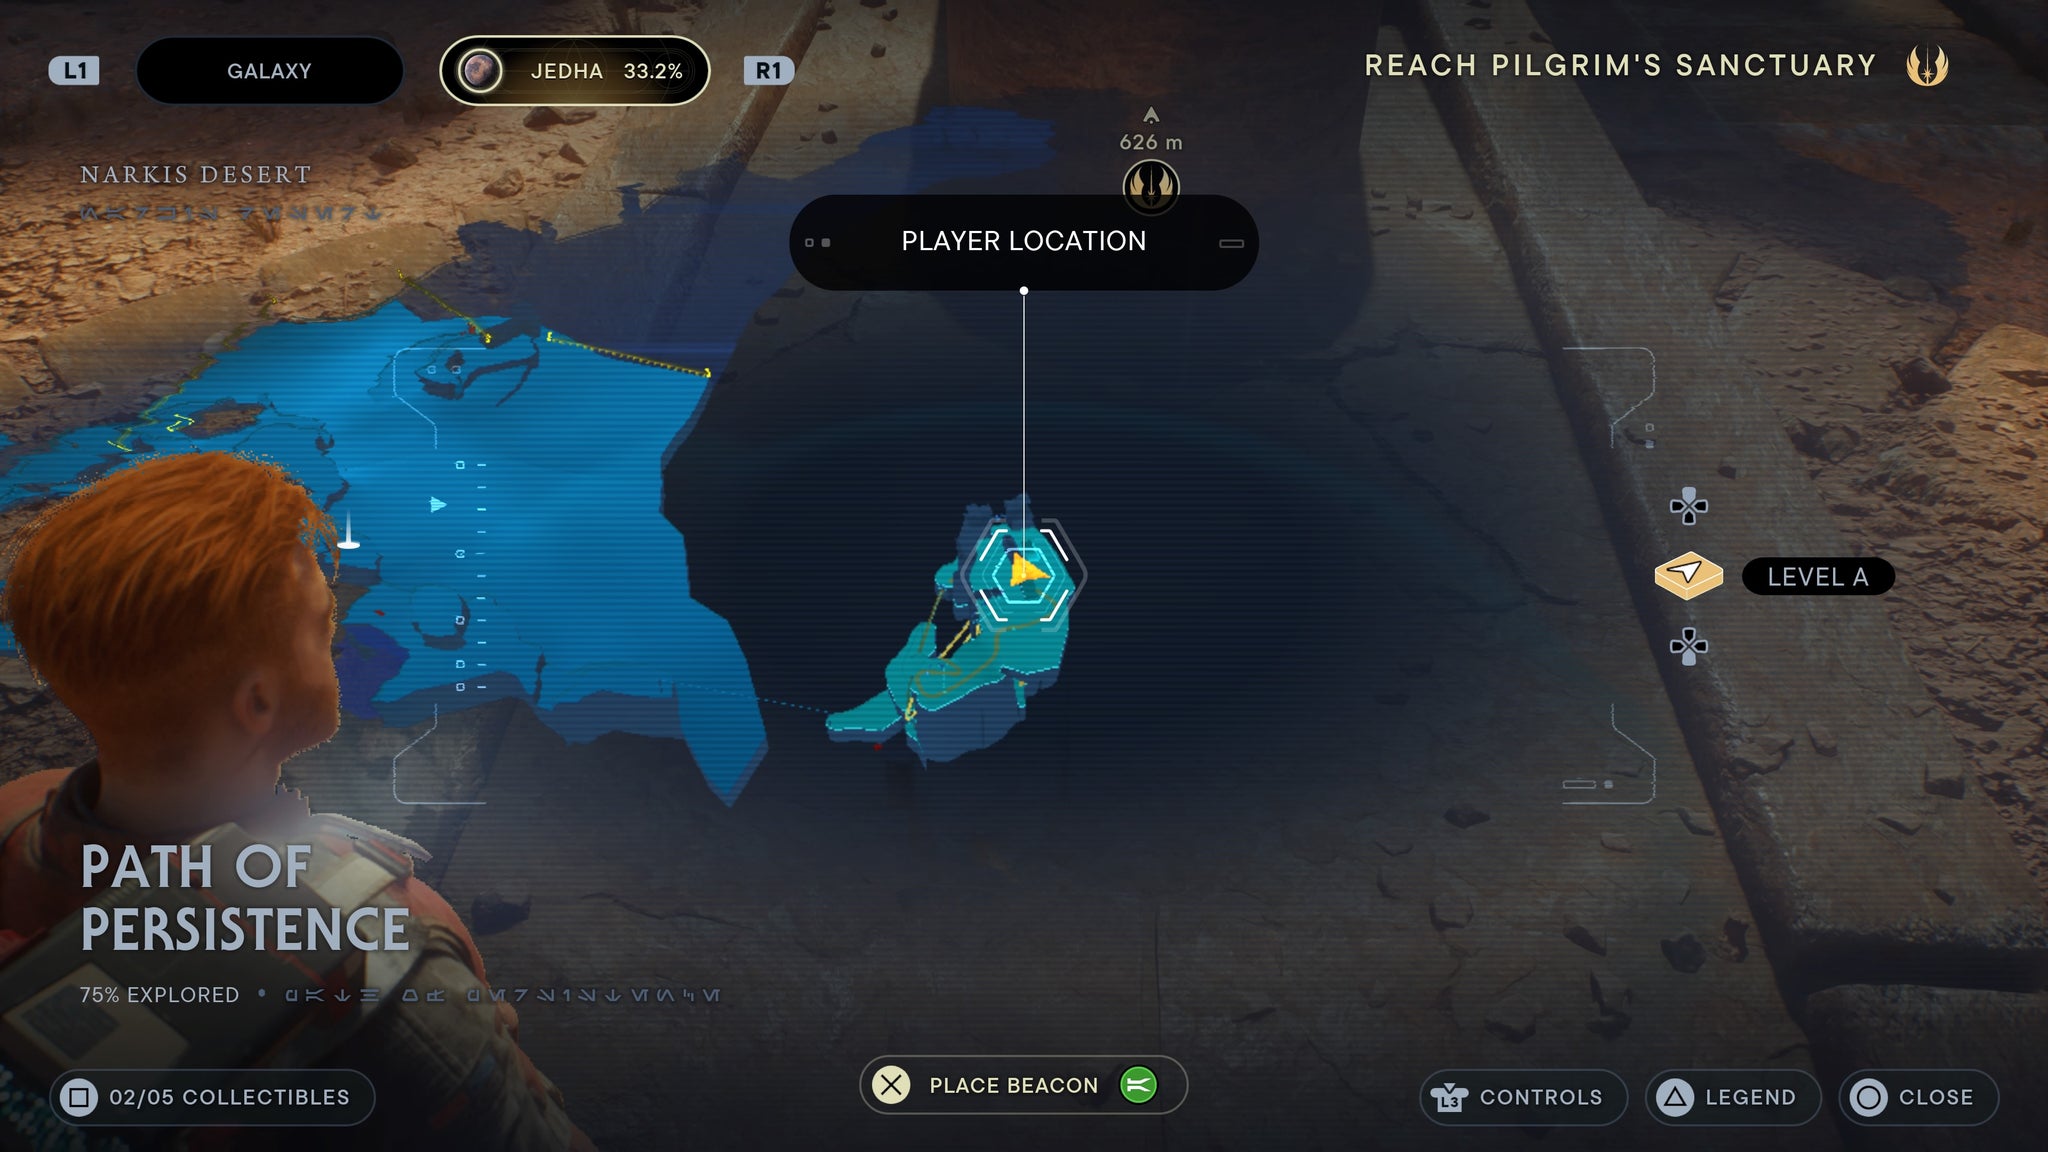
At the very top of the path.
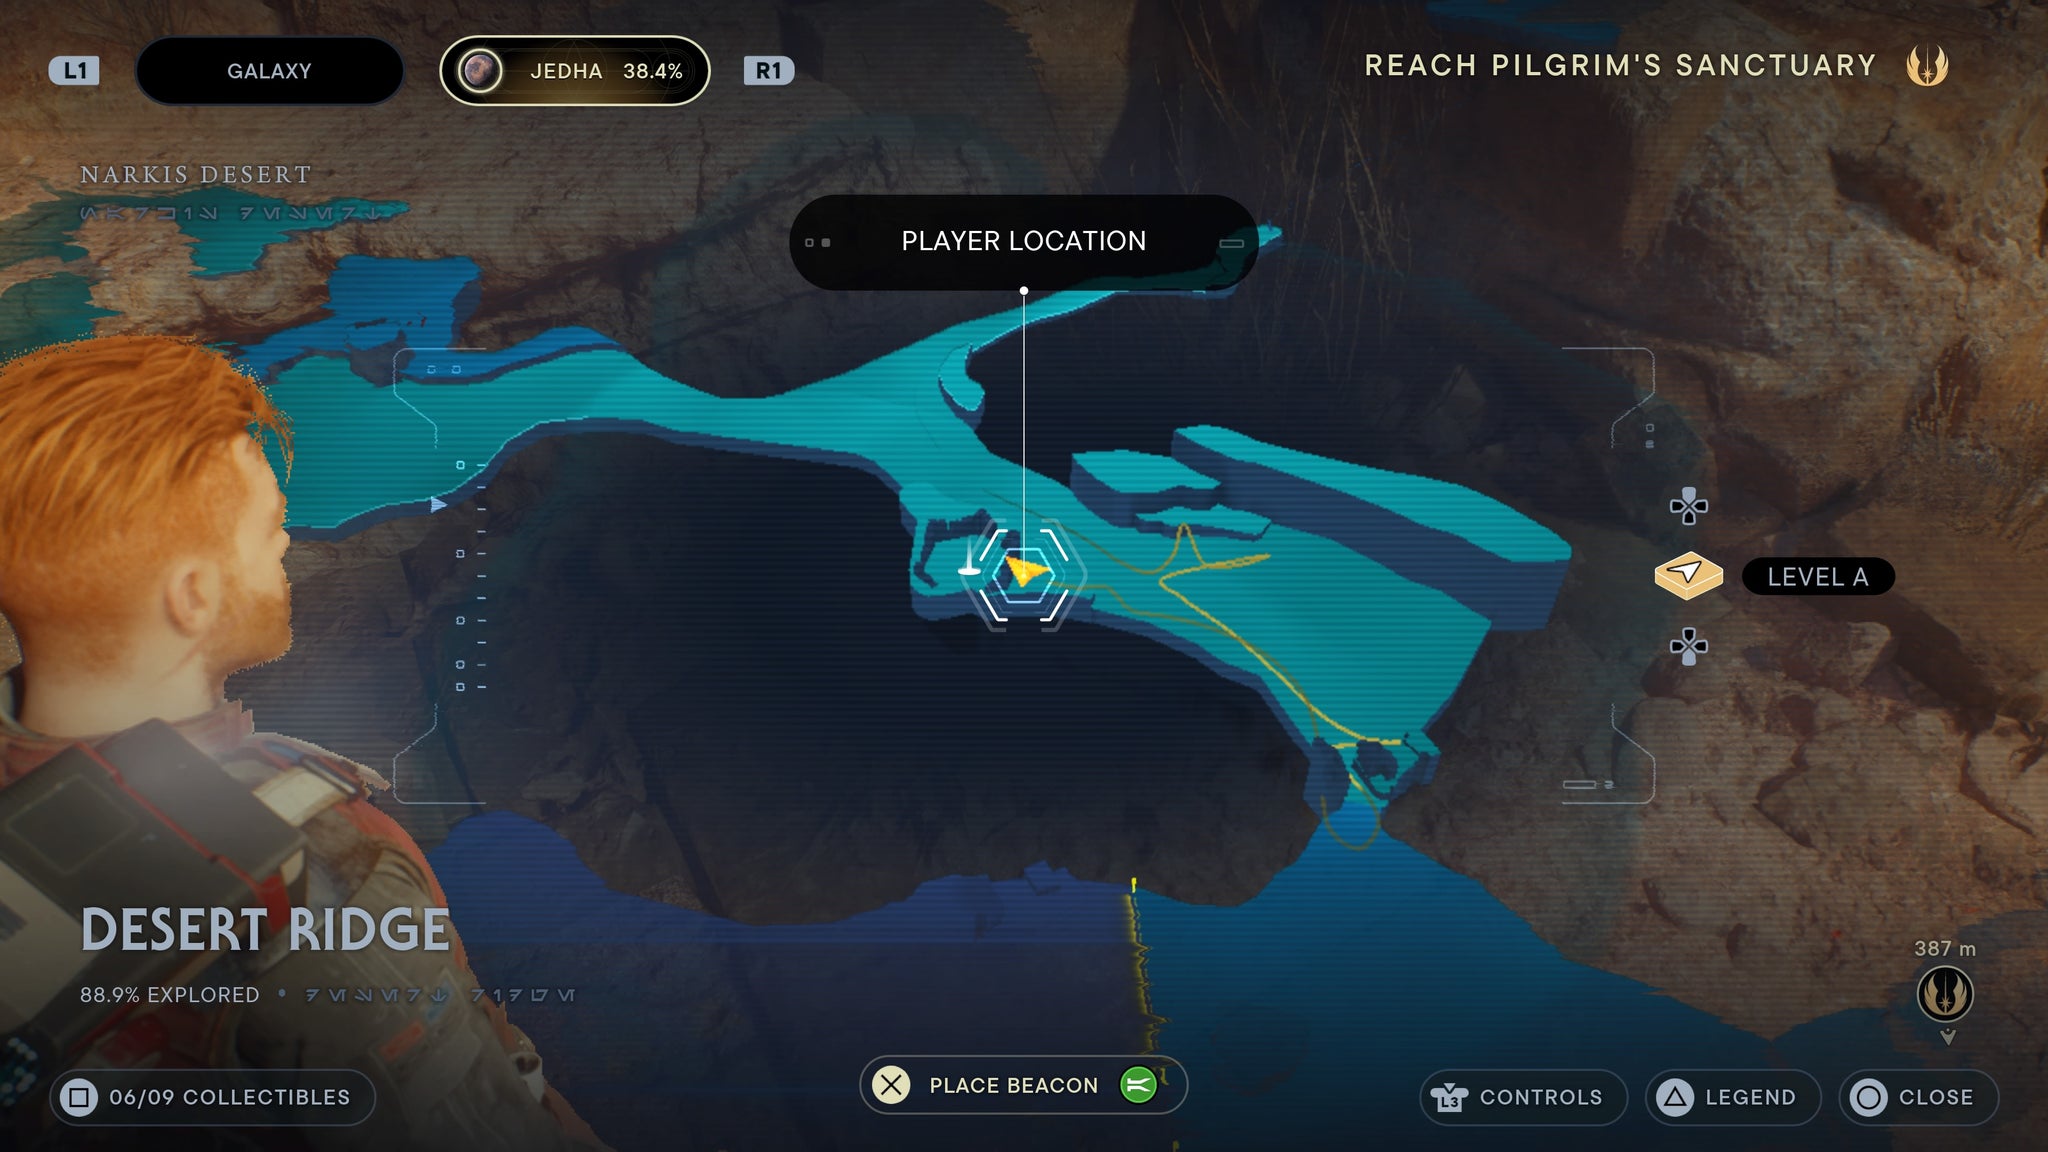
Desert Ridge
Ride left from the meditation point and force push some rocks away from a cave entrance. Head inside, and you’ll find a force echo inside.
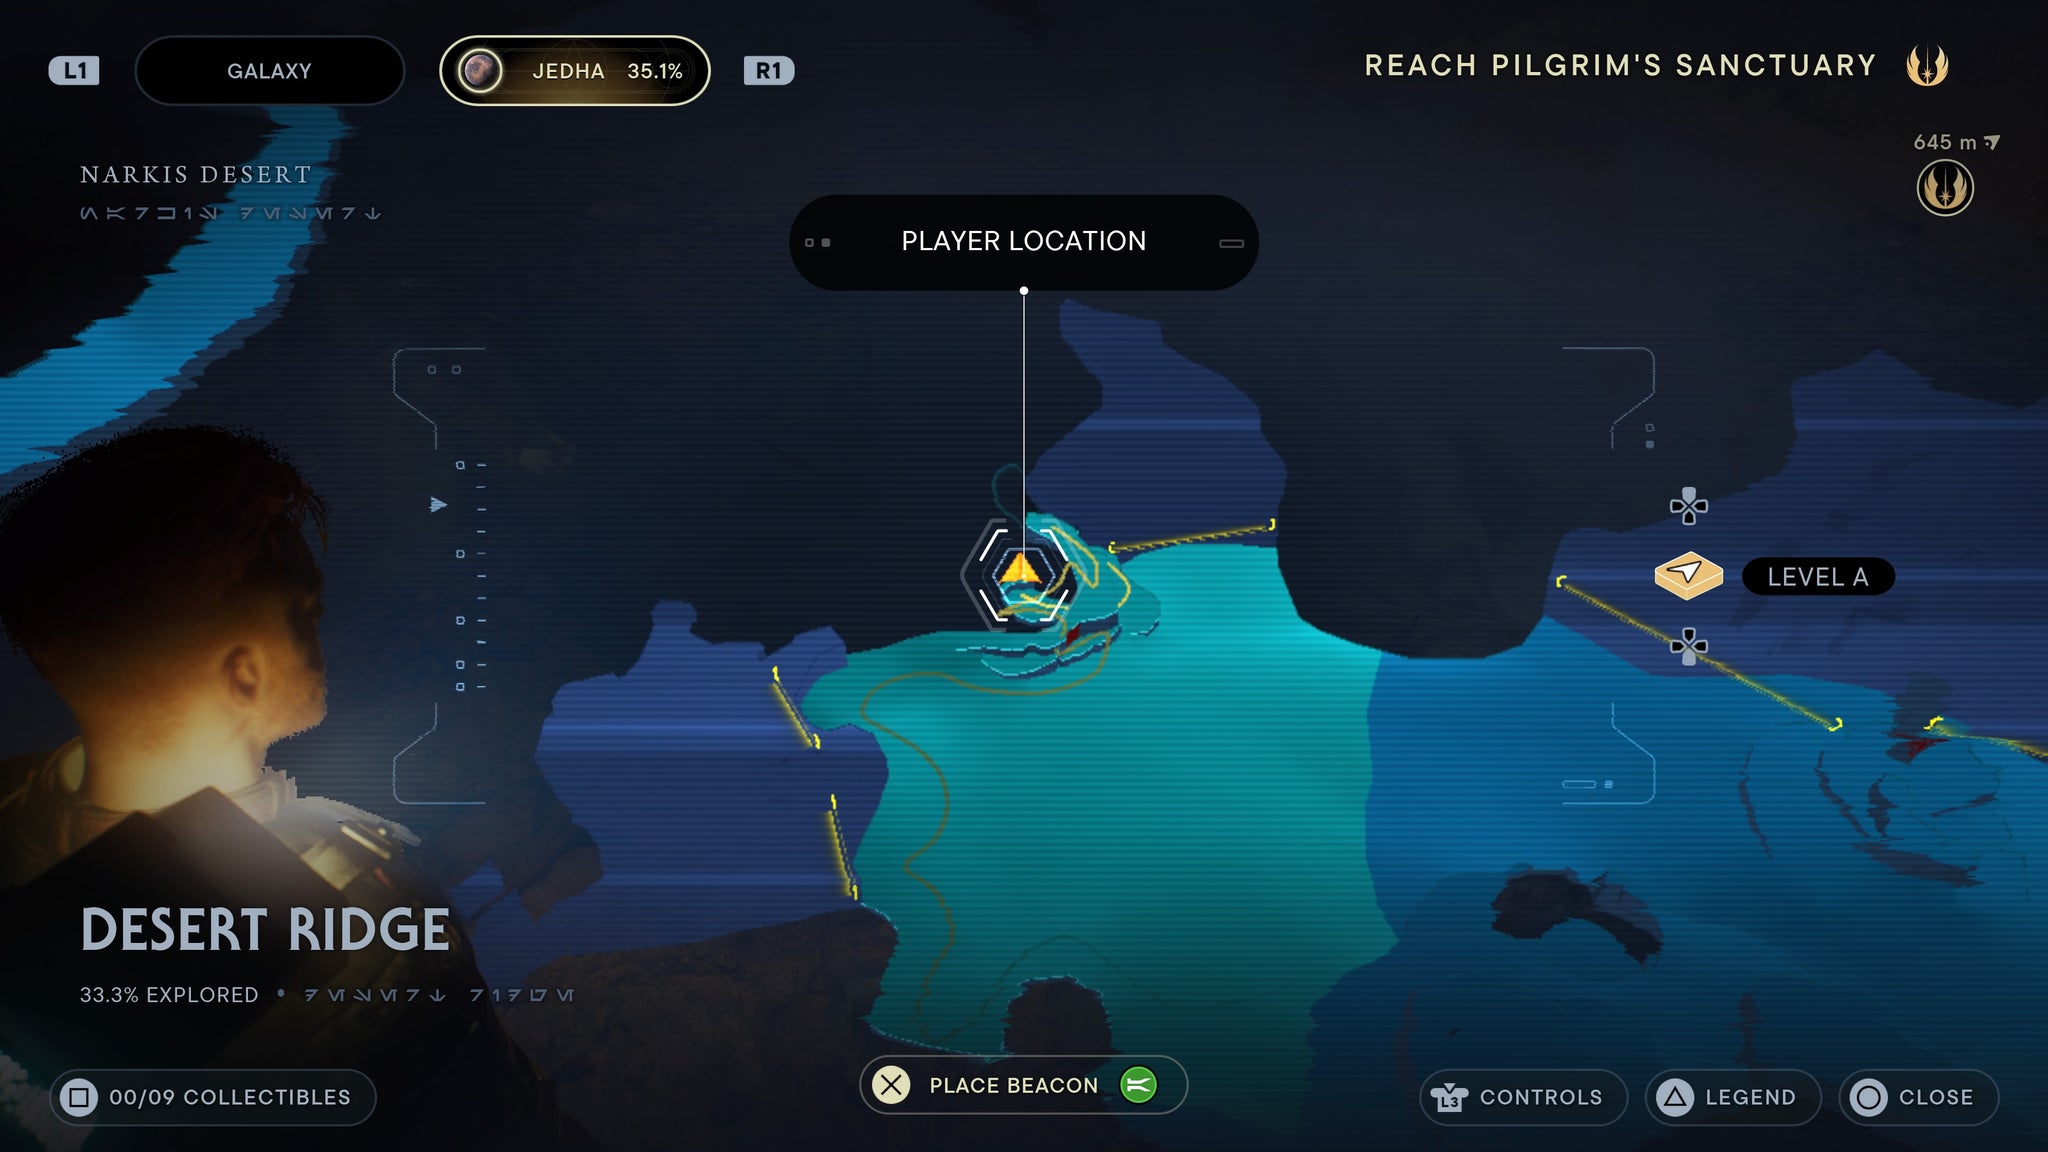
Inside the cave covered with rocks.
Outside the meditation point ruins.
On a skeleton. Scary!
Blustery Mesa
As soon as you climb up a ledge and kill several crabs, you’ll find a force echo on some robot legs ahead.
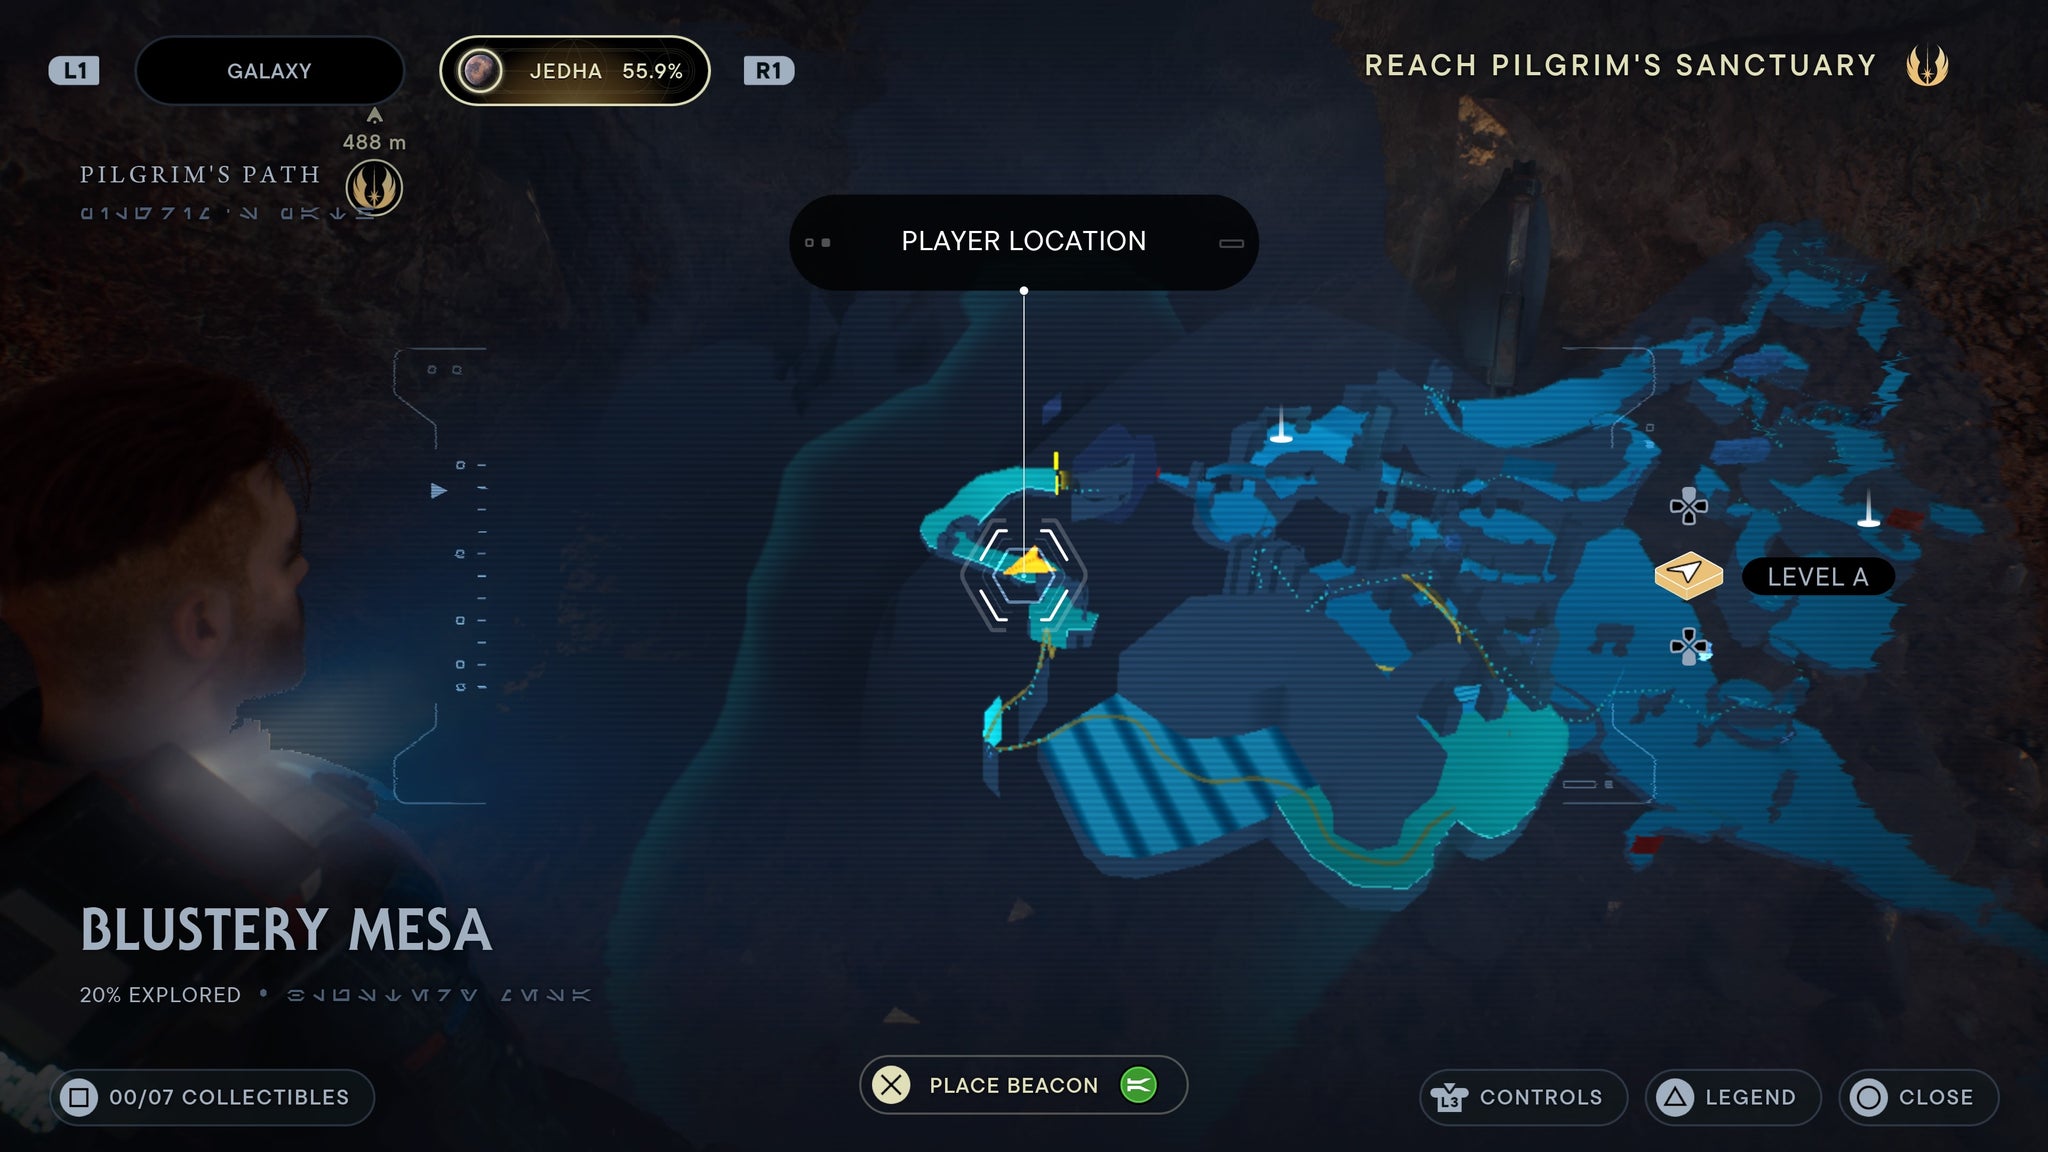
Look at those legs…damn.
Make the wind-assisted jump over, then take the lower path down to the dark room. To the left is a row of bells you can scan.
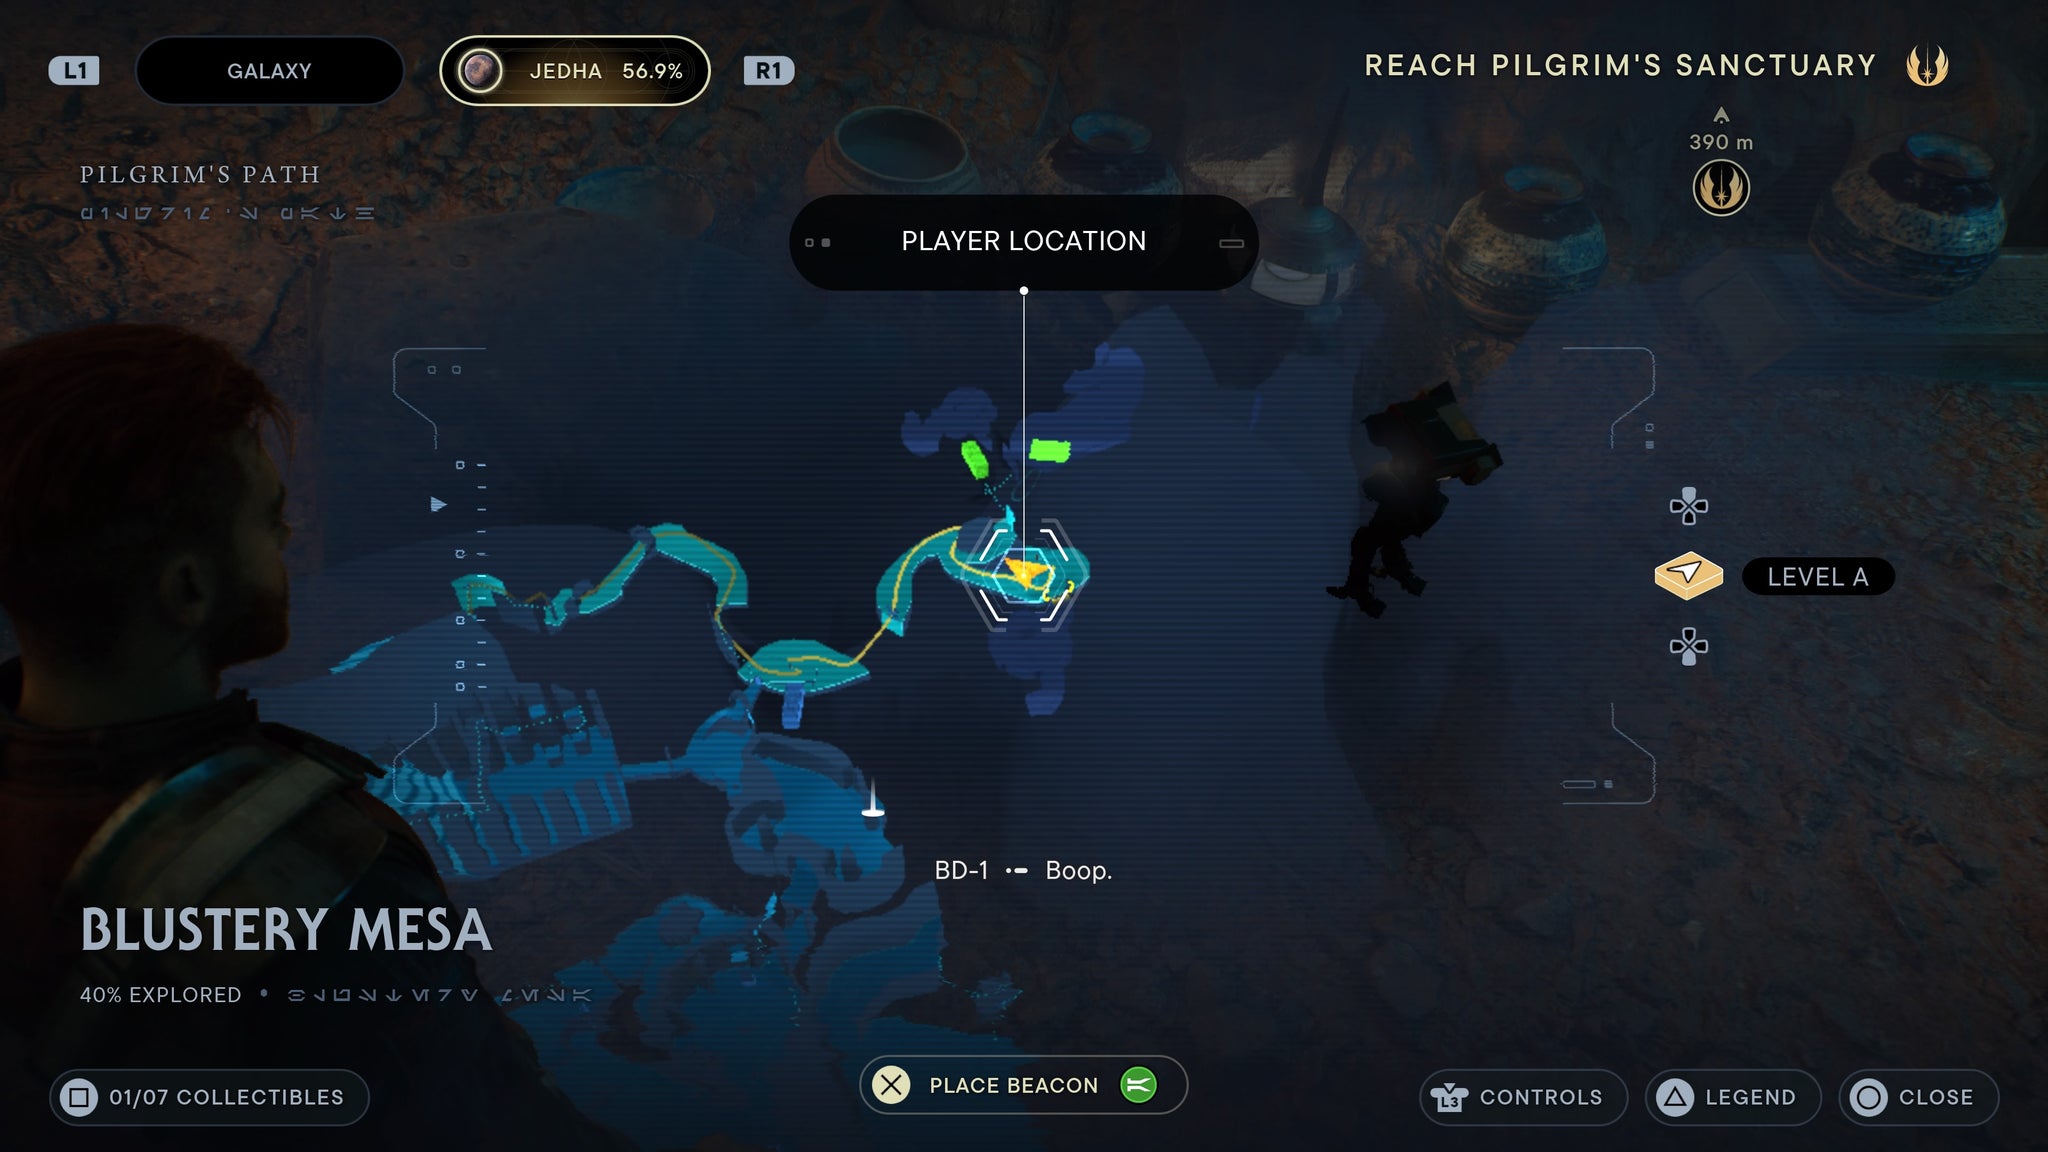
The row of bells near the lift!
Crypt of Uhrma
Follow the path in the crypt all the way forward as you enter, and you’ll find a scan at the end.
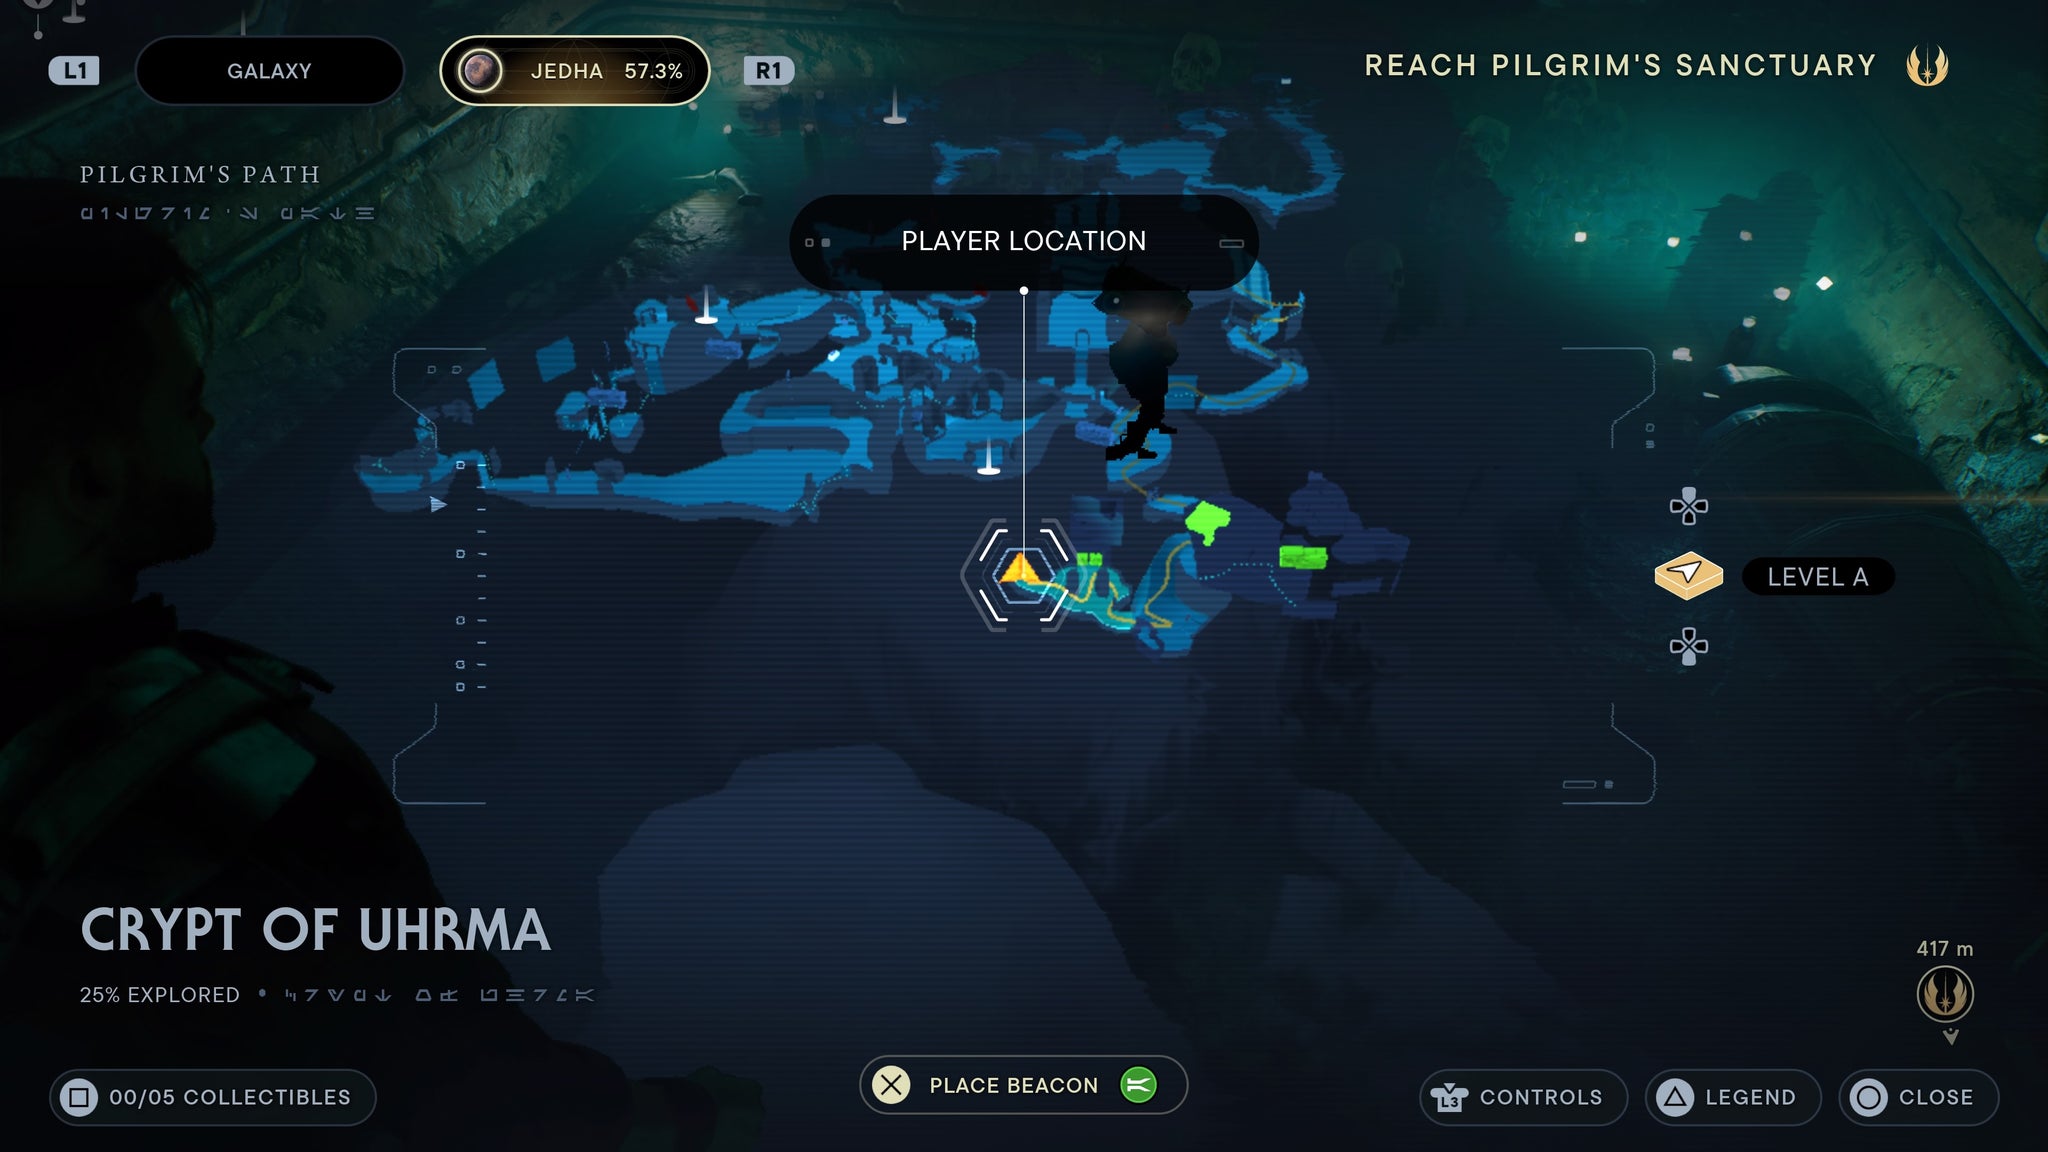
In a wall.
Open up the sealed door in the crypt (see guide here) and jump across to the opposite platform. There you’ll find a force echo.
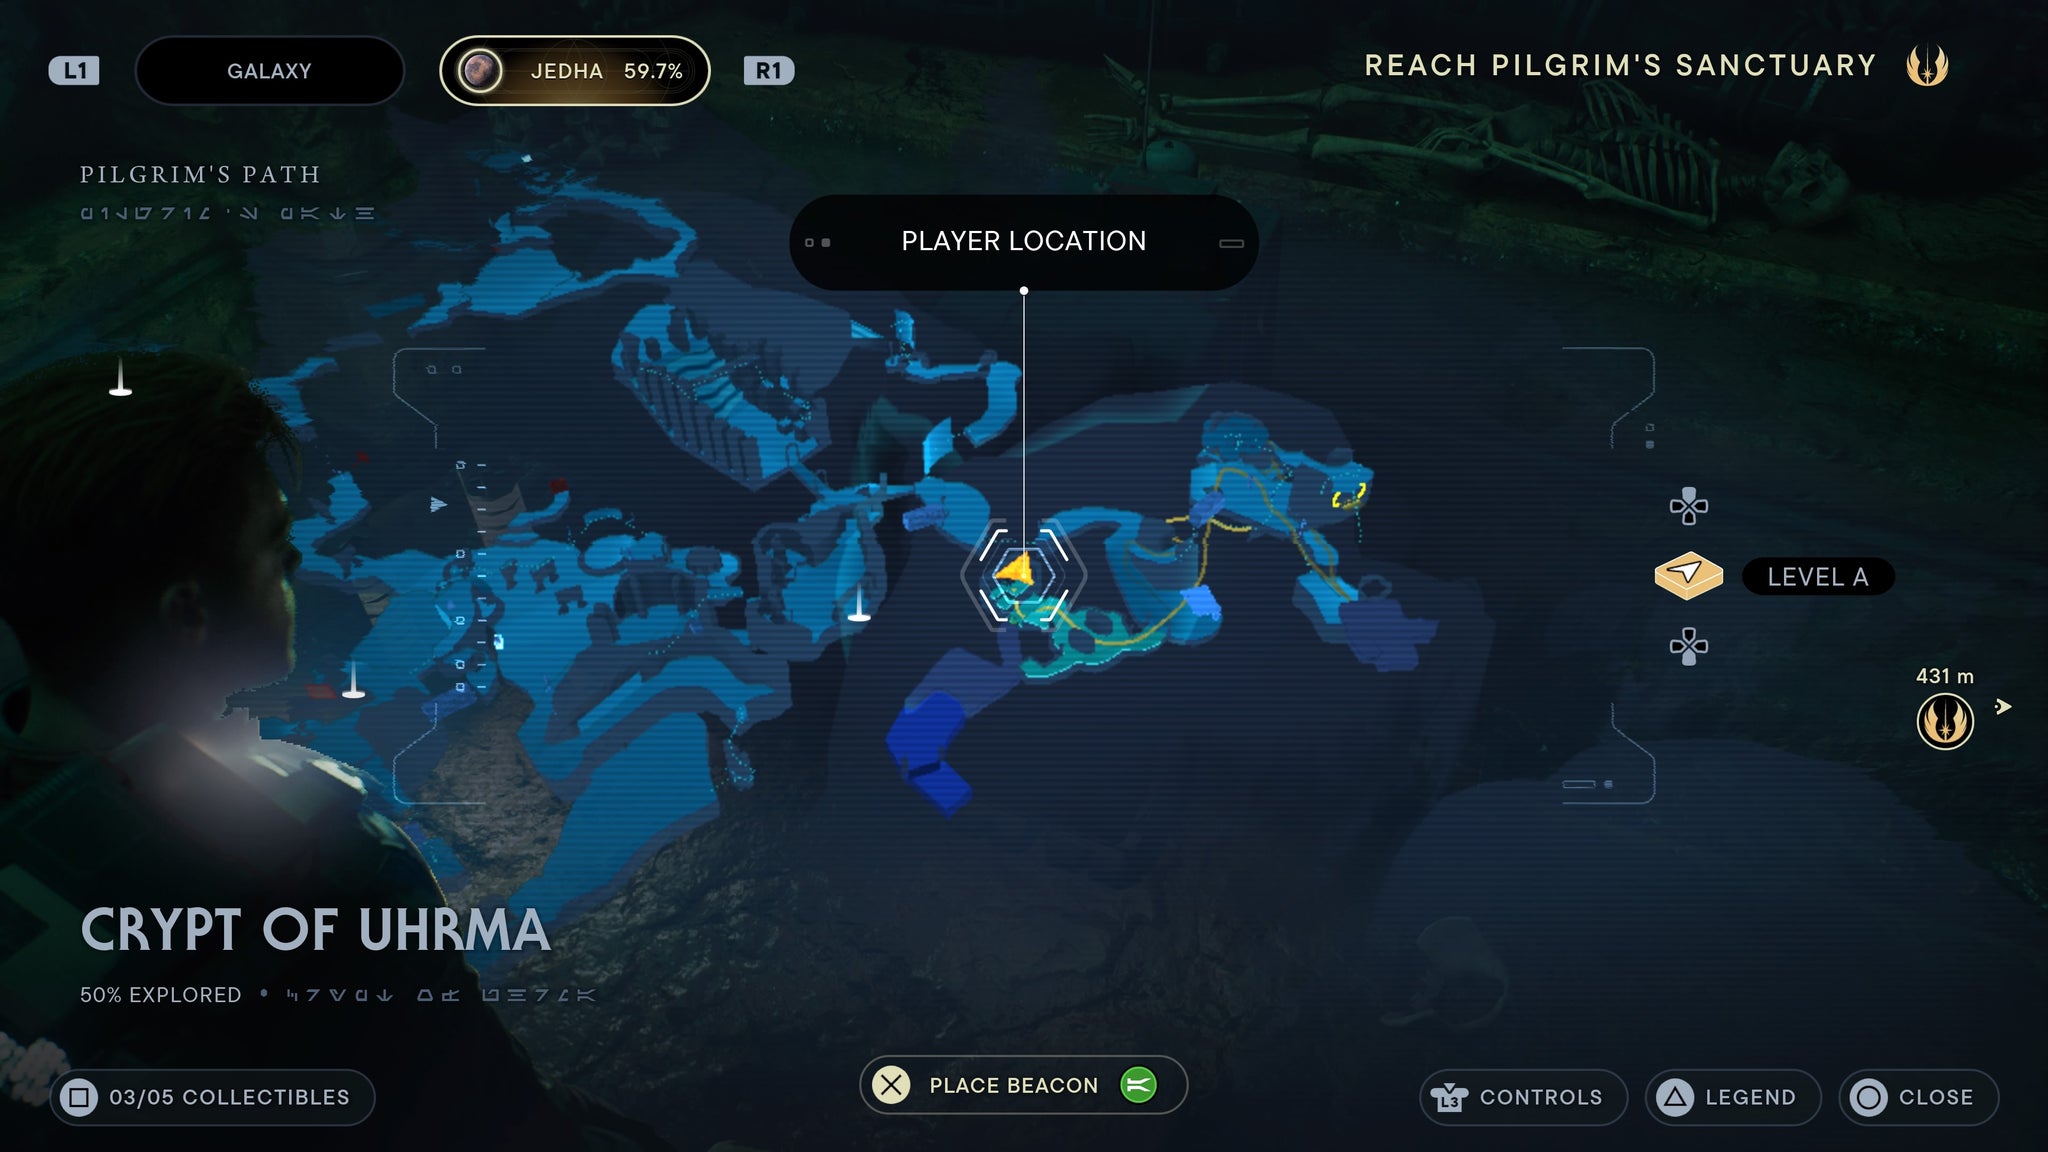
Scan the gonk droid!
Singing Ruins
When you jump into the ruins, take a left and you’ll find a force echo.
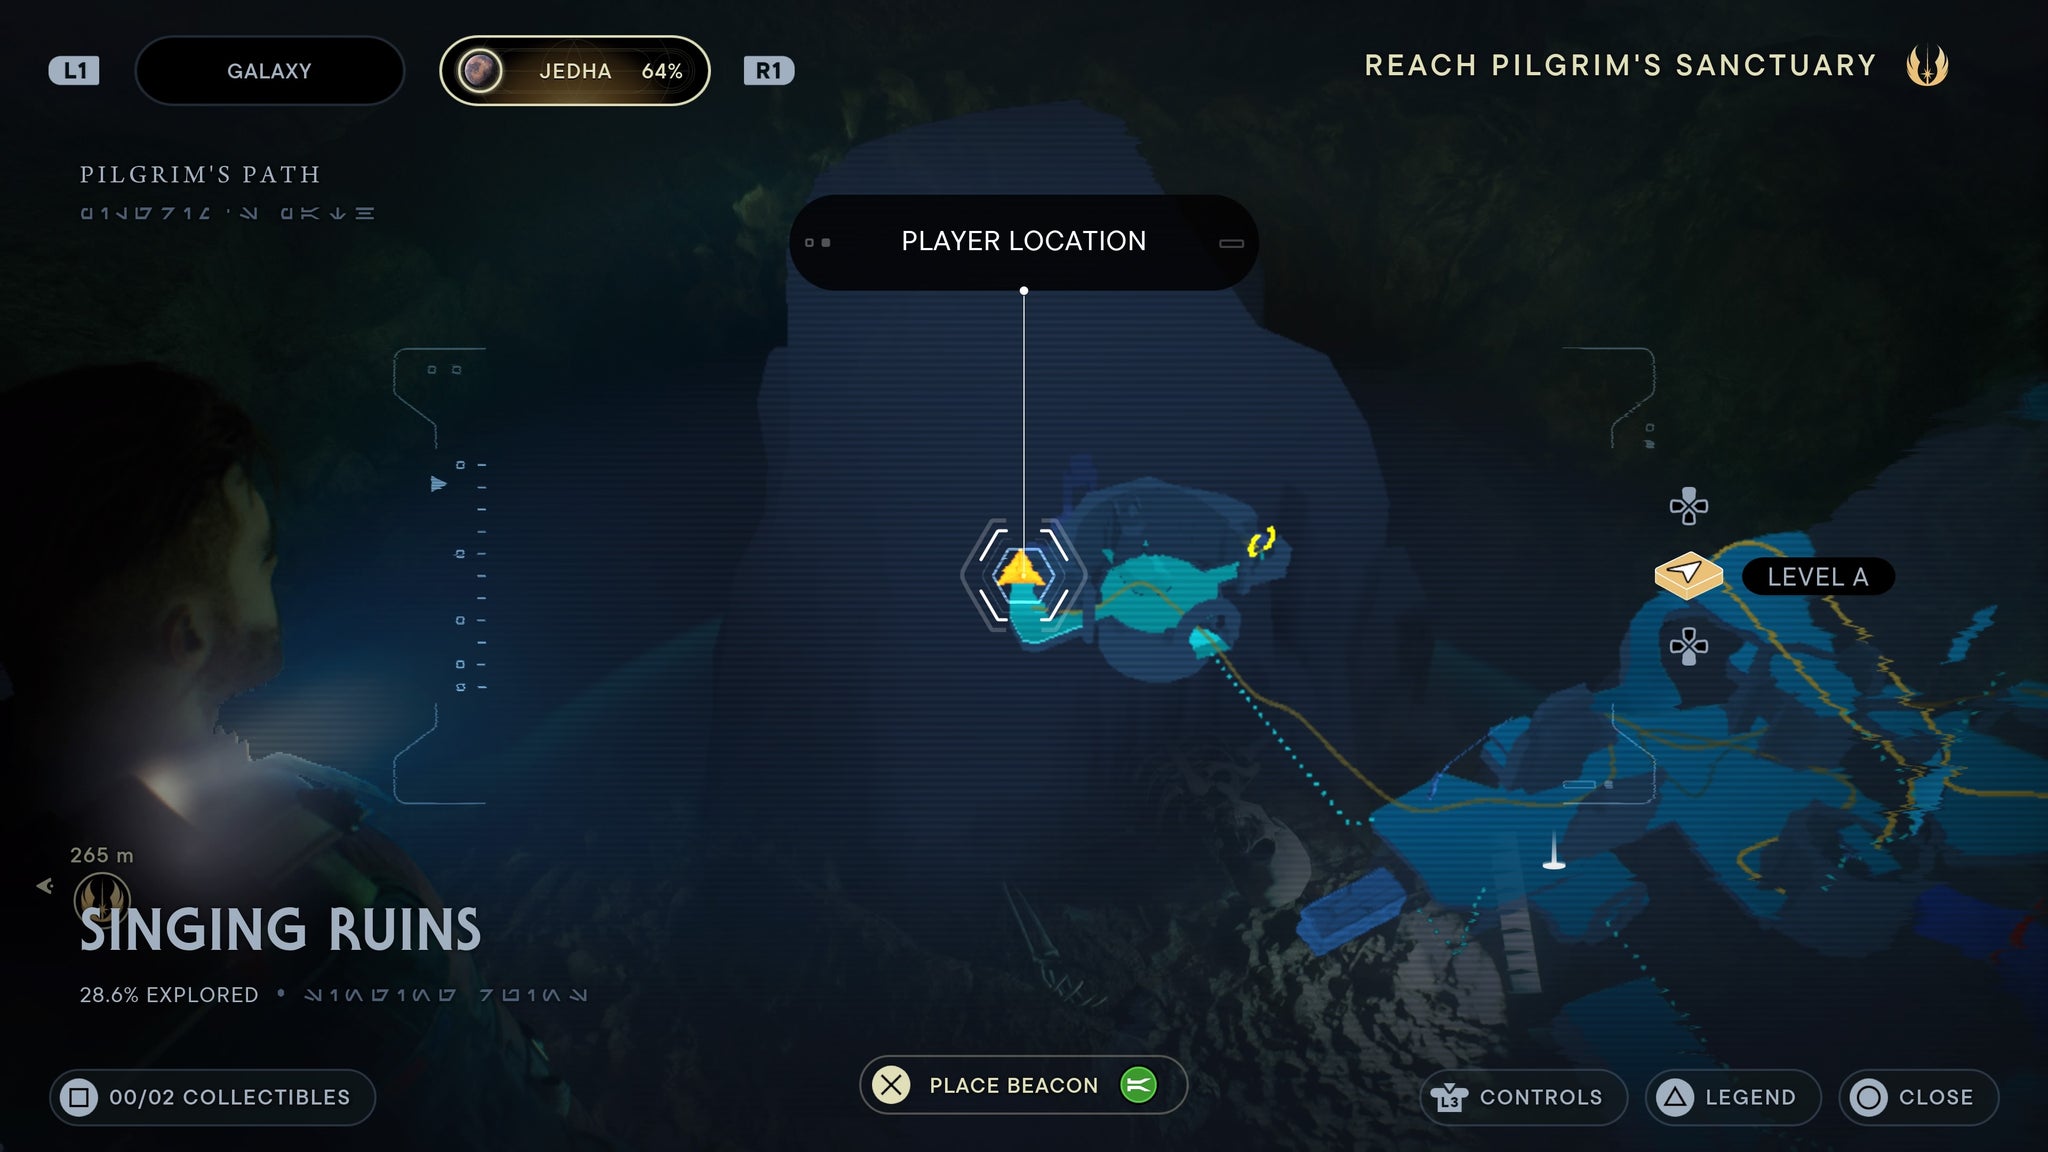
make the jump from the bridge, then look left!
Sanctuary Temple
Go through the squeeze space. The, straight ahead of you, is a scan.
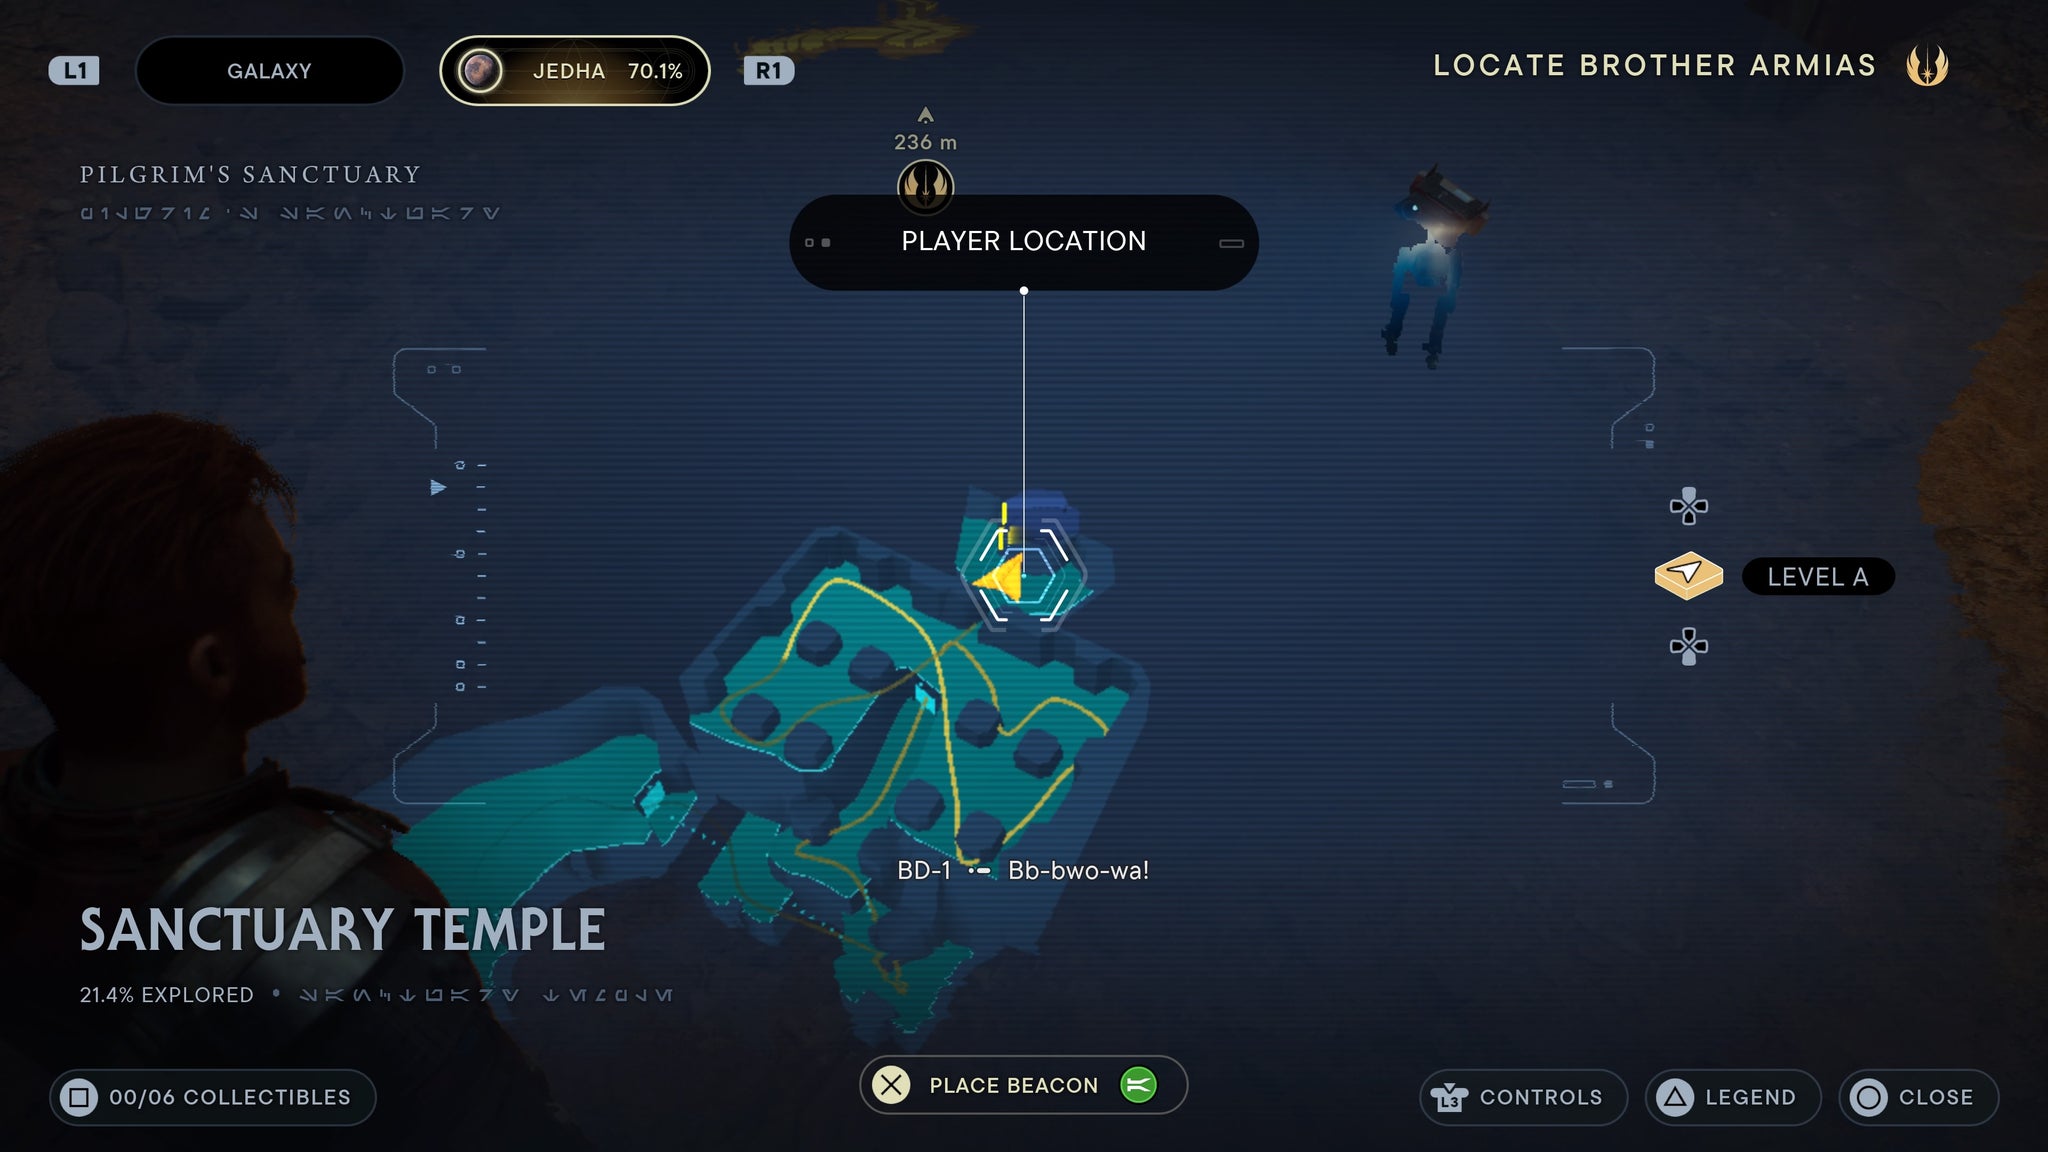
Scan the wall as you squeeze through.
Go through the squeeze space, then take a left. You’ll walk up to a force echo.
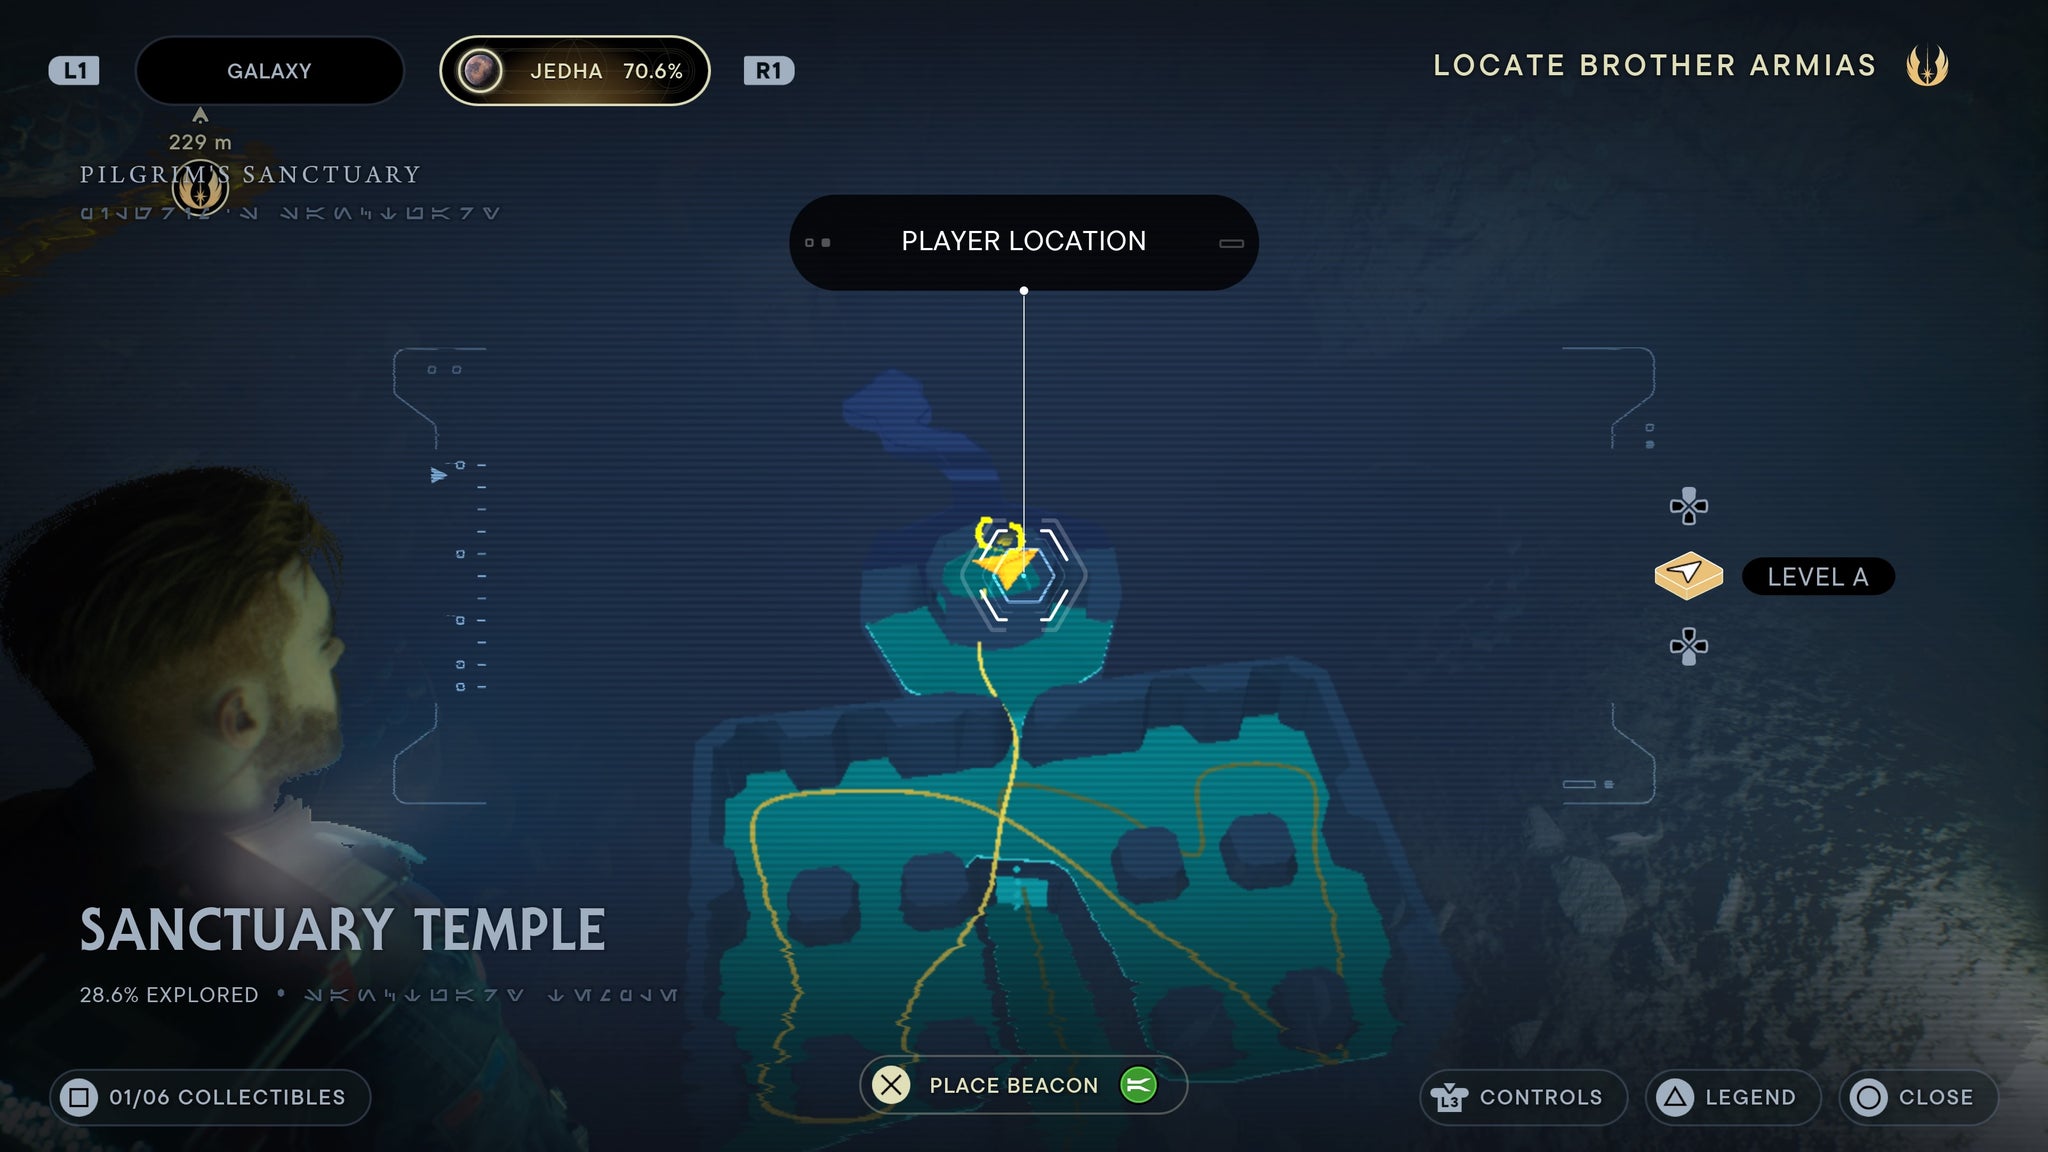
Pots on the ground.
As you dash past the giant ship’s first leg, you’ll see an echo in the corridor ahead of you, to the left.
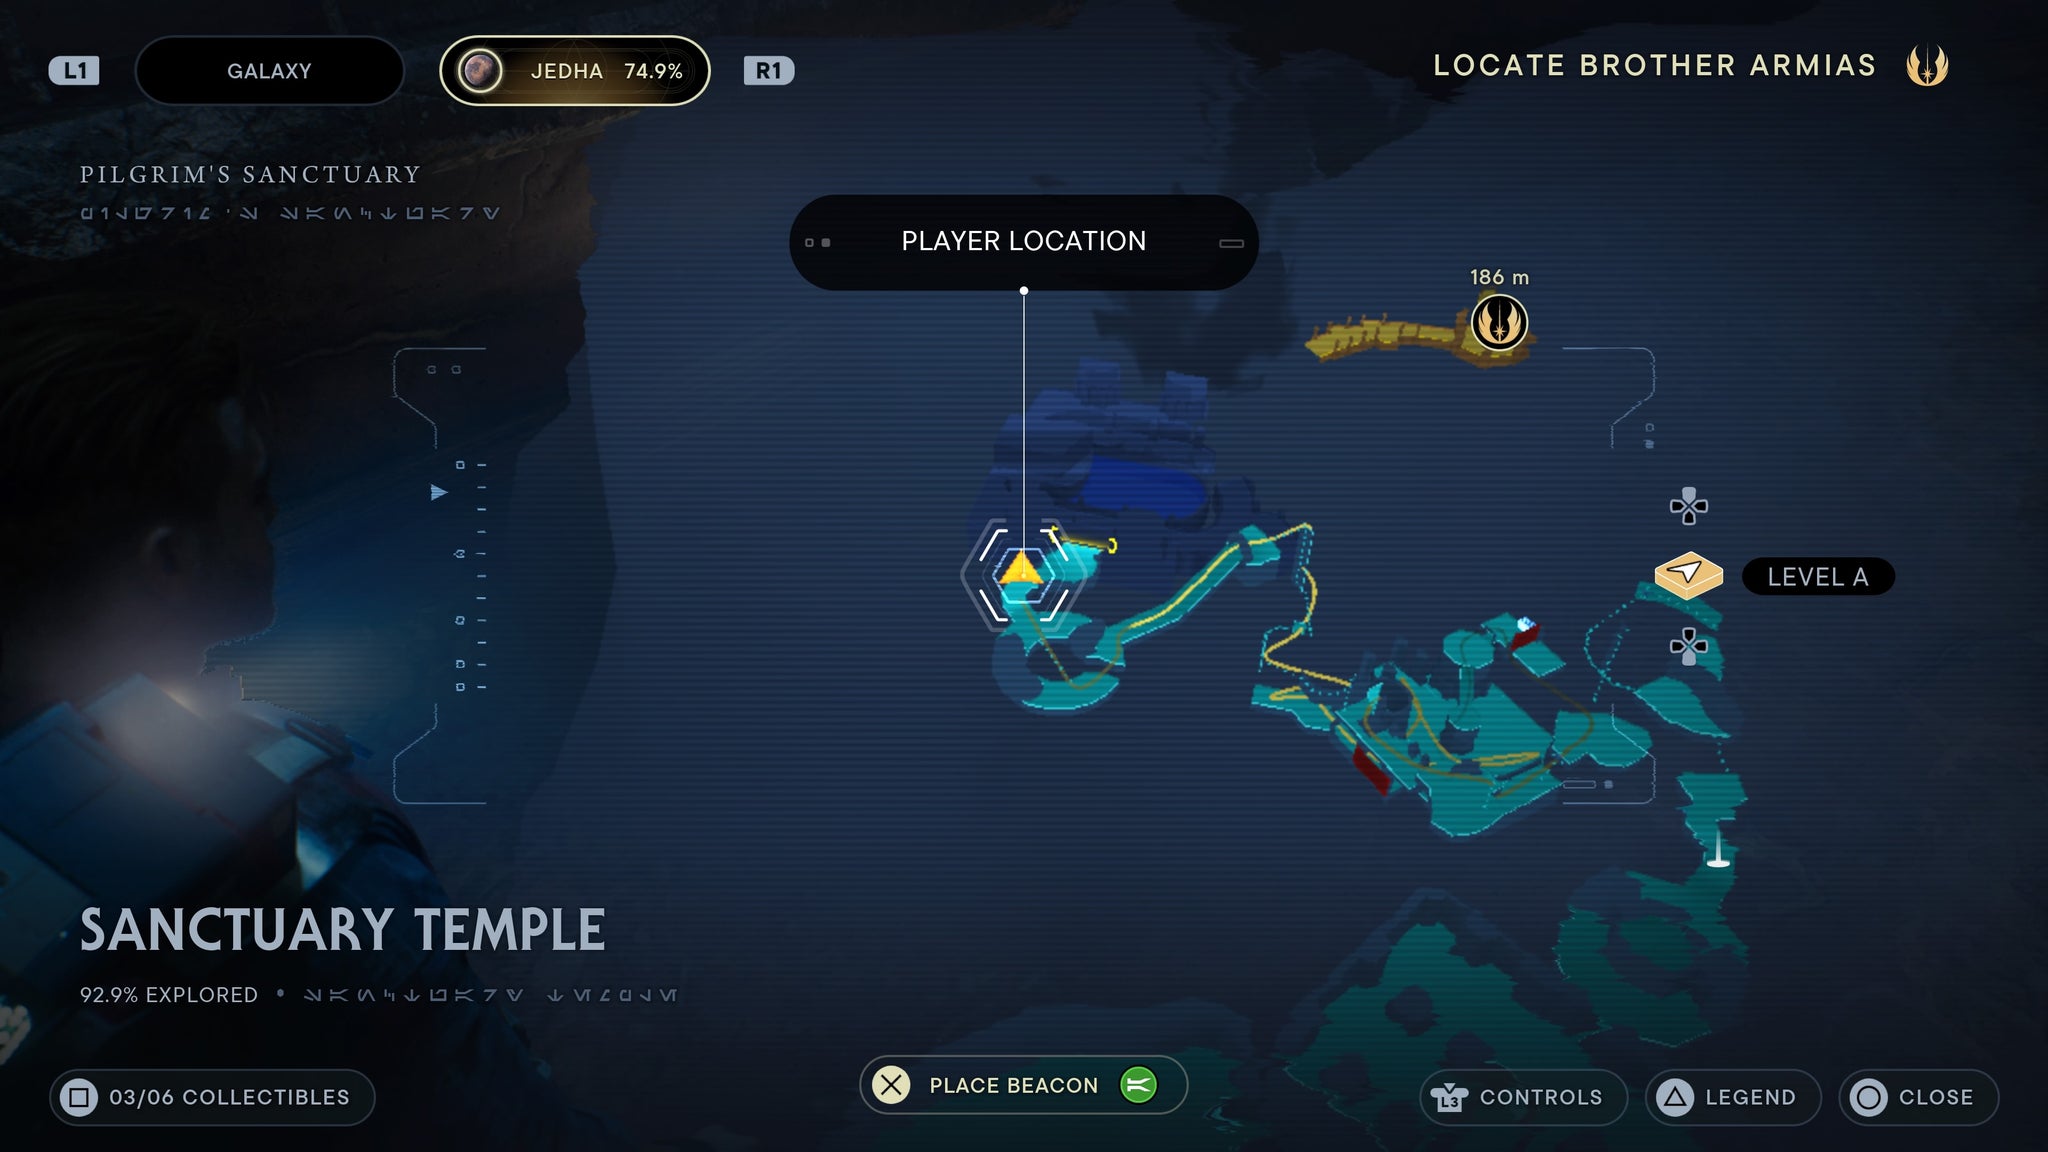
In front of a large wall mural.
Buried Refuge
As you pass through the giant front doors, scan the wall to your right.
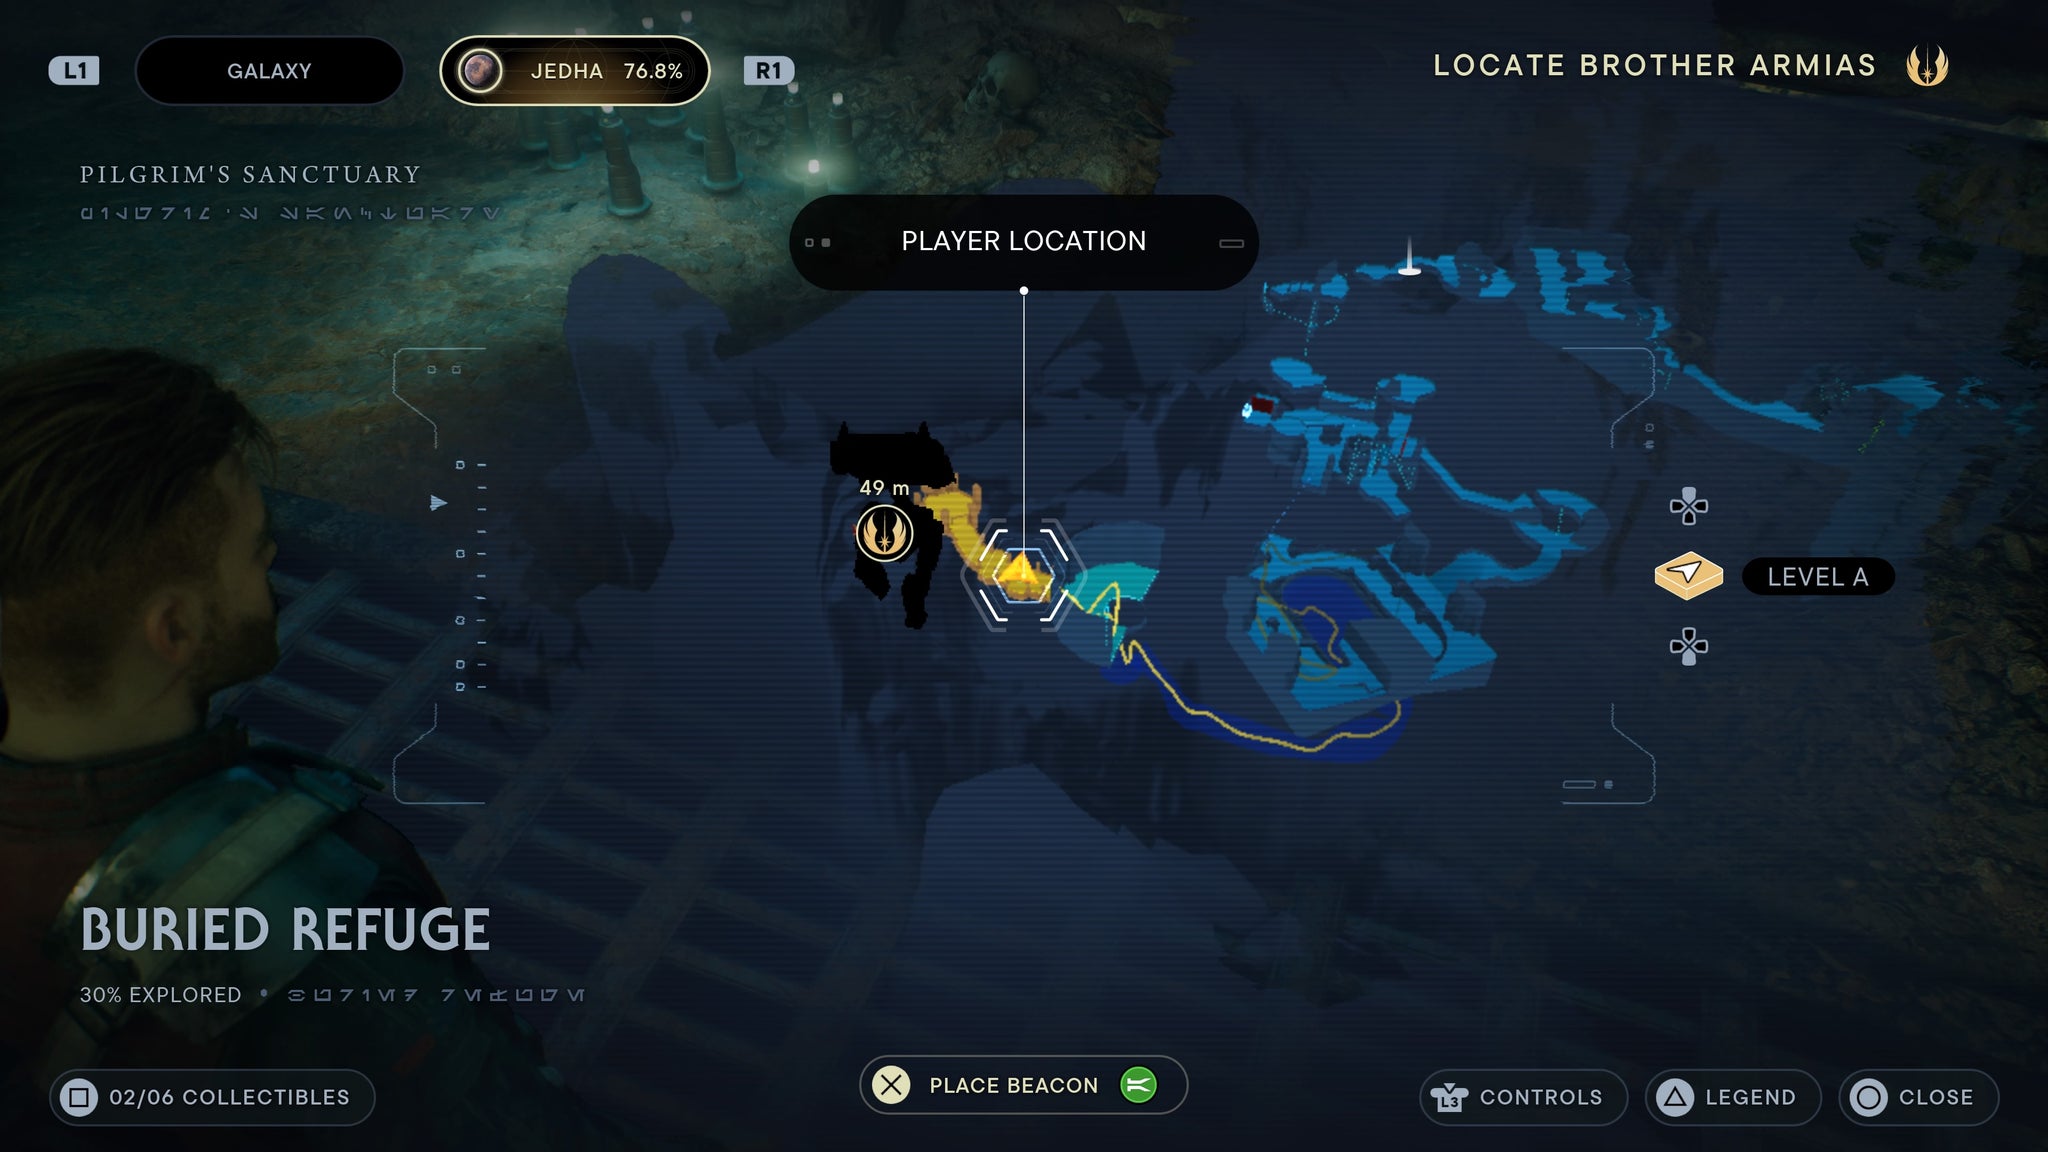
A skeleton in the wall.
As you pass through the giant front doors, you’ll find a force echo on a skeleton ahead.
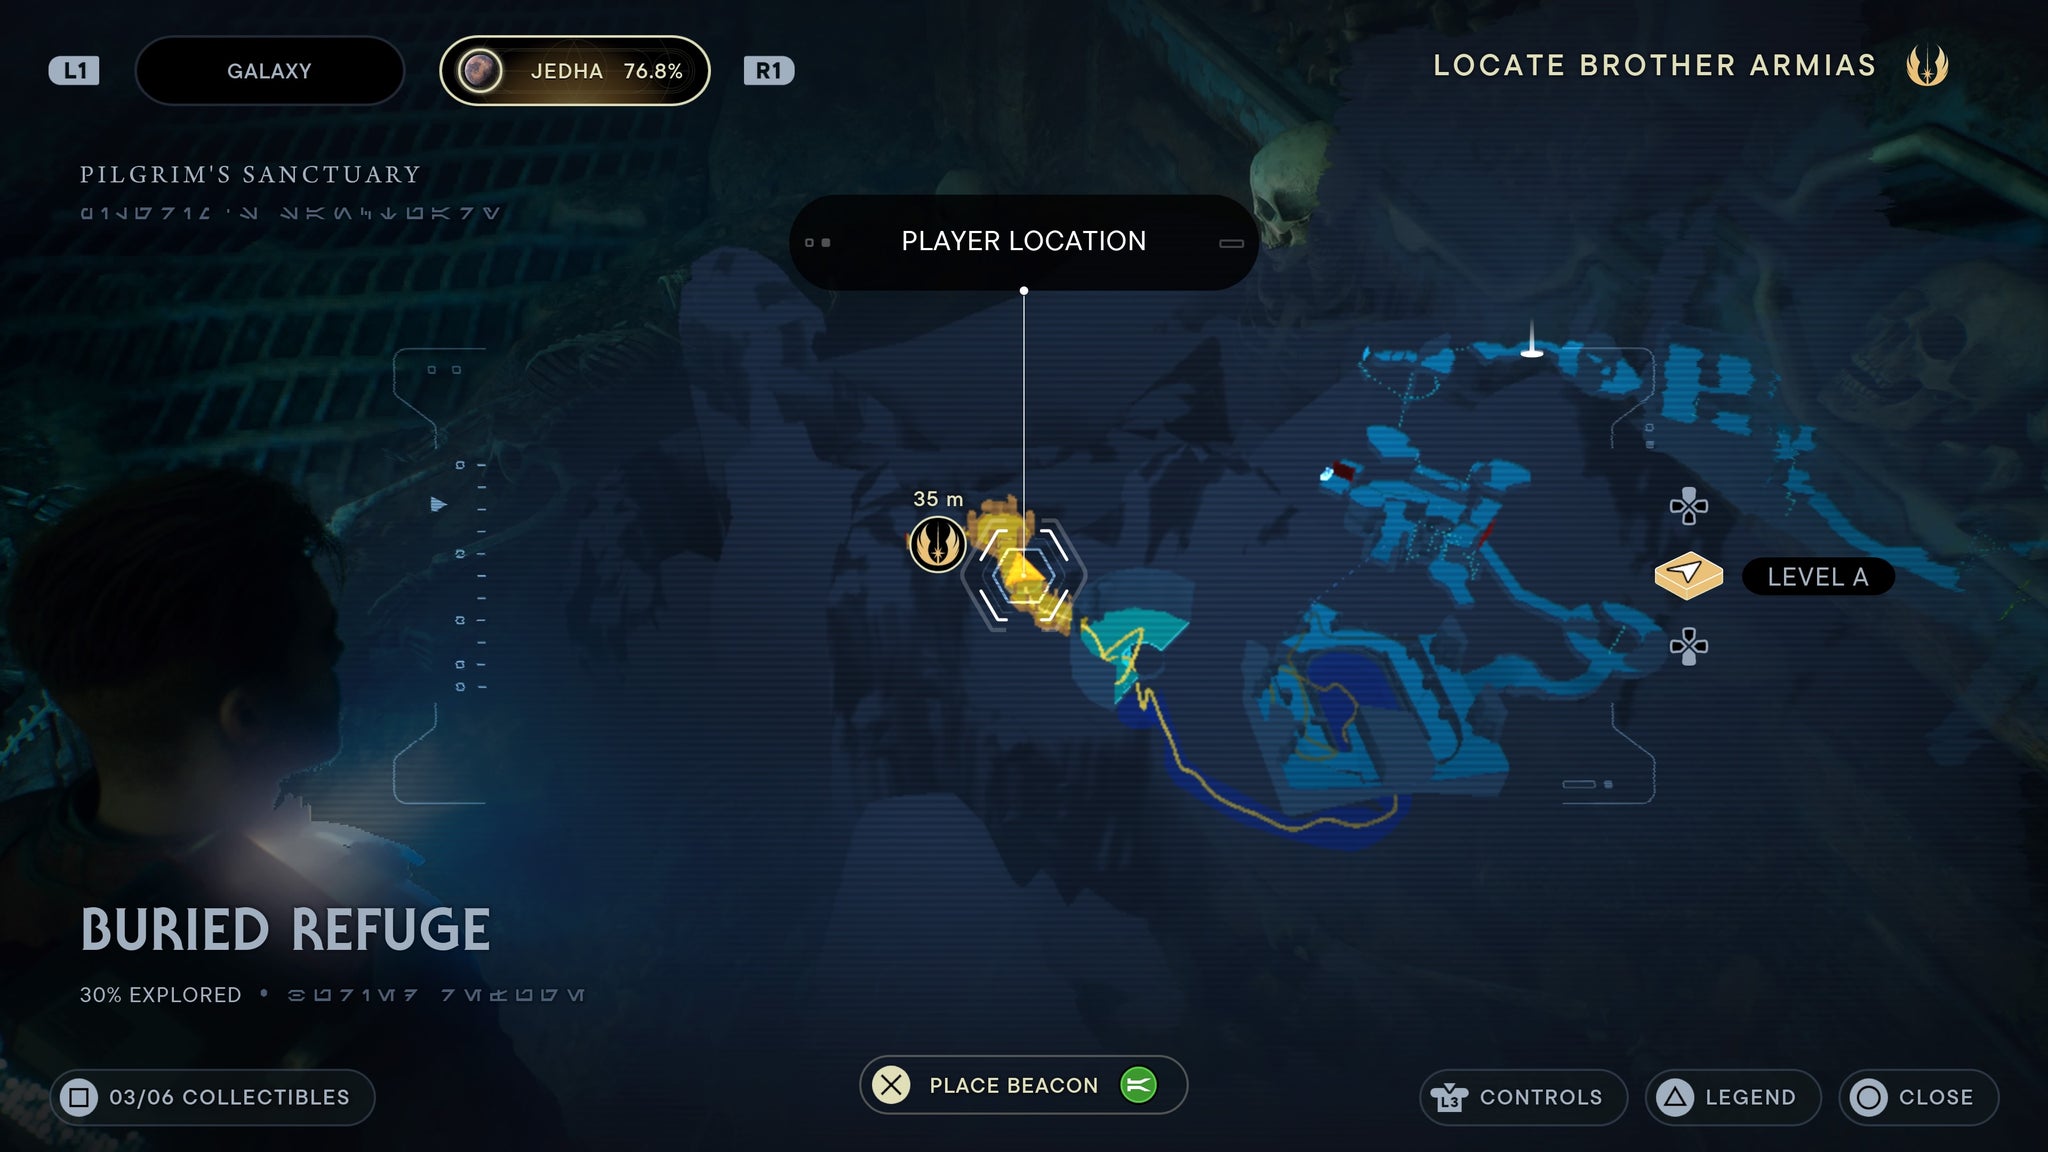
On a skeleton on the floor!
As you pass through the giant front doors, you’ll find a device in the middle of the next room with a force echo on it.
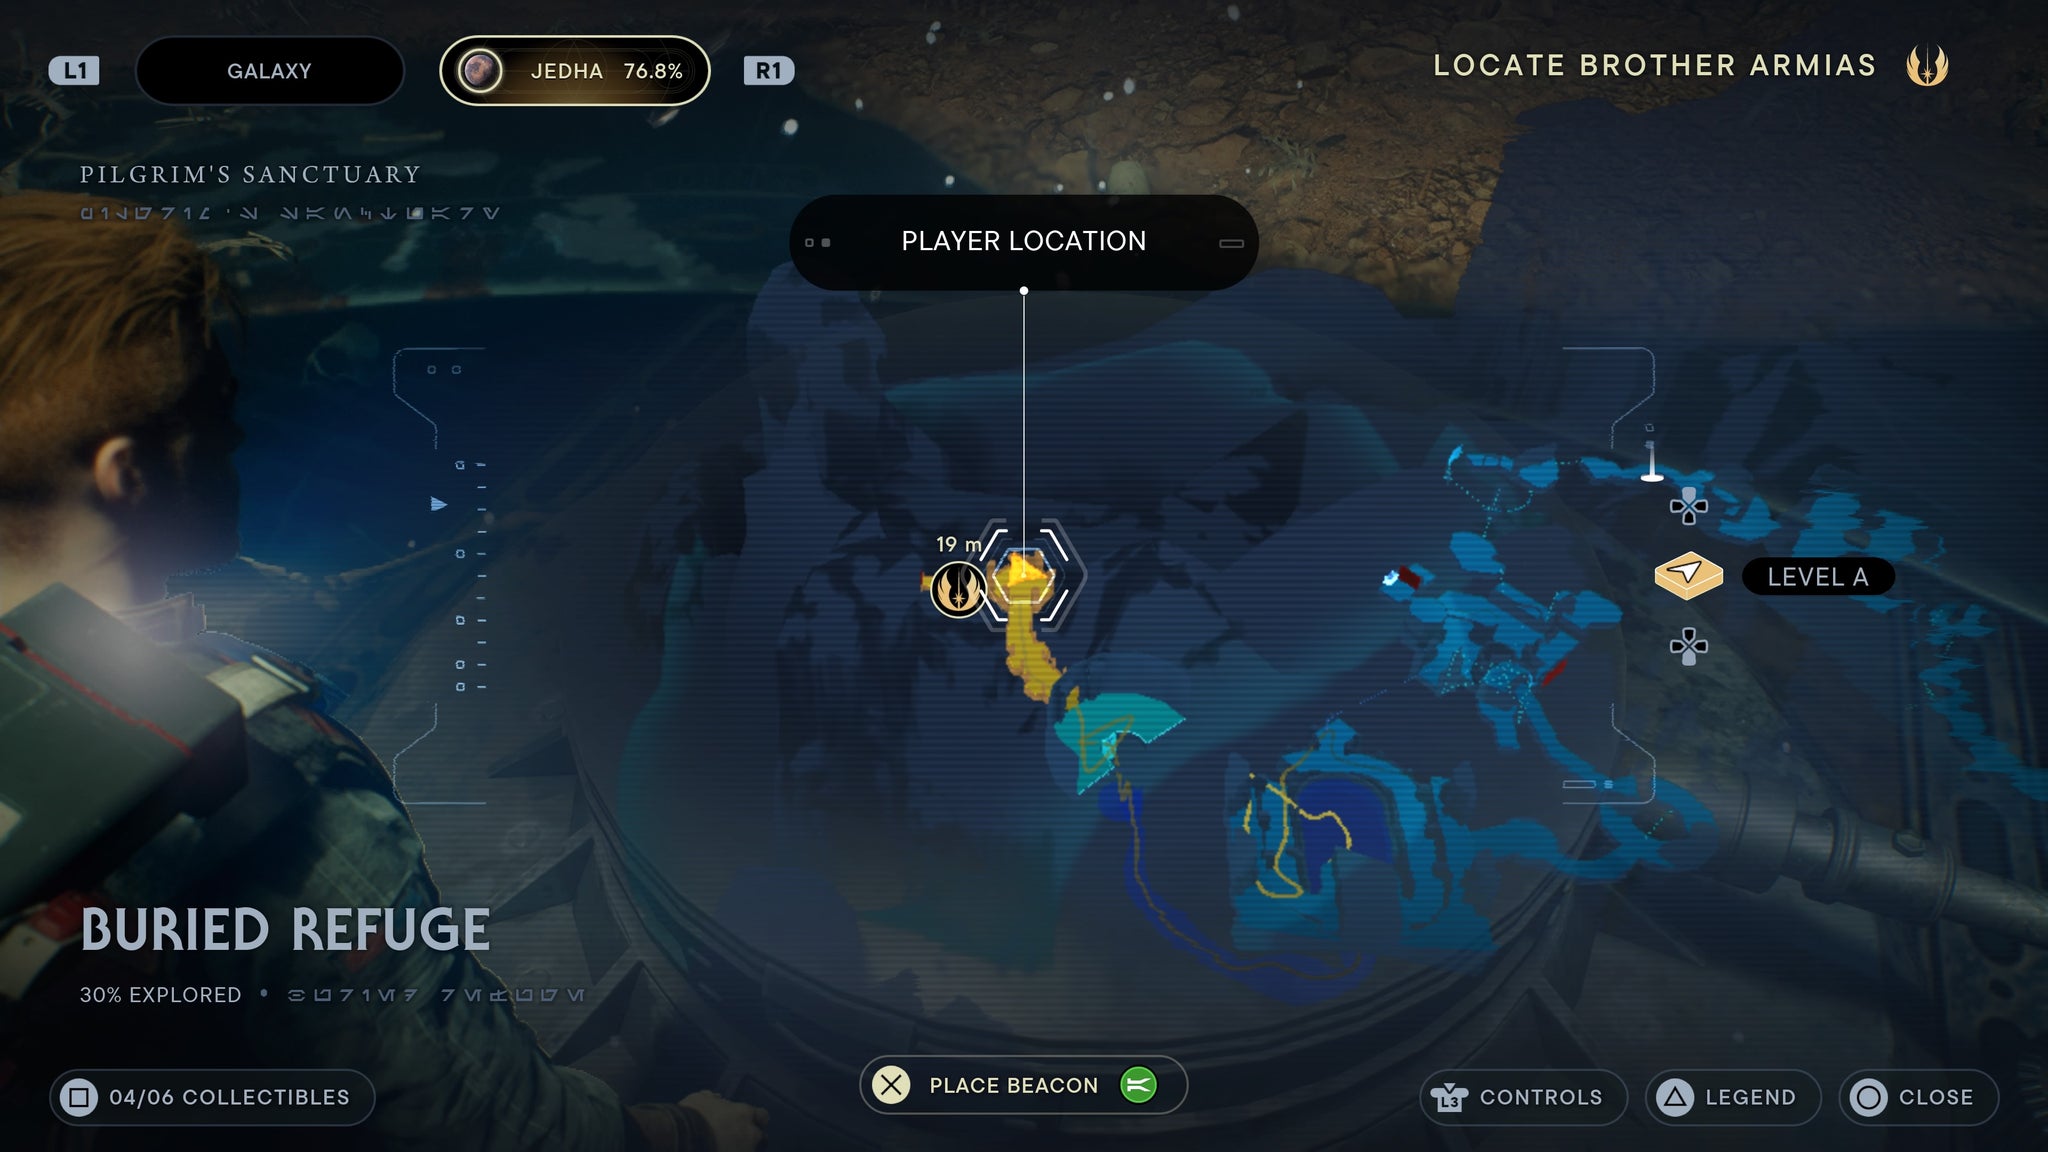
In the centre of the room.
Path of Restoration
Requires air dash. Jash over to the platform to the right of the Path of Restoration, then walk left. You’ll find a statue you can scan.
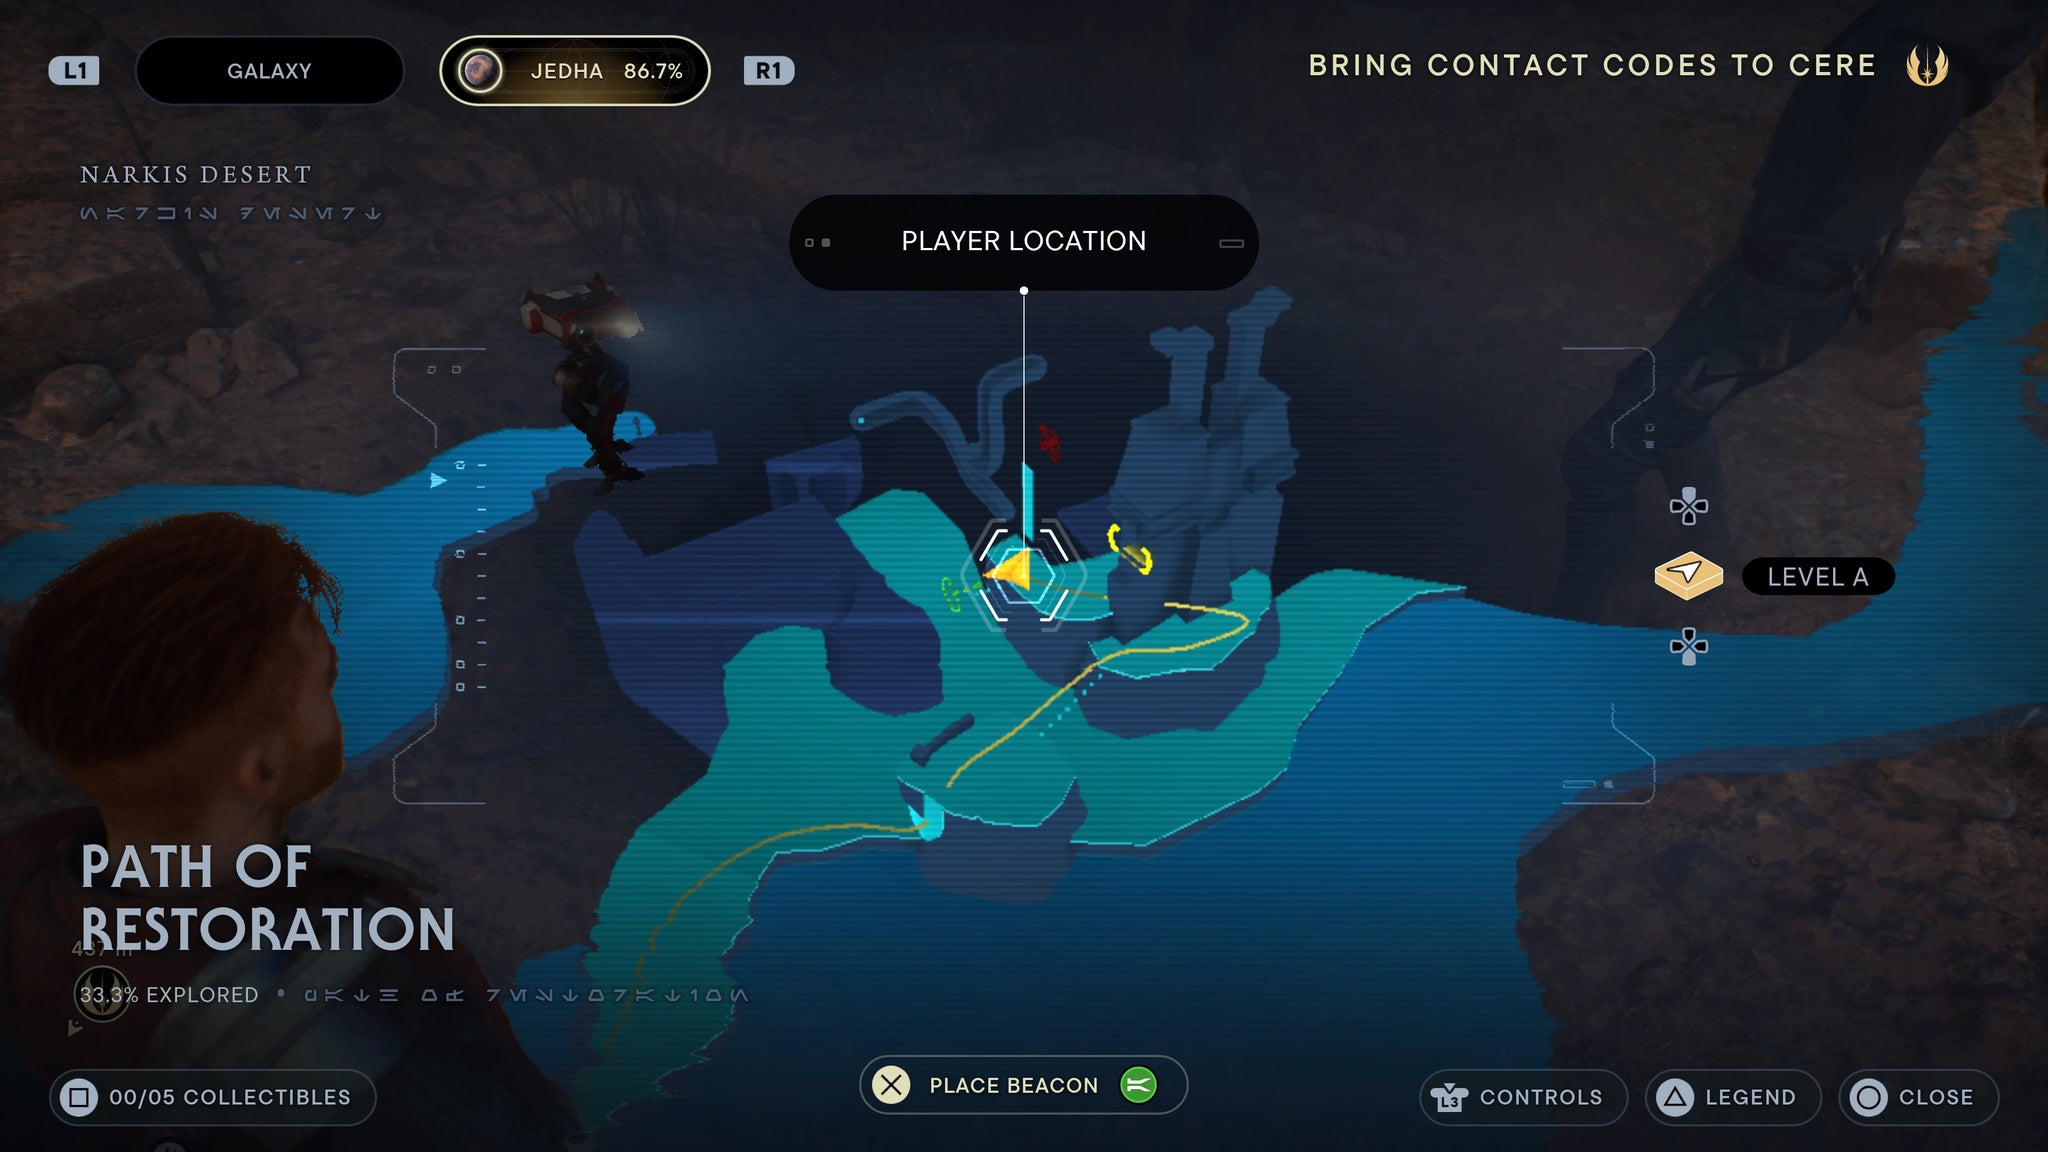
Right of the Path, there’ll bea statue.
Wall run to the back of the Path of Restoration near the orb you need to push. There on the ground will be a force echo.
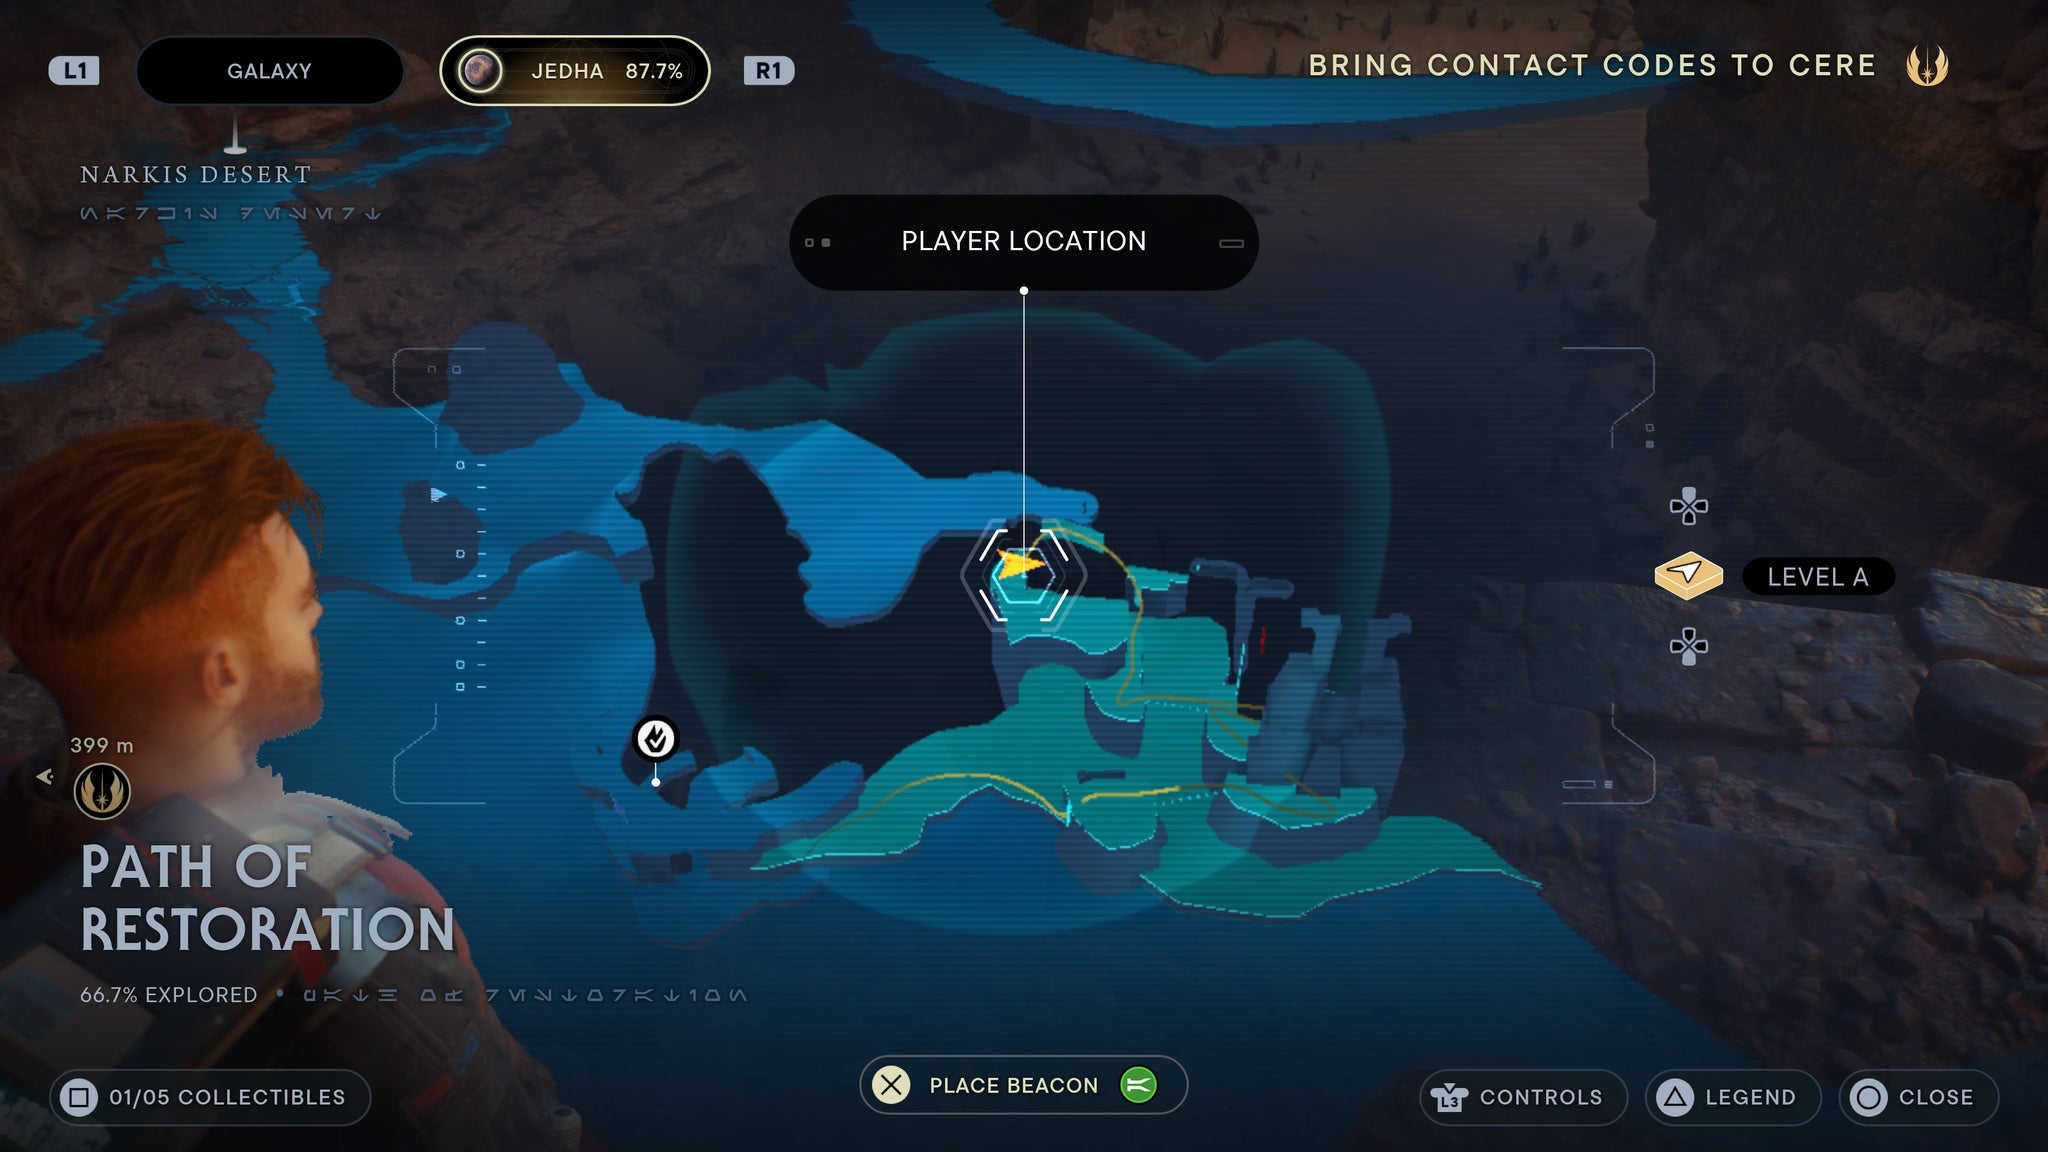
On the edge of a higher platform, by an orb.
At the top of the Path of Restoration is the force echo.
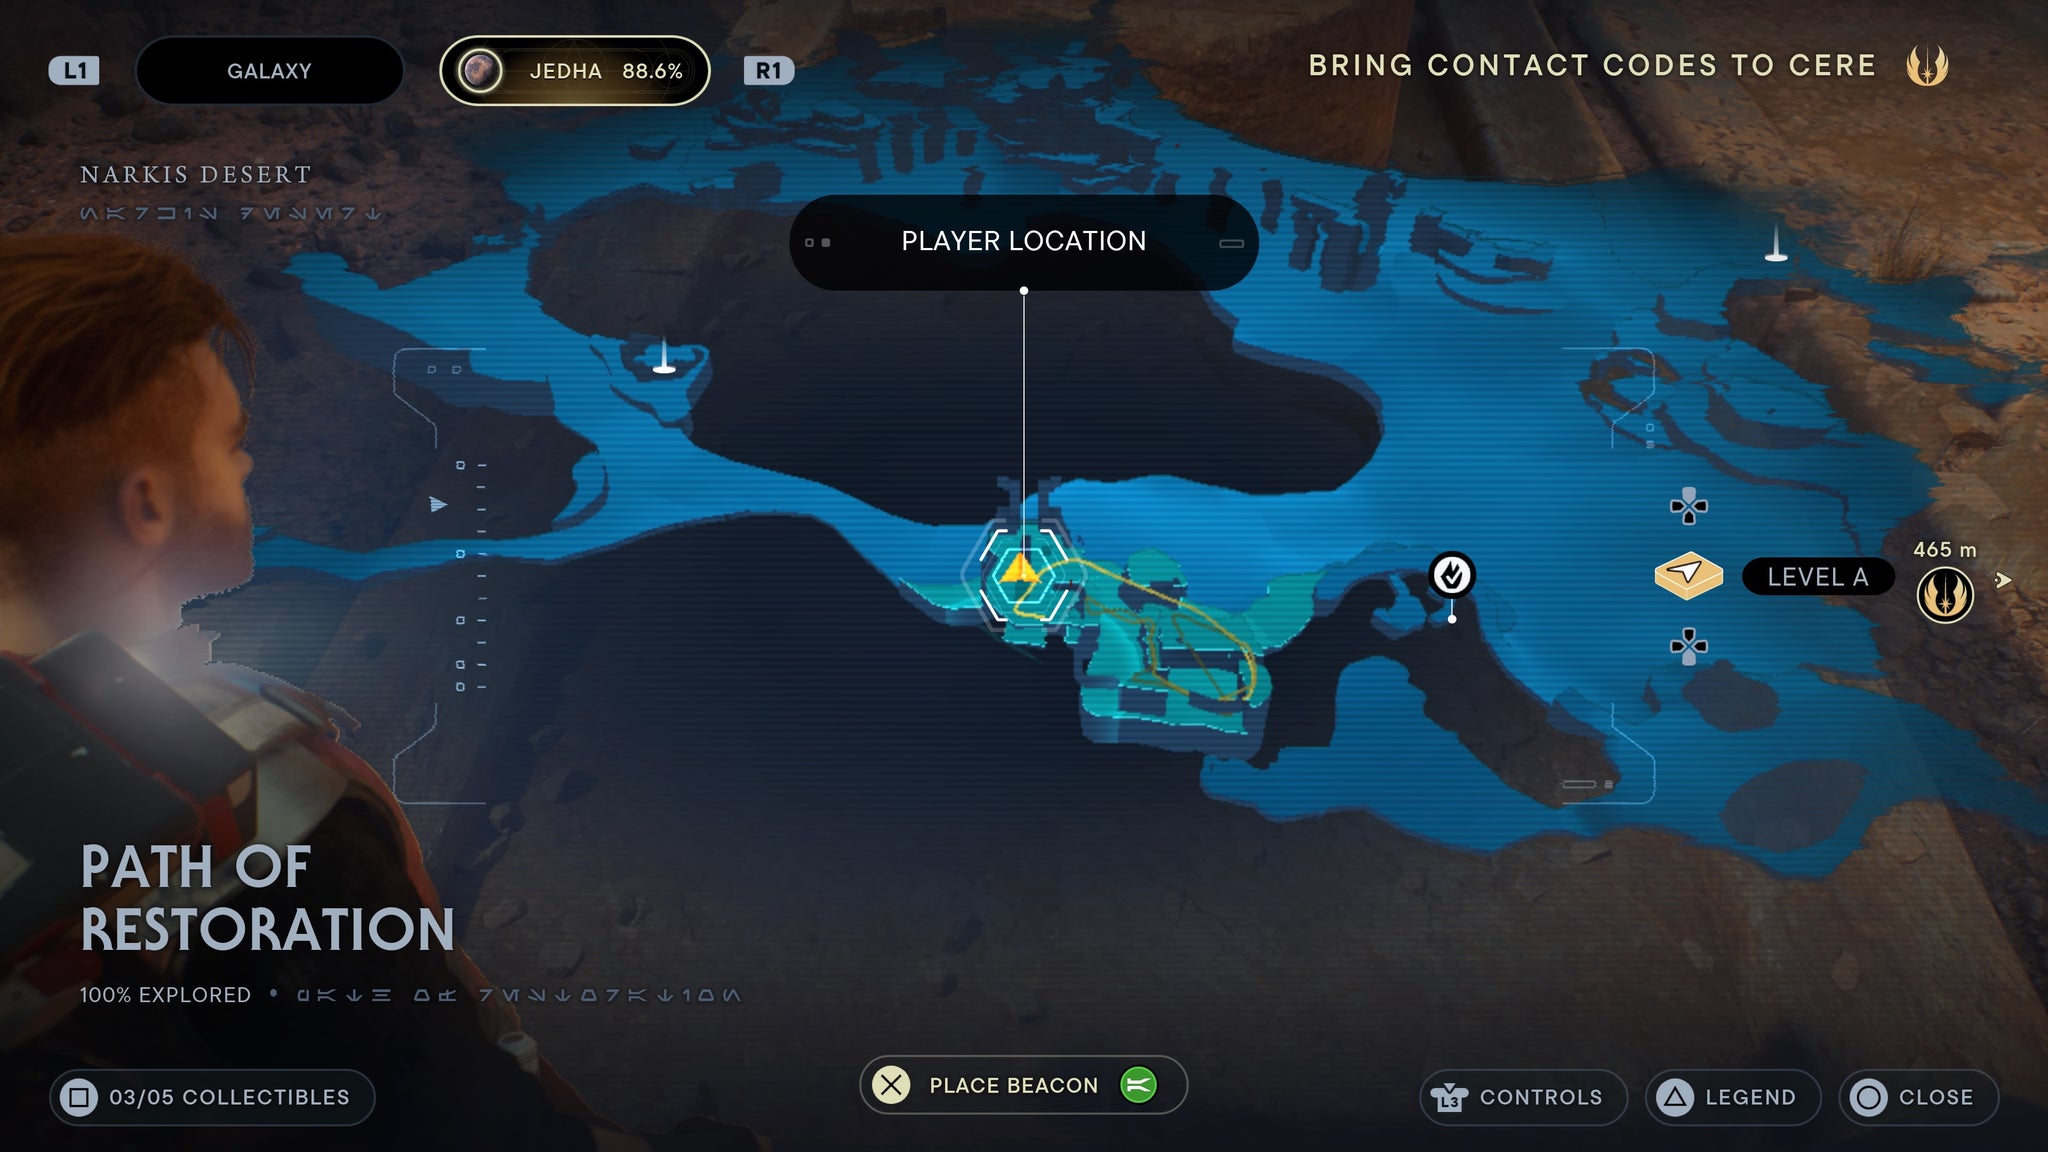
Right at the top, by the orb.
Path of Conviction
This force echo can be found at the top of the Path of Conviction, by the orb path.
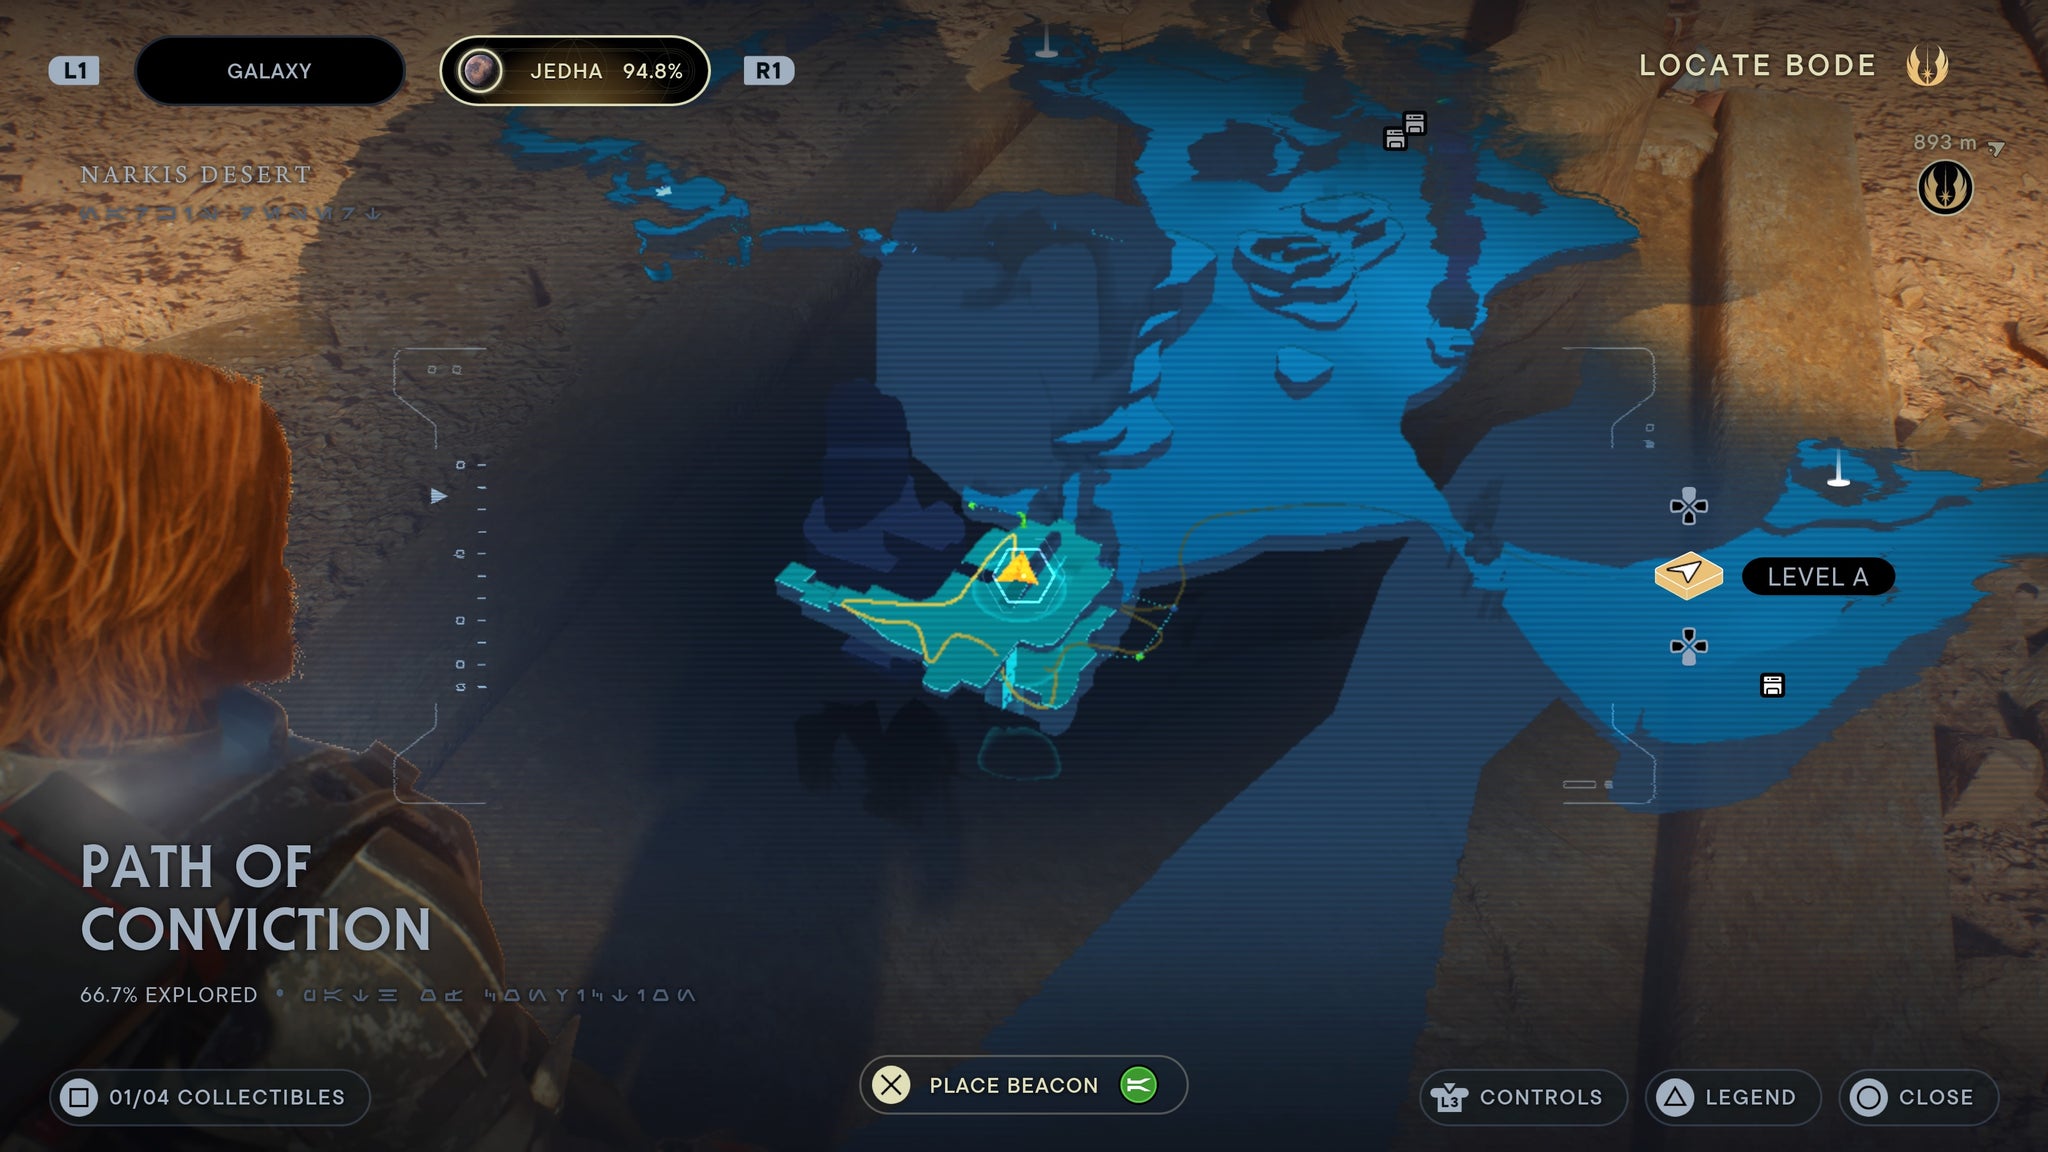
Right by the top, by the central orb path.
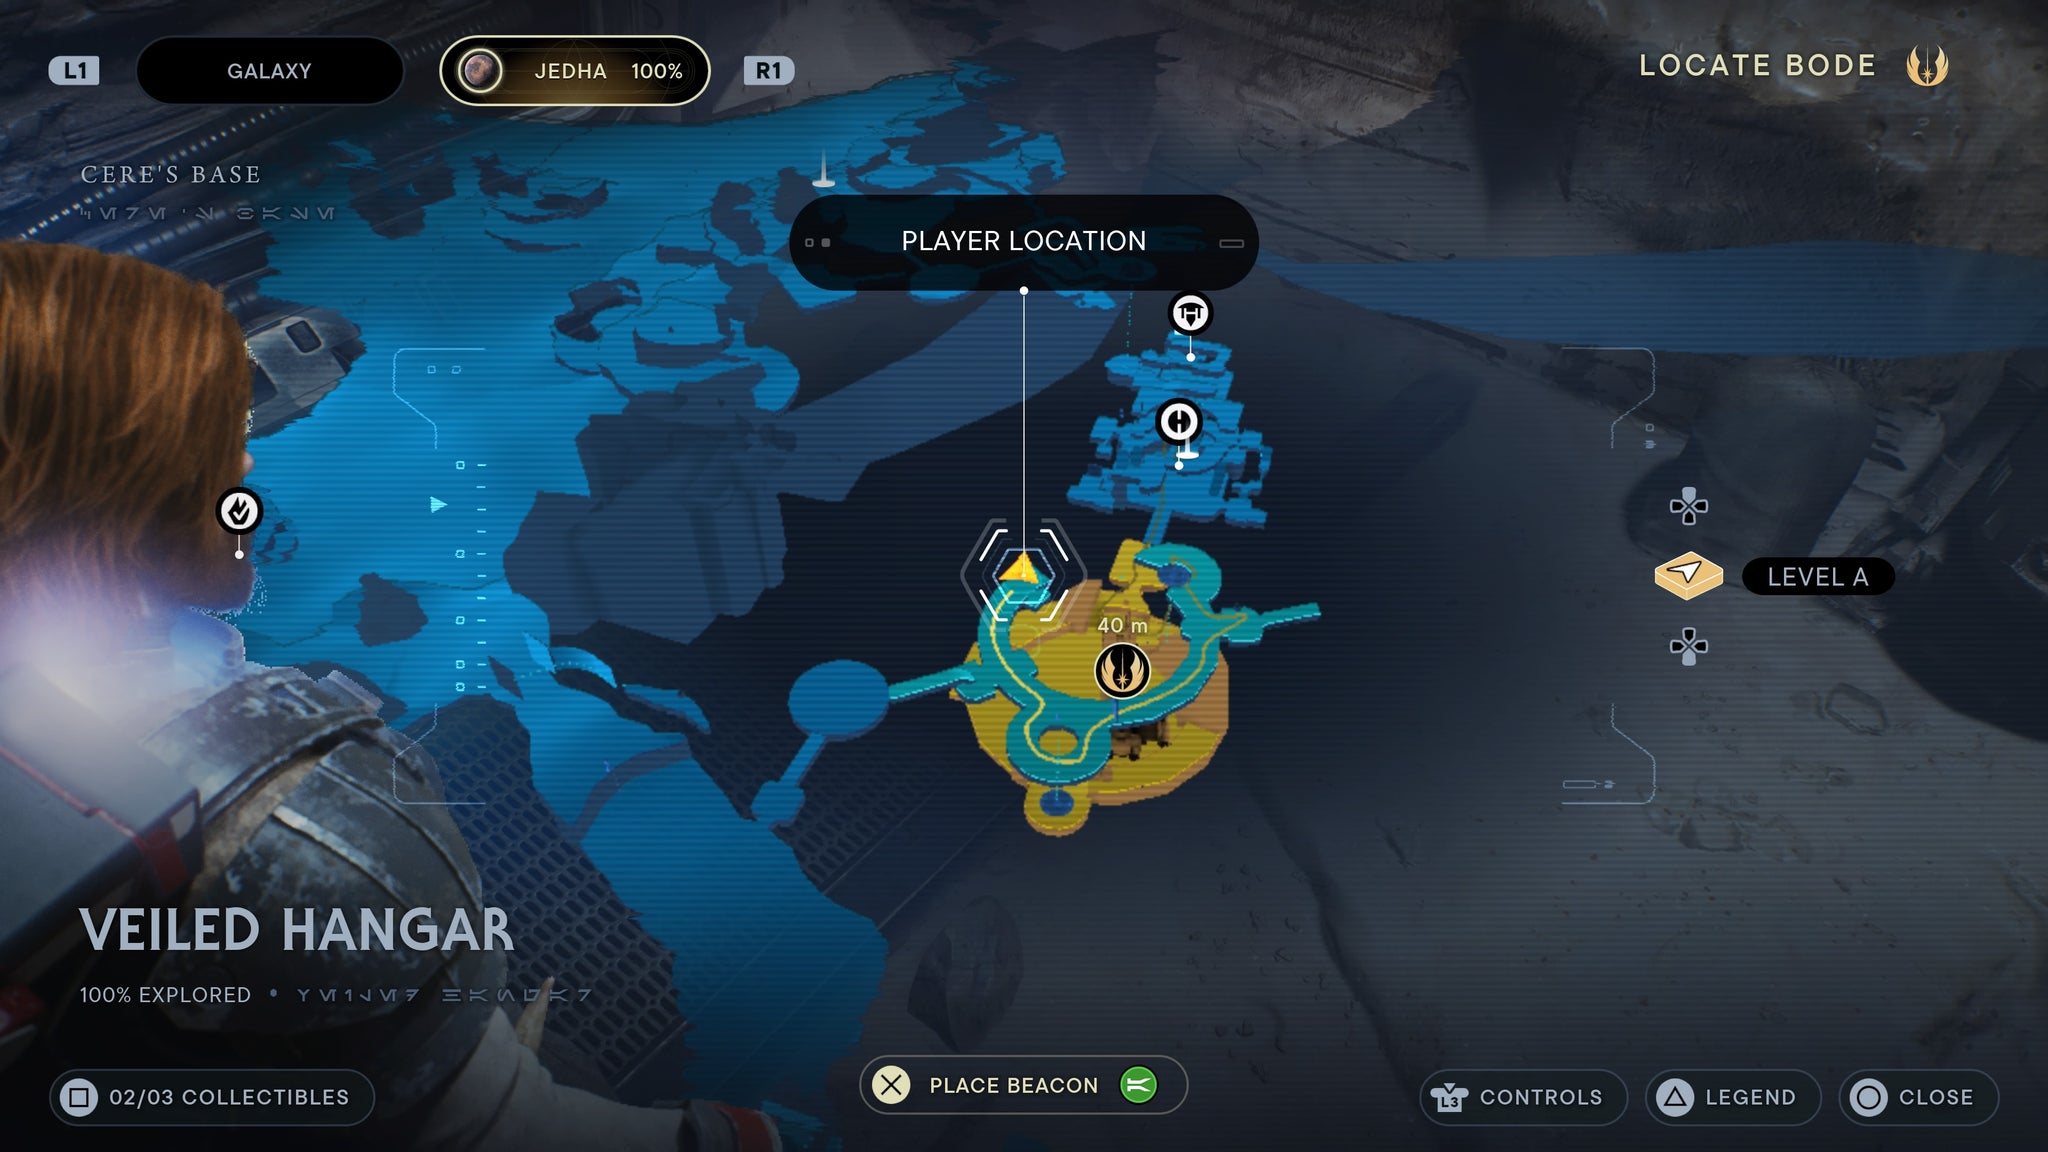
Veiled hangar
Requires completion of chapter five. Make your way around to the left of the circular platform above the Mantis. There, you’ll find a force echo.
All the way to the left!
Shattered Moon databank collectable locations
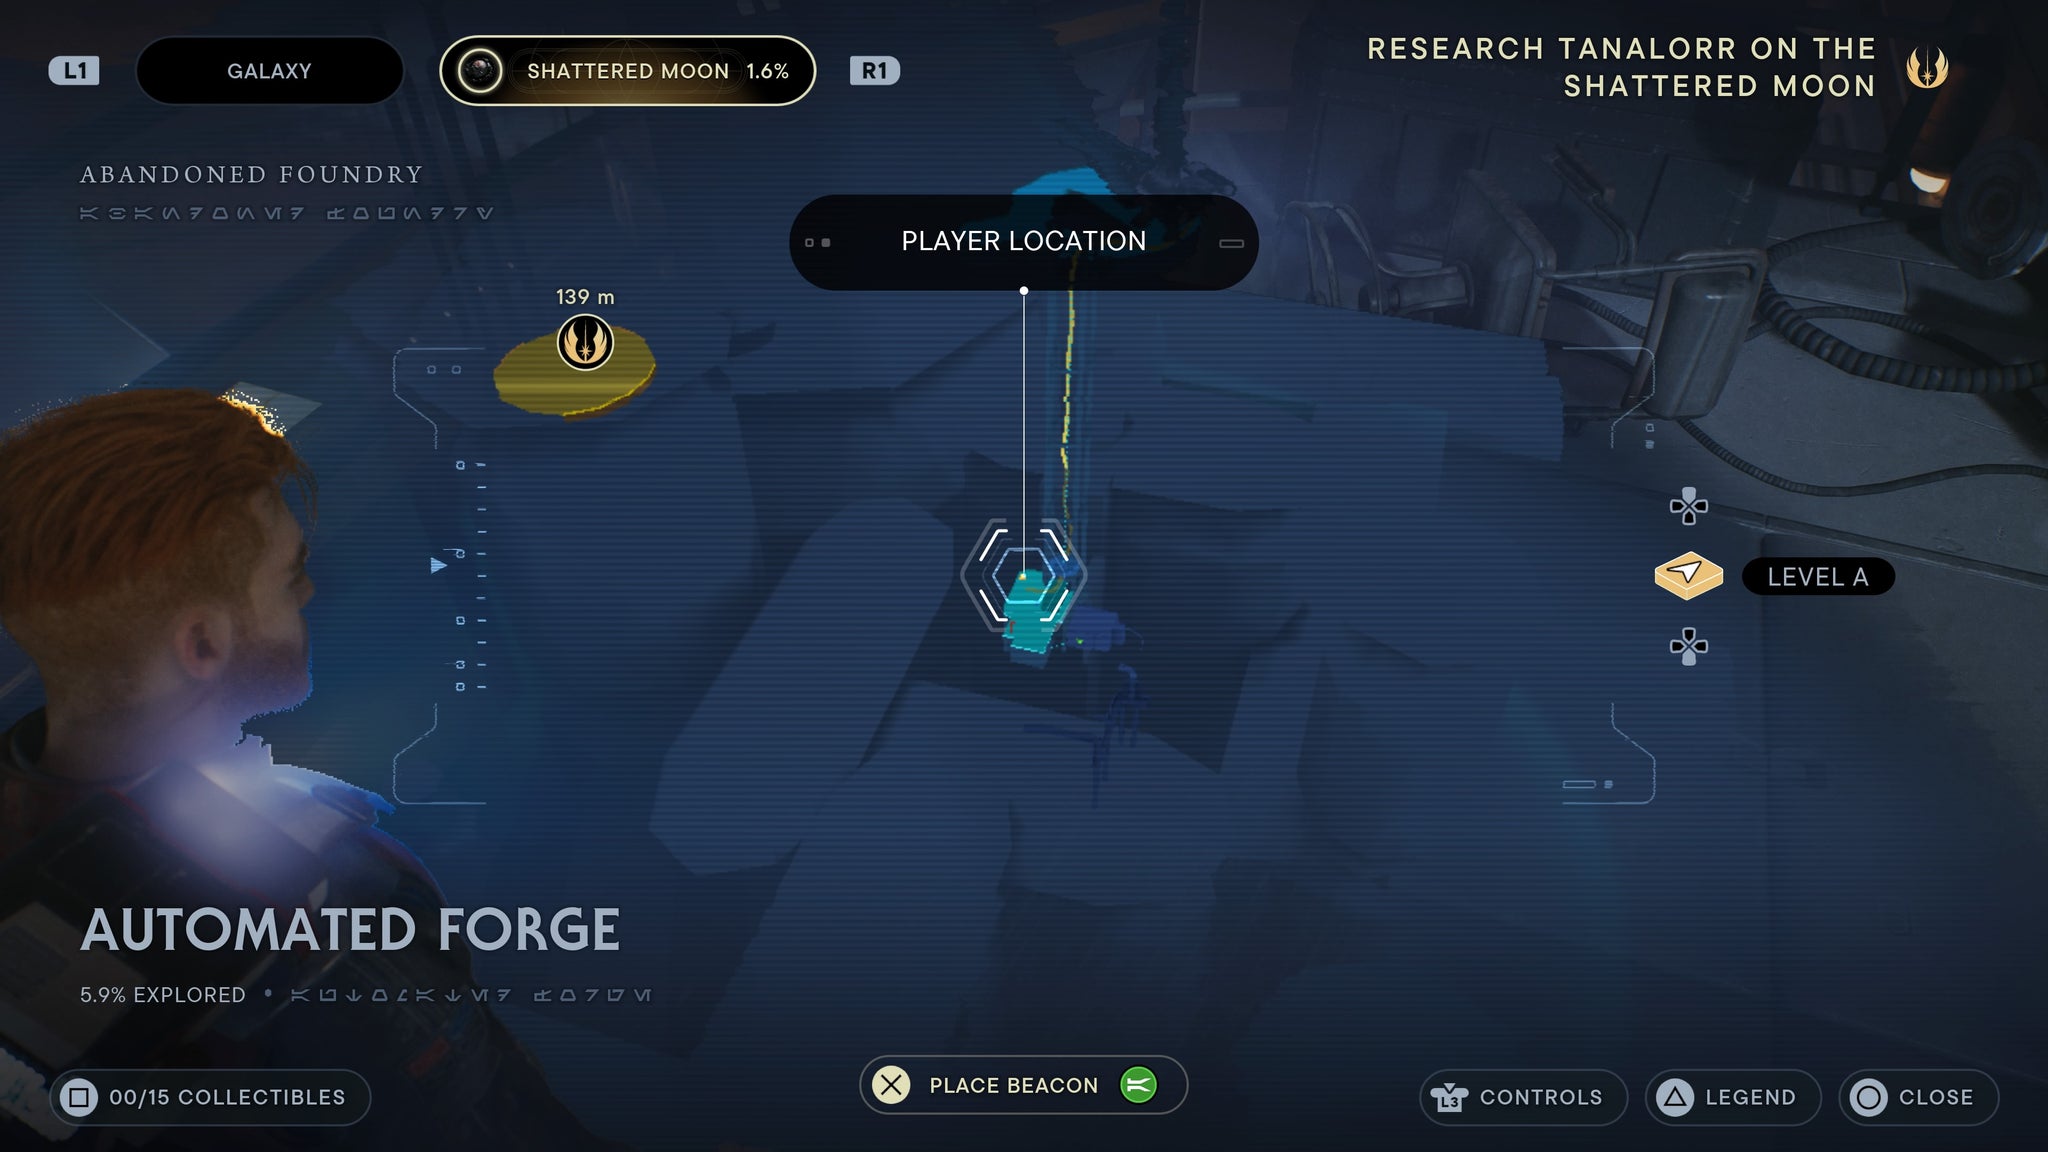
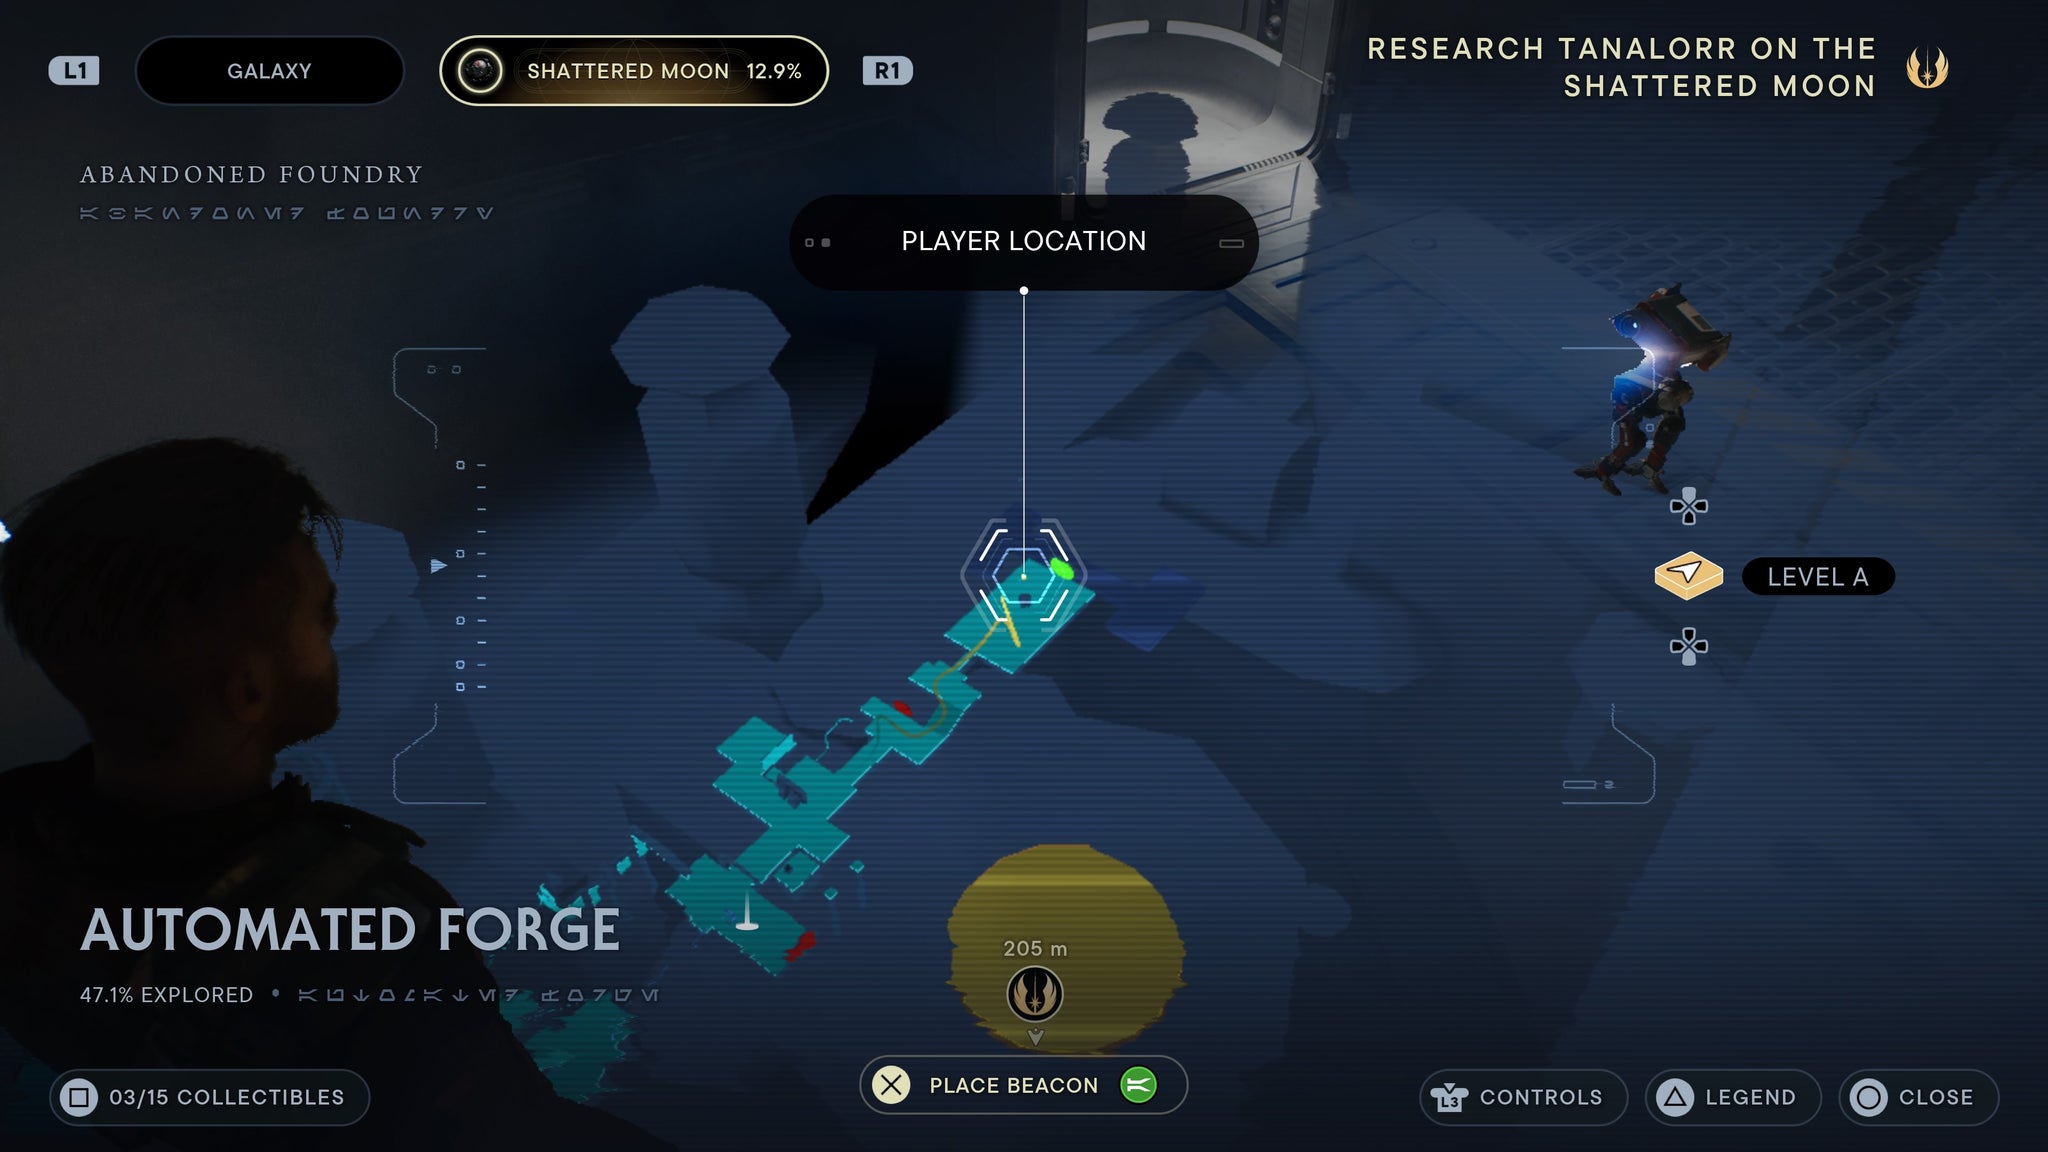
Automated Forge
As soon as you take the left down towards the meditation point, turn around and look left for a force echo.
Next to the lift!
Walk forward from the meditation point then take a left. There’s a force echo on a chair inside the next room.

On a chair!
Walk into the room filled with droids in their pods. Walk to the left of the room, and scan a pod near the far door.
Inside the masive combat room!
Wall run across the room at the far end of the Automated Forge, and you’ll come across a scannable terminal.
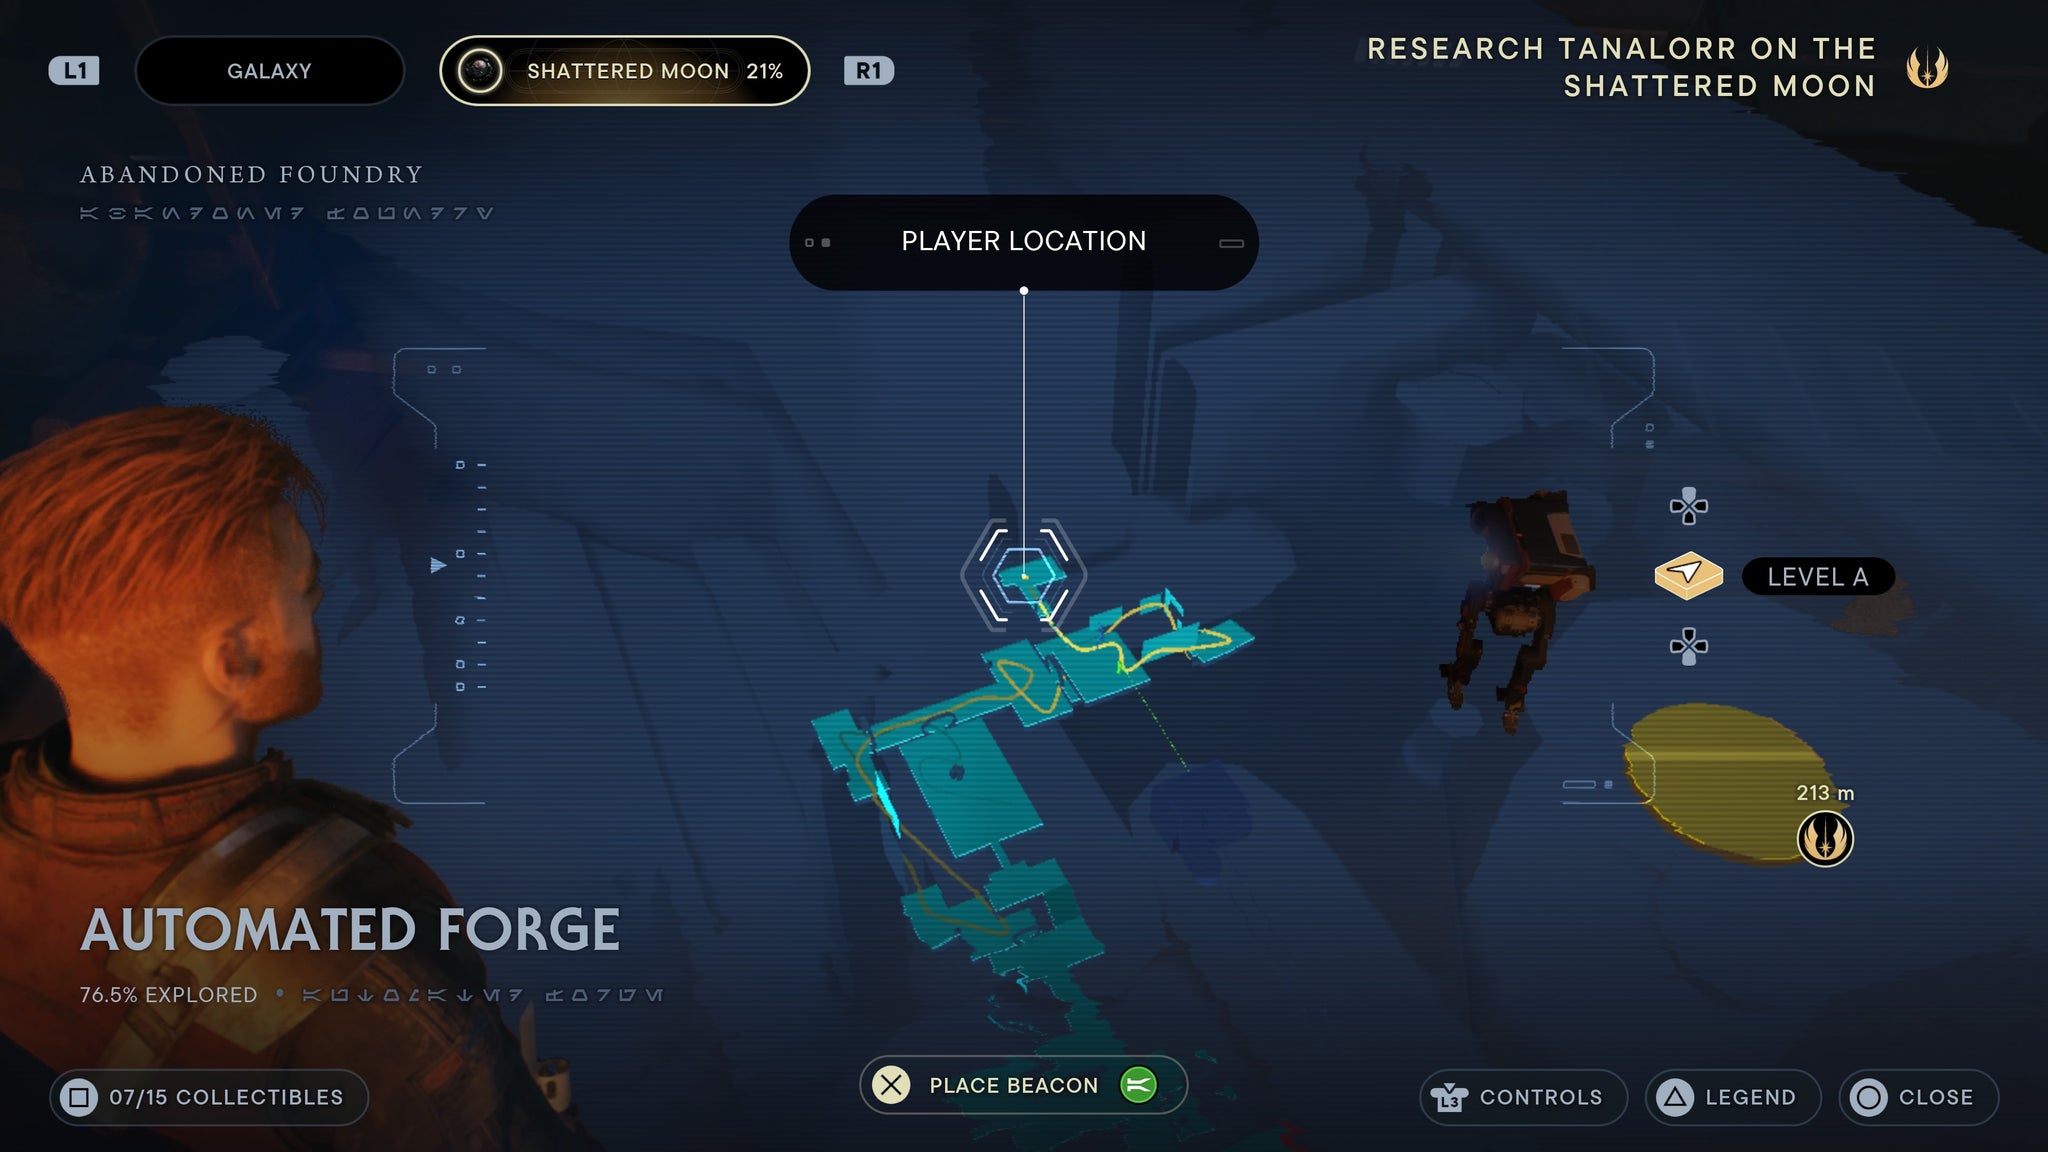
Right at the end of the room.
Assembly Staging
After you do the large string of wall runs, jump on the grate and climb up to the two droids. Once they are dead, walk right for a force echo,
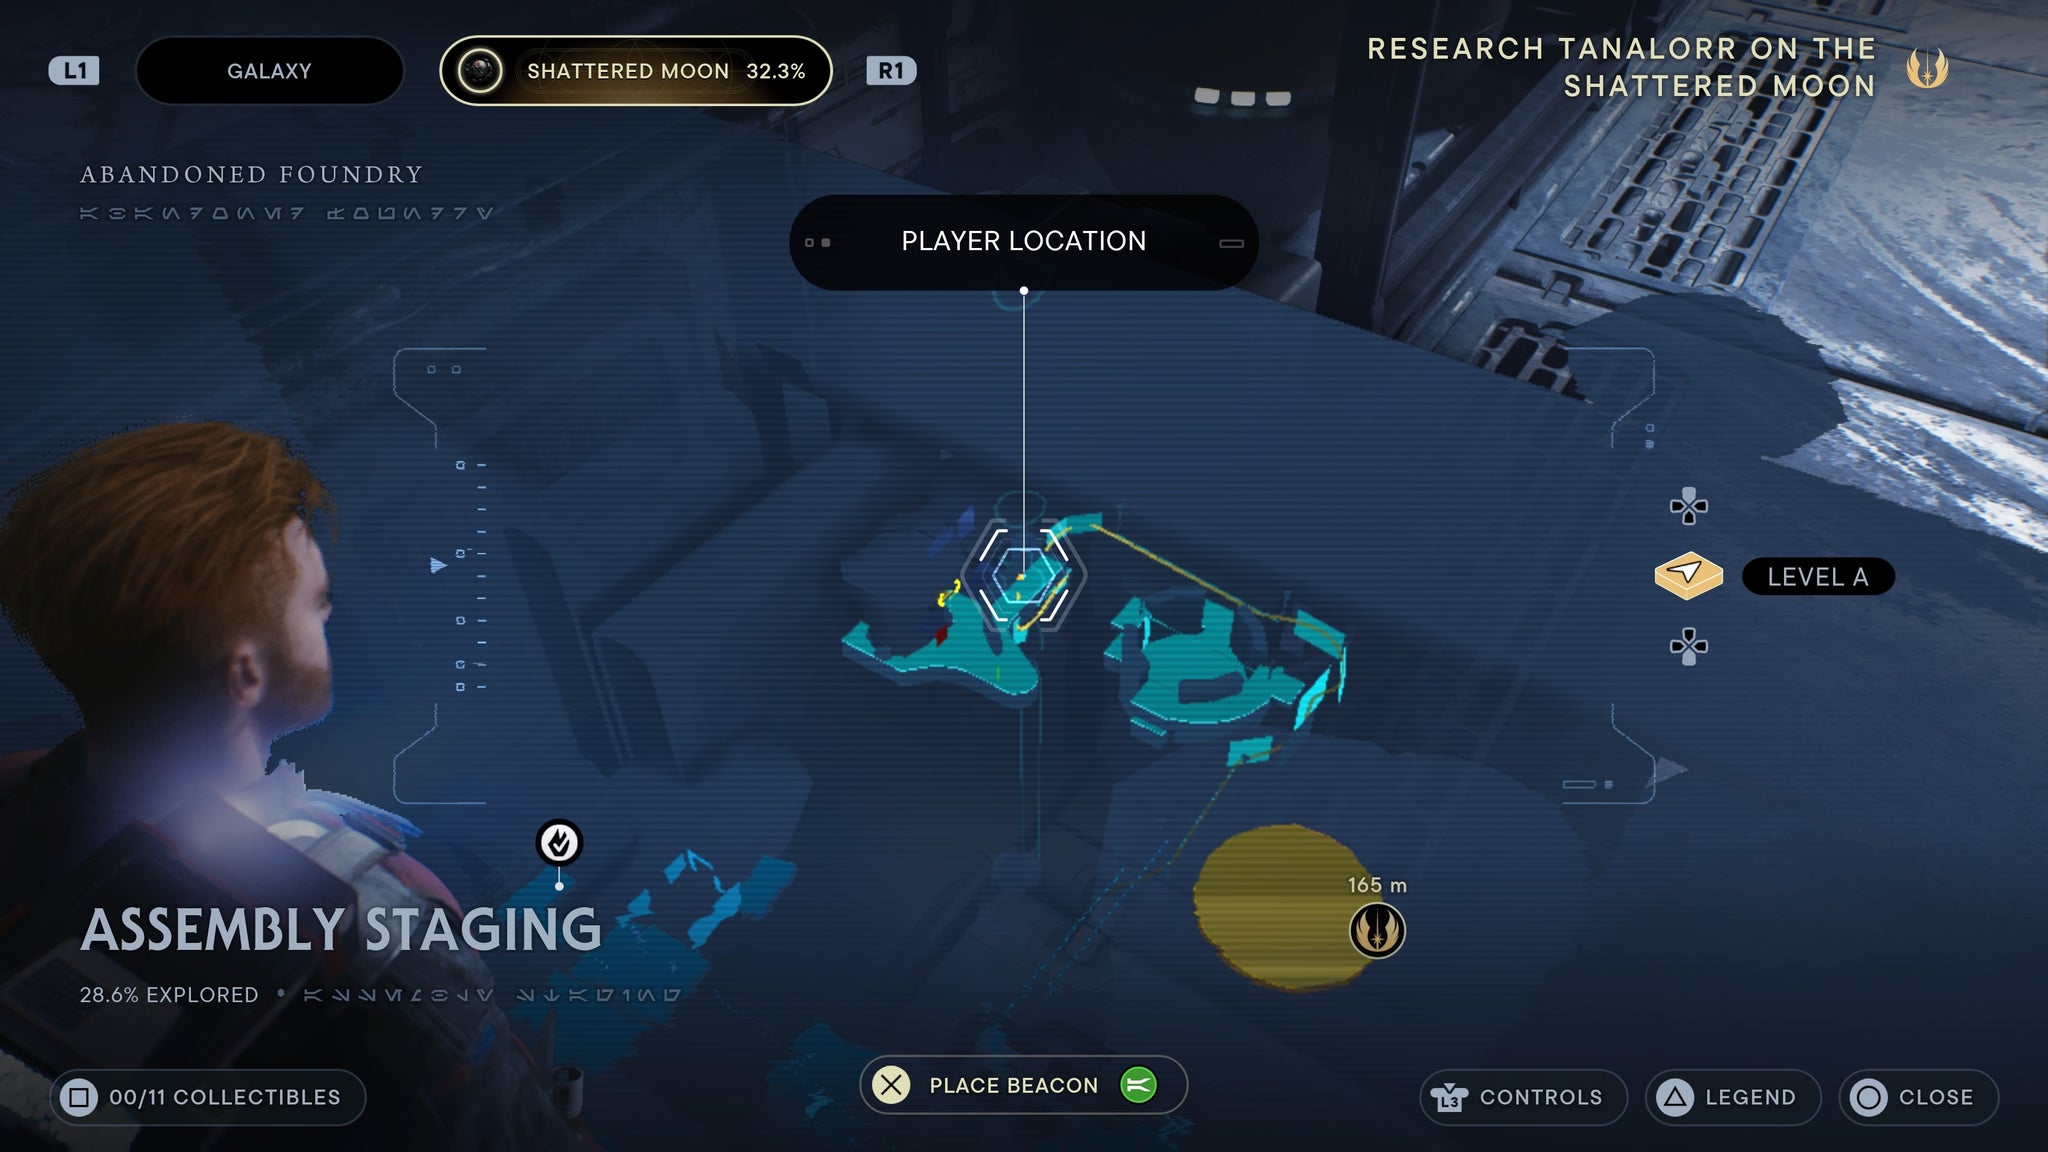
On the ground by the droids.
Jump over the pit filled with bug enemies (or grapple back up), then turn right. You’ll find a droid you can scan.
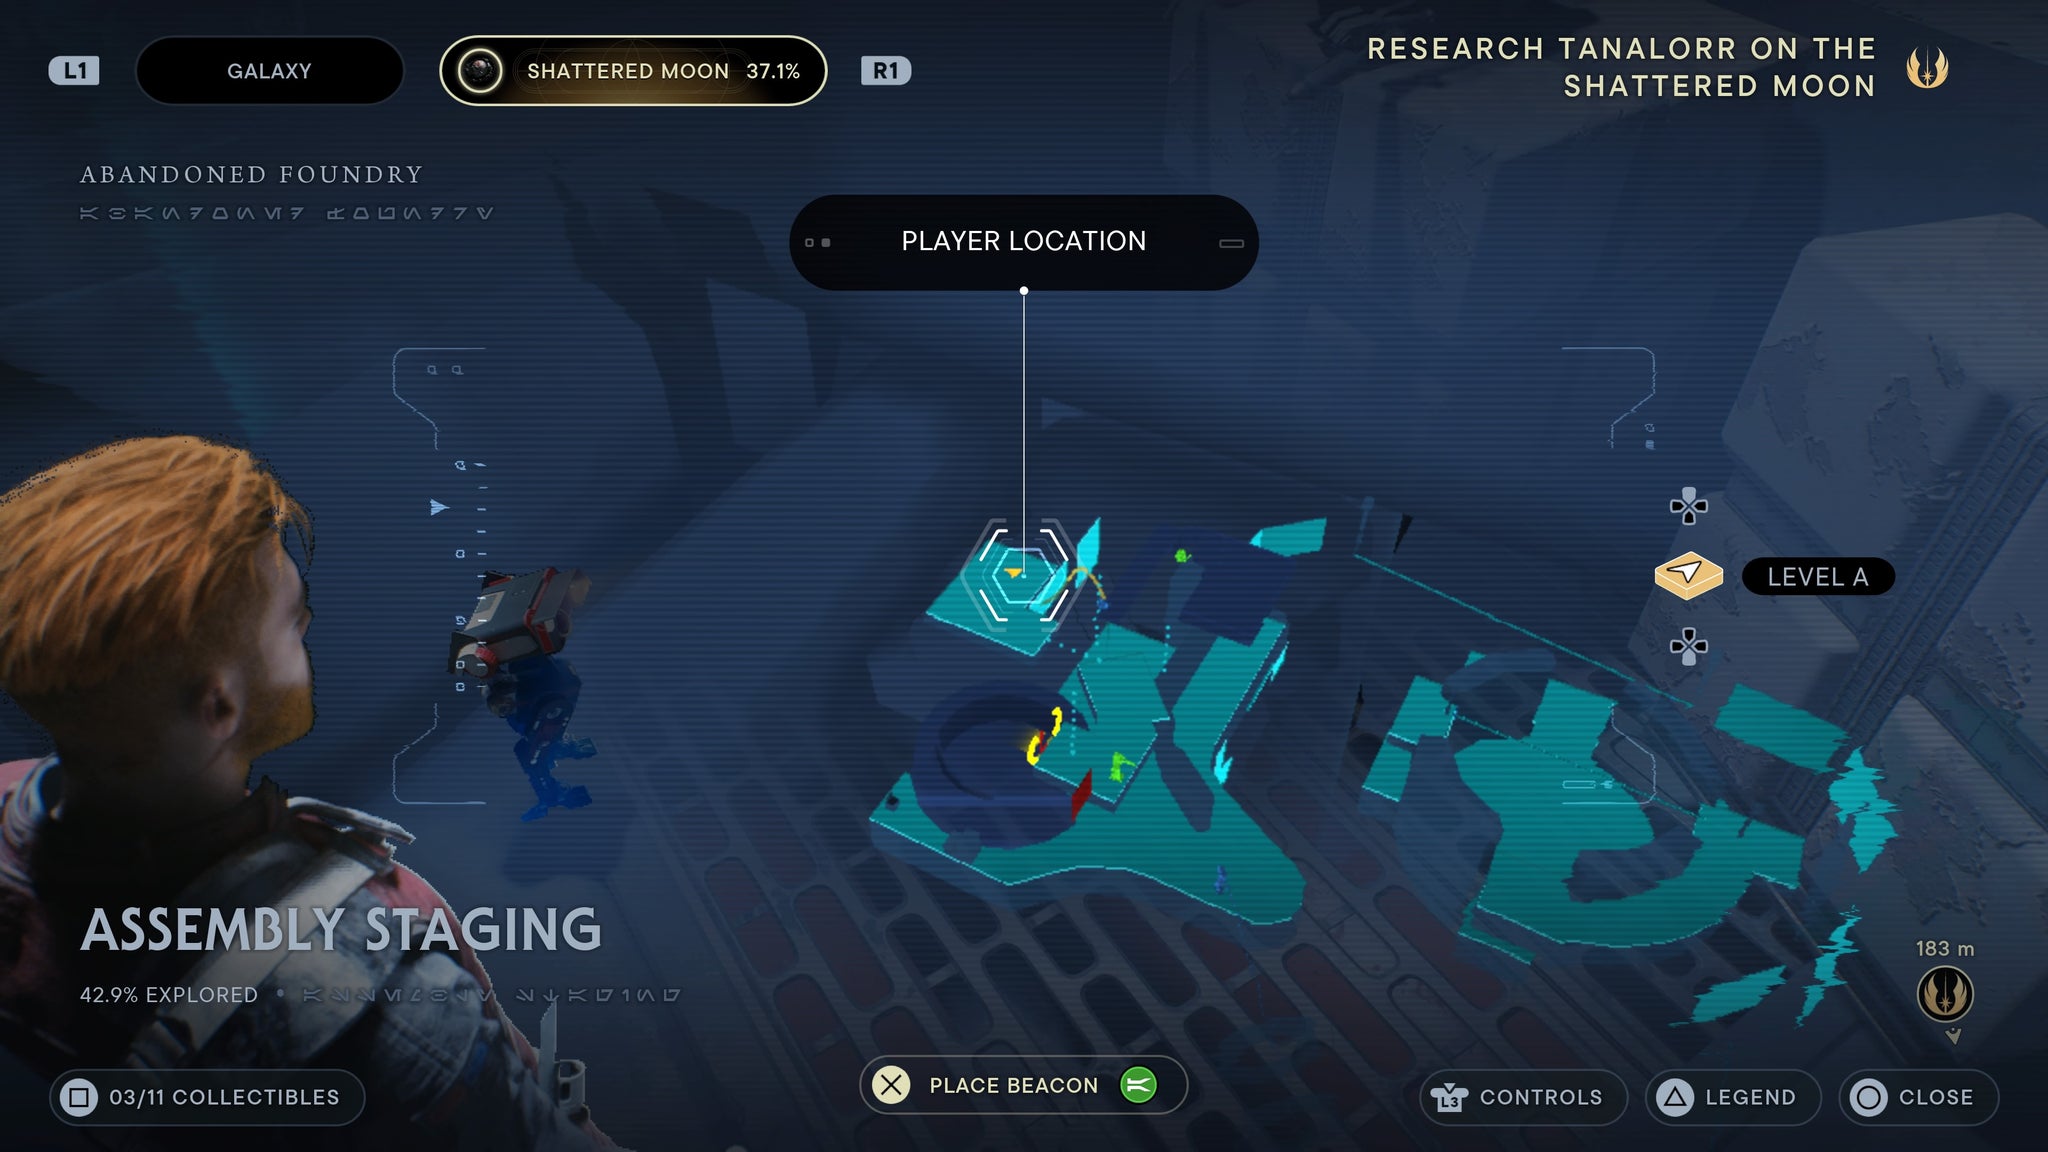
it’s a lift droid! Give ’em a scan!
Jump over the lightning lines and onto a platform with three B droids. Once they are dead, scan a panel overlooking an endless drop
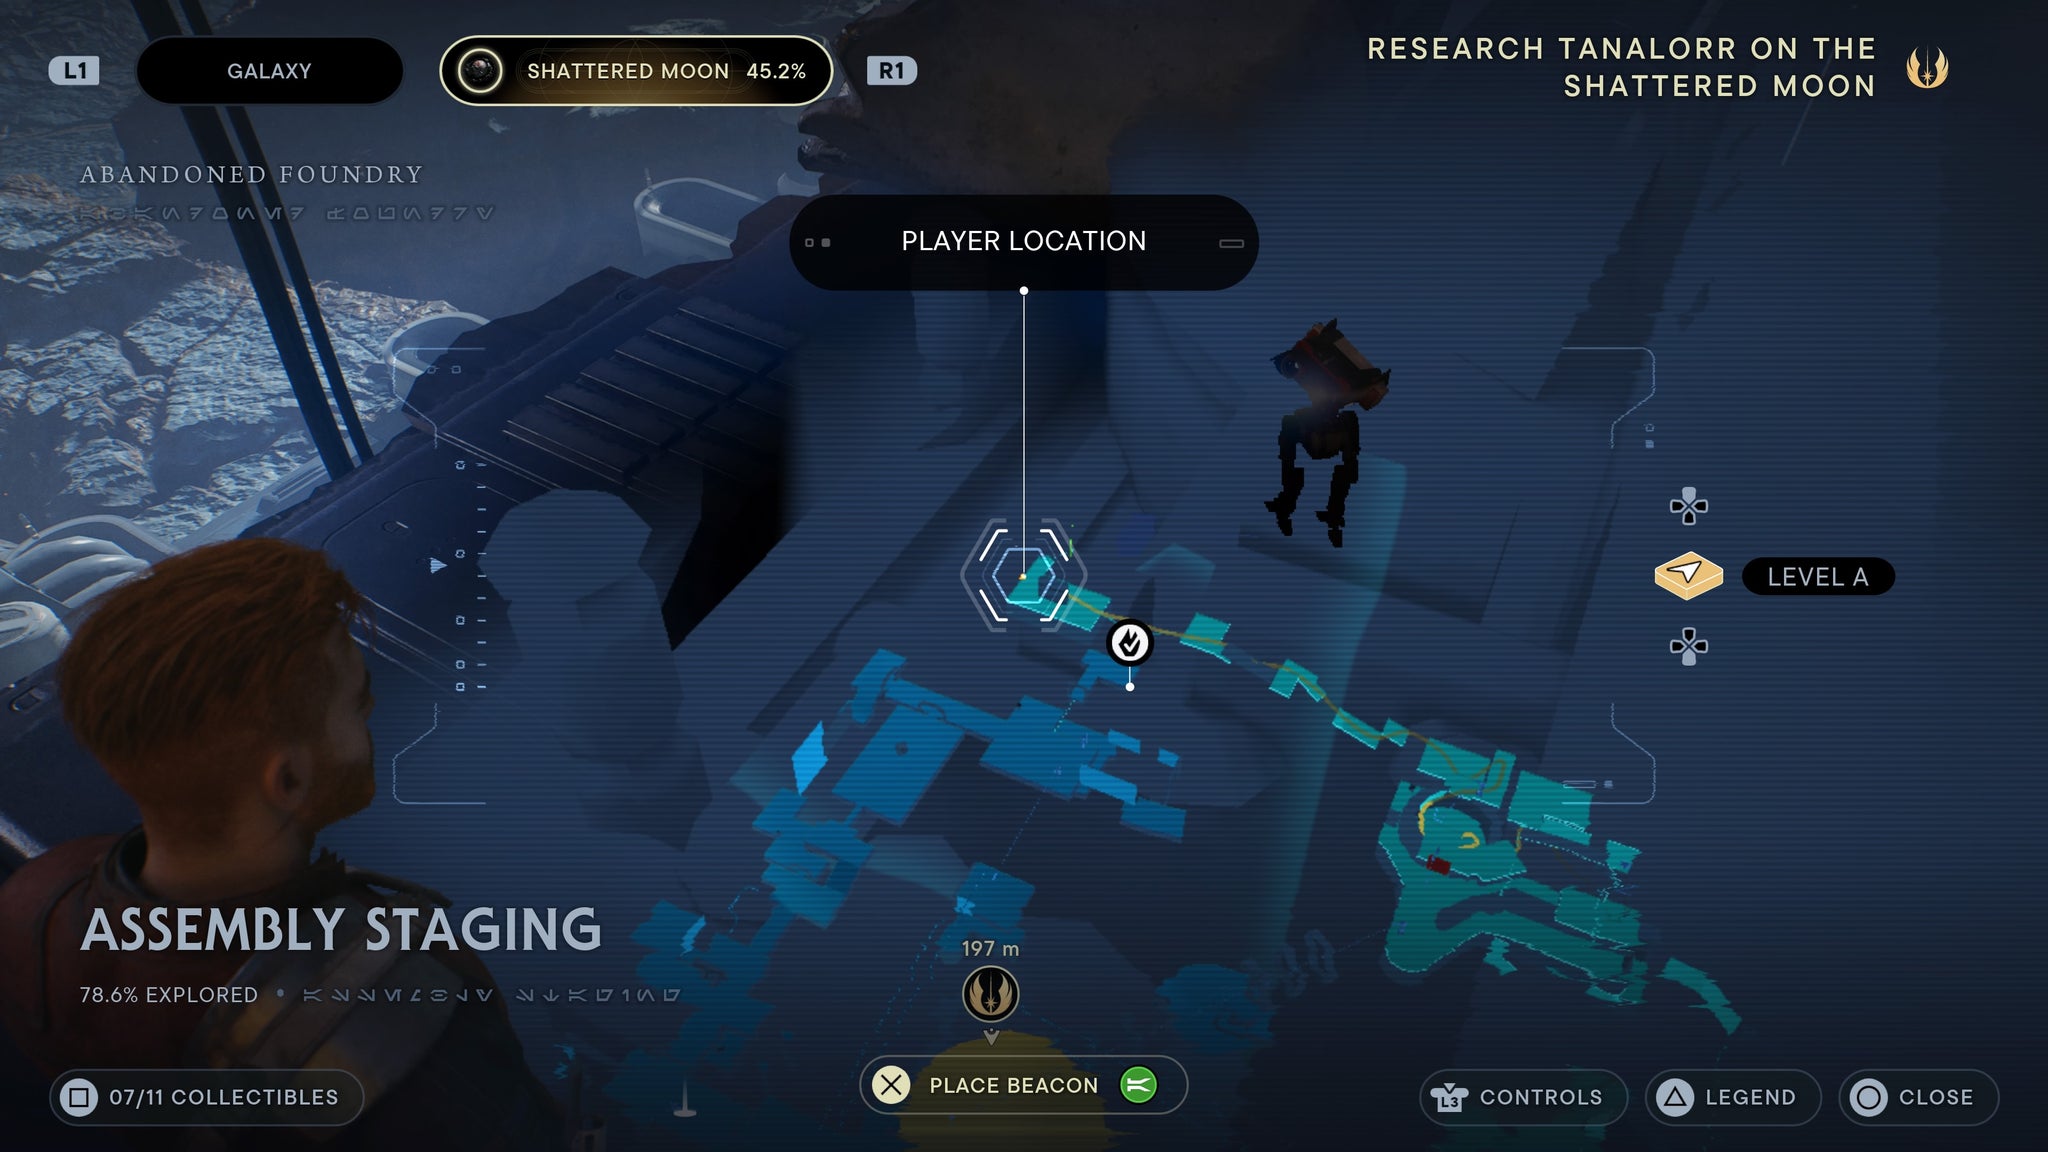
A bit of pipe that you can scan, after a tussle.
Superstructure Fabricators
As you swing onto the Superstructure fFabricators, you’ll see a force echo straight ahead on a droid.
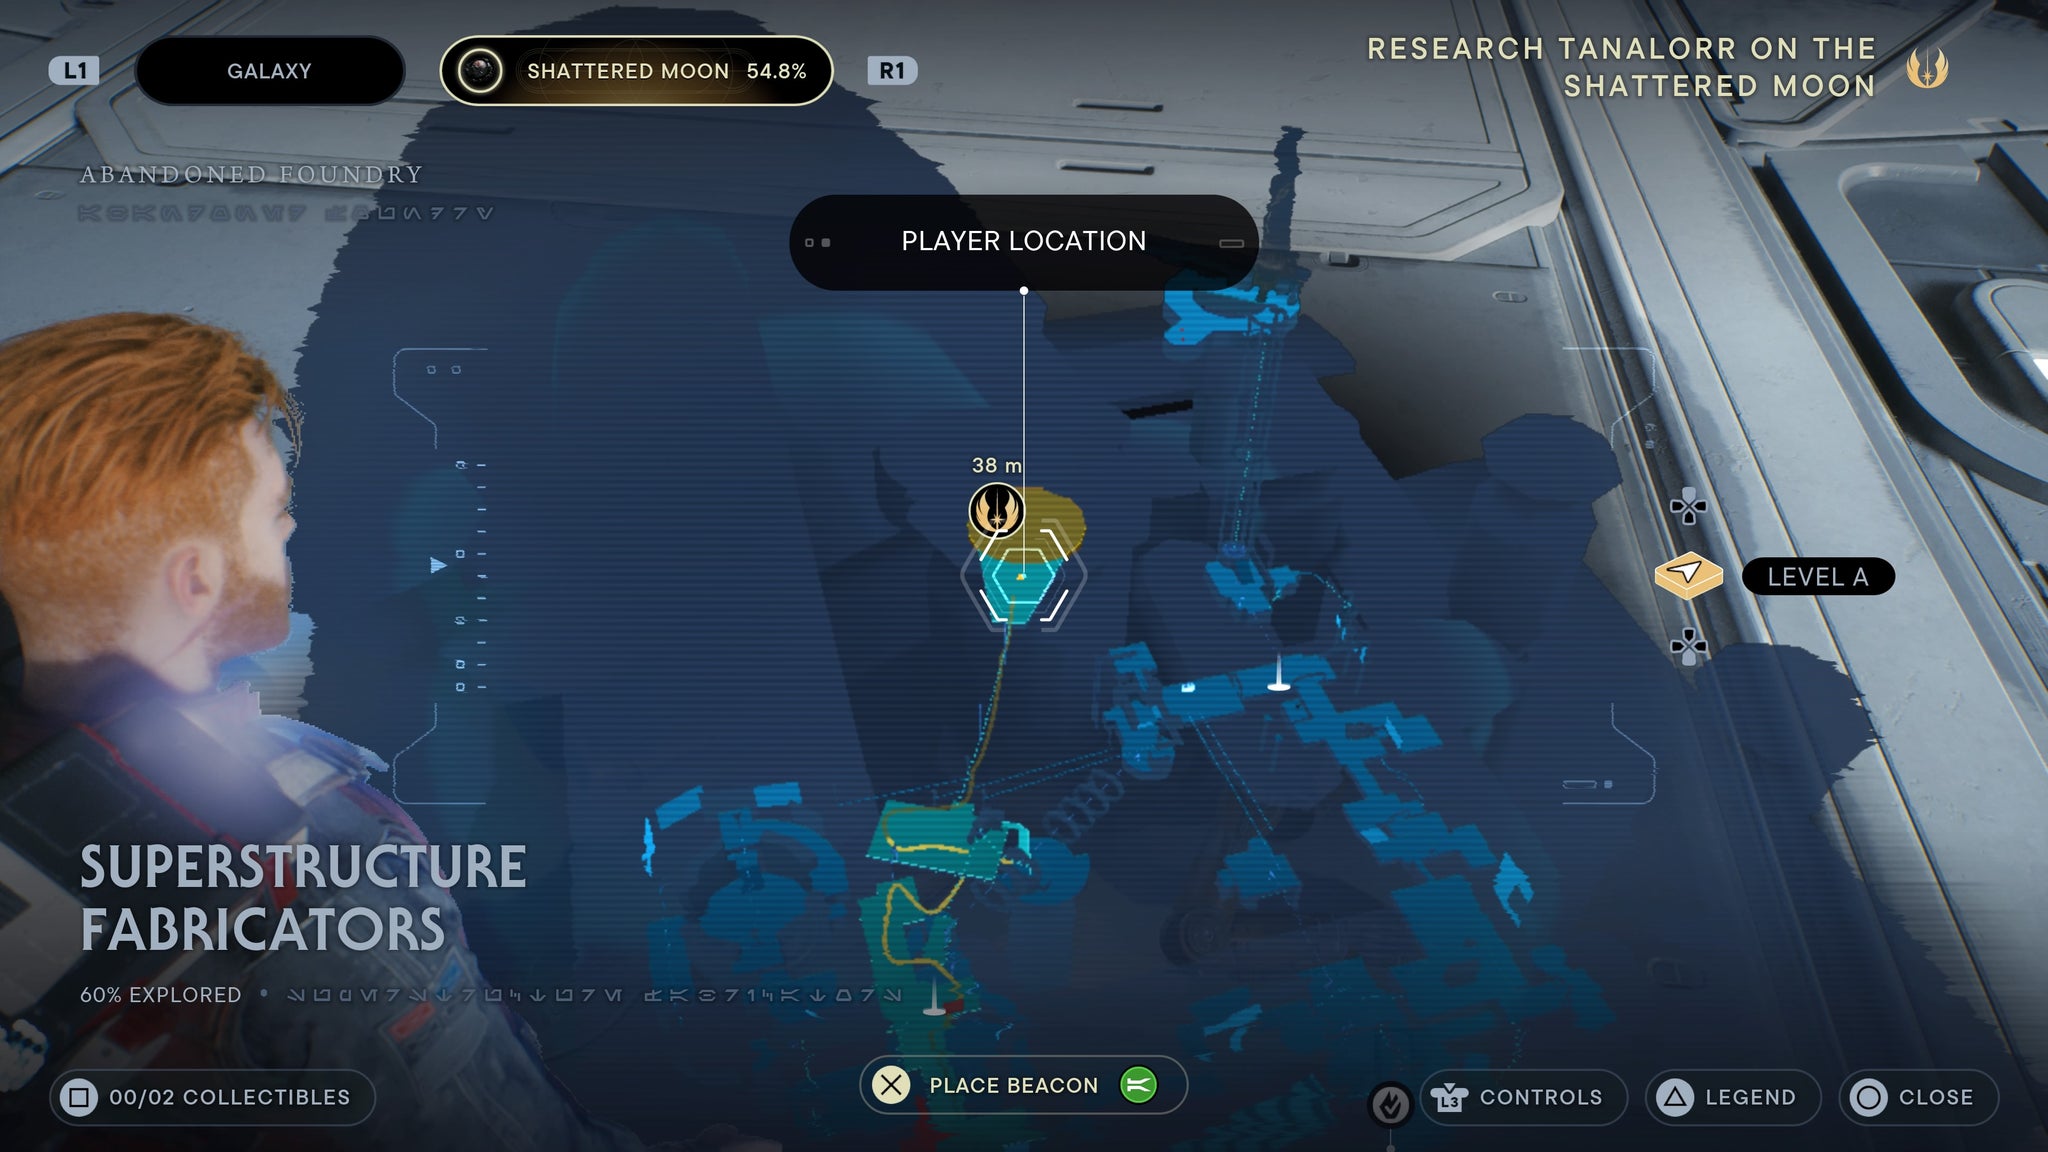
Before you enter the main room
After the boss fight, you’ll find an echo next to the slicable door.
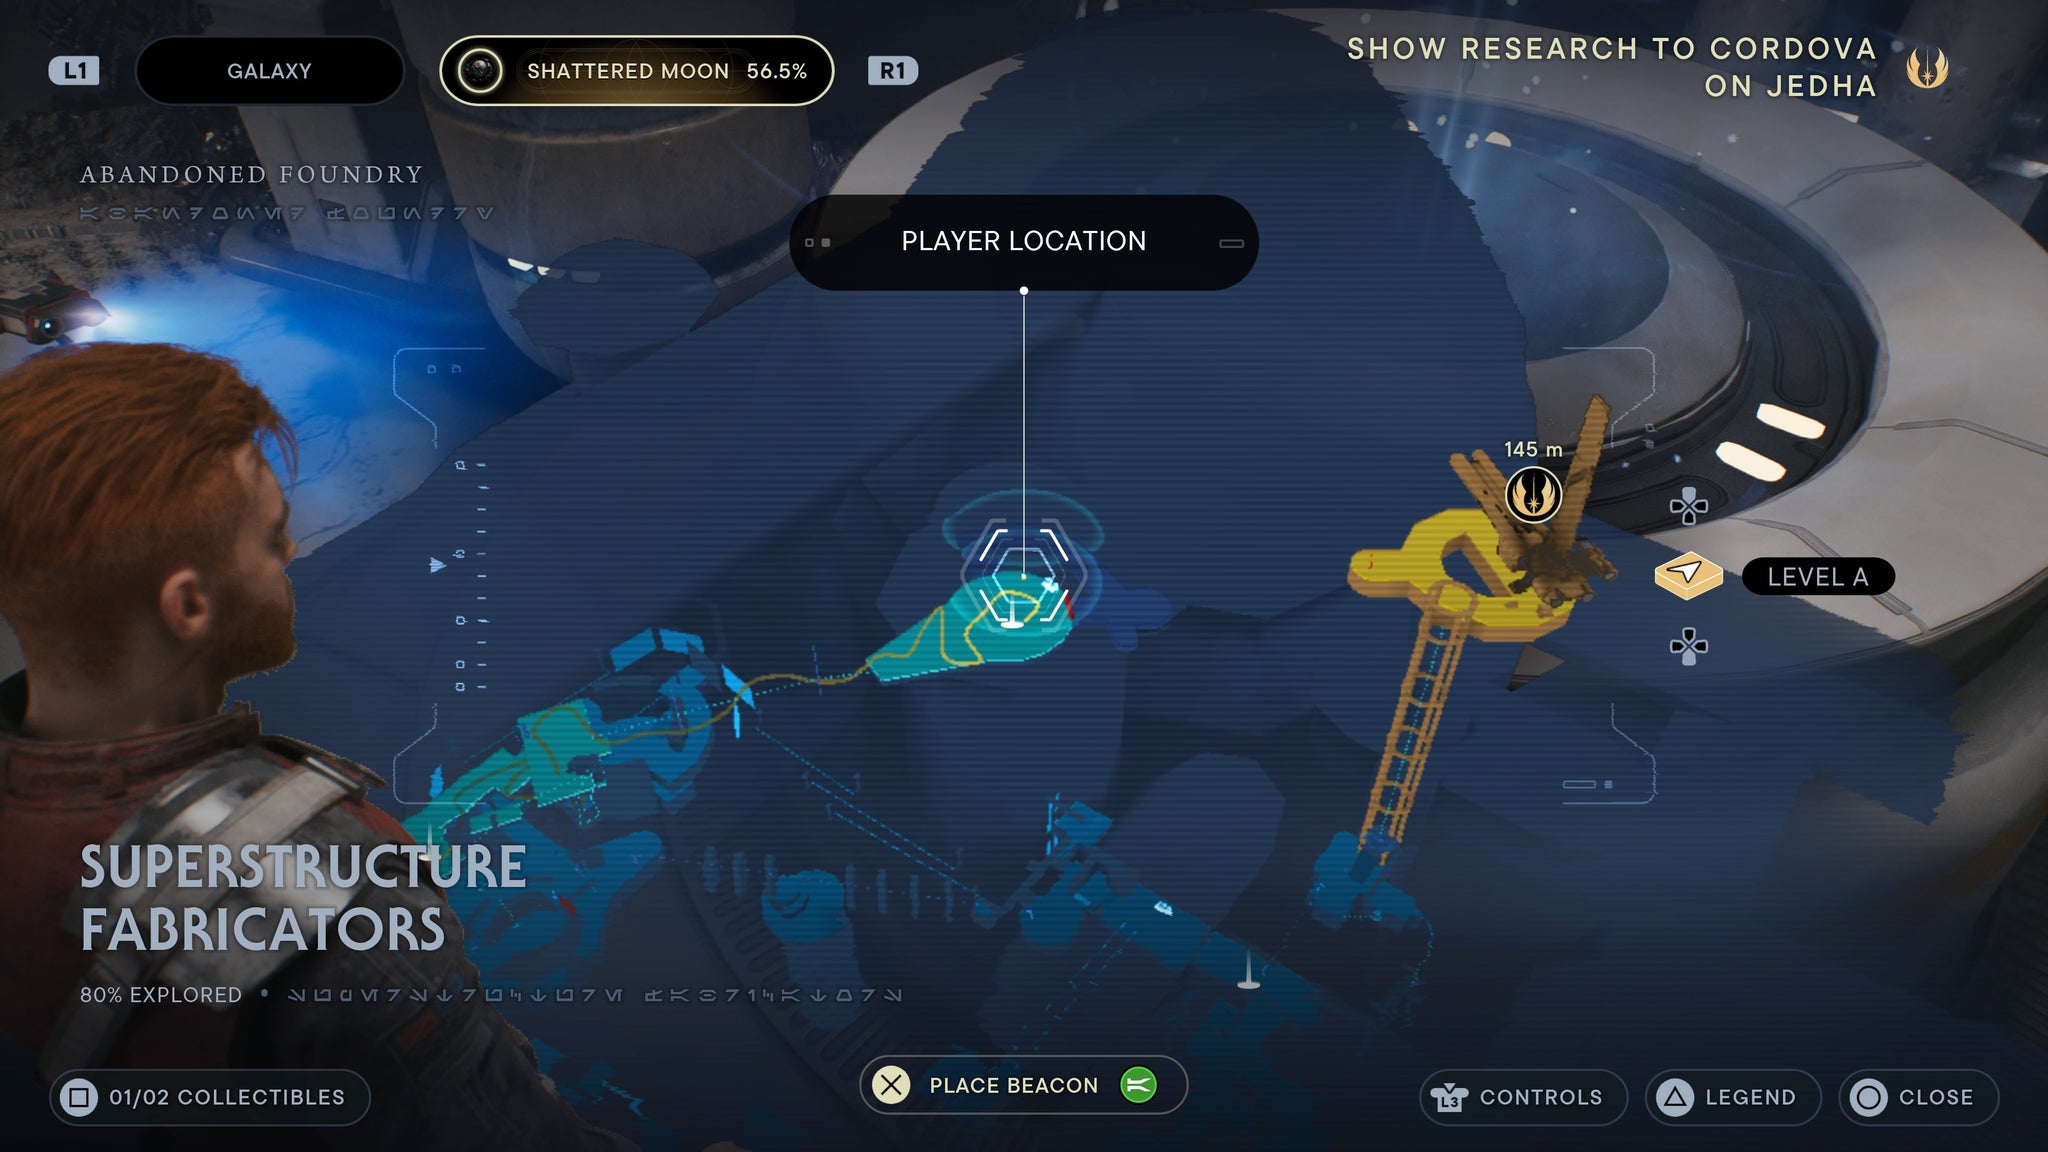
Your other reward for beating the boss.
Array Channel
Found in the first room as you enter the Array Channel. Look right and scan the terminal.
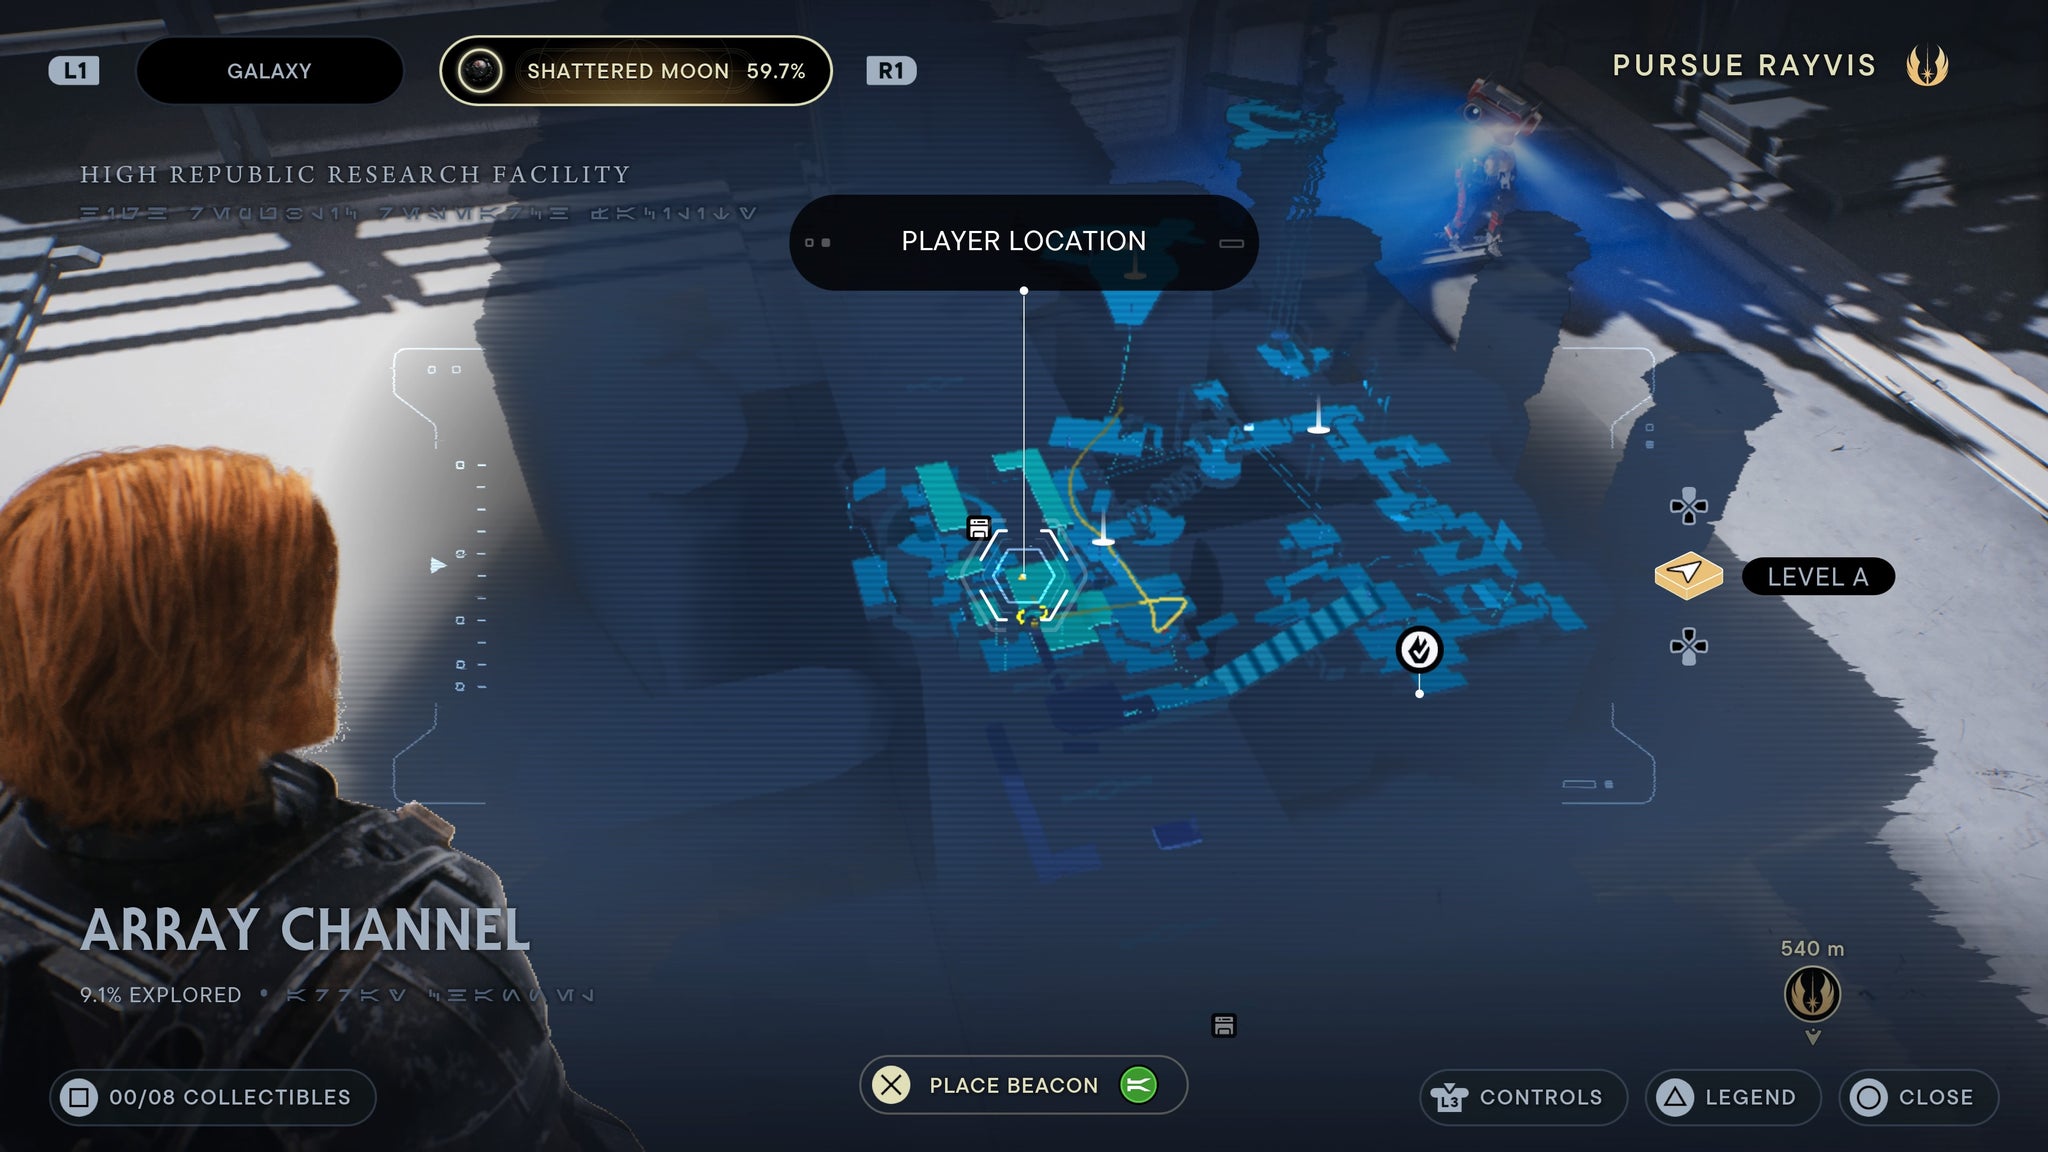
The first scan you’ll likely find as you enter.
Run through the firing chamber and look left as you exit. You’ll see a force echo on the ground.
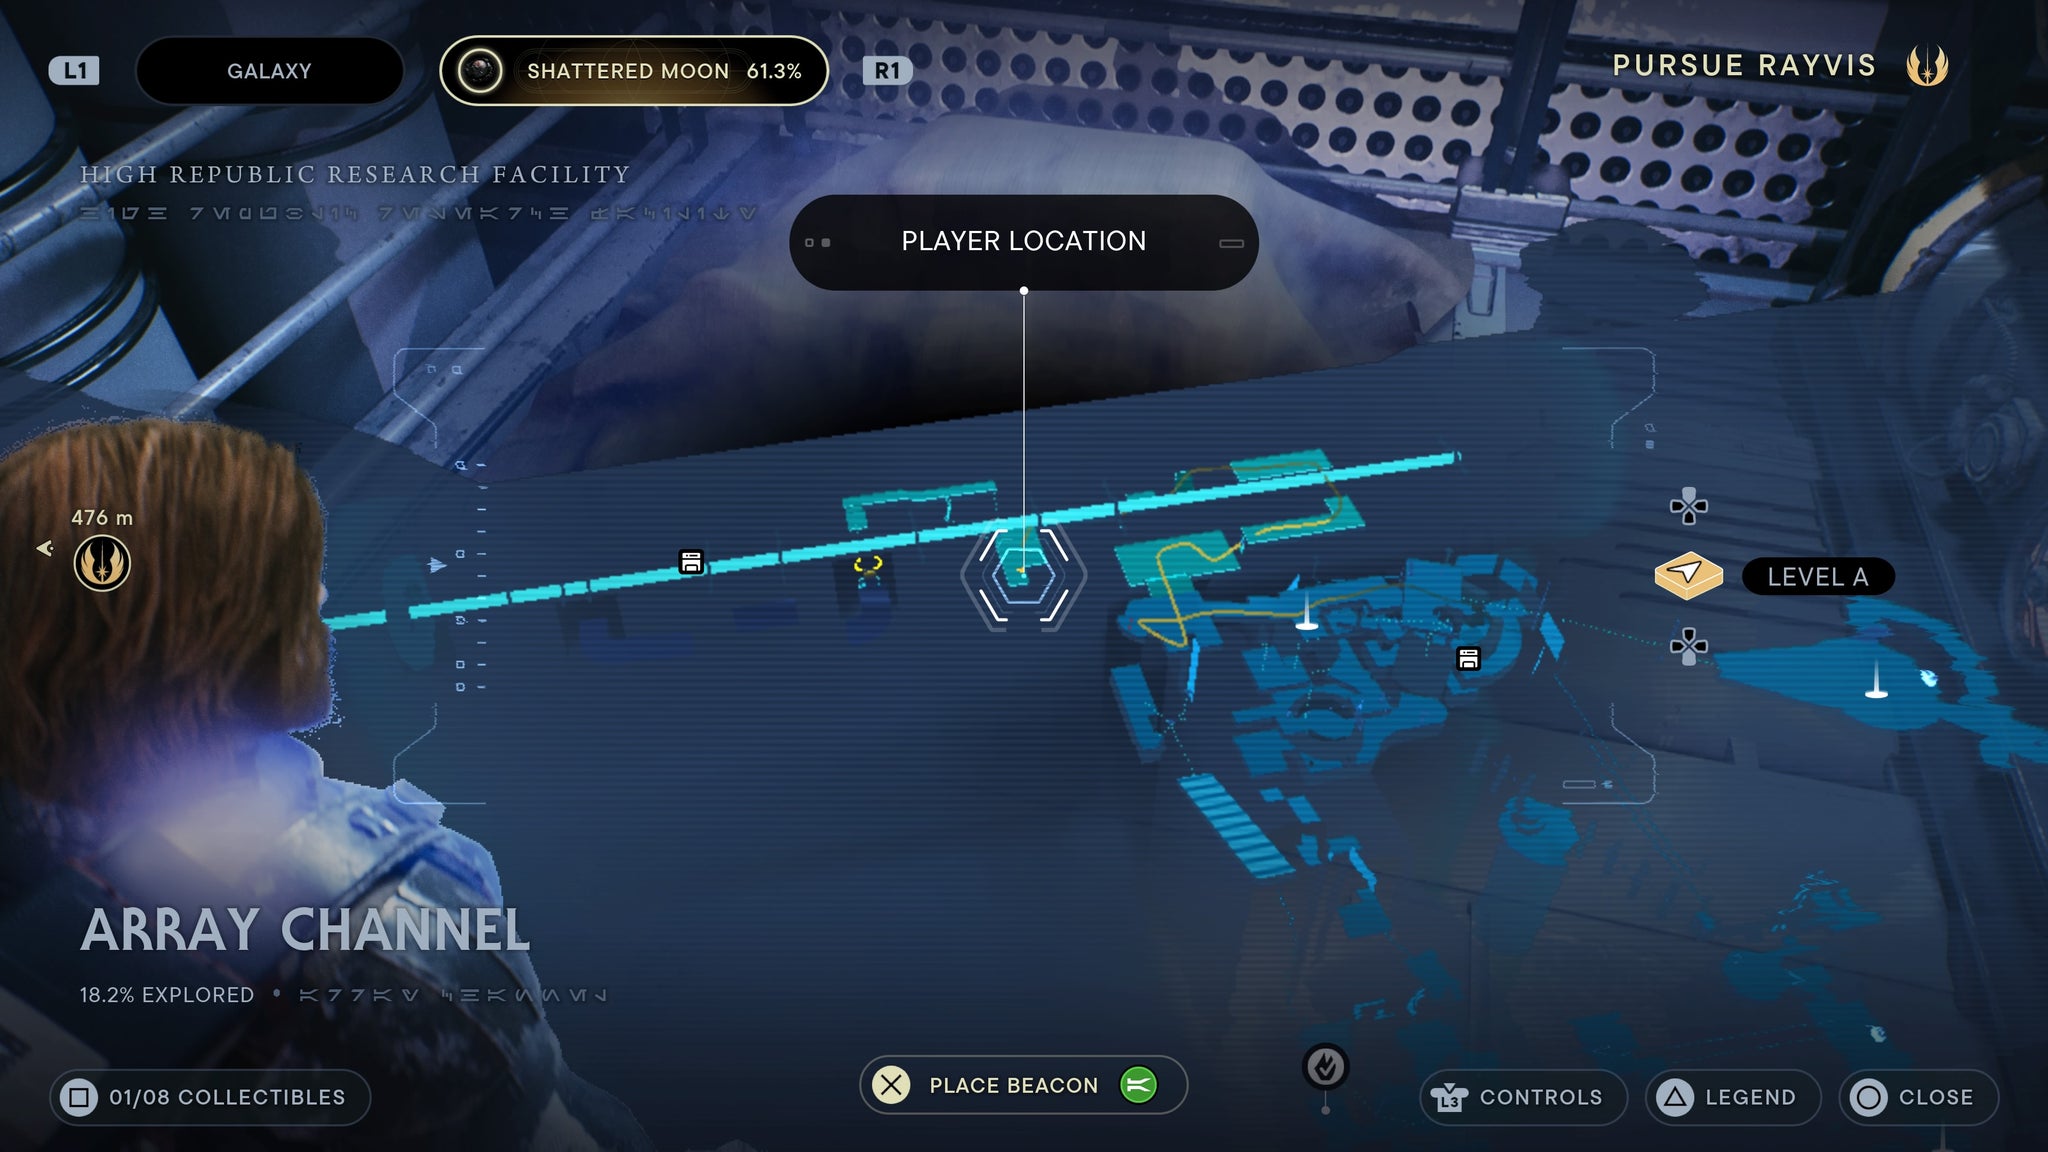
QUickly duck into this side room for a force echo.
Found by a terminal looking at the beam in the second main Array Channel room.
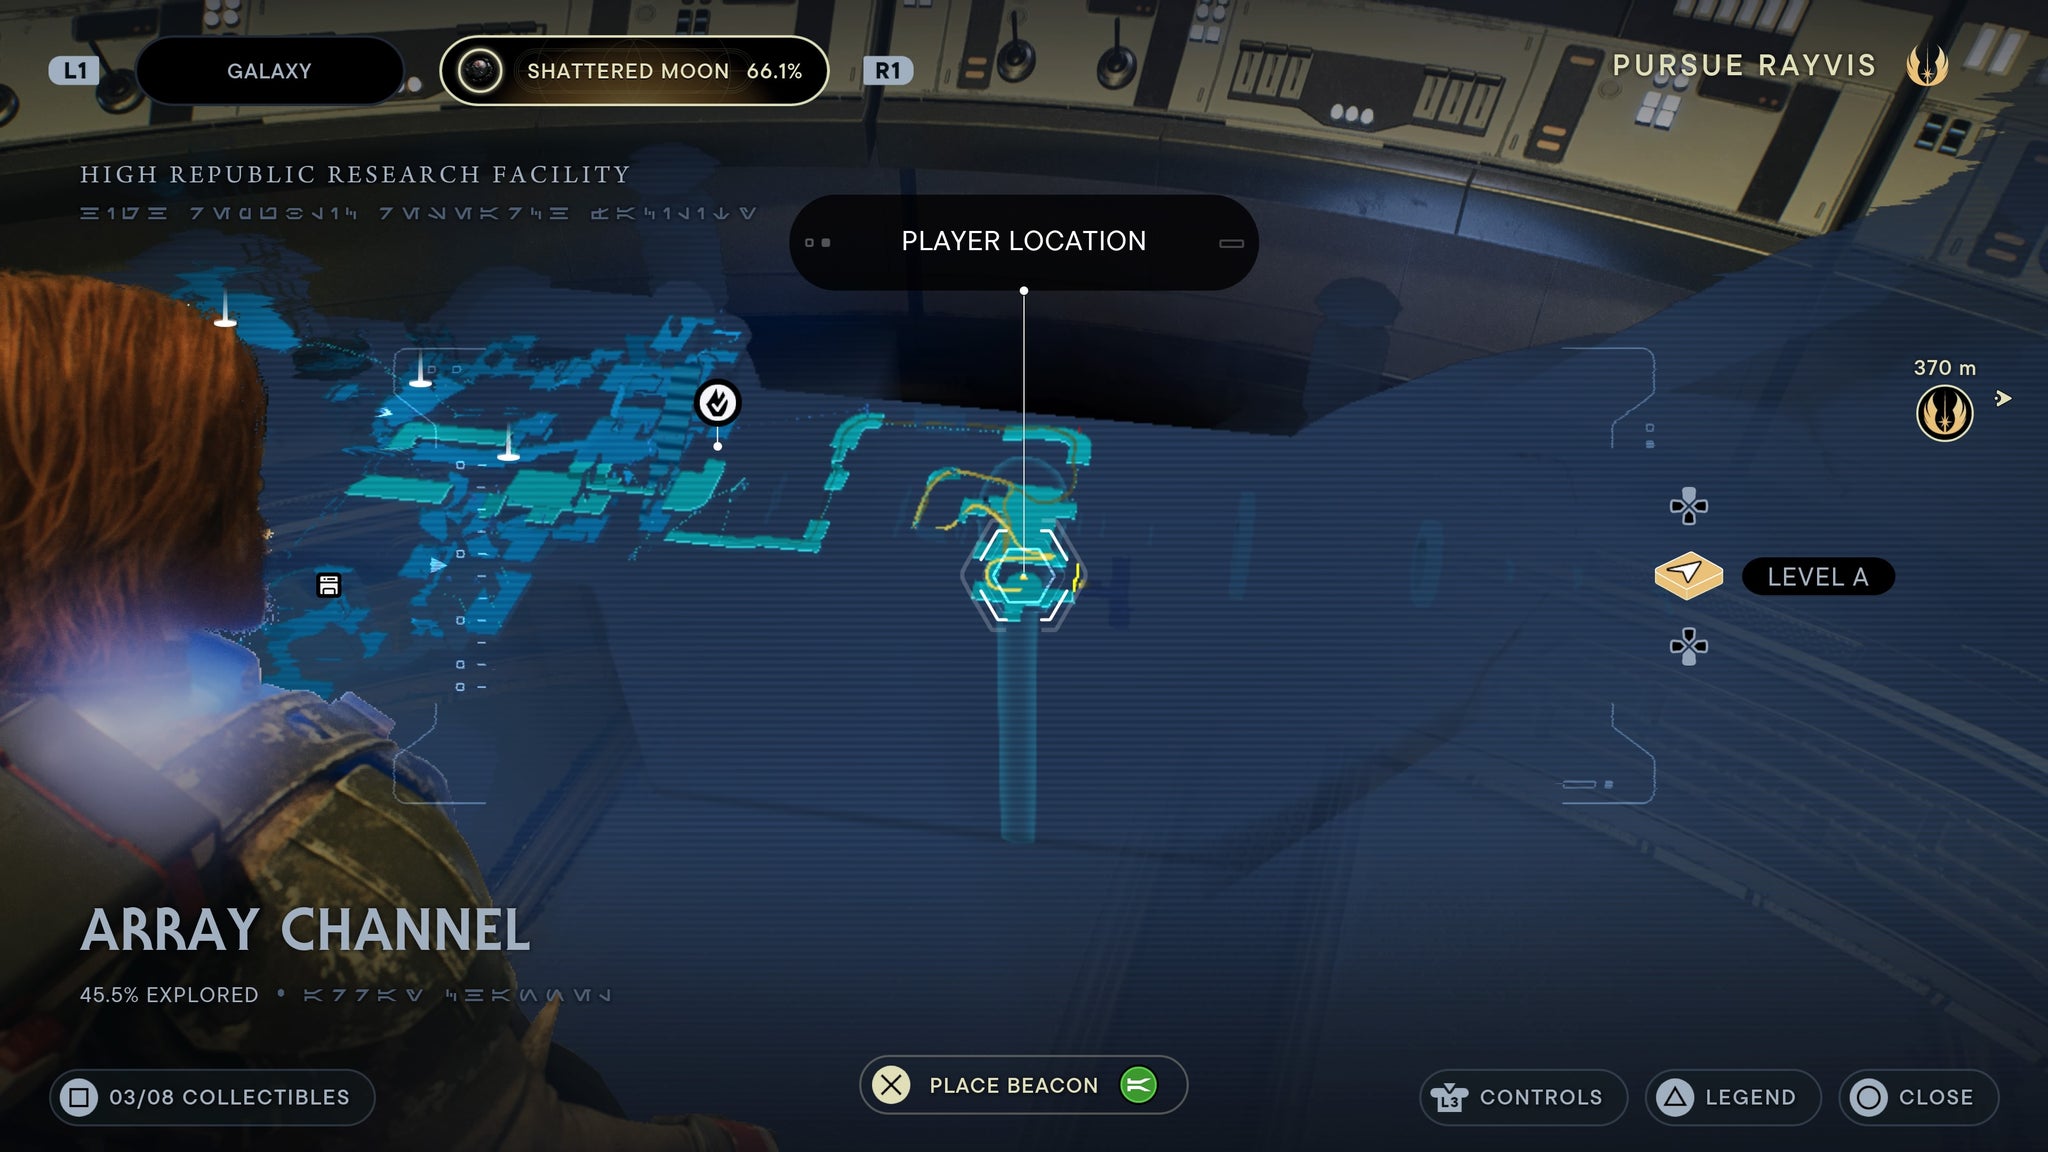
You’ll have to clear out the room of enemies first!
Found on a terminal as you climb up towards several battle droids.
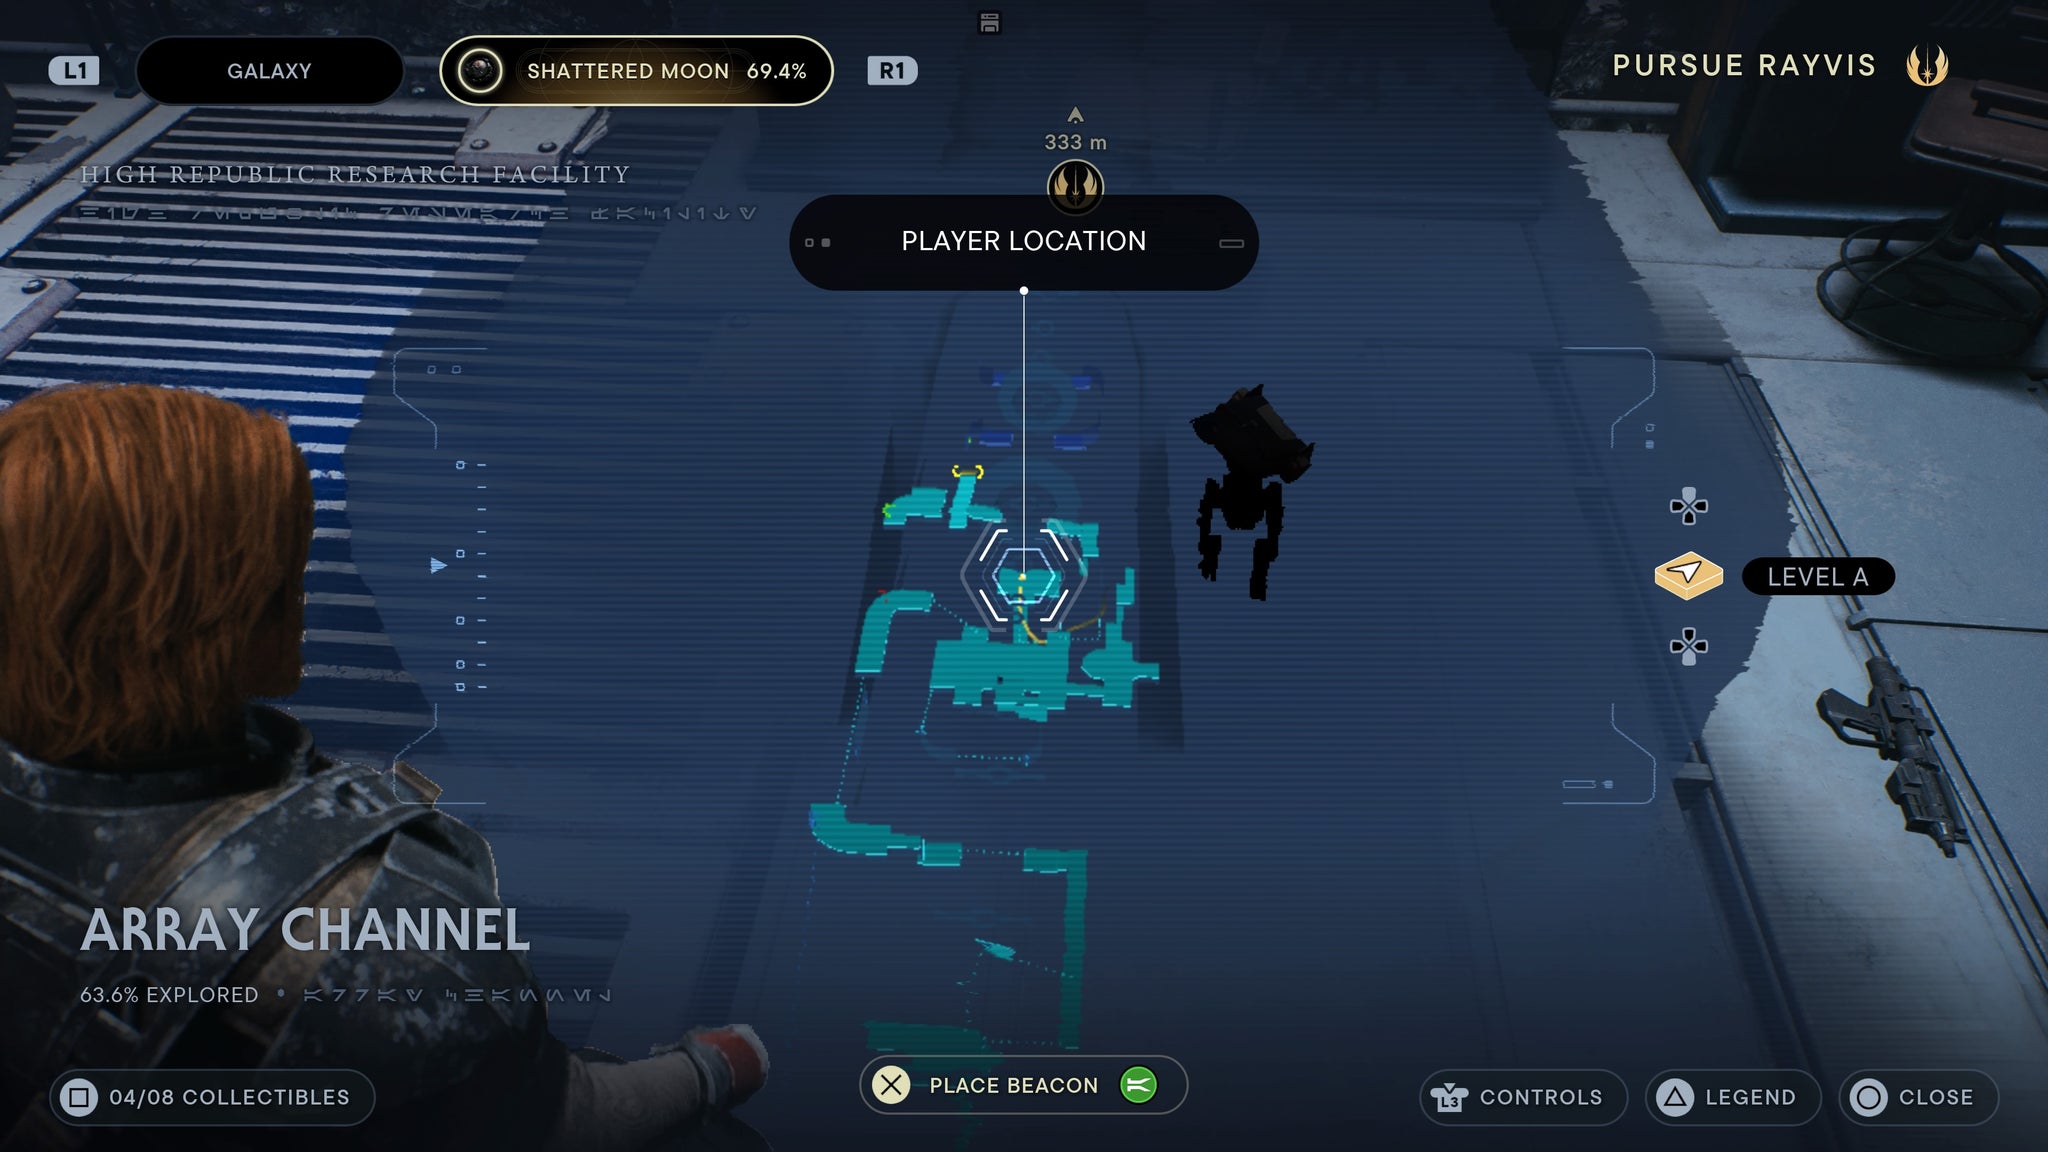
One more terminal to scan.
Found to the right through a forcefield as you enter the firing chamber for a second time.

One more side room for one more echo.
Republic Research Laboratory
This scan is found right next to the meditation point.
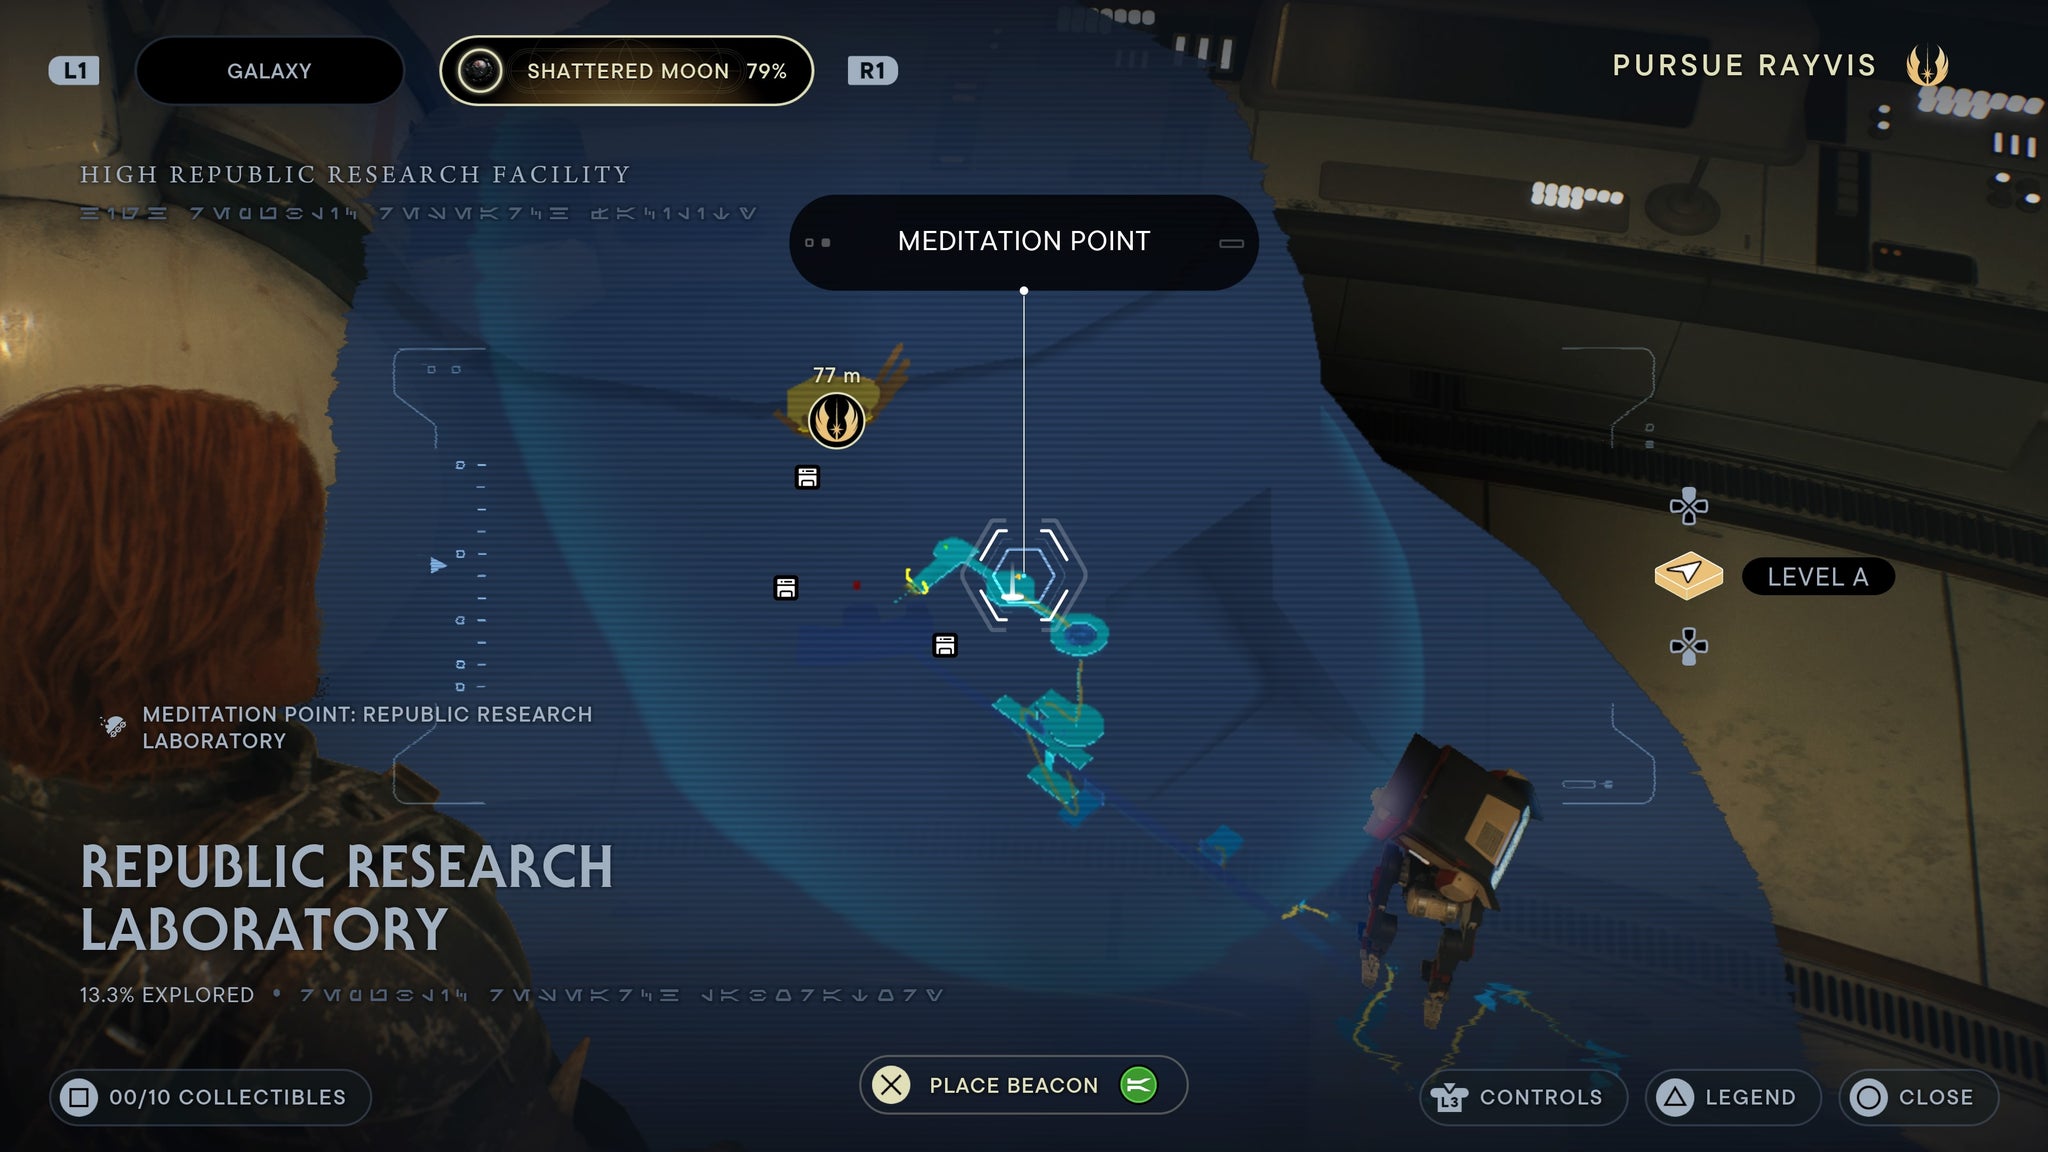
Real easy to find.
A force echo is found above the first combat room, near a window overlooking the meditation point.
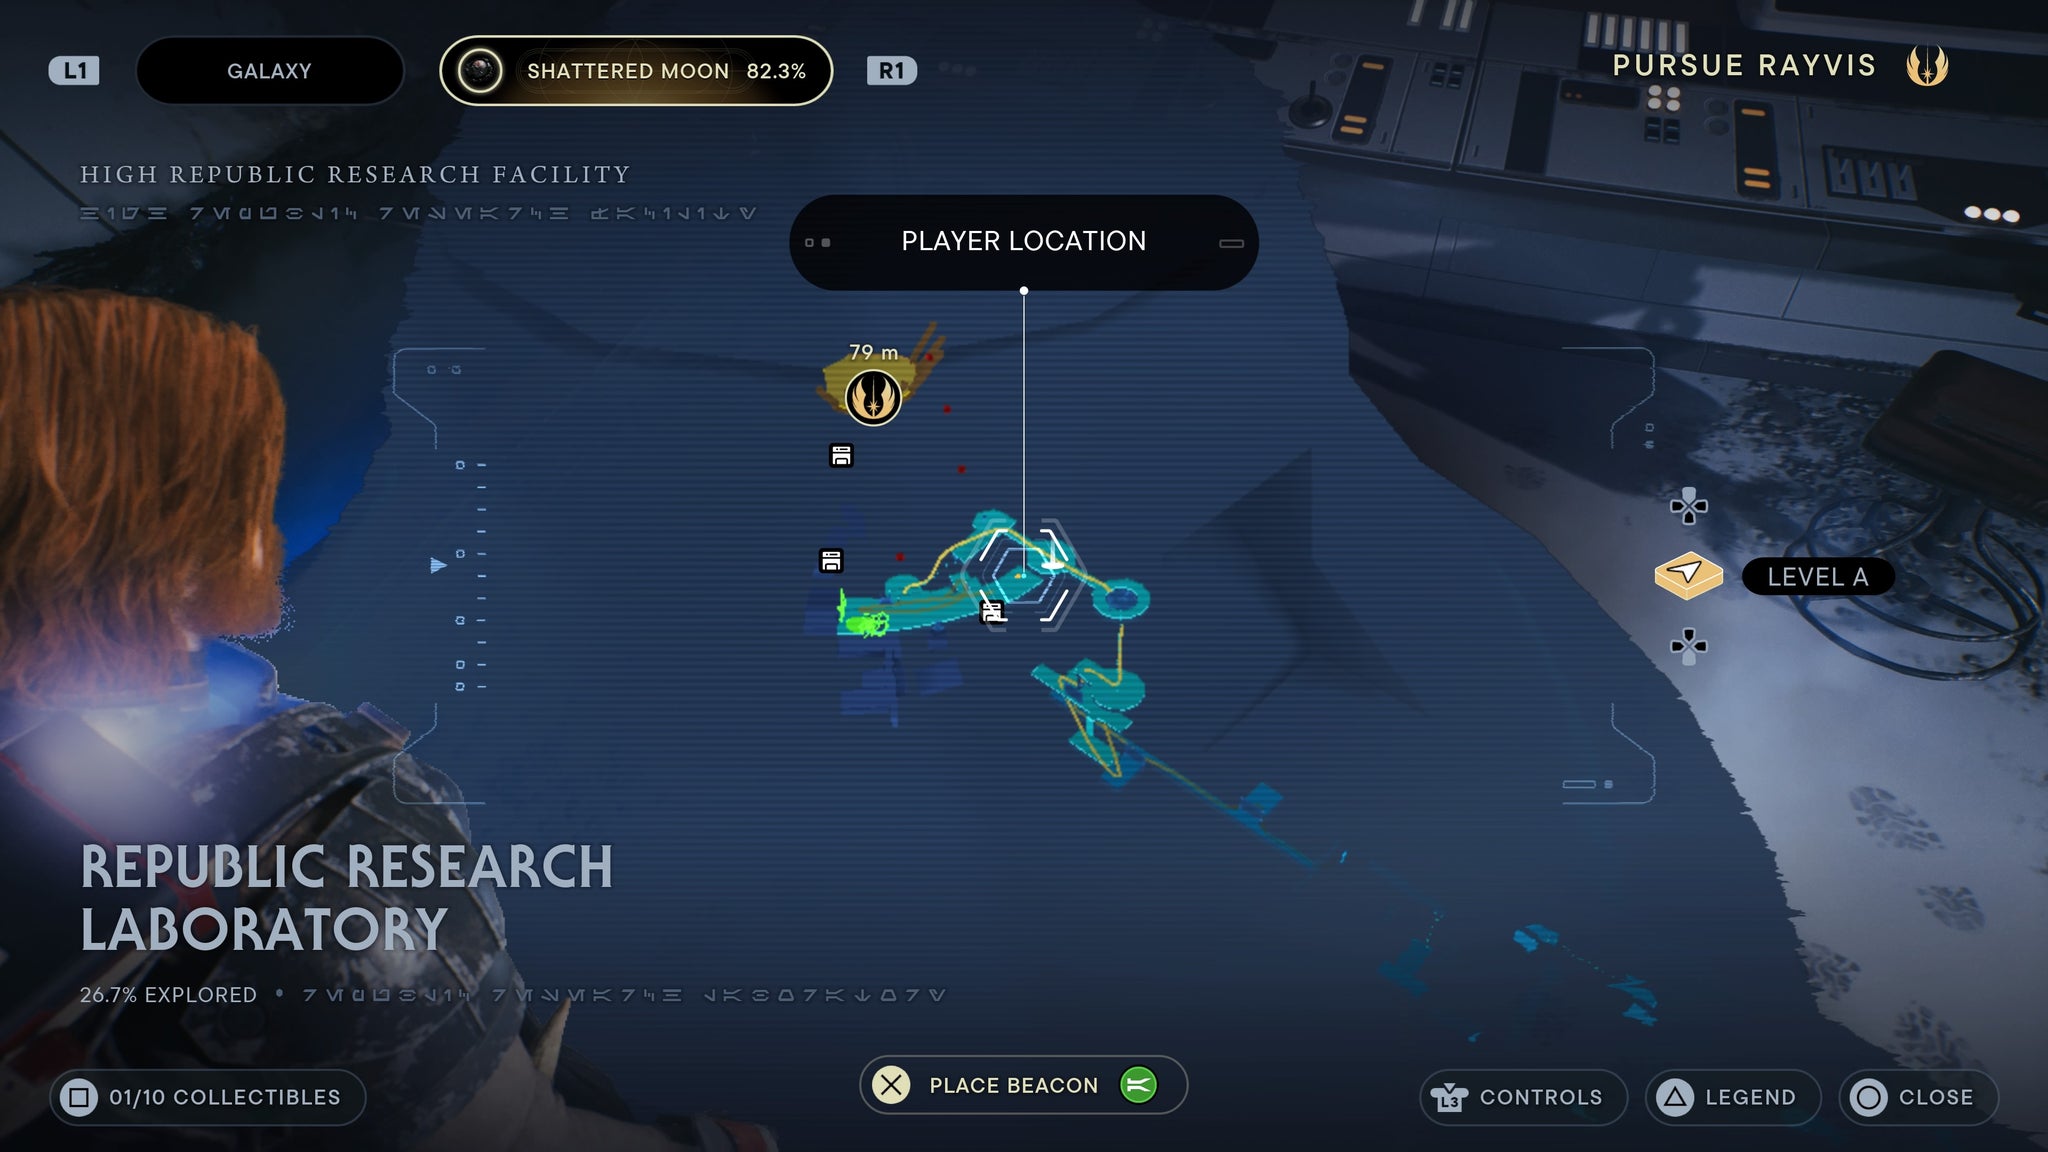
At the other side of the window by the meditation point.
A force echo can be found near the first combat room, past a door you can slice open.
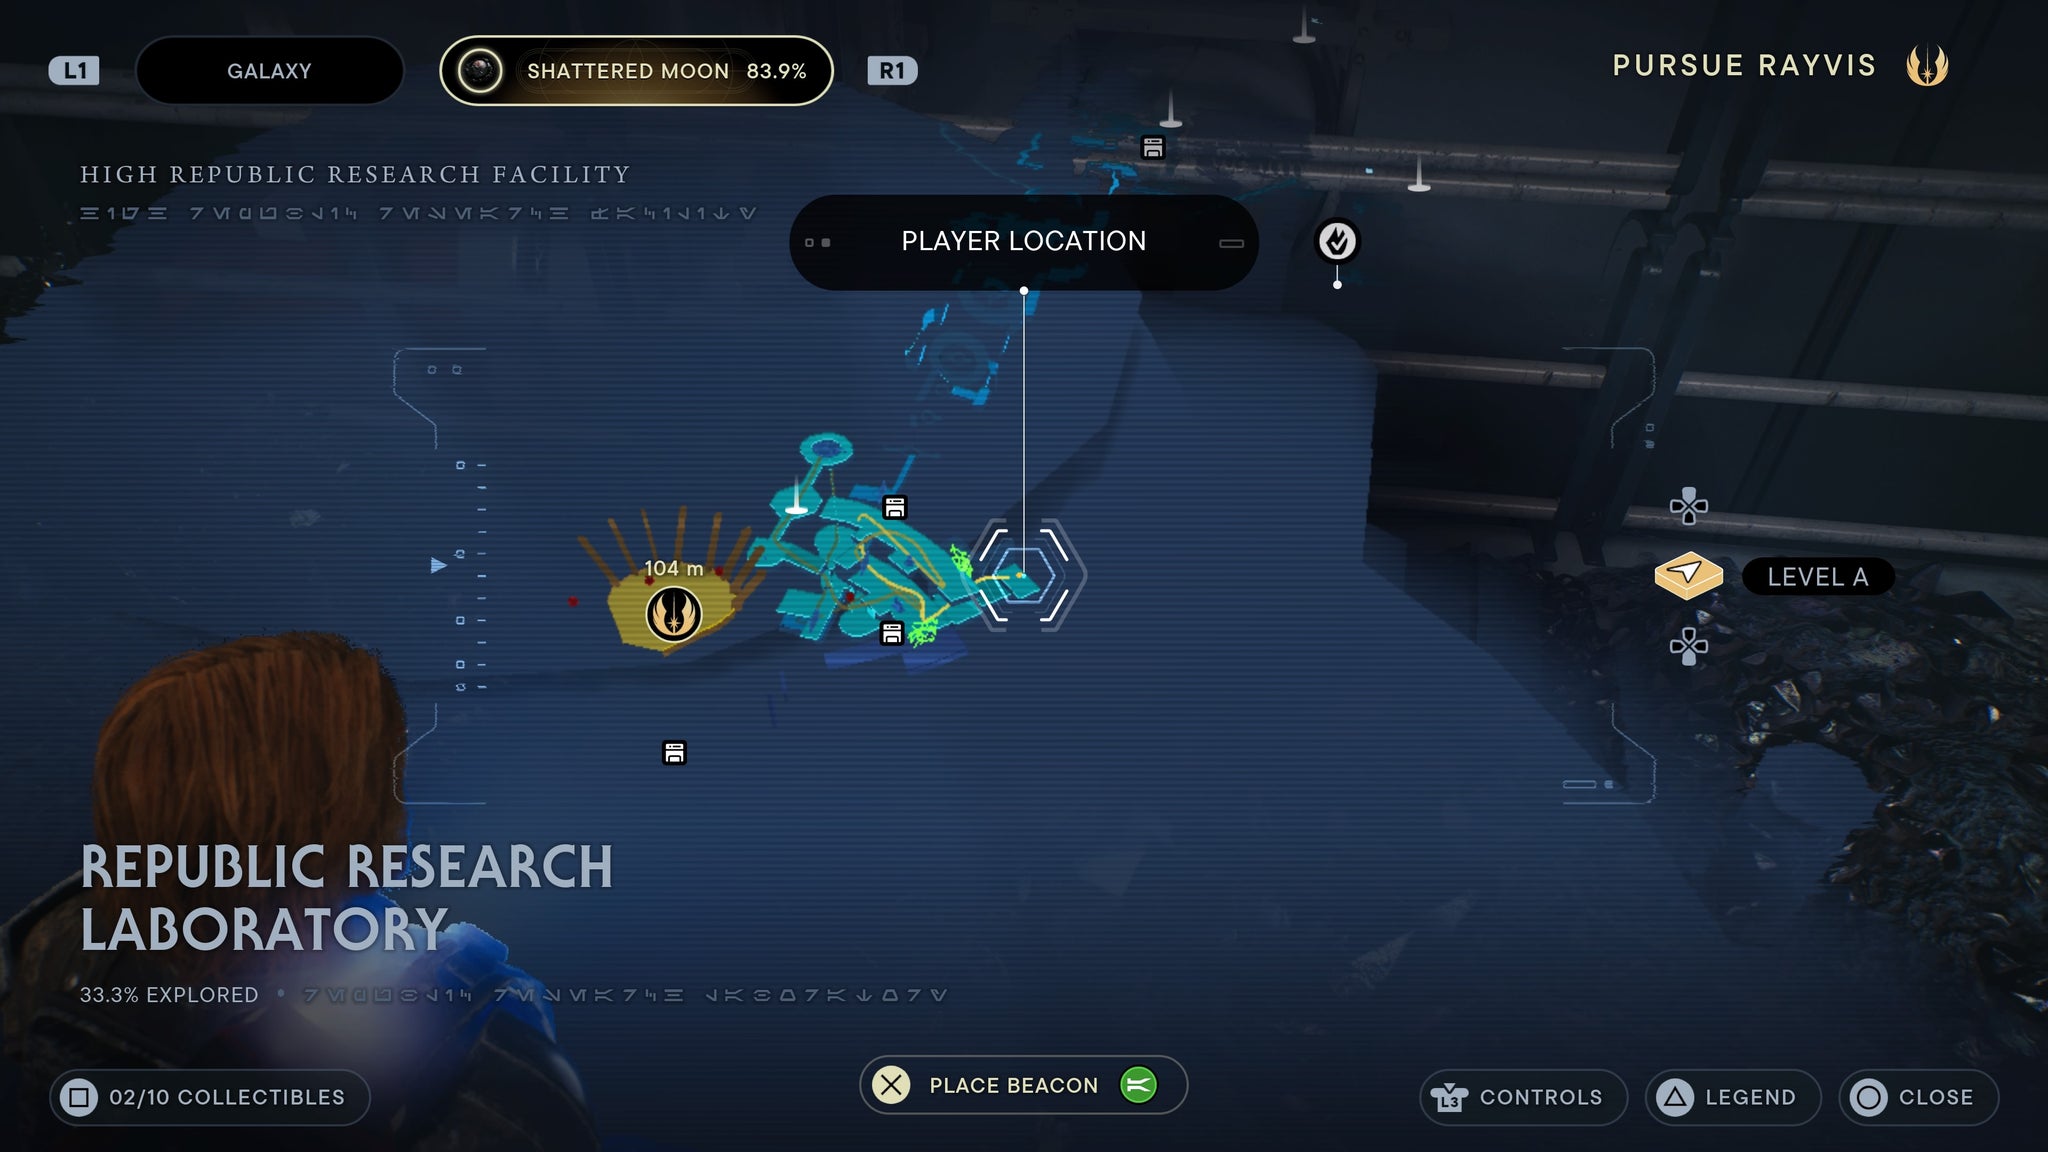
On a pile of rocks.
Once you get the balloon grapple, you’ll be prompted to leap outside and take a right to proceed. Instead, jump left and you’ll be able to scan a laser.
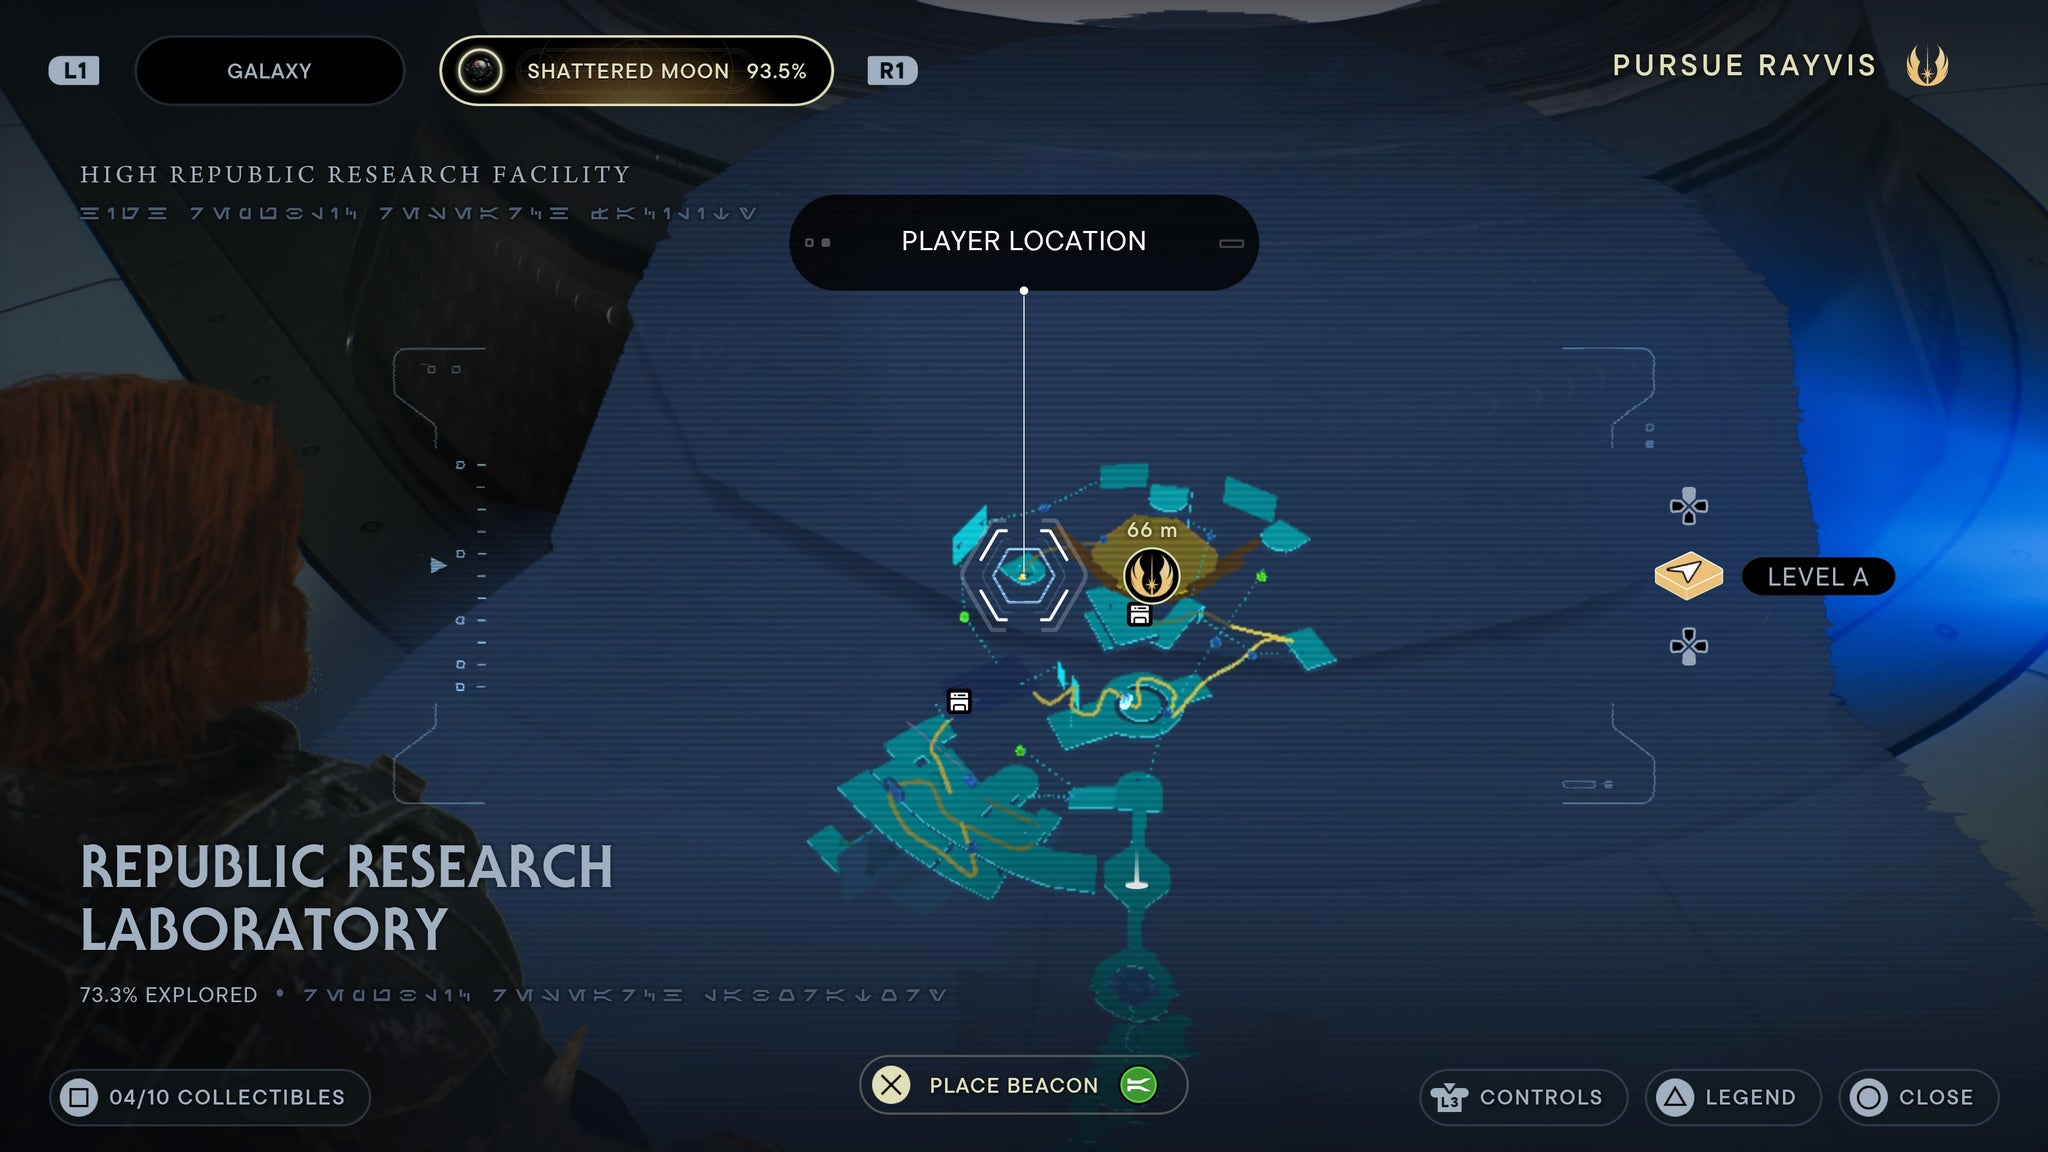
land on the beam platform and give it a scan.
Found in the outside hallway by the workbench is a scannable terminal.
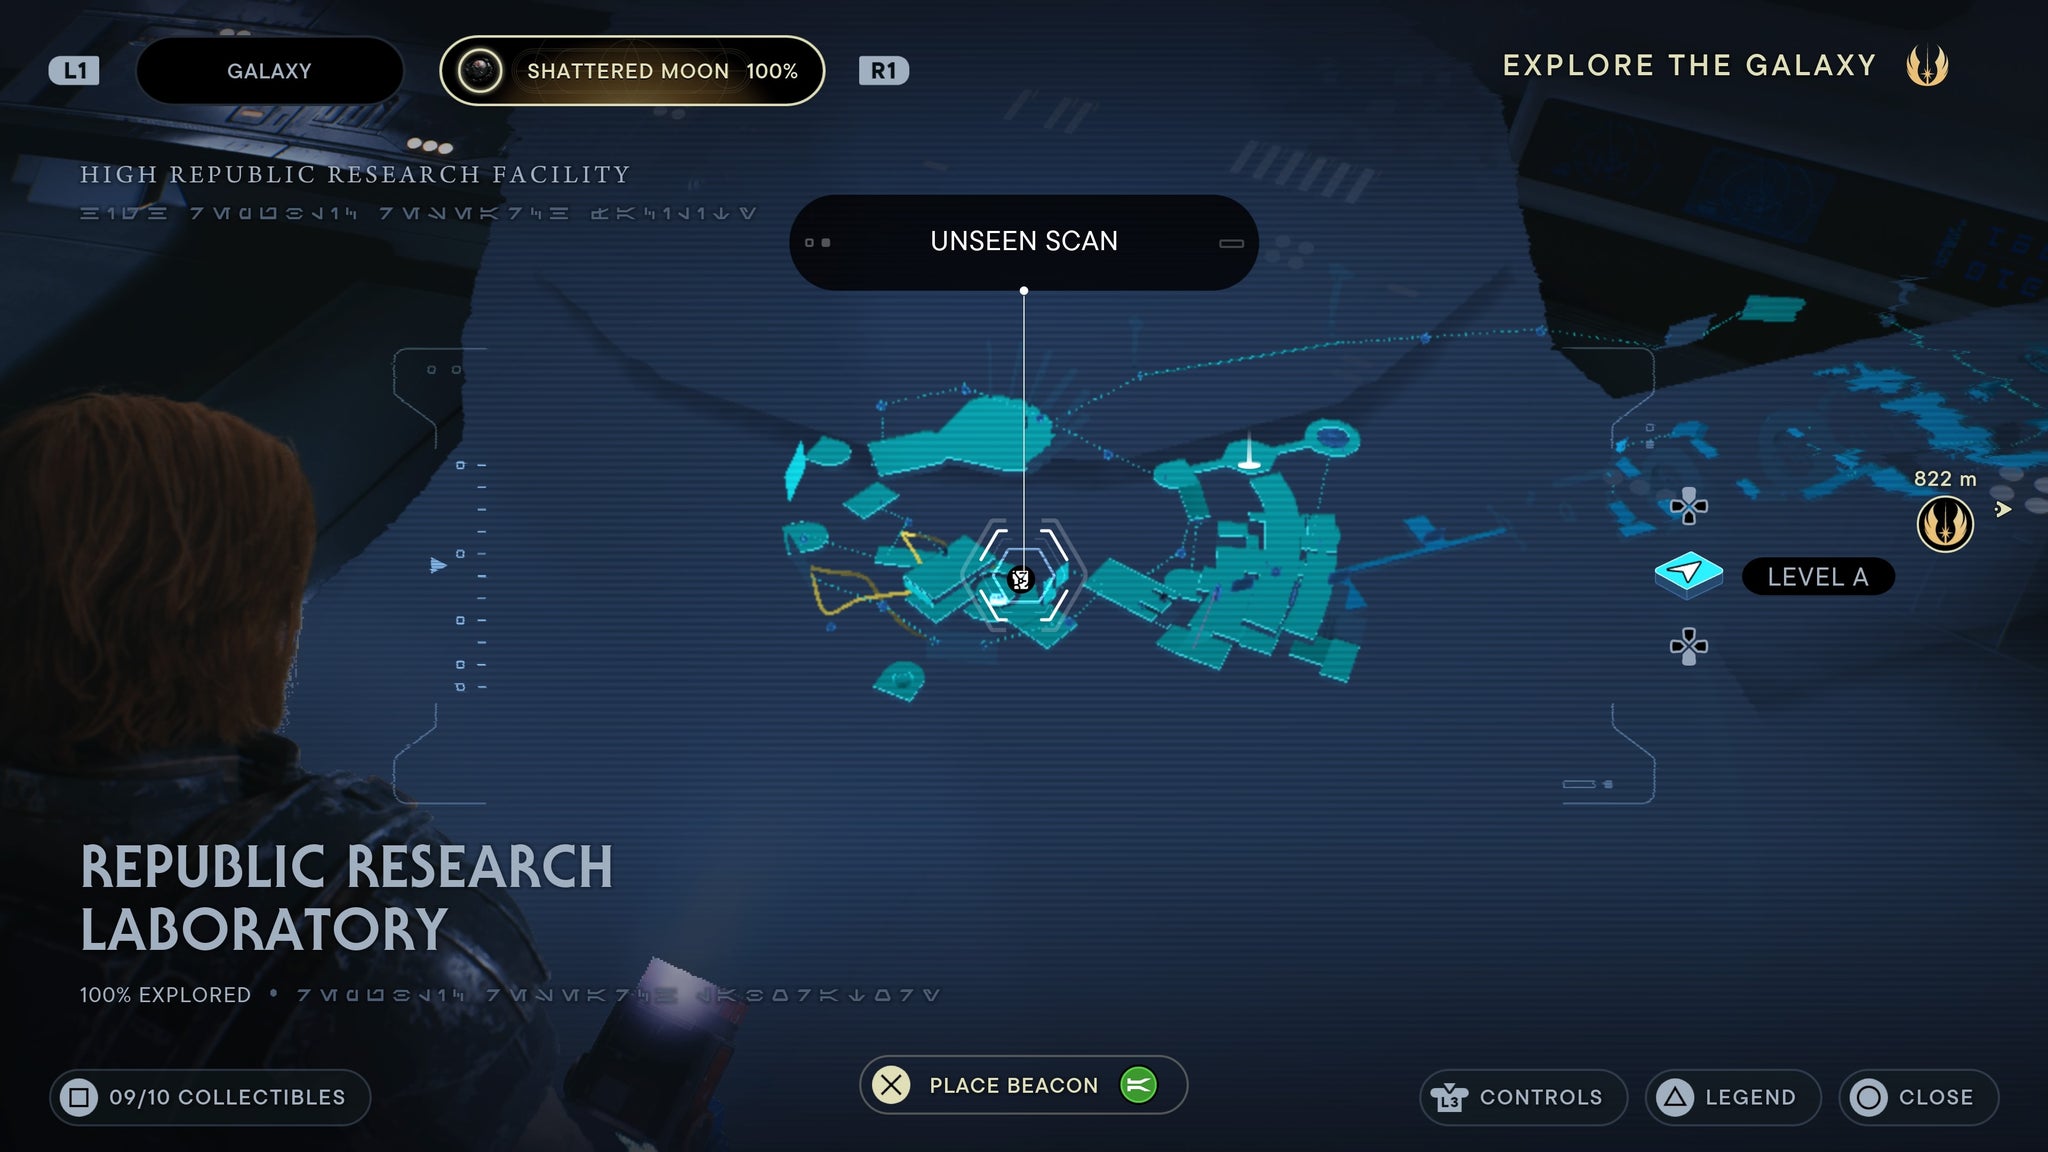
Right outside the workbench.
Nova Garon databank collectable locations
Hangar Bay Exterior
Look right of the door. You’ll be able to scan the door.
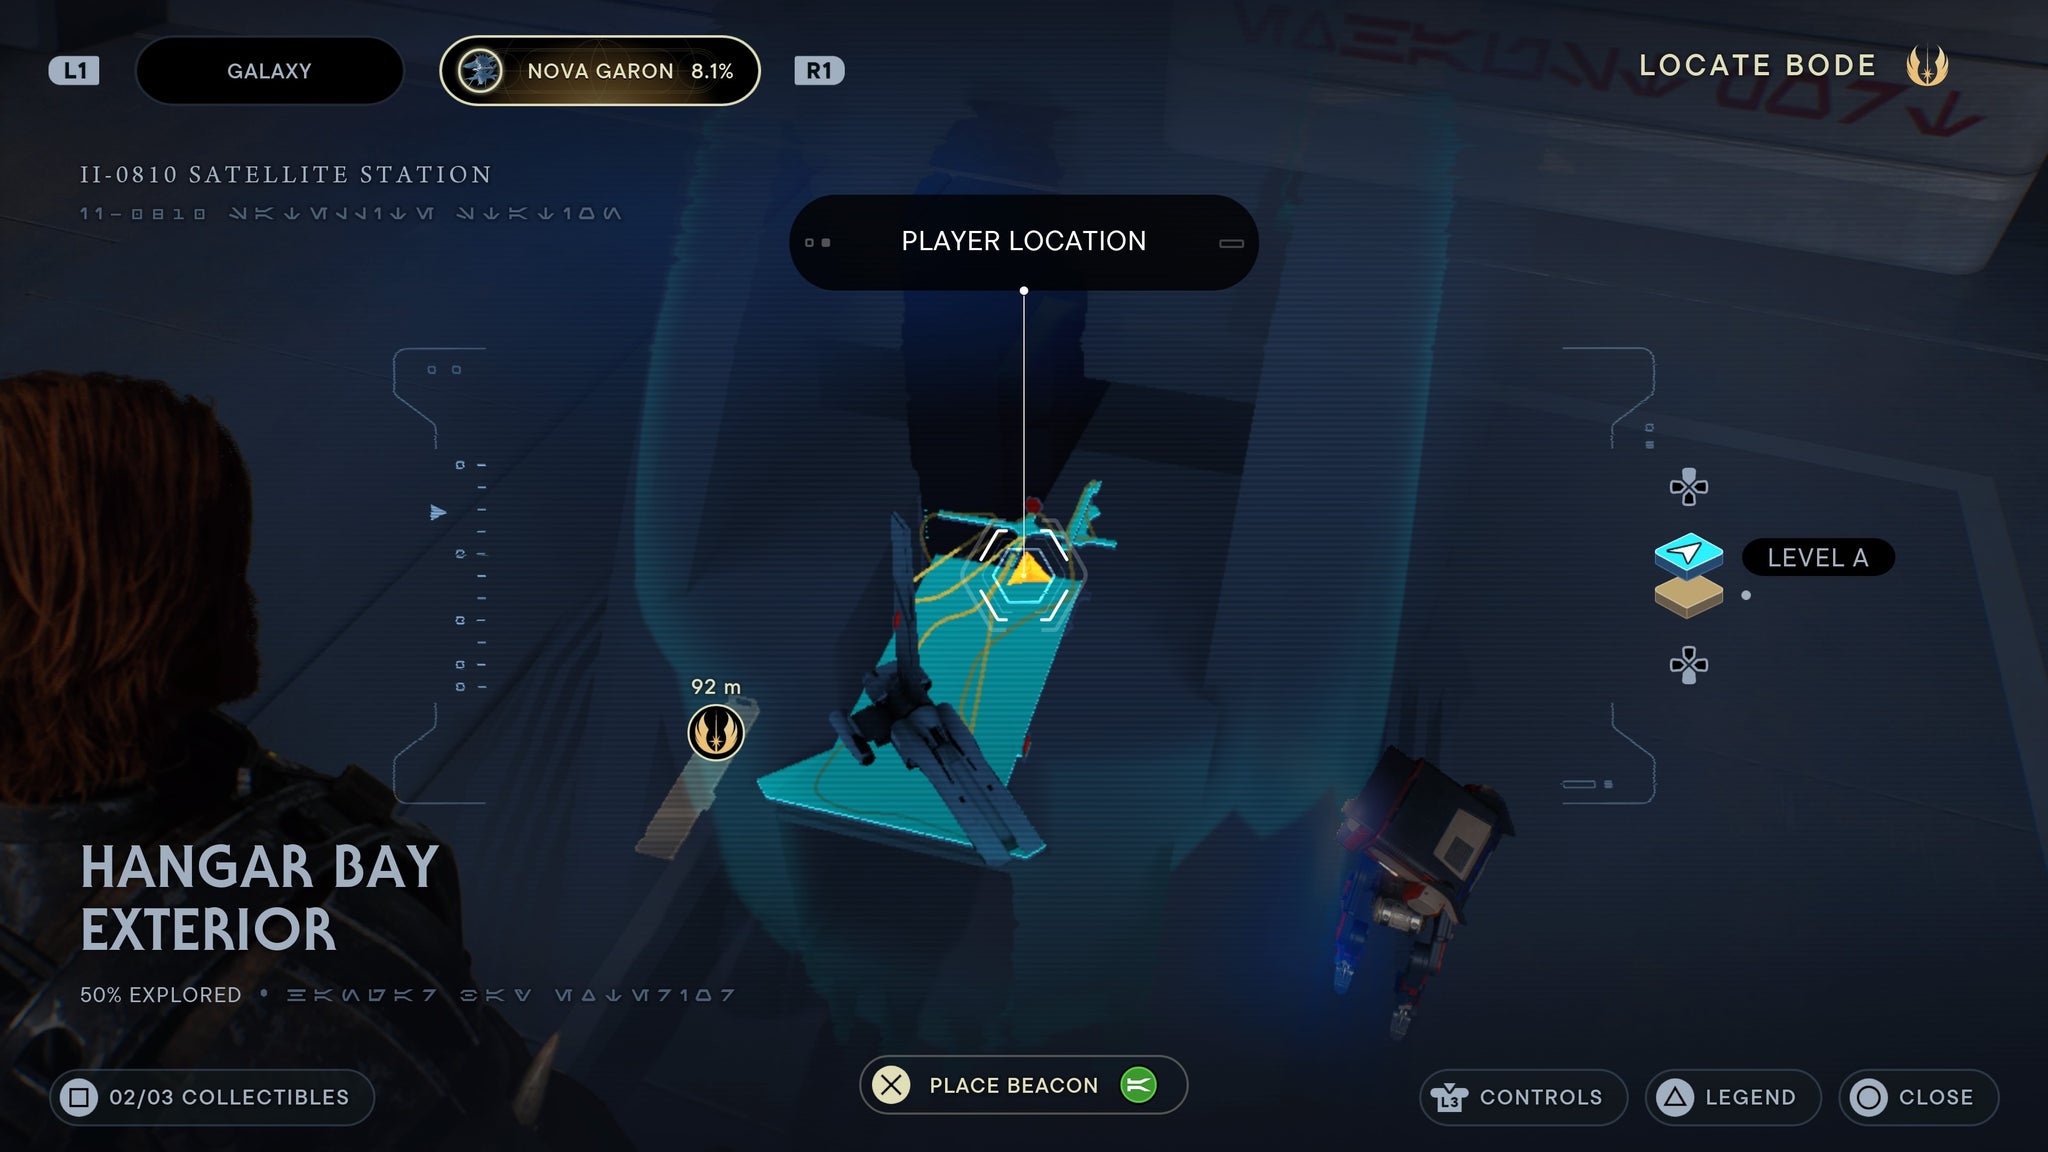
Right of the door!
Hangar Bay
As you drop down into the Hangar Bay, scan the entrance.
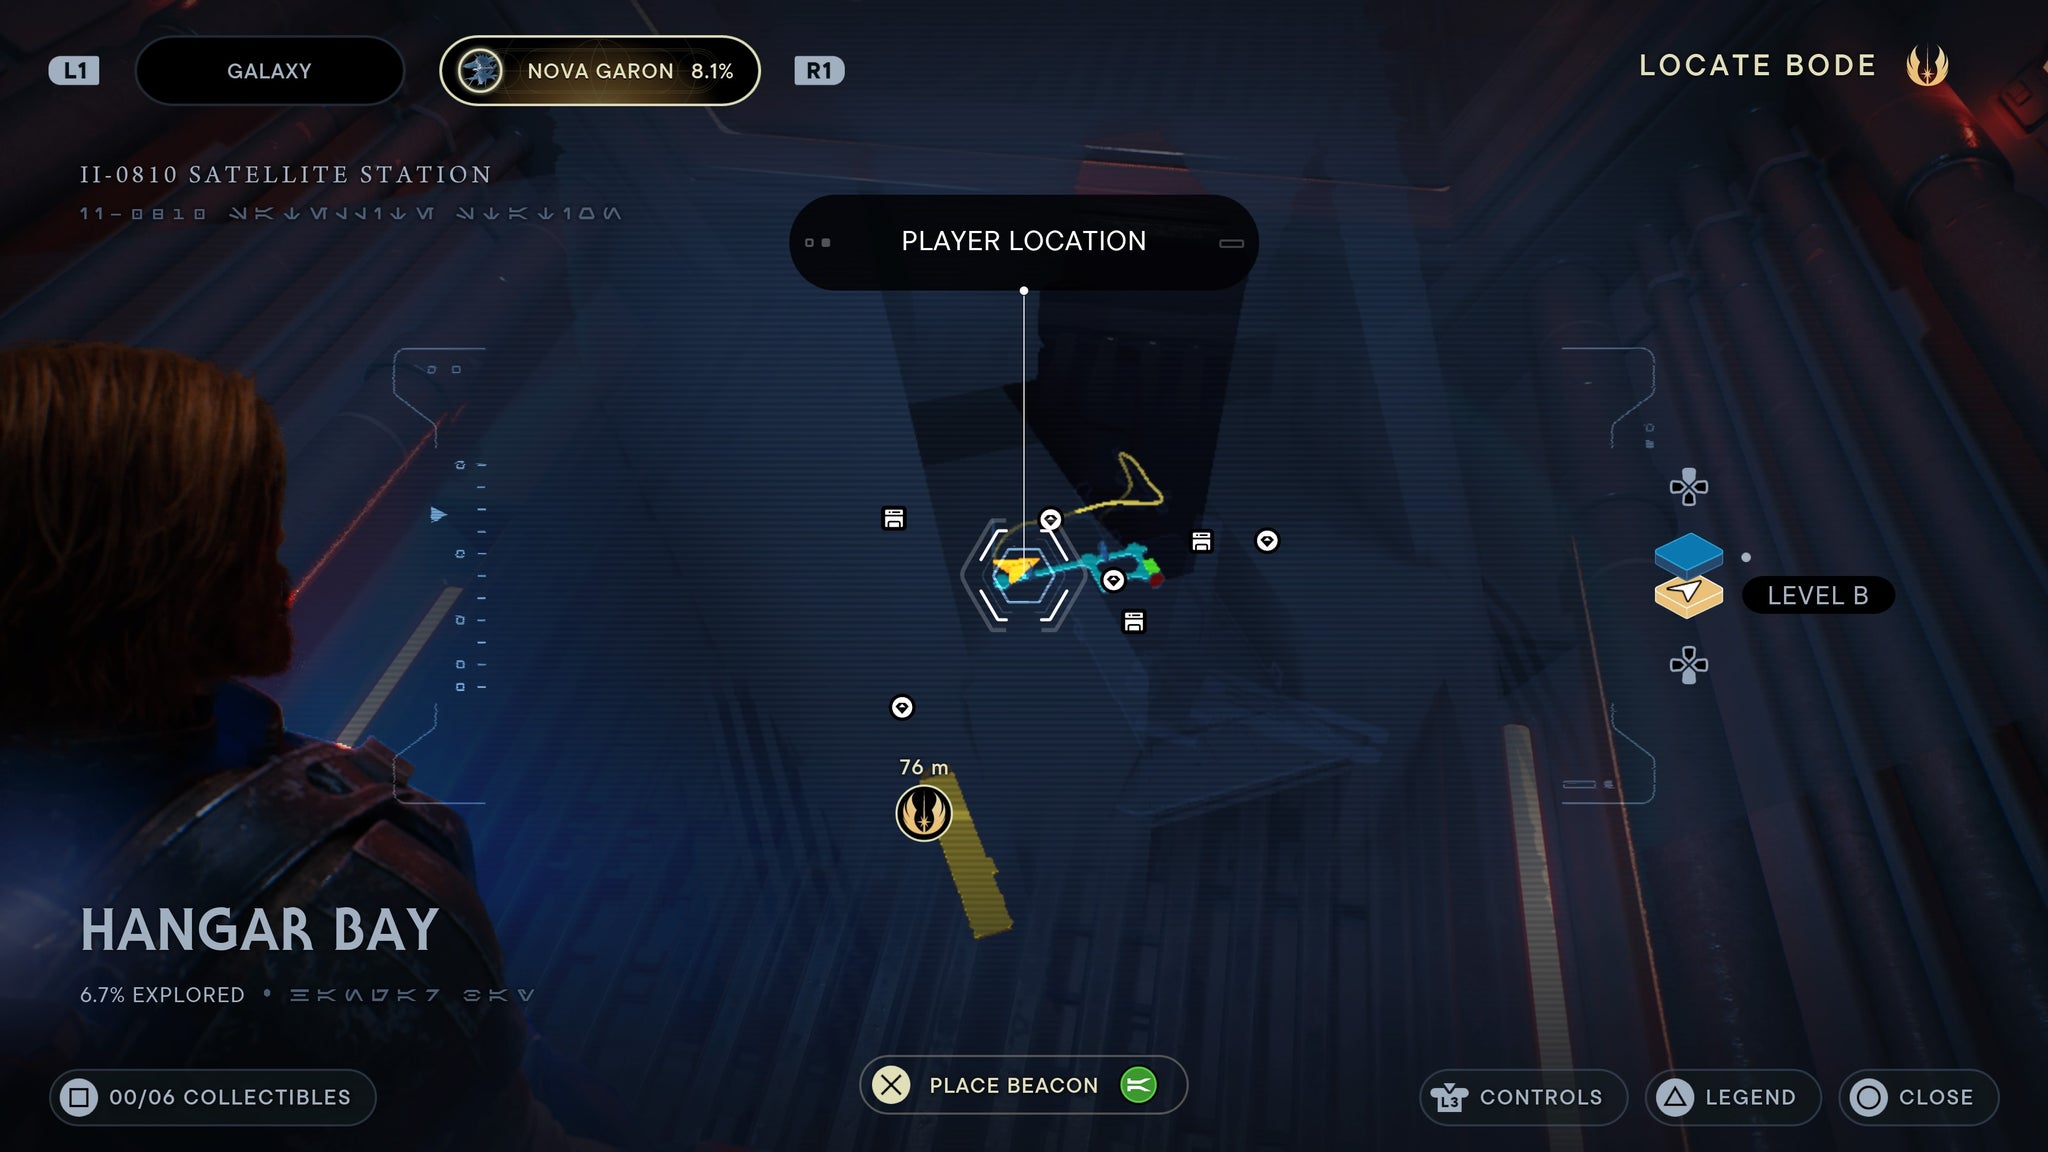
Scan it before you dash through it.
Walk past the Imperial Inspector, slice the door, then you’ll find a force echo inside.
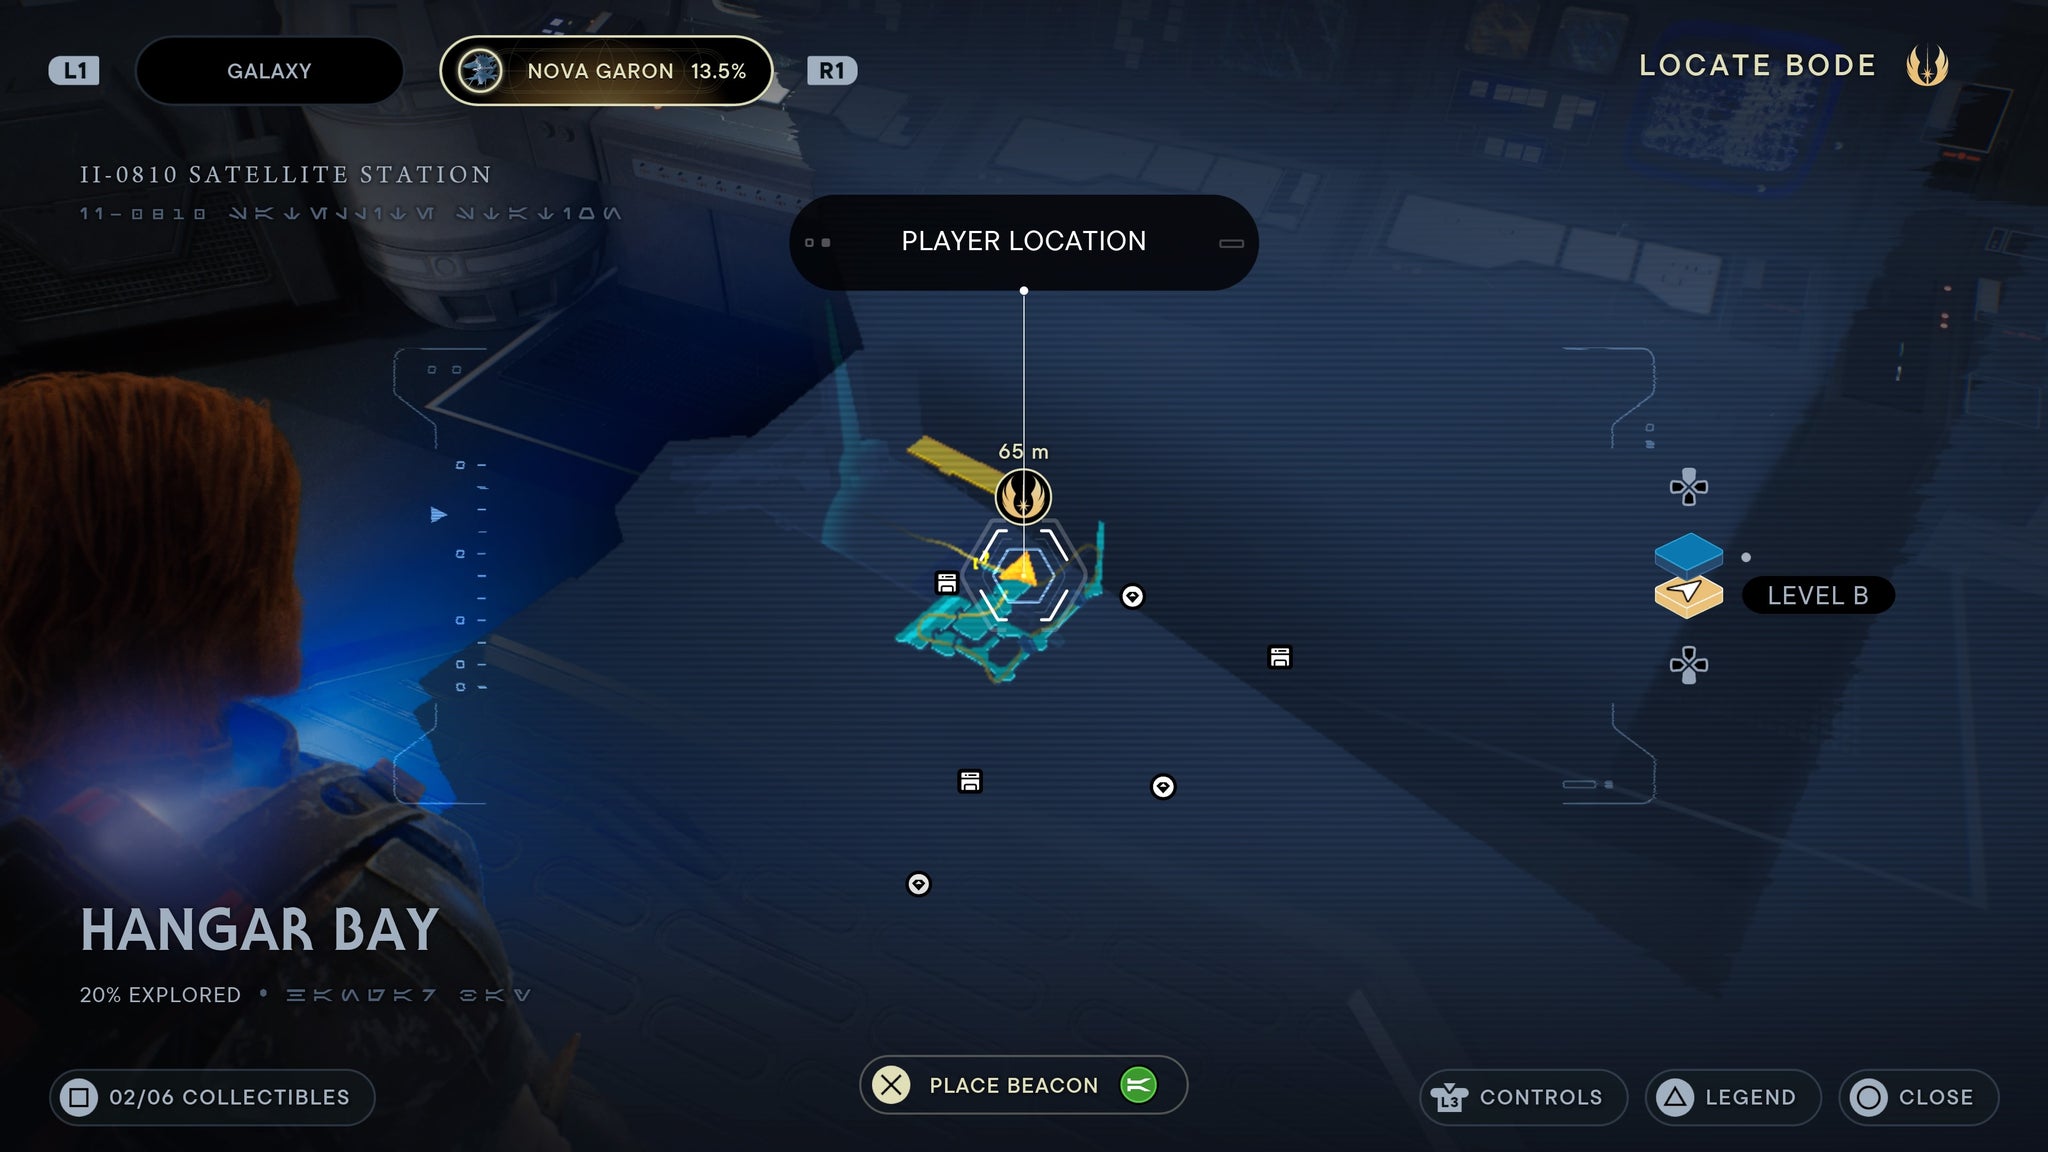
Kill the inspector then scan his stuff.
Squeeze through into the large white room field with imperial enemies. Once they are dead, scan a terminal in the centre.
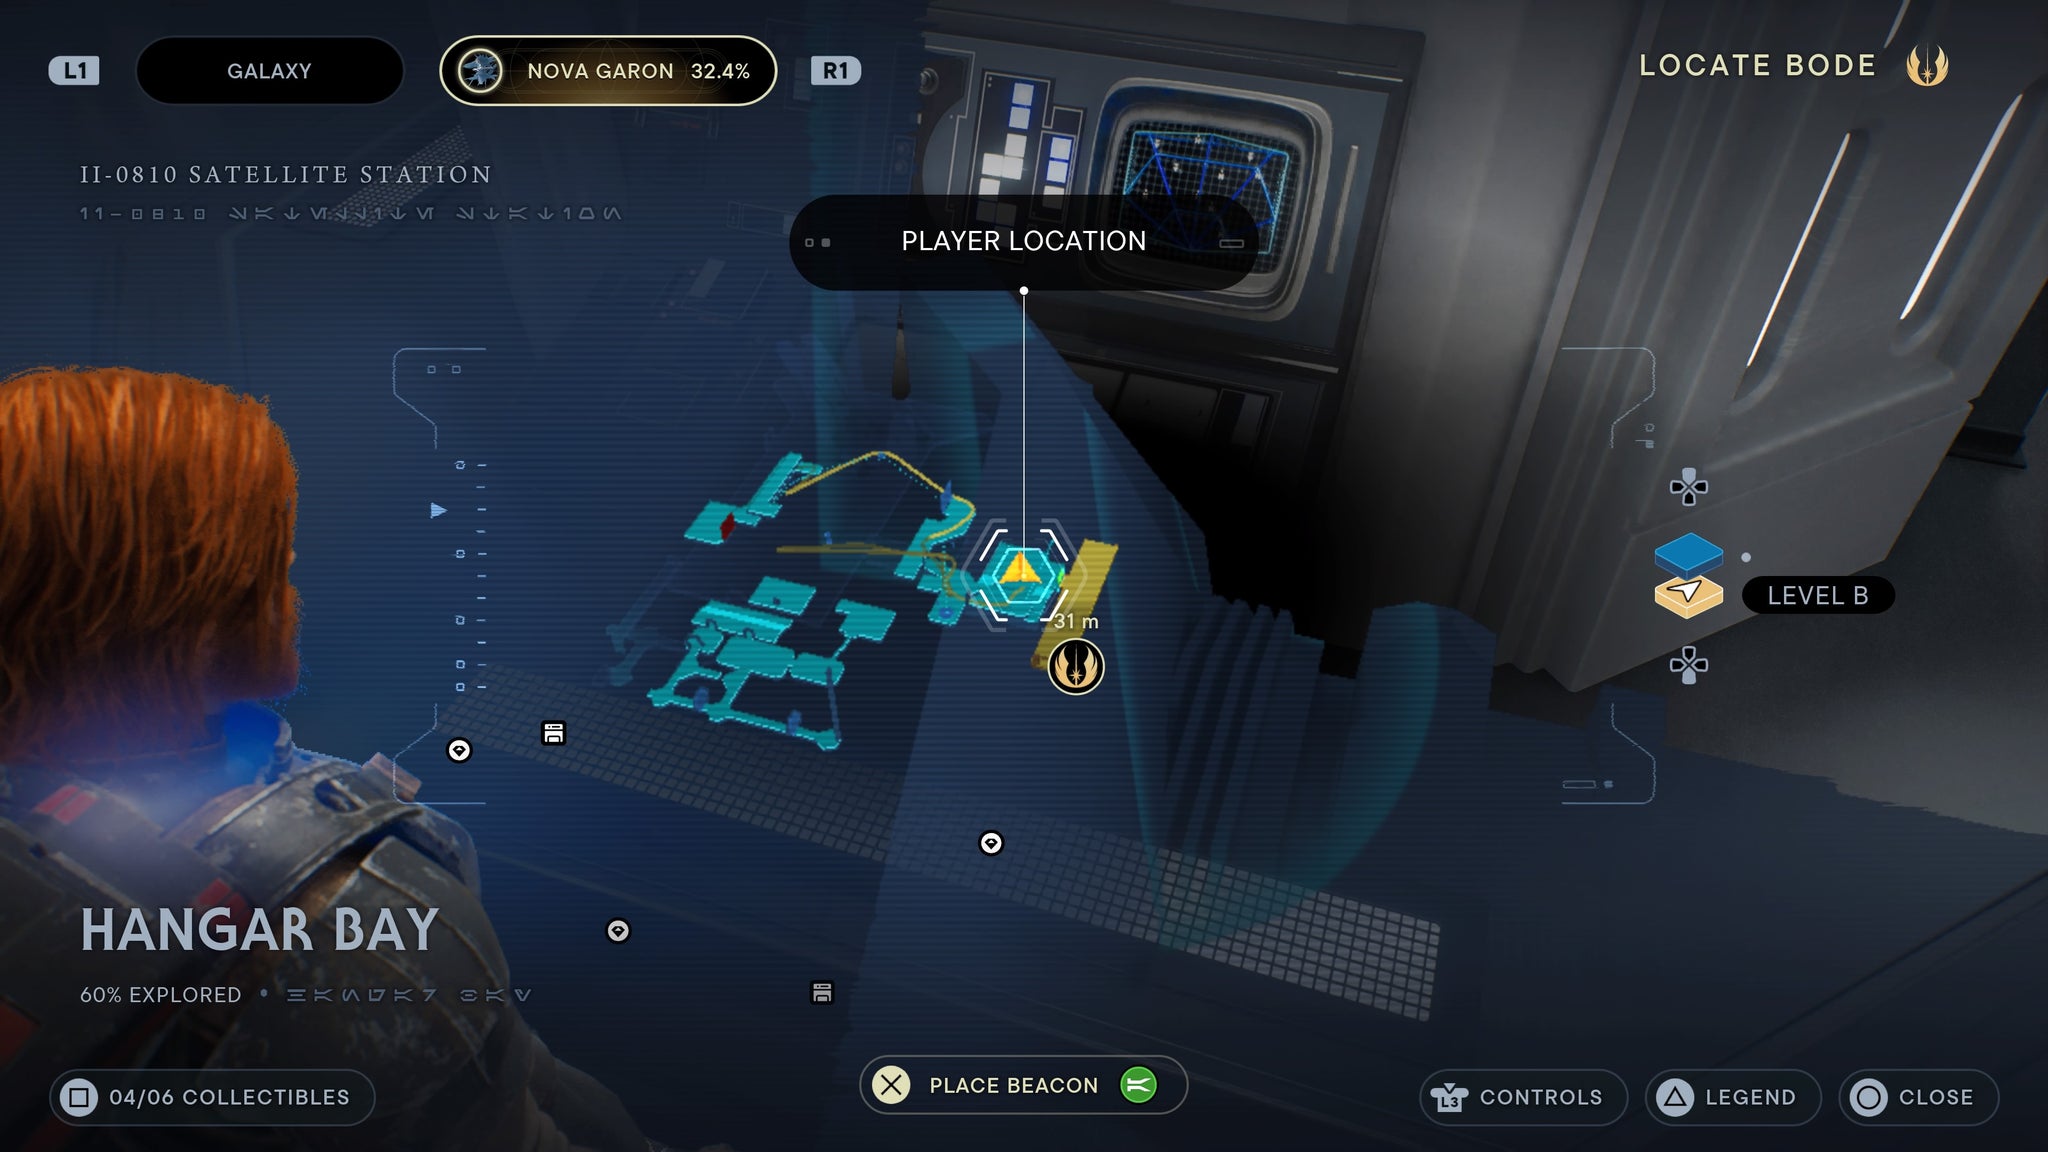
Wipe out the imperial enemies then scan the centre console.
Central Command
Found right of the elevator. It’s a terminal you can scan.
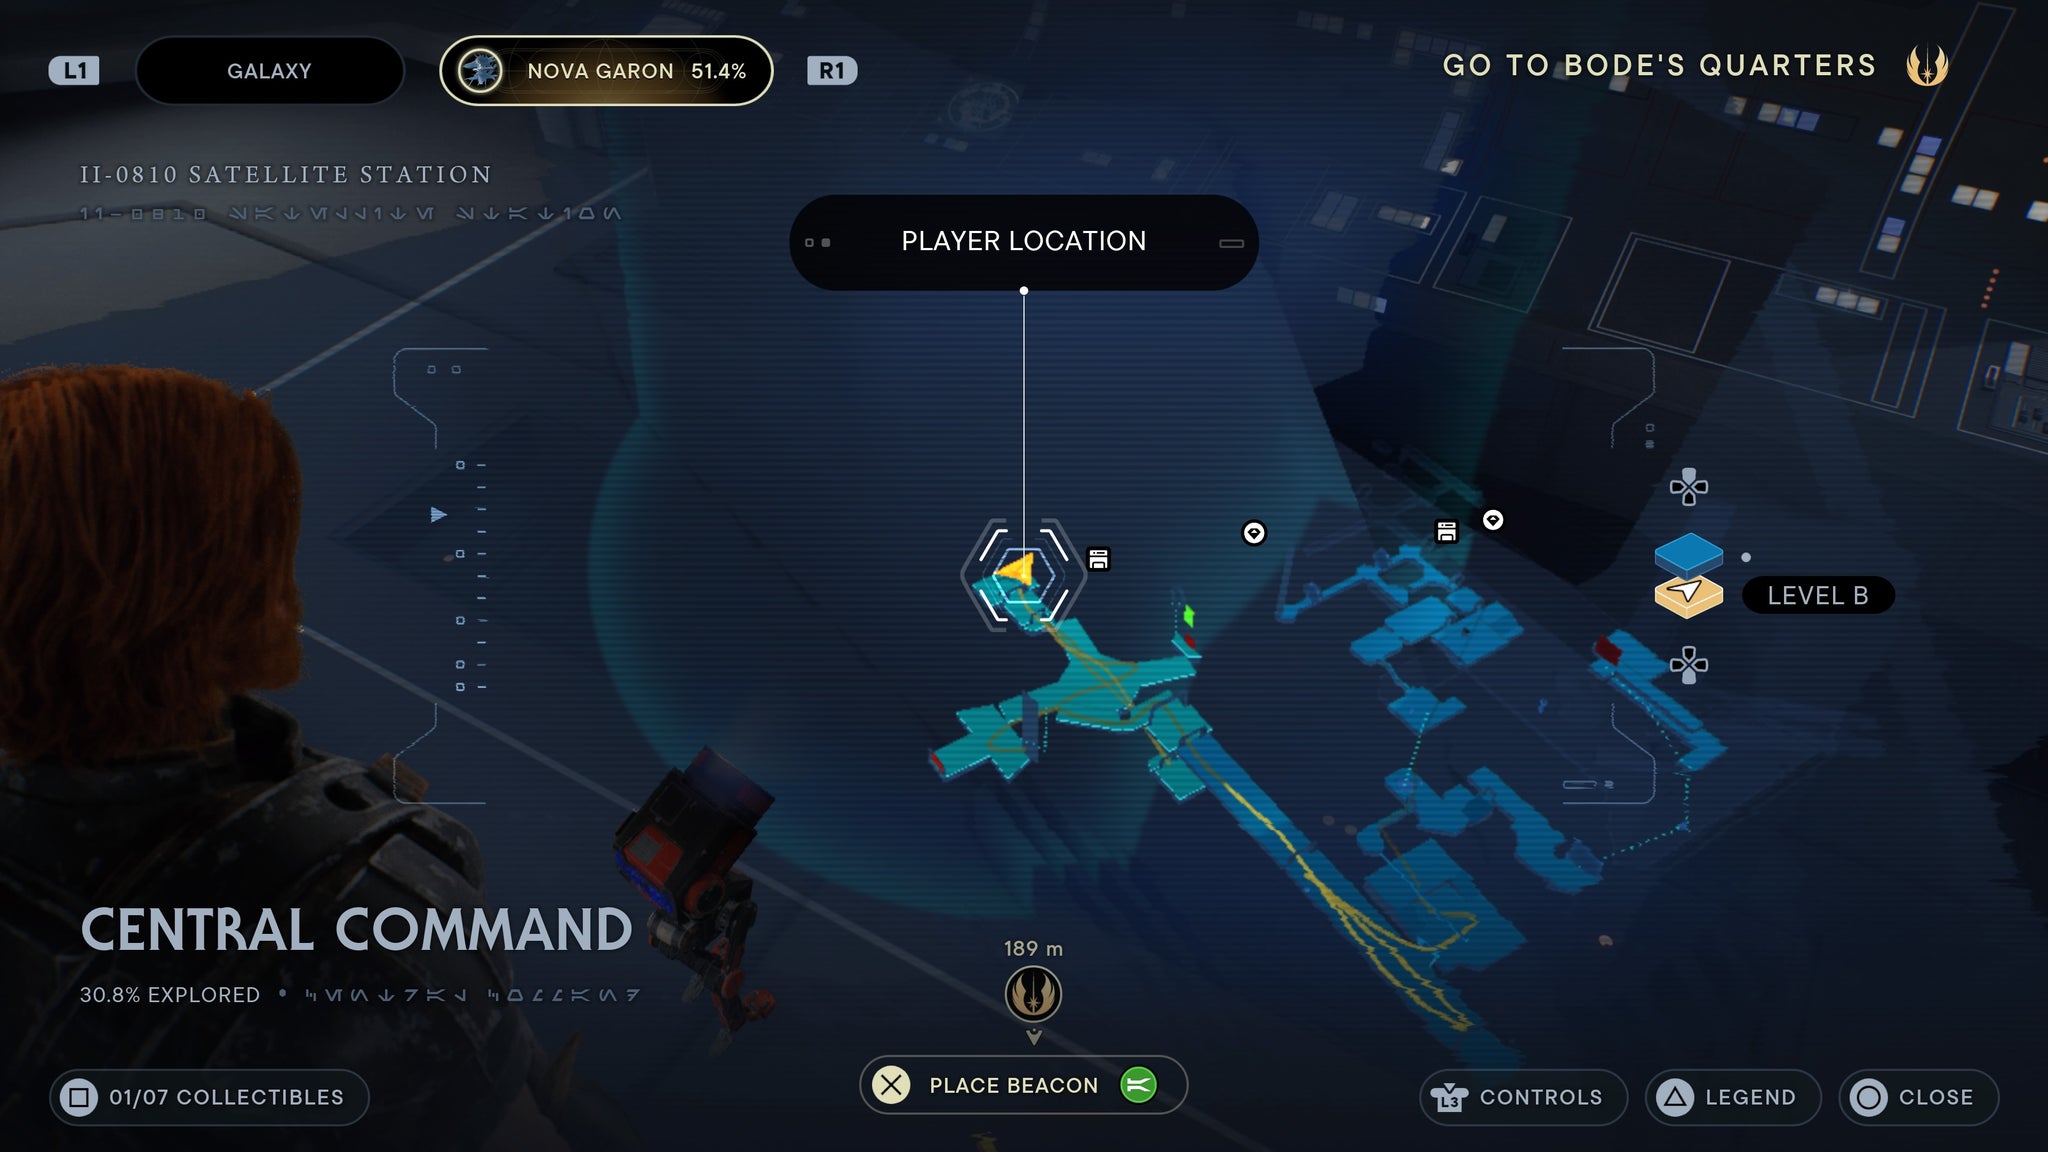
Right next to the elavator.
When you drop down to meet the boss of the base, walk right and scan the lockers near his desk.
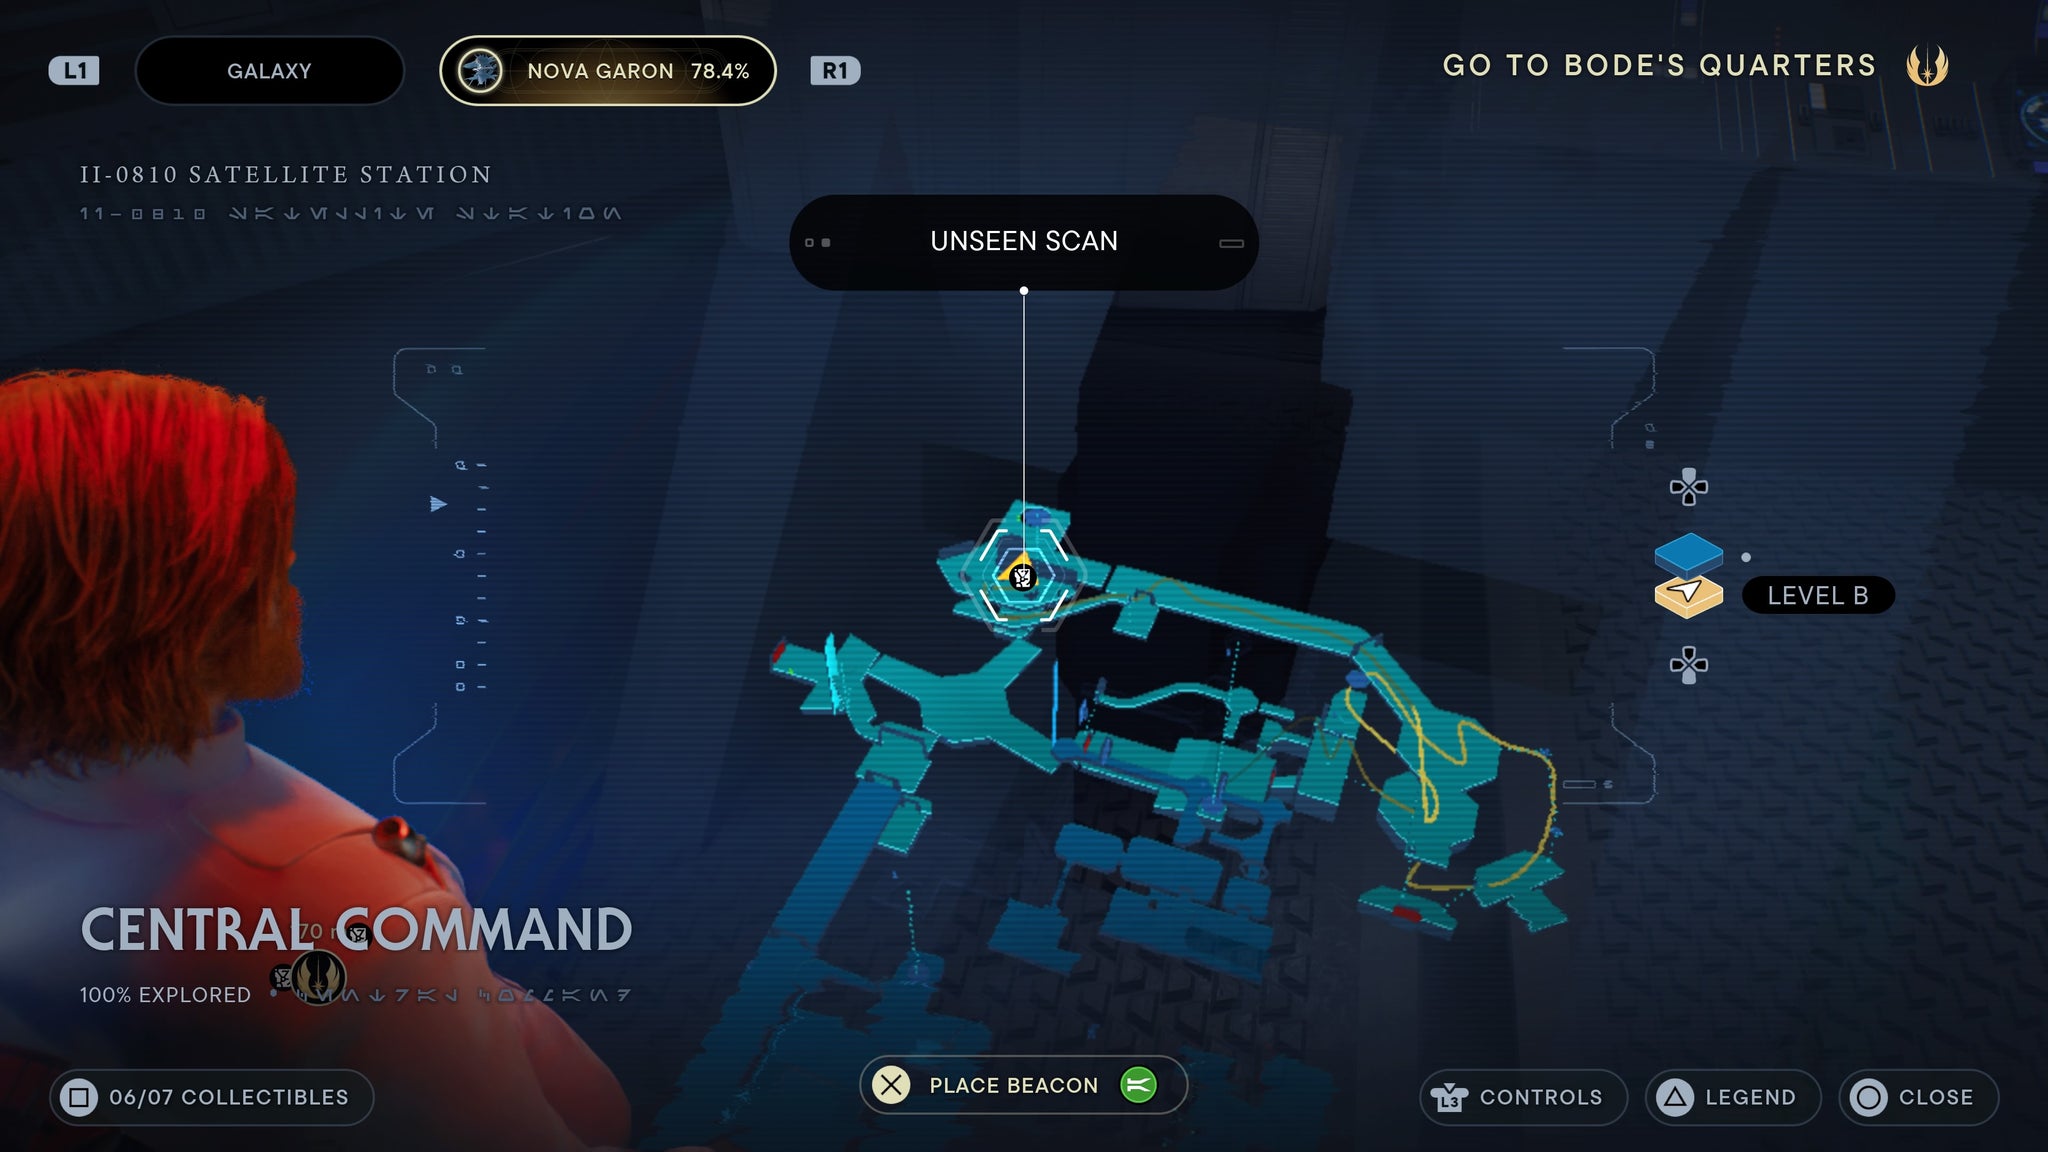
A scan with your sick new officer drip.
Officer’s Quarters
When you reach Bode’s office, walk to the room to your left and you’ll see a force echo on a picture.
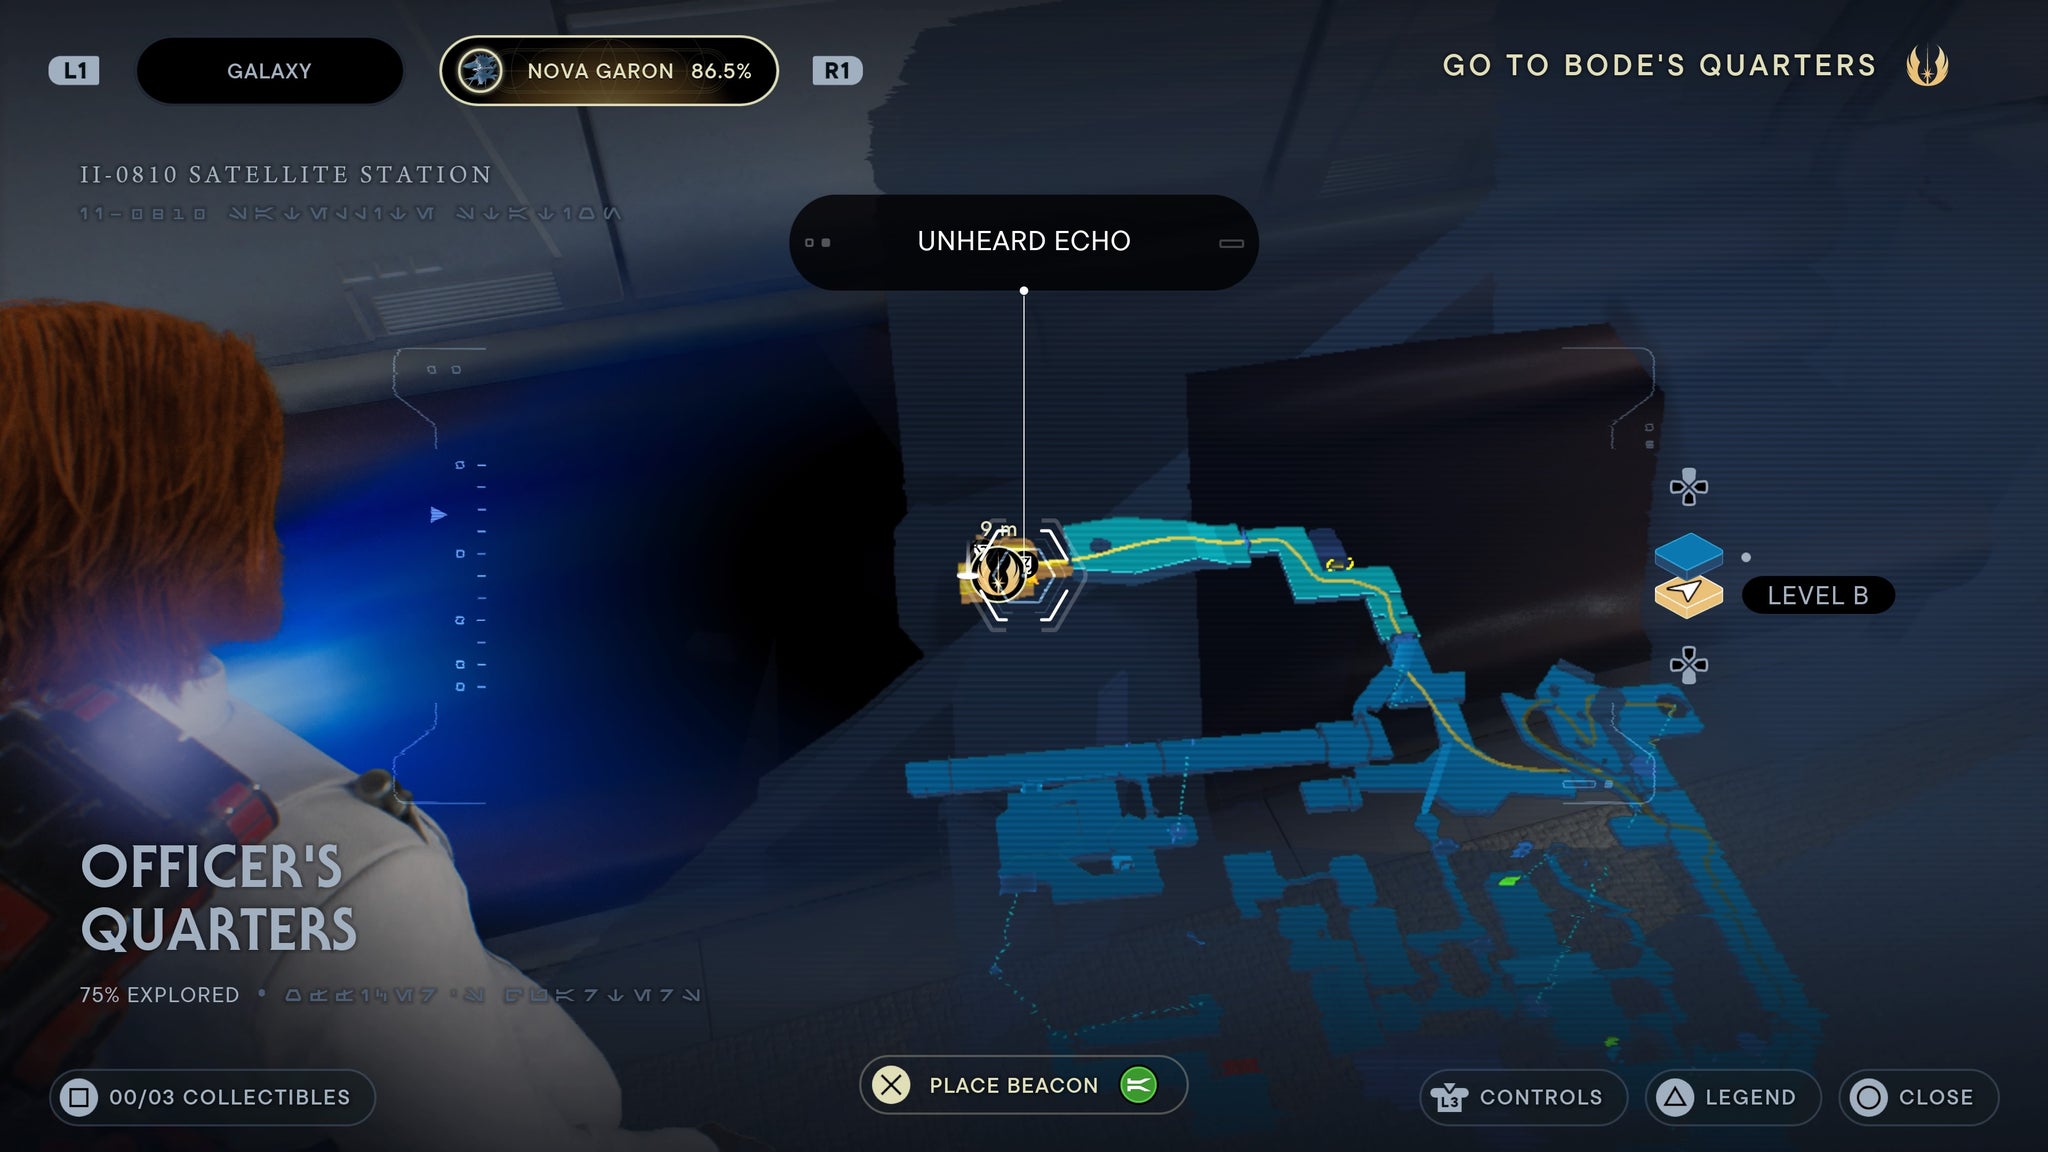
Scan his stupid kid and wife and feel bad I guess.
When you reach Bode’s office, there’s a scan by the tent in the corner.
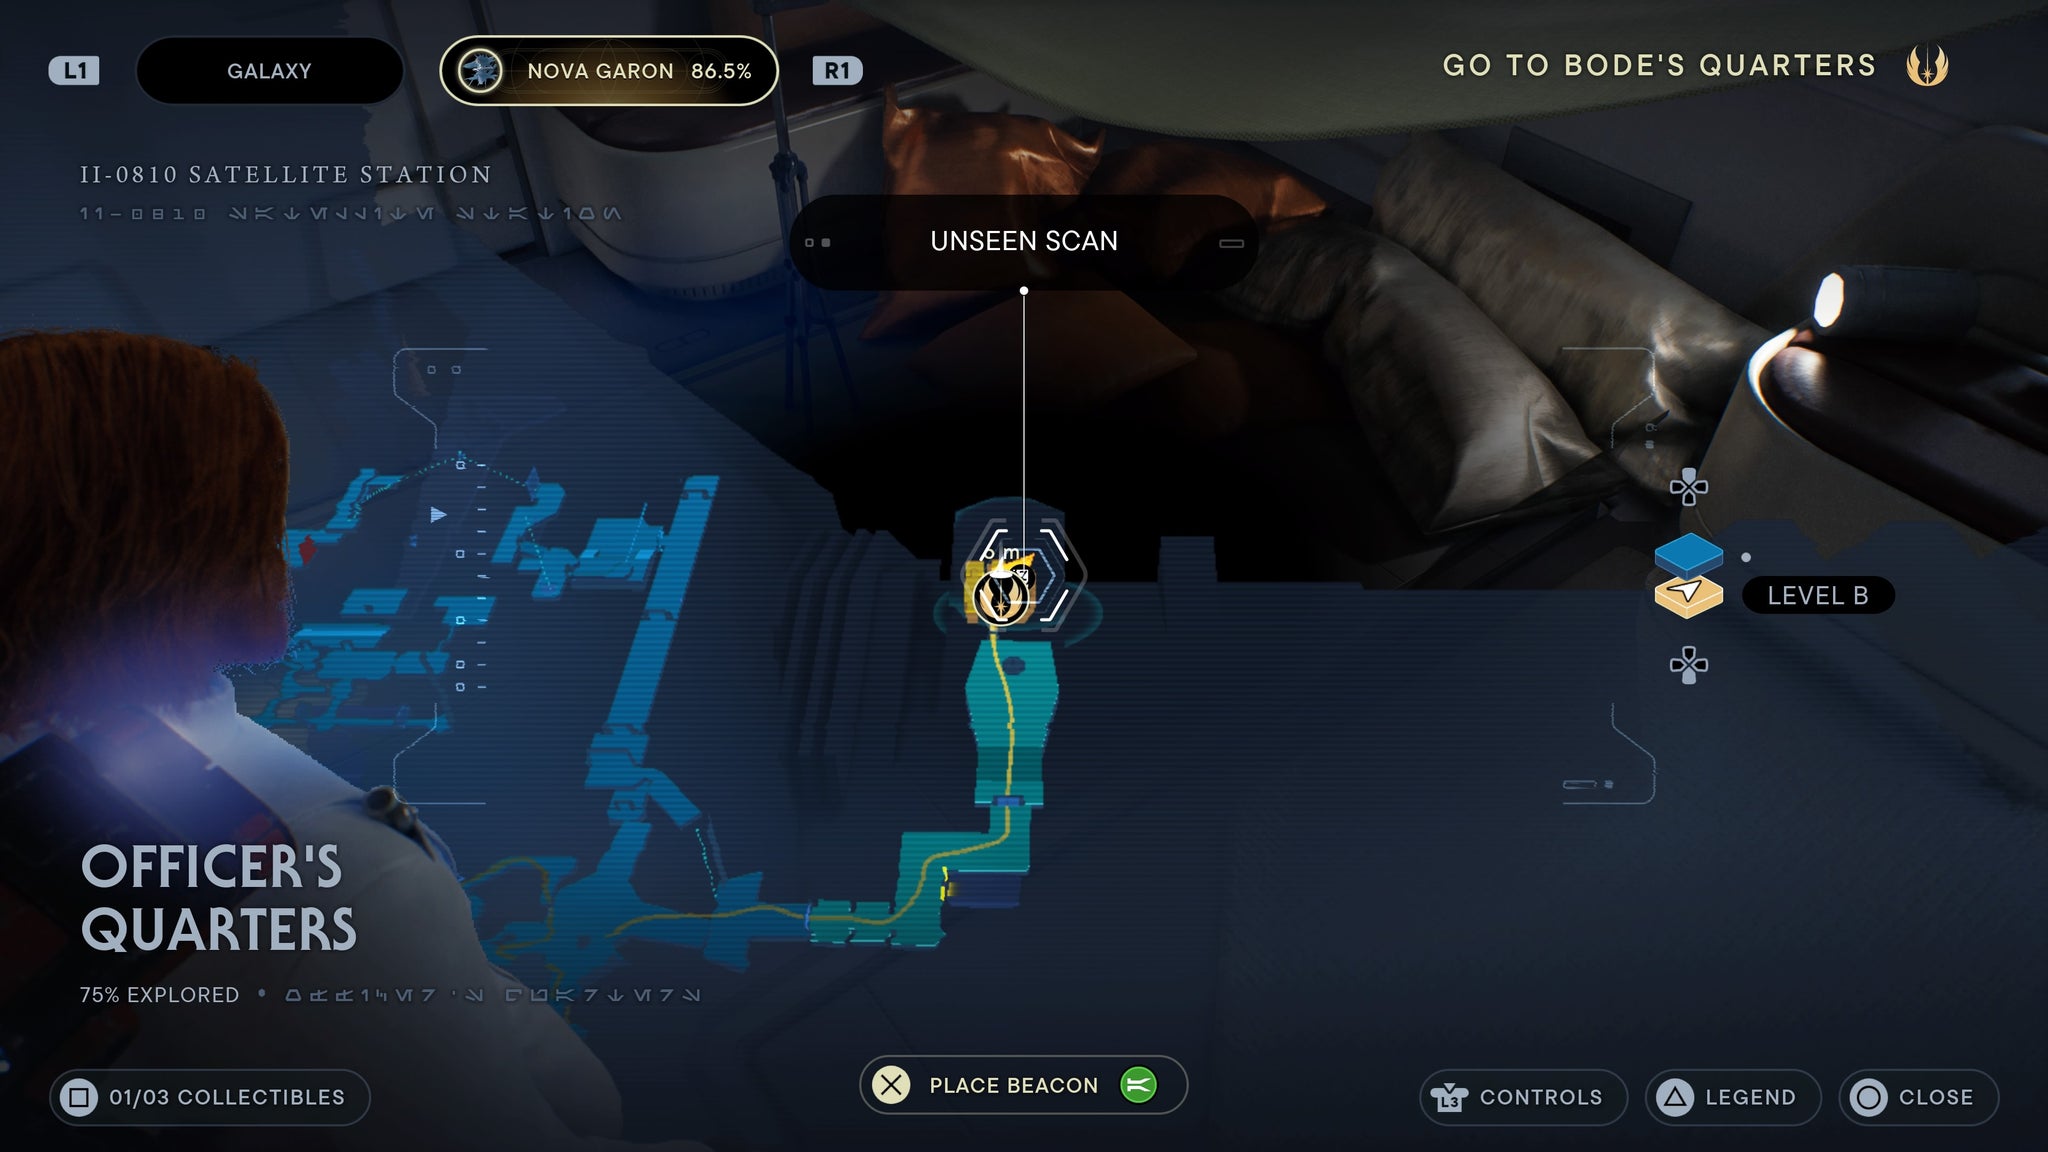
Scan the dumb tent that the sympathy person lives in.
Tanalorr databank collectable locations
Haven’s Edge
Look behind the Mantis and you’ll find a corpse you can scan.
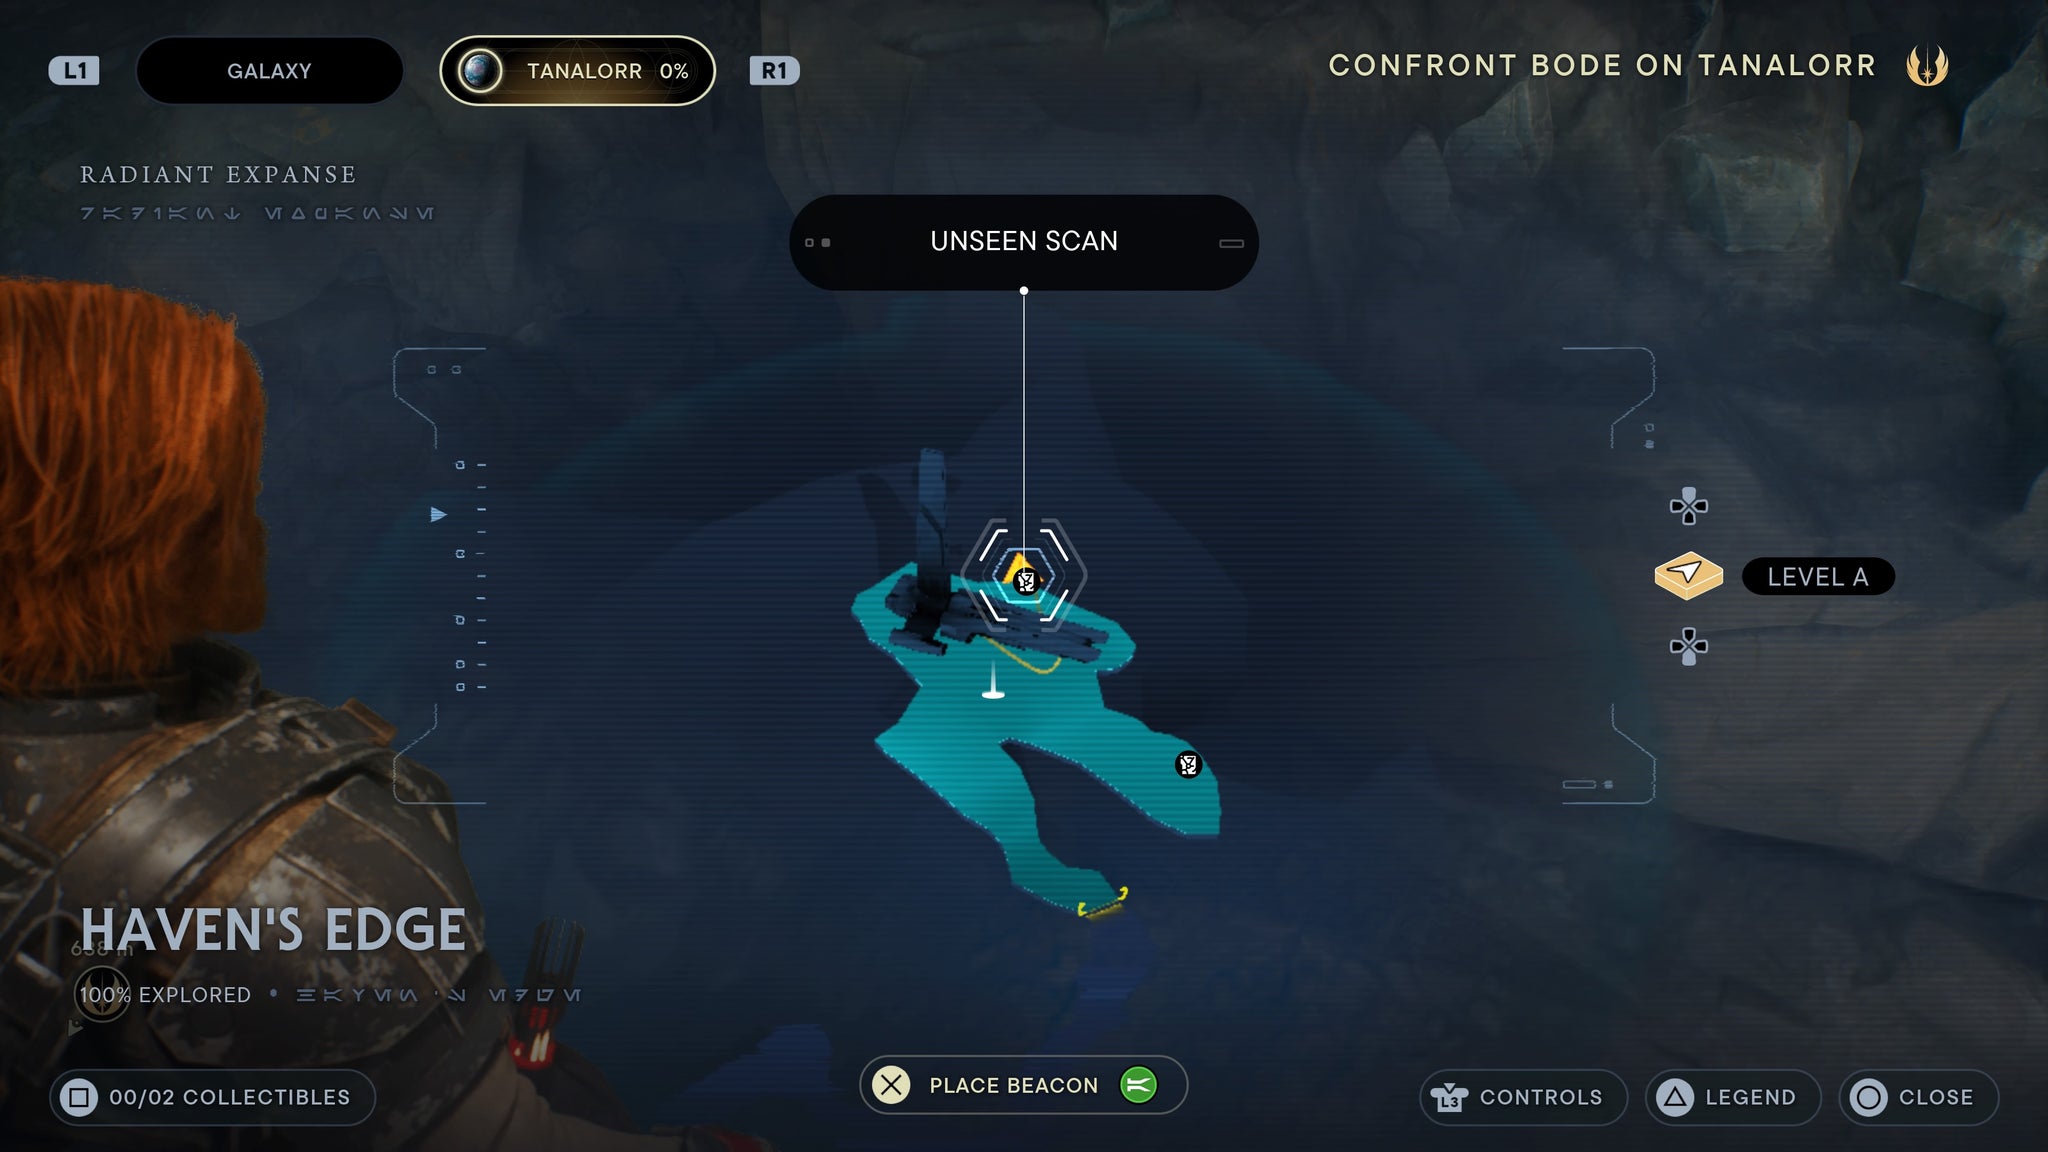
One last corpse for the road.
As you exit the Mantis, walk left and you can scan the pillar in front of you.
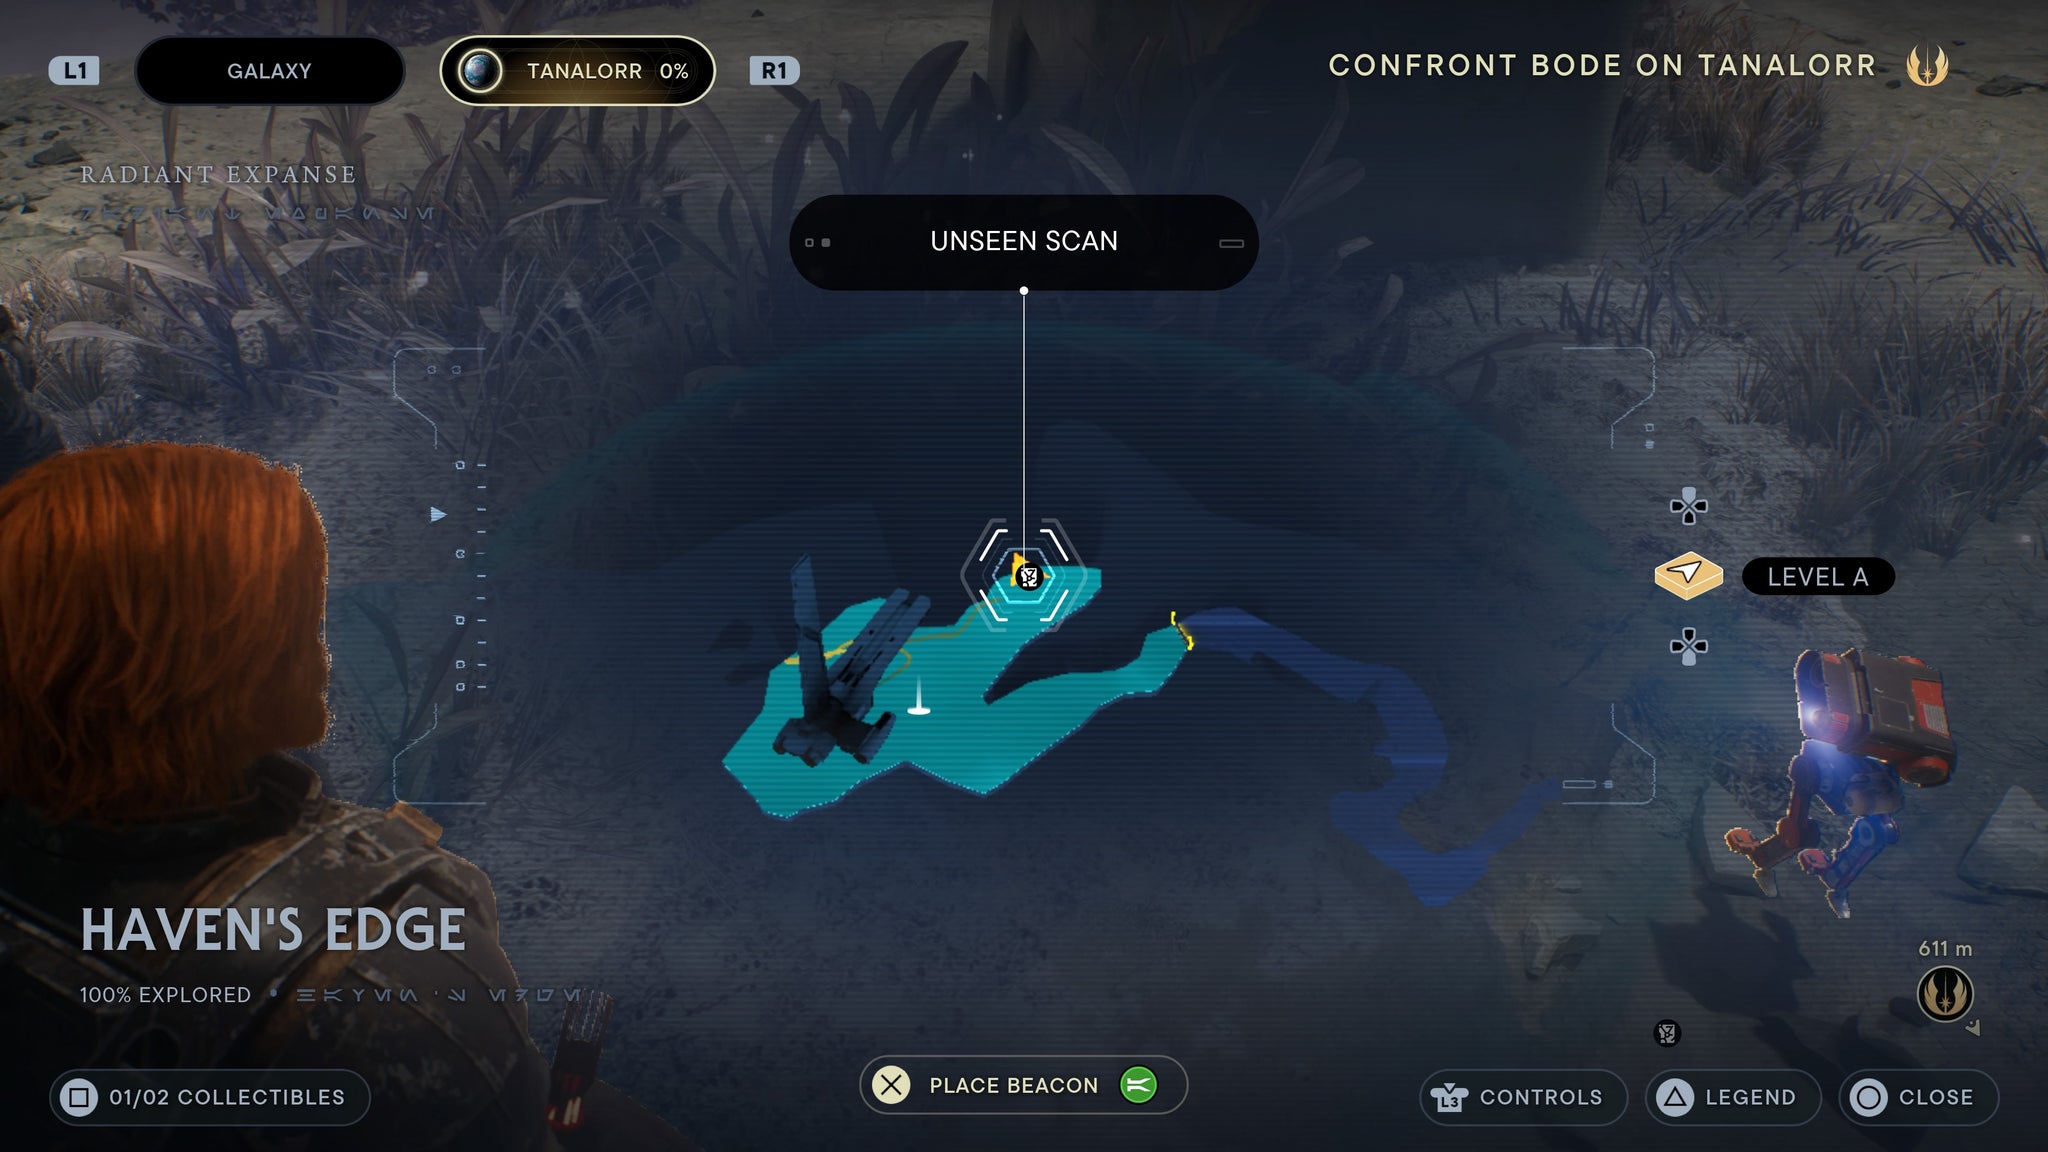
A nice pillar looking out at the skybox.
Verdant Gardens
As you go down the hill into the zone, scan the rocket embedded in the ground.

Big missile. Very cool.
As you squeeze through to the open area with Bode’s fighter, turn left and you can find a force echo.

To the left of the fighter.
As you go up the stairs towards the temple, scan the small fountain in front of the door.
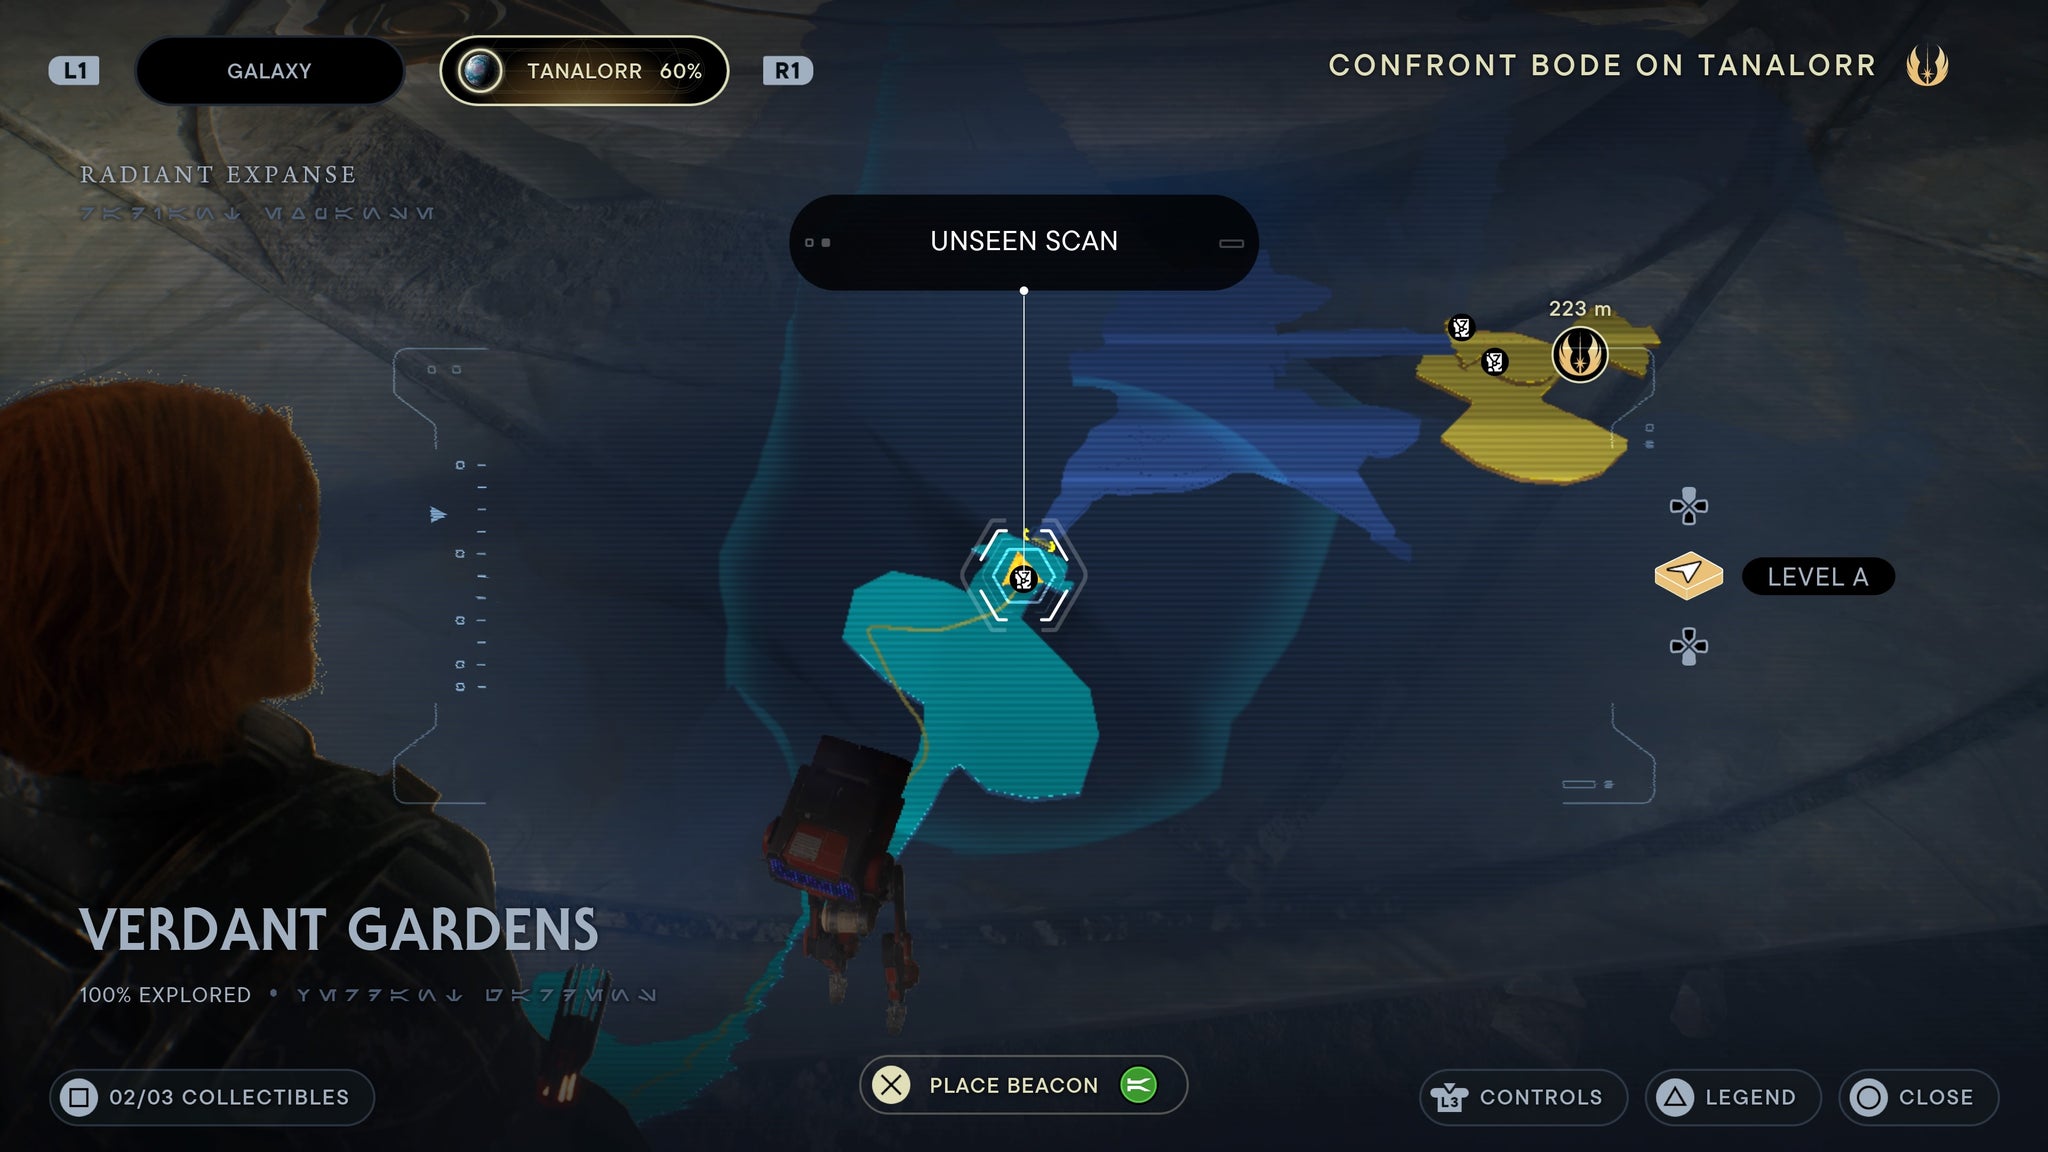
We’re nearly done - can you feel it?
Audience Chamber
After you murder Bode in front of his surprisingly okay with it daughter, return to the audience chamber and you’ll find a force echo on the left before you drop down.
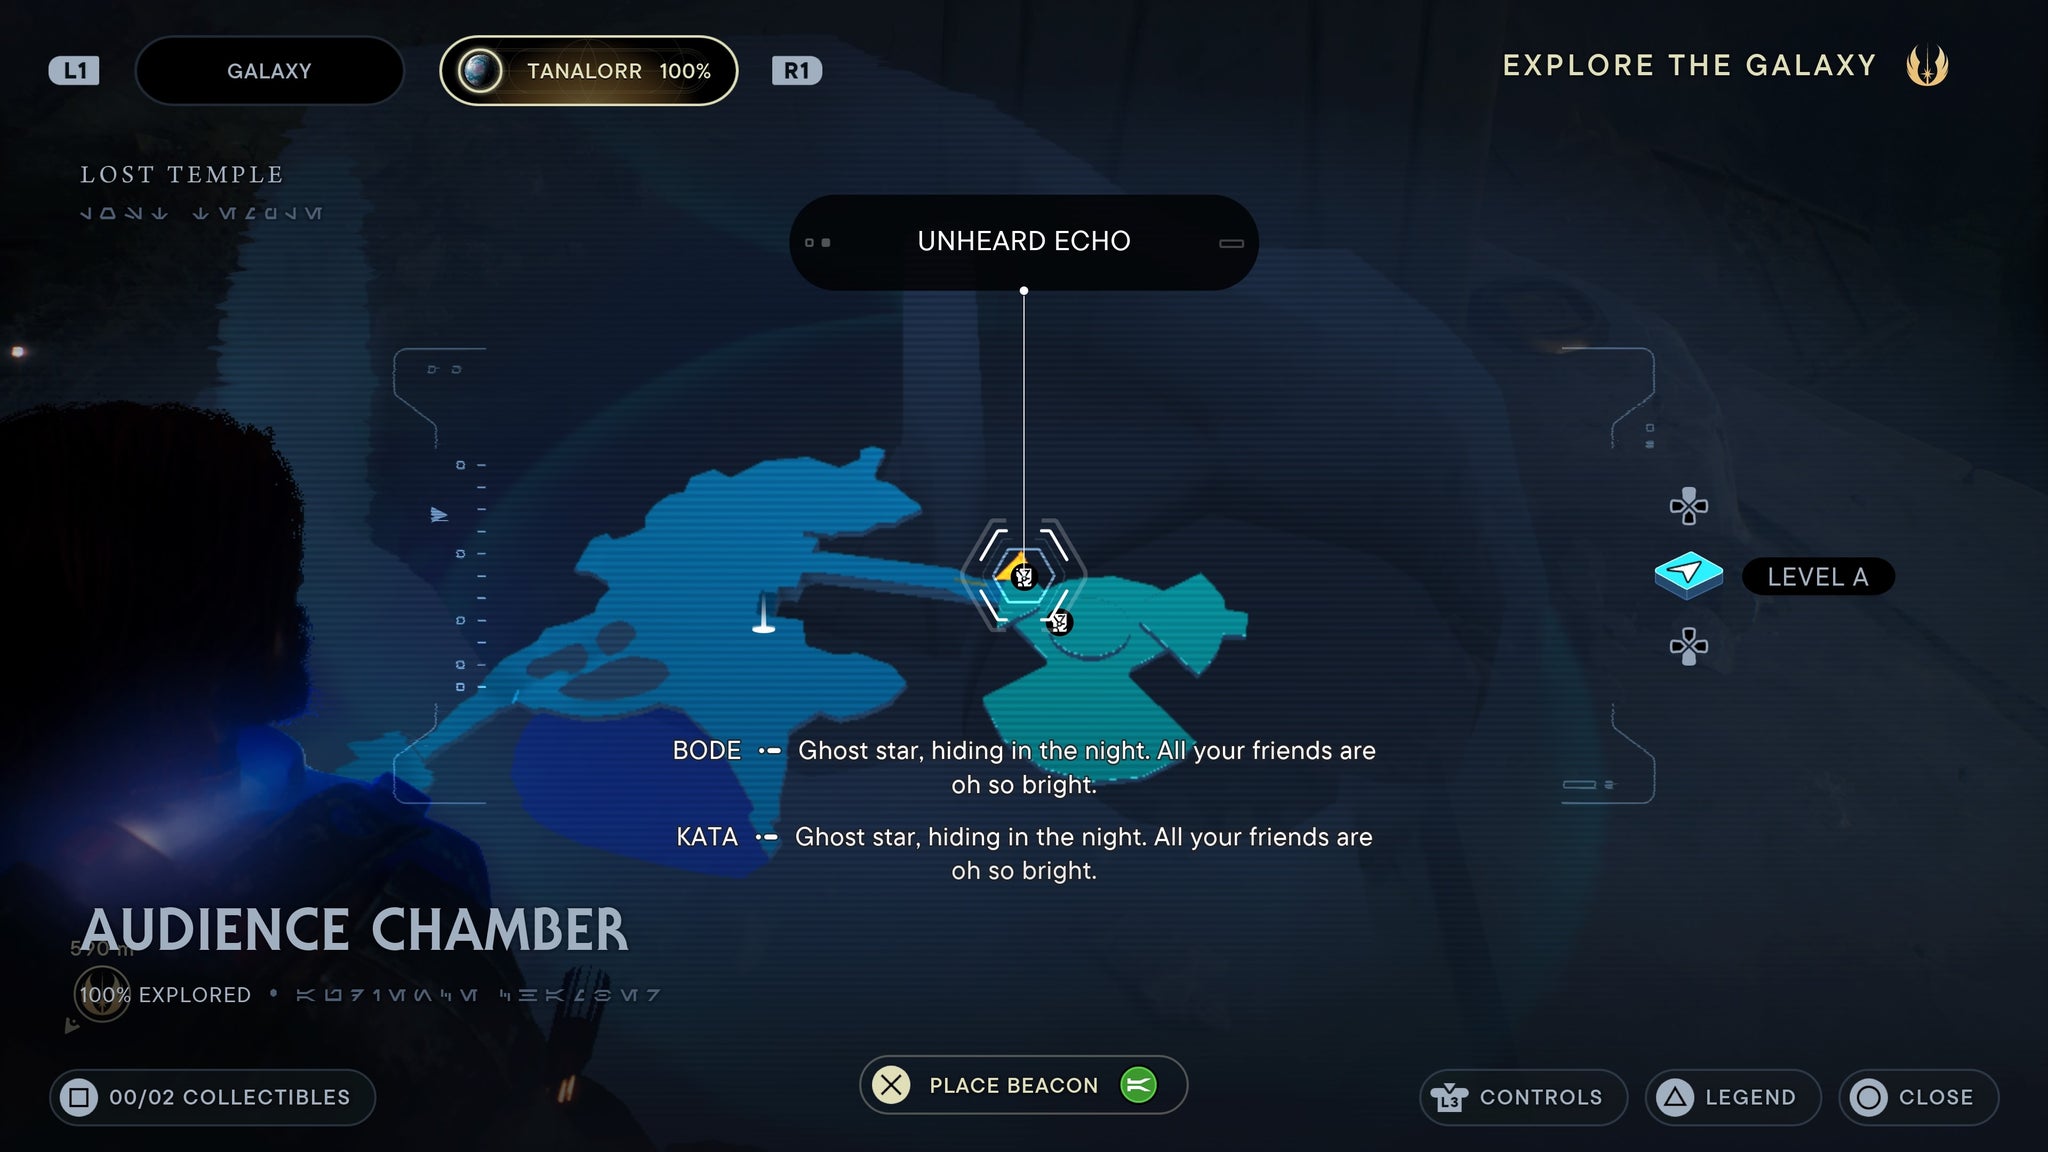
Bode is dead oh well scan this sick collectable.
Drop down into the audience chamber and you’ll find your last databank collectable (and perhaps even your final collectible), in the broken wall below the grapple point.

We’re done, thank god.

Star Wars Jedi: Survivor
Video Game
Sign in and unlock a world of features

