Assassin’s Creed Shadows: The Iron Hand Guild locations
On the trail of the Iron Hand Guild, Naoe has a fresh challenge: sparing the targets instead of assassinating them.

Image credit:Ubisoft/VG247

Update: We’ve added an interactive map showing the location of all of the Iron Hand Guild merchants in Assassin’s Creed Shadows.
After ridding the city of Sakai from the evil influence of the nefarious group who killed her father in Assassin’s Creed Shadows, Naoe’s association with the Imai family isn’t over yet.
When she finds an incriminating letter in the Money Changer District (or any other bandit-controlled hostile area in Settsu), it seems as if the Imais are trying to step into the void left by Nobunaga under the guise of the Iron Hand.

Image credit:Ubisoft/VG247
But when she speaks to Imai Sokun, Naoe learns that the Iron Hand Guild are imposters trying to use the Imai to gain influence, before Sokun asks her to interrogate merchants around Japan for information.
This gives you a slate of new targets ranging from the teens to level 35, only this time there’s a twist. Imai Sokun asks you to spare the merchants you interrogate , as they’re likely caught up in shady business they don’t fully understand, or have at least had the wool pulled over their eyes as to who they’re dealing with.
When Assassin’s Creed Shadows is so geared around combat, taking the non-leathal approach can be difficult and not very intuitive - even though it’s the right thing to do in this instance.
Here’s not only where to find the Iron Hand Guild targets, but spare them as well.
How to spare the Iron Hand Guild
While you’ve been asked to spare the merchants caught up with the Iron Hand Guild, it’s very easy to kill them.
Even if you unequip your weapons and defeat them with your fists, the target menu will still mark them as “killed”.

Image credit:Ubisoft/VG247
To avoid this and spare them, you need to isolate your target, sneak up behind them and press Triangle (or your controller’s equivalent) to “grab” them . Then quickly, before they have time to break free of your grab, hold Triangle again to perform a “knock out” .
This is the only non-leathal solution which is properly registered by the target objectives menu.
Iron Hand Guild locations
Below we’ve embedded an interactive map showing the location of every Iron Hand Guild merchant in Assassin’s Creed Shadows :
Next, we’ll go into more detail about where to find each merchant and their unique quest.
On this page:
- Merchant Tamao - Level 15
- Merchant Kanta - Level 26
- Merchant Kin-no-suke - Level 33
- Merchant Ginroku - Level 35
- The Iron Hand location
Merchant Tamao - Level 15
The first target, Tamao, is in Kyoto, where you’re given the following clues:
- He is in Yamashiro
- He runs a brewery in Kyoto
- It is west of Honpoji temple

Image credit:Ubisoft/VG247
Honpoji temple is a white diamond in the middle of Kyoto .
Immediately to the west (left on the map) you see some of Tamao’s workers lamenting their boss’s absence and that he’s locked himself in a warehouse.
To lure him out, Naoe suggests destroying some of his stock. The shining blue markers all around the yard indicate the stock to destroy . Crash around in the barrels and he’ll burst out, katana in hand.
If you hit Tamao even once, you immediately kill him - which isn’t your intention. If you want to “spare” them, you can’t even knock them out with your fists. You need to sneak up behind him and press Triangle to grab , then hold triangle to “knock out” - this is the only non-leathal solution.
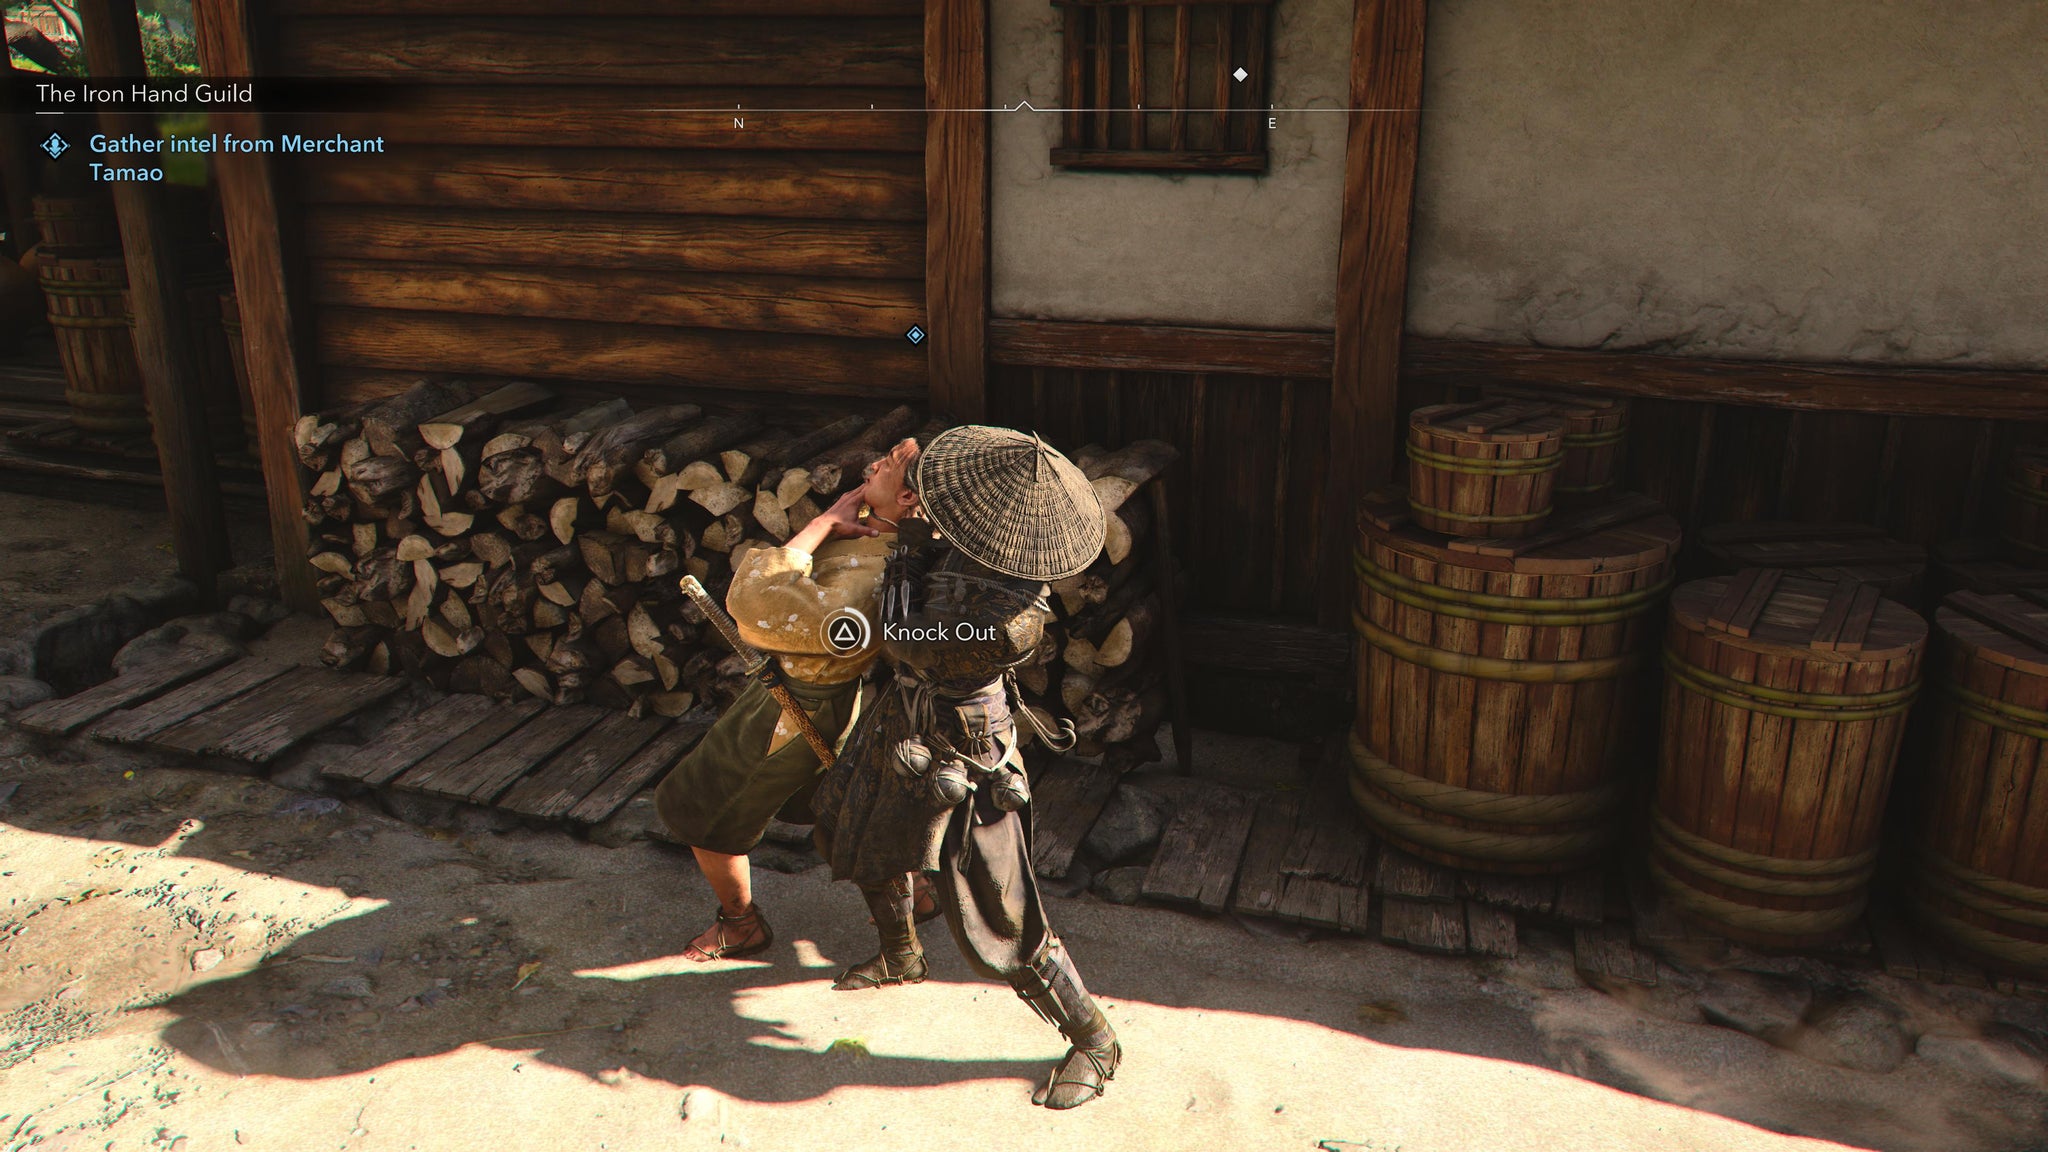
Image credit:Ubisoft/VG247
To do this, make sure you run away before he spots you outside the warehouse or lose him when he does. After knocking him out, you get a lead on the Tamba Highlands, somewhere in the mountains, but need more to go on.
Merchant Kanta - Level 26
To find the Merchant Kanta, you must first find and inspect his missing ship, of which you’re given the following clues:
- It sailed in Omi
- It was last spotted in Lake Biwa
- It was supposed to pass near Okishima

Image credit:Ubisoft/VG247
On the southwestern edge of the island of Okishima , you find the boat next to the shore, capsized.
Approach stealthily and defeat the pirates, then loot the shipping manifest from the broken boat next to the overturned ship. This gives you the clue that while Kanta sails the length and breadth of Lake Biwa, his home port is in Otsu. Otsu is on the southern shore of Lake Biwa, next to where it says the “Mouth of Seta”.
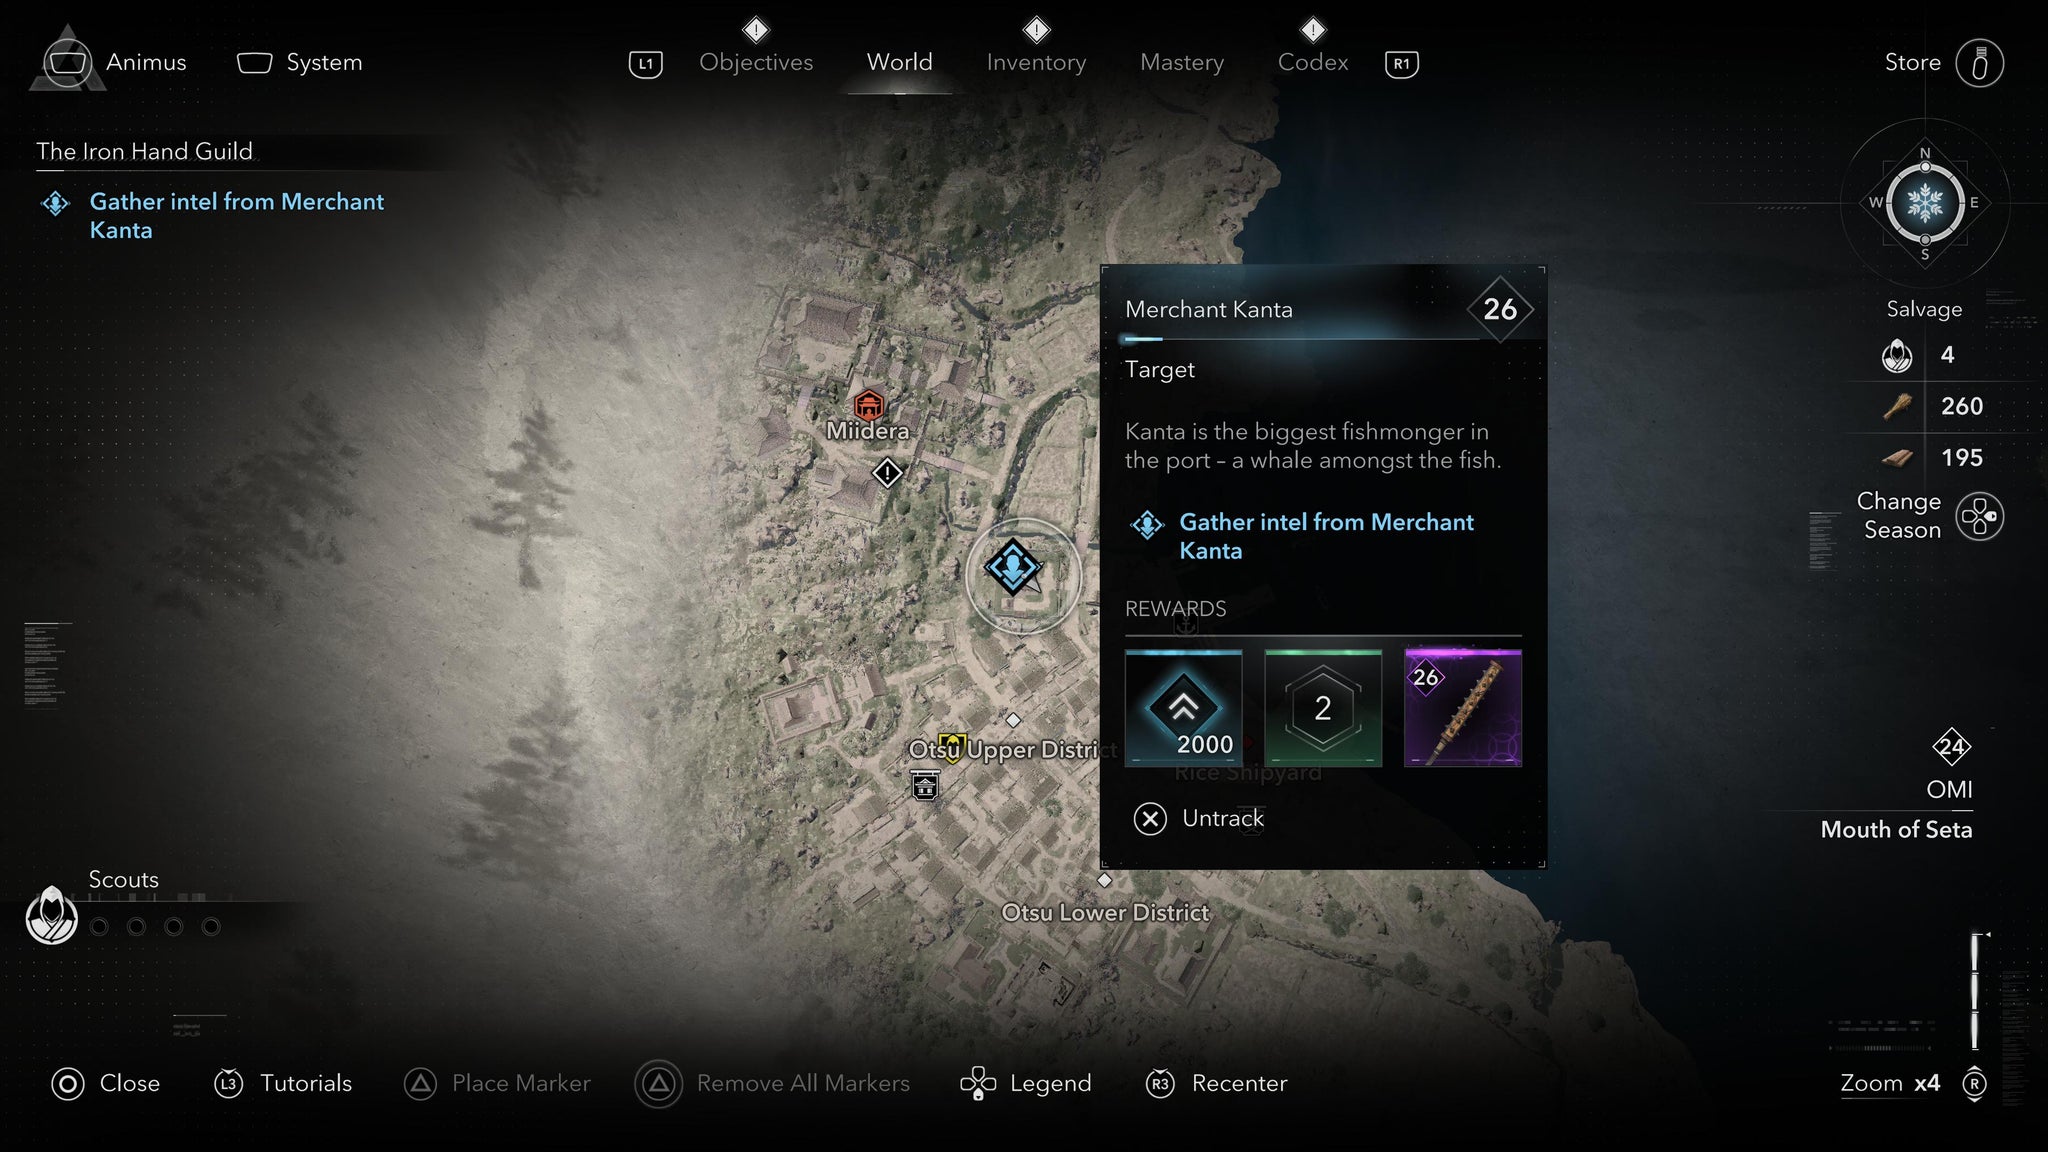
Image credit:Ubisoft/VG247
Go to Otsu and you find Kanta inside his house in the Upper District, just southeast of Miidera.

Image credit:Ubisoft/VG247
You don’t even need to grab him. Simply sneak in quietly and loot the letter from his desk which tells you the Iron Hand is in Tamba. With that you can slip out and the merchant is spared an untimely end.
Merchant Kin-no-suke - Level 33
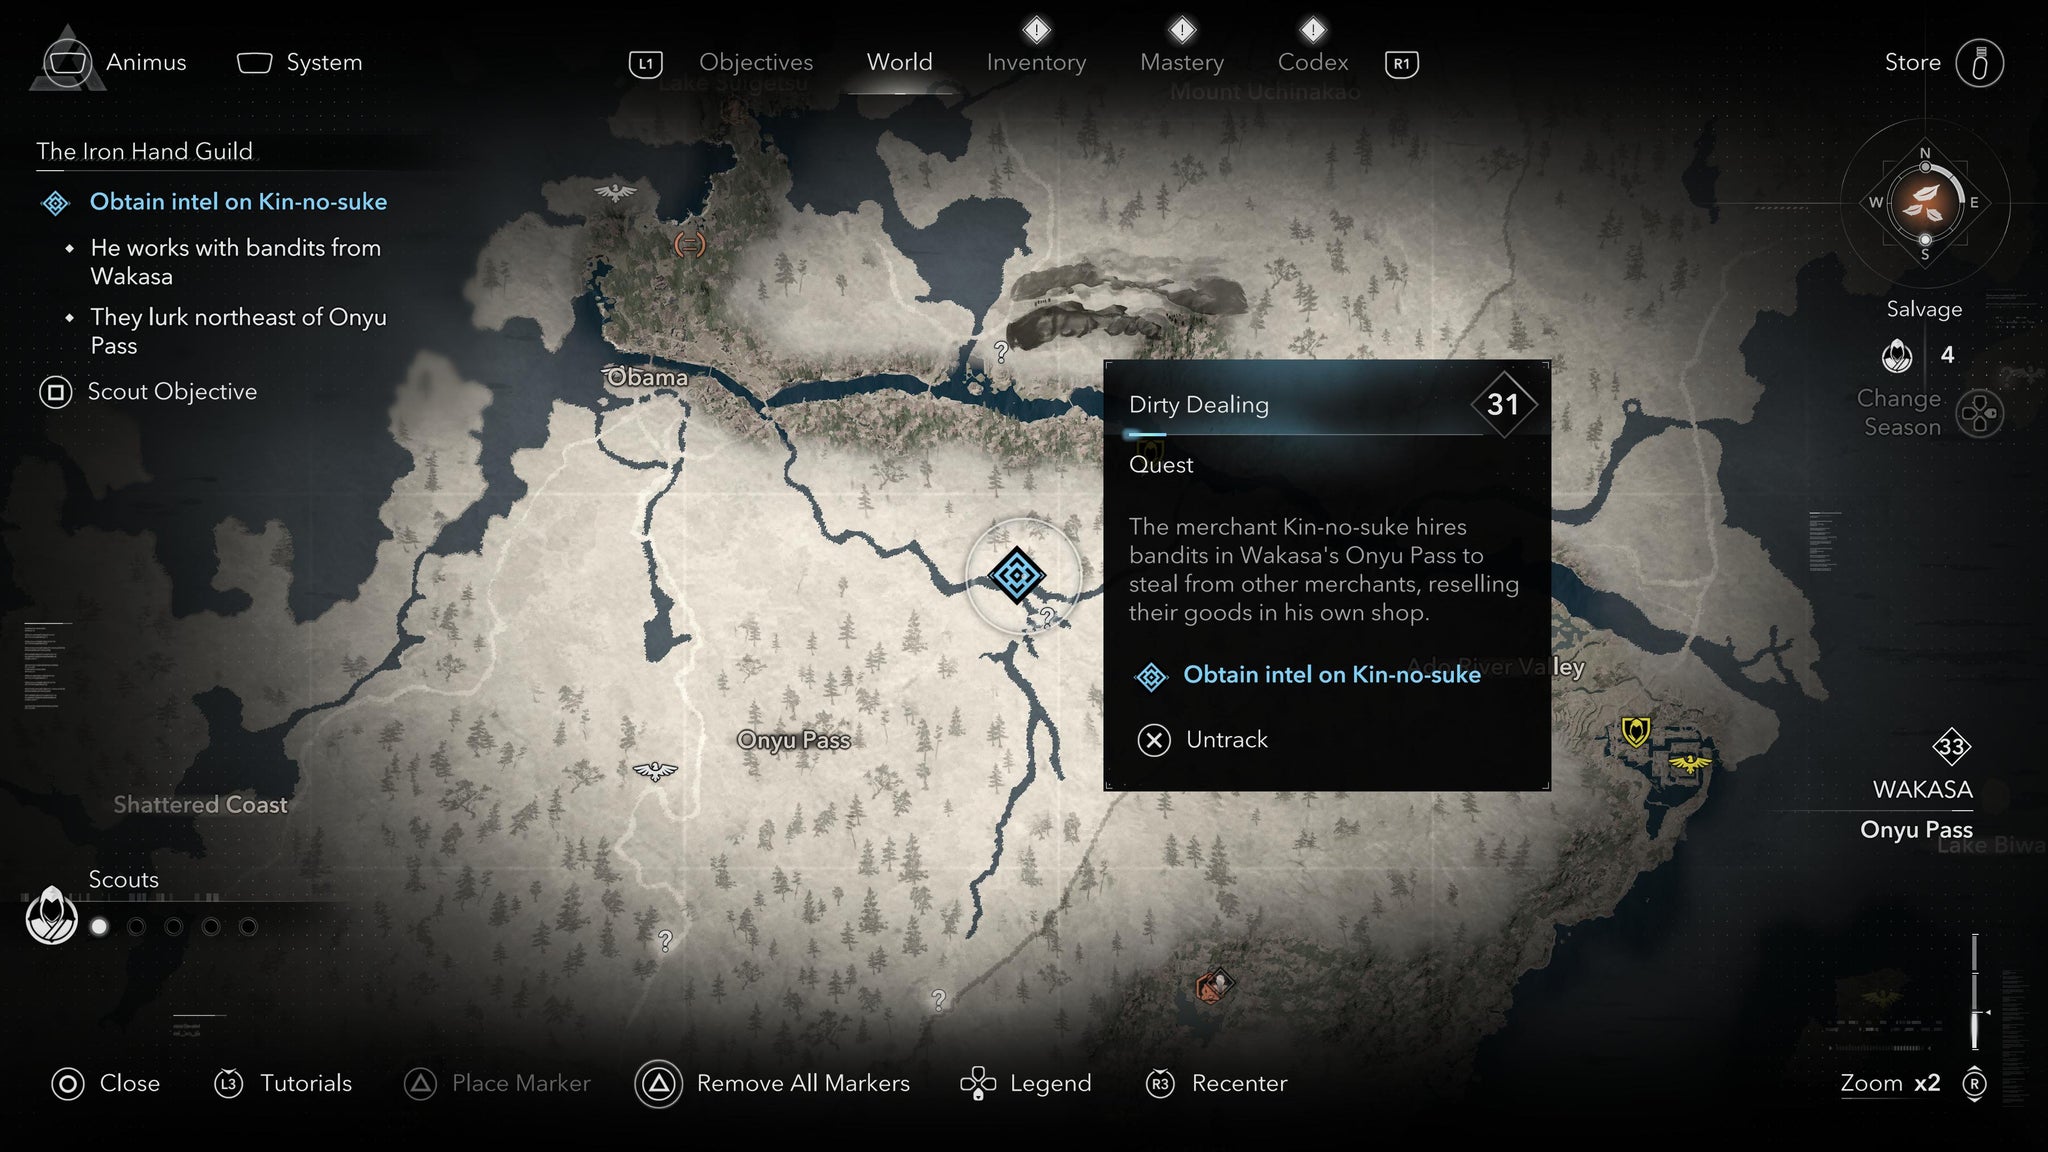
Image credit:Ubisoft/VG247
You get the quest, Dirty Dealing, in Wakasa to gain more intelligence on where to find the merchant, Kin-no-suke.
Head south of the Kumagawa Kakurega, northeast of where it says Onyu Pass on the map, and on the river bank you find a bandit camp nestled amongst the undergrowth.
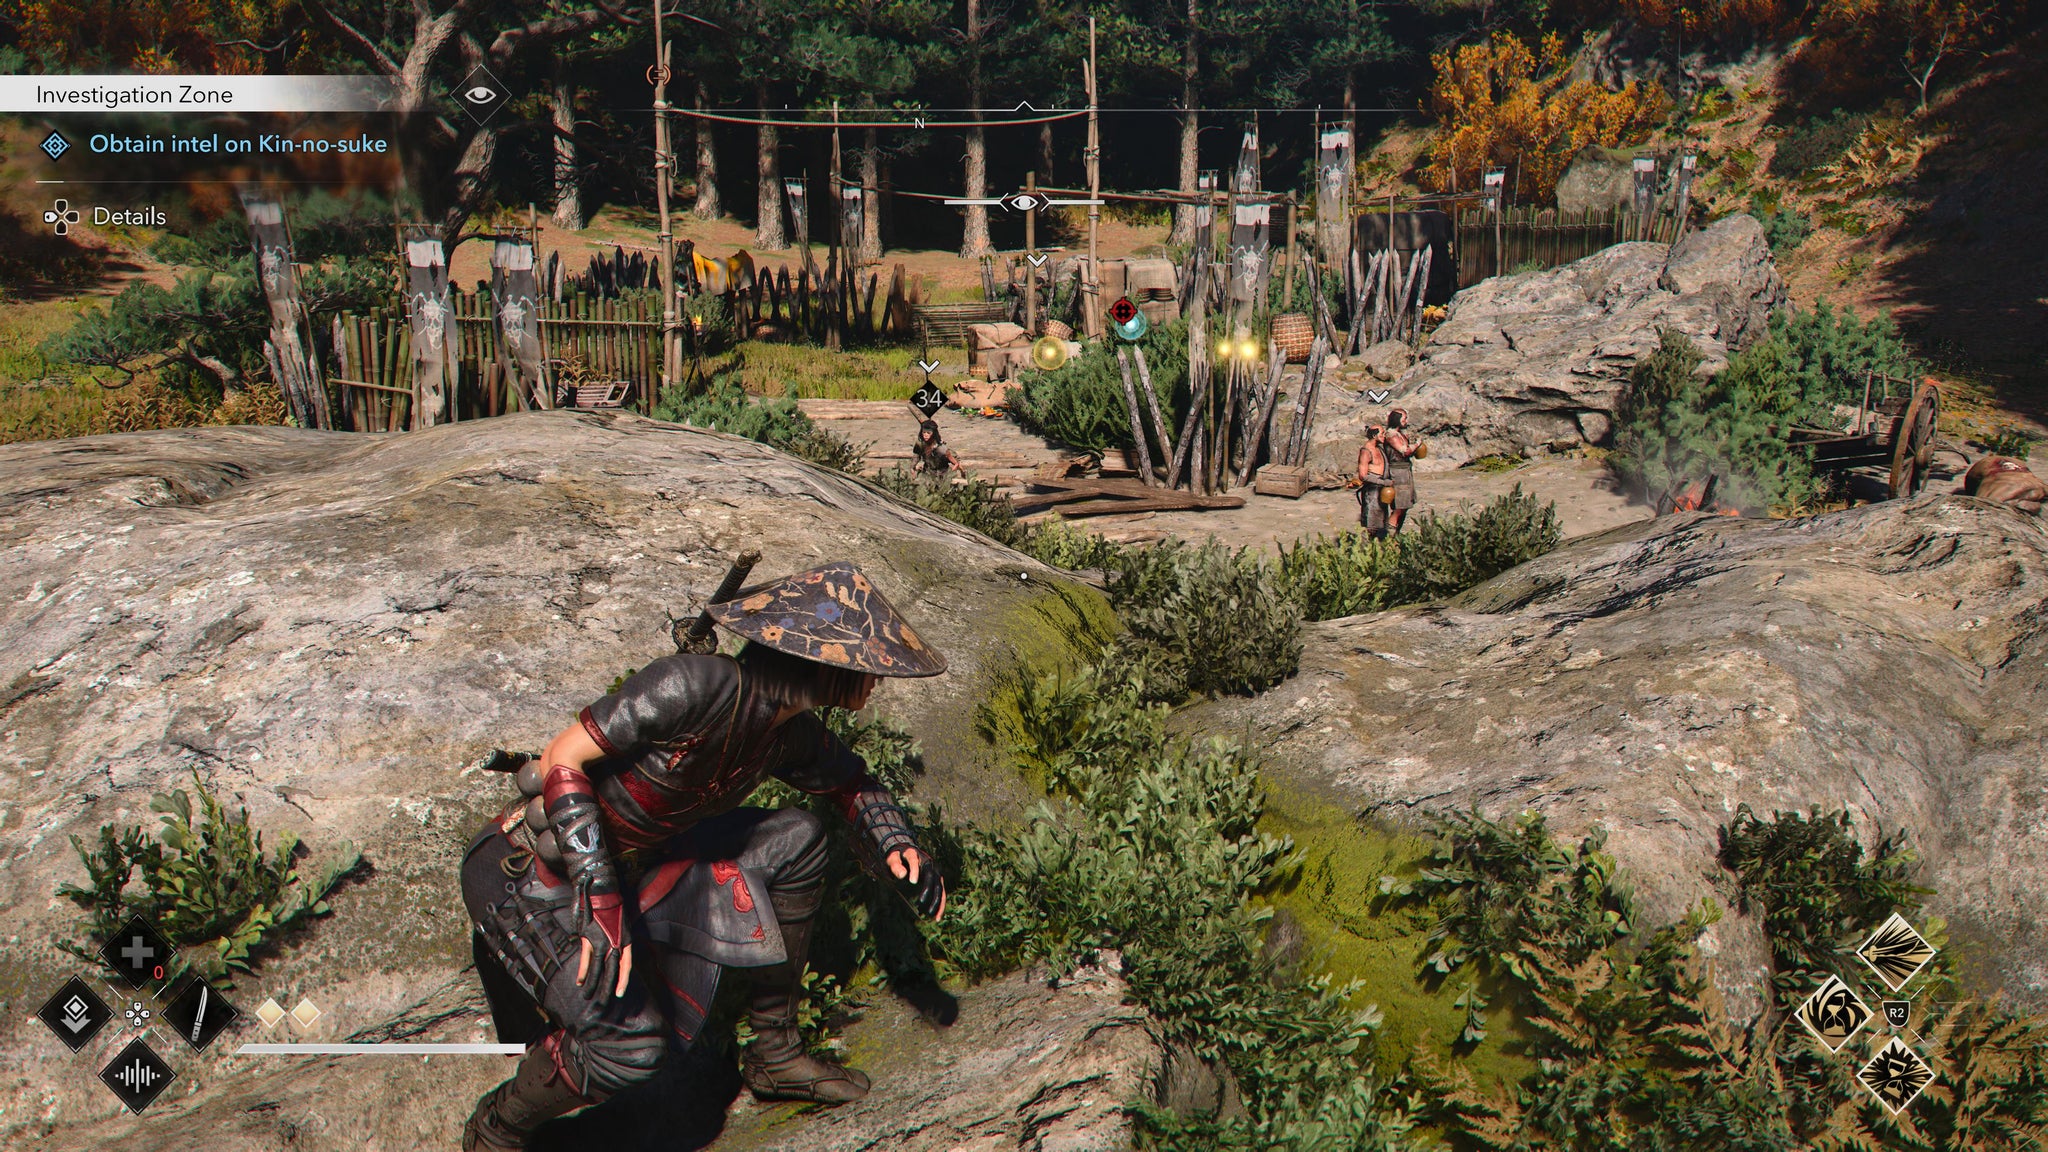
Image credit:Ubisoft/VG247
Defeat the assembled baddies and search the camp for clues. On the writing desk you find a letter instructing the bandits to cart their spoils to the town of Obama, nearby in Wakasa.
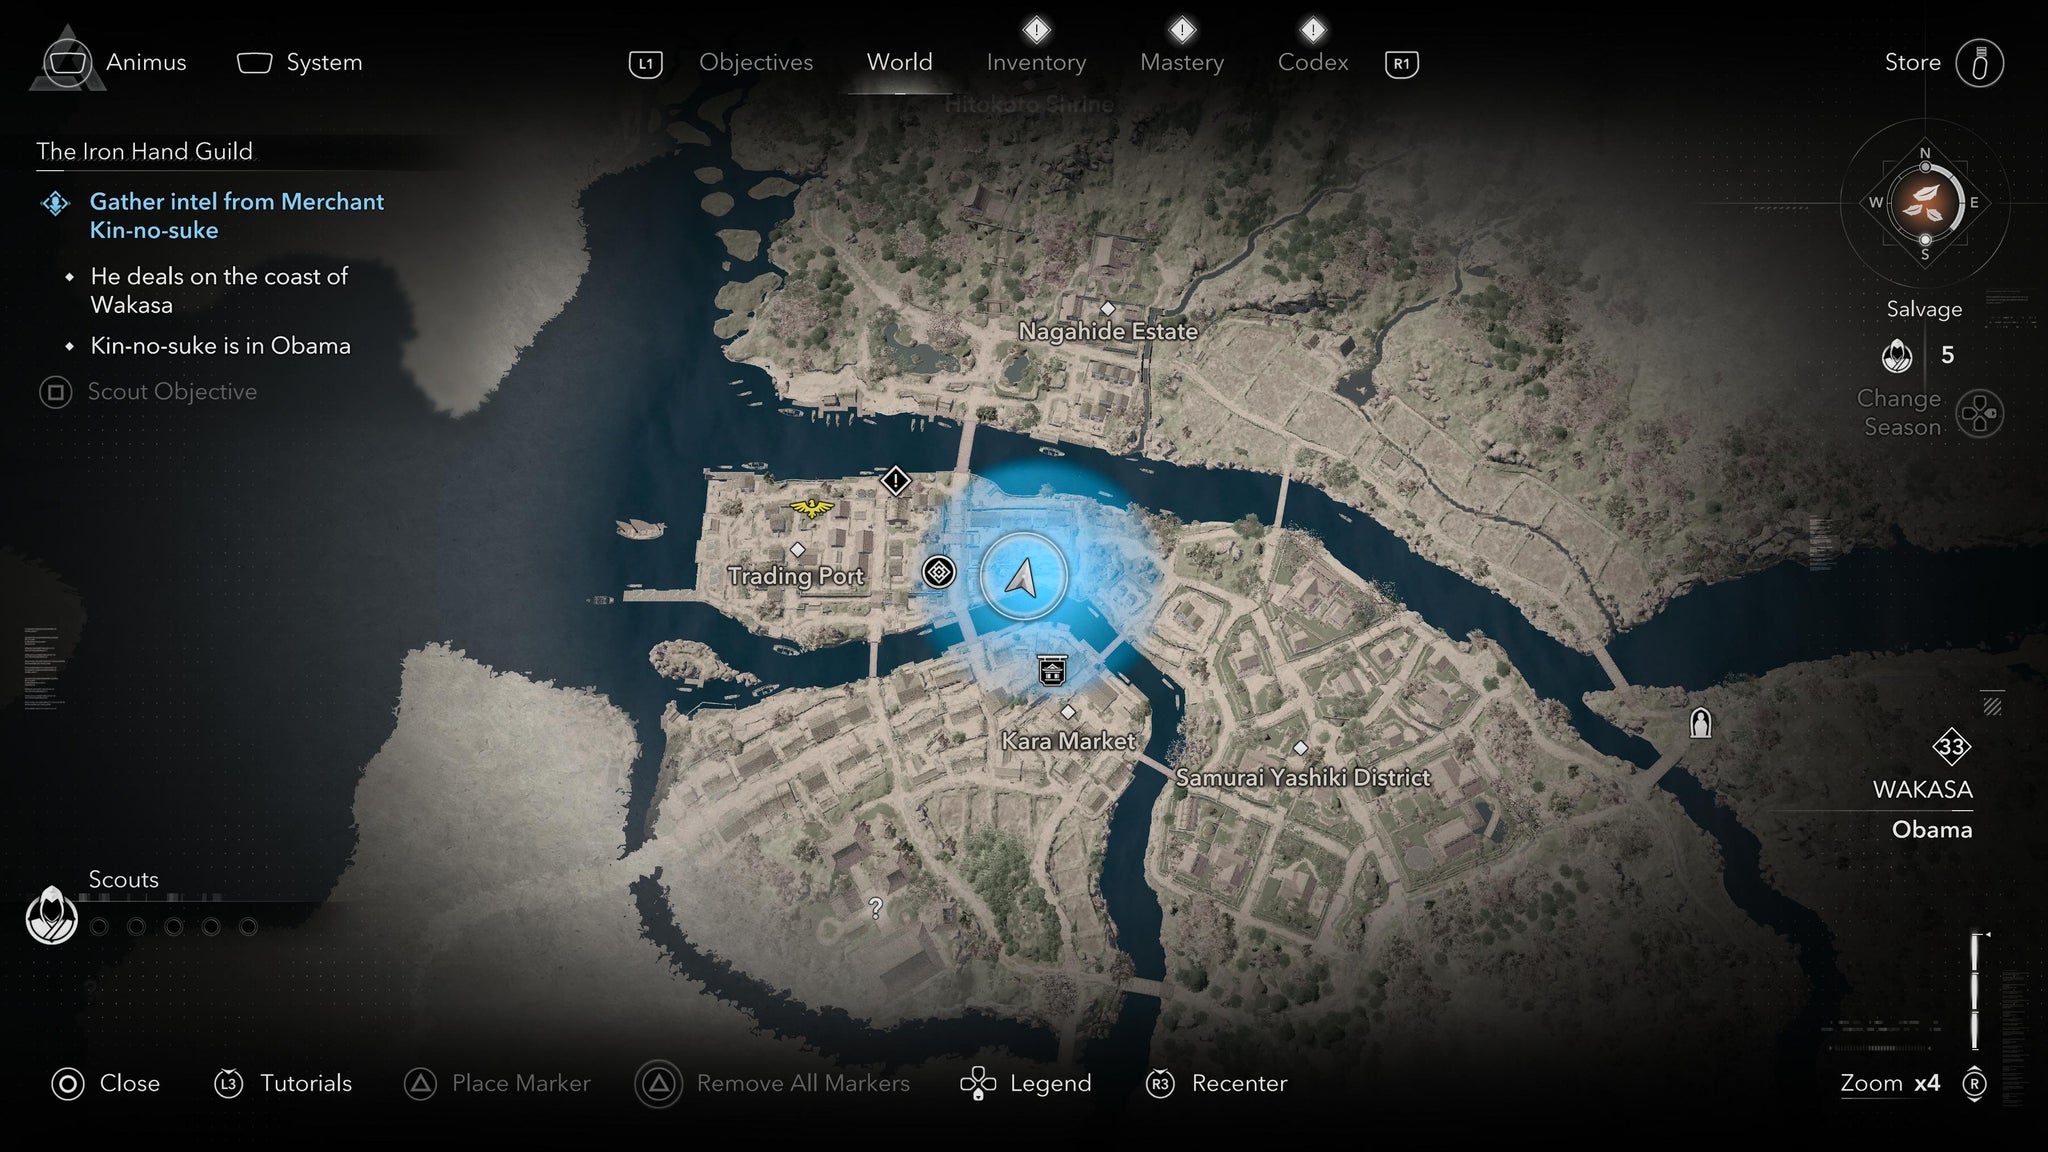
Image credit:Ubisoft/VG247
Make your way west to Obama, and in the west of the town, between Kara Market and the Trading Port you find the Merchant Kin-no-suke. Out in the open at his stall, but flanked by two guards, as you approach Naoe will remark that the incriminating letter sets this merchant out as as cruel and uncompromising as the Iron Hand themself.
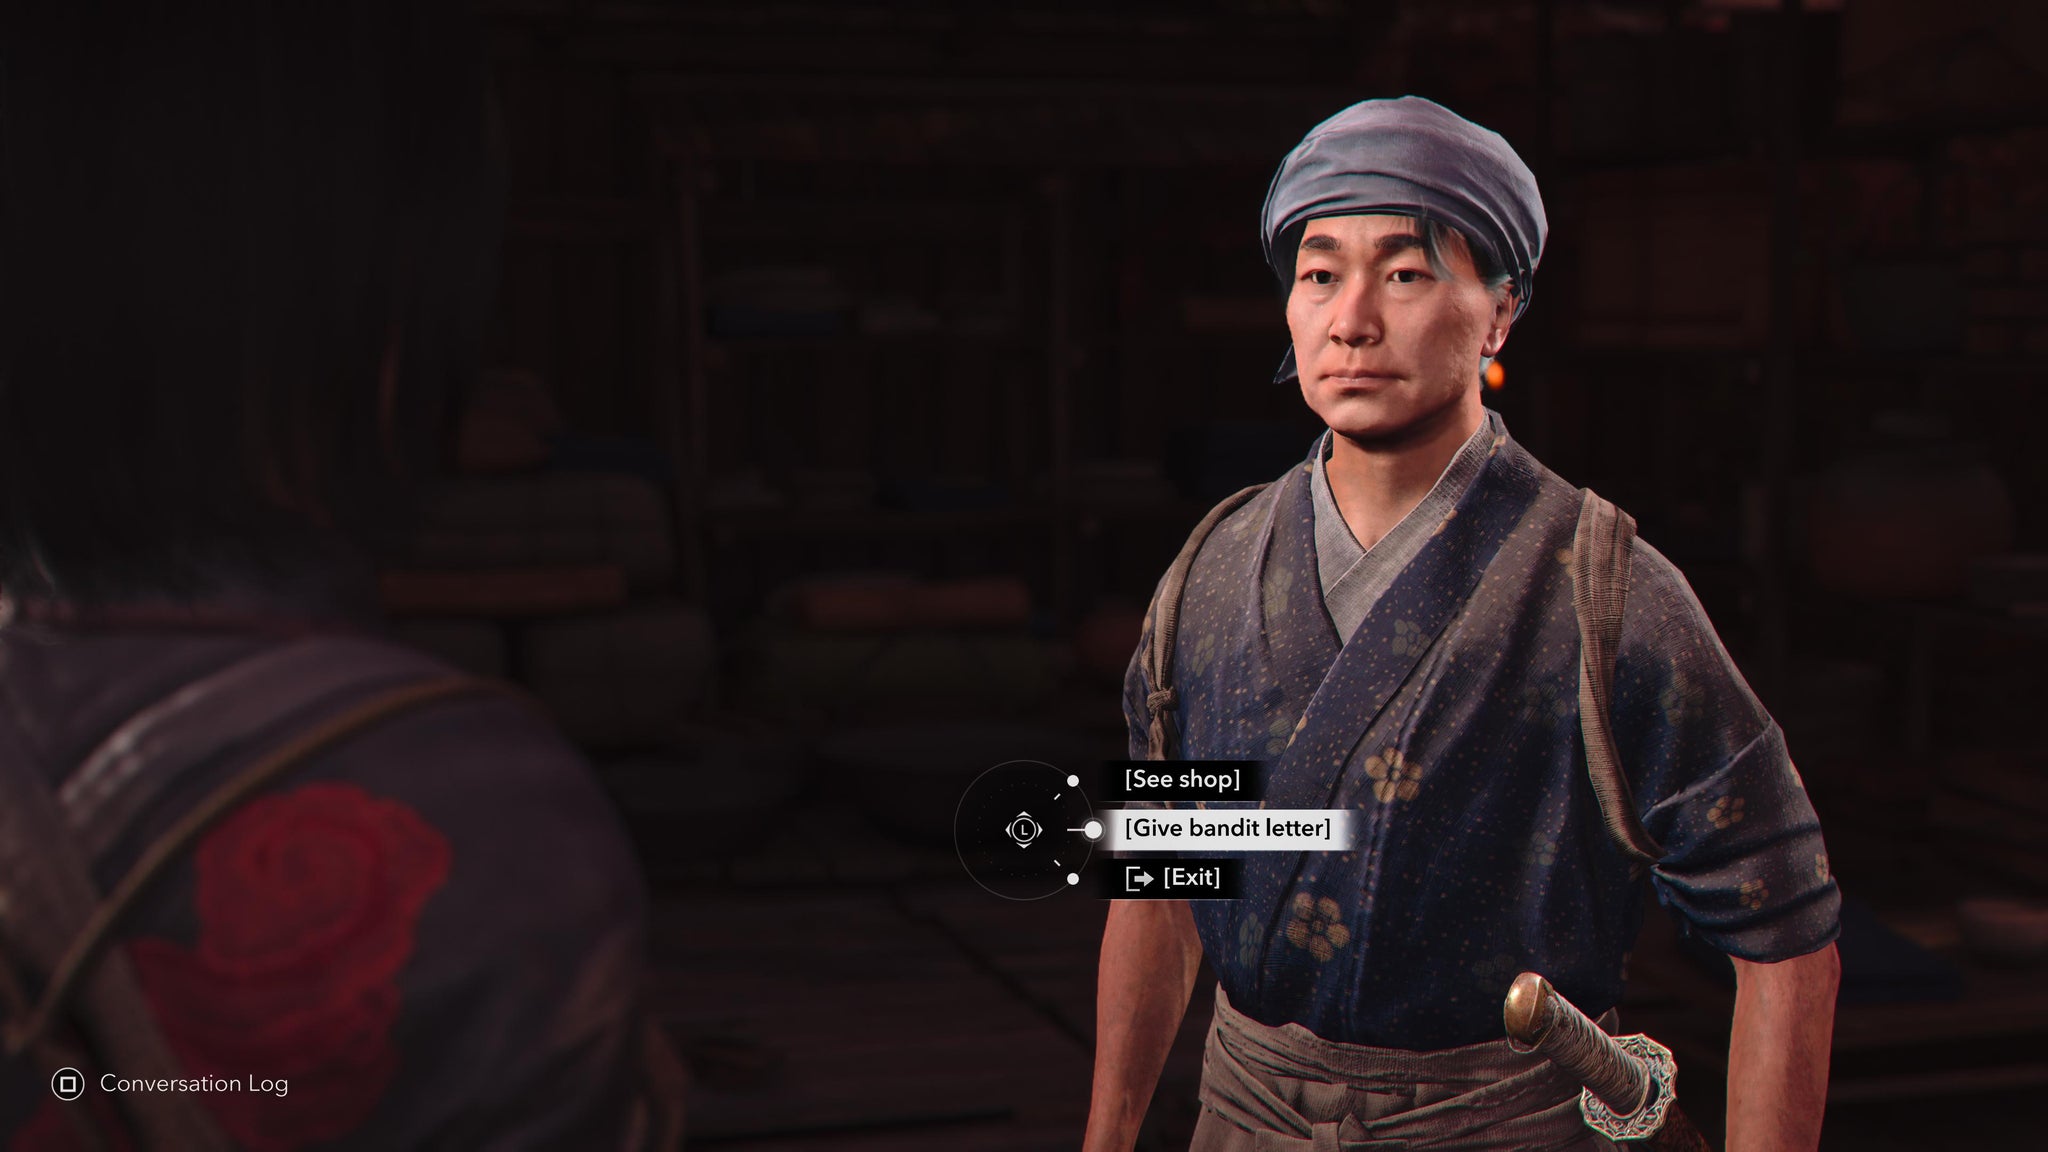
Image credit:Ubisoft/VG247
Take the subtle approach and speak to Kin-no-suke non-violently first. Give him the letter and he’ll assume you’re in league with the bandits, ready with another shipment. This will make him leave his post and walk to a more secluded location where you can talk freely, away from his guards.
You can still spare him though if you wish (the quest log says Imai Sokun will find him useful in dealing with shady characters) and just take the letter from the storeroom you find yourself next to. This tells you that the Iron Hand is not adverse to using tea ceremony as a means of influence, just like conventional businessmen.
Merchant Ginroku - Level 35
Finally, Merchant Ginroku is found in the province of Tamba, in the west of the map. His shop is apparently in Miyazu Bay, which is in the top left-hand corner of the area.
You get the following three clues:
- He is located in Tamba
- He owns a shop in Miyazu Bay
- It is near the bridges of Miyazu Bay
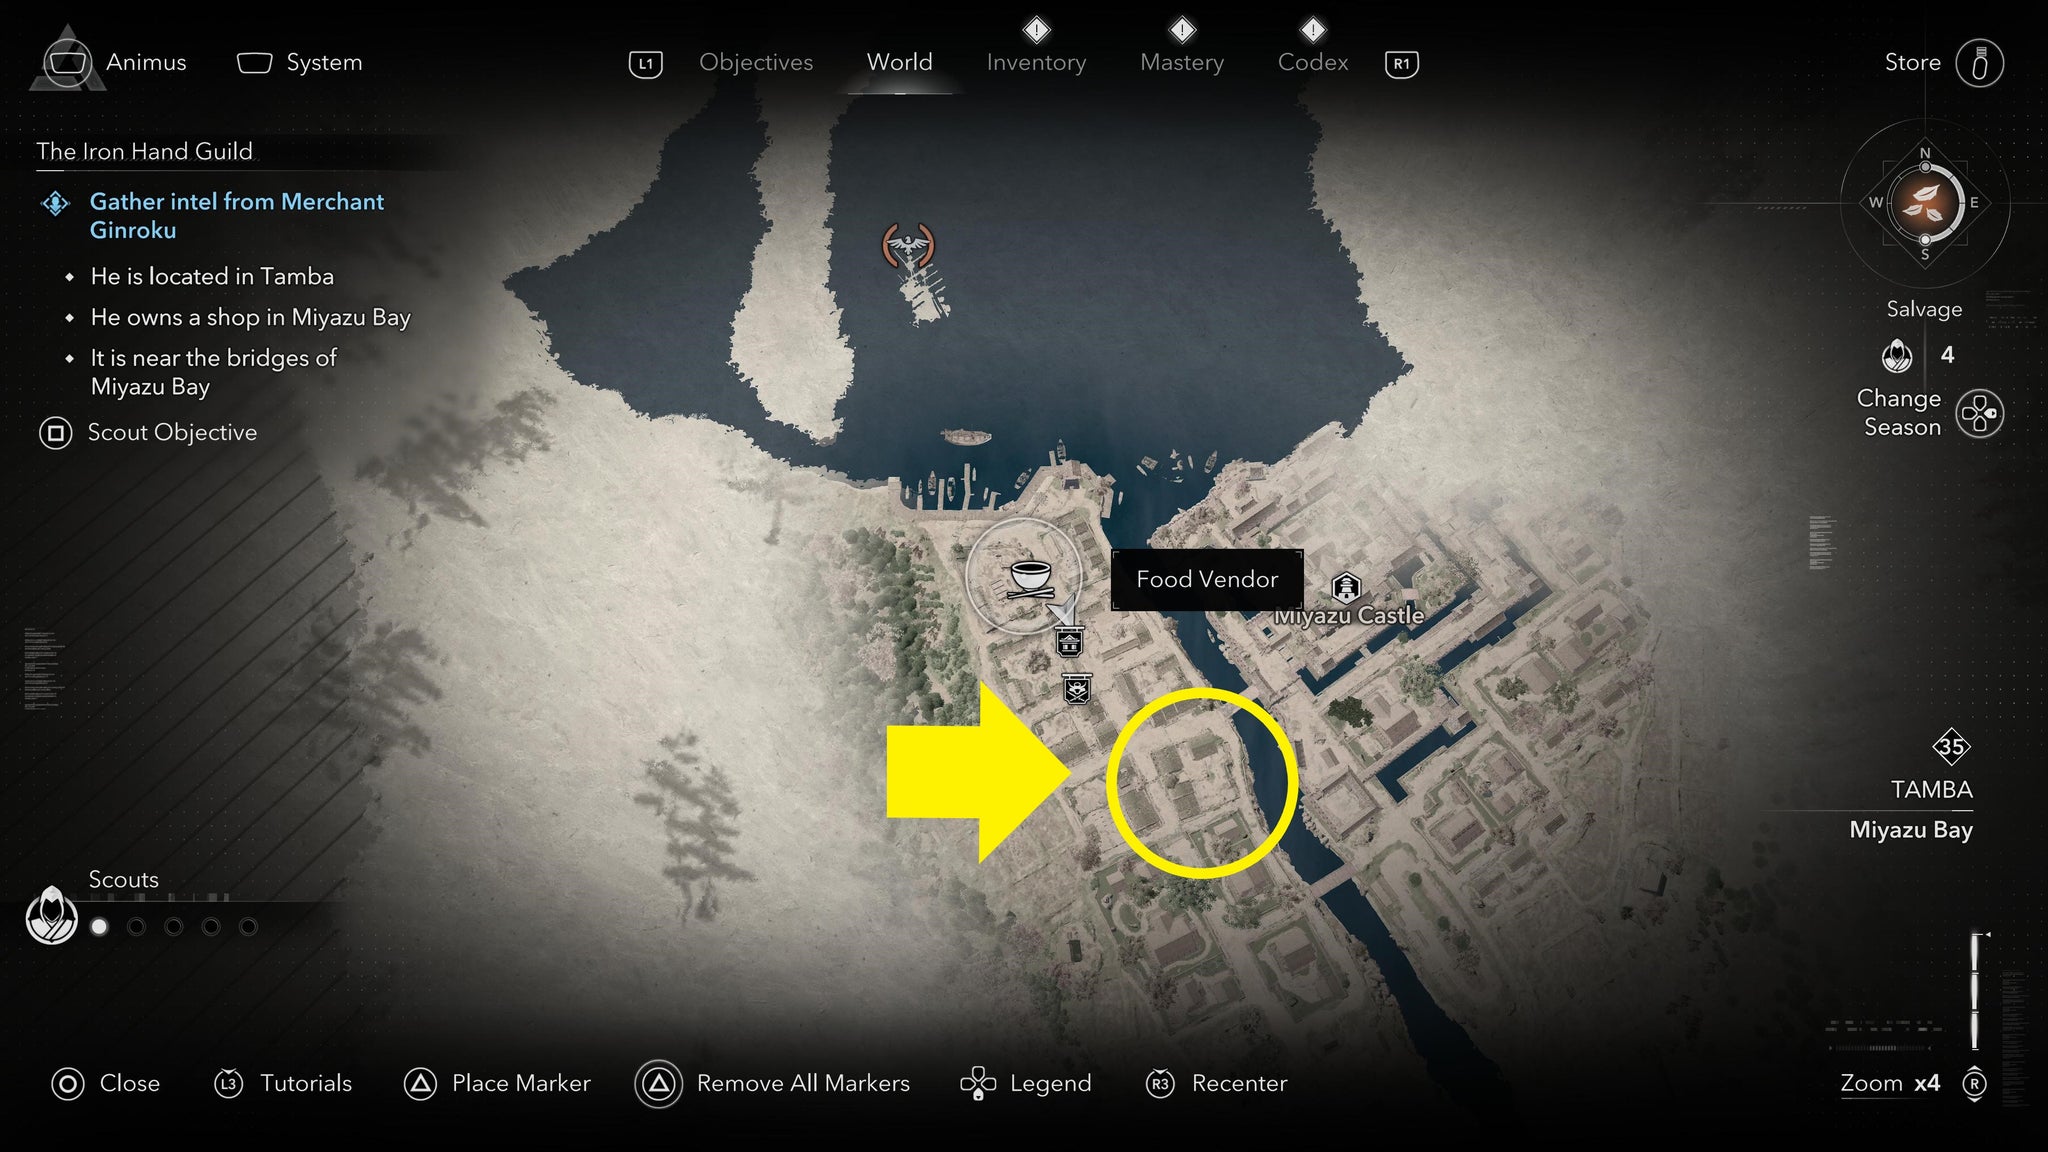
Image credit:Ubisoft/VG247
The bridges are just to the southwest of Miyazu Castle and Ginroku’s shop is between them, on the western side of the inlet.

Image credit:Ubisoft/VG247
The shop isn’t a hostile area, so you’re free to wander up to the merchant, press Triangle to grab, then hold Triangle to knock him out for the info. While it’s in a high-level area, it’s by far the easiest task you’ve had so far.
The Iron Hand location

Image credit:Ubisoft/VG247
With all of the merchants spared, you finally have the information you need: the Iron Hand has made his base in Fukuchiyama Castle , which can be found in Tamba, just to the southeast of the final merchant in Miyazu Bay.
Again, while it’s a high-level castle, if you stick to stealth and avoid a fight with the guards, you can take out the Iron Hand while still being lower than his level.

Image credit:Ubisoft/VG247
Infiltrate Fukuchiyama Castle and you find the Iron Hand in the southeast corner of the middle castle, standing alone mulling some nefarious business.
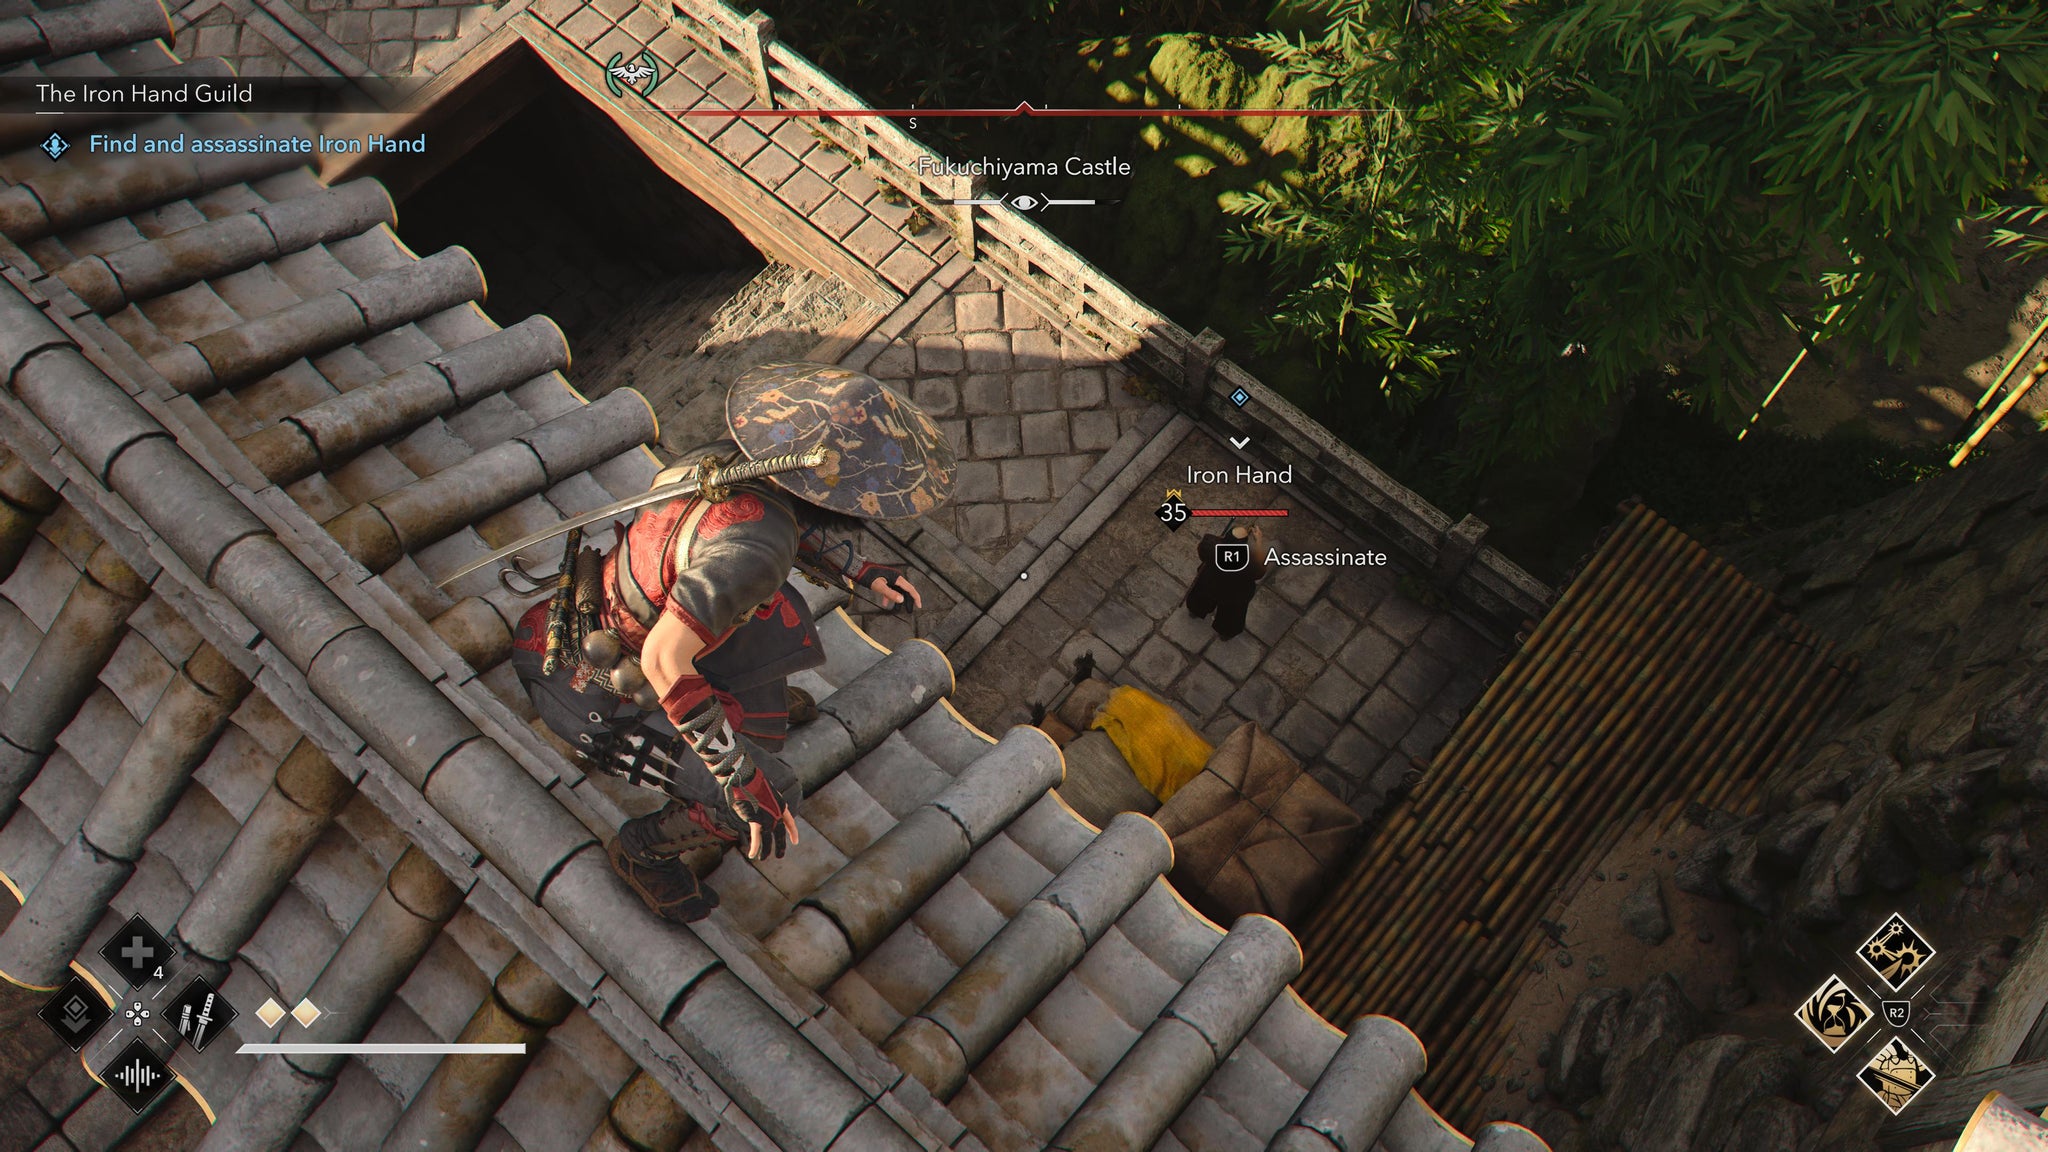
Image credit:Ubisoft/VG247
With some careful climbing to avoid guards, you can position yourself above them for an easy assassination. For finally defeating them, you receive the Bloody Business Katana and the damage with Poison engraving.
Return to Imai in Sakai and tell him of your success. As a reward, he hands over a hefty chunk of XP, precious Gold, the Damage for Alerted Provinces engraving and the Fujin’s Tempest Trinket which gives you a 10% damage boost for every province you’re wanted in during a season.
Until then there are plenty of other early game targets to track down including the Kabukimono , Twisted Tree and Origami Butterflies .
Assassin’s Creed Shadows
PS5 , Xbox Series X/S , PC , Mac , Nintendo Switch 2
Sign in and unlock a world of features

